warning SKODA YETI 2015 1.G / 5L Owner's Manual
[x] Cancel search | Manufacturer: SKODA, Model Year: 2015, Model line: YETI, Model: SKODA YETI 2015 1.G / 5LPages: 232, PDF Size: 30.84 MB
Page 132 of 232
So that an engagement of the OFF ROAD mode can take place, the following
conditions must be met.
The OFF ROAD mode is enabled.
The vehicle is moving at a speed of less than 30 km/h. The warning light
illuminates in the instrument cluster.
The following functions are integrated in the OFF ROAD mode.
▶ Downhill Drive Support » page 130.
▶ TCS OFF ROAD » page 130.
▶ EDL OFF ROAD » page 130.
▶ ABS OFF ROAD » page 130.
▶ Start-Off Assistant » page 131.
Note
If the engine stalls while driving and is started again within 30 seconds, then
OFF ROAD mode will be automatically activated.
Hill Descent Assistant
Read and observe
and on page 129 first.
The hill descent assistant (hereinafter referred to as assistant), with its auto-
matic braking action on all wheels, ensures a constant speed is maintained on
a steep slope when driving forwards and reversing.
During an intervention of the Assistants, the warning light flashes in the in-
strument cluster.
The assistant is automatically engaged under the following conditions. The engine is running.
For vehicles with Manual transmission the shift lever is in the neutral po-
sition and or the 1st, 2nd, 3rd gear, or reverse gear is engaged.
On vehicles with an automatic transmission , the selector lever is in the R,
N, D, S position or in the Tiptronic position.
The downhill gradient is at least 10 % (when driving over sleepers, the lim-
it can briefly drop to 8 %).
Neither the accelerator nor the brake pedal is operated.
Driving speed
Initiate the downhill decent at a reasonable speed up to 30 km / h the hill de-
scent assist maintains this speed when driving downhill constant.
The assistant can maintain constant speed of about 2 - 30 km / h.
If a forwards or reverse gear is engaged for vehicles with Manual transmis-
sion , the speed must be high enough to avoid stalling the engine.
By pressing the accelerator or brake pedal, the speed can be increased or re-
duced. This is true even if the shift lever is in the neutral position and the se-
lector lever in the N position. The engagement of the assistant is resumed af-
ter the pedal is released.WARNINGFor the correct operation of the assistant the road surface must be suffi-
ciently adherent. The assistant cannot properly fulfil its function on slushy
soil due to physical reasons (e.g. ice or mud). - there is a risk of an accident!
Note
During an active intervention of the assistant, the brake lights do not light up.
TCSOFF ROAD
Read and observe
and on page 129 first.
The ASR OFF ROAD makes starting and driving on an unpaved surface easier
as it partially allows wheel-spin.
Note
When disabled, the TCS » Fig. 140 on page 127 OFF ROAD mode works without
the support of the TCS OFF ROAD.
EDS OFF ROAD
Read and observe
and on page 129 first.
The EDS supports OFF ROAD vehicle traction when driving on a surface withdifferent grip under the drive wheels or when driving over bumps.
A spinning wheel or wheels are braked earlier and with more force than with
the intervention of the standard EDS system.
ABS OFF ROAD
Read and observe
and on page 129 first.
The ABS OFF ROAD supports the driver when braking on an unpaved surface
such as gravel, snow, etc.
130Driving
Page 133 of 232
The system generated by a controlled locking of the wheels braked wheel be-
fore a “wedge” of piled material, which shortens the braking distance.
The system is only available, if the front wheels are in the straight-ahead posi-
tion.
The system operates at speeds of up to 50 km/h.
Start-Off Assistant 1)
Read and observe
and on page 129 first.
The Start-Off assistant assists the driver when setting off, such as on a steep
slope or on a slippery surface. When the driver presses the accelerator, the
maximum engine speed is electronically limited so that a gentle approach is
possible.
Parking assistance (ParkPilot)
Introduction
This chapter contains information on the following subjects:
Function
131
Display in the Infotainment display
132
Activation/deactivation
133
The parking aid (hereinafter referred to as system) draws attention via acous- tic signals or the Infotainment display when manoeuvring around obstacles in
the vicinity of the vehicle.
WARNING■ The general information relating to the use of assistance systems must
be observed » page 127, in section Introduction .■
Moving persons or objects may not be recognized by the system sensors.
■
Under certain circumstances, surfaces of certain objects and types of
clothing cannot reflect the system signals. For this reason, such people or
objects may not be recognised by the system sensors.
WARNING (Continued)■ External noise sources may affect the signals of the system sensors. Un-
der adverse conditions, this may cause objects or people not to be recog-
nised by the system.■
Before reversing, you should make sure that there are no small obstacles,
such as rocks, thin posts, trailer drawbars etc. in front or behind your vehi-
cle. Such obstacles may not be recognised by the system sensors.
CAUTION
■ Keep the system sensors » Fig. 143 on page 131 clean, snow-and ice-free
and do not cover with any objects of any kind, otherwise the system function-
ing may be impaired.■
Under adverse weather conditions (heavy rain, water vapour, very low or
high temperatures, etc.), the system function may be limited - “incorrect recog-
nition of obstacle”.
■
Accessories additionally installed on the vehicle rear, such as bicycle carriers,
can impair the system function.
Function
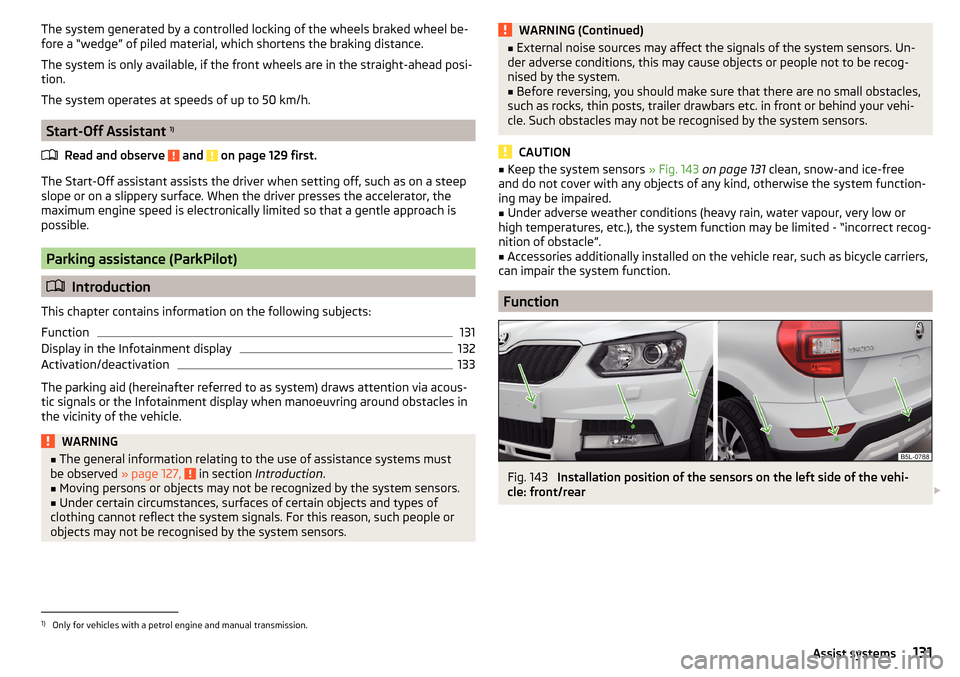
Fig. 143
Installation position of the sensors on the left side of the vehi-
cle: front/rear
1)
Only for vehicles with a petrol engine and manual transmission.
131Assist systems
Page 134 of 232
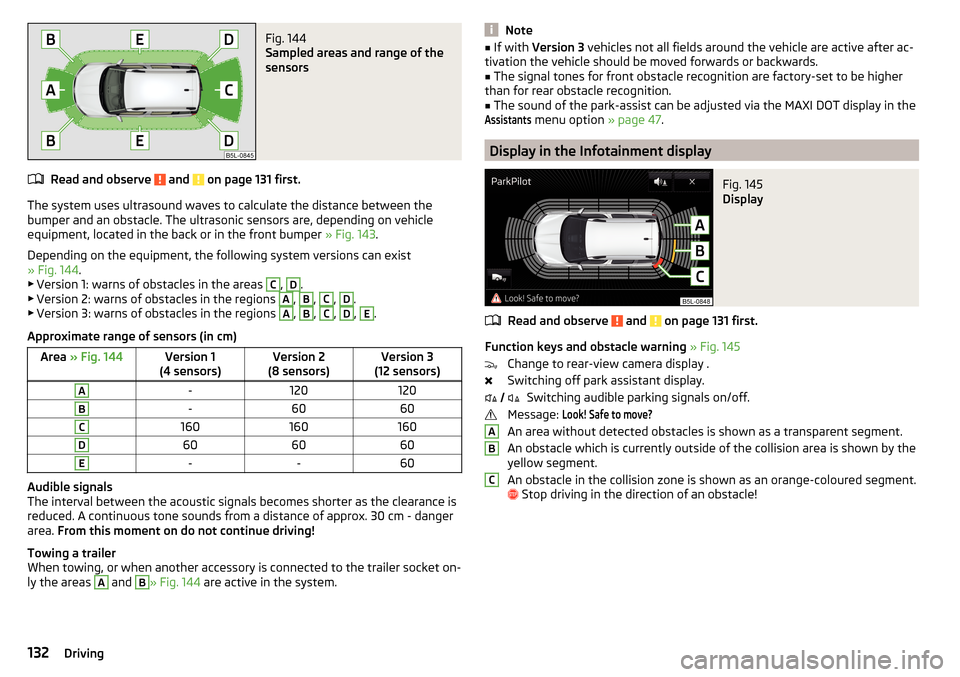
Fig. 144
Sampled areas and range of the
sensors
Read and observe and on page 131 first.
The system uses ultrasound waves to calculate the distance between the
bumper and an obstacle. The ultrasonic sensors are, depending on vehicle
equipment, located in the back or in the front bumper » Fig. 143.
Depending on the equipment, the following system versions can exist
» Fig. 144 .
▶ Version 1: warns of obstacles in the areas
C
,
D
.
▶ Version 2: warns of obstacles in the regions
A
,
B
,
C
,
D
.
▶ Version 3: warns of obstacles in the regions
A
,
B
,
C
,
D
,
E
.
Approximate range of sensors (in cm)
Area » Fig. 144Version 1
(4 sensors)Version 2
(8 sensors)Version 3
(12 sensors)A-120120B-6060C160160160D606060E--60
Audible signals
The interval between the acoustic signals becomes shorter as the clearance is
reduced. A continuous tone sounds from a distance of approx. 30 cm - danger
area. From this moment on do not continue driving!
Towing a trailer
When towing, or when another accessory is connected to the trailer socket on-
ly the areas
A
and
B
» Fig. 144 are active in the system.
Note■
If with Version 3 vehicles not all fields around the vehicle are active after ac-
tivation the vehicle should be moved forwards or backwards.■
The signal tones for front obstacle recognition are factory-set to be higher
than for rear obstacle recognition.
■
The sound of the park-assist can be adjusted via the MAXI DOT display in the
Assistants
menu option » page 47.
Display in the Infotainment display
Fig. 145
Display
Read and observe and on page 131 first.
Function keys and obstacle warning » Fig. 145
Change to rear-view camera display .
Switching off park assistant display. Switching audible parking signals on/off.
Message:
Look! Safe to move?
An area without detected obstacles is shown as a transparent segment.
An obstacle which is currently outside of the collision area is shown by the
yellow segment.
An obstacle in the collision zone is shown as an orange-coloured segment.
Stop driving in the direction of an obstacle!
ABC132Driving
Page 135 of 232
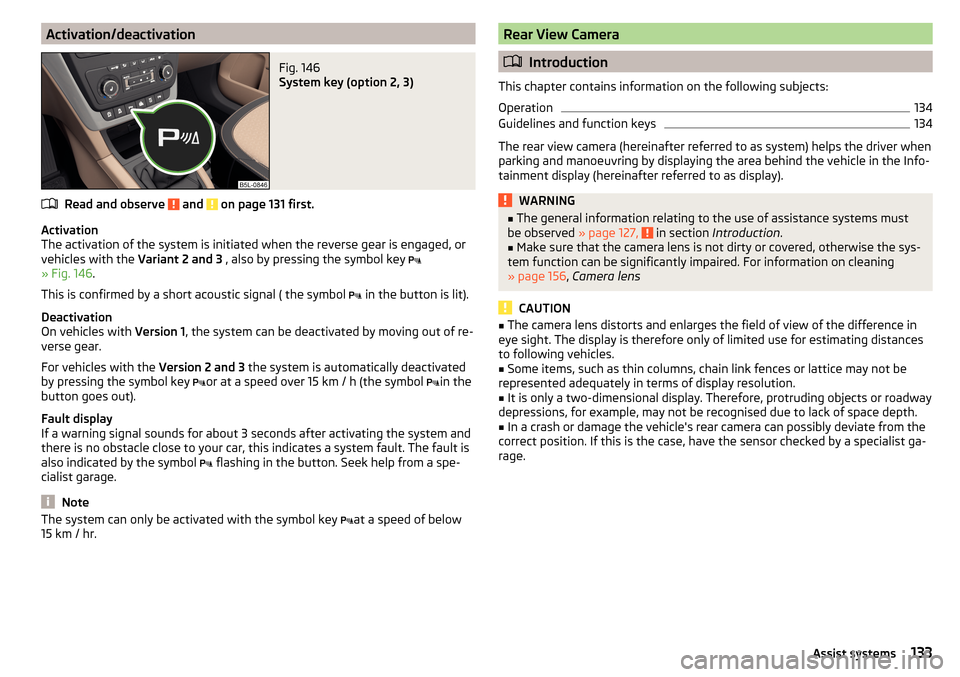
Activation/deactivationFig. 146
System key (option 2, 3)
Read and observe and on page 131 first.
Activation
The activation of the system is initiated when the reverse gear is engaged, or
vehicles with the Variant 2 and 3 , also by pressing the symbol key
» Fig. 146 .
This is confirmed by a short acoustic signal ( the symbol in the button is lit).
Deactivation
On vehicles with Version 1, the system can be deactivated by moving out of re-
verse gear.
For vehicles with the Version 2 and 3 the system is automatically deactivated
by pressing the symbol key or at a speed over 15 km / h (the symbol
in the
button goes out).
Fault display
If a warning signal sounds for about 3 seconds after activating the system and
there is no obstacle close to your car, this indicates a system fault. The fault is
also indicated by the symbol flashing in the button. Seek help from a spe-
cialist garage.
Note
The system can only be activated with the symbol key at a speed of below
15 km / hr.Rear View Camera
Introduction
This chapter contains information on the following subjects:
Operation
134
Guidelines and function keys
134
The rear view camera (hereinafter referred to as system) helps the driver when
parking and manoeuvring by displaying the area behind the vehicle in the Info-
tainment display (hereinafter referred to as display).
WARNING■ The general information relating to the use of assistance systems must
be observed » page 127, in section Introduction .■
Make sure that the camera lens is not dirty or covered, otherwise the sys-
tem function can be significantly impaired. For information on cleaning
» page 156 , Camera lens
CAUTION
■
The camera lens distorts and enlarges the field of view of the difference in
eye sight. The display is therefore only of limited use for estimating distances
to following vehicles.■
Some items, such as thin columns, chain link fences or lattice may not be
represented adequately in terms of display resolution.
■
It is only a two-dimensional display. Therefore, protruding objects or roadway
depressions, for example, may not be recognised due to lack of space depth.
■
In a crash or damage the vehicle's rear camera can possibly deviate from the
correct position. If this is the case, have the sensor checked by a specialist ga-
rage.
133Assist systems
Page 137 of 232
Note■The orientation lines are immobile, and therefore the spacing of the bars be-
hind the vehicle will vary, depending on the vehicle load state and the road in-
clination.■
If reduced park assistance display is switched off the acoustic signal cannot
be turned off with the button
.
Park Assist
Introduction
This chapter contains information on the following subjects:
Functioning
135
Parking space search
136
Parking
137
Departing from a parallel parking space
137
Automatic brake assist
138
Information messages
138
Park Assist (hereinafter referred to as system) helps drivers park in suitable
parallel and perpendicular parking places or also to manoeuvre out of parallel
parking spaces.
The system takes over the steering movements when parking or leaving a
parking space. The driver operates the pedals and the shift lever or gear selec-
tor.
The state in which the steering wheel is operated by the system, is referred to
as parking operation.
The Park Assist is an extension of the parking aid » page 131 and operates on
the basis of data collected by the ultrasonic sensors.
For this reason, the chapter on the parking aid is to be read carefully and the safety notes are to be observed.
WARNING■ The general information relating to the use of assistance systems must
be observed » page 127, in section Introduction .■
During the parking process, the system automatically performs rapid
steering movements. While it is doing so, do not place your hands between
the steering wheel – risk of injury!
■
During a parking manoeuvre on loose or slippery surfaces (gravel, snow,
ice, etc.) you may stray from the calculated road. Therefore we suggest that
you do not use the system in such situations.
CAUTION
The correct evaluation of the parking space and the parking procedure de-
pends on the circumference of the wheels on the vehicle.■
The system only works correctly if the vehicle is fitted with the wheel size
approved by the manufacturer.
■
Abstain from using the system when the vehicle is fitted with snow chains or
a temporary spare wheel.
■
If wheels other than those approved by the manufacturer are mounted, the
resulting position of the vehicle in the parking space can differ slightly. This
can be avoided by readjusting the system at a specialist garage.
CAUTION
If other vehicles are parked behind the kerb or on it, the system can also guide
your vehicle beyond the kerb or onto it. Ensure that the wheels or the wheel
rims of your vehicle are not damaged and if necessary intervene in time.
Note
■ We recommend performing the parking at a safe speed to about 5 km / h.■The driver can stop the parking process at any time by pressing the symbol
key
» Fig. 149 on page 136 or by a driver steering intervention.
Functioning
Read and observe
and on page 135 first.
The system support is provided in the following manner.▶ While the parking space search is going on, a measurement and evaluation of
the parking space size is completed.
▶ Suitable parking spaces are shown in the display of the instrument cluster
(hereinafter only in the display).
135Assist systems
Page 140 of 232
Automatic brake assistRead and observe
and on page 135 first.
Automatic brake assist when speeding
If a velocity of 7 km / h is exceeded during the parking manoeuvre for the first
time, the speed will be automatically reduced by the system to less than 7 km /
h. This prevents the parking manoeuvre from aborting.
Automatic emergency braking
If the system detects a risk of collision during parking, automatic emergency
braking takes place to prevent a collision.
The parking is terminated by the emergency braking.
CAUTION
The automatic emergency braking is not triggered by the system when the
parking process stops due to the speed of 7 km / hr being exceeded!
Information messages
Read and observe
and on page 135 first.
The warning symbols are shown in the instrument cluster display.
Park Assist: speed too high.
If a speed of 50 km / h is exceeded while searching for a parking space, the
system with the key symbol is must be reactivated.
Speed too high. Please take over steering!
The parking is terminated if the speed exceeds 7 km / hr.
Driver steering intervention: Please take over steering!
The parking procedure is terminated due to a driver steering intervention.
Park Assist finished. ASR deactivated.
The parking procedure cannot be carried out because the TCS system is deac-
tivated » page 127 , Braking and stabilisation systems . Activate the TCS.
ASR deactivated. Please take over steering!
The parking procedure was ended because TCS was deactivated during the
parking procedure.
Trailer: Park Assist finished.The parking process cannot be performed with a trailer or when another ac-
cessory is connected to the trailer socket.Time limit exceeded. Please take over steering!
The parking procedure was ended because the time limit of 6 minutes was
passed.
Park Assist currently not available.
The system cannot be activated because a fault exists on the vehicle. Seek
help from a specialist garage.
Park Assist ended. System currently not available.
The parking procedure was ended because a fault exists on the vehicle. Seek
help from a specialist garage.
Park Assist faulty. Workshop!
The parking procedure is not possible because a fault exists in the system.
Seek help from a specialist garage.
ASR intervention! Please take over steering!
The parking procedure is terminated by a TCS intervention.
Automatic space departure not possible. Space too small.
The manoeuvring procedure using the system is not possible. The parking gap
is too small.
Park Assist: Brake interv. Speed too high.
The speed was too high during the parking and was automatically reduced.
Speed control system
Introduction
This chapter contains information on the following subjects:
Functioning
139
Operating Description
139
The Cruise Control System (CCS) maintains a set speed without you having to
actuate the accelerator pedal.
The state where the GRA maintains the speed is referred to hereinafter as the
control .
138Driving
Page 141 of 232
WARNINGThe general information relating to the use of assistance systems must be
observed » page 127, in section Introduction .
Functioning
Read and observe
on page 139 first.
Basic requirements for start of control The GRA is activated.
On vehicles with a manual transmission , the second gear or higher is en-
gaged.
On vehicles with an automatic transmission , the selector lever is in the D,
S position or in the Tiptronic position.
The current speed is higher than approx. 20 km/h.
This is only possible within the range which is permitted by the power output and braking power of the engine.
WARNINGIf the engine power and engine braking effect is insufficient to maintain
the set speed, vehicle operation must be taken over!
Operating Description
Fig. 151
Cruise control system controls
Read and observe on page 139 first.
Overview of the control elements of the CCS » Fig. 151ADeactivate CCS (delete set speed) Interrupt control (sprung position) Activate CCS (control deactivated)BTake control again a)
/ Increase speedCLaunch control / reduce speeda)
If no speed is set the current speed is adopted.
After the start of the regulation, the GRA regulates the vehicle to the current
speed and the warning light
illuminates in the instrument cluster.
After the interruption in control, the stored speed can be resumed by pressing
the
B
button.
Automatic control interruption
Automatic control interruption occurs if any of the following conditions are
met.
▶ By pressing the brake or clutch pedal.
▶ When one of the brake assist systems (e.g. ESC) intervenes.
▶ Through an airbag deployment.
WARNING■ Always deactivate the cruise control system after use to prevent the sys-
tem being switched on unintentionally.■
Control may only be resumed if the set speed is not too high for the cur-
rent traffic conditions.
Note
During control, speed can be increased by pressing the accelerator pedal. Re-
leasing the accelerator pedal will cause the speed to drop again to the set
speed.
Fatigue detection
Introduction
This chapter contains information on the following subjects:
Function
140
Information messages
140
The fatigue detection system (hereinafter referred to as system) recommends
the driver takes a break from driving when driver fatigue can be detected due
to the driver's steering behaviour.
139Assist systems
Page 142 of 232
WARNING■The general information relating to the use of assistance systems must
be observed » page 127, in section Introduction .■
For the driving ability is always the driver's responsibility. Never drive if
you feel tired.
■
The system may not detect all cases where a break is needed.
■
Therefore, take regular, sufficient breaks during long trips.
■
There will be no system warning during the so-called micro-sleep.
Note
■ In some situations, the system may evaluate the driving incorrectly and thus
mistakenly recommend a break (e.g. sporty driving, adverse weather condi-
tions or poor road conditions).■
The system is designed primarily for use on motorways.
Function
Read and observe
on page 140 first.
From the start of the journey, the system evaluates steering behaviour. If,
while driving, there have been changes in the steering behaviours that are
evaluated by the system as indicating possible fatigue, a break recommenda-
tion is issued.
The system evaluates steering behaviour and recommends a break at speeds
of 65-200 km / h.
The system detects a break from driving when one of the following condi-
tions is met.
▶ The vehicle is stopped and the ignition switched off.
▶ The vehicle is stopped, the seat belt removed and the driver's door opened.
▶ The vehicle is stopped for more than 15 minutes.
If none of these conditions are met or if the driving style is not changed, the
system recommends a driving break again after 15 minutes.
Activation/deactivation
The system can be activated/deactivated via the MAXI DOT display in the
Assis-tants
menu option » page 44.
Information messages
Read and observe
on page 140 first.
In MAXI DOT display the icon appears for a few seconds and the following
message.
Driver alert.
Take a break!
An audible signal is also emitted.
Tyre pressure monitoring
Introduction
This chapter contains information on the following subjects:
Save tyre pressure values
141
The tyre pressure monitoring function (hereinafter referred to as the system)
monitors the tyre pressure while driving.
If the rolling circumference of a wheel is changed, the warning light in the
instrument cluster lights up and an audible signal sounds.
Information on the procedure for the notification of change of tyre inflation
pressure » page 38 .
The system can only function properly if the tyres have the prescribed inflation
pressure and these pressure values are stored in the system.
WARNING■ The general information relating to the use of assistance systems must
be observed » page 127, in section Introduction .■
Having the correct tyre inflation pressure is always the driver's responsi-
bility. Tyre pressure should be checked regularly » page 176.
■
The system cannot warn in case of very rapid tyre inflation pressure loss,
e.g. in case of sudden tyre damage.
140Driving
Page 143 of 232
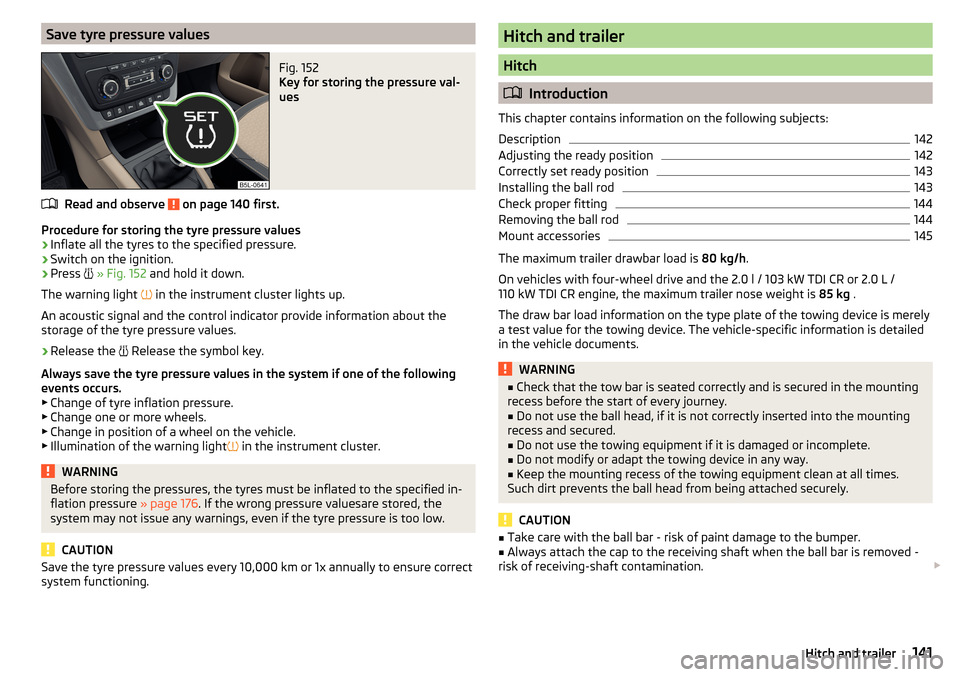
Save tyre pressure valuesFig. 152
Key for storing the pressure val-
ues
Read and observe on page 140 first.
Procedure for storing the tyre pressure values
›
Inflate all the tyres to the specified pressure.
›
Switch on the ignition.
›
Press
» Fig. 152 and hold it down.
The warning light in the instrument cluster lights up.
An acoustic signal and the control indicator provide information about the
storage of the tyre pressure values.
›
Release the Release the symbol key.
Always save the tyre pressure values in the system if one of the following
events occurs.
▶ Change of tyre inflation pressure.
▶ Change one or more wheels.
▶ Change in position of a wheel on the vehicle.
▶ Illumination of the warning light in the instrument cluster.
WARNINGBefore storing the pressures, the tyres must be inflated to the specified in-
flation pressure » page 176. If the wrong pressure valuesare stored, the
system may not issue any warnings, even if the tyre pressure is too low.
CAUTION
Save the tyre pressure values every 10,000 km or 1x annually to ensure correct
system functioning.Hitch and trailer
Hitch
Introduction
This chapter contains information on the following subjects:
Description
142
Adjusting the ready position
142
Correctly set ready position
143
Installing the ball rod
143
Check proper fitting
144
Removing the ball rod
144
Mount accessories
145
The maximum trailer drawbar load is 80 kg/h.
On vehicles with four-wheel drive and the 2.0 l / 103 kW TDI CR or 2.0 L /
110 kW TDI CR engine, the maximum trailer nose weight is 85 kg .
The draw bar load information on the type plate of the towing device is merely
a test value for the towing device. The vehicle-specific information is detailed
in the vehicle documents.
WARNING■ Check that the tow bar is seated correctly and is secured in the mounting
recess before the start of every journey.■
Do not use the ball head, if it is not correctly inserted into the mounting
recess and secured.
■
Do not use the towing equipment if it is damaged or incomplete.
■
Do not modify or adapt the towing device in any way.
■
Keep the mounting recess of the towing equipment clean at all times.
Such dirt prevents the ball head from being attached securely.
CAUTION
■ Take care with the ball bar - risk of paint damage to the bumper.■Always attach the cap to the receiving shaft when the ball bar is removed -
risk of receiving-shaft contamination. 141Hitch and trailer
Page 146 of 232
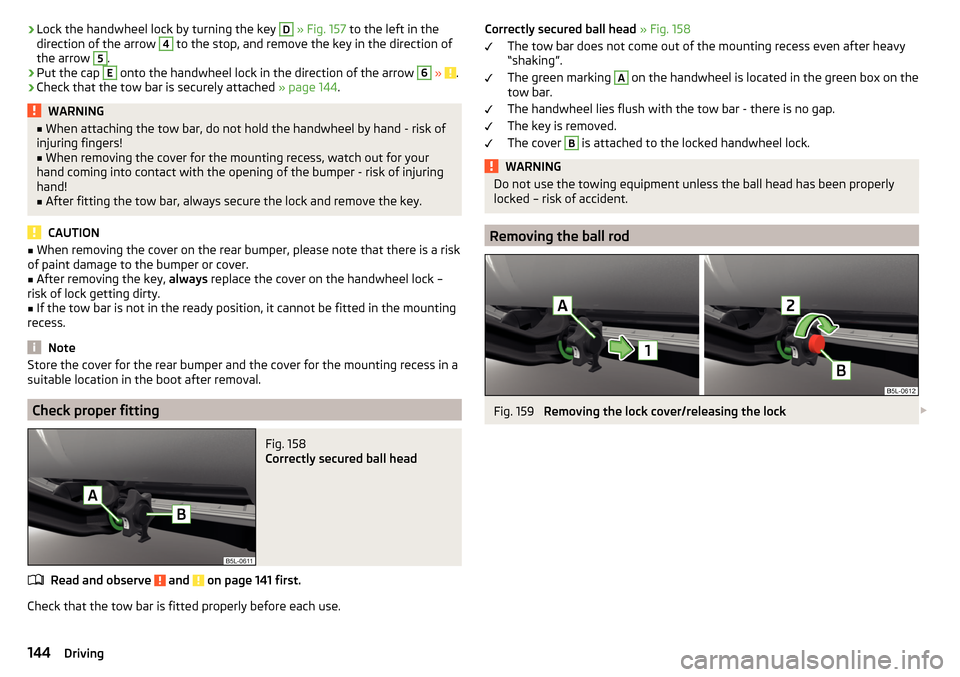
›Lock the handwheel lock by turning the key D
» Fig. 157 to the left in the
direction of the arrow 4 to the stop, and remove the key in the direction of
the arrow 5
.
›
Put the cap
E
onto the handwheel lock in the direction of the arrow
6
» .
›
Check that the tow bar is securely attached » page 144.
WARNING■
When attaching the tow bar, do not hold the handwheel by hand - risk of
injuring fingers!■
When removing the cover for the mounting recess, watch out for your
hand coming into contact with the opening of the bumper - risk of injuring
hand!
■
After fitting the tow bar, always secure the lock and remove the key.
CAUTION
■ When removing the cover on the rear bumper, please note that there is a risk
of paint damage to the bumper or cover.■
After removing the key, always replace the cover on the handwheel lock –
risk of lock getting dirty.
■
If the tow bar is not in the ready position, it cannot be fitted in the mounting
recess.
Note
Store the cover for the rear bumper and the cover for the mounting recess in a
suitable location in the boot after removal.
Check proper fitting
Fig. 158
Correctly secured ball head
Read and observe and on page 141 first.
Check that the tow bar is fitted properly before each use.
Correctly secured ball head » Fig. 158
The tow bar does not come out of the mounting recess even after heavy “shaking”.
The green marking A
on the handwheel is located in the green box on the
tow bar.
The handwheel lies flush with the tow bar - there is no gap.
The key is removed.
The cover
B
is attached to the locked handwheel lock.
WARNINGDo not use the towing equipment unless the ball head has been properly
locked – risk of accident.
Removing the ball rod
Fig. 159
Removing the lock cover/releasing the lock
144Driving