check engine SKODA YETI 2015 1.G / 5L User Guide
[x] Cancel search | Manufacturer: SKODA, Model Year: 2015, Model line: YETI, Model: SKODA YETI 2015 1.G / 5LPages: 232, PDF Size: 30.84 MB
Page 40 of 232
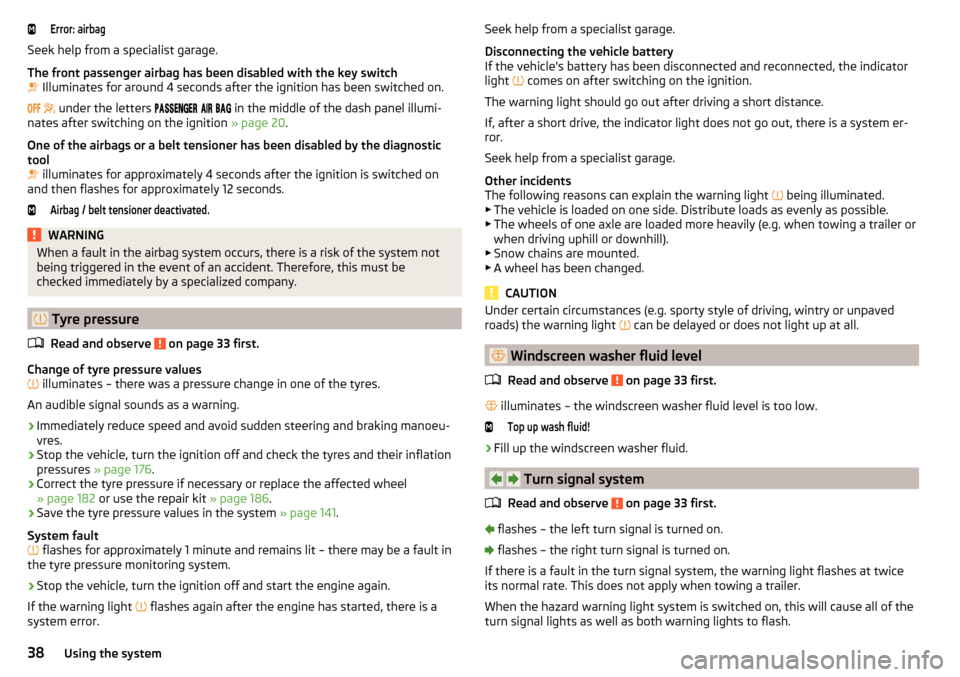
Error: airbag
Seek help from a specialist garage.
The front passenger airbag has been disabled with the key switch
Illuminates for around 4 seconds after the ignition has been switched on.
under the letters
in the middle of the dash panel illumi-
nates after switching on the ignition » page 20.
One of the airbags or a belt tensioner has been disabled by the diagnostic
tool
illuminates for approximately 4 seconds after the ignition is switched on
and then flashes for approximately 12 seconds.
Airbag / belt tensioner deactivated.WARNINGWhen a fault in the airbag system occurs, there is a risk of the system not
being triggered in the event of an accident. Therefore, this must be
checked immediately by a specialized company.
Tyre pressure
Read and observe
on page 33 first.
Change of tyre pressure values
illuminates – there was a pressure change in one of the tyres.
An audible signal sounds as a warning.
›
Immediately reduce speed and avoid sudden steering and braking manoeu-
vres.
›
Stop the vehicle, turn the ignition off and check the tyres and their inflation
pressures » page 176 .
›
Correct the tyre pressure if necessary or replace the affected wheel
» page 182 or use the repair kit » page 186.
›
Save the tyre pressure values in the system » page 141.
System fault
flashes for approximately 1 minute and remains lit – there may be a fault in
the tyre pressure monitoring system.
›
Stop the vehicle, turn the ignition off and start the engine again.
If the warning light flashes again after the engine has started, there is a
system error.
Seek help from a specialist garage.
Disconnecting the vehicle battery
If the vehicle's battery has been disconnected and reconnected, the indicator
light
comes on after switching on the ignition.
The warning light should go out after driving a short distance.
If, after a short drive, the indicator light does not go out, there is a system er-
ror.
Seek help from a specialist garage.
Other incidents
The following reasons can explain the warning light being illuminated.
▶ The vehicle is loaded on one side. Distribute loads as evenly as possible.
▶ The wheels of one axle are loaded more heavily (e.g. when towing a trailer or
when driving uphill or downhill).
▶ Snow chains are mounted.
▶ A wheel has been changed.
CAUTION
Under certain circumstances (e.g. sporty style of driving, wintry or unpaved
roads) the warning light can be delayed or does not light up at all.
Windscreen washer fluid level
Read and observe
on page 33 first.
illuminates – the windscreen washer fluid level is too low.
Top up wash fluid!›
Fill up the windscreen washer fluid.
Turn signal system
Read and observe
on page 33 first.
flashes – the left turn signal is turned on.
flashes – the right turn signal is turned on.
If there is a fault in the turn signal system, the warning light flashes at twice
its normal rate. This does not apply when towing a trailer.
When the hazard warning light system is switched on, this will cause all of the
turn signal lights as well as both warning lights to flash.
38Using the system
Page 41 of 232
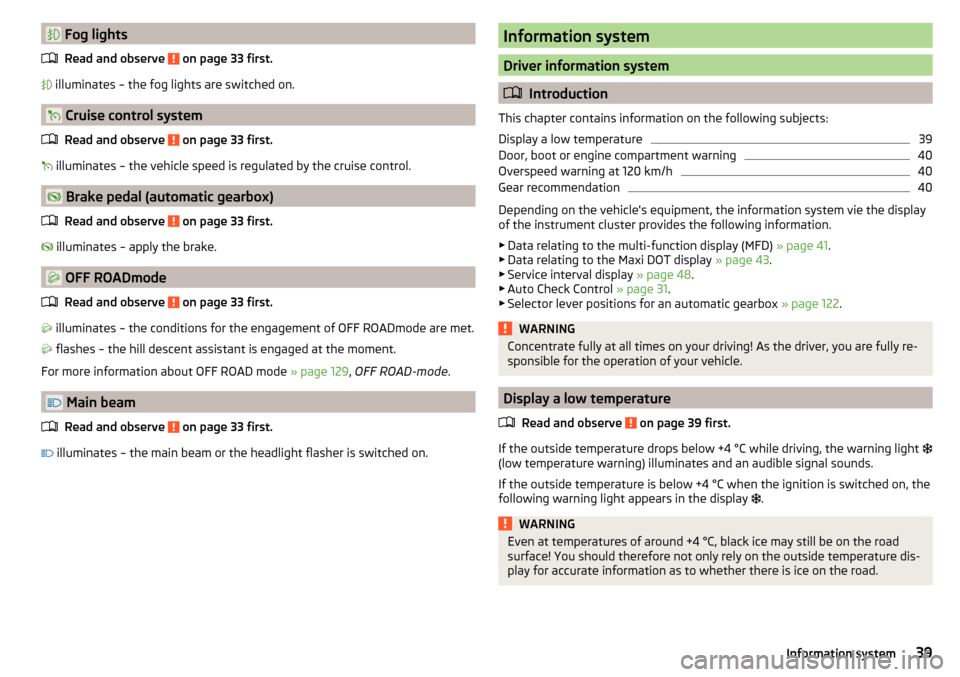
Fog lightsRead and observe
on page 33 first.
illuminates – the fog lights are switched on.
Cruise control system
Read and observe
on page 33 first.
illuminates – the vehicle speed is regulated by the cruise control.
Brake pedal (automatic gearbox)
Read and observe
on page 33 first.
illuminates – apply the brake.
OFF ROADmode
Read and observe
on page 33 first.
illuminates – the conditions for the engagement of OFF ROADmode are met.
flashes – the hill descent assistant is engaged at the moment.
For more information about OFF ROAD mode » page 129, OFF ROAD-mode .
Main beam
Read and observe
on page 33 first.
illuminates – the main beam or the headlight flasher is switched on.
Information system
Driver information system
Introduction
This chapter contains information on the following subjects:
Display a low temperature
39
Door, boot or engine compartment warning
40
Overspeed warning at 120 km/h
40
Gear recommendation
40
Depending on the vehicle's equipment, the information system vie the display
of the instrument cluster provides the following information.
▶ Data relating to the multi-function display (MFD) » page 41.
▶ Data relating to the Maxi DOT display » page 43.
▶ Service interval display » page 48.
▶ Auto Check Control » page 31.
▶ Selector lever positions for an automatic gearbox » page 122.
WARNINGConcentrate fully at all times on your driving! As the driver, you are fully re-
sponsible for the operation of your vehicle.
Display a low temperature
Read and observe
on page 39 first.
If the outside temperature drops below +4 °C while driving, the warning light
(low temperature warning) illuminates and an audible signal sounds.
If the outside temperature is below +4 °C when the ignition is switched on, the
following warning light appears in the display .
WARNINGEven at temperatures of around +4 °C, black ice may still be on the road
surface! You should therefore not only rely on the outside temperature dis- play for accurate information as to whether there is ice on the road.39Information system
Page 44 of 232
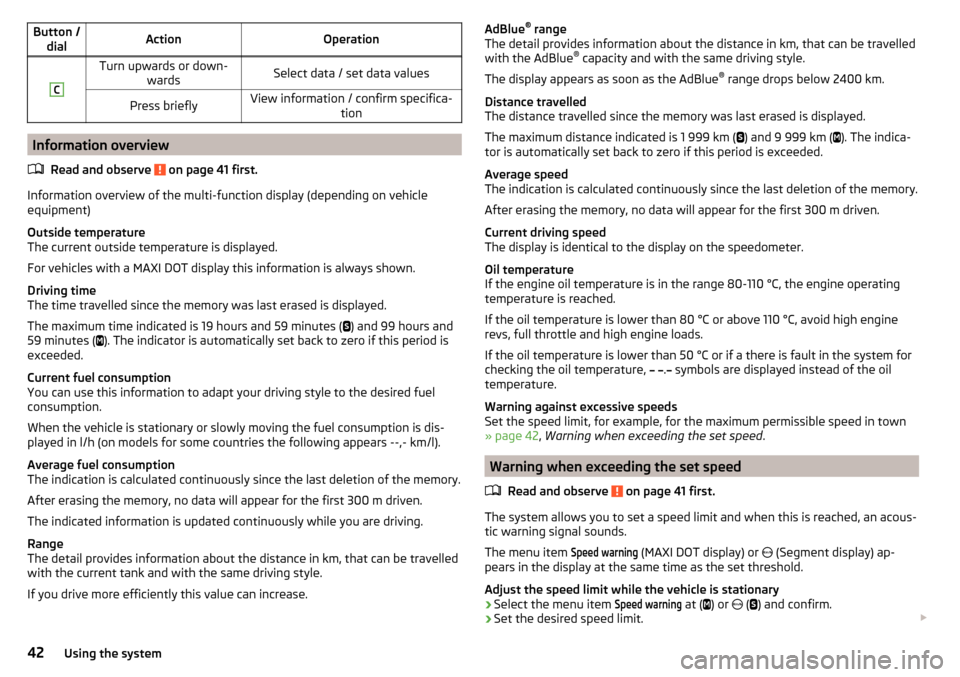
Button /dialActionOperationCTurn upwards or down- wardsSelect data / set data valuesPress brieflyView information / confirm specifica- tion
Information overview
Read and observe
on page 41 first.
Information overview of the multi-function display (depending on vehicle
equipment)
Outside temperature
The current outside temperature is displayed.
For vehicles with a MAXI DOT display this information is always shown.
Driving time
The time travelled since the memory was last erased is displayed.
The maximum time indicated is 19 hours and 59 minutes ( ) and 99 hours and
59 minutes ( ). The indicator is automatically set back to zero if this period is
exceeded.
Current fuel consumption
You can use this information to adapt your driving style to the desired fuel
consumption.
When the vehicle is stationary or slowly moving the fuel consumption is dis-
played in l/h (on models for some countries the following appears --,- km/l).
Average fuel consumption
The indication is calculated continuously since the last deletion of the memory.
After erasing the memory, no data will appear for the first 300 m driven.
The indicated information is updated continuously while you are driving.
Range
The detail provides information about the distance in km, that can be travelled
with the current tank and with the same driving style.
If you drive more efficiently this value can increase.
AdBlue ®
range
The detail provides information about the distance in km, that can be travelled
with the AdBlue ®
capacity and with the same driving style.
The display appears as soon as the AdBlue ®
range drops below 2400 km.
Distance travelled
The distance travelled since the memory was last erased is displayed.
The maximum distance indicated is 1 999 km (
) and 9 999 km (
). The indica-
tor is automatically set back to zero if this period is exceeded.
Average speed
The indication is calculated continuously since the last deletion of the memory.
After erasing the memory, no data will appear for the first 300 m driven.
Current driving speed
The display is identical to the display on the speedometer.
Oil temperature
If the engine oil temperature is in the range 80-110 °C, the engine operating temperature is reached.
If the oil temperature is lower than 80 °C or above 110 °C, avoid high engine
revs, full throttle and high engine loads.
If the oil temperature is lower than 50 °C or if a there is fault in the system for
checking the oil temperature,
.
symbols are displayed instead of the oil
temperature.
Warning against excessive speeds
Set the speed limit, for example, for the maximum permissible speed in town
» page 42 , Warning when exceeding the set speed .
Warning when exceeding the set speed
Read and observe
on page 41 first.
The system allows you to set a speed limit and when this is reached, an acous-
tic warning signal sounds.
The menu item
Speed warning
(MAXI DOT display) or (Segment display) ap-
pears in the display at the same time as the set threshold.
Adjust the speed limit while the vehicle is stationary
›
Select the menu item
Speed warning
at ( ) or
(
) and confirm.
›
Set the desired speed limit.
42Using the system
Page 52 of 232
More information on available applications, a list of compatible communication
devices and on SmartGate, can be found on the ŠKODA website » Fig. 33.
http://www.skoda-auto.comWARNING■ The general binding country-specific regulations for operating communi-
cation devices in the vehicle must be observed.■
Never leave a communication device in the deployment area of an airbag,
on a seat, on the dash panel or any another area, from which it can be
thrown during a sudden braking manoeuvre, an accident or a collision - risk
of injury!
■
Never connect or disconnect a communication device while driving - risk
of accident!
CAUTION
■ To increase the access security to the transmitted vehicle data, once the
ŠKODA application has been started, you are requested to change the pass-
word/PIN code if the default password/PIN code has not yet been changed
» page 51 , Password/PIN code change . It is not possible to start the ŠKODA
application without changing it.■
ŠKODA accepts no responsibility for any problems caused by incompatibility
or improper functioning of the communication devices.
Note
The ŠKODA applications, support communications devices with the Android
operating system version 4.x.x and later and iOS 7.x.x and higher.
Connection to SmartGate using Wi-Fi
Read and observe
and on page 50 first.
Connecting to an Android communication device
›
Switch on the ignition.
›
Switch on the Wi-Fi on the communication device to be connected.
›
Start the SmartGate application using the communication device to be con-
nected.
›
Then follow the instructions in the manual, which are included in the
SmartGate application.
With SmartGate, a maximum of four communication devices can be connected
simultaneously using Wi-Fi, with as many launched ŠKODA applications as re-
quired.
Connecting to an iOS communication device›
Switch on the ignition.
›
Switch on the Wi-Fi on the communication device to be connected.
›
Allow the communication device to be connected to search for available Wi-
Fi networks (see the Owner's Manual for the communication device to be
connected).
›
In the menu of the detected networks select “SmartGate_...” 1)
or “DIRECT
SmartGate_...” 1)
.
›
Enter the password » page 51.
With SmartGate, a maximum of four communication devices can be connected
simultaneously using Wi-Fi. In these communication devices, up to four ŠKODA
applications can be started simultaneously.
Disconnection
The connection can be switched off in one of the following ways.
›
Switch off the ignition for longer than 5 seconds (for vehicles with a starter
button, switch off the engine and open the driver's door).
›
End the connection in the SmartGate application.
›
Switch off the Wi-Fi on the connected communication device.
Automatic connection
If the communication device once had a connection with SmartGate, then the
connection is automatically restored under the following conditions.
The ignition is switched on.
The Wi-Fi on the communication device to be connected is switched on.
The communication device to be connected stores the password required
for the connection check.
Connection to SmartGate using Wi-Fi Direct
Read and observe
and on page 50 first.
This type of connection is intended for communication devices running theAndroid operating system.
1)
The last 6 characters of the VIN vehicle identification number of your vehicle are displayed at position
....
50Using the system
Page 119 of 232
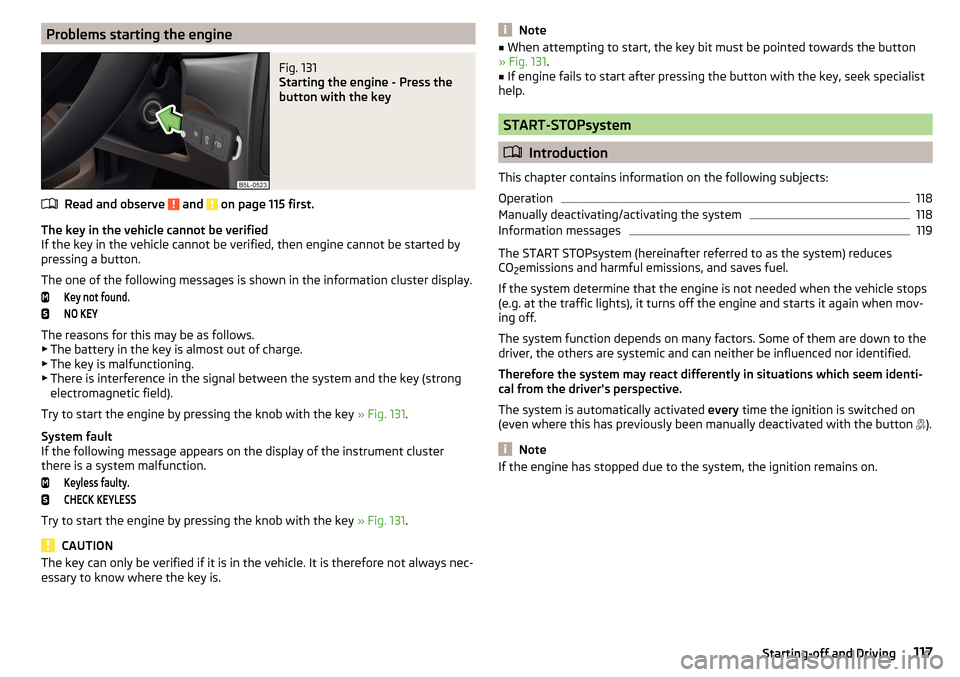
Problems starting the engineFig. 131
Starting the engine - Press the
button with the key
Read and observe and on page 115 first.
The key in the vehicle cannot be verified
If the key in the vehicle cannot be verified, then engine cannot be started by pressing a button.
The one of the following messages is shown in the information cluster display.
Key not found.NO KEY
The reasons for this may be as follows.
▶ The battery in the key is almost out of charge.
▶ The key is malfunctioning.
▶ There is interference in the signal between the system and the key (strong
electromagnetic field).
Try to start the engine by pressing the knob with the key » Fig. 131.
System fault
If the following message appears on the display of the instrument cluster
there is a system malfunction.
Keyless faulty.CHECK KEYLESS
Try to start the engine by pressing the knob with the key » Fig. 131.
CAUTION
The key can only be verified if it is in the vehicle. It is therefore not always nec-
essary to know where the key is.Note■ When attempting to start, the key bit must be pointed towards the button
» Fig. 131 .■
If engine fails to start after pressing the button with the key, seek specialist
help.
START-STOPsystem
Introduction
This chapter contains information on the following subjects:
Operation
118
Manually deactivating/activating the system
118
Information messages
119
The START STOPsystem (hereinafter referred to as the system) reduces
CO 2emissions and harmful emissions, and saves fuel.
If the system determine that the engine is not needed when the vehicle stops
(e.g. at the traffic lights), it turns off the engine and starts it again when mov-
ing off.
The system function depends on many factors. Some of them are down to the
driver, the others are systemic and can neither be influenced nor identified.
Therefore the system may react differently in situations which seem identi-
cal from the driver's perspective.
The system is automatically activated every time the ignition is switched on
(even where this has previously been manually deactivated with the button ).
Note
If the engine has stopped due to the system, the ignition remains on.117Starting-off and Driving
Page 121 of 232
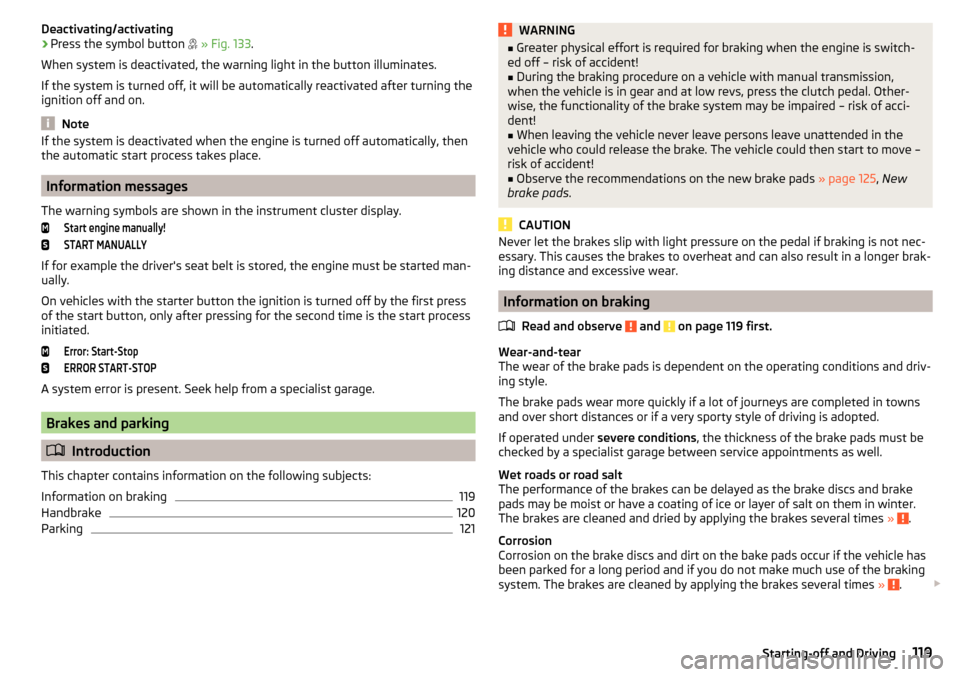
Deactivating/activating›Press the symbol button » Fig. 133 .
When system is deactivated, the warning light in the button illuminates.
If the system is turned off, it will be automatically reactivated after turning the
ignition off and on.
Note
If the system is deactivated when the engine is turned off automatically, then
the automatic start process takes place.
Information messages
The warning symbols are shown in the instrument cluster display.
Start engine manually!START MANUALLY
If for example the driver's seat belt is stored, the engine must be started man-
ually.
On vehicles with the starter button the ignition is turned off by the first press
of the start button, only after pressing for the second time is the start process
initiated.
Error: Start-StopERROR START-STOP
A system error is present. Seek help from a specialist garage.
Brakes and parking
Introduction
This chapter contains information on the following subjects:
Information on braking
119
Handbrake
120
Parking
121WARNING■ Greater physical effort is required for braking when the engine is switch-
ed off – risk of accident!■
During the braking procedure on a vehicle with manual transmission,
when the vehicle is in gear and at low revs, press the clutch pedal. Other-
wise, the functionality of the brake system may be impaired – risk of acci-
dent!
■
When leaving the vehicle never leave persons leave unattended in the
vehicle who could release the brake. The vehicle could then start to move –
risk of accident!
■
Observe the recommendations on the new brake pads » page 125, New
brake pads .
CAUTION
Never let the brakes slip with light pressure on the pedal if braking is not nec-
essary. This causes the brakes to overheat and can also result in a longer brak-
ing distance and excessive wear.
Information on braking
Read and observe
and on page 119 first.
Wear-and-tear
The wear of the brake pads is dependent on the operating conditions and driv-
ing style.
The brake pads wear more quickly if a lot of journeys are completed in towns
and over short distances or if a very sporty style of driving is adopted.
If operated under severe conditions , the thickness of the brake pads must be
checked by a specialist garage between service appointments as well.
Wet roads or road salt
The performance of the brakes can be delayed as the brake discs and brake
pads may be moist or have a coating of ice or layer of salt on them in winter.
The brakes are cleaned and dried by applying the brakes several times »
.
Corrosion
Corrosion on the brake discs and dirt on the bake pads occur if the vehicle has
been parked for a long period and if you do not make much use of the braking
system. The brakes are cleaned by applying the brakes several times »
.
119Starting-off and Driving
Page 128 of 232
WARNING■Always adjust your driving to the current terrain and weather conditions.
Excessive speed or incorrect driving manoeuvres can cause damage to the
vehicle and lead to serious injuries.■
Combustible objects such as dry leaves or twigs caught under the base of
the vehicle could ignite on hot vehicle parts - risk of fire!
CAUTION
■ Pay attention to the ground clearance of the vehicle! When driving over ob-
jects which are larger than the ground clearance, the vehicle can get damaged.■
Any objects that get trapped under the vehicle floor must be removed as
soon as possible. These objects can damage the fuel lines, the brake system,
seals and other parts of the vehicle.
■
Drive slowly in unknown terrain and watch out for unexpected obstacles,
such as potholes, rocks, stumps, etc.
■
Check up on confusing sections of unpaved roads before travelling on them
and consider whether such travelling is possible without risk.
Driving through water
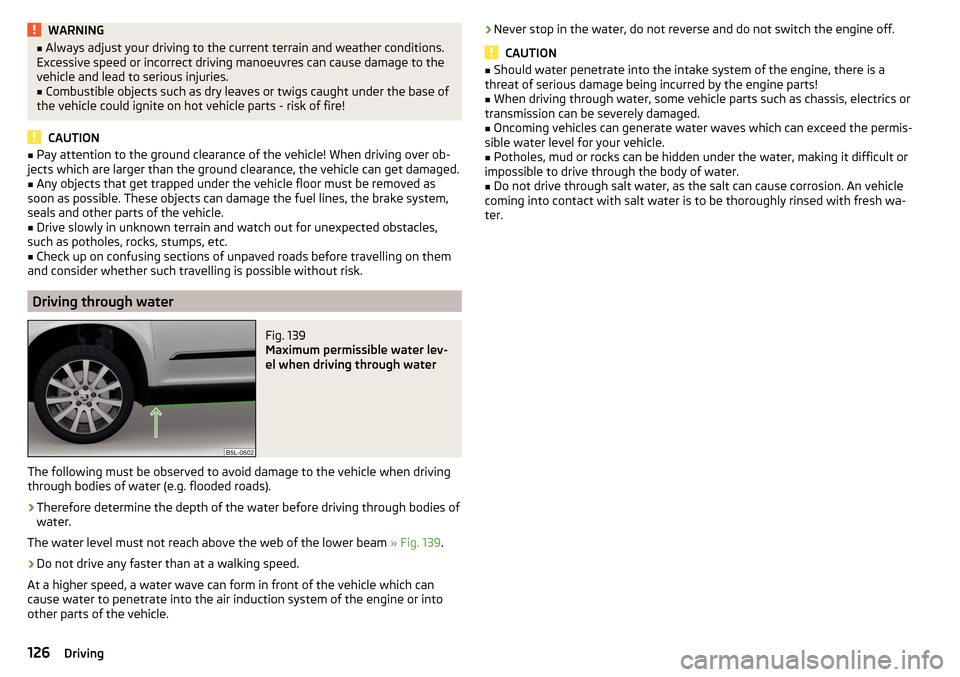
Fig. 139
Maximum permissible water lev-
el when driving through water
The following must be observed to avoid damage to the vehicle when driving
through bodies of water (e.g. flooded roads).
›
Therefore determine the depth of the water before driving through bodies of
water.
The water level must not reach above the web of the lower beam » Fig. 139.
›
Do not drive any faster than at a walking speed.
At a higher speed, a water wave can form in front of the vehicle which can
cause water to penetrate into the air induction system of the engine or into
other parts of the vehicle.
› Never stop in the water, do not reverse and do not switch the engine off.
CAUTION
■
Should water penetrate into the intake system of the engine, there is a
threat of serious damage being incurred by the engine parts!■
When driving through water, some vehicle parts such as chassis, electrics or
transmission can be severely damaged.
■
Oncoming vehicles can generate water waves which can exceed the permis-
sible water level for your vehicle.
■
Potholes, mud or rocks can be hidden under the water, making it difficult or
impossible to drive through the body of water.
■
Do not drive through salt water, as the salt can cause corrosion. An vehicle
coming into contact with salt water is to be thoroughly rinsed with fresh wa-
ter.
126Driving
Page 143 of 232
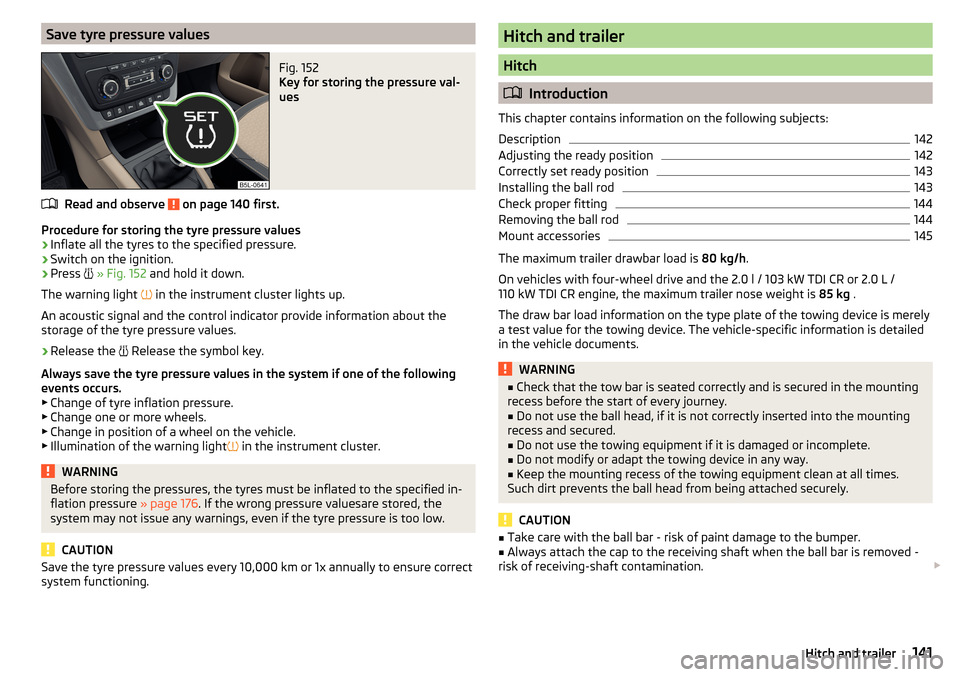
Save tyre pressure valuesFig. 152
Key for storing the pressure val-
ues
Read and observe on page 140 first.
Procedure for storing the tyre pressure values
›
Inflate all the tyres to the specified pressure.
›
Switch on the ignition.
›
Press
» Fig. 152 and hold it down.
The warning light in the instrument cluster lights up.
An acoustic signal and the control indicator provide information about the
storage of the tyre pressure values.
›
Release the Release the symbol key.
Always save the tyre pressure values in the system if one of the following
events occurs.
▶ Change of tyre inflation pressure.
▶ Change one or more wheels.
▶ Change in position of a wheel on the vehicle.
▶ Illumination of the warning light in the instrument cluster.
WARNINGBefore storing the pressures, the tyres must be inflated to the specified in-
flation pressure » page 176. If the wrong pressure valuesare stored, the
system may not issue any warnings, even if the tyre pressure is too low.
CAUTION
Save the tyre pressure values every 10,000 km or 1x annually to ensure correct
system functioning.Hitch and trailer
Hitch
Introduction
This chapter contains information on the following subjects:
Description
142
Adjusting the ready position
142
Correctly set ready position
143
Installing the ball rod
143
Check proper fitting
144
Removing the ball rod
144
Mount accessories
145
The maximum trailer drawbar load is 80 kg/h.
On vehicles with four-wheel drive and the 2.0 l / 103 kW TDI CR or 2.0 L /
110 kW TDI CR engine, the maximum trailer nose weight is 85 kg .
The draw bar load information on the type plate of the towing device is merely
a test value for the towing device. The vehicle-specific information is detailed
in the vehicle documents.
WARNING■ Check that the tow bar is seated correctly and is secured in the mounting
recess before the start of every journey.■
Do not use the ball head, if it is not correctly inserted into the mounting
recess and secured.
■
Do not use the towing equipment if it is damaged or incomplete.
■
Do not modify or adapt the towing device in any way.
■
Keep the mounting recess of the towing equipment clean at all times.
Such dirt prevents the ball head from being attached securely.
CAUTION
■ Take care with the ball bar - risk of paint damage to the bumper.■Always attach the cap to the receiving shaft when the ball bar is removed -
risk of receiving-shaft contamination. 141Hitch and trailer
Page 149 of 232
WARNING■Improperly connected trailer electrical installations may cause accidents
or serious injury due to electric shock.■
Work on the electrical system must only be carried out by specialist ga-
rages.
■
Never directly connect the trailer's electrical system with the electrical
connections for the tail lights or other current sources.
■
After coupling the trailer and connecting up the power socket, check the
rear lights on the trailer to ensure they are working.
■
Never use the safety eyelet for towing!
CAUTION
Improperly connected trailer electrical installations may cause malfunction of
the entire vehicle electronics.
Loading a trailer
Distribution of the cargo
Distribute the cargo in the trailer in such a way that heavy items are located as
close to the trailer axle as possible. Secure the items from slipping.
The distribution of the weight is very poor if your vehicle is unladen and the
trailer is laden. Maintain a particularly low speed if you cannot avoid driving
with this combination.
Tyre pressure
Correct the tyre inflation pressure on your vehicle for a “full load” » page 176.WARNINGSliding cargo can significantly adversely affect stability and driving safety -
risk of accident!
Trailer
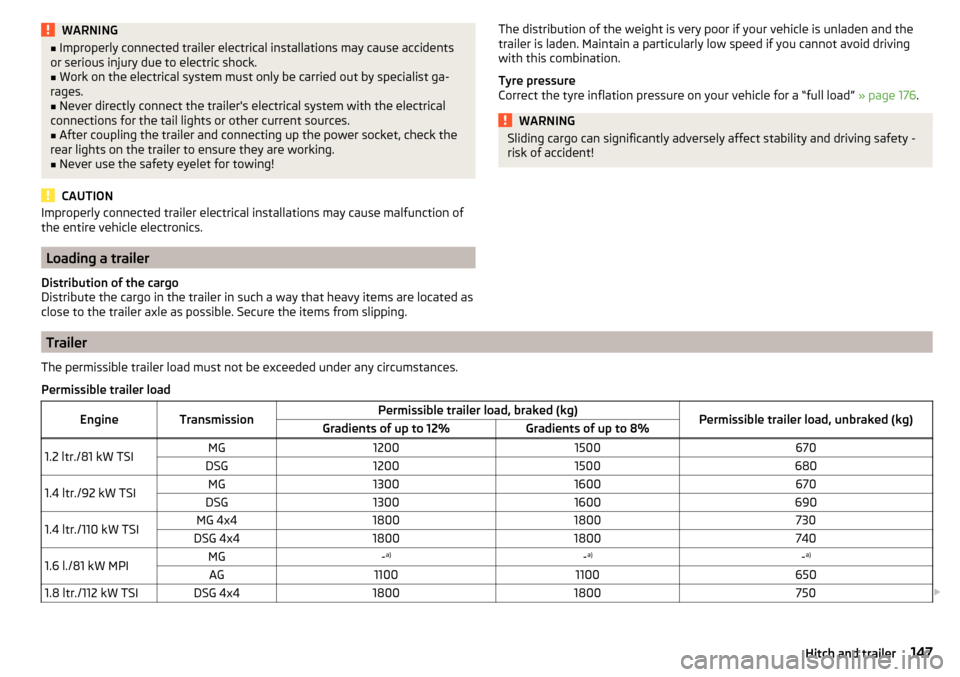
The permissible trailer load must not be exceeded under any circumstances.Permissible trailer loadEngineTransmissionPermissible trailer load, braked (kg)Permissible trailer load, unbraked (kg)Gradients of up to 12%Gradients of up to 8%1.2 ltr./81 kW TSIMG12001500670DSG120015006801.4 ltr./92 kW TSIMG13001600670DSG130016006901.4 ltr./110 kW TSIMG 4x418001800730DSG 4x4180018007401.6 l./81 kW MPIMG- a)-a)-a)AG110011006501.8 ltr./112 kW TSIDSG 4x418001800750
147Hitch and trailer
Page 159 of 232
Towing hitch and mounting recessRead and observe
and on page 154 first.
Close the mounting recess with the cover to prevent any dirt from getting in.
If dirt is present, clean the inner surfaces of the mounting recess and treat
with a suitable preservative.
Always check the ball head before hitching a trailer. Apply a suitable grease if
necessary.
Use the protective cover when stowing away the tow bar, in order to stop the
boot from getting dirty.
CAUTION
Apply grease to the inner part of the mounting recess. Make sure you do not
remove any grease.
Under-body protection
Read and observe
and on page 154 first.
The underside of your vehicle is already permanently protected by the factory
against chemical and mechanical influences.
It is not possible to guarantee that the protective coating will not suffer any
damage as the vehicle is driven.
We recommend having the protective coating underneath the vehicle and the
chassis checked — preferably before the beginning of winter and at the end of
winter.
WARNINGNever use additional underbody protection or anti-corrosion agents for ex-
haust pipes, catalytic converters, diesel particle filters or heat shields.
When the engine reaches its operating temperature, these substances may ignite - risk of fire!Wiper blades
Read and observe
and on page 154 first.
Clean the wiper blades regularly with a glass cleaner. The wiper blades shouldbe cleaned with a sponge or cloth if they are heavily soiled by insect residues,
for example.
The wiper blades can become soiled with wax residues after washing in auto-
matic vehicle wash systems for example.
Interior care
Introduction
This chapter contains information on the following subjects:
Natural leather
158
Artificial leather, materials and Alcantara ®
158
Seat covers
159
Safety belts
159
We recommend using vehicle care products from ŠKODA Original Accessories.
These are available from ŠKODA Partners. The usage instructions on the pack-
age must be observed.
WARNING■ Vehicle care products may be harmful to your health if not used according
to the instructions.■
Always keep the vehicle care products safe from people who are not com-
pletely independent, e.g. children - there is a danger of poisoning!
■
Air fresheners and scents can be hazardous to heath when the tempera-
ture inside the vehicle is high.
CAUTION
■ Be sure to check clothing for colour fastness to avoid any damage or visible
stains on the material (leather), panels and textiles.■
Remove fresh stains such as those from ball-point pens, ink, lipstick, shoe
polish, etc., from the material (leather), panels and textiles as quickly as possi-
ble.
■
Do not attach scents or air fresheners to the dash panel – there is a risk of
damage to the dash panel.
157Care and maintenance