ESP SSANGYONG RODIUS 2006 Owner's Guide
[x] Cancel search | Manufacturer: SSANGYONG, Model Year: 2006, Model line: RODIUS, Model: SSANGYONG RODIUS 2006Pages: 444, PDF Size: 56.32 MB
Page 320 of 444

0-21
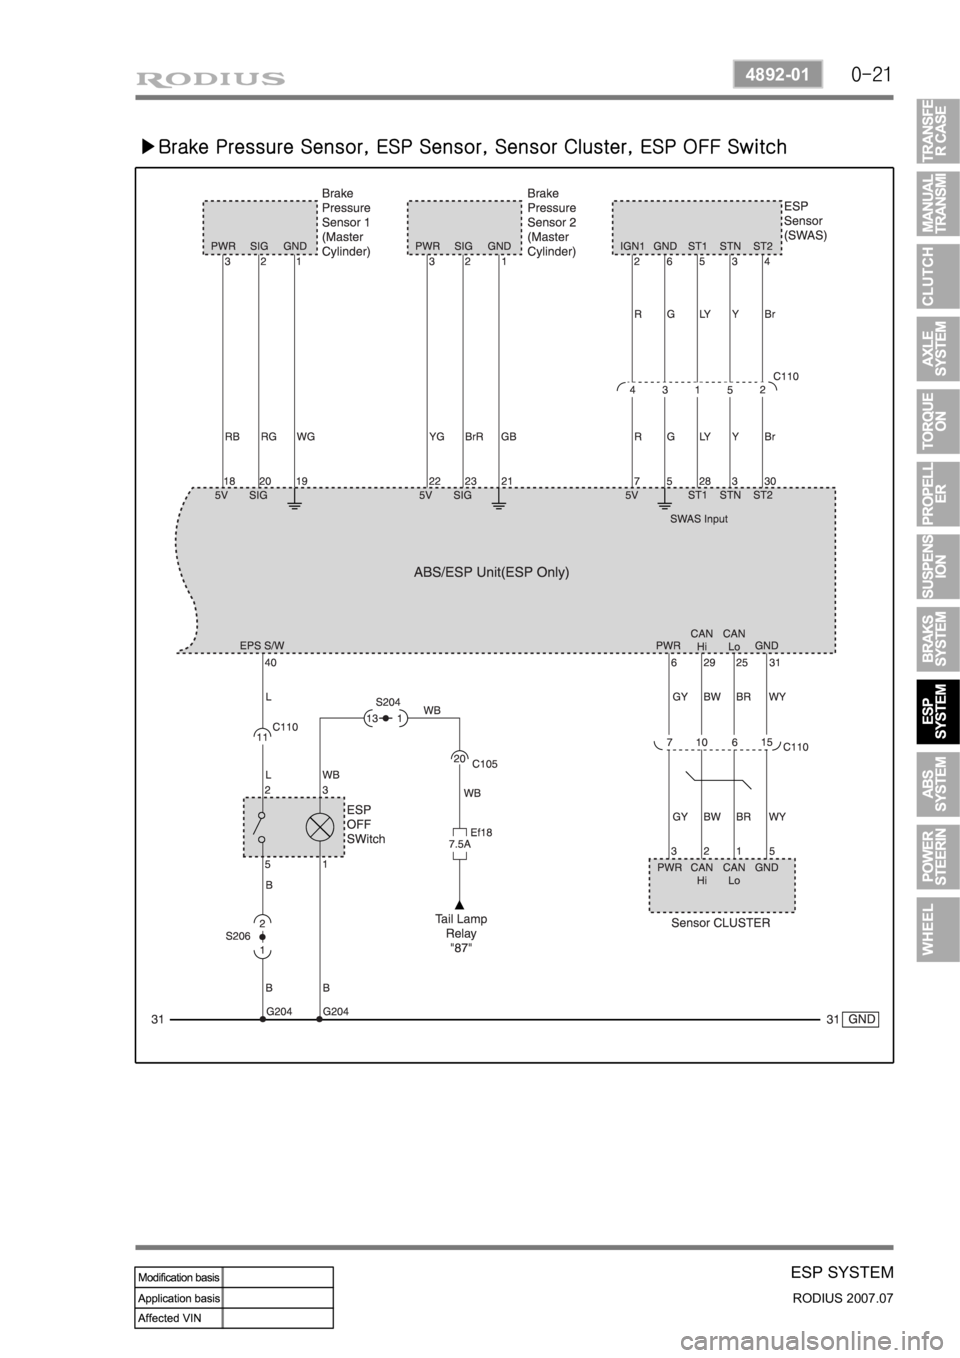
ESP SYSTEM
RODIUS 2007.07
4892-01
<0d960069009900880092008c004700770099008c009a009a009c0099008c0047007a008c0095009a0096009900530047006c007a00770047007a008c0095009a0096009900530047007a008c0095009a009600990047006a0093009c009a009b008c009900
530047006c007a007700470076006d006d0047007a009e0090>tch
Page 333 of 444

0-15
ABS SYSTEM
RODIUS 2007.07
4892-01
3. ABS SYSTEM DESCRIPTION
1) EBD (ELECTRONIC BRAKE FORCE DISTRIBUTION) SYSTEM
(1) System Description
As an add-on logic to the ABS base algorithm, EBD works in a range in which the intervention
thresholds for ABS control can not be reached. EBD ensures that the rear wheels are
sensitively monitored for slip with respect to the front axle. If slip is detected, the inlet valves fo
r
the rear wheels are switched to pressure hold to prevent a further increase in pressure at the
rear-wheel breaks, thus electronically reproducing a pressure-reduction function at the rear-
wheel brakes. ABS features an enhanced algorithm which includes control of the brake force
distribution between the front and rear axles. This is called Electronic Brake Distribution. In an
unloading car condition the brake efficiency is comparable to the conventional system but for a
fully loaden vehicle the efficiency of the EBD system is higher due to the better use of rear axle
braking capability.
(2) The Benefits of EBD
Elimination of conventional proportioning valve EBD utilizes the existing rear axle wheel
speed sensor to monitor rear wheel slip.
Based on many variables in algorithm a pressure hold, increase and/or decrease pulsetrain
may be triggered at the rear wheels insuring vehicle stability.
Vehicle approaches the ideal brake force distribution (front to rear).
Constant brake force distribution during vehicle lifetime.
EBD function is monitored via ABS safety logic (conventional proportioning valves are not
monitorable).
“Keep alive” function. -
-
-
-
-
-
Page 339 of 444

0-21
ABS SYSTEM
RODIUS 2007.07
4892-01
(3) COMPONENTS DESCRIPTION
HECU (Hydraulic & Electronic Control Unit) ▶
Motor Pump ▶
Valve Body ▶
HECU consists of motor pump (1), solenoid
valve (2) and ECU (3).
ECU connector has 47 pins and the numbe
r
of valves in valve body is 6 when equipped
with only ABS and 12 when equipped with
ESP system.
The motor is operated when ABS is
activated. The cam-shaped output shaft o
f
the motor enables the brake system to
receive and supply the brake fluid during the
motor operation.
The cam bushing is installed between
plungers and it draws and discharges the
brake fluid.
Page 340 of 444

0-22
RODIUS 2007.07
4892-01
ABS SYSTEM
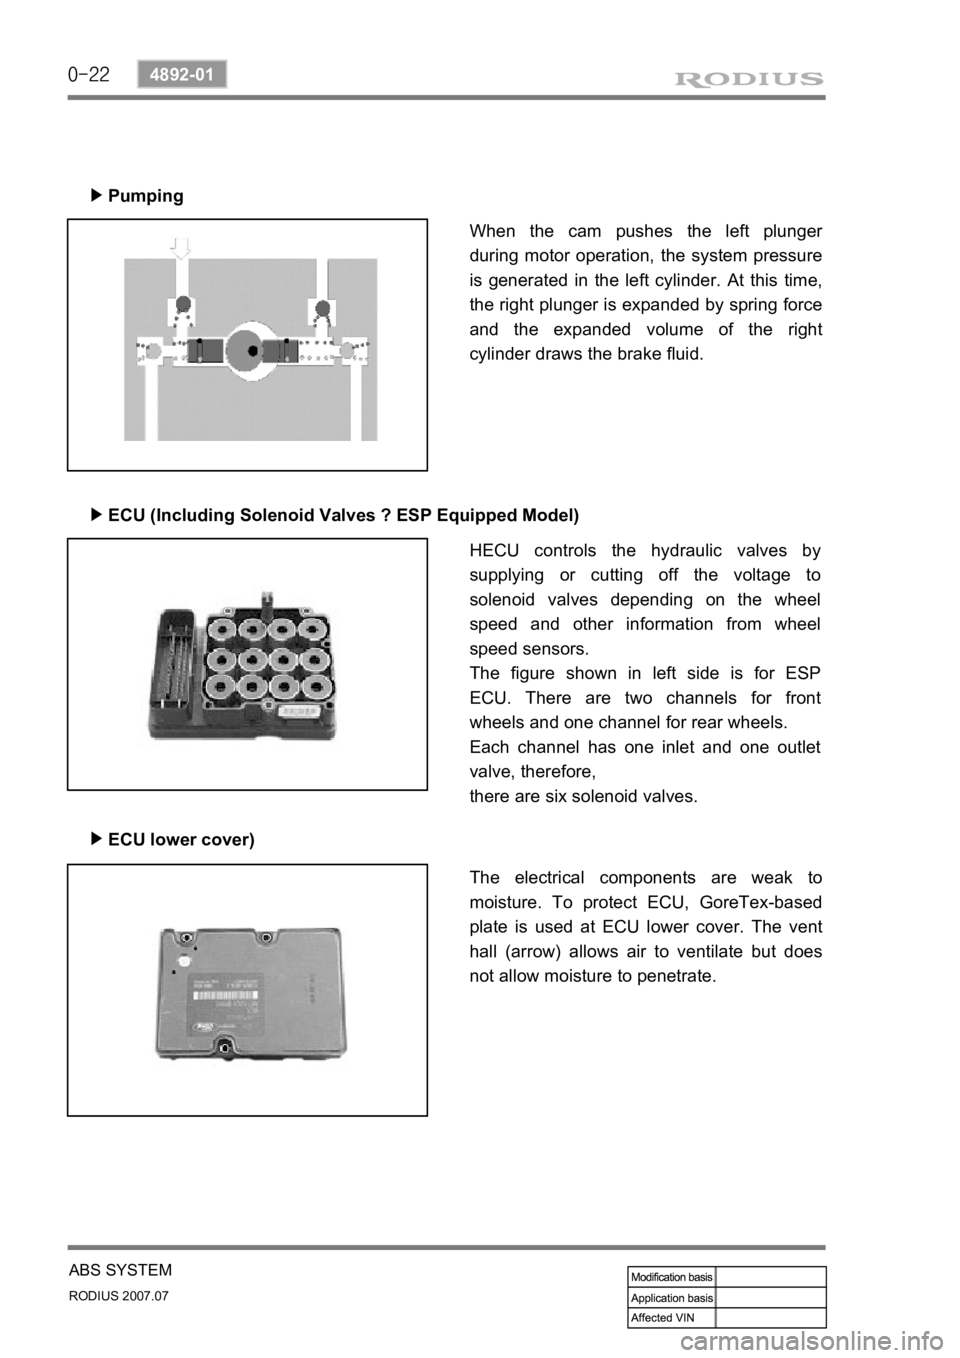
Pumping
▶
ECU (Including Solenoid Valves ? ESP Equipped Model)
▶
ECU lower cover)
▶
When the cam pushes the left plunger
during motor operation, the system pressure
is generated in the left cylinder. At this time,
the right plunger is expanded by spring force
and the expanded volume of the right
cylinder draws the brake fluid.
HECU controls the hydraulic valves by
supplying or cutting off the voltage to
solenoid valves depending on the wheel
speed and other information from wheel
speed sensors.
The figure shown in left side is for ESP
ECU. There are two channels for front
wheels and one channel for rear wheels.
Each channel has one inlet and one outlet
valve, therefore,
there are six solenoid valves.
The electrical components are weak to
moisture. To protect ECU, GoreTex-based
plate is used at ECU lower cover. The vent
hall (arrow) allows air to ventilate but does
not allow moisture to penetrate.
Page 352 of 444

0-8
RODIUS 2007.07
4710-09
WHEEL
3. WHEEL ALIGNMENT
The first responsibility of engineering is to design safe steering and suspension systems. Each
component must be strong enough to with stand and absorb extreme punishment.
Both the steering system and the front and the rear suspension must function geometrically
with the body mass.
The steering and suspension systems require that the front wheels self-return and that the tire
rolling effort and the road friction be held to a negligible force in order to allow the customer to
direct the vehicle with the least effort and the most comfort.
A complete wheel alignment check should include measurements of the rear toe and camber.
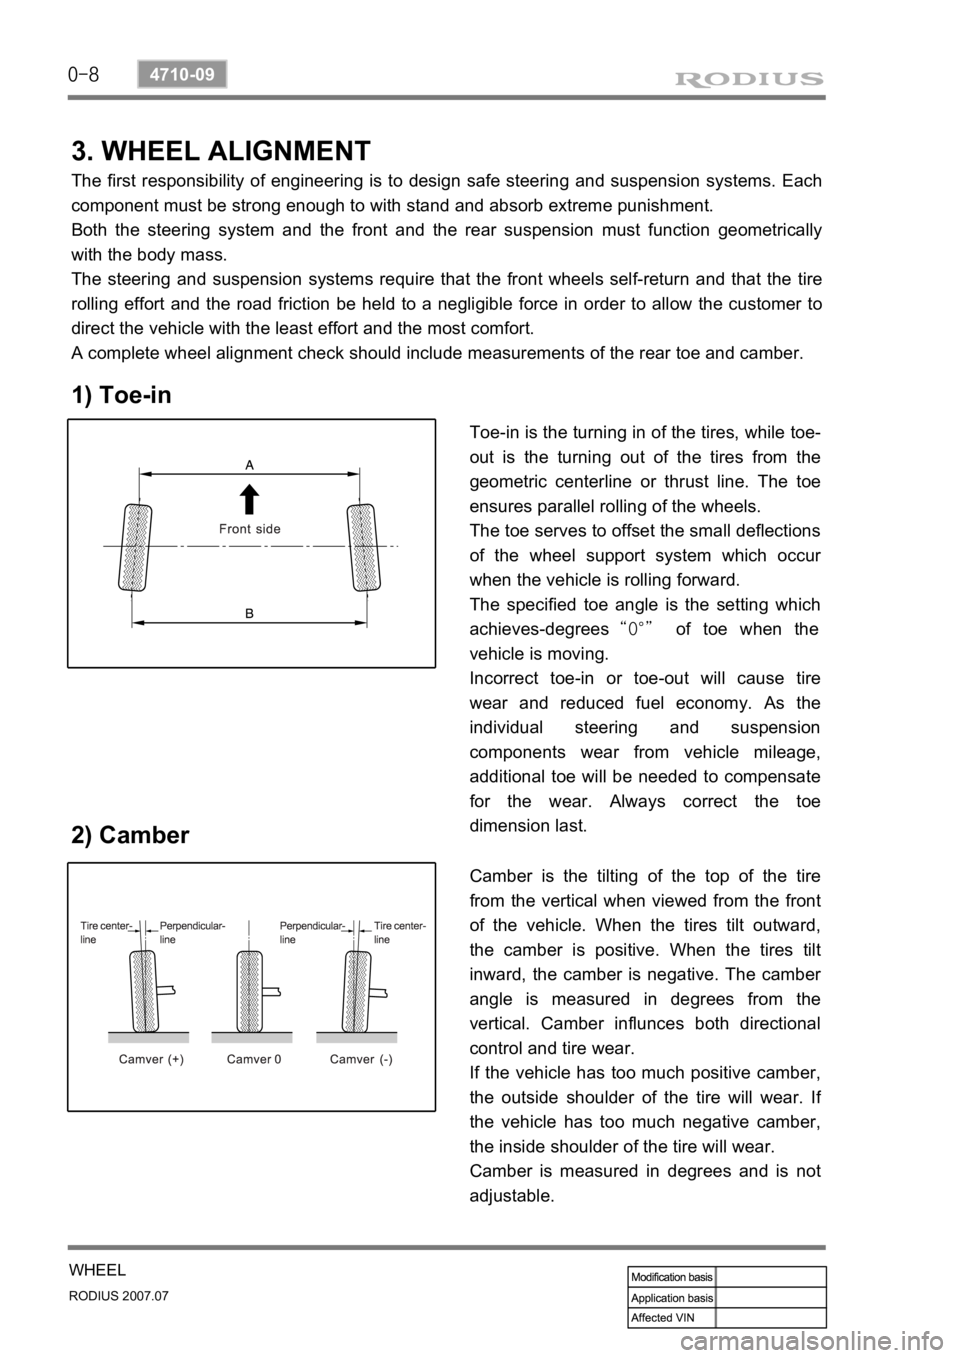
1) Toe-in
2) Camber
Toe-in is the turning in of the tires, while toe-
out is the turning out of the tires from the
geometric centerline or thrust line. The toe
ensures parallel rolling of the wheels.
The toe serves to offset the small deflections
of the wheel support system which occu
r
when the vehicle is rolling forward.
The specified toe angle is the setting which
achieves-degrees “0°” of toe when the
vehicle is moving.
Incorrect toe-in or toe-out will cause tire
wear and reduced fuel economy. As the
individual steering and suspension
components wear from vehicle mileage,
additional toe will be needed to compensate
for the wear. Always correct the toe
dimension last.
Camber is the tilting of the top of the tire
from the vertical when viewed from the front
of the vehicle. When the tires tilt outward,
the camber is positive. When the tires tilt
inward, the camber is negative. The cambe
r
angle is measured in degrees from the
vertical. Camber influnces both directional
control and tire wear.
If the vehicle has too much positive camber,
the outside shoulder of the tire will wear. I
f
the vehicle has too much negative camber,
the inside shoulder of the tire will wear.
Camber is measured in degrees and is not
adjustable.
Page 375 of 444

0-24
RODIUS 2007.07
6810-20
AIR CONDITIONING SYSTEM
(1) Inspection
If the intake door mode on FATC is different from the actual intake door mode,
check as below. ▶
Turn the ignition switch to ON position.
Measure the voltage between each terminal (P1 through P5)and positive (+) terminal in
respective mode.
(If the voltage is changed from 0 V to 12 V after selecting the mode, it is normal.)
If the voltage value is out of the specified value, check the related circuits for open.
If the circuits are in normal condition, replace the FATC.
If the voltage is within the specified value, replace the mode door actuator assembly.
Connect the positive (+) and negative (-) cables of temporary power supply to the doo
r
mode actuator. And, connect the negative cable to each terminal (P1 through P5) to check
its operation.
(If it operates as shown in above figure, it is normal.) 1.
2.
3.
4.
5.
6.
Circuit diagramTerminal arrangement