engine SSANGYONG RODIUS 2007 Service Manual
[x] Cancel search | Manufacturer: SSANGYONG, Model Year: 2007, Model line: RODIUS, Model: SSANGYONG RODIUS 2007Pages: 465, PDF Size: 56.32 MB
Page 216 of 465

0-4
RODIUS 2006.09
8010-10
CLUSTER
2. DESCRIPTIONS OF INDICATOR DISPLAY
1. Immobilizer indicator
2. Glow indicator
3. Winter mode indicator
4. Left turn signal indicator
5. Auto shift indicator (for automatic transmission)
6. Right turn signal indicator
7. Harzard indicator*
8. Engine check warning light
9. Cruise control indicator*
10. 4WD CHECK warning light
11. 4WD HIGH indicator
12. 4WD LOW indicator
13. Brake warning light14. Battery charge warning light
15. Seat belt reminder
16. Low fuel level warning light
17. Heated glass indicator
18. Door open warning light
19. High beam indicator
20. Engine oil pressure warning light
21. Air bag warning light
22. Water separator warning light
23. ABS warning light
24. EBD warning light
25. ESP warning light
Page 220 of 465

0-8
RODIUS 2006.09
8010-10
CLUSTER
4. FUNCTION DESCRIPTION AND INSPECTION OF
METER
CLUSTER
1) Tachometer - Engine RPM Display
The tachometer indicates engine speed in revolutions per minute. Multiply 1,000 to the current
number, then it will be the current number of engine revolutions.
Under the normal engine operating temperature, the proper idling speed is 700~800 rpm. The
red zone (danger rpm range) starts from 4,500 rpm.
1. Connect the tachometer for tune-up test and start the engine.
2. Eliminate the hysteresis by tapping the tachometer.
3. Compare the values on the tester and tachometer and replace the tachometer if the
tolerance
is excessive.
If the tachometer pointer vibrates, stands at a certain range or sounds abnormal noise, there
could be defectives in tachometer. If there is a difference between actual engine speed (rpm)
and reading from tachometer, connect a scanner and then compare the value on tachomete
r
with the reading from scanner.
Danger range (red zone)
Page 235 of 465

0-12
RODIUS 2006.09
8310-01
LAMP
▶When Using a Screen Install a screen (2m X 1.5m) in front of the headlamps in vertical by 3m away and align the
center lines of the vehicle and the screen.
1.
Run the engine with approx. 2,000 rpm
and turn on the headlamp. At this
moment, the focus of the headlamp
should aim the “A” point.
2.
If the focus deviates the “A” point,
adjust the headlamp aiming by rotating
control levers (Up, Down, Left, Right) in
turn with a screwdriver.
3.(Unit: mm) (Unit: mm)
Page 243 of 465

0-7
RAIN SENSOR
RODIUS 2006.09
8610-11
4. FUNCTIONS OF RAIN SENSOR
1) Windshield Glass and Coupler Attachment
Check the outer windshield surface of sensing area for wear, damage and scratch. The sensor
is able to compensate the wear up to a specific level. Check the coupler attached surface of
windshield for porosity. If the porosity exists, the sensor cannot function properly.
2) Recognition of AUTO Mode
3) Instant Wipe Function
When the variable resistance knob on the multifunction wiper switch is turned by each 1 stage
from low sensitivity (Smark) to high sensitivity (F mark), the wiper operates one cycle.
And, the wiper also operates during raining up to 5 minutes after rain stops.When the engine is started with the wiper switch “AUTO” position, the wiper operates
one cycle to remind a driver that the wiper switch is in “AUTO” position.
When the wiper switch is turned to “AUTO” from OFF, the wiper operates one cycle. It
always operates one cycle for the initial operation, however, the wiper does not operate
afterwards to prevent the wiper blade wear if not raining when turning the wiper switch to
“AUTO” from “OFF”. However, the wiper operates up to 5 minutes after rain stops.
If this function does not occur, check No. 2 terminal on the rain sensor. If any defective
cannot be found, check the wiper relay (LOW) for defective. 1)
2)
3)If the installed wiper brushes are out of specification (size and length), the rain sensing
area cannot be fully wiped. In this case, the rain sensor’s sensitivity could be
decreased and the wipers are not properly operated -
As described, the STICS recognizes the wiper switch “AUTO” position. If there are not
any problem, go to diagnosis mode in STICS and check the terminal that receives signal
from wiper and communication lines between rain sensor unit and STICS. -
Page 258 of 465

0-9
PARKING AID SYSTEM
RODIUS 2006.09
8790-04
3) Cautions on parking aid system
Note that the display does not show everything in the rear area.
Always check nobody, especially animals and children, is behind the vehicle.
Normal precautions when reversing should be maintained. *
*
The parking aid system is just a supplemental device to help your parking operation.
Always keep the safety precautions.
Do not press or shock the sensors by hitting or high-pressure water gun while washing, o
r
the sensors will be damaged.
If the system is in normal operating conditions, a short beep sounds when the gear selecto
r
lever is moved into “R” position with the ignition key “ON”.
If the system is in abnormal operating conditions, a beep sounds for 3 seconds when the
gear selector lever is moved into “R” position with the ignition key “ON” or engine
running. However, it is also occurred when the obstacle is within 50 cm from the rea
r
bumper. 1.
2.
3.
4.
5.
(1) The parking aid system will not work or improperly work under
following cases:
▶Certain obstacles that sensors can not detect
- Wires, ropes, chains.
- Cotton, sponge, clothes, snow that absorb ultrasonic waves.
- Obstacles lower than the bumper.
▶Not defective but improperly working
- When the sensing portion is frozen.
- When the sensing portion is covered by rain, water drops, snow or mud.
- When receiving other ultrasonic signals
(metal sound or air braking noises from heavy commercial vehicles).
- When a high-power radio is turned on.
▶Narrowed sensing area
- When the sensing portion is partially covered by snow or mud.
<00540047007a009c009900990096009c0095008b00900095008e0047009b008c00940097008c00990088009b009c0099008c00470096008d0047009a008c0095009a0096009900470090009a0047009b009600960047008f0090008e008f0047004f008800
97009700990096009f005500470096009d008c00990047005f>0°C) or too low (approx.
below -
30°C)
▶Not defective but may occur improper working
- When driving on the rough road, gravel road, hill and grass.
- When the bumper height is changed due to the heavy load.
- When the sensing portion is frozen.
- When the sensing portion is covered by rain, water drops, snow or mud.
- When receiving other ultrasonic signals
(metal sound or air braking noises from heavy commercial vehicles).
- When a high-power radio is turned on.
- When some accessories are attached in detecting ranges
Page 261 of 465

0-12
RODIUS 2006.09
8790-04
PARKING AID SYSTEM
6. OPERATIONAL PRINCIPLE OF REARVIEW CAMERA
In the rearview camera equipped vehicle, the monitors display when selecting “R”
position for safe parking. The operating conditions are as below:
1) General
When selecting R position while A/V system is in use:
The video mode in front A/V system is changed to rearview monitoring mode. However, the
audio mode stays on.
<007b008f008c0047009d0090008b008c0096004700940096008b008c0047009000950047008d009900960095009b004700680056007d0047009a00a0009a009b008c009400470099008c009a009c0094008c009a0047009e008f008c00950047009a008f00
90008d009b00900095008e00470096009c009b0047008d0099>om “R” position.
The audio and video mode in rear A/V system are not changed.
When selecting R position while A/V system is not in use:
Both monitors are automatically turned on to display rearview.
<00690096009b008f00470094009600950090009b00960099009a004700880099008c00470088009c009b009600940088009b0090008a00880093009300a00047009b009c00990095008c008b00470096008d008d0047009e008f008c00950047009a008f00
90008d009b00900095008e00470096009c009b0047008d0099>om “R” position. -
-
-
-
-
2) Operating Conditions and Modes of Rearview Camera
The rearview camera cannot operate alone. If the gear selector lever stays in “R” position
more than 3 seconds with the ignition key “ON” or engine running, the rearview appears
on the monitors automatically regardless of displays by head unit.
When the rearview mode is activated, the AV system doesn’t work even though the
buttons on the AV unit are pressed.
However, the monitor angle can be adjusted when the AV system is changed to the rearview
mode with the head unit turned off. And, the monitor angle and volume can be adjusted when
the AV system is changed to the rearview mode with the head unit turned on.
▶Auto mode
* Automatic operating mode
<004700470047007e008f008c00950047009a008c0093008c008a009b00900095008e00470079004700970096009a0090009b0090009600950047009e008f00900093008c004700680056007d0047009a00a0009a009b008c009400470090009a0047009500
96009b0047009000950047009c009a008c0047004f0070008e>nition switch “ON”, engine
running):
Both monitors are automatically turned on to display rearview.
<00690096009b008f00470094009600950090009b00960099009a004700880099008c00470088009c009b009600940088009b0090008a00880093009300a00047009b009c00990095008c008b00470096008d008d0047009e008f008c00950047009a008f00
90008d009b00900095008e00470096009c009b0047008d0099>om “R” position.
<007e008f008c00950047009a008c0093008c008a009b00900095008e00470079004700970096009a0090009b0090009600950047009e008f00900093008c004700680056007d0047009a00a0009a009b008c009400470090009a0047009000950047009c00
9a008c0047004f0070008e00950090009b0090009600950047>switch “ON”, engine
running):
The video mode in front A/V system is changed to rearview monitoring mode. However, the
audio mode stays on.
<007b008f008c0047009d0090008b008c0096004700940096008b008c0047009000950047008d009900960095009b004700680056007d0047009a00a0009a009b008c009400470099008c009a009c0094008c009a0047009e008f008c00950047009a008f00
90008d009b00900095008e00470096009c009b0047008d0099>om “R” position.
The audio and video mode in rear A/V system are not changed. -
-
-
-
-
The real distance is different from what you see in monitor because the camera uses wide-
angle lens.
Note that the display does not show everything in the rear area.
Keep the camera lens clean with a lens cleaner. -
-
-
Page 288 of 465

0-4
RODIUS 2006.09
3170-01
MANUAL TRANSMISSION
1. MANUAL TRANSMISSION OVERVIEW
4WD
2WD
TSM54/52 transmission is designed to link the gear ratio, installation dimensions and shapes
with current T5 transmission and BTRA automatic transmission. It provides maximum
drivability by the optimized engine torque and gear ratio.
TSM54/52 transmission uses linkage type shift elements directly connected to the
transmission. It prevent the transmission from shifting to the reverse gear from 5th gea
r
when shifting to reverse gear. It also prevents the break and wear. 1.
2.
Page 292 of 465

0-4
RODIUS 2006.09
3010-01
CLUTCH
1. OVERVIEW
1) Driving Elements
The driving elements consist of two flat surfaces machined to a smooth finish.
One of these is the rear face of the engine flywheel and the other is the clutch cover pressure
plate. The clutch pressure plate is fitted into a clutch steel cover, which is bolted to the flywheel.
2) Driven Elements
The driven element is the clutch disc with a splined hub which is free to slide lengthwise along
the splines of the input shaft. The driving and driven elements are held in contact by spring
pressure. This pressure is exerted by a diaphragm spring in the clutch cover pressure plate
assembly.
3) Operating Elements
The clutch control system consists of the clutch pedal, clutch master cylinder, concentric slave
cylinder. This system directly releases the clutch by using hydraulic pressure while the
conventional clutch system releases the clutch by using release lever and release fork. This
system provides higher efficiency than conventional clutch system, and its durability is superior.
Adaptor (mounted on transmission case) Concentric slave cylinder pipe (mounted inside o
f
transmission) Concentric slave cylinder (mounted inside of transmission)
Page 293 of 465

0-5
CLUTCH
RODIUS 2006.09
3010-01
4) SAT (Self Adjusting Technology)
SAT is new clutch which adjusts the clutch free play according to the wearness of clutch disc. Operation description
▶
Diaphram spring rotates the adjusting equipment as clutch disc is wearing and so,
pressure plate is pushed to clutch disc side at the amount of wearness.
Disc wear (Free play) → Diaphram spring (1) → Adjusting equipme nt (2, 3)
→ Pressure plate (4)
*
Clutch assembly Adjusting
equipment
Disassembly of clutch disc & cover
▶
- When reinstall the clutch assembly without the special zig, Disc can be slip and worn
easily.
Installation of special zig
▶
Identify the SAT clutch with adjusting equipment around the clutch cover.
Adapt the zig set(4 pieces) between the clutch cover and diaphram spring around (Refer to
the picture).
1)
2)
Diaphram
Cover Zig for clutch removal and installationAdjusting
equipmen
t
1) When clutch disc is replaced (Disc change)
- Replace the clutch disc and clutch cover assembly together
2) When clutch disc is not replaced (Engine disassembly, Flywheel related job, Checking
the clutch assy)
- Apply the zig set (SST) on the clutch cover set for re-usage
Page 299 of 465

0-5
TORQUE ON DEMAND
RODIUS 2006.09
3240-01
2. GENERAL DESCRIPTION
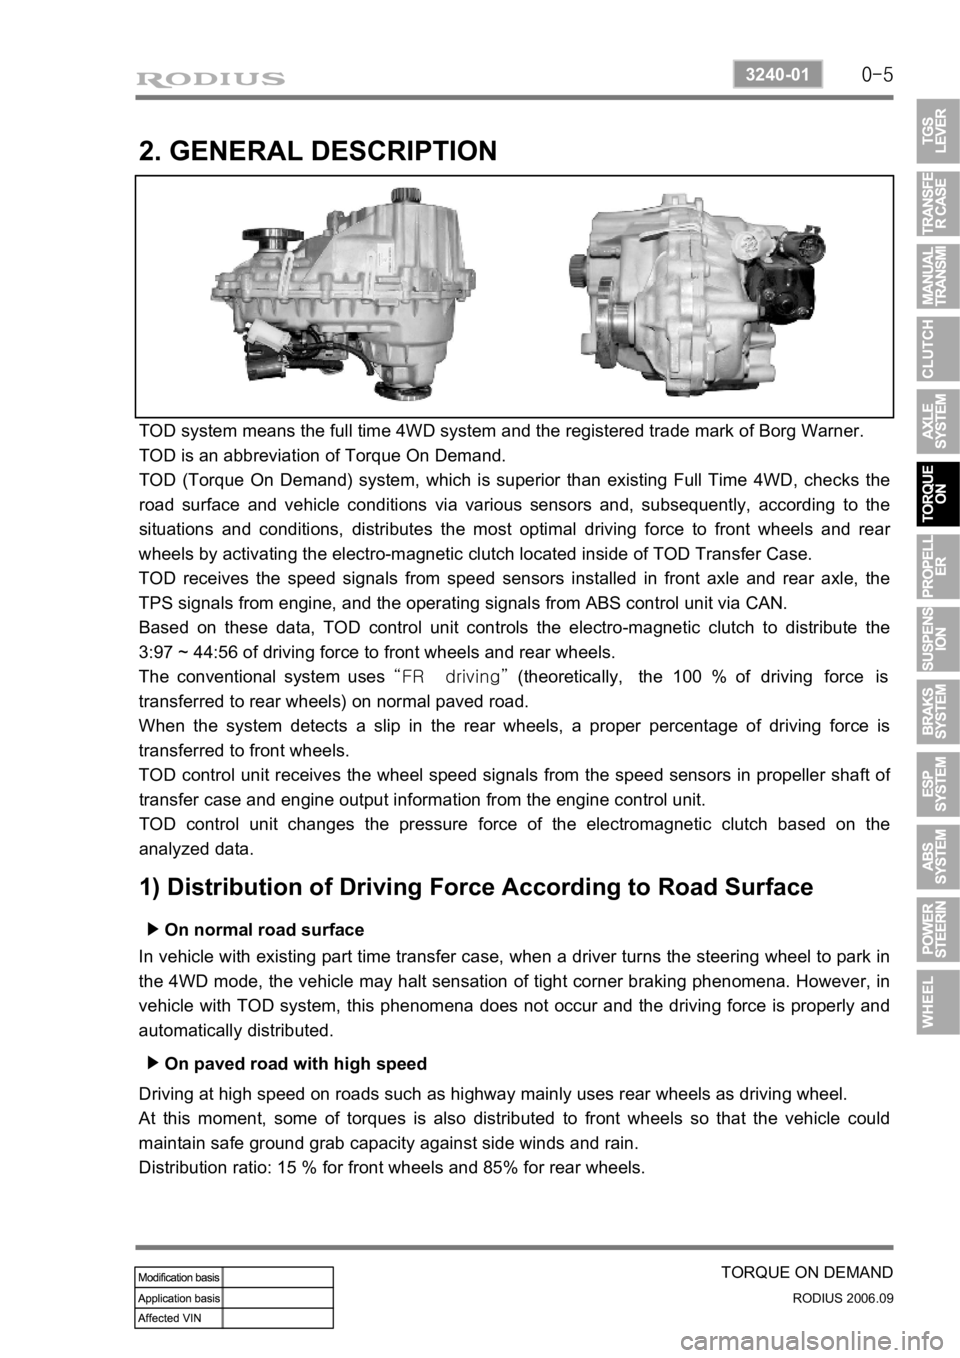
TOD system means the full time 4WD system and the registered trade mark of Borg Warner.
TOD is an abbreviation of Torque On Demand.
TOD (Torque On Demand) system, which is superior than existing Full Time 4WD, checks the
road surface and vehicle conditions via various sensors and, subsequently, according to the
situations and conditions, distributes the most optimal driving force to front wheels and rea
r
wheels by activating the electro-magnetic clutch located inside of TOD Transfer Case.
TOD receives the speed signals from speed sensors installed in front axle and rear axle, the
TPS signals from engine, and the operating signals from ABS control unit via CAN.
Based on these data, TOD control unit controls the electro-magnetic clutch to distribute the
3:97 ~ 44:56 of driving force to front wheels and rear wheels.
The conventional system uses “FR driving” (theoretically, the 100 % of driving force is
transferred to rear wheels) on normal paved road.
When the system detects a slip in the rear wheels, a proper percentage of driving force is
transferred to front wheels.
TOD control unit receives the wheel speed signals from the speed sensors in propeller shaft o
f
transfer case and engine output information from the engine control unit.
TOD control unit changes the pressure force of the electromagnetic clutch based on the
analyzed data.
1) Distribution of Driving Force According to Road Surface
On normal road surface ▶
In vehicle with existing part time transfer case, when a driver turns the steering wheel to park in
the 4WD mode, the vehicle may halt sensation of tight corner braking phenomena. However, in
vehicle with TOD system, this phenomena does not occur and the driving force is properly and
automatically distributed.
On paved road with high speed ▶
Driving at high speed on roads such as highway mainly uses rear wheels as driving wheel.
At this moment, some of torques is also distributed to front wheels so that the vehicle could
maintain safe ground grab capacity against side winds and rain.
Distribution ratio: 15 % for front wheels and 85% for rear wheels.