SUBARU BRZ 2019 Owners Manual
Manufacturer: SUBARU, Model Year: 2019, Model line: BRZ, Model: SUBARU BRZ 2019Pages: 560, PDF Size: 8.9 MB
Page 311 of 560
311
3-5. Other interior features
3
Interior features
BRZ_U
Clock
■The clock is displayed when
Vehicles without a keyless access with push button start system
The engine switch is in the “ACC” or “ON” position.
Vehicles with a keyless access with push button start system
The push-button ignition switch is in “ACC” or “ON” mode.
■ When disconnecting and reco nnecting battery terminals
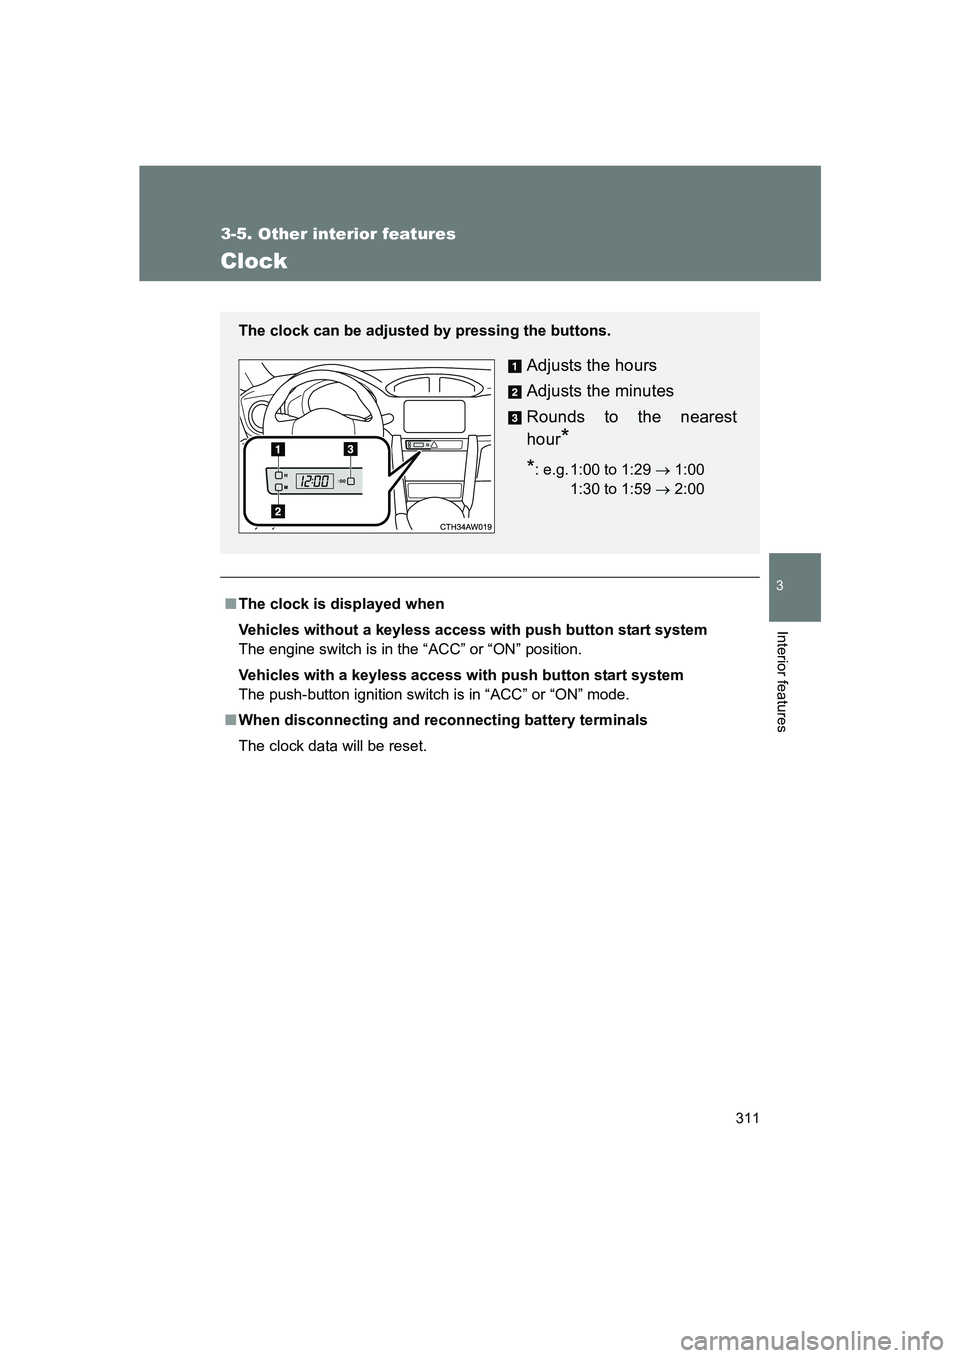
The clock data will be reset. The clock can be adjusted by pressing the buttons.
Adjusts the hours
Adjusts the minutes
Rounds to the nearest
hour
*
*: e.g. 1:00 to 1:29 → 1:00
1:30 to 1:59 → 2:0000
Page 312 of 560
312
3-5. Other interior features
BRZ_U
Power outlets
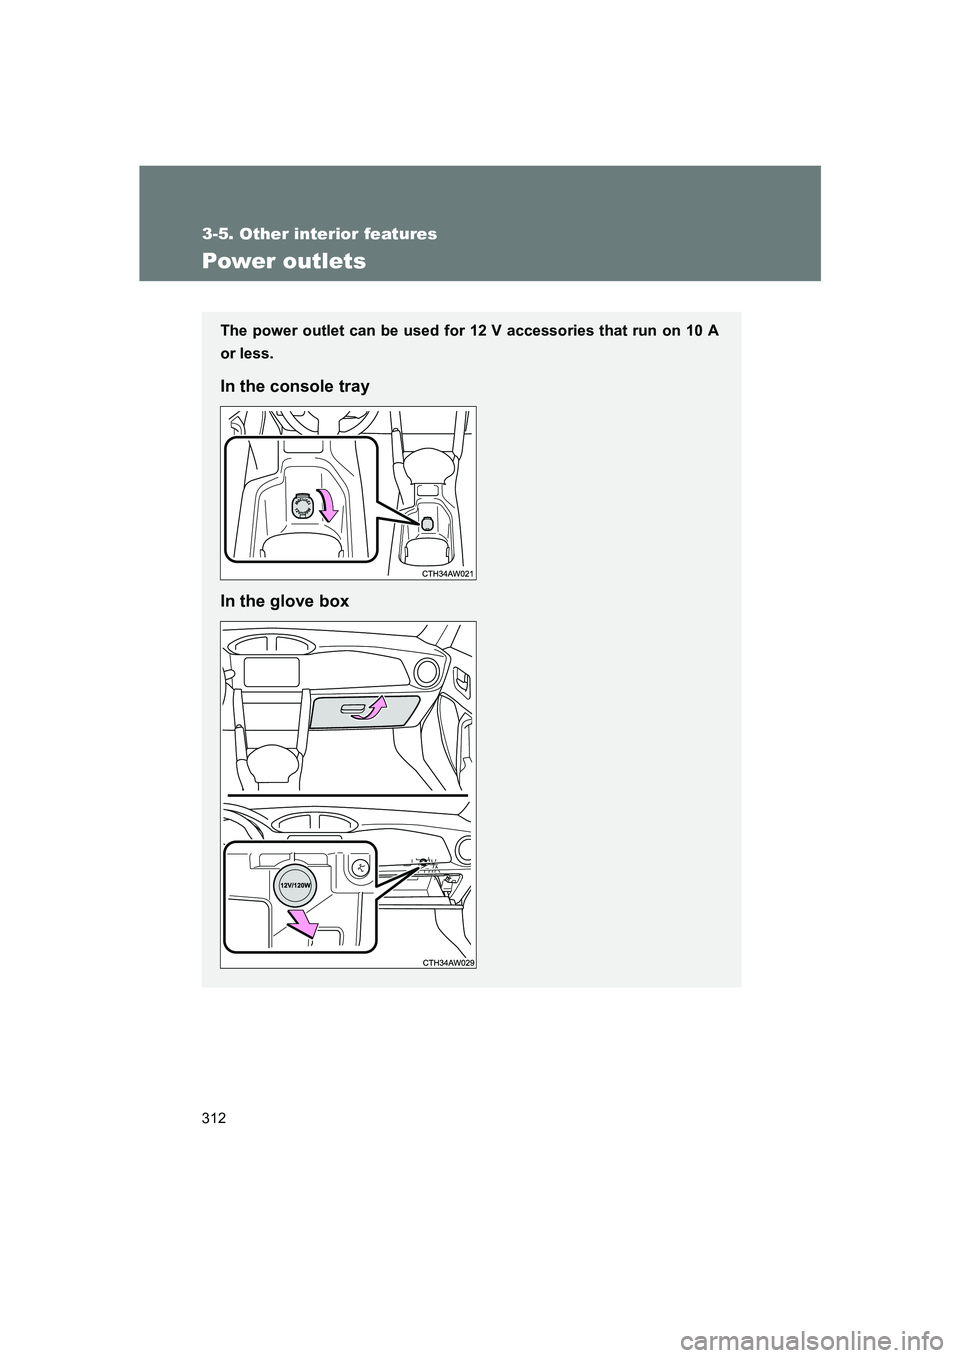
The power outlet can be used for 12 V accessories that run on 10 A
or less.
In the console tray
In the glove box
Page 313 of 560
313
3-5. Other interior features
3
Interior features
BRZ_U
■
The power outlet can be used when
Vehicles without a keyless access with push button start system
The engine switch is in the “ACC” or “ON” position.
Vehicles with a keyless access with push button start system
The push-button ignition switch is in “ACC” or “ON” mode.
CAUTION
■To avoid damaging the power outlet
Close the power outlet lid when the power outlet is not in use.
Foreign objects or liquids that enter the power outlet may cause a short cir-
cuit.
■ To prevent the fuse from being blown
Do not use an accessory that uses more than 12 V 10 A.
■ To prevent battery discharge
Do not use the power outlet longer than necessary when the engine is not
running.
Page 314 of 560
314
3-5. Other interior features
BRZ_U
Seat heaters∗
■The seat heaters can be used when
The push-button ignition switch is in “ON” mode.
■ When not in use
Turn the seat heater off. The indicator light goes off.
∗: If equipped
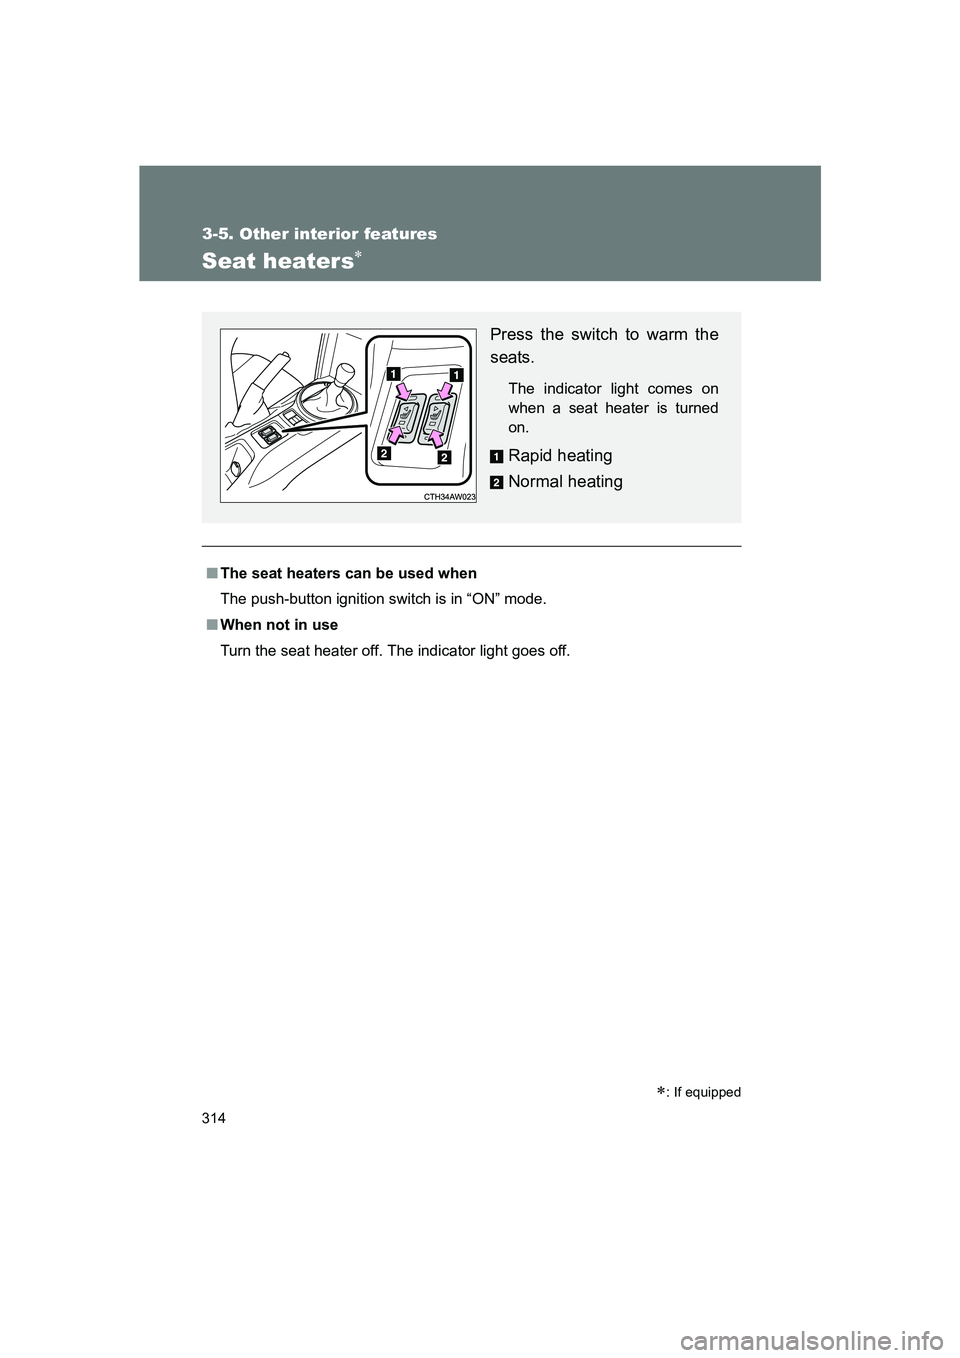
Press the switch to warm the
seats.
The indicator light comes on
when a seat heater is turned
on.
Rapid heating
Normal heating
Page 315 of 560
315
3-5. Other interior features
3
Interior features
BRZ_U
WARNING
■
Burns
● Use caution when seating the following persons in a seat with the seat
heater on to avoid the possibility of burns:
• Babies, small children, the elderly, the sick and the physically chal-
lenged
• Persons with sensitive skin
• Persons who are fatigued
• Persons who have taken alcohol or drugs that induce sleep (sleeping drugs, cold remedies, etc.)
● Do not cover the seat with anything when using the seat heater.
Using the seat heater with a blanket or cushion increases the temperature
of the seat and may lead to overheating.
● Do not use the seat heater more than necessary. Doing so may cause
minor burns or overheating.
CAUTION
■To prevent seat heater damage
Do not put heavy objects that have an uneven surface on the seat and do
not stick sharp objects (needles, nails, etc.) into the seat.
■ To prevent battery discharge
Turn the seat heaters off when the engine is not running.
Page 316 of 560
316
3-5. Other interior features
BRZ_U
Floor mat∗
∗: If equipped
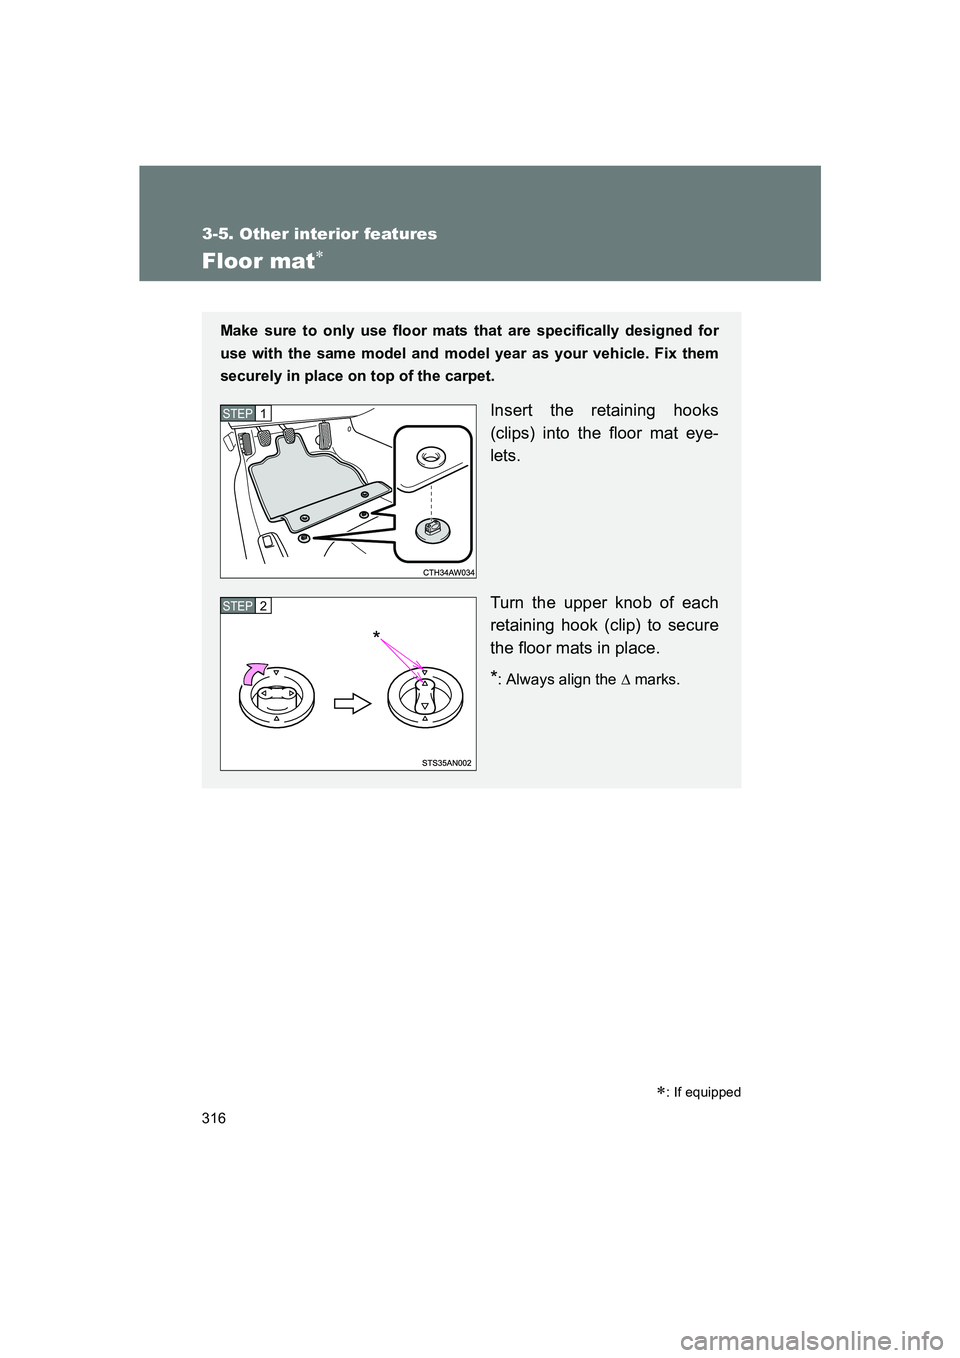
Make sure to only use floor mats that are specifically designed for
use with the same model and model year as your vehicle. Fix them
securely in place on top of the carpet.
Insert the retaining hooks
(clips) into the floor mat eye-
lets.
Turn the upper knob of each
retaining hook (clip) to secure
the floor mats in place.
*: Always align the ∆ marks.
STEP 1
STEP 2
*
Page 317 of 560
317
3-5. Other interior features
3
Interior features
BRZ_U
WARNING
Observe the following precautions.
Failure to do so may cause the driver's floor mat to slip, possibly interfering
with the pedals while driving. An unexpectedly high speed may result or it may
become difficult to stop the vehicle. Th
is could lead to an accident, resulting in
death or serious injury.
■ When installing the driver's floor mat
● Do not use floor mats designed for ot her models or different model year
vehicles, even if they are SUBARU Genuine floor mats.
● Only use floor mats designed for the driver's seat.
● Always install the floor mat securely using the retaining hooks (clips) pro-
vided.
● Do not use two or more floor mats on top of each other.
● Do not place the floor mat bottom-side up or upside-down.
■ Before driving
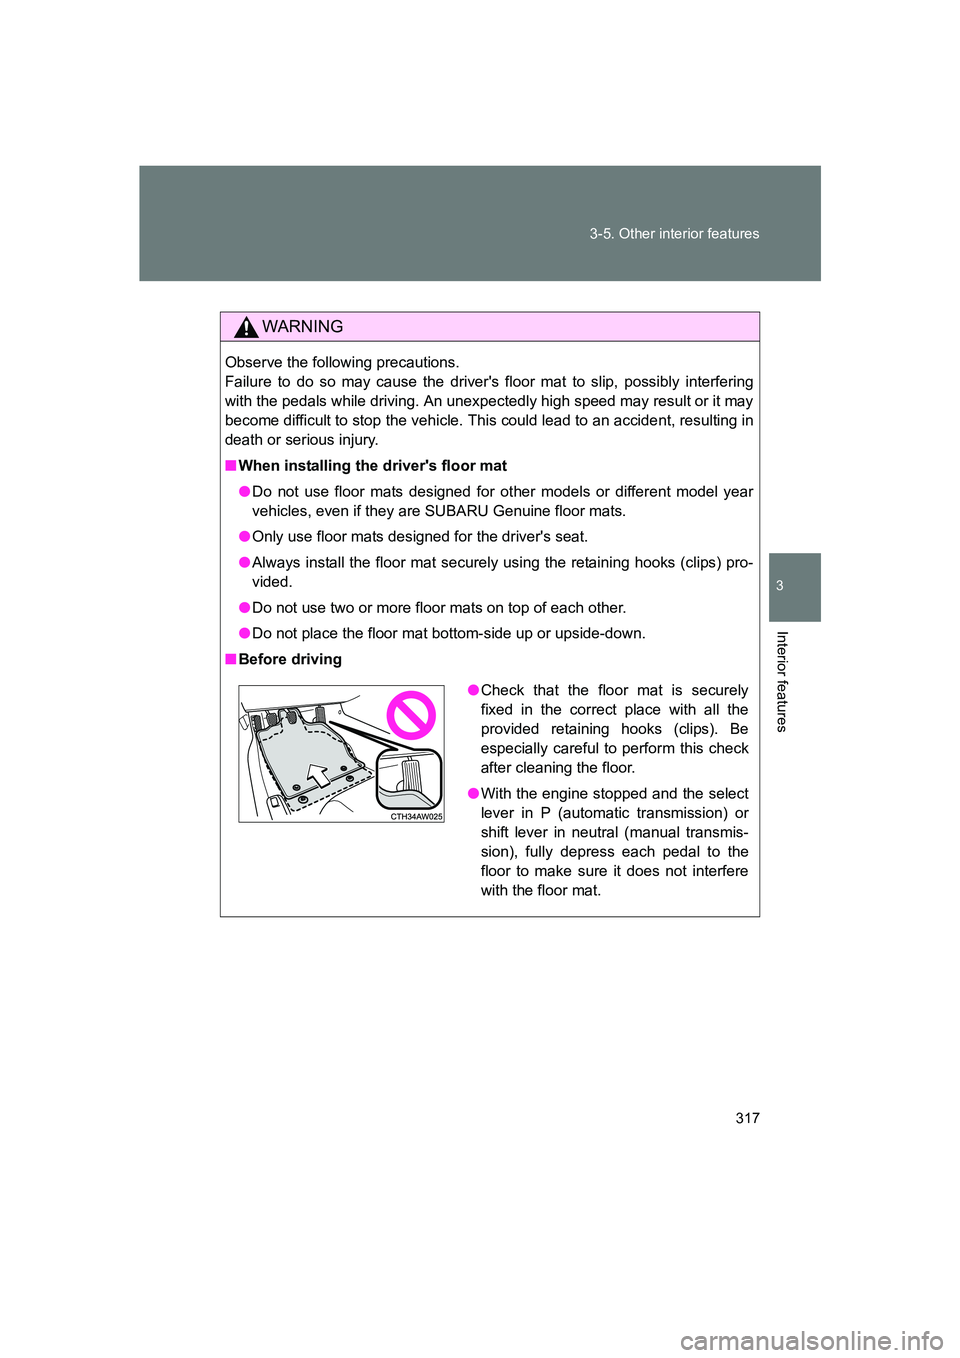
●Check that the floor mat is securely
fixed in the correct place with all the
provided retaining hooks (clips). Be
especially careful to perform this check
after cleaning the floor.
● With the engine stopped and the select
lever in P (automatic transmission) or
shift lever in neutral (manual transmis-
sion), fully depress each pedal to the
floor to make sure it does not interfere
with the floor mat.
Page 318 of 560
318
3-5. Other interior features
BRZ_U
HomeLink®∗
Programming HomeLink
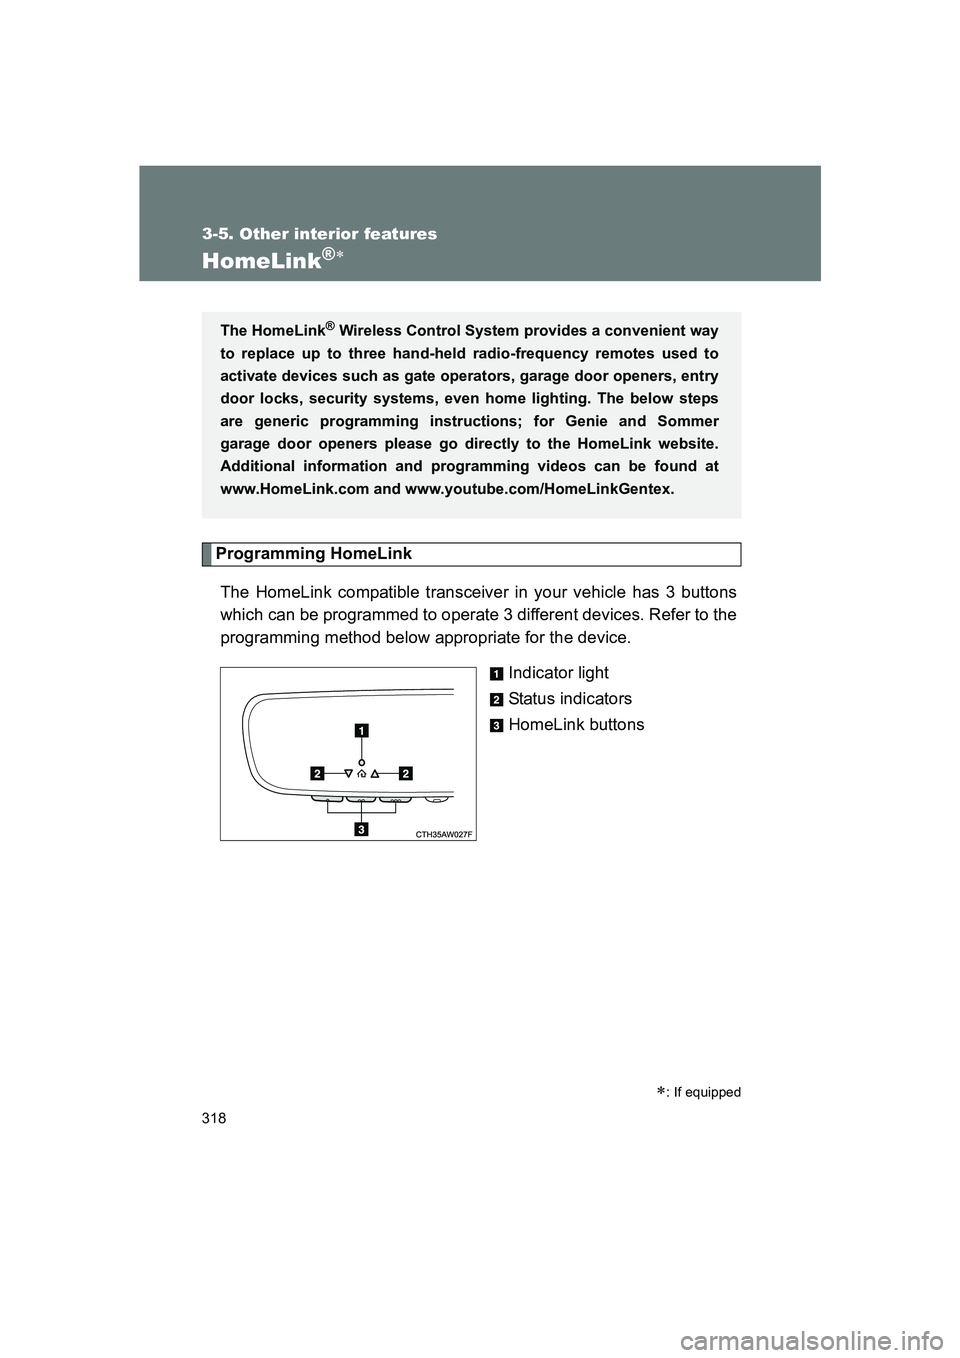
The HomeLink compatible transceiver in your vehicle has 3 buttons
which can be programmed to operate 3 different devices. Refer to the
programming method below appropriate for the device. Indicator light
Status indicators
HomeLink buttons
∗: If equipped
The HomeLink® Wireless Control System provides a convenient way
to replace up to three hand-held radio-frequency remotes used to
activate devices such as gate operators, garage door openers, entry
door locks, security systems, even home lighting. The below steps
are generic programming instructions; for Genie and Sommer
garage door openers please go dir ectly to the HomeLink website.
Additional information and programming videos can be found at
www.HomeLink.com and www.youtube.com/HomeLinkGentex.
Page 319 of 560
319
3-5. Other interior features
3
Interior features
BRZ_U
■
Before programming HomeLink
●Before programming HomeLink to a garage door opener or gate
operator, make sure that people and objects are out of the way
of the device to prevent potential harm or damage.
● When programming a garage door opener, it is advised to park
outside of the garage.
● Do not use HomeLink with any garage door opener that lacks
safety stop and reverse features as required by U.S. federal
safety standards (this includes any garage door opener model
manufactured before April 1, 1982). A garage door that cannot
detect an object signaling the door to stop and reverse does not
meet current U.S. federal safety standards.
● It is also recommended that a new battery be placed in the
hand-held remote (garage door opener remote) of the device for
quicker and more accurate training.
● Vehicles without a keyless access with push button start system:
Some vehicles may require the engine switch to be turned to the
“ACC” or “ON” position for programming and/or operation of
HomeLink.
● Vehicles with a keyless access with push button start system:
Some vehicles may require the push-button ignition switch to be
turned to the “ACC” or “ON” mode for programming and/or oper-
ation of HomeLink.
Page 320 of 560
320 3-5. Other interior features
BRZ_U■
Programming a New HomeLink Button
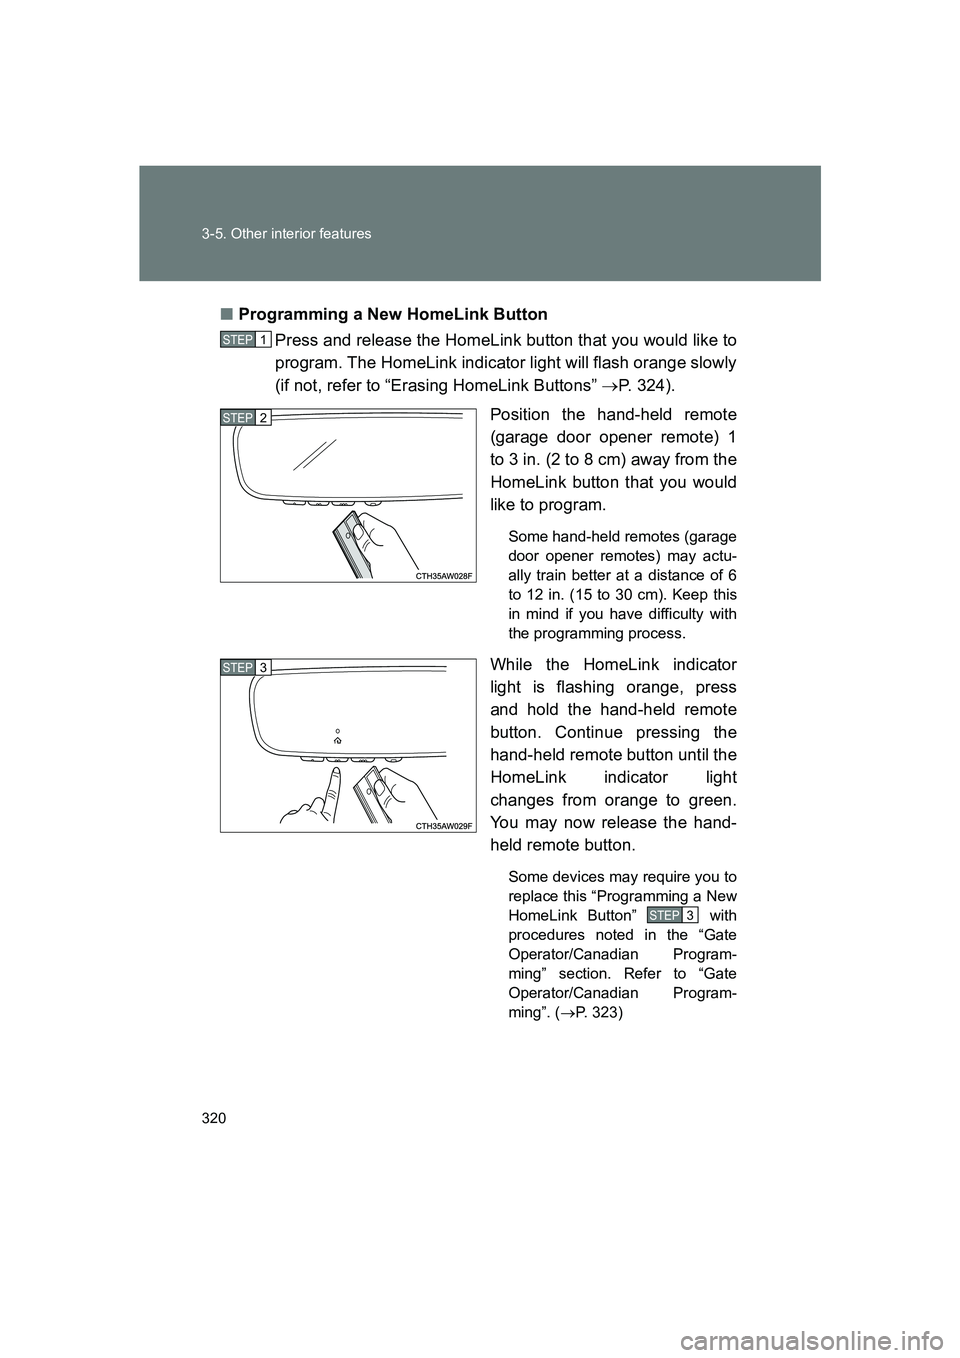
Press and release the HomeLink button that you would like to
program. The HomeLink indicator light will flash orange slowly
(if not, refer to “Erasing HomeLink Buttons” →P. 324).
Position the hand-held remote
(garage door opener remote) 1
to 3 in. (2 to 8 cm) away from the
HomeLink button that you would
like to program.
Some hand-held remotes (garage
door opener remotes) may actu-
ally train better at a distance of 6
to 12 in. (15 to 30 cm). Keep this
in mind if you have difficulty with
the programming process.
While the HomeLink indicator
light is flashing orange, press
and hold the hand-held remote
button. Continue pressing the
hand-held remote button until the
HomeLink indicator light
changes from orange to green.
You may now release the hand-
held remote button.
Some devices may require you to
replace this “Programming a New
HomeLink Button” with
procedures noted in the “Gate
Operator/Canadian Program-
ming” section. Refer to “Gate
Operator/Canadian Program-
ming”. ( →P. 323)
STEP 1
STEP 2
STEP 3
STEP 3