parking brake SUBARU CROSSTREK 2017 1.G Owners Manual
[x] Cancel search | Manufacturer: SUBARU, Model Year: 2017, Model line: CROSSTREK, Model: SUBARU CROSSTREK 2017 1.GPages: 572, PDF Size: 41.52 MB
Page 21 of 572
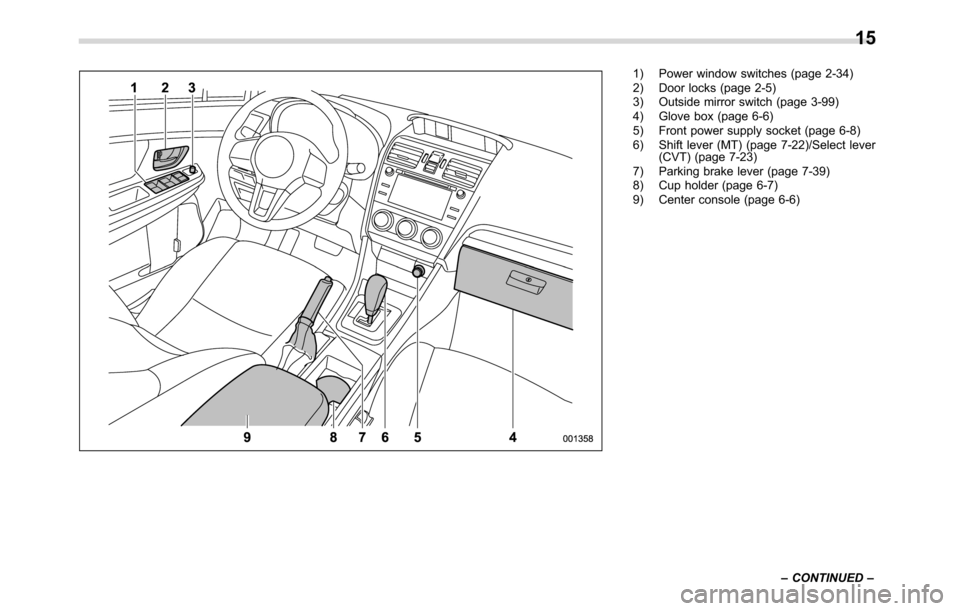
1) Power window switches (page 2-34)
2) Door locks (page 2-5)
3) Outside mirror switch (page 3-99)
4) Glove box (page 6-6)
5) Front power supply socket (page 6-8)
6) Shift lever (MT) (page 7-22)/Select lever
(CVT) (page 7-23)
7) Parking brake lever (page 7-39)
8) Cup holder (page 6-7)
9) Center console (page 6-6)
–CONTINUED–
15
Page 151 of 572
Before that time, the ECO gauge does
not operate.Warning and indicator lights
&Initial illumination for system
check
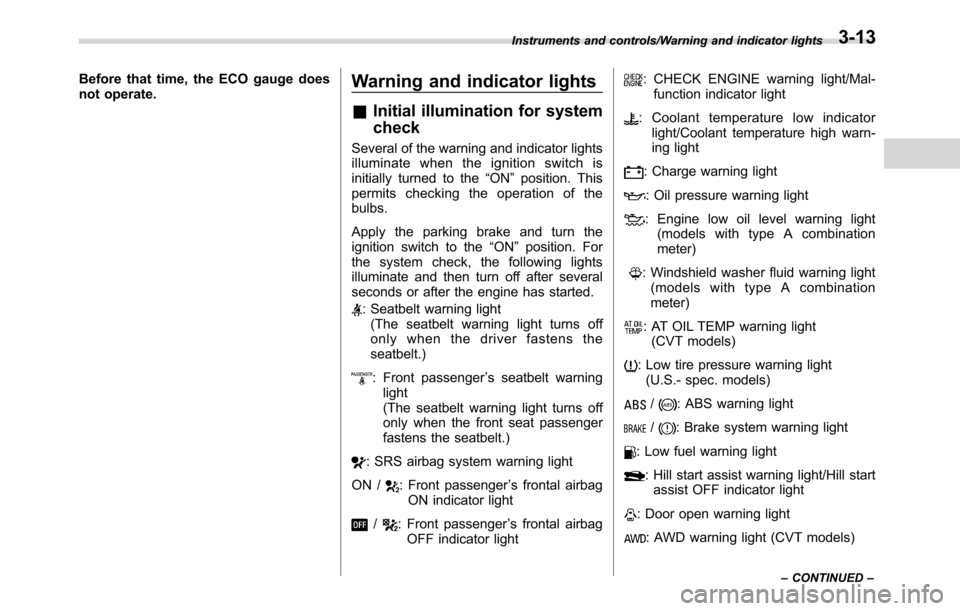
Several of the warning and indicator lights
illuminate when the ignition switch is
initially turned to the“ON”position. This
permits checking the operation of the
bulbs.
Apply the parking brake and turn the
ignition switch to the“ON”position. For
the system check, the following lights
illuminate and then turn off after several
seconds or after the engine has started.
: Seatbelt warning light
(The seatbelt warning light turns off
only when the driver fastens the
seatbelt.)
: Front passenger’s seatbelt warning
light
(The seatbelt warning light turns off
only when the front seat passenger
fastens the seatbelt.)
: SRS airbag system warning light
ON /
: Front passenger’s frontal airbag
ON indicator light
/: Front passenger’s frontal airbag
OFF indicator light
: CHECK ENGINE warning light/Mal-
function indicator light
: Coolant temperature low indicator
light/Coolant temperature high warn-
ing light
: Charge warning light
: Oil pressure warning light
: Engine low oil level warning light
(models with type A combination
meter)
: Windshield washer fluid warning light
(models with type A combination
meter)
: AT OIL TEMP warning light
(CVT models)
: Low tire pressure warning light
(U.S.- spec. models)
/: ABS warning light
/: Brake system warning light
: Low fuel warning light
: Hill start assist warning light/Hill start
assist OFF indicator light
: Door open warning light
: AWD warning light (CVT models)
Instruments and controls/Warning and indicator lights
–CONTINUED–3-13
Page 159 of 572
pressure warning light should turn
off a few minutes later. Therefore, be
sure to install the specified size for
the front and rear tires.
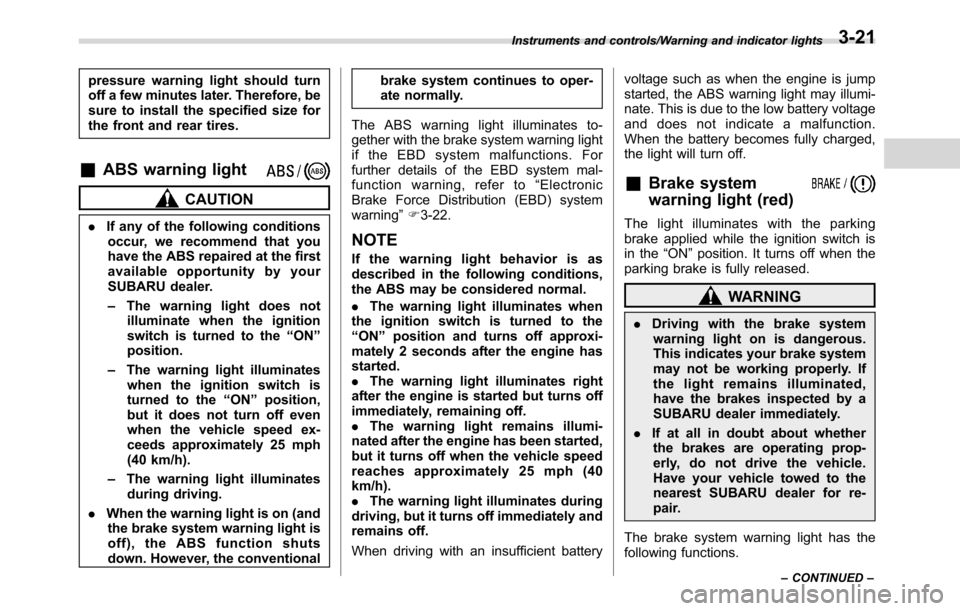
&ABS warning light
CAUTION
.If any of the following conditions
occur, we recommend that you
have the ABS repaired at the first
available opportunity by your
SUBARU dealer.
–The warning light does not
illuminate when the ignition
switch is turned to the“ON”
position.
–The warning light illuminates
when the ignition switch is
turned to the“ON”position,
but it does not turn off even
when the vehicle speed ex-
ceeds approximately 25 mph
(40 km/h).
–The warning light illuminates
during driving.
.When the warning light is on (and
the brake system warning light is
off), the ABS function shuts
down. However, the conventionalbrake system continues to oper-
ate normally.
The ABS warning light illuminates to-
gether with the brake system warning light
if the EBD system malfunctions. For
further details of the EBD system mal-
function warning, refer to“Electronic
Brake Force Distribution (EBD) system
warning”F3-22.NOTE
If the warning light behavior is as
described in the following conditions,
the ABS may be considered normal.
.The warning light illuminates when
the ignition switch is turned to the
“ON”position and turns off approxi-
mately 2 seconds after the engine has
started.
.The warning light illuminates right
after the engine is started but turns off
immediately, remaining off.
.The warning light remains illumi-
nated after the engine has been started,
but it turns off when the vehicle speed
reaches approximately 25 mph (40
km/h).
.The warning light illuminates during
driving, but it turns off immediately and
remains off.
When driving with an insufficient batteryvoltage such as when the engine is jump
started, the ABS warning light may illumi-
nate. This is due to the low battery voltage
and does not indicate a malfunction.
When the battery becomes fully charged,
the light will turn off.
&Brake system
warning light (red)
The light illuminates with the parking
brake applied while the ignition switch is
in the“ON”position. It turns off when the
parking brake is fully released.
WARNING
.Driving with the brake system
warning light on is dangerous.
This indicates your brake system
may not be working properly. If
the light remains illuminated,
have the brakes inspected by a
SUBARU dealer immediately.
.If at all in doubt about whether
the brakes are operating prop-
erly, do not drive the vehicle.
Have your vehicle towed to the
nearest SUBARU dealer for re-
pair.
The brake system warning light has the
following functions.
Instruments and controls/Warning and indicator lights
–CONTINUED–3-21
Page 160 of 572
Instruments and controls/Warning and indicator lights
!Brake fluid level warning
This light illuminates when the brake fluid
level has dropped to near the“MIN”level
of the brake fluid reservoir with the ignition
switch in the“ON”position and with the
parking brake fully released.
If the brake system warning light should
illuminate while driving (with the parking
brake fully released and with the ignition
switch positioned in“ON”), it could be an
indication of leaking of brake fluid or worn
brake pads. If this occurs, immediately
stop the vehicle at the nearest safe
location and check the brake fluid level.
If the fluid level is below the“MIN”mark in
the reservoir, do not drive the vehicle.
Have the vehicle towed to the nearest
SUBARU dealer for repair.
!Electronic Brake Force Distribution
(EBD) system warning
The brake system warning light also
illuminates if a malfunction occurs in the
EBD system. In that event, it illuminates
together with the ABS warning light.
The EBD system may be malfunctioning if
the brake system warning light and ABS
warning light illuminate simultaneously
during driving.
Even if the EBD system fails, the conven-
tional braking system will still function.
However, the rear wheels will be moreprone to locking when the brakes are
applied harder than usual and the vehi-
cle’s motion may therefore become some-
what harder to control.
If the brake system warning light and ABS
warning light illuminate simultaneously,
take the following steps.
1. Stop the vehicle in the nearest safe,
flat location.
2. Shut down the engine, apply the
parking brake and then restart it.
3. Release the parking brake. Even if
both warning lights turn off, the EBD
system may be malfunctioning. Drive
carefully to the nearest SUBARU dealer
and have the system inspected.
4. If both warning lights illuminate again
and remain illuminated after the engine
has been restarted, shut down the engine
again, apply the parking brake, and check
the brake fluid level.
5. If the brake fluid level is not below the
“MIN”mark, the EBD system may be
malfunctioning. Drive carefully to the
nearest SUBARU dealer and have the
system inspected.
6. If the brake fluid level is below the
“MIN”mark, DO NOT drive the vehicle.
Instead, have the vehicle towed to the
nearest SUBARU dealer for repair.&Low fuel warning light
The low fuel warning light illuminates
when the tank is nearly empty, at approxi-
mately 2.6 US gal (10.0 liters, 2.2 Imp gal).
It only operates when the ignition switch is
in the“ON”position.
CAUTION
Promptly put fuel in the tank when-
ever the low fuel warning light
illuminates. Engine misfires as a
result of an empty tank could cause
damage to the engine.
NOTE
This light does not turn off unless the
tank is replenished up to an internal
fuel quantity of approximately 4.5 US
gal (17 liters, 3.7 Imp gal).
&Hill start assist warning
light/Hill start assist
OFF indicator light
!Hill start assist warning light
While the engine is running, if there are
any malfunctions in the Hill start assist
system, the warning light will illuminate.
3-22
Page 229 of 572
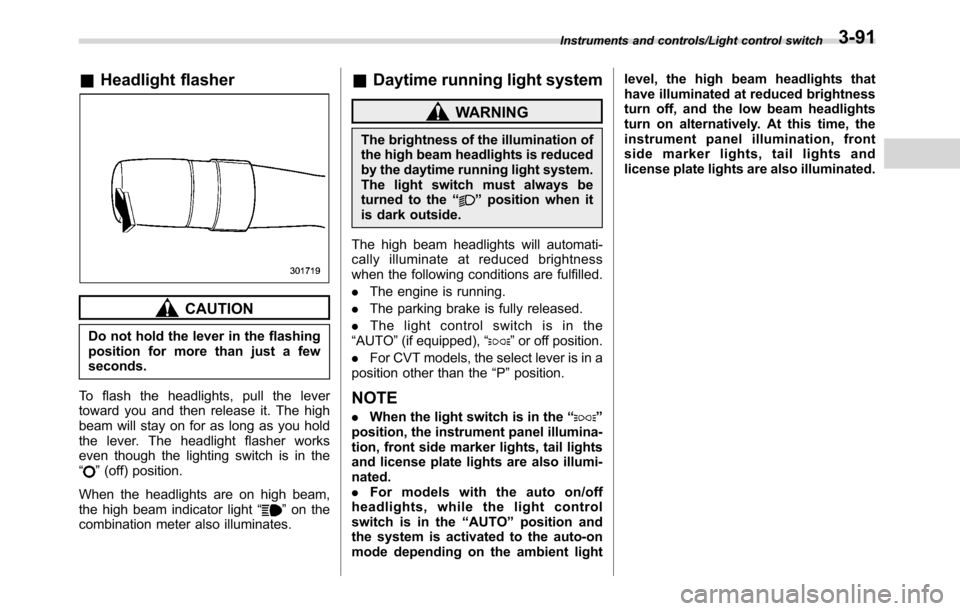
&Headlight flasher
CAUTION
Do not hold the lever in the flashing
position for more than just a few
seconds.
To flash the headlights, pull the lever
toward you and then release it. The high
beam will stay on for as long as you hold
the lever. The headlight flasher works
even though the lighting switch is in the
“
”(off) position.
When the headlights are on high beam,
the high beam indicator light“
”on the
combination meter also illuminates.
&Daytime running light system
WARNING
The brightness of the illumination of
the high beam headlights is reduced
by the daytime running light system.
The light switch must always be
turned to the“
”position when it
is dark outside.
The high beam headlights will automati-
cally illuminate at reduced brightness
when the following conditions are fulfilled.
.The engine is running.
.The parking brake is fully released.
.The light control switch is in the
“AUTO”(if equipped),“
”or off position.
.For CVT models, the select lever is in a
position other than the“P”position.
NOTE
.When the light switch is in the“”
position, the instrument panel illumina-
tion, front side marker lights, tail lights
and license plate lights are also illumi-
nated.
.For models with the auto on/off
headlights, while the light control
switch is in the“AUTO”position and
the system is activated to the auto-on
mode depending on the ambient lightlevel, the high beam headlights that
have illuminated at reduced brightness
turn off, and the low beam headlights
turn on alternatively. At this time, the
instrument panel illumination, front
side marker lights, tail lights and
license plate lights are also illuminated.
Instruments and controls/Light control switch3-91
Page 269 of 572
&Basic information before use
WARNING
When the vehicle is stopped with the
engine running, always apply the
parking brake for safety. Failure to
do so may result in loss of control of
your vehicle and cause an accident
or serious injury.
CAUTION
.To prevent damaging the screen,
touch the screen keys with your
finger lightly.
.Wipe off fingerprints using a
glass cleaning cloth. Do not use
chemical cleaners to clean the
screen, as they may damage the
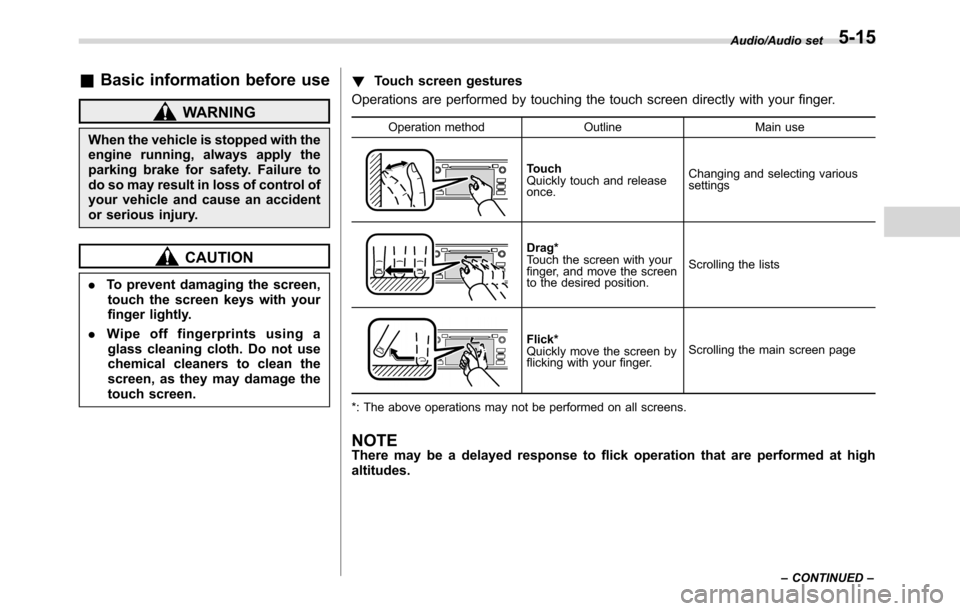
touch screen.!Touch screen gestures
Operations are performed by touching the touch screen directly with your finger.
Operation method Outline Main use
Touch
Quickly touch and release
once.Changing and selecting various
settings
Drag*
Touch the screen with your
finger, and move the screen
to the desired position.Scrolling the lists
Flick*
Quickly move the screen by
flicking with your finger.Scrolling the main screen page
*: The above operations may not be performed on all screens.
NOTEThere may be a delayed response to flick operation that are performed at high
altitudes.
Audio/Audio set
–CONTINUED–5-15
Page 370 of 572
Starting and operating
Vehicle Dynamics Control system monitor.......... 7-36
Vehicle Dynamics Control OFF switch................. 7-36
Tire pressure monitoring system (TPMS)
(U.S.-spec. models)......................................... 7-37
Parking your vehicle.......................................... 7-39
Parking brake..................................................... 7-39
Parking tips....................................................... 7-39
Hill start assist system...................................... 7-41
To activate/deactivate the Hill start assist
system............................................................. 7-42
Hill start assist warning light/Hill start assist OFF
indicator light................................................... 7-44
Cruise control (if equipped)............................... 7-44To set cruise control.......................................... 7-44To temporarily cancel the cruise control............. 7-45
To turn off the cruise control.............................. 7-46
To change the cruising speed............................ 7-46
Cruise control indicator light.............................. 7-48
Cruise control set indicator light ........................ 7-48
BSD/RCTA (if equipped).................................... 7-48System features................................................. 7-49
System operation............................................... 7-51
BSD/RCTA approach indicator light/warning
buzzer............................................................. 7-52
BSD/RCTA warning indicator.............................. 7-54
BSD/RCTA OFF switch....................................... 7-55
Certification for the BSD/RCTA........................... 7-55
Handling of radar sensors.................................. 7-56
Page 378 of 572
Starting and operating/Starting and stopping the engine (models without push–button start system)
!MT models
1. Apply the parking brake.
2. Turn off unnecessary lights and ac-
cessories.
3. Depress the clutch pedal to the floor
and shift the shift lever into neutral. Hold
the clutch pedal to the floor while starting
the engine.
The starter motor will only operate when
the clutch pedal is depressed fully to the
floor.
4. Turn the ignition switch to the“ON”
position and check the operation of the
warning and indicator lights. Refer to
“Warning and indicator lights”F3-13.
5. Turn the ignition switch to the“START”
positionwithoutdepressing the accelera-
tor pedal. Release the key immediately
after the engine has started.
If the engine does not start, try the
following procedure.
(1) Turn the ignition switch to the
“LOCK”/“OFF”position and wait for at
least 10 seconds. After checking that
the parking brake is firmly set, turn the
ignition switch to the“START”position
while depressing the accelerator pedal
slightly (approximately a quarter of the
full stroke). Release the accelerator
pedal as soon as the engine starts.
(2) If this fails to start the engine, turnthe ignition switch back to the“LOCK”/
“OFF”position and wait for at least 10
seconds. Then fully depress the accel-
erator pedal and turn the ignition
switch to the“START”position. If the
engine starts, quickly release the
accelerator pedal.
(3) If this fails to start the engine, turn
the ignition switch again to the
“LOCK”/“OFF”position. After waiting
for 10 seconds or longer, turn the
ignition switch to the“START”position
without depressing the accelerator
pedal.
(4) If the engine still does not start,
contact your nearest SUBARU dealer
for assistance.
6. Confirm that all warning and indicator
lights have turned off after the engine has
started. The fuel injection system auto-
matically lowers the idle speed as the
engine warms up.
!CVT models
1. Apply the parking brake.
2. Turn off unnecessary lights and ac-
cessories.
3. Shift the select lever to the“
P”or“N”
position (preferably the
“
P”position).
The starter motor will only operate when
the select lever is at the“P”or“N”position.4. Turn the ignition switch to the“ON”
position and check the operation of the
warning and indicator lights. Refer to
“Warning and indicator lights”F3-13.
5. Turn the ignition switch to the“START”
positionwithoutdepressing the accelera-
tor pedal. Release the key immediately
after the engine has started.
If the engine does not start, try the
following procedure.
(1) Turn the ignition switch to the
“LOCK”/“OFF”position and wait for at
least 10 seconds. After checking that
the parking brake is firmly set, turn the
ignition switch to the“START”position
while depressing the accelerator pedal
slightly (approximately a quarter of the
full stroke). Release the accelerator
pedal as soon as the engine starts.
(2) If this fails to start the engine, turn
the ignition switch back to the“LOCK”/
“OFF”position and wait for at least 10
seconds. Then fully depress the accel-
erator pedal and turn the ignition
switch to the“START”position. If the
engine starts, quickly release the
accelerator pedal.
(3) If this fails to start the engine, turn
the ignition switch again to the
“LOCK”/“OFF”position. After waiting
for 10 seconds or longer, turn the
ignition switch to the“START”position
7-10
Page 379 of 572
without depressing the accelerator
pedal.
(4) If the engine still refuses to start,
contact your nearest SUBARU dealer
for assistance.
6. Confirm that all warning and indicator
lights have turned off after the engine has
started. The fuel injection system auto-
matically lowers the idle speed as the
engine warms up.
While the engine is warming up, make
sure that the select lever is at the“P”or
“N”position and that the parking brake is
applied.
CAUTION
If you restart the engine while the
vehicle is moving, shift the select
lever into the“N”position. Do not
attempt to place the select lever of a
moving vehicle into the“P”posi-
tion.
&Stopping the engine
The ignition switch should be turned off
only when the vehicle is stopped and the
engine is idling.
WARNING
Do not stop the engine when the
vehicle is moving. This will cause
loss of power to the power steering
and the brake booster, making steer-
ing and braking more difficult. It
could also result in accidental acti-
vation of the“LOCK”/“OFF”posi-
tion on the ignition switch, causing
the steering wheel to lock.
Starting and stopping engine
(models with push-button
start system)
&Safety precautions
Refer to“Safety precautions”F2-10.
&Operating range for push-
button start system
Refer to“Operating range for push-button
start system”F3-6.
&Starting engine
WARNING
.There are some general precau-
tions when starting the engine.
Carefully read the precautions
described in“General precau-
tions when starting/stopping en-
gine”F7-9.
.If the indicator on the push-
button ignition switch flashes in
green after the engine has
started, never drive the vehicle.
The steering is still locked, and it
may result in an accident.
Starting and operating/Starting and stopping engine (models with push–button start system)
–CONTINUED–7-11
Page 380 of 572
Starting and operating/Starting and stopping engine (models with push–button start system)
CAUTION
.When the operation indicator on
the push-button ignition switch is
flashing in orange, there may be
a malfunction with the vehicle.
Contact a SUBARU dealer imme-
diately.
.If the indicator on the push-
button ignition switch is flashing
in green after the engine has
started, it means that the steering
is still locked. Depress the brake
pedal while moving the steering
wheel to the right and left, and
press the push-button ignition
switch.
.Do not continue pressing the
push-button ignition switch for
more than 10 seconds. Doing so
could cause a malfunction. If the
engine does not start, stop
pressing the push-button ignition
switch. Instead, press the push-
button ignition switch without
depressing the brake pedal to
switch the power status to
“OFF”. Wait 10 seconds, and
then press the push-button igni-
tion switch to start the engine.
NOTE
.When the push-button ignition
switch is pressed while depressing
thebrakepedal,theenginestarter
operates for a maximum of 10 seconds
and after starting the engine, the starter
stops automatically.
.When the push-button ignition
switch is pressed while depressing
the brake pedal, the engine can be
started regardless of the status of the
push-button ignition switch.
.If the security indicator light illumi-
nates when you attempt to start the
engine but the engine does not start,
press the push-button ignition switch
to switch the power to“OFF”and then
try to start the engine again.
.If the engine does not start, press
the push-button ignition switch without
depressing the brake pedal to switch
the power to“OFF”. Then, while de-
pressing the brake pedal more force-
fully, press the push-button ignition
switch.
.The engine start procedures may
not function depending on the radio
wave conditions around the vehicle. In
such a case, refer to“Starting engine”
F9-18.
.If the vehicle battery is discharged,
the steering cannot be unlocked.Charge the battery.
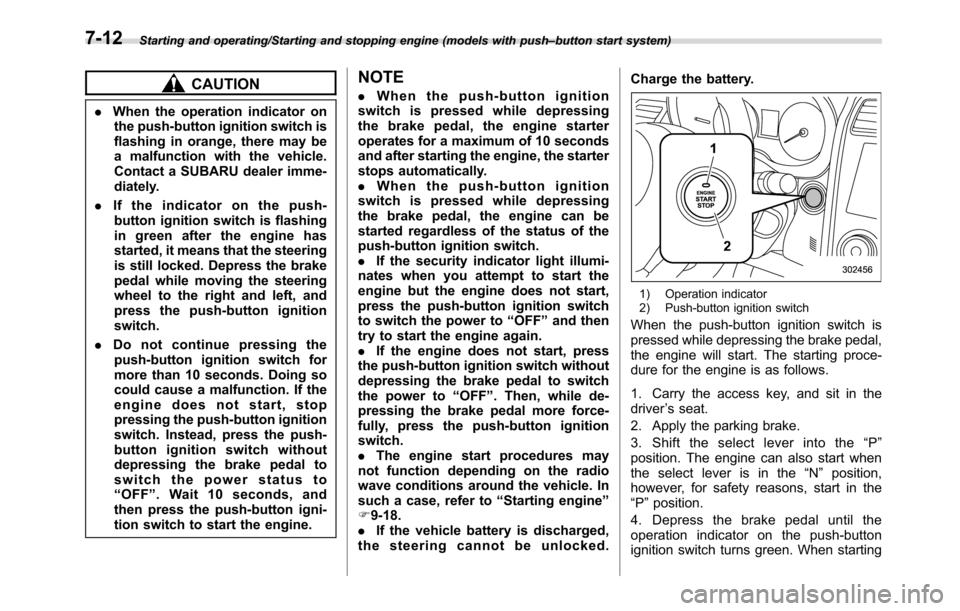
1) Operation indicator
2) Push-button ignition switch
When the push-button ignition switch is
pressed while depressing the brake pedal,
the engine will start. The starting proce-
dure for the engine is as follows.
1. Carry the access key, and sit in the
driver’s seat.
2. Apply the parking brake.
3. Shift the select lever into the“P”
position. The engine can also start when
the select lever is in the“N”position,
however, for safety reasons, start in the
“P”position.
4. Depress the brake pedal until the
operation indicator on the push-button
ignition switch turns green. When starting
7-12