keyless entry SUBARU FORESTER 1999 Service Repair Manual
[x] Cancel search | Manufacturer: SUBARU, Model Year: 1999, Model line: FORESTER, Model: SUBARU FORESTER 1999Pages: 345, PDF Size: 5.6 MB
Page 115 of 345
4. Keyless Entry System
A: PRECAUTION
1. SUPPLEMENTAL RESTRAINT SYSTEM
ªAIRBAGº
Airbag system wiring harness is routed near the
keyless entry control module.
CAUTION:
IAll airbag system wiring harness and con-
nectors are yellow. Do not use electrical test
equipment on these circuits.
IBe careful not to damage airbag system wir-
ing harness when servicing the keyless entry
control module.
B: PRE-INSPECTION
1. POWER DOOR LOCK
4B11 : CHECK POWER DOOR LOCK.
Perform lock and unlock with door lock switch.
:Does the power door lock function
normally?
: Go to step4B21.
: Repair power door lock.
2. TRANSMITTER
4B21 : CHECK TRANSMITTER BATTERY.
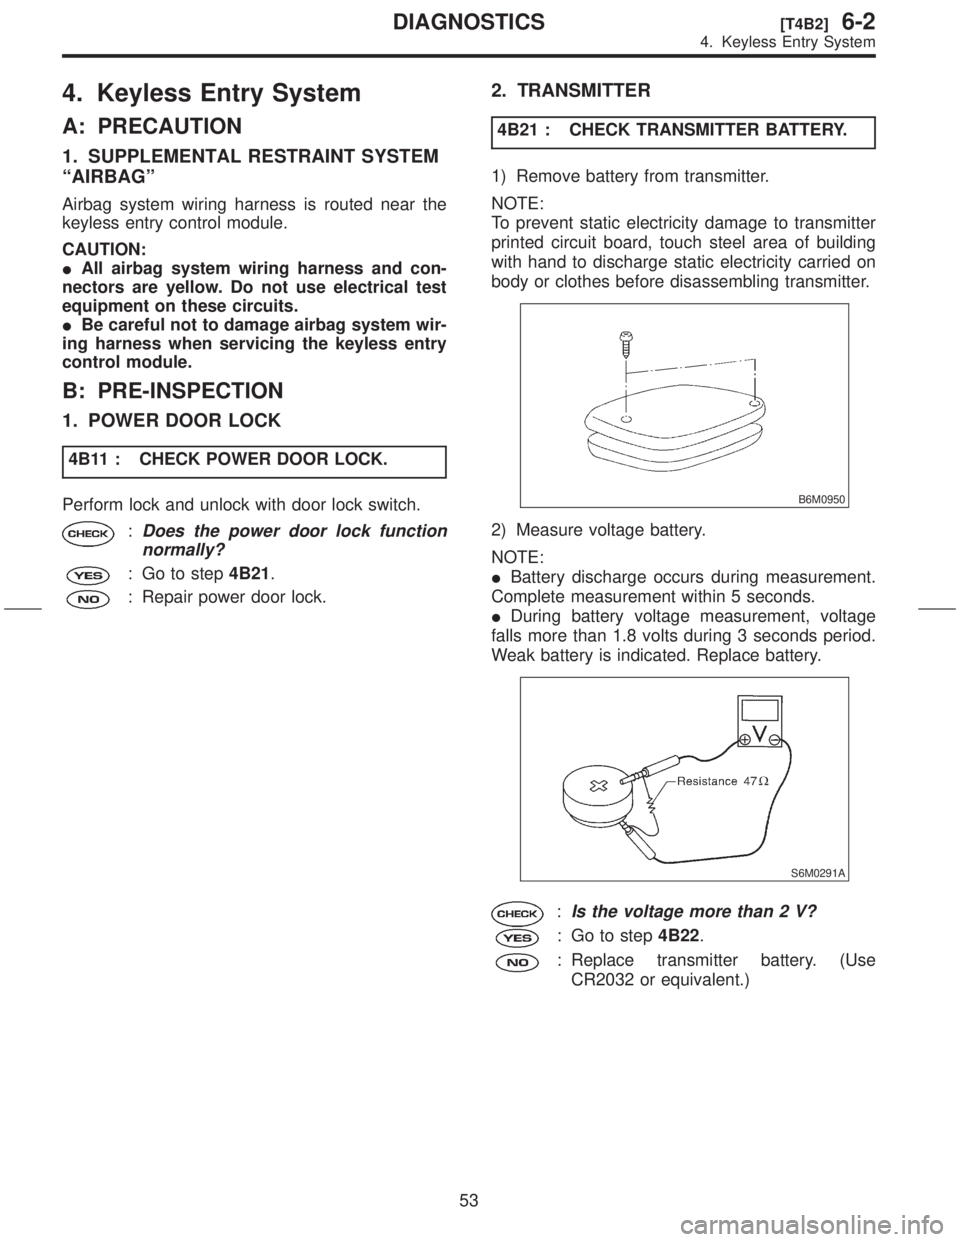
1) Remove battery from transmitter.
NOTE:
To prevent static electricity damage to transmitter
printed circuit board, touch steel area of building
with hand to discharge static electricity carried on
body or clothes before disassembling transmitter.
B6M0950
2) Measure voltage battery.
NOTE:
IBattery discharge occurs during measurement.
Complete measurement within 5 seconds.
IDuring battery voltage measurement, voltage
falls more than 1.8 volts during 3 seconds period.
Weak battery is indicated. Replace battery.
S6M0291A
:Is the voltage more than 2 V?
: Go to step4B22.
: Replace transmitter battery. (Use
CR2032 or equivalent.)
53
[T4B2]6-2DIAGNOSTICS
4. Keyless Entry System
Page 116 of 345
4B22 : CHECK LED OF TRANSMITTER.
1) Press either the LOCK/ARM or UNLOCK/
DISARM button six times to synchronize with the
keyless entry control module.
2) Press the LOCK/ARM button.
:Does the LED blink one time?
: Go to step4B23.
: Replace transmitter.
4B23 : CHECK LED OF TRANSMITTER.
Keep the LOCK/ARM button pressed.
:Does the LED blink one time and then
turn on?
: Go to step4B24.
: Replace transmitter.
4B24 : CHECK LED OF TRANSMITTER.
Press the UNLOCK/DISARM button.
:Does the LED blink one time?
: Go to step4B25.
: Replace transmitter.
4B25 : CHECK LED OF TRANSMITTER.
Keep the UNLOCK/DISARM button pressed.
:Does the LED blink two times?
: Go to step4B26.
: Replace transmitter.
4B26 : CHECK POWER DOOR LOCK
FUNCTION.
Perform lock and unlock function of power door
lock with transmitter.
:Does it function normally?
: Go to step4B27.
: Replace transmitter.4B27 : CHECK ON/OFF SELECT HORN
SIGNAL.
Press the LOCK/ARM or UNLOCK/DISARM but-
ton.
:Does the horn signal chirp?
: Go to step4B28.
: Keep both LOCK/ARM and UNLOCK/
DISARM buttons pressed for more than
1.5 seconds. Go to step4B28.
4B28 : CHECK ON/OFF SELECT HORN
SIGNAL.
Keep both LOCK/ARM and UNLOCK/DISARM
buttons pressed for more than 1.5 seconds.
:Does the horn signal chirp two
times?
: Go to step4B29.
: Replace transmitter.
4B29 : CHECK ON/OFF SELECT HORN
SIGNAL.
Press LOCK/ARM or UNLOCK/DISARM button.
:Does the horn signal chirp?
: Replace transmitter.
: Go to step4B210.
4B210 : CHECK ON/OFF SELECT HORN
SIGNAL.
Keep both LOCK/ARM and UNLOCK/DISARM
buttons pressed for more than 1.5 seconds.
:Does the horn signal chirp one time?
: Go to step4B211.
: Replace transmitter.
4B211 : CHECK ON/OFF SELECT HORN
SIGNAL.
Press LOCK/ARM and UNLOCK/DISARM button.
:Does the horn signal chirp?
: Go to step4B212.
: Replace transmitter.
54
6-2[T4B2]DIAGNOSTICS
4. Keyless Entry System
Page 117 of 345
4B212 : CHECK FOR UNCHECKED TRANS-
MITTER.
Check for an unchecked transmitter.
:Does an unchecked transmitter
exist?
: Check for an unchecked transmitter. Go
to step4B21.
: Go to step4B31.
3. FUSE
4B31 : CHECK FUSE.
Remove and visually check the fuse No. 3 (in fuse
box).
:Is fuse No. 3 blown?
: Replace fuse (15 A).
: Go to step4B41.
55
[T4B3]6-2DIAGNOSTICS
4. Keyless Entry System
Page 118 of 345

4. POWER SUPPLY CIRCUIT
4B41 : CHECK POWER SUPPLY CIRCUIT.
Measure voltage between fuse box connector
(B158) and chassis ground.
Connector & terminal
(B158) No. 8 (+) Ð Chassis ground (þ):
B6M1344B
:Is the voltage more than 10 V?
: Go to step4B42.
: Repair wiring harness between fuse box
and battery.
4B42 : CHECK POWER SUPPLY CIRCUIT.
1) Disconnect connector from keyless entry con-
trol module.
2) Measure voltage between keyless entry control
module connector (B176) and chassis ground.
Connector & terminal
(B176) No. 3 (+) Ð Chassis ground (þ):
B6M0952A
:Is the voltage more than 10 V?
: Go to step4B51.
: Repair wiring harness between keyless
entry control module and fuse box.
5. GROUND CIRCUIT
4B51 : CHECK GROUND CIRCUIT.
Measure resistance between keyless entry control
module connector (B176) and chassis ground.
Connector & terminal
(B176) No. 8 (+) Ð Chassis ground (þ):
B6M0953A
:Is the resistance less than 10W?
: Go to step4F11.
: Repair wiring harness between keyless
entry control module and chassis
ground.
56
6-2[T4B4]DIAGNOSTICS
4. Keyless Entry System
Page 119 of 345
![SUBARU FORESTER 1999 Service Repair Manual C: ELECTRICAL COMPONENTS LOCATION
S6M0450A
(1) Horn
(2) Keyless entry control module(3) Horn relay (in main fuse box)
(4) Rear gate latch switch(5) Door switch
57
[T4C0]6-2DIAGNOSTICS
4. Keyless Entry SUBARU FORESTER 1999 Service Repair Manual C: ELECTRICAL COMPONENTS LOCATION
S6M0450A
(1) Horn
(2) Keyless entry control module(3) Horn relay (in main fuse box)
(4) Rear gate latch switch(5) Door switch
57
[T4C0]6-2DIAGNOSTICS
4. Keyless Entry](/img/17/57427/w960_57427-118.png)
C: ELECTRICAL COMPONENTS LOCATION
S6M0450A
(1) Horn
(2) Keyless entry control module(3) Horn relay (in main fuse box)
(4) Rear gate latch switch(5) Door switch
57
[T4C0]6-2DIAGNOSTICS
4. Keyless Entry System
Page 120 of 345
![SUBARU FORESTER 1999 Service Repair Manual D: SCHEMATIC
S6M0451
58
6-2[T4D0]DIAGNOSTICS
4. Keyless Entry System SUBARU FORESTER 1999 Service Repair Manual D: SCHEMATIC
S6M0451
58
6-2[T4D0]DIAGNOSTICS
4. Keyless Entry System](/img/17/57427/w960_57427-119.png)
D: SCHEMATIC
S6M0451
58
6-2[T4D0]DIAGNOSTICS
4. Keyless Entry System
Page 121 of 345
![SUBARU FORESTER 1999 Service Repair Manual S6M0452
59
[T4D0]6-2DIAGNOSTICS
4. Keyless Entry System SUBARU FORESTER 1999 Service Repair Manual S6M0452
59
[T4D0]6-2DIAGNOSTICS
4. Keyless Entry System](/img/17/57427/w960_57427-120.png)
S6M0452
59
[T4D0]6-2DIAGNOSTICS
4. Keyless Entry System
Page 122 of 345
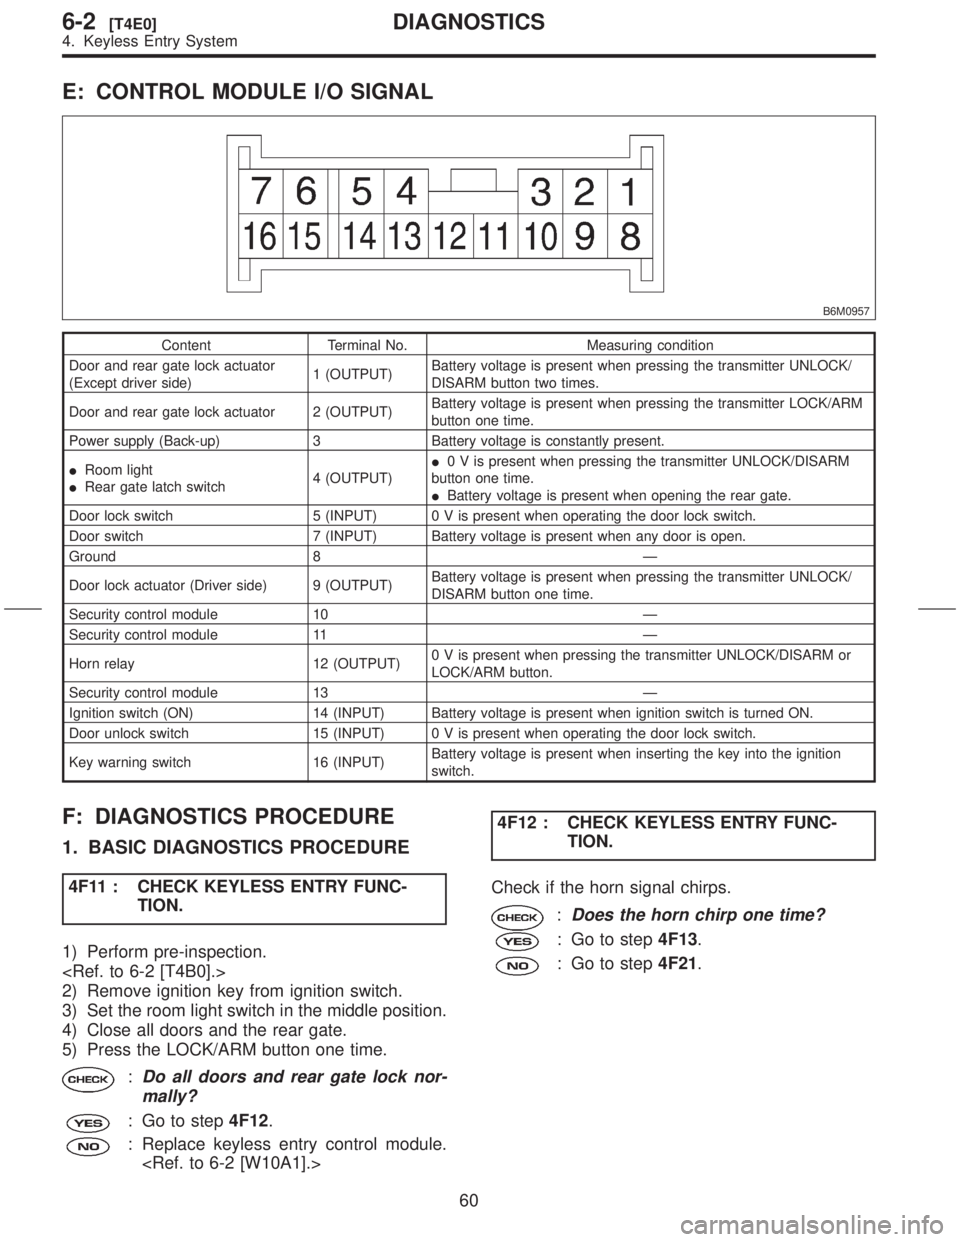
E: CONTROL MODULE I/O SIGNAL
B6M0957
Content Terminal No. Measuring condition
Door and rear gate lock actuator
(Except driver side)1 (OUTPUT)Battery voltage is present when pressing the transmitter UNLOCK/
DISARM button two times.
Door and rear gate lock actuator 2 (OUTPUT)Battery voltage is present when pressing the transmitter LOCK/ARM
button one time.
Power supply (Back-up) 3 Battery voltage is constantly present.
IRoom light
IRear gate latch switch4 (OUTPUT)I0 V is present when pressing the transmitter UNLOCK/DISARM
button one time.
IBattery voltage is present when opening the rear gate.
Door lock switch 5 (INPUT) 0 V is present when operating the door lock switch.
Door switch 7 (INPUT) Battery voltage is present when any door is open.
Ground 8 Ð
Door lock actuator (Driver side) 9 (OUTPUT)Battery voltage is present when pressing the transmitter UNLOCK/
DISARM button one time.
Security control module 10 Ð
Security control module 11 Ð
Horn relay 12 (OUTPUT)0 V is present when pressing the transmitter UNLOCK/DISARM or
LOCK/ARM button.
Security control module 13 Ð
Ignition switch (ON) 14 (INPUT) Battery voltage is present when ignition switch is turned ON.
Door unlock switch 15 (INPUT) 0 V is present when operating the door lock switch.
Key warning switch 16 (INPUT)Battery voltage is present when inserting the key into the ignition
switch.
F: DIAGNOSTICS PROCEDURE
1. BASIC DIAGNOSTICS PROCEDURE
4F11 : CHECK KEYLESS ENTRY FUNC-
TION.
1) Perform pre-inspection.
2) Remove ignition key from ignition switch.
3) Set the room light switch in the middle position.
4) Close all doors and the rear gate.
5) Press the LOCK/ARM button one time.
:Do all doors and rear gate lock nor-
mally?
: Go to step4F12.
: Replace keyless entry control module.
TION.
Check if the horn signal chirps.
:Does the horn chirp one time?
: Go to step4F13.
: Go to step4F21.
60
6-2[T4E0]DIAGNOSTICS
4. Keyless Entry System
Page 123 of 345
4F13 : CHECK KEYLESS ENTRY FUNC-
TION.
Press the UNLOCK/DISARM button one time.
:Does the driver's door unlock nor-
mally?
: Go to step4F14.
: Replace keyless entry control module.
4F14 : CHECK KEYLESS ENTRY FUNC-
TION.
Check if the horn signal chirps.
:Does the horn chirp two times?
: Go to step4F15.
: Replace keyless entry control module.
4F15 : CHECK KEYLESS ENTRY FUNC-
TION.
Check if the room light is turned on.
:Does the room light turn on for 30
seconds, and then turn off?
: Go to step4F16.
: Go to step4F31.
4F16 : CHECK KEYLESS ENTRY FUNC-
TION.
1) Press the LOCK/ARM button one time.
2) Press the UNLOCK/DISARM button two times.
:Do all doors and rear gate unlock
normally?
: Go to step4F17.
: Replace keyless entry control module.
4F17 : CHECK KEYLESS ENTRY FUNC-
TION.
Keep the LOCK/ARM button pressed for more than
1.5 seconds.
:Does the horn sound for 30 seconds,
and then turns off?
: Go to step4F18.
: Replace keyless entry control module.
TION.
1) Keep the LOCK/ARM button pressed for more
than 1.5 seconds.
2) Horn will sound, and then press the LOCK/ARM
button.
:Does the horn turn off?
: Go to step4F19.
: Replace keyless entry control module.
4F19 : CHECK KEYLESS ENTRY FUNC-
TION.
1) Keep the LOCK/ARM button pressed for more
than 1.5 seconds.
2) Horn will sound, and then press the UNLOCK/
DISARM button.
:Does the horn turn off?
: Go to step4F110.
: Replace keyless entry control module.
4F110 : CHECK DOOR SWITCH FUNCTION.
Open the front left door.
:Does the room light turn on?
: Go to step4 F 111.
: Go to step4F41.
4F111 : CHECK DOOR SWITCH FUNCTION.
1) Close the front left door.
2) Open the front right door.
:Does the room light turn on?
: Go to step4F112.
: Go to step4F41.
4F112 : CHECK DOOR SWITCH FUNCTION.
1) Close the front right door.
2) Open the rear left door.
:Does the room light turn on?
: Go to step4F113.
: Go to step4F41.
61
[T4F1]6-2DIAGNOSTICS
4. Keyless Entry System
Page 124 of 345
4F113 : CHECK DOOR SWITCH FUNCTION.
1) Close the rear left door.
2) Open the rear right door.
:Does the room light turn on?
: Go to step4F114.
: Go to step4F41.
4F114 : PERFORM PROGRAMMING.
NOTE:
Finish operation from step 1) through 4) within 45
seconds.
1) Sit on the driver's seat and close all doors and
the rear gate.
2) Open the driver's door.
3) Close the driver's door.
4) Turn the ignition switch from ON to LOCK ten
times in rapid succession (within 15 seconds).
NOTE:
Do not start the engine at this time.
5) The horn chirps one time to indicate that the
system has been in the programming mode.
6) Open the driver's door.
7) Close the driver's door.
8) Press any button on the transmitter that you
wish to program into the system.
9) Horn will chirp two times to indicate that the
transmitter has been programmed.
NOTE:
Any additional transmitter can also be pro-
grammed at this time. Repeat steps 6) through 9)
for an additional transmitter.
10) Remove the ignition key from the ignition
switch.
11) The horn will chirp three times to indicate that
the system has exited the programming mode.
12) Check the keyless entry system properly oper-
ates by operating each transmitter.
:Does the transmitter operate nor-
mally?
: Go to step4F115.
: Go to step4F51.4F115 : CHECK IGNITION KEY SWITCH.
1) Insert the ignition key to the ignition switch (at
LOCK position).
2) Perform lock and unlock with transmitter.
:Does the power door lock function
normally?
: Go to step4F61.
: End of basic diagnostics procedure.
62
6-2[T4F1]DIAGNOSTICS
4. Keyless Entry System