wheel bolts SUBARU FORESTER 1999 Service Repair Manual
[x] Cancel search | Manufacturer: SUBARU, Model Year: 1999, Model line: FORESTER, Model: SUBARU FORESTER 1999Pages: 345, PDF Size: 5.6 MB
Page 280 of 345

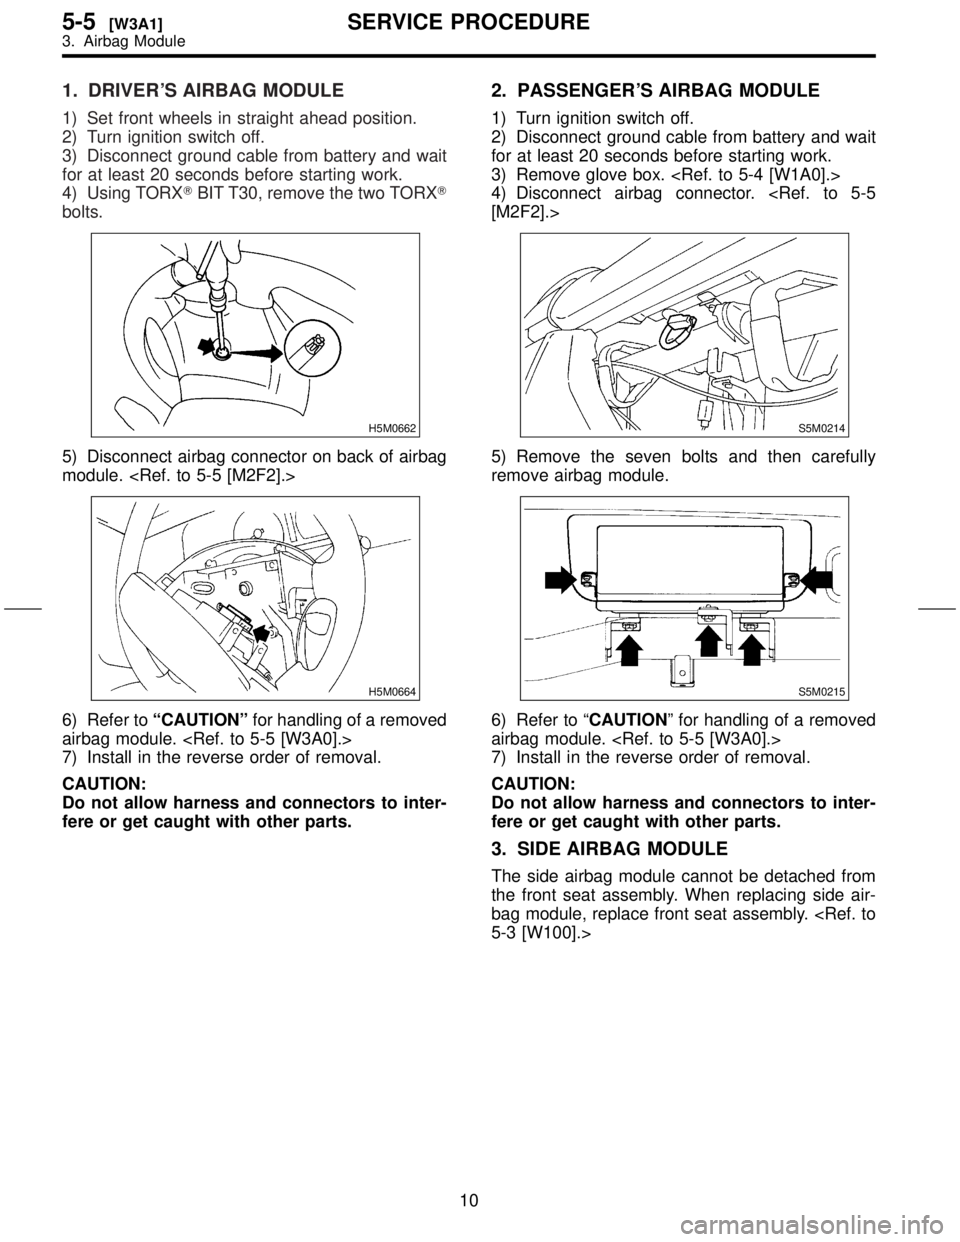
1. DRIVER'S AIRBAG MODULE
1) Set front wheels in straight ahead position.
2) Turn ignition switch off.
3) Disconnect ground cable from battery and wait
for at least 20 seconds before starting work.
4) Using TORXTBIT T30, remove the two TORXT
bolts.
H5M0662
5) Disconnect airbag connector on back of airbag
module.
H5M0664
6) Refer toªCAUTIONºfor handling of a removed
airbag module.
7) Install in the reverse order of removal.
CAUTION:
Do not allow harness and connectors to inter-
fere or get caught with other parts.
2. PASSENGER'S AIRBAG MODULE
1) Turn ignition switch off.
2) Disconnect ground cable from battery and wait
for at least 20 seconds before starting work.
3) Remove glove box.
4) Disconnect airbag connector.
S5M0214
5) Remove the seven bolts and then carefully
remove airbag module.
S5M0215
6) Refer to ªCAUTIONº for handling of a removed
airbag module.
7) Install in the reverse order of removal.
CAUTION:
Do not allow harness and connectors to inter-
fere or get caught with other parts.
3. SIDE AIRBAG MODULE
The side airbag module cannot be detached from
the front seat assembly. When replacing side air-
bag module, replace front seat assembly.
10
5-5[W3A1]SERVICE PROCEDURE
3. Airbag Module
Page 286 of 345
![SUBARU FORESTER 1999 Service Repair Manual 8. Roll Connector
A: REMOVAL
1) Turn ignition switch off.
2) Disconnect ground cable from battery and wait
for at least 20 seconds before starting work.
3) Remove lower cover. <Ref. to 5-4 [W1A0].>
4) SUBARU FORESTER 1999 Service Repair Manual 8. Roll Connector
A: REMOVAL
1) Turn ignition switch off.
2) Disconnect ground cable from battery and wait
for at least 20 seconds before starting work.
3) Remove lower cover. <Ref. to 5-4 [W1A0].>
4)](/img/17/57427/w960_57427-285.png)
8. Roll Connector
A: REMOVAL
1) Turn ignition switch off.
2) Disconnect ground cable from battery and wait
for at least 20 seconds before starting work.
3) Remove lower cover.
4) Disconnect airbag connector (AB3) and (AB8)
below steering column.
CAUTION:
Do not reconnect airbag connector at steering
column until combination switch is securely re-
installed.
G5M0312
5) Disconnect combination switch connectors
from body harness connector.
6) Set front wheels in straight ahead position.
Using T30 TORXTbit, remove the two TORXT
bolts.
H5M0662
7) Disconnect airbag connector on back of airbag
module.
module, and place it with pad side facing upward.
H5M0664
8) Using steering puller (A), remove steering
wheel.
CAUTION:
Do not allow connector to interfere when
removing steering wheel.
S5M0436A
9) Remove steering column covers.
10) Removing the three retaining screws, remove
combination switch.
S5M0220
14
5-5[W8A0]SERVICE PROCEDURE
8. Roll Connector
Page 341 of 345

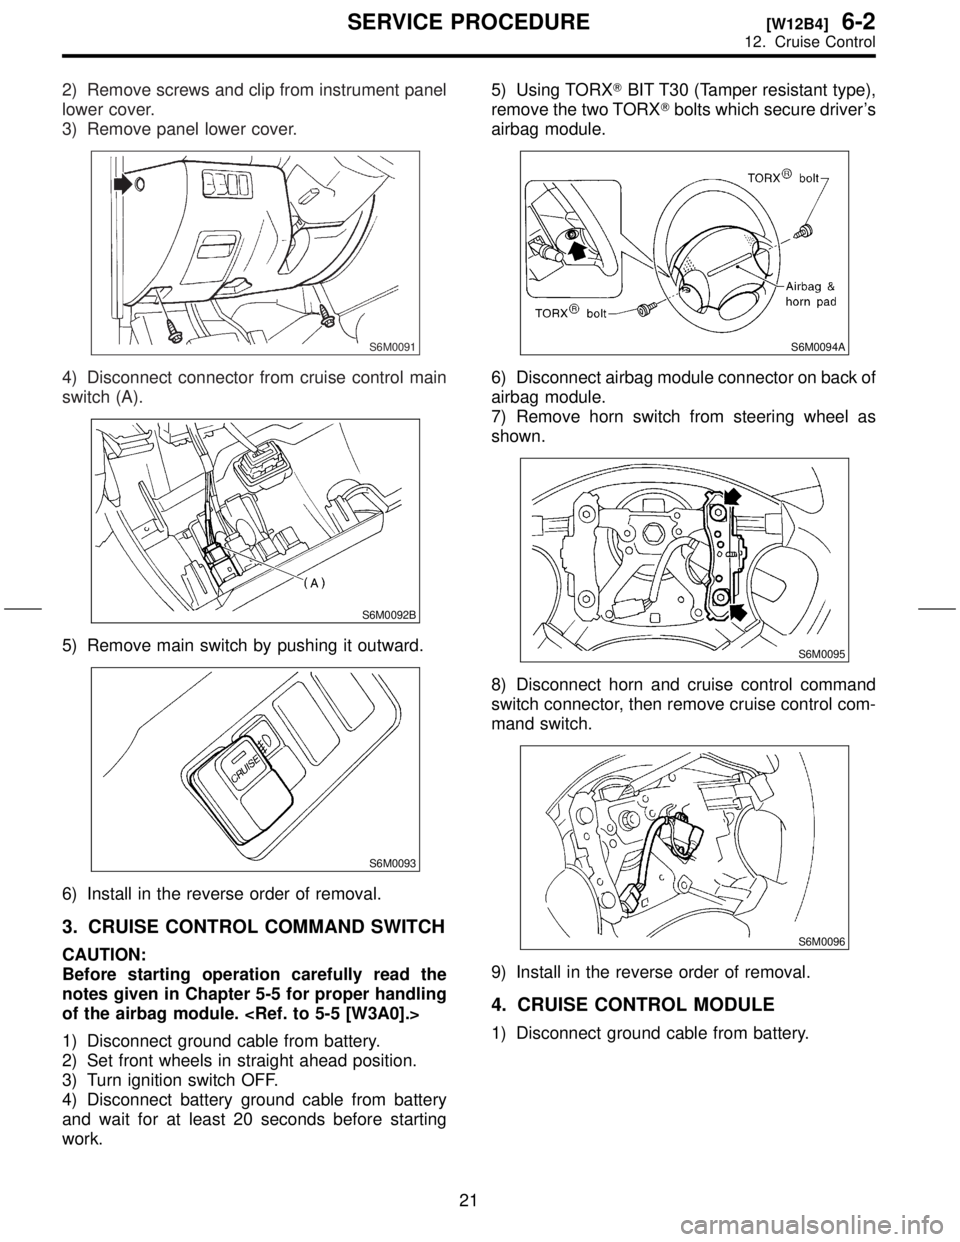
2) Remove screws and clip from instrument panel
lower cover.
3) Remove panel lower cover.
S6M0091
4) Disconnect connector from cruise control main
switch (A).
S6M0092B
5) Remove main switch by pushing it outward.
S6M0093
6) Install in the reverse order of removal.
3. CRUISE CONTROL COMMAND SWITCH
CAUTION:
Before starting operation carefully read the
notes given in Chapter 5-5 for proper handling
of the airbag module.
1) Disconnect ground cable from battery.
2) Set front wheels in straight ahead position.
3) Turn ignition switch OFF.
4) Disconnect battery ground cable from battery
and wait for at least 20 seconds before starting
work.5) Using TORXTBIT T30 (Tamper resistant type),
remove the two TORXTbolts which secure driver's
airbag module.
S6M0094A
6) Disconnect airbag module connector on back of
airbag module.
7) Remove horn switch from steering wheel as
shown.
S6M0095
8) Disconnect horn and cruise control command
switch connector, then remove cruise control com-
mand switch.
S6M0096
9) Install in the reverse order of removal.
4. CRUISE CONTROL MODULE
1) Disconnect ground cable from battery.
21
[W12B4]6-2SERVICE PROCEDURE
12. Cruise Control