SUBARU FORESTER 2017 SJ / 4.G Owners Manual
Manufacturer: SUBARU, Model Year: 2017, Model line: FORESTER, Model: SUBARU FORESTER 2017 SJ / 4.GPages: 634, PDF Size: 11.77 MB
Page 211 of 634
Instruments and controls/Multi function display
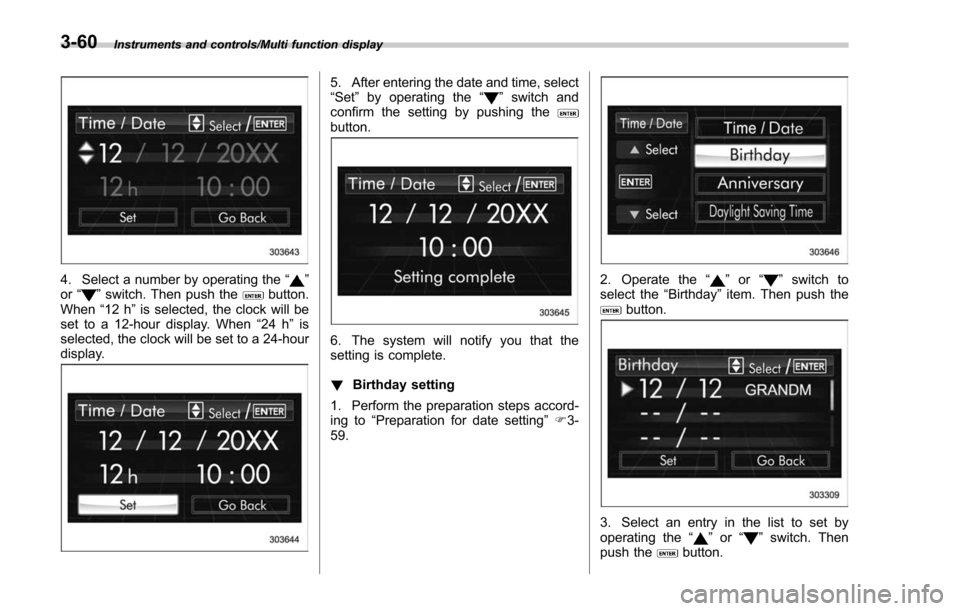
4. Select a number by operating the“”
or “”switch. Then push thebutton.
When “12 h”is selected, the clock will be
set to a 12-hour display. When “24 h”is
selected, the clock will be set to a 24-hour
display.
5. After entering the date and time, select
“Set ”by operating the “”switch and
confirm the setting by pushing the
button.
6. The system will notify you that the
setting is complete.
! Birthday setting
1. Perform the preparation steps accord-
ing to “Preparation for date setting ”F 3-
59.
2. Operate the “”or “”switch to
select the “Birthday ”item. Then push the
button.
3. Select an entry in the list to set by
operating the “”or “”switch. Then
push thebutton.
3-60
Page 212 of 634
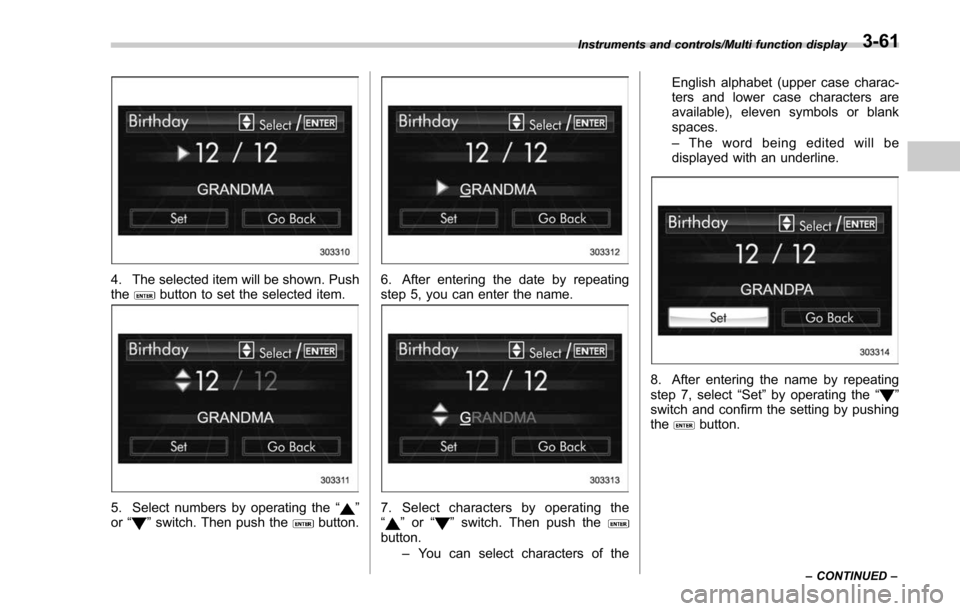
4. The selected item will be shown. Push
thebutton to set the selected item.
5. Select numbers by operating the“”
or “”switch. Then push thebutton.
6. After entering the date by repeating
step 5, you can enter the name.
7. Select characters by operating the
“” or “”switch. Then push thebutton.
–You can select characters of the English alphabet (upper case charac-
ters and lower case characters are
available), eleven symbols or blank
spaces.
–
The word being edited will be
displayed with an underline.
8. After entering the name by repeating
step 7, select “Set”by operating the “”
switch and confirm the setting by pushing
the
button.
Instruments and controls/Multi function display
–CONTINUED –3-61
Page 213 of 634
Instruments and controls/Multi function display
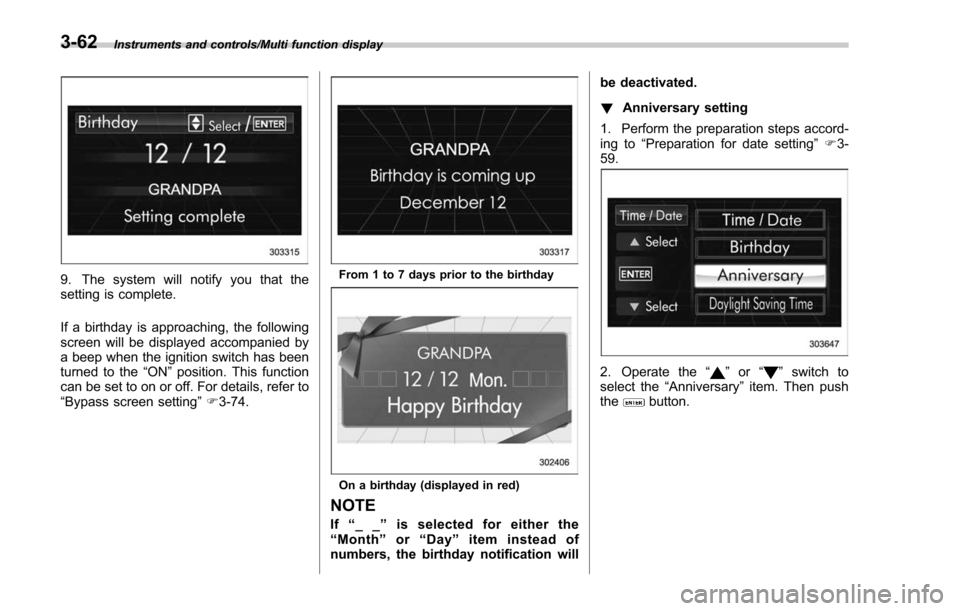
9. The system will notify you that the
setting is complete.
If a birthday is approaching, the following
screen will be displayed accompanied by
a beep when the ignition switch has been
turned to the“ON”position. This function
can be set to on or off. For details, refer to
“Bypass screen setting ”F 3-74.From 1 to 7 days prior to the birthday
On a birthday (displayed in red)
NOTE
If “__ ”is selected for either the
“ Month ”or “Day ”item instead of
numbers, the birthday notification will be deactivated.
!
Anniversary setting
1. Perform the preparation steps accord-
ing to “Preparation for date setting ”F 3-
59.
2. Operate the “”or “”switch to
select the “Anniversary ”item. Then push
the
button.
3-62
Page 214 of 634
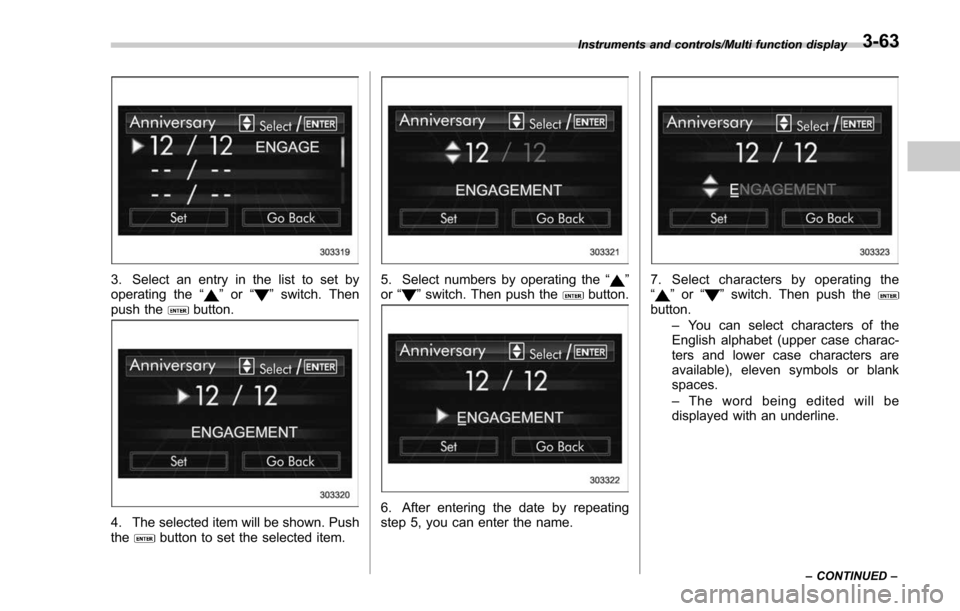
3. Select an entry in the list to set by
operating the“”or “”switch. Then
push thebutton.
4. The selected item will be shown. Push
thebutton to set the selected item.
5. Select numbers by operating the “”
or “”switch. Then push thebutton.
6. After entering the date by repeating
step 5, you can enter the name.
7. Select characters by operating the
“” or “”switch. Then push thebutton.
–You can select characters of the
English alphabet (upper case charac-
ters and lower case characters are
available), eleven symbols or blank
spaces.
– The word being edited will be
displayed with an underline.
Instruments and controls/Multi function display
–CONTINUED –3-63
Page 215 of 634
Instruments and controls/Multi function display
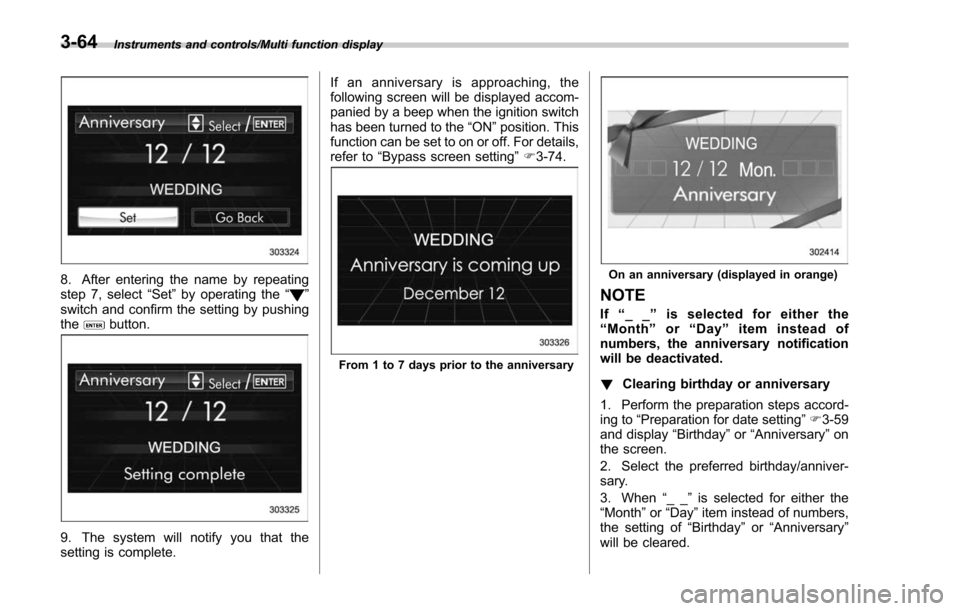
8. After entering the name by repeating
step 7, select“Set”by operating the “”
switch and confirm the setting by pushing
the
button.
9. The system will notify you that the
setting is complete. If an anniversary is approaching, the
following screen will be displayed accom-
panied by a beep when the ignition switch
has been turned to the
“ON ”position. This
function can be set to on or off. For details,
refer to “Bypass screen setting ”F 3-74.
From 1 to 7 days prior to the anniversary
On an anniversary (displayed in orange)
NOTE
If “__ ”is selected for either the
“ Month ”or “Day ”item instead of
numbers, the anniversary notification
will be deactivated.
! Clearing birthday or anniversary
1. Perform the preparation steps accord-
ing to “Preparation for date setting ”F 3-59
and display “Birthday ”or “Anniversary ”on
the screen.
2. Select the preferred birthday/anniver-
sary.
3. When “__ ”is selected for either the
“Month ”or “Day” item instead of numbers,
the setting of “Birthday ”or “Anniversary ”
will be cleared.
3-64
Page 216 of 634
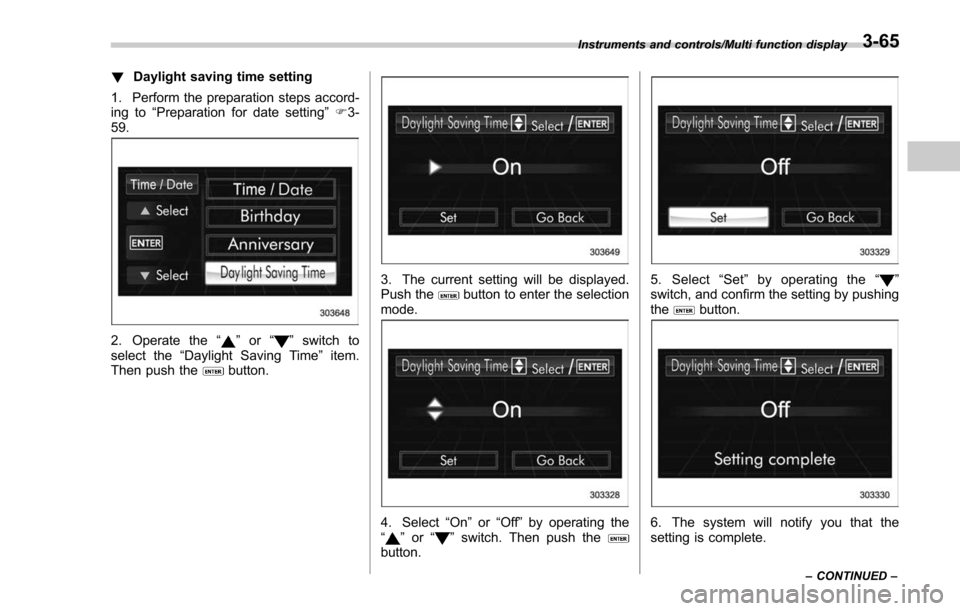
!Daylight saving time setting
1. Perform the preparation steps accord-
ing to “Preparation for date setting ”F 3-
59.
2. Operate the “”or “”switch to
select the “Daylight Saving Time ”item.
Then push the
button.
3. The current setting will be displayed.
Push thebutton to enter the selection
mode.
4. Select “On”or“Off ”by operating the
“” or “”switch. Then push thebutton.
5. Select “Set ”by operating the “”
switch, and confirm the setting by pushing
the
button.
6. The system will notify you that the
setting is complete.
Instruments and controls/Multi function display
–CONTINUED –3-65
Page 217 of 634
Instruments and controls/Multi function display
&Image quality and volume
settings
The image quality and volume settings
can be adjusted. To change the items,
operate the “
”or “”switch.
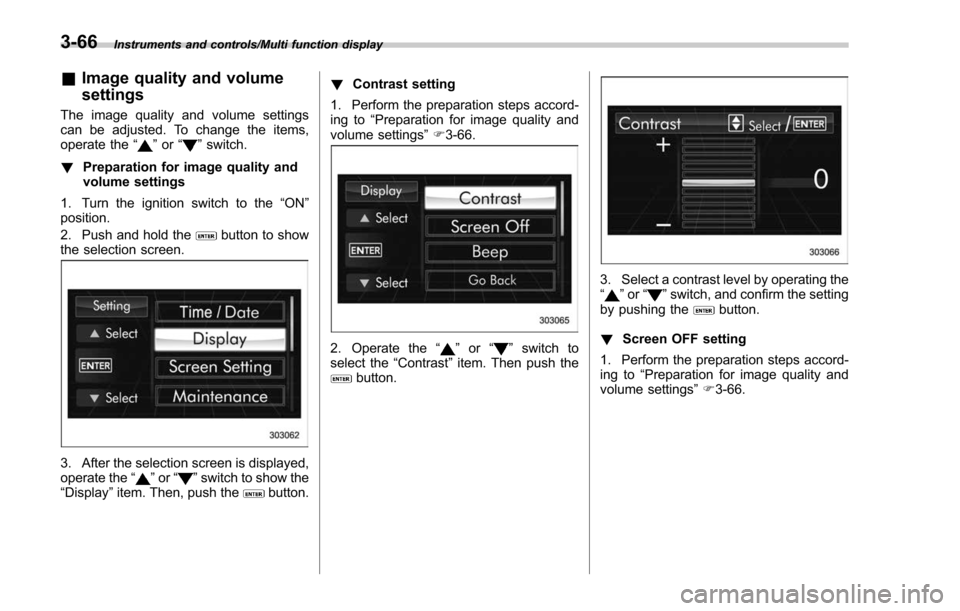
! Preparation for image quality and
volume settings
1. Turn the ignition switch to the “ON”
position.
2. Push and hold the
button to show
the selection screen.
3. After the selection screen is displayed,
operate the “”or “”switch to show the
“Display ”item. Then, push thebutton. !
Contrast setting
1. Perform the preparation steps accord-
ing to “Preparation for image quality and
volume settings” F3-66.
2. Operate the “”or “”switch to
select the “Contrast”item. Then push the
button.
3. Select a contrast level by operating the
“”or “”switch, and confirm the setting
by pushing thebutton.
! Screen OFF setting
1. Perform the preparation steps accord-
ing to “Preparation for image quality and
volume settings” F3-66.
3-66
Page 218 of 634
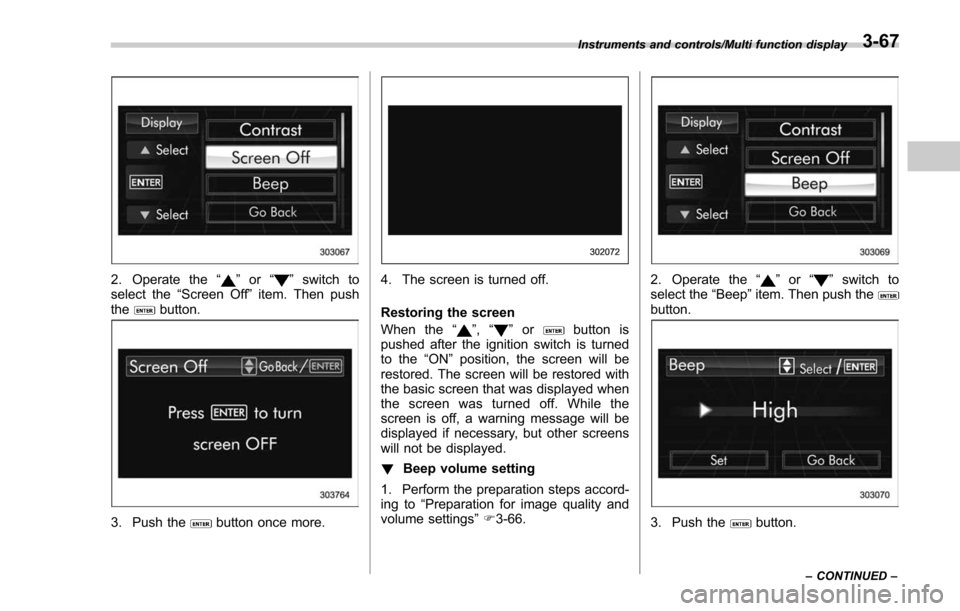
2. Operate the“”or “”switch to
select the “Screen Off ”item. Then push
the
button.
3. Push thebutton once more.
4. The screen is turned off.
Restoring the screen
When the “
”,“”orbutton is
pushed after the ignition switch is turned
to the “ON ”position, the screen will be
restored. The screen will be restored with
the basic screen that was displayed when
the screen was turned off. While the
screen is off, a warning message will be
displayed if necessary, but other screens
will not be displayed.
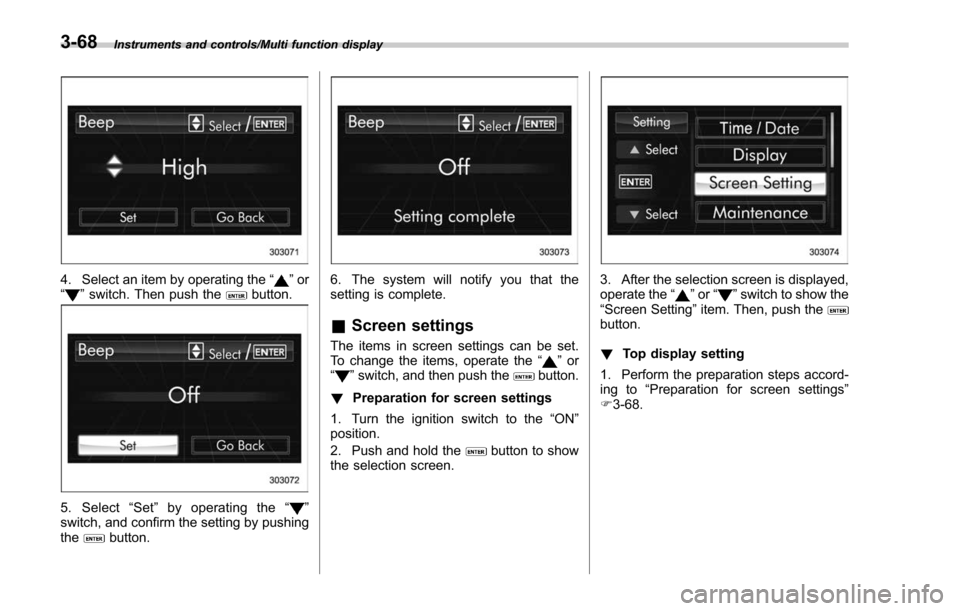
! Beep volume setting
1. Perform the preparation steps accord-
ing to “Preparation for image quality and
volume settings” F3-66.
2. Operate the “”or “”switch to
select the “Beep ”item. Then push the
button.
3. Push thebutton.
Instruments and controls/Multi function display
–CONTINUED –3-67
Page 219 of 634
Instruments and controls/Multi function display
4. Select an item by operating the“”or
“” switch. Then push thebutton.
5. Select “Set ”by operating the “”
switch, and confirm the setting by pushing
the
button.
6. The system will notify you that the
setting is complete.
& Screen settings
The items in screen settings can be set.
To change the items, operate the “”or
“” switch, and then push thebutton.
! Preparation for screen settings
1. Turn the ignition switch to the “ON”
position.
2. Push and hold the
button to show
the selection screen.
3. After the selection screen is displayed,
operate the “”or “”switch to show the
“ Screen Setting ”item. Then, push the
button.
! Top display setting
1. Perform the preparation steps accord-
ing to “Preparation for screen settings”
F 3-68.
3-68
Page 220 of 634
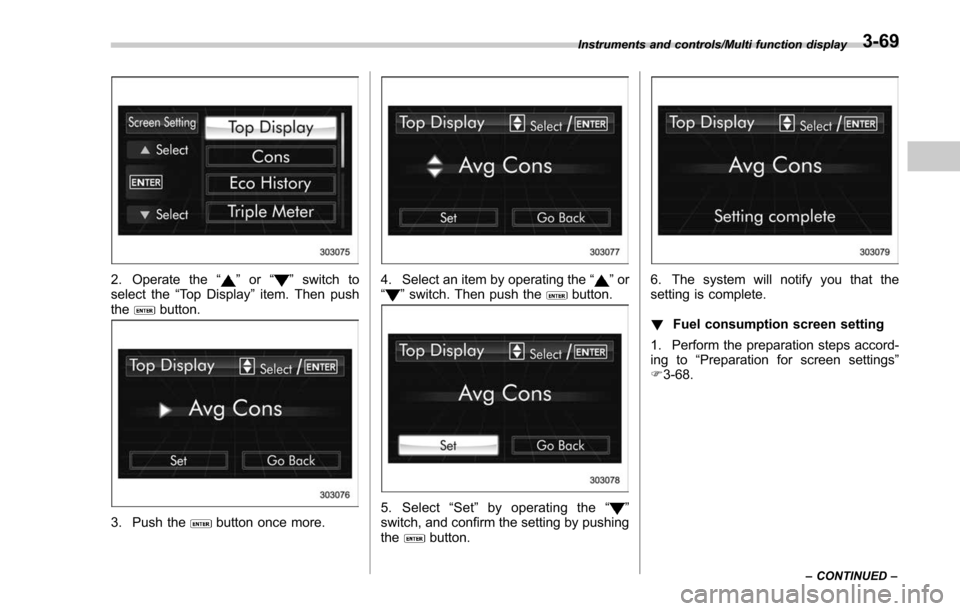
2. Operate the“”or “”switch to
select the “Top Display ”item. Then push
the
button.
3. Push thebutton once more.
4. Select an item by operating the “”or
“” switch. Then push thebutton.
5. Select “Set ”by operating the “”
switch, and confirm the setting by pushing
the
button.
6. The system will notify you that the
setting is complete.
! Fuel consumption screen setting
1. Perform the preparation steps accord-
ing to “Preparation for screen settings”
F 3-68.
Instruments and controls/Multi function display
–CONTINUED –3-69