SUBARU IMPREZA WRX STI 2012 Owners Manual
Manufacturer: SUBARU, Model Year: 2012, Model line: IMPREZA WRX STI, Model: SUBARU IMPREZA WRX STI 2012Pages: 463, PDF Size: 7.69 MB
Page 221 of 463
Black plate (177,1)
北米Model "A1130BE-A" EDITED: 2011/ 6/ 7
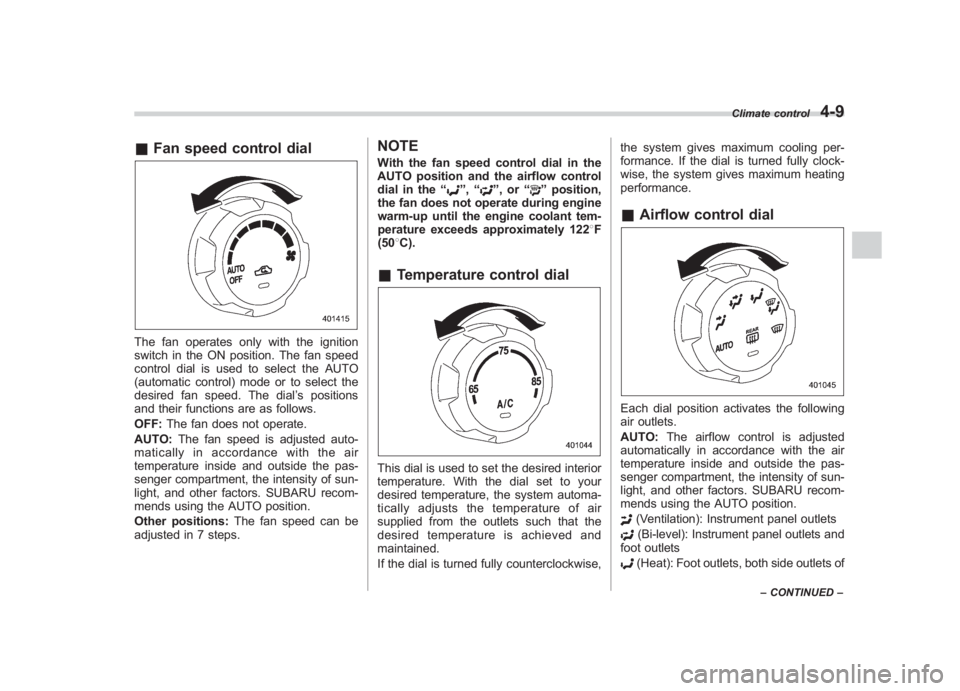
& Fan speed control dialThe fan operates only with the ignition
switch in the ON position. The fan speed
control dial is used to select the AUTO
(automatic control) mode or to select the
desired fan speed. The dial ’s positions
and their functions are as follows.
OFF: The fan does not operate.
AUTO: The fan speed is adjusted auto-
maticallyinaccordancewiththeair
temperature inside and outside the pas-
senger compartment, the intensity of sun-
light, and other factors. SUBARU recom-
mends using the AUTO position.
Other positions: The fan speed can be
adjusted in 7 steps.
NOTEWith the fan speed control dial in the
AUTO position and the airflow control
dial in the “
”, “
”,or “
”position,
the fan does not operate during engine
warm-up until the engine coolant tem-
perature exceeds approximately 1228 F
(50 8C).
& Temperature control dialThis dial is used to set the desired interior
temperature. With the dial set to your
desired temperature, the system automa-
tically adjusts the temperature of air
supplied from the outlets such that the
desired temperature is achieved and
maintained.
If the dial is turned fully counterclockwise, the system gives maximum cooling per-
formance. If the dial is turned fully clock-
wise, the system gives maximum heating
performance.
&
Airflow control dialEach dial position activates the following
air outlets.
AUTO: The airflow control is adjusted
automatically in accordance with the air
temperature inside and outside the pas-
senger compartment, the intensity of sun-
light, and other factors. SUBARU recom-
mends using the AUTO position.
(Ventilation): Instrument panel outlets(Bi-level): Instrument panel outlets and
foot outlets(Heat): Foot outlets, both side outlets of
Climate control
4-9
– CONTINUED –
4
Page 222 of 463
Black plate (178,1)
北米Model "A1130BE-A" EDITED: 2011/ 6/ 7
4-10
Climate control
the instrument panel and some through
windshield defroster outlets (A small
amount of air flows to the windshield and
both side windows to prevent fogging.)
(Heat-def): Windshield defroster out-
lets, foot outlets and both side outlets of
the instrument panel: Windshield defroster outlets and both
side outlets of the instrument panel
For details, refer to “Airflow selection”F 4-
2.
NOTEWhen the dial is placed in the “
”or
“
” position, the air inlet selection is
automatically set to “outside air ”
mode.
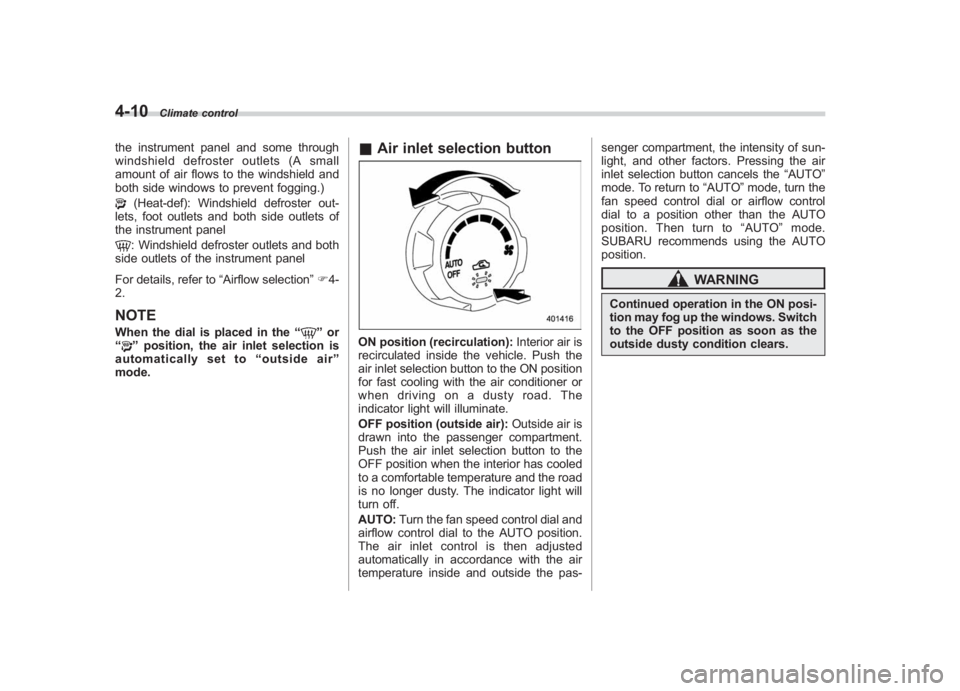
& Air inlet selection buttonON position (recirculation): Interior air is
recirculated inside the vehicle. Push the
air inlet selection button to the ON position
for fast cooling with the air conditioner or
when driving on a dusty road. The
indicator light will illuminate.
OFF position (outside air): Outside air is
drawn into the passenger compartment.
Push the air inlet selection button to the
OFF position when the interior has cooled
to a comfortable temperature and the road
is no longer dusty. The indicator light will
turn off.
AUTO: Turn the fan speed control dial and
airflow control dial to the AUTO position.
The air inlet control is then adjusted
automatically in accordance with the air
temperature inside and outside the pas- senger compartment, the intensity of sun-
light, and other factors. Pressing the air
inlet selection button cancels the
“AUTO”
mode. To return to “AUTO”mode, turn the
fan speed control dial or airflow control
dial to a position other than the AUTO
position. Then turn to “AUTO ”mode.
SUBARU recommends using the AUTO
position.
WARNING
Continued operation in the ON posi-
tion may fog up the windows. Switch
to the OFF position as soon as the
outside dusty condition clears.
Page 223 of 463
Black plate (179,1)
北米Model "A1130BE-A" EDITED: 2011/ 6/ 7
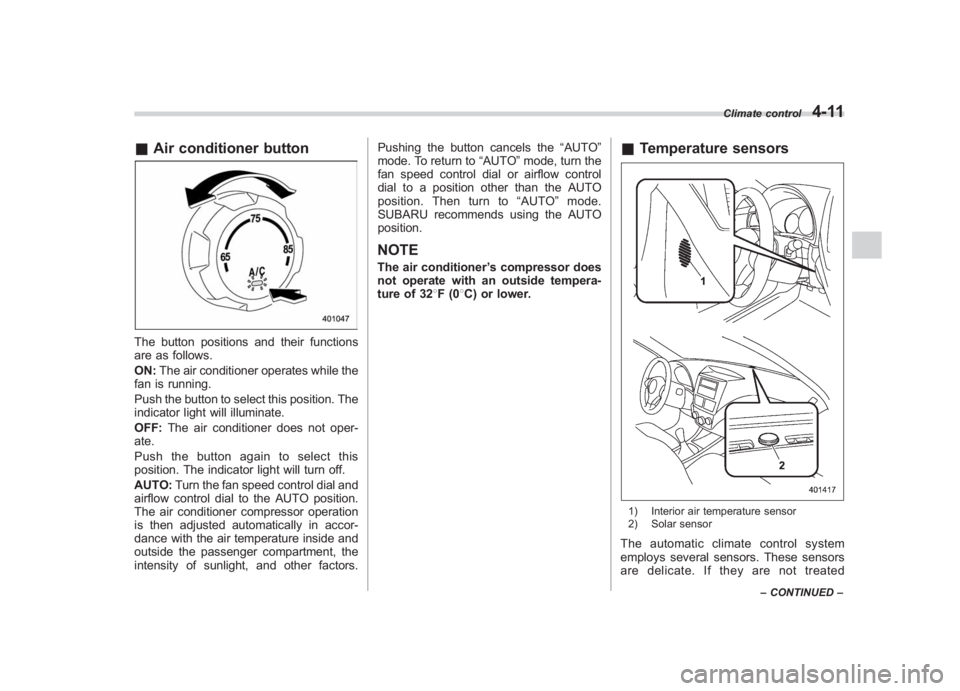
& Air conditioner buttonThe button positions and their functions
are as follows.
ON: The air conditioner operates while the
fan is running.
Push the button to select this position. The
indicator light will illuminate.
OFF: The air conditioner does not oper-
ate.
Push the button again to select this
position. The indicator light will turn off.
AUTO: Turn the fan speed control dial and
airflow control dial to the AUTO position.
The air conditioner compressor operation
is then adjusted automatically in accor-
dance with the air temperature inside and
outside the passenger compartment, the
intensity of sunlight, and other factors. Pushing the button cancels the
“AUTO”
mode. To return to “AUTO”mode, turn the
fan speed control dial or airflow control
dial to a position other than the AUTO
position. Then turn to “AUTO ”mode.
SUBARU recommends using the AUTO
position.
NOTEThe air conditioner ’s compressor does
not operate with an outside tempera-
ture of 32 8F(0 8C) or lower.
& Temperature sensors1) Interior air temperature sensor
2) Solar sensorThe automatic climate control system
employs several sensors. These sensors
are delicate. If they are not treated
Climate control
4-11
–CONTINUED –
4
Page 224 of 463
Black plate (180,1)
北米Model "A1130BE-A" EDITED: 2011/ 6/ 7
4-12
Climate control
properly and become damaged, the sys-
tem may not be able to control the interior
temperature correctly. To avoid damaging
the sensors, observe the following pre-
cautions.
– Do not subject the sensors to impact.
– Keep water away from the sensors.
– Do not cover the sensors.
The sensors are located as follows.
– Solar sensor: beside the windshield
defroster grille.
– Interior air temperature sensor: near
the ignition switch.
– Outside temperature sensor: behind
the front grille.
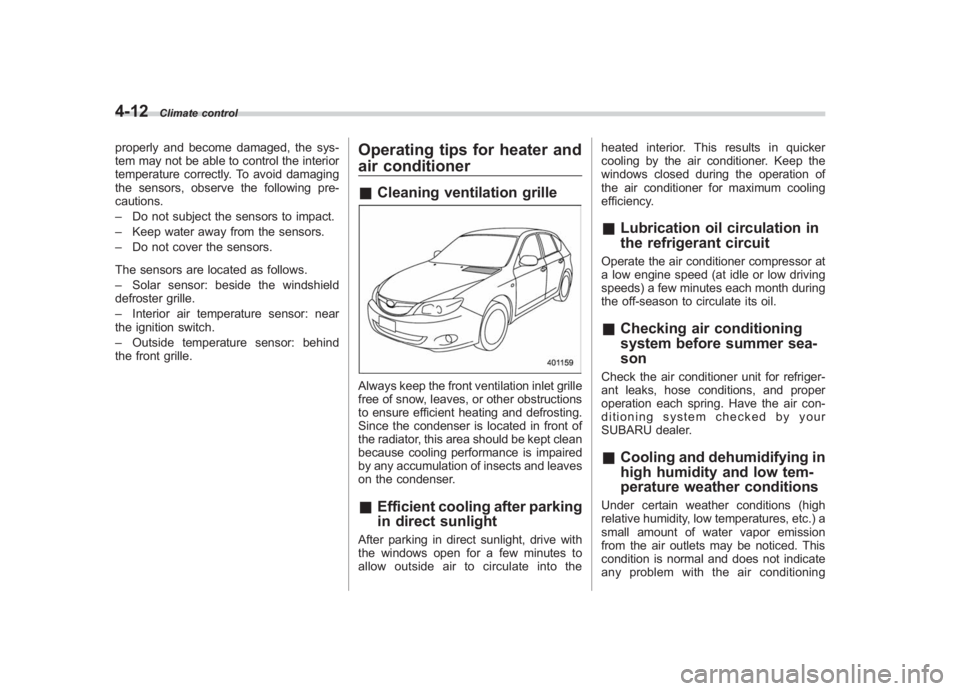
Operating tips for heater and
air conditioner& Cleaning ventilation grilleAlways keep the front ventilation inlet grille
free of snow, leaves, or other obstructions
to ensure efficient heating and defrosting.
Since the condenser is located in front of
the radiator, this area should be kept clean
because cooling performance is impaired
by any accumulation of insects and leaves
on the condenser.&Efficient cooling after parking
in direct sunlightAfter parking in direct sunlight, drive with
the windows open for a few minutes to
allow outside air to circulate into the heated interior. This results in quicker
cooling by the air conditioner. Keep the
windows closed during the operation of
the air conditioner for maximum cooling
efficiency.
&
Lubrication oil circulation in
the refrigerant circuitOperate the air conditioner compressor at
a low engine speed (at idle or low driving
speeds) a few minutes each month during
the off-season to circulate its oil.&Checking air conditioning
system before summer sea-
sonCheck the air conditioner unit for refriger-
ant leaks, hose conditions, and proper
operation each spring. Have the air con-
ditioning system checked by your
SUBARU dealer.&Cooling and dehumidifying in
high humidity and low tem-
perature weather conditionsUnder certain weather conditions (high
relative humidity, low temperatures, etc.) a
small amount of water vapor emission
from the air outlets may be noticed. This
condition is normal and does not indicate
any problem with the air conditioning
Page 225 of 463
Black plate (181,1)
北米Model "A1130BE-A" EDITED: 2011/ 6/ 7
system.& Air conditioner compressor
shut-off when engine is
heavily loadedTo improve acceleration and gas mileage,
the air conditioner compressor is designed
to temporarily shut off during air condi-
tioner operation whenever the accelerator
is fully depressed such as during rapid
acceleration or when driving on a steep
upgrade.&Refrigerant for your climate
control systemYour air conditioner uses ozone friendly
refrigerant HFC134a. Therefore, the meth-
od of adding, changing or checking the
refrigerant is different from the method for
CFC12 (freon). Consult your SUBARU
dealer for service. Repairs needed as a
result of using the wrong refrigerant are
not covered under warranty.
Air filtration systemReplace the filter element according to the
replacement schedule as follows. This
schedule should be followed to maintain
the filter ’s dust collection ability. Under
extremely dusty conditions, the filter
should be replaced more frequently. It is
recommended that you have your filter
checked or replaced by your SUBARU
dealer. For replacement, use only a
genuine SUBARU air filter kit.Replacement schedule:
Every 12 months or 7,500 miles (12,000
km) whichever comes first
CAUTION
Contact your SUBARU dealer if the
following occurs, even if it is not yet
time to change the filter:
. Reduction of the airflow through
the vents.
. Windshield gets easily fogged or
misted.NOTEThe filter can influence the air condi-
tioning, heating and defroster perfor- mance if not properly maintained.
&
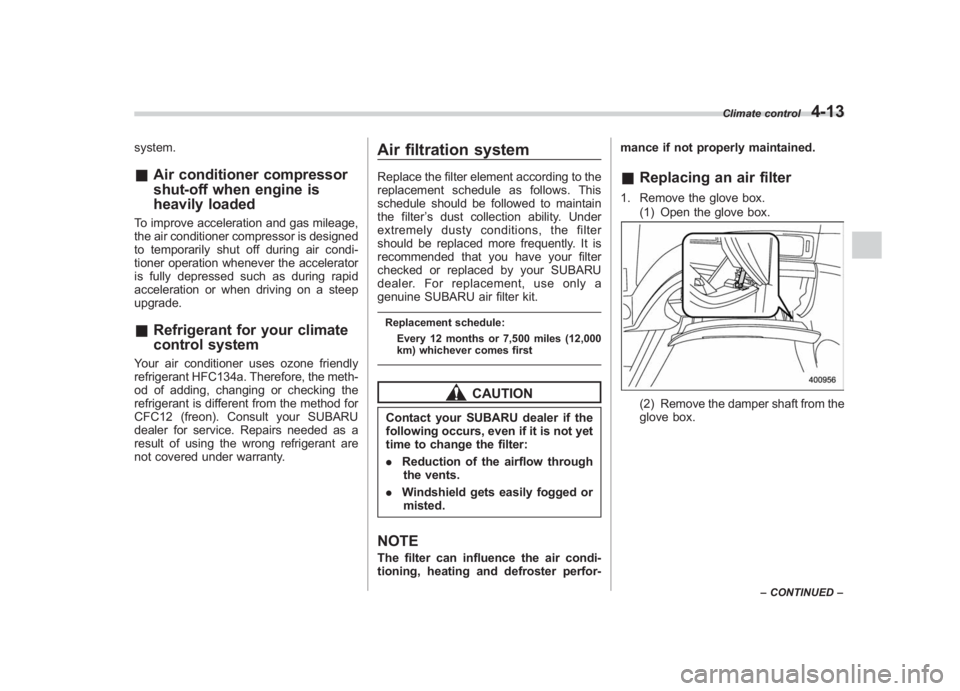
Replacing an air filter1. Remove the glove box.
(1) Open the glove box.
(2) Remove the damper shaft from the
glove box.
Climate control
4-13
–CONTINUED –
4
Page 226 of 463
Black plate (182,1)
北米Model "A1130BE-A" EDITED: 2011/ 6/ 7
4-14
Climate control
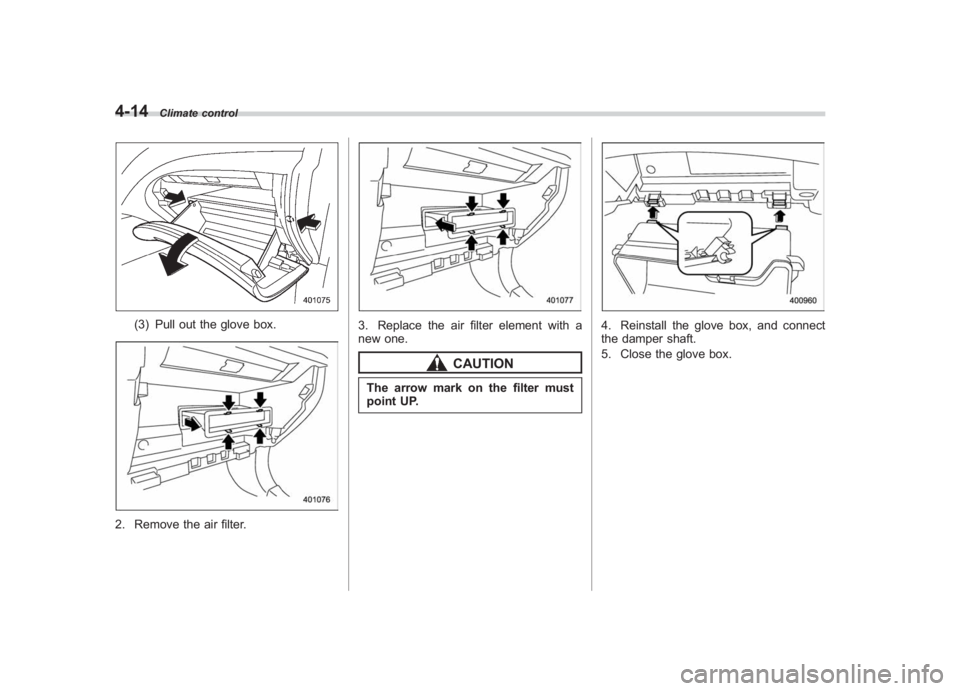
(3) Pull out the glove box.
2. Remove the air filter.
3. Replace the air filter element with a
new one.
CAUTION
The arrow mark on the filter must
point UP.
4. Reinstall the glove box, and connect
the damper shaft.
5. Close the glove box.
Page 227 of 463
Black plate (183,1)
北米Model "A1130BE-A" EDITED: 2011/ 6/ 7
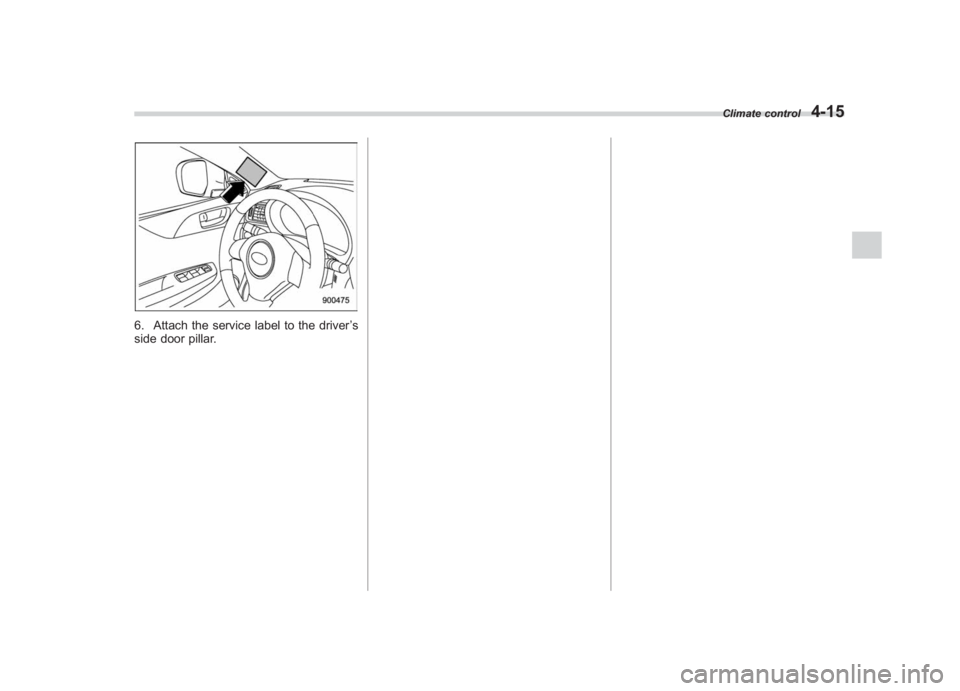
6. Attach the service label to the driver ’s
side door pillar.
Climate control
4-15
4
Page 228 of 463
Black plate (2,1)
Model "ALL_MODEL_MEMO" EDITED: 2007/ 6/ 22
Left Page————————————————————————————————————————
————————————————————————————————————————
————————————————————————————————————————
————————————————————————————————————————
————————————————————————————————————————
————————————————————————————————————————
————————————————————————————————————————
————————————————————————————————————————
————————————————————————————————————————
————————————————————————————————————————
————————————————————————————————————————
————————————————————————————————————————
————————————————————————————————————————
Page 229 of 463
Black plate (9,1)
北米Model "A1130BE-A" EDITED: 2011/ 6/ 6
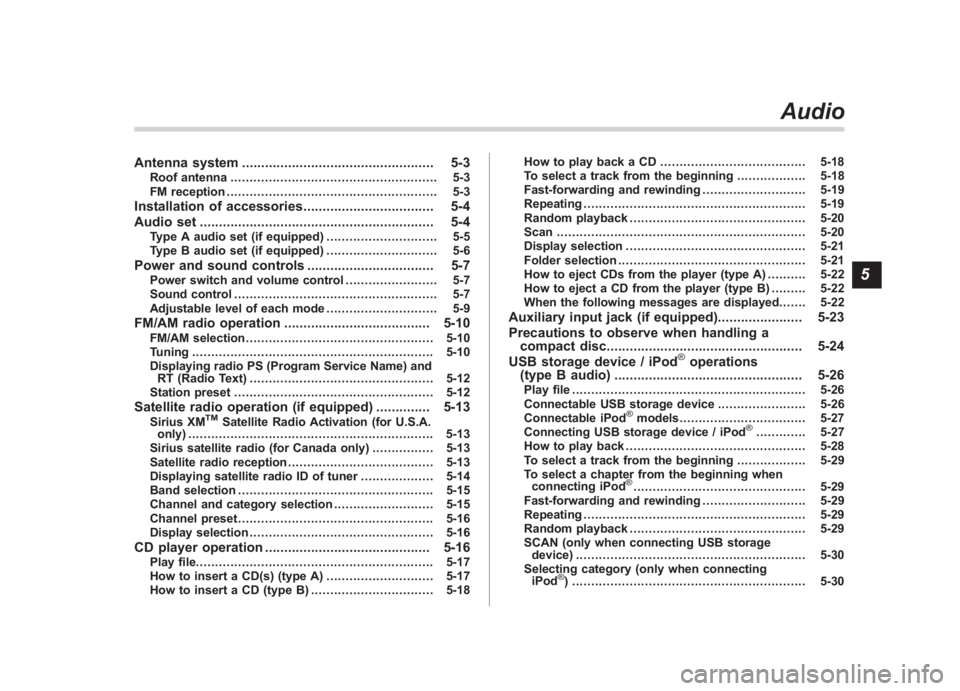
Antenna system .................................................. 5-3
Roof antenna...................................................... 5-3
FM reception ....................................................... 5-3
Installation of accessories .................................. 5-4
Audio set ............................................................. 5-4
Type A audio set (if equipped) ............................. 5-5
Type B audio set (if equipped) ............................. 5-6
Power and sound controls................................. 5-7
Power switch and volume control ........................ 5-7
Sound control ..................................................... 5-7
Adjustable level of each mode ............................. 5-9
FM/AM radio operation...................................... 5-10
FM/AM selection................................................. 5-10
Tuning ............................................................... 5-10
Displaying radio PS (Program Service Name) and RT (Radio Text) ................................................ 5-12
Station preset .................................................... 5-12
Satellite radio operation (if equipped) .............. 5-13
Sirius XM
TM
Satellite Radio Activation (for U.S.A.
only) ................................................................ 5-13
Sirius satellite radio (for Canada only) ................ 5-13
Satellite radio reception ...................................... 5-13
Displaying satellite radio ID of tuner ................... 5-14
Band selection ................................................... 5-15
Channel and category selection .......................... 5-15
Channel preset ................................................... 5-16
Display selection ................................................ 5-16
CD player operation ........................................... 5-16
Play file.............................................................. 5-17
How to insert a CD(s) (type A) ............................ 5-17
How to insert a CD (type B) ................................ 5-18 How to play back a CD
...................................... 5-18
To select a track from the beginning .................. 5-18
Fast-forwarding and rewinding . .......................... 5-19
Repeating .......................................................... 5-19
Random playback .............................................. 5-20
Scan ................................................................. 5-20
Display selection ............................................... 5-21
Folder selection ................................................. 5-21
How to eject CDs from the player (type A) ..... ..... 5-22
How to eject a CD from the player (type B) .... ..... 5-22
When the following messages are displayed. . ..... 5-22
Auxiliary input jack (if equipped)...................... 5-23
Precautions to observe when handling a compact disc ................................................... 5-24
USB storage device / iPod
®operations
(type B audio) ................................................. 5-26
Play file............................................................. 5-26
Connectable USB storage device ....................... 5-26
Connectable iPod
®models ................................. 5-27
Connecting USB storage device / iPod
®............. 5-27
How to play back ............................................... 5-28
To select a track from the beginning .................. 5-29
To select a chapter from the beginning when connecting iPod
®............................................. 5-29
Fast-forwarding and rewinding . .......................... 5-29
Repeating .......................................................... 5-29
Random playback .............................................. 5-29
SCAN (only when connecting USB storage device) ............................................................ 5-30
Selecting category (only when connecting iPod
®) ............................................................. 5-30
Audio
5
Page 230 of 463
Black plate (10,1)
北米Model "A1130BE-A" EDITED: 2011/ 6/ 2
Audio
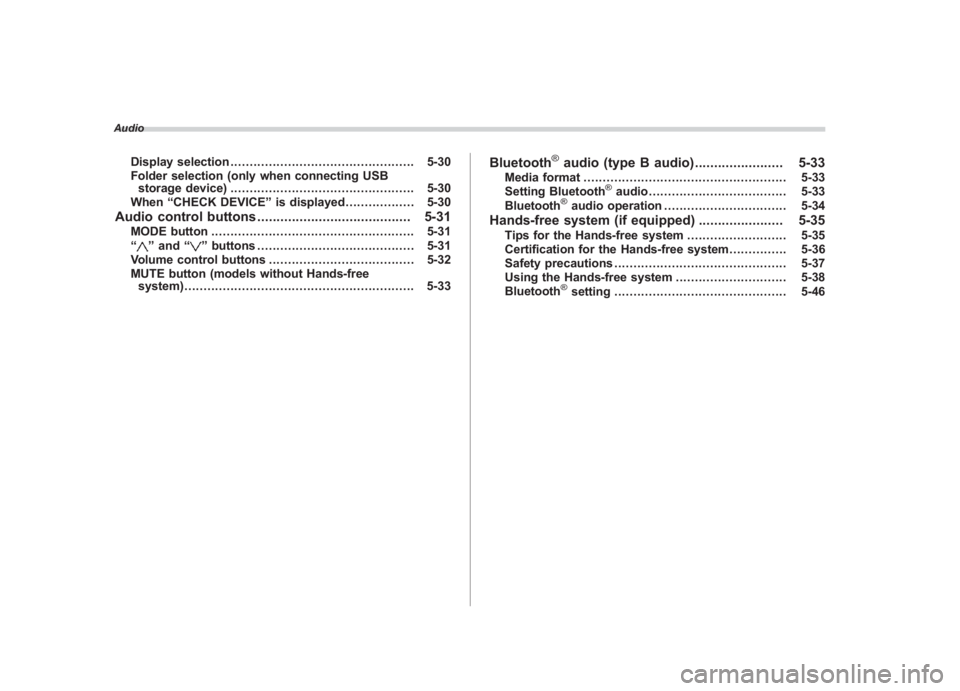
Display selection ................................................ 5-30
Folder selection (only when connecting USB storage device) ................................................ 5-30
When “CHECK DEVICE ”is displayed .................. 5-30
Audio control buttons ........................................ 5-31
MODE button..................................................... 5-31
“
” and “
”buttons ......................................... 5-31
Volume control buttons ...................................... 5-32
MUTE button (models without Hands-free system) ............................................................ 5-33
Bluetooth
®audio (type B audio) ....................... 5-33
Media format..................................................... 5-33
Setting Bluetooth
®audio .................................... 5-33
Bluetooth
®audio operation ................................ 5-34
Hands-free system (if equipped) ...................... 5-35
Tips for the Hands-free system.......................... 5-35
Certification for the Hands-free system ............... 5-36
Safety precautions ............................................. 5-37
Using the Hands-free system ............................. 5-38
Bluetooth
®setting ............................................. 5-46