navigation SUBARU LEGACY 2010 5.G Navigation Manual
[x] Cancel search | Manufacturer: SUBARU, Model Year: 2010, Model line: LEGACY, Model: SUBARU LEGACY 2010 5.GPages: 90, PDF Size: 28.14 MB
Page 11 of 90
Navigation 25
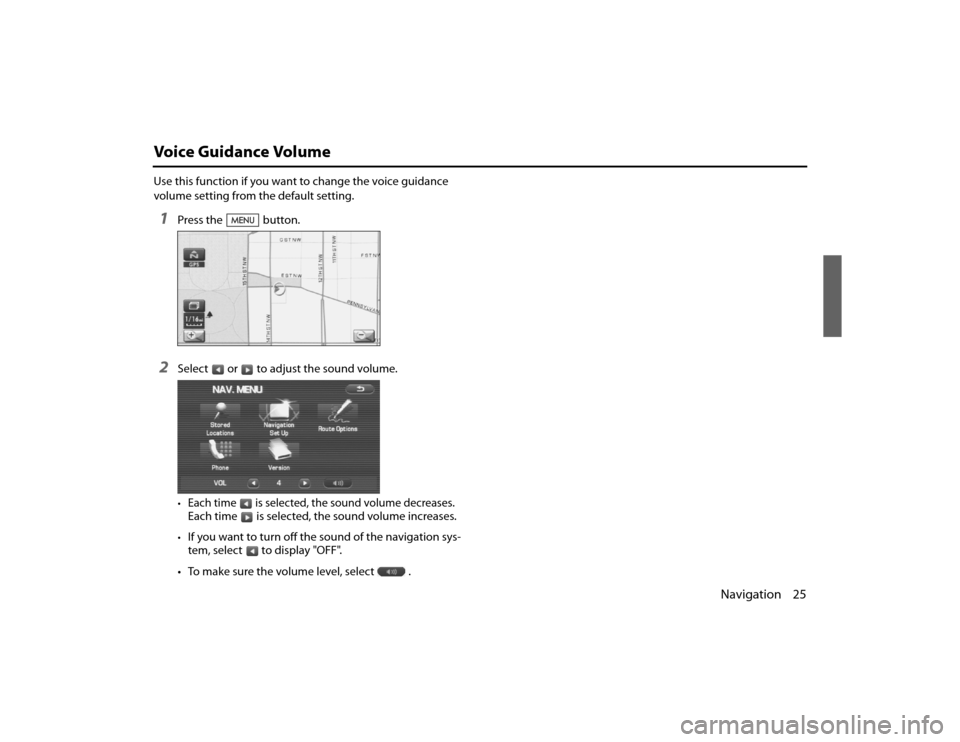
Voice Guidance VolumeUse this function if you want to change the voice guidance
volume setting from the default setting.1
Press the button.
2
Select or to adjust the sound volume.•Each time is selected, the sound volume decreases.Each time is selected, the sound volume increases.•If you want to turn off the sound of the navigation sys-
tem, select to display "OFF".
• To make sure the volume level, select .
Legacy_B2462BE-A.book Page 25 Wednesday, April 22, 2009 5:32 PM
Page 12 of 90
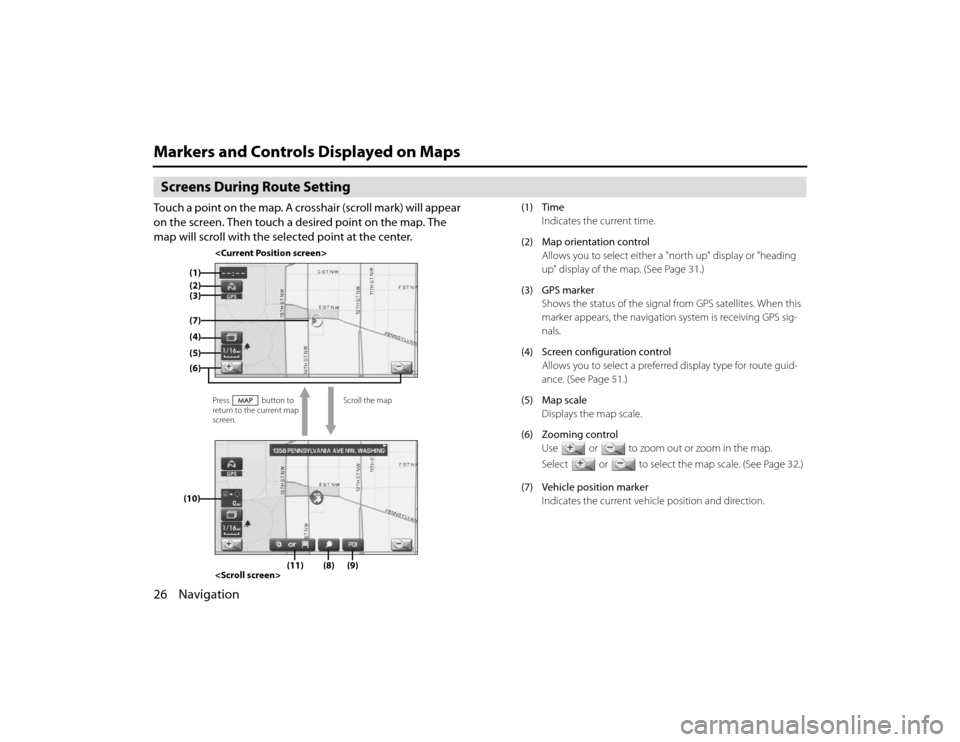
26 NavigationMarkers and Controls Displayed on MapsScreens During Route SettingTouch a point on the map. A crosshair (scroll mark) will appear
on the screen. Then touch a desired point on the map. The
map will scroll with the selected point at the center.
(1) TimeIndicates the current time.
(2) Map orientation control Allows you to select either a "north up" display or "heading
up" display of the map. (See Page 31.)
(3) GPS marker Shows the status of the signal from GPS satellites. When this
marker appears, the navigation system is receiving GPS sig-
nals.
(4) Screen configuration control Allows you to select a preferred display type for route guid-
ance. (See Page 51.)
(5) Map scale Displays the map scale.
(6) Zooming control Use or to zoom out or zoom in the map.
Select or to select the map scale. (See Page 32.)
(7) Vehicle position marker Indicates the current vehicle position and direction.
(4)
Scroll the map
return to the current map
screen.
(1)
(2)(6)(7)(5)(10)
(9)
(8)
(11)(3)
Legacy_B2462BE-A.book Page 26 Wednesday, April 22, 2009 5:32 PM
Page 13 of 90
Navigation 27
Markers and Controls Displayed on Maps
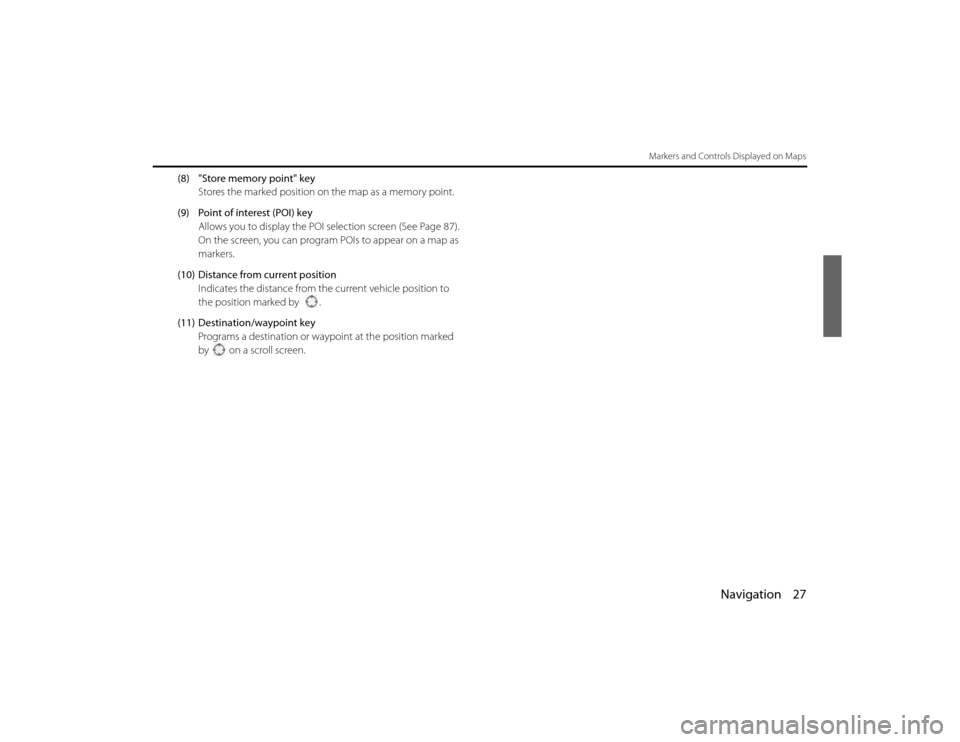
(8) "Store memory point" keyStores the marked position on the map as a memory point.
(9) Point of interest (POI) key Allows you to display the POI selection screen (See Page 87).
On the screen, you can program POIs to appear on a map as
markers.
(10) Distance from current position Indicates the distance from th e current vehicle position to
the position marked by .
(11) Destination/waypoint key Programs a destination or wayp oint at the position marked
by on a scroll screen.
Legacy_B2462BE-A.book Page 27 Wednesday, April 22, 2009 5:32 PM
Page 14 of 90
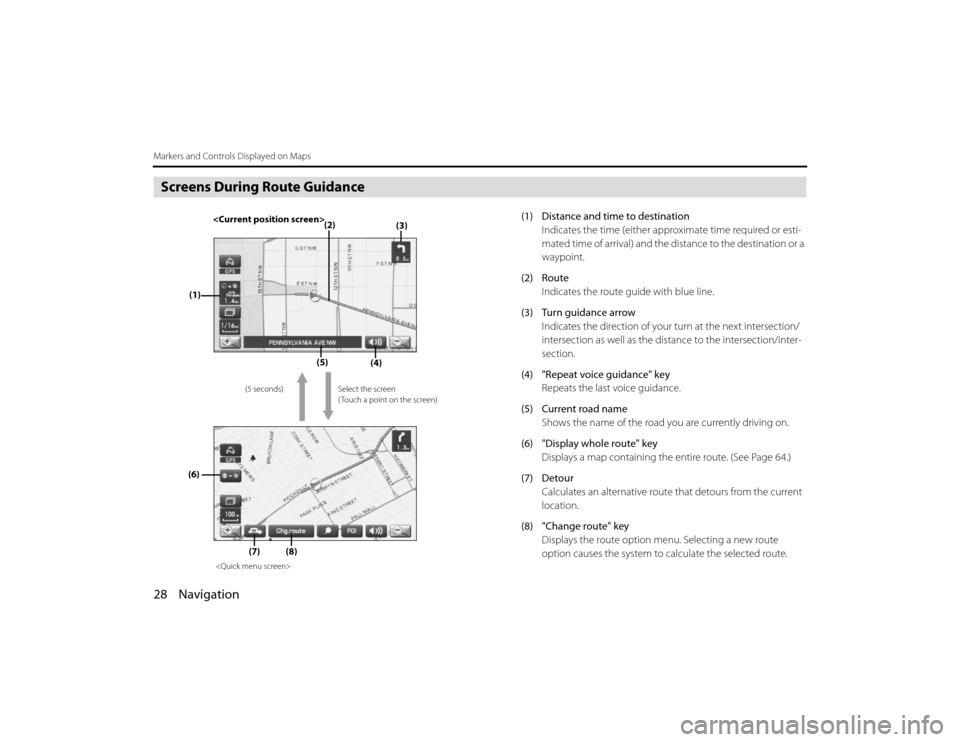
28 NavigationMarkers and Controls Displayed on MapsScreens During Route Guidance
(1) Distance and time to destinationIndicates the time (either approximate time required or esti-
mated time of arrival) and the di stance to the destination or a
waypoint.
(2) Route Indicates the route guide with blue line.
(3) Turn guidance arrow Indicates the direction of your turn at the next intersection/
intersection as well as the distance to the intersection/inter-
section.
(4) "Repeat voice guidance" key Repeats the last voice guidance.
(5) Current road name Shows the name of the road you are currently driving on.
(6) "Display whole route" key Displays a map containing the entire route. (See Page 64.)
(7) Detour Calculates an alternative route that detours from the current
location.
(8) "Change route" key Displays the route option menu. Selecting a new route
option causes the system to calculate the selected route.
(3)
(2)
(1)
(4)
(5)
(6)
(7)
Select the screen
( Touch a point on the screen)
(5 seconds)
(8)
Legacy_B2462BE-A.book Page 28
Wednesday, April 22, 2009 5:32 PM
Page 15 of 90
Navigation 29
Menu Screen Keys and Functions
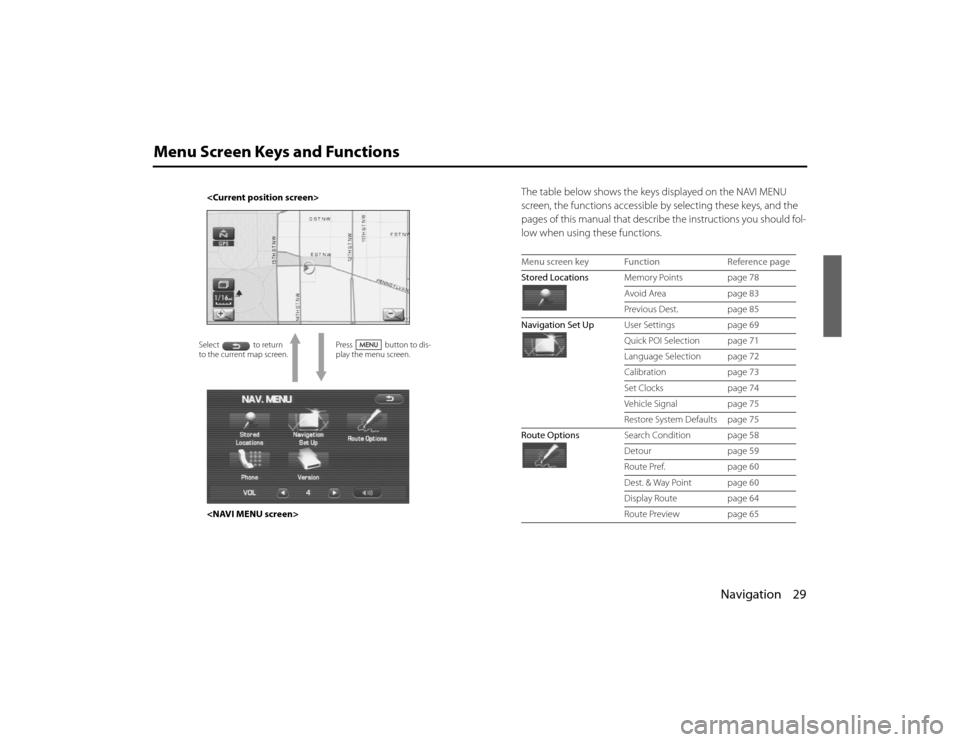
The table below shows the keys displayed on the NAVI MENU
screen, the functions accessible by selecting these keys, and the
pages of this manual that describe the instructions you should fol-
low when using these functions.
Press button to dis-
play the menu screen.
to the current map screen.
Menu screen key Function Reference page
Stored Locations Memory Points page 78
Avoid Area page 83
Previous Dest. page 85
Navigation Set Up User Settings page 69
Quick POI Selection page 71
Language Selection page 72
Calibration page 73
Set Clocks page 74
Vehicle Signal page 75
Restore System Defaults page 75
Route Options Search Condition page 58
Detour page 59
Route Pref. page 60
Dest. & Way Point page 60
Display Route page 64
Route Preview page 65
Legacy_B2462BE-A.book Page 29 Wednesday, April 22, 2009 5:32 PM
Page 16 of 90
30 NavigationMenu Screen Keys and Functions
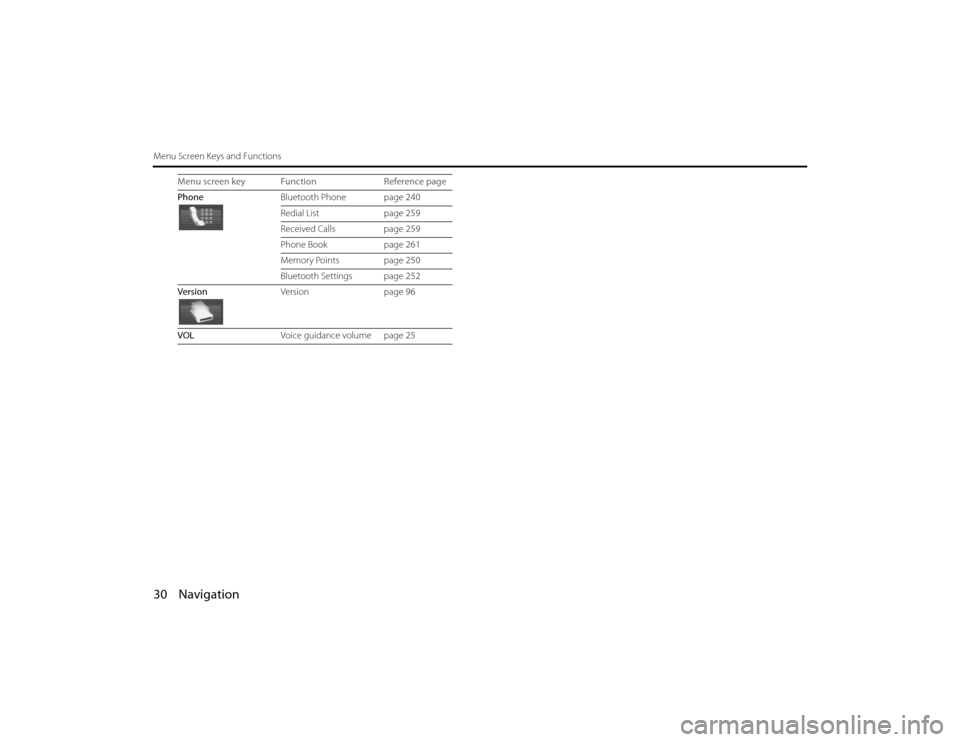
PhoneBluetooth Phone page 240
Redial Listpage 259
Received Calls page 259
Phone Book page 261
Memory Points page 250
Bluetooth Settings page 252
Version Versionpage 96
VOL Voice guidance volume page 25
Menu screen key Function
Reference page
Legacy_B2462BE-A.book Page 30 Wednesday, April 22, 2009 5:32 PM
Page 17 of 90
Navigation 31
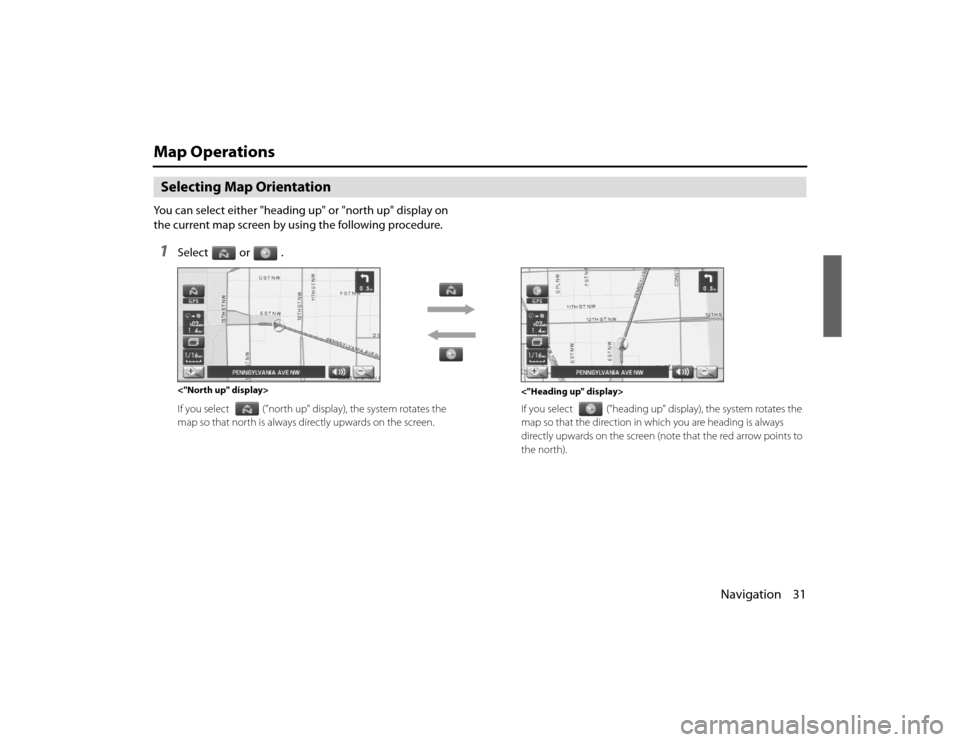
Map OperationsSelecting Map OrientationYou can select either "heading up" or "north up" display on
the current map screen by using the following procedure.1
Select or .If you select ("north up" display), the system rotates the
map so that north is always directly upwards on the screen. If you select
("heading up" display), the system rotates the
map so that the direction in wh ich you are heading is always
directly upwards on the screen (note that the red arrow points t o
the north).
<"Heading up" display>
<"North up" display>
Legacy_B2462BE-A.book Page 31
Wednesday, April 22, 2009 5:32 PM
Page 18 of 90
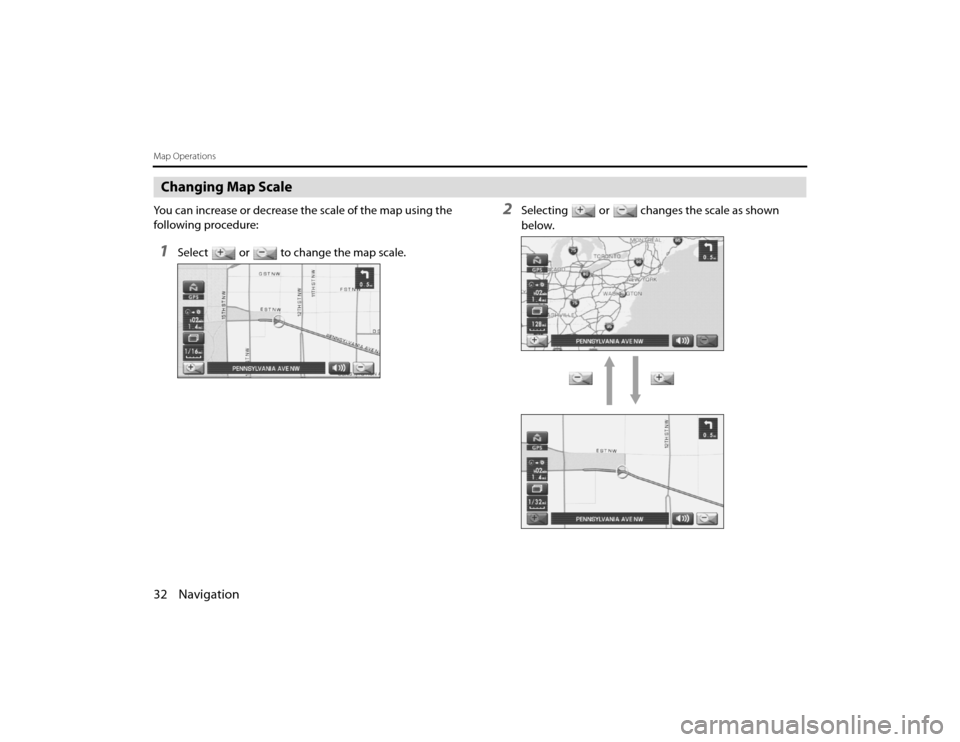
32 NavigationMap OperationsChanging Map ScaleYou can increase or decrease the scale of the map using the
following procedure:1
Select or to change the map scale.
2
Selecting or changes the scale as shown
below.
Legacy_B2462BE-A.book Page 32 Wednesday, April 22, 2009 5:32 PM
Page 19 of 90
Navigation 33
Map Operations
NOTE• Briefly touching or allows you to change the ma p scale.
• Touching or for a long time allows you to ch ange the map scale.
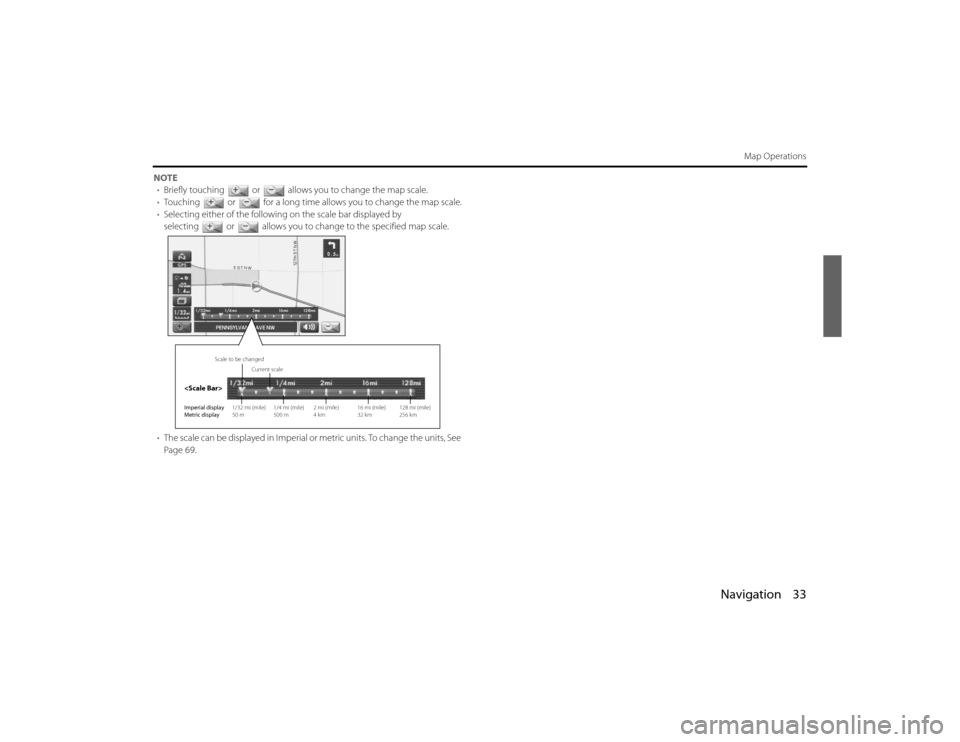
• Selecting either of the followin g on the scale bar displayed by
selecting or allows you to change to the specifie d map scale.
• The scale can be displayed in Imperial or metric units. To change the units, See
Page 69.
Imperial display
Metric display 1/32 mi (mile)
50 m1/4 mi (mile)
500 m2 mi (mile)
4 km 16 mi (mile)
32 km128 mi (mile)
256 km
Current scale
Scale to be changed
Legacy_B2462BE-A.book Page 33
Wednesday, April 22, 2009 5:32 PM
Page 20 of 90
34 NavigationSetting RouteSetting Destination
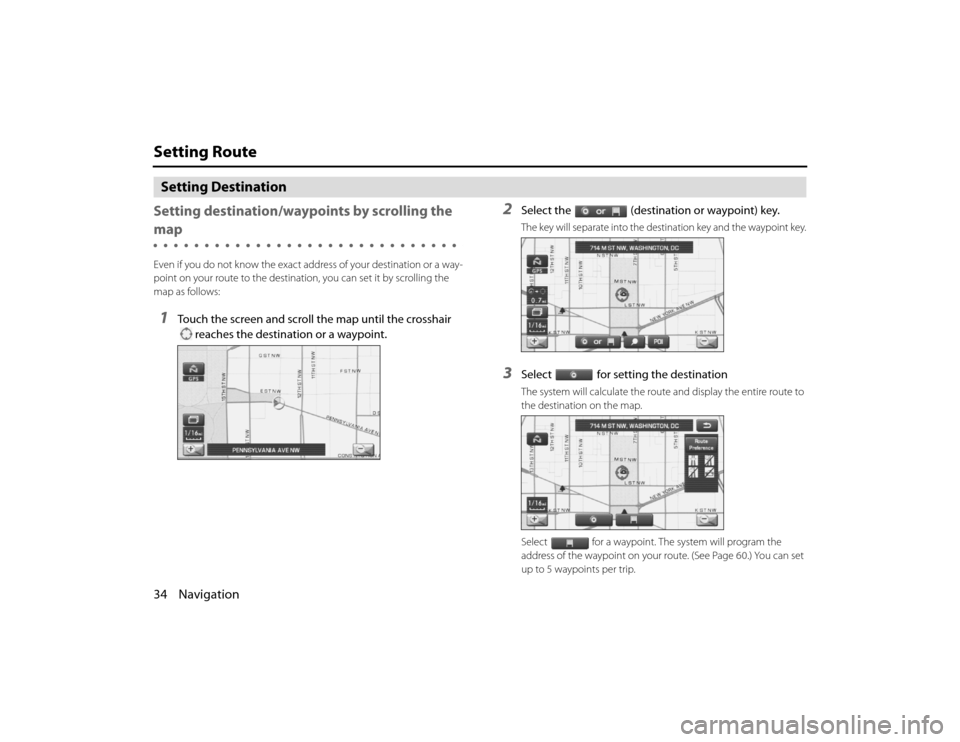
Setting destination/wayp oints by scrolling the mapEven if you do not know the exact address of your destination or a way-
point on your route to the destination, you can set it by scrolling the
map as follows:1
Touch the screen and scroll the map until the crosshair
reaches the destination or a waypoint.
2
Select the (destination or waypoint) key.The key will separate into the destination key and the waypoint key.
3
Select for setting the destinationThe system will calculate the route and display the entire route to
the destination on the map.
Select for a waypoint. The system will program the
address of the waypoint on your route. (See Page 60.) You can set
up to 5 waypoints per trip.
Legacy_B2462BE-A.book Page 34 Wednesday, April 22, 2009 5:32 PM