SUBARU LEGACY 2012 5.G Owners Manual
Manufacturer: SUBARU, Model Year: 2012, Model line: LEGACY, Model: SUBARU LEGACY 2012 5.GPages: 474, PDF Size: 17.45 MB
Page 201 of 474
5-18Audio
&Station preset
! How to preset stations
1. Select the preferred reception mode.
2. Select the preferred station.
3. Press and hold one of the preset
buttons (from
to) to store the
frequency. If the button is pressed briefly,
the preceding selection will remain in the
memory.
NOTE . Up to six stations for each reception
mode may be preset. . If the connection between the radio
and battery is broken for any reason
such as vehicle maintenance or radio
removal, all stations stored in the
preset buttons are cleared. If this
occurs, it is necessary to reset the
preset buttons.. If a cell phone is placed near the
radio, it may cause the radio to emit
noise when a phone call is received.
This noise does not indicate a radiomalfunction.. For type C audio, if you press and
hold a preset button while receiving a
broadcasting station with SPS (Supple-
mental Program Service), the station
will be stored in the memory for that preset button. !
Selecting preset stations
1. Select the preferred reception mode.
2. Press the preferred preset button (from
to) briefly.
NOTE
For type C audio, if the preset button
which stores a broadcasting station
with SPS (Supplemental Program Ser-
vice) while the HD Radio OFF mode isselected, “No digital data available ”will
be displayed and the volume will be
reduced to zero. ! Auto-store
Auto-store button:
Type A audio
Type B audio
Type C audio
Using the Auto-store function, you can
automatically store 6 stations on the current waveband by pressing and holding
the Auto-store button. Use Auto-store to
quickly find the strongest stations, for
example when traveling through different
reception areas. NOTE .
When you use Auto-store, the new
stations replace any stations pre-
viously stored.. Interrupting Auto-store: If you acci-
dentally press the Auto-store button,
you can cancel the Auto-store function
before it has been completed as fol-lows.
–Switch to the other source mode.
– Switch to the other band.
– Press the Auto-store button.
– Press the “SCAN ”button (type A
and B audio). – Press the “SEEK ”button.
– Press any of the preset buttons.
– Turn the “TUNE ”dial.
– Turn off the audio system.
– Turn off the ignition switch.
. When you use the Auto-store func-
tion while selecting the FM mode, even
if you have selected the FM1 or FM2
station, the new stations are stored in
the FM3 (type A and C audio)/FM-AS
(type B audio) station memory. . For type B audio, when you use the
Page 202 of 474
Auto-store function while selecting the
AM mode, even if you have selected the“AM ”station, the new stations are
stored in the AM-AS station memory. . If it is only possible to receive less
than 6 stations, the available stations
are stored from preset 1 in order by
frequency and the unused preset but-
tons are not registered to a station. . For type A and C audio, the pre-
viously registered station memories of
the unused preset buttons are cleared. . For type B audio, the previously
registered station memories of the
unused preset buttons are not cleared. . If no stations can be received, the
previously stored stations are not re- placed. . After pressing the Auto-store but-
ton, if more than 1 station is stored, the
radio receives the station stored in
preset 1. . After pressing the Auto-store but-
ton, if no stations are stored, the radio
receives the band and station that the
radio received before pressing thebutton. Satellite radio operation (if equipped)
To receive satellite radio, it is necessary to
install the SUBARU genuine satellite
receiver for some models, and to enter
into a contract with a satellite radio
network service such as
“Sirius XM
TM
satellite radio ”(for U.S.A. only). For de-
tails, please contact your SUBARU dealer. & Sirius XM
TMSatellite Radio
Activation (for U.S.A. only)
Models with Sirius XM
TMare eligible for a
3-month complimentary subscription to
the Sirius XM
TMSatellite Radio service.
! Activation process
If you would like to activate your Satellite
Radio online, please visit
http://www.sir-iusxm.com/activationhelp and follow the
step-by-step instructions for easy activa- tion. & Satellite radio reception
Satellite radio signals are best received in
areas with a clear view of the open sky. In
areas where there are tall buildings, trees,
tunnels or other structures that may
obstruct the signal of the satellites, there
may be signal interruptions. Other circum- stances that may result in signal loss
include driving near a wall, steep cliff, hill
or driving on the lower level of a multi-
tiered road or inside of a parking garage.
To help reduce this condition, satellite
radio providers have installed ground-
based repeaters in heavily populated
areas. However, you may still experience
reception problems in some areas. !
Sirius XM
TMsatellite radio reception
tips (for U.S.A. only —if equipped)
The Sirius XM
TMsatellite radio receiver
that is fitted to your vehicle receives the
necessary signals from two specially
designated satellites that are in a geosta-
tionary orbit over the equator. One satellite
covers the east coast and the other covers
the west coast. Both of them direct their
signals north. These signals are then
relayed throughout the radio reception
area by a network of ground repeater
stations. The satellite radio signals are
transmitted as “line of sight ”signals. The
line of sight signals can be blocked by
objects such as buildings, but the network
of repeater stations allows signal cover-
age within urban areas such as cities.
You may experience problems in receiving
Sirius XM
TMsatellite radio signals in the
following situations. Audio
5-19
– CONTINUED –
Page 203 of 474
5-20Audio
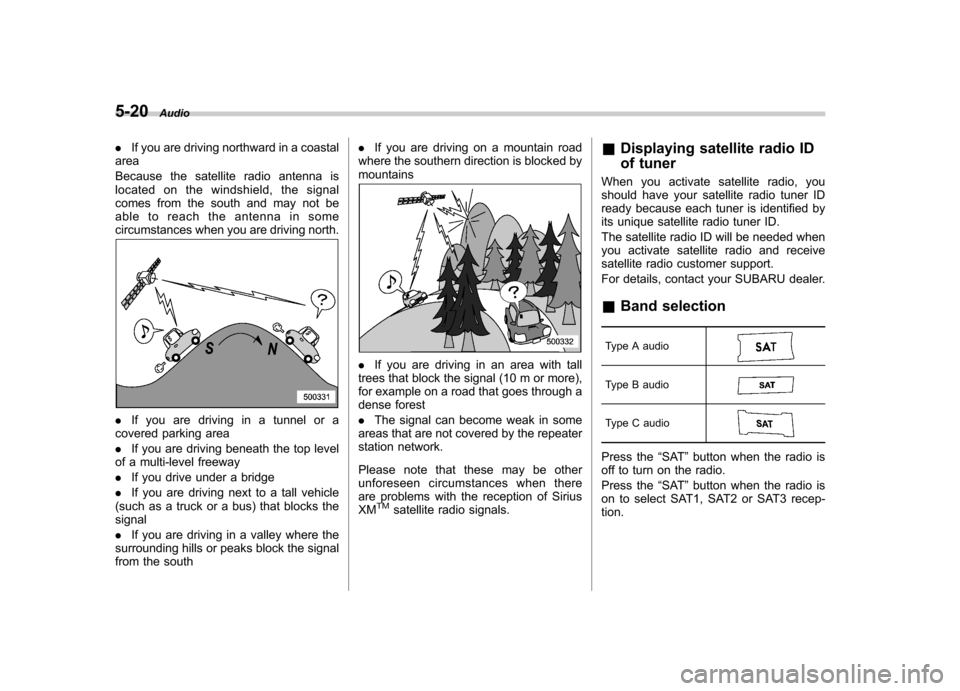
.If you are driving northward in a coastal
area
Because the satellite radio antenna is
located on the windshield, the signal
comes from the south and may not be
able to reach the antenna in some
circumstances when you are driving north.
. If you are driving in a tunnel or a
covered parking area . If you are driving beneath the top level
of a multi-level freeway. If you drive under a bridge
. If you are driving next to a tall vehicle
(such as a truck or a bus) that blocks the signal . If you are driving in a valley where the
surrounding hills or peaks block the signal
from the south .
If you are driving on a mountain road
where the southern direction is blocked bymountains
. If you are driving in an area with tall
trees that block the signal (10 m or more),
for example on a road that goes through a
dense forest . The signal can become weak in some
areas that are not covered by the repeater
station network.
Please note that these may be other
unforeseen circumstances when there
are problems with the reception of SiriusXM
TMsatellite radio signals. &
Displaying satellite radio ID
of tuner
When you activate satellite radio, you
should have your satellite radio tuner ID
ready because each tuner is identified by
its unique satellite radio tuner ID.
The satellite radio ID will be needed when
you activate satellite radio and receive
satellite radio customer support.
For details, contact your SUBARU dealer. & Band selection
Type A audio
Type B audio
Type C audio
Press the “SAT ”button when the radio is
off to turn on the radio.
Press the “SAT ”button when the radio is
on to select SAT1, SAT2 or SAT3 recep- tion.
Page 204 of 474
&Channel and category selec- tion
! Channel selection by operating the dial
“ TUNE ”dial:
Type A audio
Type B audio
Type C audio
Turn the “TUNE ”dial clockwise to select
the next channel and turn the “TUNE ”dial
counterclockwise to select the previous channel. !
Channel selection by pressing the
button (type A audio)
When in the SAT mode, briefly press the “SEEK ”button “”or “”to select the
channel. !
Skip channel selection (type A and
B audio)
When in the SAT mode, press and hold
the following buttons to change to the
channel selection mode.
Type A audio:
1) Change the channel up by 10 channels
2) Change the channel down by 10 chan- nels
Type B audio:
Change the channel
up by 10 channels
Change the channel
down by 10 channels
Audio 5-21
– CONTINUED –
Page 205 of 474
5-22Audio
!Category selection (type C audio)
Change the cate-
gory up by one step
Change the cate-
gory down by one step
To activate the category search mode,
press the “”or “”button. When in the
category search mode, press the “”or
“” button to change the category up or
down.
When a category is selected, turning the “ TUNE ”dial selects channels only within
the selected category.
The control function returns to the normal
mode after approximately 6 seconds. ! Channel scan (type C audio)
“ SCAN/A.S ”button
Press the “SCAN/A.S ”button to change
the radio to the SCAN mode. In this mode,
under the selected category, the radio
scans through the channel until a station
is found. The radio will stop at the station
for 5 seconds while displaying the channel
number, after which scanning will continue
until the entire channel has been scanned. Press the
“SCAN/A.S ”button again to
cancel the SCAN mode and to stop on any
displayed channel.
& Channel preset
! How to preset channels
1. Press the “SAT ”button to select SAT1,
SAT2 and SAT3 reception.
2. Select the desired channel.
3. Press and hold one of the preset
buttons (from
to) to store the
channel. If the button is pressed briefly,
the preceding selection will remain in the
memory.
NOTE . Up to six SAT1, SAT2 and SAT3
channels each may be preset. . If the connection between the radio
and battery is broken for any reason
such as vehicle maintenance or radio
removal, all channels stored in the
preset buttons are cleared. If this
occurs, it is necessary to reset the
preset channels. !
Selecting preset channels
1. Press the “SAT ”button to select SAT1,
SAT2 or SAT3 reception.
2. Press the preferred preset button (from
to) briefly.
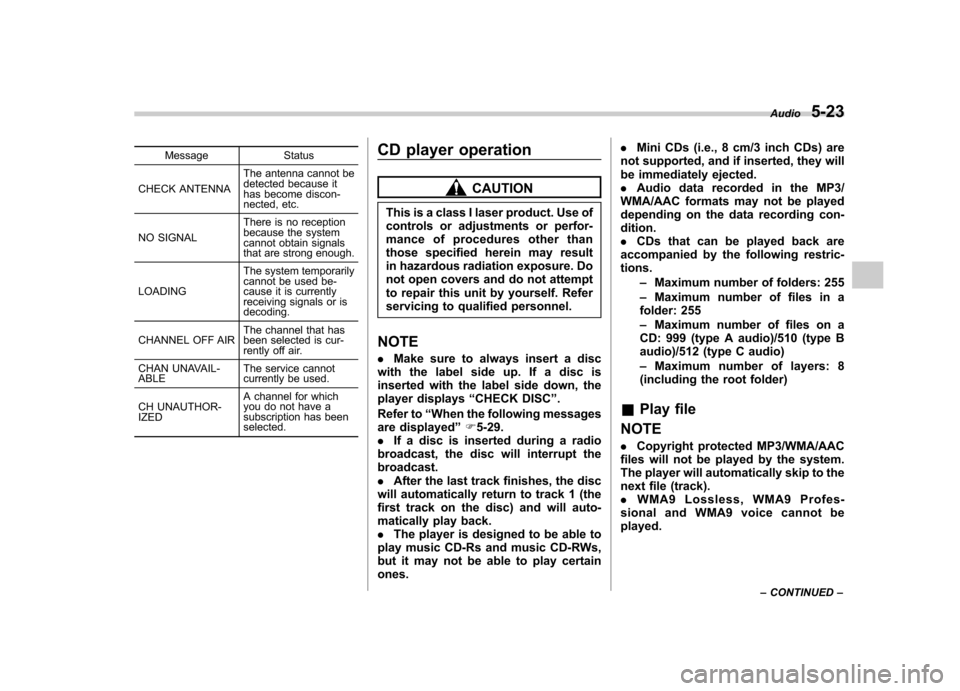
& When the following mes-
sages are displayed (type C audio)
If one of the following messages is
displayed when receiving XM signals,
determine the cause based on the follow-
ing information. If you cannot clear these
messages, contact your SUBARU dealer.
Page 206 of 474
Message Status
CHECK ANTENNA The antenna cannot be
detected because it
has become discon-
nected, etc.
NO SIGNAL There is no reception
because the system
cannot obtain signals
that are strong enough.
LOADING The system temporarily
cannot be used be-
cause it is currently
receiving signals or is decoding.
CHANNEL OFF AIR The channel that has
been selected is cur-
rently off air.
CHAN UNAVAIL-ABLE The service cannot
currently be used.
CH UNAUTHOR-IZED A channel for which
you do not have a
subscription has been selected. CD player operation
CAUTION
This is a class I laser product. Use of
controls or adjustments or perfor-
mance of procedures other than
those specified herein may result
in hazardous radiation exposure. Do
not open covers and do not attempt
to repair this unit by yourself. Refer
servicing to qualified personnel.
NOTE . Make sure to always insert a disc
with the label side up. If a disc is
inserted with the label side down, the
player displays “CHECK DISC ”.
Refer to “When the following messages
are displayed ”F 5-29.
. If a disc is inserted during a radio
broadcast, the disc will interrupt thebroadcast.. After the last track finishes, the disc
will automatically return to track 1 (the
first track on the disc) and will auto-
matically play back.. The player is designed to be able to
play music CD-Rs and music CD-RWs,
but it may not be able to play certainones. .
Mini CDs (i.e., 8 cm/3 inch CDs) are
not supported, and if inserted, they will
be immediately ejected.. Audio data recorded in the MP3/
WMA/AAC formats may not be played
depending on the data recording con-dition.. CDs that can be played back are
accompanied by the following restric-tions.
–Maximum number of folders: 255
– Maximum number of files in a
folder: 255 – Maximum number of files on a
CD: 999 (type A audio)/510 (type B
audio)/512 (type C audio) – Maximum number of layers: 8
(including the root folder)
& Play file
NOTE . Copyright protected MP3/WMA/AAC
files will not be played by the system.
The player will automatically skip to the
next file (track).. WMA9 Lossless, WMA9 Profes-
sional and WMA9 voice cannot beplayed. Audio
5-23
– CONTINUED –
Page 207 of 474
5-24Audio
MP3: .Based on MPEG 1, 2 and 2.5 Layer 3
(type A and B audio). Based on MPEG 1, 2 and 2.5 Layer 2
and 3 (type C audio). Sampling rate (kHz): 48, 44.1, 32, 24,
22.05, 16, 12, 11.025, 8. Bit rate (kbps): 8 to 320 (type A and B
audio). Bit rate (kbps): 32 to 320 (type C audio)
. Supports variable bit rates
WMA (type B audio):. Based on Windows Media Audio 9
. Sampling rate (kHz): 48, 44.1, 32
. Bit rate (kbps): 32 to 192
WMA (type C audio): . Based on Windows Media Audio 7, 8
and 9 . Sampling rate (kHz): 48, 44.1, 32
. Bit rate (kbps): 32 to 192
AAC (type B audio):. Based on MPEG4 AAC
. Sampling rate (kHz): 48, 44.1, 32, 24,
22.05, 16, 12, 11.025, 8. Bit rate (kbps): 24 to 320
. Number of channels: 1 to 2ch AAC (type C audio):.
Based on MPEG2 AAC and MPEG4
AAC. Sampling rate (kHz): 48, 44.1, 32, 24,
22.05, 16, 12, 11.025, 8. Bit rate (kbps): 24 to 320
. Number of channels: 1 to 2ch
& How to insert a CD
While the ignition switch is in the “Acc ”or
“ ON ”position, hold a disc with a finger in
the center hole while gripping the edge of
the disc, then insert it in to the slot (with
the label side up) and the player will
automatically pull the disc into position.
NOTE
DO NOT INSERT TWO DISCS INTO THE
DISC INSERTION SLOT AT A TIME. & How to play back a CD
! When there is no CD inserted
Insert a CD by referring to “How to insert a
CD ”F 5-24.
When a CD is loaded, the player will start
playback of the CD, beginning with the
first track. !
When CD is in the player (type A)
When the
button is pressed, the
player will start playback. ! When CD is in the player (type B
and C)
Type B audio
Type C audio
Each brief press of the “CD/AUX ”button
changes the modes in the following sequence.
*: For type B audio, “BT-A ”is displayed.
When the CD mode is selected, the player
will start playback. & To select a track from the beginning
NOTE
With an MP3, WMA or AAC: . Skipping past the last track/file will
take you back to the first track/file in
the folder.
Page 208 of 474
.Skipping past the first track/file will
take you to the last track/file in the
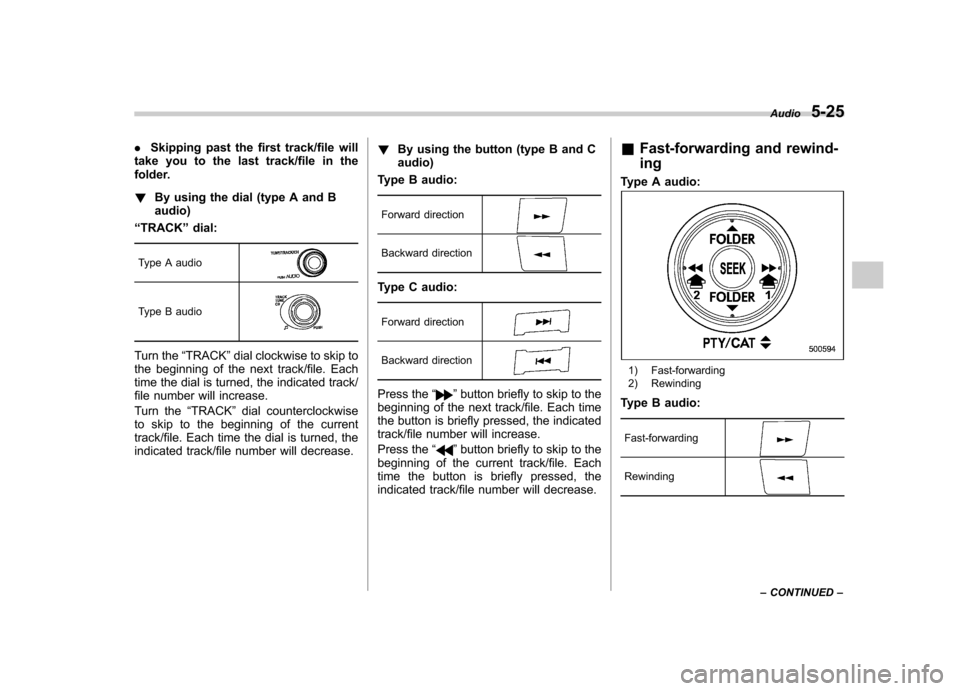
folder. ! By using the dial (type A and B audio)
“ TRACK ”dial:
Type A audio
Type B audio
Turn the “TRACK ”dial clockwise to skip to
the beginning of the next track/file. Each
time the dial is turned, the indicated track/
file number will increase.
Turn the “TRACK ”dial counterclockwise
to skip to the beginning of the current
track/file. Each time the dial is turned, the
indicated track/file number will decrease. !
By using the button (type B and Caudio)
Type B audio:
Forward direction
Backward direction
Type C audio:
Forward direction
Backward direction
Press the “”button briefly to skip to the
beginning of the next track/file. Each time
the button is briefly pressed, the indicated
track/file number will increase.
Press the “
”button briefly to skip to the
beginning of the current track/file. Each
time the button is briefly pressed, the
indicated track/file number will decrease. &
Fast-forwarding and rewind- ing
Type A audio:
1) Fast-forwarding
2) Rewinding
Type B audio:
Fast-forwarding
Rewinding
Audio 5-25
– CONTINUED –
Page 209 of 474
5-26Audio
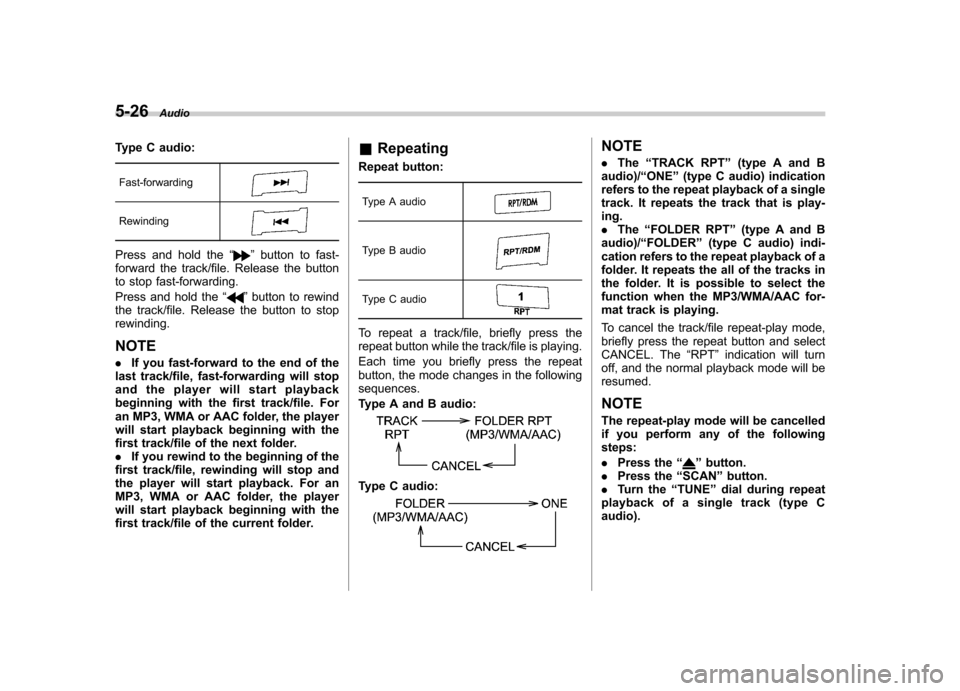
Type C audio:
Fast-forwarding
Rewinding
Press and hold the “”button to fast-
forward the track/file. Release the button
to stop fast-forwarding.
Press and hold the “
”button to rewind
the track/file. Release the button to stop rewinding.
NOTE . If you fast-forward to the end of the
last track/file, fast-forwarding will stop
and the player will start playback
beginning with the first track/file. For
an MP3, WMA or AAC folder, the player
will start playback beginning with the
first track/file of the next folder.. If you rewind to the beginning of the
first track/file, rewinding will stop and
the player will start playback. For an
MP3, WMA or AAC folder, the player
will start playback beginning with the
first track/file of the current folder. &
Repeating
Repeat button:
Type A audio
Type B audio
Type C audio
To repeat a track/file, briefly press the
repeat button while the track/file is playing.
Each time you briefly press the repeat
button, the mode changes in the followingsequences.
Type A and B audio:
Type C audio:
NOTE . The “TRACK RPT ”(type A and B
audio)/ “ONE ”(type C audio) indication
refers to the repeat playback of a single
track. It repeats the track that is play-ing.. The “FOLDER RPT ”(type A and B
audio)/ “FOLDER ”(type C audio) indi-
cation refers to the repeat playback of a
folder. It repeats the all of the tracks in
the folder. It is possible to select the
function when the MP3/WMA/AAC for-
mat track is playing.
To cancel the track/file repeat-play mode,
briefly press the repeat button and select
CANCEL. The “RPT ”indication will turn
off, and the normal playback mode will beresumed.
NOTE
The repeat-play mode will be cancelled
if you perform any of the followingsteps: . Press the “
”button.
. Press the “SCAN ”button.
. Turn the “TUNE ”dial during repeat
playback of a single track (type C audio).
Page 210 of 474
&Random playback
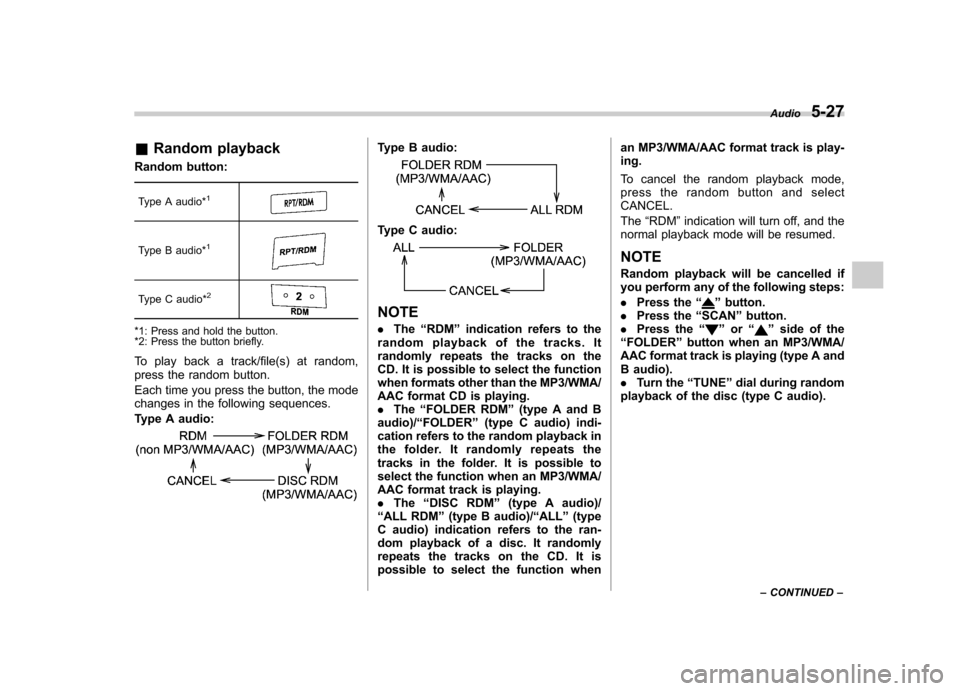
Random button:
Type A audio*
1
Type B audio*1
Type C audio*2
*1: Press and hold the button.
*2: Press the button briefly.
To play back a track/file(s) at random,
press the random button.
Each time you press the button, the mode
changes in the following sequences.
Type A audio:
Type B audio:
Type C audio:
NOTE . The “RDM ”indication refers to the
random playback of the tracks. It
randomly repeats the tracks on the
CD. It is possible to select the function
when formats other than the MP3/WMA/
AAC format CD is playing.. The “FOLDER RDM ”(type A and B
audio)/ “FOLDER ”(type C audio) indi-
cation refers to the random playback in
the folder. It randomly repeats the
tracks in the folder. It is possible to
select the function when an MP3/WMA/
AAC format track is playing.. The “DISC RDM ”(type A audio)/
“ ALL RDM ”(type B audio)/ “ALL ”(type
C audio) indication refers to the ran-
dom playback of a disc. It randomly
repeats the tracks on the CD. It is
possible to select the function when an MP3/WMA/AAC format track is play-ing.
To cancel the random playback mode,
press the random button and selectCANCEL. The
“RDM ”indication will turn off, and the
normal playback mode will be resumed.
NOTE
Random playback will be cancelled if
you perform any of the following steps: . Press the “”button.
. Press the “SCAN ”button.
. Press the “
”or “”side of the
“ FOLDER ”button when an MP3/WMA/
AAC format track is playing (type A and
B audio).. Turn the “TUNE ”dial during random
playback of the disc (type C audio). Audio
5-27
– CONTINUED –