SUBARU TRIBECA 2008 Owners Manual
Manufacturer: SUBARU, Model Year: 2008, Model line: TRIBECA, Model: SUBARU TRIBECA 2008Pages: 409, PDF Size: 5.75 MB
Page 261 of 409
system. When the switch is pressed again
to reactivate the Traction Control system,
the“
”indicator light goes off.
With the Traction Control system deacti-
vated, traction enhancement offered by
Traction Control system is unavailable.
Therefore you should not deactivate the
Traction Control system except under
above-mentioned situations.
NOTE. When the switch has been pressed
to deactivate the Traction Control sys-
tem, the Traction Control system auto-
matically reactivates itself the next time
the ignition key is turned to the “LOCK ”
position and the engine is restarted.
. If the switch is held down for 10
seconds or longer, the indicator light
goes off, the Traction Control system is
activated, and the system ignores any
further pressing of the switch. To make
the switch usable again, turn the igni-
tion key to the “LOCK ”position and
restart the engine.
. When the switch is pressed to
deactivate the Traction Control system,
the vehicle ’s running performance is
comparable with that of a vehicle that
does not have a Traction Control
system. Do not deactivate the Traction
Control system except when absolutely necessary.
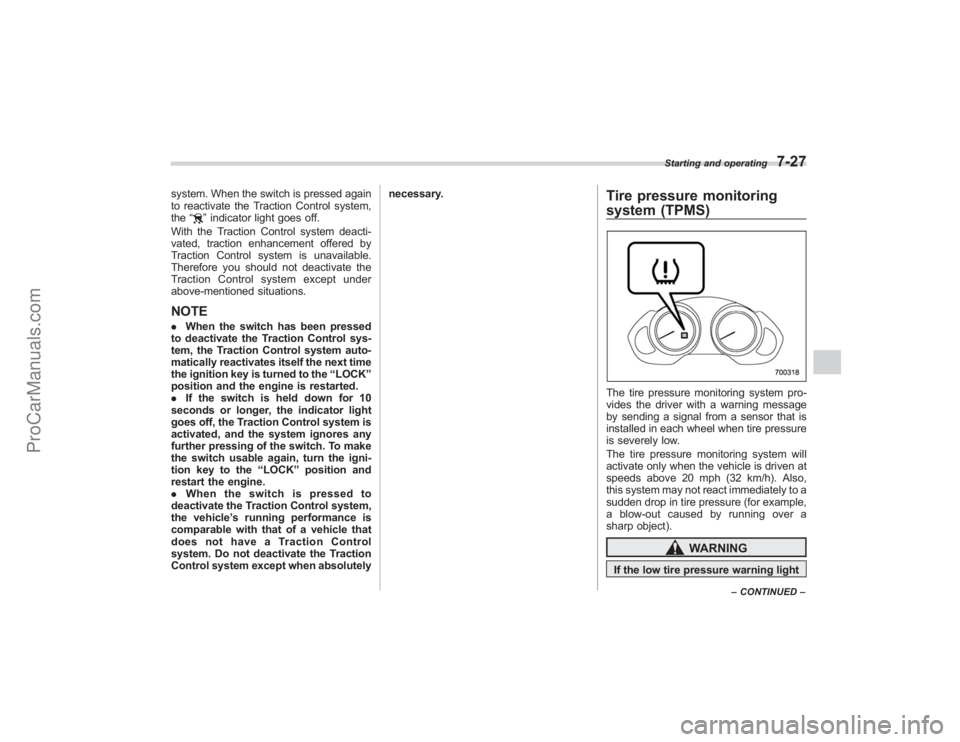
Tire pressure monitoring
system (TPMS)The tire pressure monitoring system pro-
vides the driver with a warning message
by sending a signal from a sensor that is
installed in each wheel when tire pressure
is severely low.
The tire pressure monitoring system will
activate only when the vehicle is driven at
speeds above 20 mph (32 km/h). Also,
this system may not react immediately to a
sudden drop in tire pressure (for example,
a blow-out caused by running over a
sharp object).
WARNING
If the low tire pressure warning light
Starting and operating
7-27
–
CONTINUED –
ProCarManuals.com
Page 262 of 409
7-28
Starting and operating
comes on while driving, never brake
suddenly and keep driving straight
ahead while gradually reducing
speed. Then slowly pull off the road
to a safe place. Otherwise an acci-
dent involving serious vehicle da-
mage and serious personal injury
could occur.
Check the pressure for all four tires
and adjust the pressure to the COLD
tire pressure shown on the tire
placard on the door pillar on the
driver’s side.
Even when the vehicle is driven a
very short distance, the tires get
warm and their pressures increase
accordingly. Be sure to let the tires
cool thoroughly before adjusting
their pressures to the standard
values shown on the tire placard.
(Refer to the “Tires and wheels ”
section in chapter 11.) The tire
pressure monitoring system does
not function when the vehicle is
stationary. After adjusting the tire
pressures, increase the vehicle
speed to at least 20 mph (32 km/h)
to start the TPMS re-checking of the
tire inflation pressures. If the tire
pressures are now above the severe
low pressure threshold, the low tire
pressure warning light should go off a few minutes later.
If this light still comes on while
driving after adjusting the tire pres-
sure, a tire may have significant
damage and a fast leak that causes
the tire to lose air rapidly. If you have
a flat tire, replace it with a spare tire
as soon as possible.
When a spare tire is mounted or a
wheel rim is replaced without the
original pressure sensor/transmitter
being transferred, the low tire pres-
sure warning light will illuminate
steadily after blinking for approxi-
mately one minute. This indicates
the TPMS is unable to monitor all
four road wheels. Contact your
SUBARU dealer as soon as possible
for tire and sensor replacement and/
or system resetting.
Do not inject any tire liquid or
aerosol tire sealant into the tires,
as this may cause a malfunction of
the tire pressure sensors. If the light
illuminates steadily after blinking for
approximately one minute, promptly
contact a SUBARU dealer to have
the system inspected.
CAUTION
Do not place metal film or any metal
parts under the driver
’s seat. This
may cause poor reception of the
signals from the tire pressure sen-
sors, and the tire pressure monitor-
ing system will not function prop-
erly.NOTEThis device complies with Part 15 of
the FCC Rules and with RSS-210 of
Industry Canada. Operation is subject
to the following two conditions: (1) This
device may not cause harmful inter-
ference, and (2) this device must
accept any interference received, in-
cluding interference that may cause
undesired operation.
Changes or modifications not ex-
pressly approved by the party respon-
sible for compliance could void the
user ’s authority to operate the equip-
ment.
ProCarManuals.com
Page 263 of 409
Parking your vehicle
WARNING
.Never leave unattended children
or pets in the vehicle. They could
accidentally injure themselves or
others through inadvertent op-
eration of the vehicle. Also, on
hot or sunny days, the tempera-
ture in a closed vehicle could
quickly become high enough to
cause severe or possibly fatal
injuries to them.
. Do not park the vehicle over
flammable materials such as dry
grass, waste paper or rags, as
they may burn easily if they come
near hot engine or exhaust sys-
tem parts.
. Be sure to stop the engine if you
take a nap in the vehicle. If
engine exhaust gas enters the
passenger compartment, occu-
pants in the vehicle could die
from carbon monoxide (CO) con-
tained in the exhaust gas.
& Parking brake
CAUTION
. Never drive while the parking
brake is set because this will
cause unnecessary wear on the
brake linings. Before starting to
drive, always make sure that the
parking brake has been fully
released.
. Never drive with your foot on the
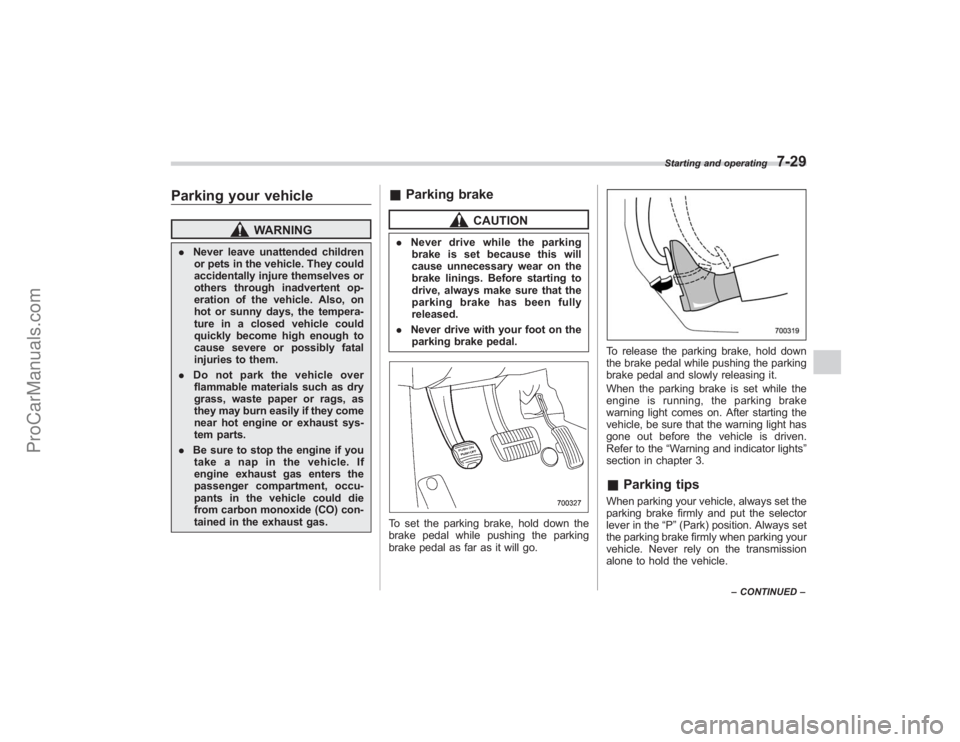
parking brake pedal.To set the parking brake, hold down the
brake pedal while pushing the parking
brake pedal as far as it will go.
To release the parking brake, hold down
the brake pedal while pushing the parking
brake pedal and slowly releasing it.
When the parking brake is set while the
engine is running, the parking brake
warning light comes on. After starting the
vehicle, be sure that the warning light has
gone out before the vehicle is driven.
Refer to the “Warning and indicator lights ”
section in chapter 3.& Parking tipsWhen parking your vehicle, always set the
parking brake firmly and put the selector
lever in the “P”(Park) position. Always set
the parking brake firmly when parking your
vehicle. Never rely on the transmission
alone to hold the vehicle.
Starting and operating
7-29
– CONTINUED –
ProCarManuals.com
Page 264 of 409
7-30
Starting and operating
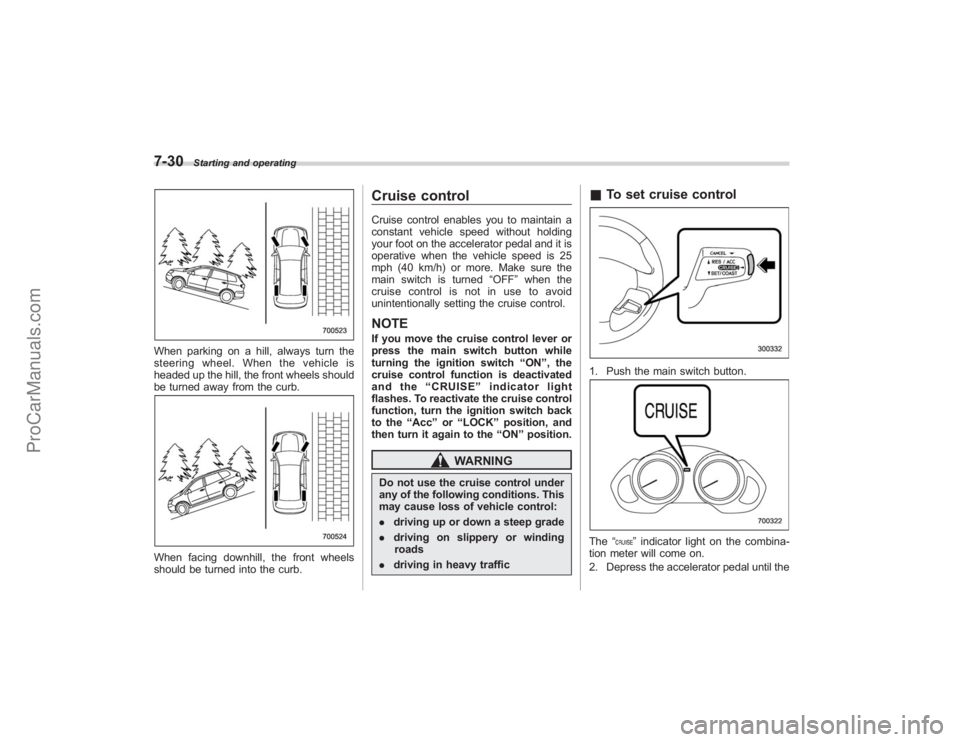
When parking on a hill, always turn the
steering wheel. When the vehicle is
headed up the hill, the front wheels should
be turned away from the curb.When facing downhill, the front wheels
should be turned into the curb.
Cruise controlCruise control enables you to maintain a
constant vehicle speed without holding
your foot on the accelerator pedal and it is
operative when the vehicle speed is 25
mph (40 km/h) or more. Make sure the
main switch is turned“OFF”when the
cruise control is not in use to avoid
unintentionally setting the cruise control.NOTEIf you move the cruise control lever or
press the main switch button while
turning the ignition switch “ON ”, the
cruise control function is deactivated
and the “CRUISE ”indicator light
flashes. To reactivate the cruise control
function, turn the ignition switch back
to the “Acc ”or “LOCK ”position, and
then turn it again to the “ON ”position.
WARNING
Do not use the cruise control under
any of the following conditions. This
may cause loss of vehicle control:
. driving up or down a steep grade
. driving on slippery or winding
roads
. driving in heavy traffic
&To set cruise control1. Push the main switch button.The “
”indicator light on the combina-
tion meter will come on.
2. Depress the accelerator pedal until the
ProCarManuals.com
Page 265 of 409
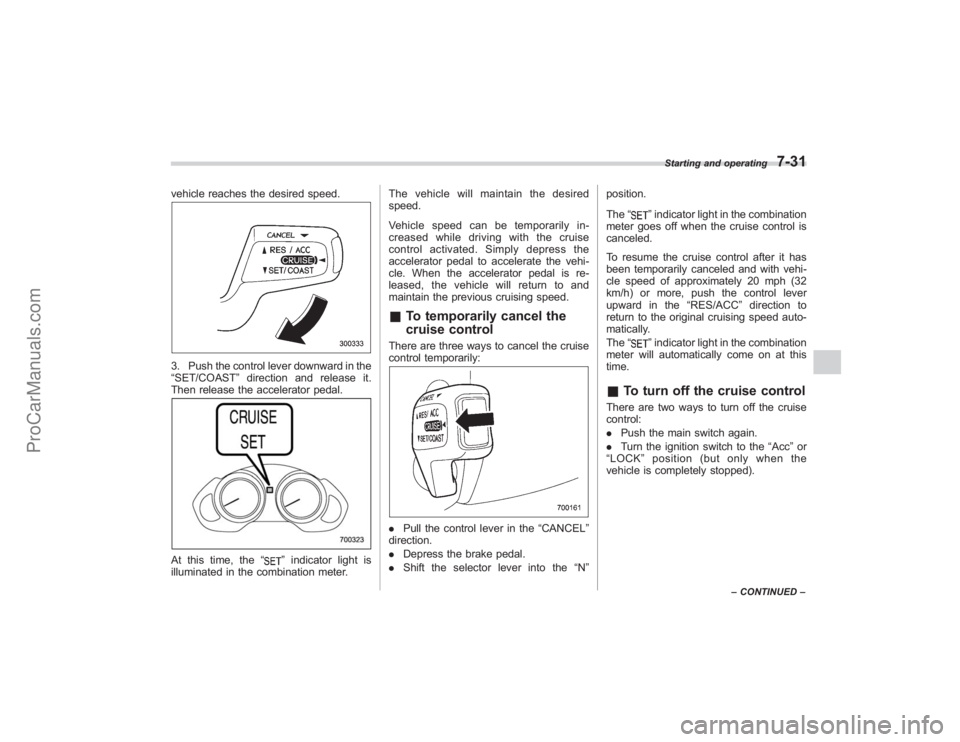
vehicle reaches the desired speed.3. Push the control lever downward in the
“SET/COAST”direction and release it.
Then release the accelerator pedal.At this time, the “
”indicator light is
illuminated in the combination meter. The vehicle will maintain the desired
speed.
Vehicle speed can be temporarily in-
creased while driving with the cruise
control activated. Simply depress the
accelerator pedal to accelerate the vehi-
cle. When the accelerator pedal is re-
leased, the vehicle will return to and
maintain the previous cruising speed.
&
To temporarily cancel the
cruise controlThere are three ways to cancel the cruise
control temporarily:. Pull the control lever in the “CANCEL”
direction.
. Depress the brake pedal.
. Shift the selector lever into the “N” position.
The
“
”indicator light in the combination
meter goes off when the cruise control is
canceled.
To resume the cruise control after it has
been temporarily canceled and with vehi-
cle speed of approximately 20 mph (32
km/h) or more, push the control lever
upward in the “RES/ACC”direction to
return to the original cruising speed auto-
matically.
The “”indicator light in the combination
meter will automatically come on at this
time.
& To turn off the cruise controlThere are two ways to turn off the cruise
control:
. Push the main switch again.
. Turn the ignition switch to the “Acc ”or
“ LOCK ”position (but only when the
vehicle is completely stopped).
Starting and operating
7-31
– CONTINUED –
ProCarManuals.com
Page 266 of 409
7-32
Starting and operating
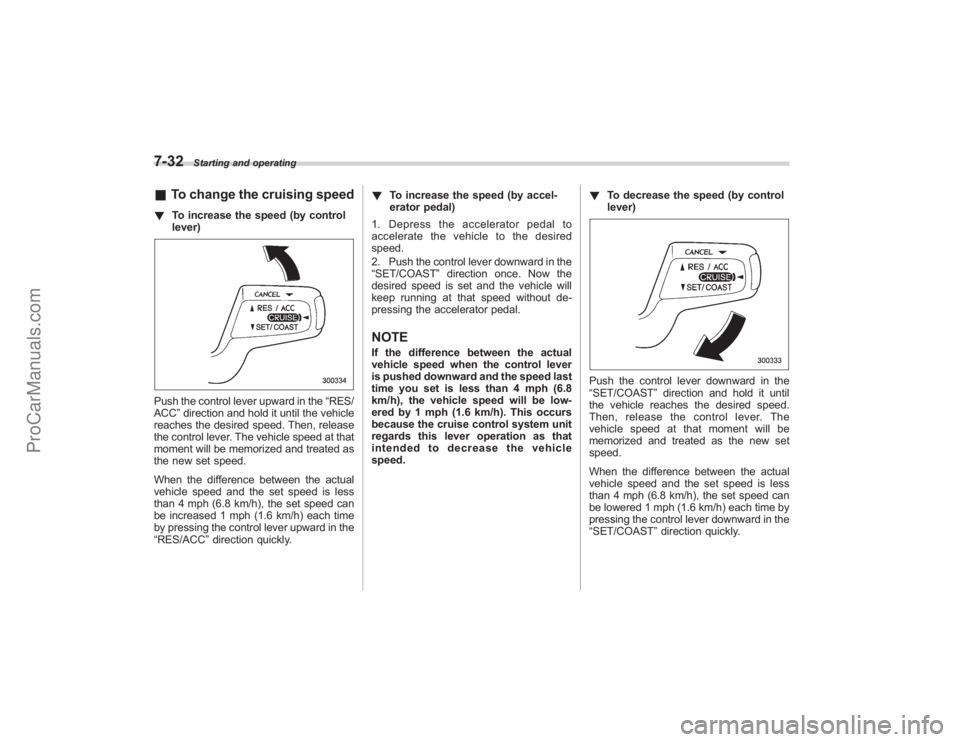
&To change the cruising speed! To increase the speed (by control
lever)Push the control lever upward in the “RES/
ACC ”direction and hold it until the vehicle
reaches the desired speed. Then, release
the control lever. The vehicle speed at that
moment will be memorized and treated as
the new set speed.
When the difference between the actual
vehicle speed and the set speed is less
than 4 mph (6.8 km/h), the set speed can
be increased 1 mph (1.6 km/h) each time
by pressing the control lever upward in the
“RES/ACC ”direction quickly. !
To increase the speed (by accel-
erator pedal)
1. Depress the accelerator pedal to
accelerate the vehicle to the desired
speed.
2. Push the control lever downward in the
“SET/COAST ”direction once. Now the
desired speed is set and the vehicle will
keep running at that speed without de-
pressing the accelerator pedal.
NOTEIf the difference between the actual
vehicle speed when the control lever
is pushed downward and the speed last
time you set is less than 4 mph (6.8
km/h), the vehicle speed will be low-
ered by 1 mph (1.6 km/h). This occurs
because the cruise control system unit
regards this lever operation as that
intended to decrease the vehicle
speed. !
To decrease the speed (by control
lever)
Push the control lever downward in the
“SET/COAST ”direction and hold it until
the vehicle reaches the desired speed.
Then, release the control lever. The
vehicle speed at that moment will be
memorized and treated as the new set
speed.
When the difference between the actual
vehicle speed and the set speed is less
than 4 mph (6.8 km/h), the set speed can
be lowered 1 mph (1.6 km/h) each time by
pressing the control lever downward in the
“SET/COAST ”direction quickly.
ProCarManuals.com
Page 267 of 409
!To decrease the speed (by brake
pedal)
1. Depress the brake pedal to release
cruise control temporarily.
2. When the speed decreases to the
desired speed, press the control lever
downward in the “SET/COAST”direction
once. Now the desired speed is set and
the vehicle will keep running at that speed
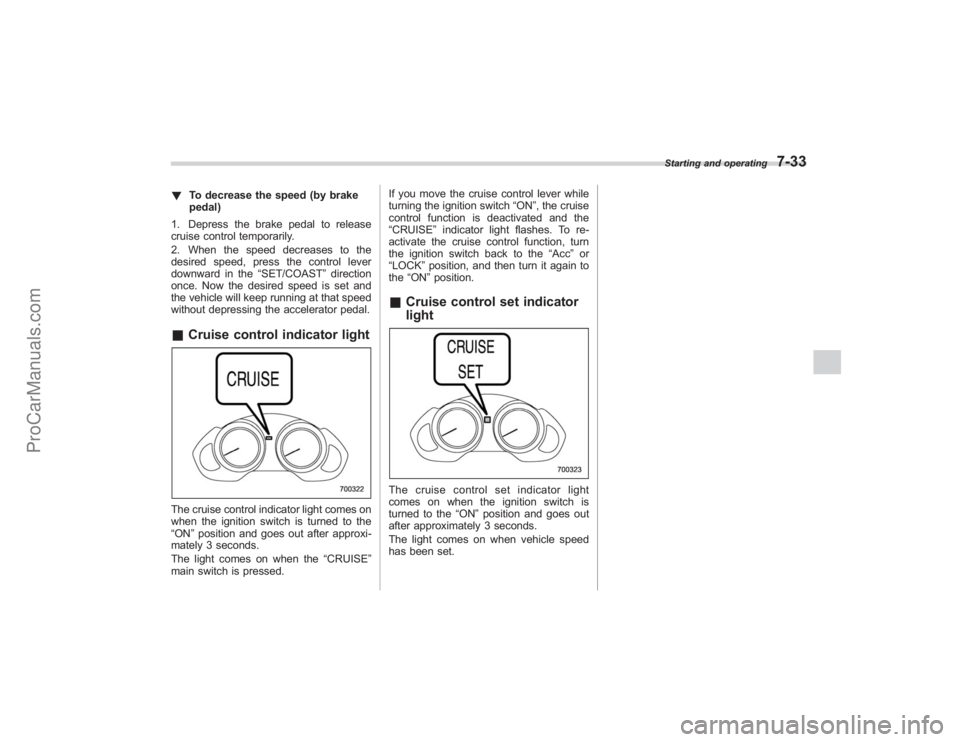
without depressing the accelerator pedal.& Cruise control indicator lightThe cruise control indicator light comes on
when the ignition switch is turned to the
“ON ”position and goes out after approxi-
mately 3 seconds.
The light comes on when the “CRUISE”
main switch is pressed. If you move the cruise control lever while
turning the ignition switch
“ON”, the cruise
control function is deactivated and the
“CRUISE” indicator light flashes. To re-
activate the cruise control function, turn
the ignition switch back to the “Acc”or
“LOCK” position, and then turn it again to
the “ON ”position.
& Cruise control set indicator
lightThe cruise control set indicator light
comes on when the ignition switch is
turned to the “ON”position and goes out
after approximately 3 seconds.
The light comes on when vehicle speed
has been set.
Starting and operating
7-33
ProCarManuals.com
Page 268 of 409

————————————————————————————————————————
————————————————————————————————————————
————————————————————————————————————————
————————————————————————————————————————
————————————————————————————————————————
————————————————————————————————————————
————————————————————————————————————————
————————————————————————————————————————
————————————————————————————————————————
————————————————————————————————————————
————————————————————————————————————————
————————————————————————————————————————
————————————————————————————————————————
ProCarManuals.com
Page 269 of 409
New vehicle break-in driving–the first
1,000 miles (1,600 km) .................................. 8-2
Fuel economy hints ......................................... 8-2
Engine exhaust gas (Carbon monoxide) ........ 8-2
Catalytic converter ........................................... 8-3
Periodic inspections ........................................ 8-4
Driving in foreign countries ............................ 8-4
Driving tips for AWD vehicles ......................... 8-4
On-pavement and off road driving .................. 8-5
Winter driving ................................................... 8-7
Operation during cold weather .......................... 8-7
Driving on snowy and icy roads ....................... 8-9
Corrosion protection ...................................... 8-10
Snow tires ..................................................... 8-10
Tire chains ...................................................... 8-11
Rocking the vehicle ......................................... 8-11
Loading your vehicle ...................................... 8-11
Vehicle capacity weight ................................... 8-12
GVWR and GAWR (Gross Vehicle Weight Rating and Gross Axle Weight Rating) ..................... 8-12
Roof rails and crossbar (if equipped) ............... 8-13
Roof molding and crossbar (if equipped) ......... 8-16
Trailer hitch (if equipped).............................. 8-18
Connecting a trailer........................................ 8-18
When you do not tow a trailer .. ....................... 8-20
Trailer towing................................................. 8-20
Warranties and maintenance ........................... 8-20
Maximum load limits ....................................... 8-20
Trailer hitches ................................................. 8-23
Connecting a trailer ........................................ 8-24
Trailer towing tips ........................................... 8-26
Driving tips
8
ProCarManuals.com
Page 270 of 409
8-2
Driving tips
New vehicle break-in driving
–the first 1,000 miles (1,600
km)The performance and long life of your
vehicle are dependent on how you handle
and care for your vehicle while it is new.
Follow these instructions during the first
1,000 miles (1,600 km):
. Do not race the engine. And do not
allow engine speed to exceed 4,000 rpm
except in an emergency.
. Do not drive at one constant engine or
vehicle speed for a long time, either fast or
slow.
. Avoid starting suddenly and rapid
acceleration, except in an emergency.
. Avoid hard braking, except in an
emergency.
The same break-in procedures should be
applied to a newly installed or overhauled
engine or when brake pads or brake
linings are replaced with new ones.
Fuel economy hintsThe following suggestions will help to save
your fuel.
. Select the proper gear position for the
speed and road conditions.
. Avoid sudden acceleration or decelera-
tion. Always accelerate gently until you
reach the desired speed. Then try to
maintain that speed for as long as
possible.
. Do not pump the accelerator and avoid
racing the engine.
. Avoid unnecessary engine idling.
. Keep the engine properly tuned.
. Keep the tires inflated to the correct
pressure shown on the tire placard, which
is located under the door latch on the
driver ’s side. Low pressure will increase
tire wear and fuel consumption.
. Use the air conditioner only when
necessary.
. Keep the front and rear wheels in
proper alignment.
. Avoid carrying unnecessary luggage or
cargo.
Engine exhaust gas (Carbon
monoxide)
WARNING
. Never inhale engine exhaust gas.
Engine exhaust gas contains
carbon monoxide, a colorless
and odorless gas which is dan-
gerous, or even lethal, if inhaled.
. Always properly maintain the en-
gine exhaust system to prevent
engine exhaust gas from enter-
ing the vehicle.
. Never run the engine in a closed
space, such as a garage, except
for the brief time needed to drive
the vehicle in or out of it.
. Avoid remaining in a parked
vehicle for a lengthy time while
the engine is running. If that is
unavoidable, then use the venti-
lation fan to force fresh air into
the vehicle.
. Always keep the front ventilator
inlet grille free from snow, leaves
or other obstructions to ensure
that the ventilation system al-
ways works properly.
. If at any time you suspect that
ProCarManuals.com