headrest SUBARU TRIBECA 2009 1.G Service User Guide
[x] Cancel search | Manufacturer: SUBARU, Model Year: 2009, Model line: TRIBECA, Model: SUBARU TRIBECA 2009 1.GPages: 2453, PDF Size: 46.32 MB
Page 622 of 2453

SE-12
Second-row Seats
SEATS
3. Second-row Seats
A: REMOVAL
1. LH&CTR SEAT
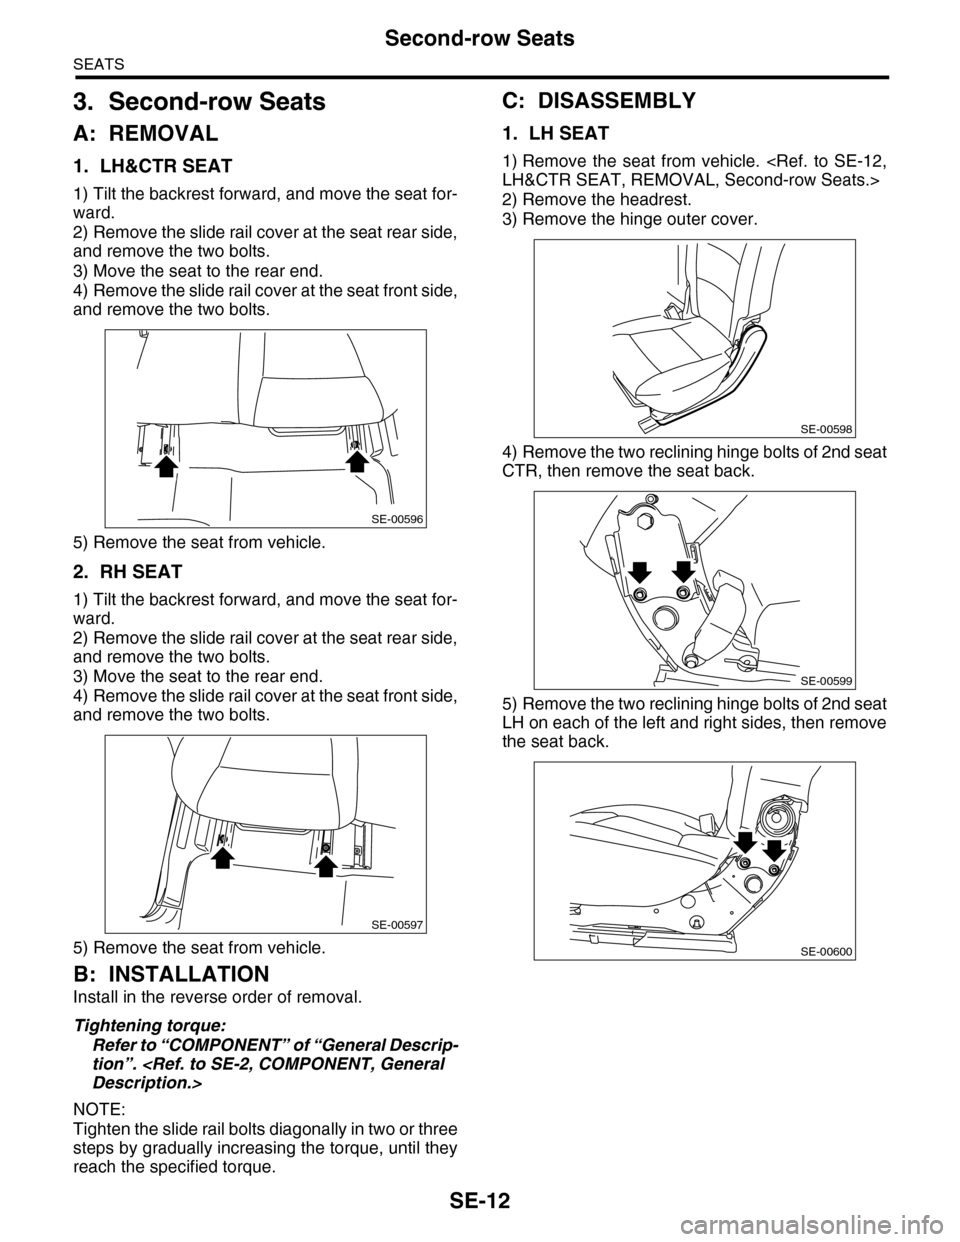
1) Tilt the backrest forward, and move the seat for-
ward.
2) Remove the slide rail cover at the seat rear side,
and remove the two bolts.
3) Move the seat to the rear end.
4) Remove the slide rail cover at the seat front side,
and remove the two bolts.
5) Remove the seat from vehicle.
2. RH SEAT
1) Tilt the backrest forward, and move the seat for-
ward.
2) Remove the slide rail cover at the seat rear side,
and remove the two bolts.
3) Move the seat to the rear end.
4) Remove the slide rail cover at the seat front side,
and remove the two bolts.
5) Remove the seat from vehicle.
B: INSTALLATION
Install in the reverse order of removal.
Tightening torque:
Refer to “COMPONENT” of “General Descrip-
tion”.
NOTE:
Tighten the slide rail bolts diagonally in two or three
steps by gradually increasing the torque, until they
reach the specified torque.
C: DISASSEMBLY
1. LH SEAT
1) Remove the seat from vehicle.
2) Remove the headrest.
3) Remove the hinge outer cover.
4) Remove the two reclining hinge bolts of 2nd seat
CTR, then remove the seat back.
5) Remove the two reclining hinge bolts of 2nd seat
LH on each of the left and right sides, then remove
the seat back.
SE-00596
SE-00597
SE-00598
SE-00599
SE-00600
Page 623 of 2453

SE-13
Second-row Seats
SEATS
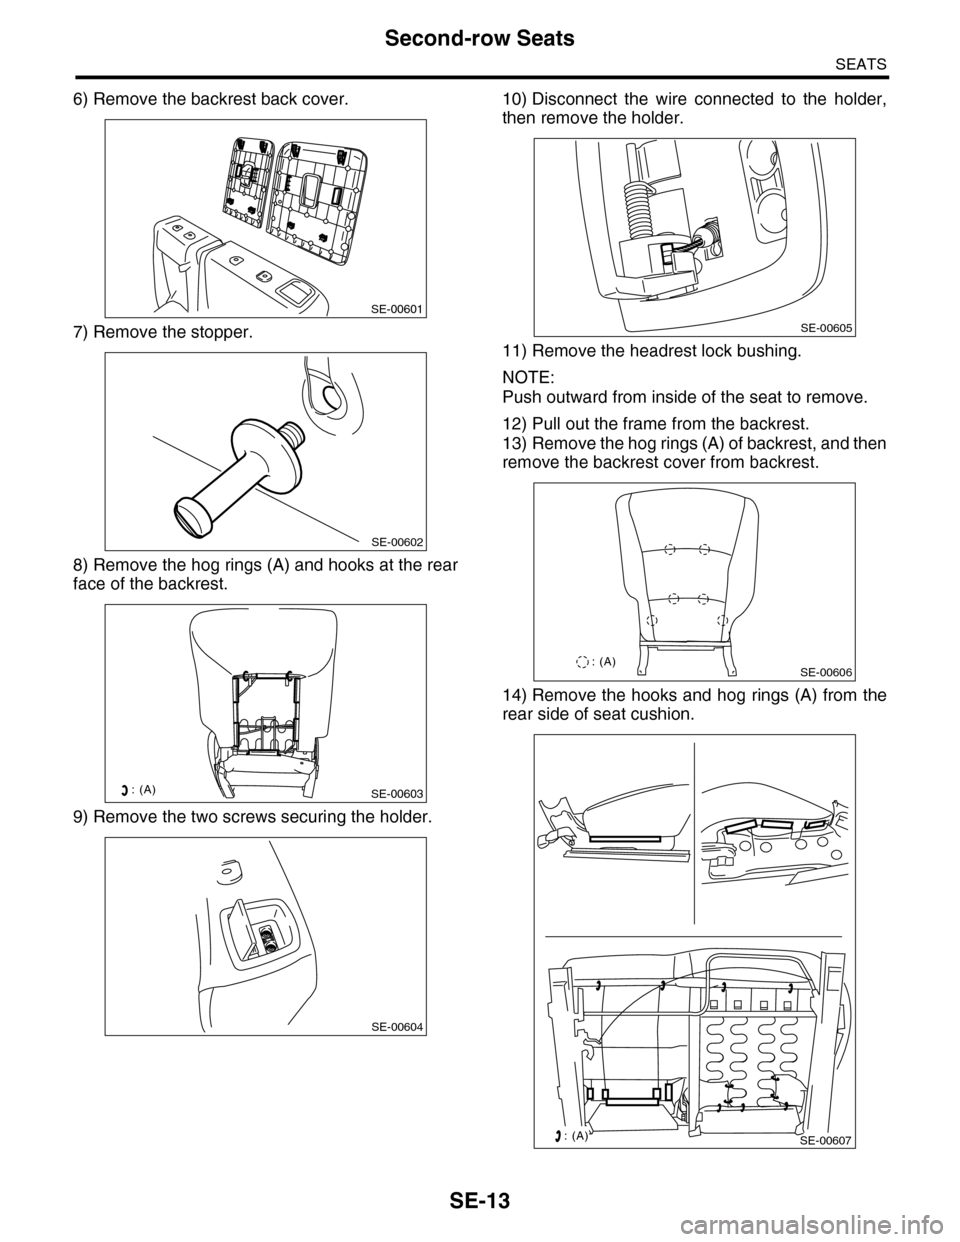
6) Remove the backrest back cover.
7) Remove the stopper.
8) Remove the hog rings (A) and hooks at the rear
face of the backrest.
9) Remove the two screws securing the holder.
10) Disconnect the wire connected to the holder,
then remove the holder.
11) Remove the headrest lock bushing.
NOTE:
Push outward from inside of the seat to remove.
12) Pull out the frame from the backrest.
13) Remove the hog rings (A) of backrest, and then
remove the backrest cover from backrest.
14) Remove the hooks and hog rings (A) from the
rear side of seat cushion.
SE-00601
SE-00602
SE-00603: (A)
SE-00604
SE-00605
SE-00606: (A)
SE-00607: (A)
Page 625 of 2453

SE-15
Second-row Seats
SEATS
3. RH SEAT
1) Remove the seat from vehicle.
2) Remove the headrest.
3) Remove the hinge outer cover.
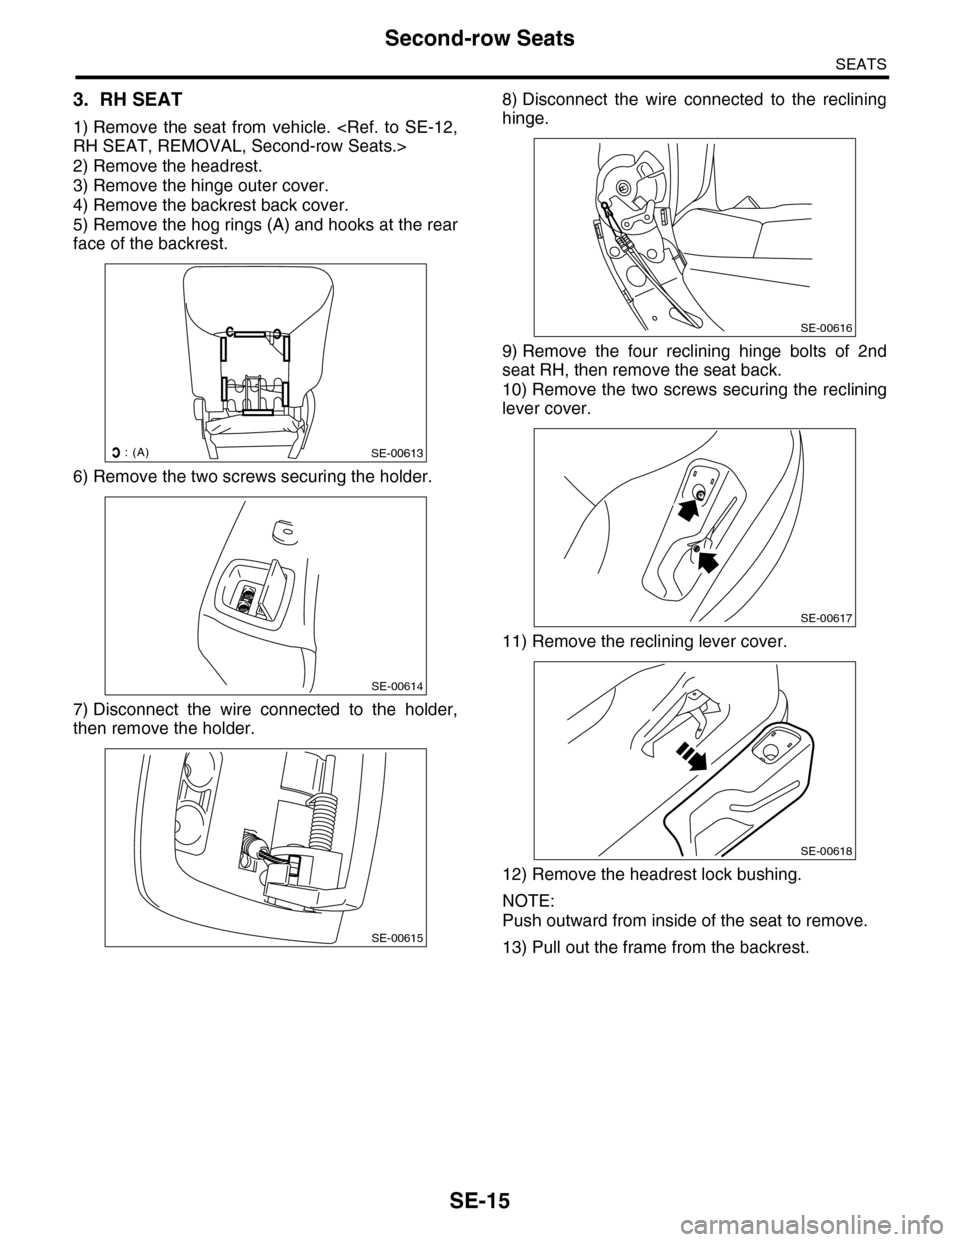
4) Remove the backrest back cover.
5) Remove the hog rings (A) and hooks at the rear
face of the backrest.
6) Remove the two screws securing the holder.
7) Disconnect the wire connected to the holder,
then remove the holder.
8) Disconnect the wire connected to the reclining
hinge.
9) Remove the four reclining hinge bolts of 2nd
seat RH, then remove the seat back.
10) Remove the two screws securing the reclining
lever cover.
11) Remove the reclining lever cover.
12) Remove the headrest lock bushing.
NOTE:
Push outward from inside of the seat to remove.
13) Pull out the frame from the backrest.
: (A)SE-00613
SE-00614
SE-00615
SE-00616
SE-00617
SE-00618
Page 627 of 2453

SE-17
Third-row Seats
SEATS
4. Third-row Seats
A: REMOVAL
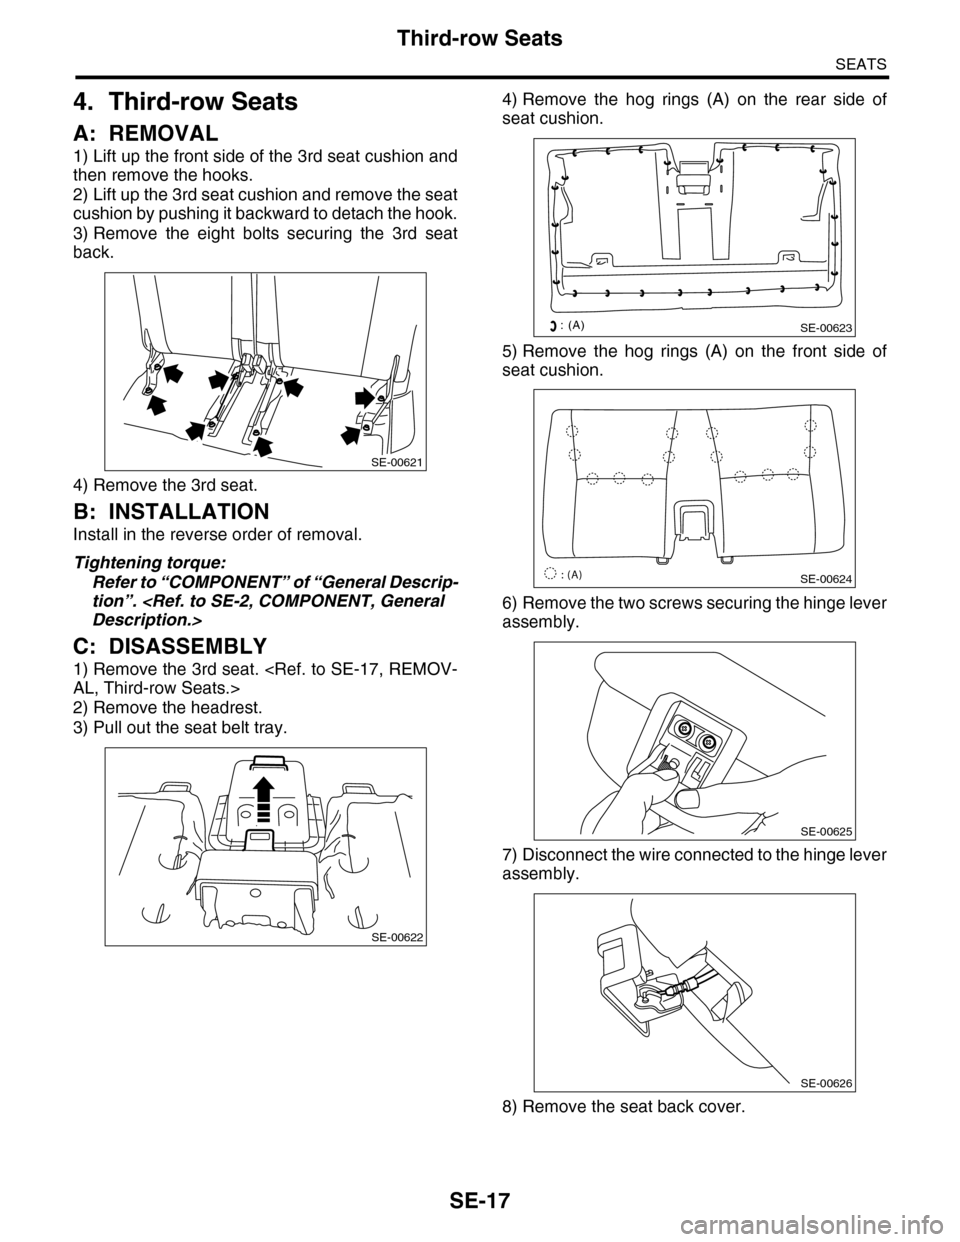
1) Lift up the front side of the 3rd seat cushion and
then remove the hooks.
2) Lift up the 3rd seat cushion and remove the seat
cushion by pushing it backward to detach the hook.
3) Remove the eight bolts securing the 3rd seat
back.
4) Remove the 3rd seat.
B: INSTALLATION
Install in the reverse order of removal.
Tightening torque:
Refer to “COMPONENT” of “General Descrip-
tion”.
C: DISASSEMBLY
1) Remove the 3rd seat.
2) Remove the headrest.
3) Pull out the seat belt tray.
4) Remove the hog rings (A) on the rear side of
seat cushion.
5) Remove the hog rings (A) on the front side of
seat cushion.
6) Remove the two screws securing the hinge lever
assembly.
7) Disconnect the wire connected to the hinge lever
assembly.
8) Remove the seat back cover.
SE-00621
SE-00622
SE-00623: (A)
SE-00624: (A)
SE-00625
SE-00626