SUBARU TRIBECA 2014 1.G Owners Manual
Manufacturer: SUBARU, Model Year: 2014, Model line: TRIBECA, Model: SUBARU TRIBECA 2014 1.GPages: 426, PDF Size: 6.37 MB
Page 111 of 426
2-6Keys and doors
It also helps prevent passengersfrom falling out if a door is acciden-tally opened, and intruders fromunexpectedly opening doors andentering your vehicle.
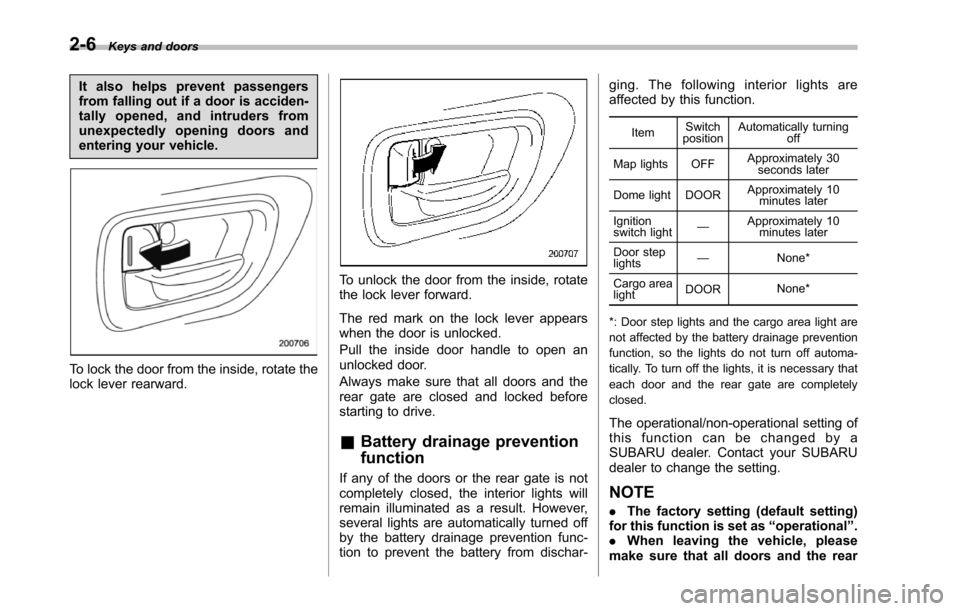
To lock the door from the inside, rotate thelock lever rearward.
To unlock the door from the inside, rotatethe lock lever forward.
The red mark on the lock lever appearswhen the door is unlocked.
Pull the inside door handle to open anunlocked door.
Always make sure that all doors and therear gate are closed and locked beforestarting to drive.
&Battery drainage prevention
function
If any of the doors or the rear gate is notcompletely closed, the interior lights willremain illuminated as a result. However,several lights are automatically turned offby the battery drainage prevention func-tion to prevent the battery from dischar-
ging. The following interior lights areaffected by this function.
ItemSwitchpositionAutomatically turningoff
Map lights OFFApproximately 30seconds later
Dome light DOORApproximately 10minutes later
Ignitionswitch light—Approximately 10minutes later
Door steplights—None*
Cargo arealightDOORNone*
*: Door step lights and the cargo area light arenot affected by the battery drainage preventionfunction, so the lights do not turn off automa-tically. To turn off the lights, it is necessary thateach door and the rear gate are completelyclosed.
The operational/non-operational setting ofthis function can be changed by aSUBARU dealer. Contact your SUBARUdealer to change the setting.
NOTE
.The factory setting (default setting)for this function is set as“operational”..When leaving the vehicle, pleasemakesure that all doors and the rear
Page 112 of 426
gate are completely closed..The battery drainage preventionfunction does not operate while thekey is in the ignition switch.
Power door locking switches
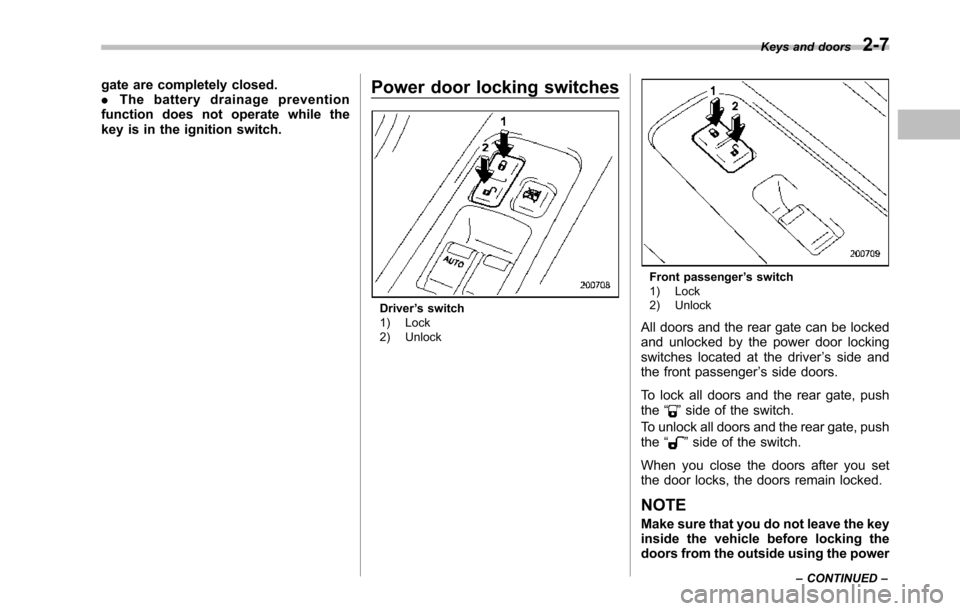
Driver’s switch1) Lock2) Unlock
Front passenger’s switch1) Lock2) Unlock
All doorsand the rear gate can be lockedand unlocked by the power door lockingswitches located at the driver’s side andthe front passenger’s side doors.
To lock all doors and the rear gate, pushthe“”side of the switch.
To unlock all doors and the rear gate, pushthe“”side of the switch.
When you close the doors after you setthe door locks, the doors remain locked.
NOTE
Make sure that you do not leave the keyinsidethe vehicle before locking thedoors from the outside using the power
Keys and doors2-7
–CONTINUED–
Page 113 of 426
2-8Keys and doors
door locking switches.
&Key lock-in prevention func-
tion
This function prevents the doors frombeing locked with the key still in theignition switch.
!Behavior with key lock-in preven-tion function operational
.With either the driver’s or front passen-ger’s door open, the doors automaticallyremain unlockedeven if the“”side of thedoor locking switch is pushed.
.It is possible to lock the all doors andthe rear gate by holding the“”side of thedoor locking switch pushed for 3 secondswith the driver’sdooropenandthenclosing the driver’s door.
!Behavior with key lock-in preven-tion function non-operational
.If the lock lever is turned to the rear(“LOCK”) position with the driver’s dooropen and the driver’s door is then closedwith the lock lever in that position, thedriver’s door is locked.
.If the spare key is used to lock thedriver’sdoorfromtheoutsideofthevehicle, the door is locked.
This function’soperational/non-opera-
tional setting can be changed by aSUBARU dealer. Contact a SUBARUdealer for details.
NOTE
When leaving the vehicle, make sureyou are holding the key before lockingthe doors.
Remote keyless entry system
CAUTION
.Do not expose the remote trans-mitter to severe shocks, such asthose experienced as a result ofdroppingor throwing.
.Do not take the remote transmit-ter apart except when replacingthe battery.
.Do not get the remote transmitterwet. If it gets wet, wipe it dry witha cloth immediately.
.When you carry the remote trans-mitter on an airplane, do notpress the button of the remotetransmitter whilein the airplane.When any button of the remotetransmitter is pressed, radiowaves are sent and may affectthe operation of the airplane.When you carry the remote trans-mitter in a bag on an airplane,take measures to prevent thebuttons of the remote transmitterfrom being pressed.
This device complies with Part 15 ofthe FCC Rules and with RSS-210 ofIndustry Canada. Operation is subject
Page 114 of 426
to the following two conditions: (1) Thisdevice may not cause harmful inter-ference, and (2) this device mustaccept any interference received, in-cluding interference that may causeundesired operation.
Changes or modifications not ex-pressly approved by the party respon-sible for compliance could void theuser’s authority to operate the equip-ment.
The transmitter for the remote keylessentry system is located inside the keyhead.
The remote keyless entry system has thefollowing functions.
.Locking and unlocking the doors andrear gatewithout a key
.Unlocking the rear gate without key
.Sounding a panic alarm
.Arming and disarming the alarm sys-tem. For detailed information, refer to“Alarm system”F2-16.
The operable distance of the remotekeyless entry system is approximately 30feet (10 meters). However, this distancewill vary depending on environmentalconditions.
The system’s operable distance will beshorter in areas near a facility or electronic
equipment emitting strong radio wavessuch as a power plant, broadcast station,TV tower, or remote controller of homeelectronic appliances.
NOTE
The remote keyless entry system doesnot operate when the ignition key isinserted in the ignition switch or whenany of the doors or the rear gate is notfully closed.
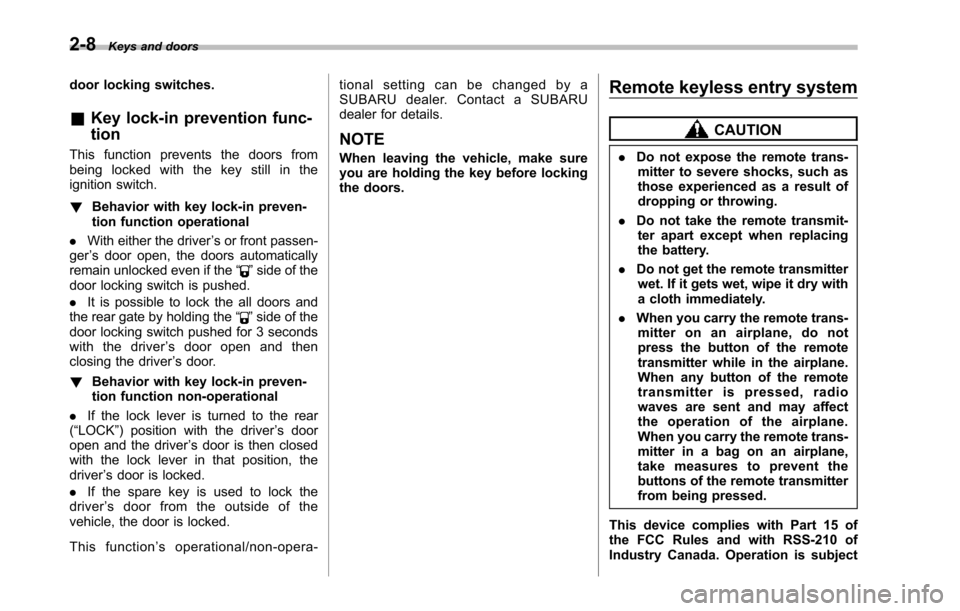
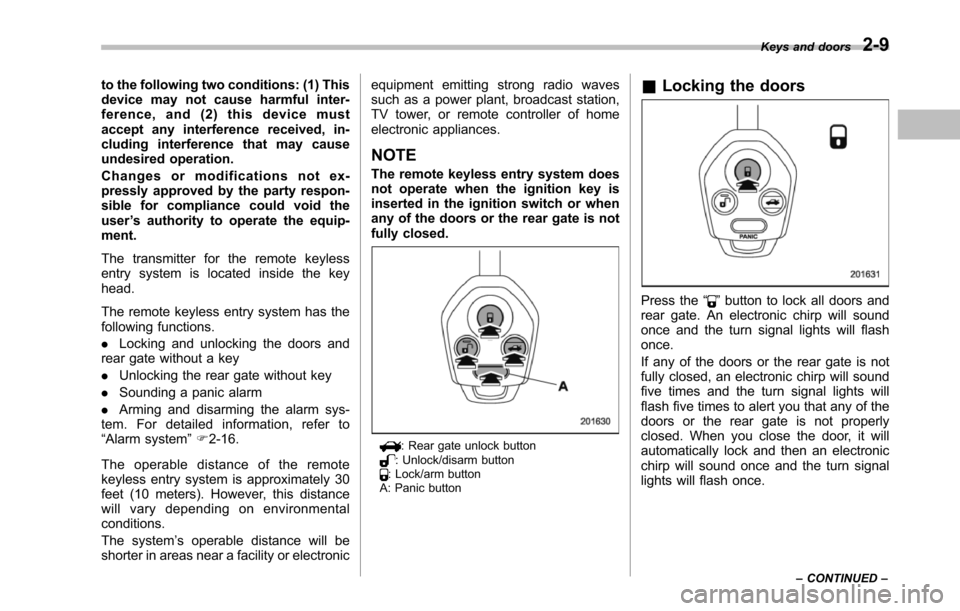
: Rear gate unlock button: Unlock/disarm button: Lock/arm buttonA: Panic button
&Locking the doors
Press the“”button to lock all doors andrear gate. An electronic chirp will soundonce and the turn signal lights will flashonce.
If any of the doors or the rear gate is notfully closed, an electronic chirp will soundfive times and the turn signal lights willflash five times to alert you that any of thedoorsor the rear gate is not properlyclosed. When you close the door, it willautomatically lock and then an electronicchirp will sound once and the turn signallights will flash once.
Keys and doors2-9
–CONTINUED–
Page 115 of 426
2-10Keys and doors
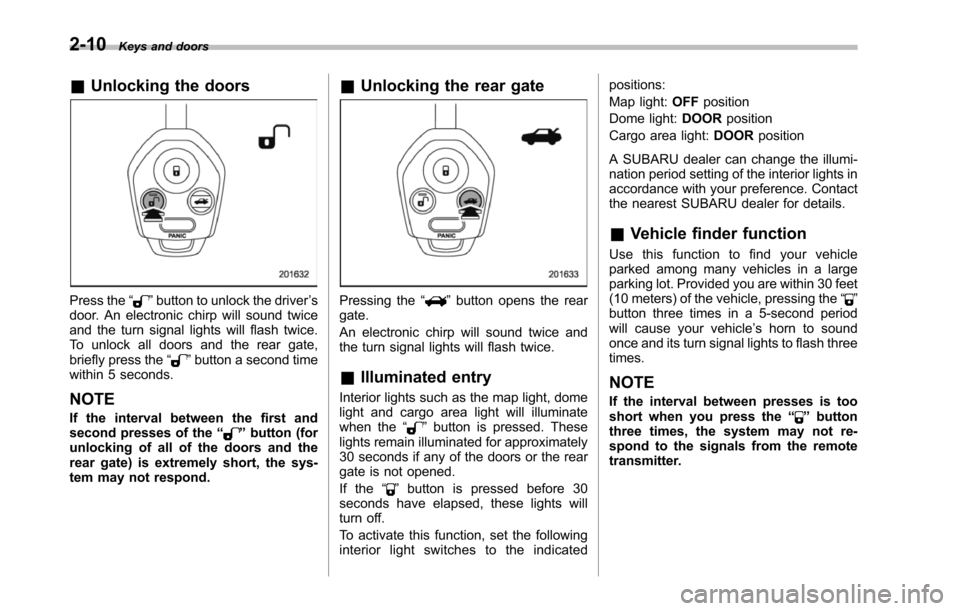
&Unlocking the doors
Press the“”button to unlock the driver’sdoor. An electronic chirp will sound twiceand the turn signal lights will flash twice.To unlock all doors and the rear gate,briefly press the“”button a second timewithin 5 seconds.
NOTE
If the interval between the first andsecond presses of the“”button (forunlocking of all of the doors and therear gate) is extremely short, the sys-tem may not respond.
&Unlocking the rear gate
Pressing the“”button opens the reargate.
An electronic chirp will sound twice andthe turn signal lights will flash twice.
&Illuminated entry
Interior lights such as the map light, domelight and cargo area light will illuminatewhen the“”button is pressed. Theselights remain illuminated for approximately30 seconds if any of the doors or the reargate is not opened.
If the“”button is pressed before 30seconds have elapsed, these lights willturn off.
To activate this function, set the followinginterior light switches to the indicated
positions:
Map light:OFFposition
Dome light:DOORposition
Cargo area light:DOORposition
A SUBARU dealer can change the illumi-nationperiod setting of the interior lights inaccordance with your preference. Contactthe nearest SUBARU dealer for details.
&Vehicle finder function
Use this function to find your vehicleparked among many vehicles in a largeparking lot. Provided you are within 30 feet(10 meters) of the vehicle, pressing the“”buttonthree times in a 5-second periodwill cause your vehicle’s horn to soundonce and its turn signal lights to flash threetimes.
NOTE
If the interval between presses is tooshort when you press the“”buttonthree times, the system may not re-spond to the signals from the remotetransmitter.
Page 116 of 426
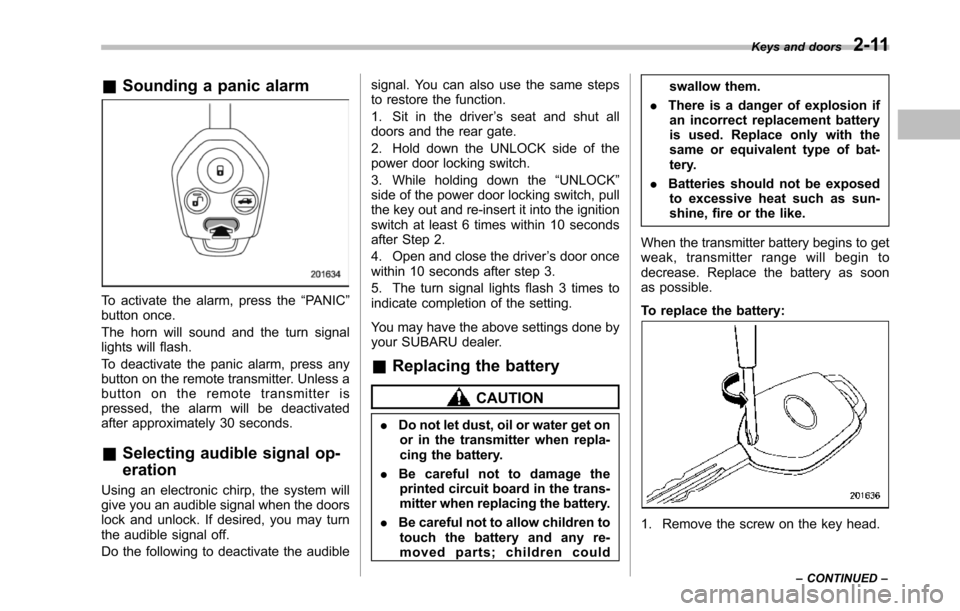
&Sounding a panic alarm
To activate the alarm, press the“PANIC”button once.
The horn will sound and the turn signallights will flash.
To deactivate the panic alarm, press anybuttonon the remote transmitter. Unless abutton on the remote transmitter ispressed, the alarm will be deactivatedafter approximately 30 seconds.
&Selecting audible signal op-
eration
Using an electronic chirp, the system willgive you an audible signal when the doorslock and unlock. If desired, you may turnthe audible signal off.
Do the following to deactivate the audible
signal. You can also use the same stepsto restore the function.
1. Sit in the driver’s seat and shut alldoors and the rear gate.
2. Hold down the UNLOCK side of thepower door locking switch.
3. While holding down the“UNLOCK”sideof the power door locking switch, pullthe key out and re-insert it into the ignitionswitch at least 6 times within 10 secondsafter Step 2.
4. Open and close the driver’s door oncewithin 10 seconds after step 3.
5. The turn signal lights flash 3 times toindicate completion of the setting.
You may have the above settings done byyour SUBARU dealer.
&Replacing the battery
CAUTION
.Do not let dust, oil or water get onor in the transmitter when repla-cing the battery.
.Be careful not to damage theprinted circuit board in the trans-mitter when replacing the battery.
.Be careful not to allow children totouch the battery and any re-moved parts; children could
swallow them.
.There is a danger of explosion ifan incorrect replacement batteryis used. Replace only with thesame or equivalent type of bat-tery.
.Batteries should not be exposedto excessive heat such as sun-shine, fire or the like.
When the transmitter battery begins to getweak, transmitter range will begin todecrease. Replace the battery as soonas possible.
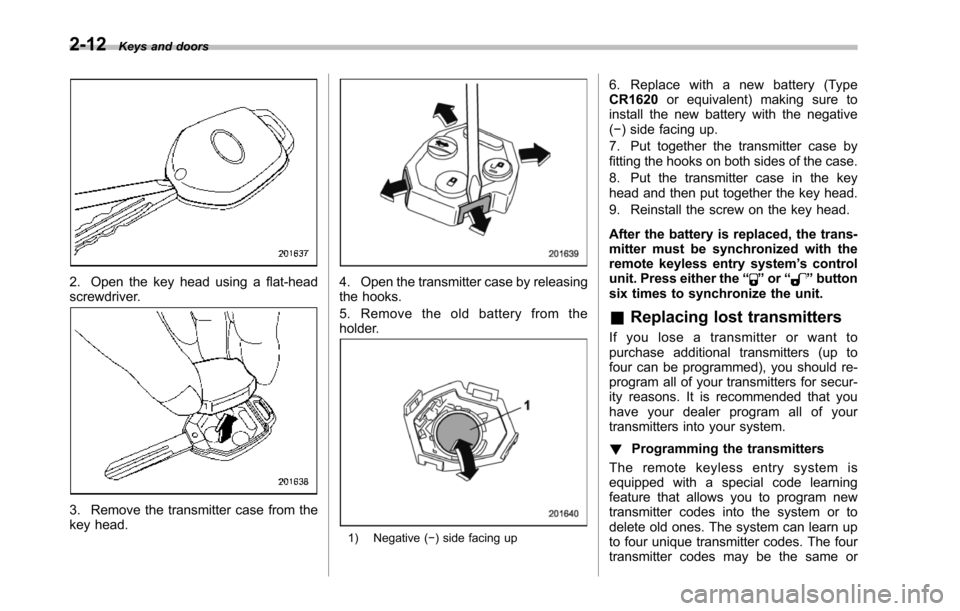
To replace the battery:
1. Remove the screw on the key head.
Keys and doors2-11
–CONTINUED–
Page 117 of 426
2-12Keys and doors
2. Open the key head using a flat-headscrewdriver.
3. Remove the transmitter case from thekey head.
4. Open the transmitter case by releasingthe hooks.
5. Remove the old battery from theholder.
1) Negative (!) side facing up
6. Replace with a new battery (TypeCR1620or equivalent) making sure toinstall the new battery with the negative(!) side facing up.
7. Put together the transmitter case byfitting thehooks on both sides of the case.
8. Put the transmitter case in the keyhead and then put together the key head.
9. Reinstall the screw on the key head.
After the battery is replaced, the trans-mitter must be synchronized with theremote keyless entry system’s controlunit. Press either the“”or“”buttonsix times to synchronize the unit.
&Replacing lost transmitters
If you lose a transmitter or want topurchase additional transmitters (up tofour can be programmed), you should re-program all of your transmitters for secur-ity reasons. It is recommended that youhave your dealer program all of yourtransmittersinto your system.
!Programming the transmitters
The remote keyless entry system isequipped witha special code learningfeature that allows you to program newtransmitter codes into the system or todelete old ones. The system can learn upto four unique transmitter codes. The fourtransmitter codes may be the same or
Page 118 of 426
different.
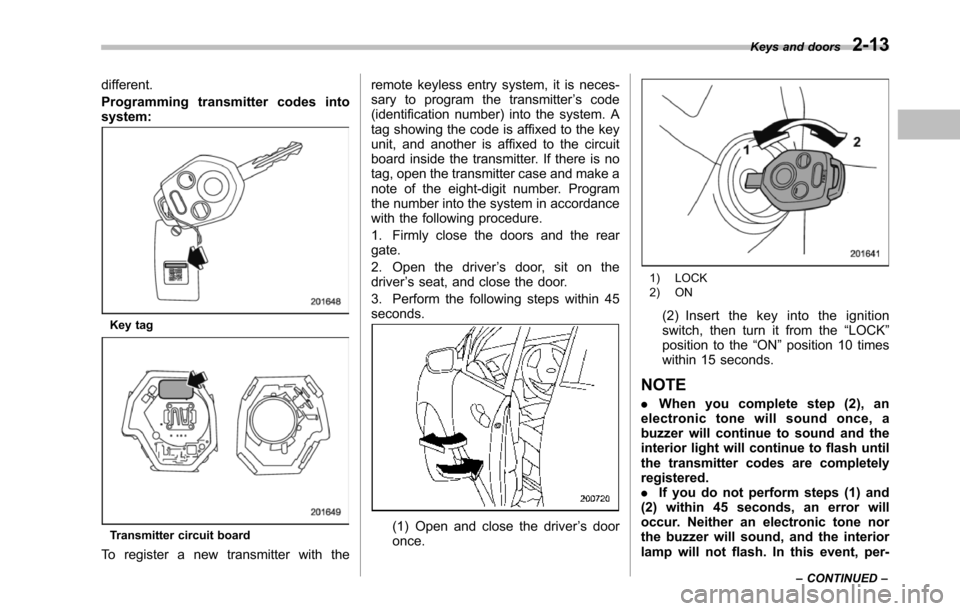
Programming transmitter codes intosystem:
Key tag
Transmitter circuit board
To register a new transmitter with the
remote keyless entry system, it is neces-sary to program the transmitter’s code(identification number) into the system. Atag showing the code is affixed to the keyunit, and another is affixed to the circuitboard inside the transmitter. If there is notag, open the transmitter case and make anote of the eight-digit number. Programthe number into the system in accordancewith the following procedure.
1. Firmly close the doors and the reargate.
2. Open the driver’s door, sit on thedriver’s seat, and close the door.
3. Perform the following steps within 45seconds.
(1) Open and close the driver’s dooronce.
1) LOCK2) ON
(2) Insert the key into the ignitionswitch, then turn it from the“LOCK”position to the“ON”position 10 timeswithin 15 seconds.
NOTE
.When you complete step (2), anelectronic tone will sound once, abuzzer will continue to sound and theinterior light will continue to flash untilthe transmitter codes are completelyregistered..If you do not perform steps (1) and(2) within 45 seconds, an error willoccur. Neither an electronic tone northe buzzer will sound, and the interiorlamp will not flash. In this event, per-
Keys and doors2-13
–CONTINUED–
Page 119 of 426
2-14Keys and doors
form the whole procedure again begin-ning with part 1.
4. Open and close the door once within15 seconds.
NOTE
.When part 4 of the procedure iscompleted, an electronic tone willsound for 30 seconds..If you do not perform the operationsin part 4 within 15 seconds, an errorwill occur and the electronic tone willnot sound. In this event, perform theregistration steps again beginning withpart 3 of the procedure.
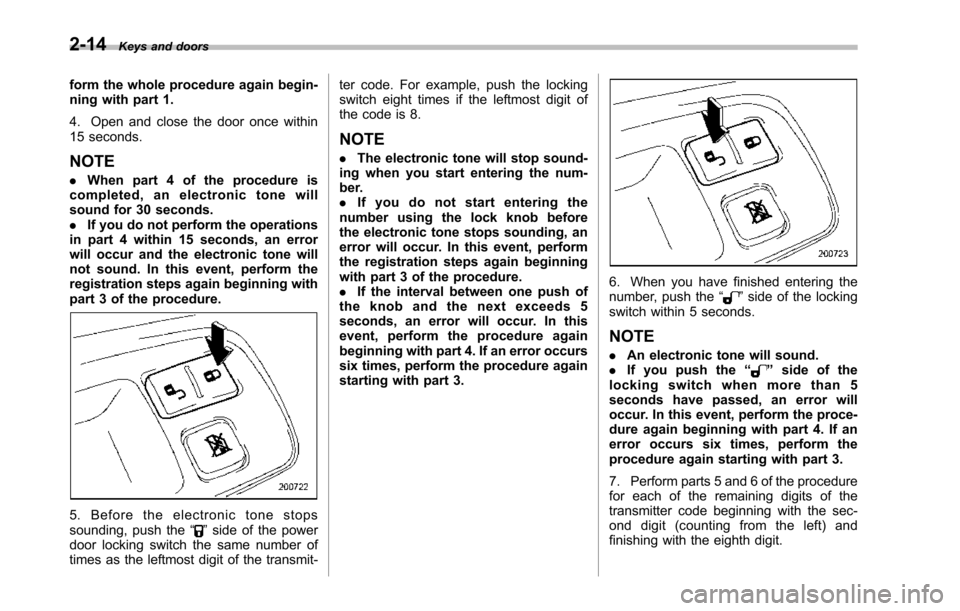
5. Before the electronic tone stopssounding, push the“”side of the powerdoor locking switch the same number oftimes as the leftmost digit of the transmit-
ter code. For example, push the lockingswitch eight times if the leftmost digit ofthe code is 8.
NOTE
.The electronic tone will stop sound-ing when you start entering the num-ber..If you do not start entering thenumber using the lock knob beforetheelectronic tone stops sounding, anerror will occur. In this event, performthe registration steps again beginningwith part 3 of the procedure..If the interval between one push ofthe knob and the next exceeds 5seconds, an error will occur. In thisevent, perform the procedure againbeginning with part 4. If an error occurssix times, perform the procedure againstarting with part 3.
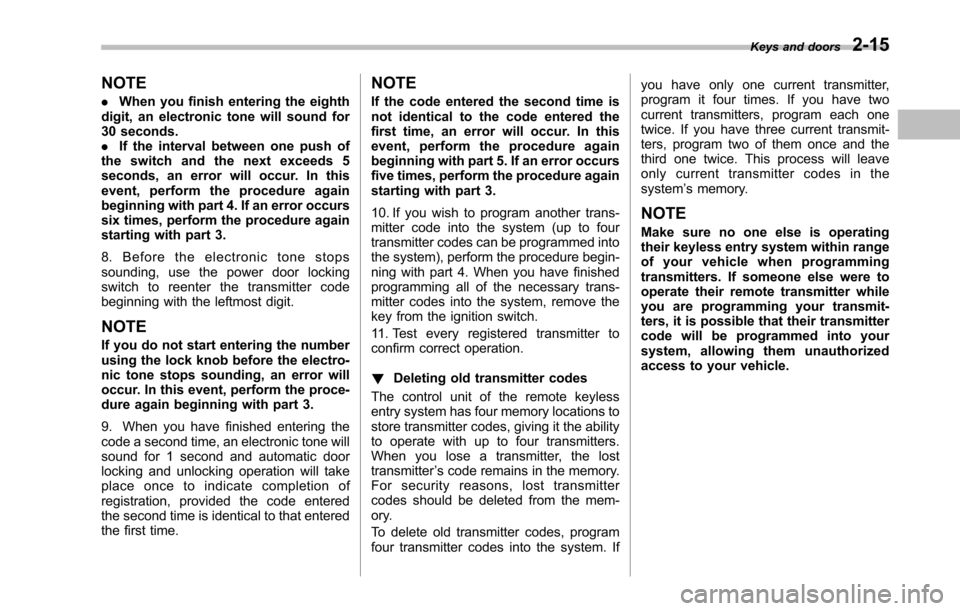
6. When you have finished entering thenumber, push the“”side of the lockingswitch within 5 seconds.
NOTE
.An electronic tone will sound..If you push the“”side of thelocking switch when more than 5seconds have passed, an error willoccur. In this event, perform the proce-dure again beginning with part 4. If anerror occurs six times, perform theprocedure again starting with part 3.
7. Perform parts 5 and 6 of the procedurefor eachof the remaining digits of thetransmitter code beginning with the sec-ond digit (counting from the left) andfinishing with the eighth digit.
Page 120 of 426
NOTE
.When you finish entering the eighthdigit, an electronic tone will sound for30 seconds..If the interval between one push ofthe switch and the next exceeds 5seconds, an error will occur. In thisevent, perform the procedure againbeginning with part 4. If an error occurssix times, perform the procedure againstarting with part 3.
8. Before the electronic tone stopssounding, use the power door lockingswitch to reenter the transmitter codebeginningwith the leftmost digit.
NOTE
If you do not start entering the numberusing the lock knob before the electro-nic tone stops sounding, an error willoccur. In this event, perform the proce-dure again beginning with part 3.
9. When you have finished entering thecode a second time, an electronic tone willsound for 1 second and automatic doorlocking and unlocking operation will takeplace once to indicate completion ofregistration, provided the code enteredthe second time is identical to that enteredthe first time.
NOTE
If the code entered the second time isnot identical to the code entered thefirst time, an error will occur. In thisevent, perform the procedure againbeginning with part 5. If an error occursfive times, perform the procedure againstarting with part 3.
10. If you wish to program another trans-mitter code into the system (up to fourtransmitter codes can be programmed intothe system), perform the procedure begin-ning with part 4. When you have finishedprogramming all of the necessary trans-mitter codes into the system, remove thekey from the ignition switch.
11. Test every registered transmitter toconfirm correctoperation.
!Deleting old transmitter codes
The control unit of the remote keylessentry system has four memory locations tostore transmitter codes, giving it the abilityto operate with up to four transmitters.When you lose a transmitter, the losttransmitter’s code remains in the memory.For security reasons, lost transmittercodes should be deleted from the mem-ory.
To delete old transmitter codes, programfour transmitter codes into the system. If
you have only one current transmitter,program it four times. If you have twocurrent transmitters, program each onetwice. If you have three current transmit-ters, program two of them once and thethird one twice. This process will leaveonly current transmitter codes in thesystem’s memory.
NOTE
Make sure no one else is operatingtheir keyless entry system within rangeof your vehicle when programmingtransmitters. If someone else were tooperate their remote transmitter whileyou are programming your transmit-ters, it is possible that their transmittercode will be programmed into yoursystem, allowing them unauthorizedaccess to your vehicle.
Keys and doors2-15