window SUBARU TRIBECA 2014 1.G Service Manual
[x] Cancel search | Manufacturer: SUBARU, Model Year: 2014, Model line: TRIBECA, Model: SUBARU TRIBECA 2014 1.GPages: 426, PDF Size: 6.37 MB
Page 226 of 426
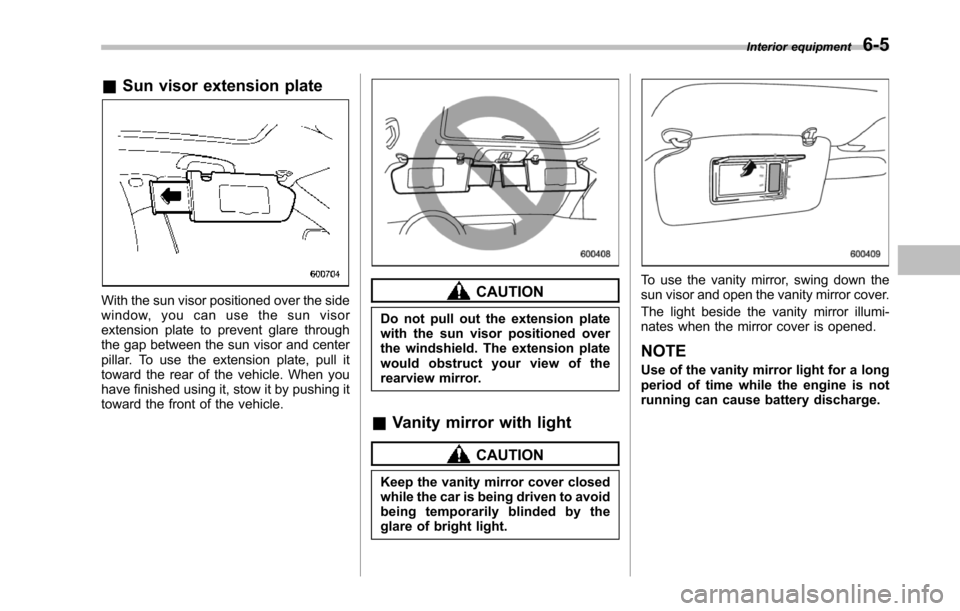
&Sun visor extension plate
With the sun visor positioned over the sidewindow, you can use the sun visorextension plate to prevent glare throughthe gap between the sun visor and centerpillar. To use the extension plate, pull ittoward the rear of the vehicle. When youhave finished using it, stow it by pushing ittoward the front of the vehicle.
CAUTION
Do not pull out the extension platewith the sun visor positioned overthe windshield. The extension platewould obstruct your view of therearview mirror.
&Vanity mirror with light
CAUTION
Keep the vanity mirror cover closedwhile the car is being driven to avoidbeing temporarily blinded by theglare of bright light.
To use the vanity mirror, swing down thesun visor and open the vanity mirror cover.
The light beside the vanity mirror illumi-nates when the mirror cover is opened.
NOTE
Use of the vanity mirror light for a longperiod of time while the engine is notrunning can cause battery discharge.
Interior equipment6-5
Page 251 of 426
7-4Starting and operating
WARNING
Before opening the fuel filler cap,first touch the vehicle body or ametal portion of the fuel pump orsimilar object to discharge anystatic electricity that may be presenton your body. If your body is carry-ing an electrostatic charge, there isa possibility that an electric sparkcould ignite the fuel, which couldburn you. To avoid acquiring a newstatic electric charge, do not getback into the vehicle while refuelingis in progress.
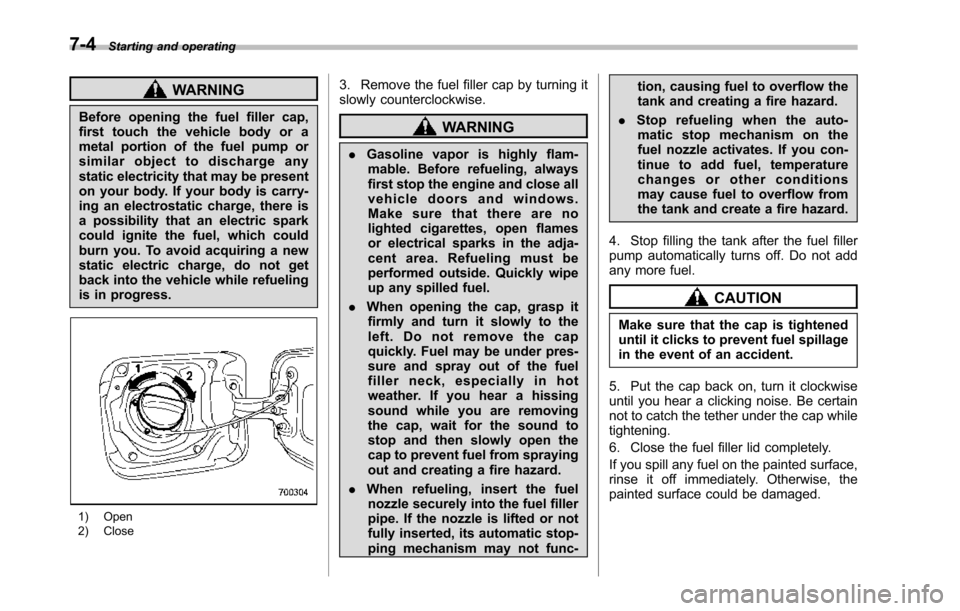
1) Open2) Close
3. Remove the fuel filler cap by turning itslowly counterclockwise.
WARNING
.Gasoline vapor is highly flam-mable. Before refueling, alwaysfirst stop the engine and close allvehicle doors and windows.Make sure that there are nolighted cigarettes, open flamesor electrical sparks in the adja-cent area. Refueling must beperformed outside. Quickly wipeup any spilled fuel.
.When opening the cap, grasp itfirmly and turn it slowly to theleft. Do not remove the capquickly. Fuel may be under pres-sure and spray out of the fuelfiller neck, especially in hotweather. If you hear a hissingsound while you are removingthe cap, wait for the sound tostop and then slowly open thecapto prevent fuel from sprayingout and creating a fire hazard.
.When refueling, insert the fuelnozzle securely into the fuel fillerpipe. If the nozzle is lifted or notfullyinserted, its automatic stop-ping mechanism may not func-
tion, causing fuel to overflow thetank and creating a fire hazard.
.Stop refueling when the auto-matic stop mechanism on thefuel nozzle activates. If you con-tinue to add fuel, temperaturechanges or other conditionsmay cause fuel to overflow fromthe tank and create a fire hazard.
4. Stop filling the tank after the fuel fillerpump automatically turns off. Do not addany more fuel.
CAUTION
Make sure that the cap is tighteneduntil it clicks to prevent fuel spillagein the event of an accident.
5. Put the cap back on, turn it clockwiseuntil you hear a clicking noise. Be certainnot to catch the tether under the cap whiletightening.
6. Close the fuel filler lid completely.
If you spill any fuel on the painted surface,rinse it off immediately. Otherwise, thepainted surface could be damaged.
Page 254 of 426
Preparing to drive
You should perform the following checksand adjustments every day before youstart driving.
1. Check that all windows, mirrors, andlights are clean and unobstructed.
2. Check the appearance and conditionof the tires. Also check tires for properinflation.
3. Look under the vehicle for any sign ofleaks.
4. Check that the hood and rear gate arefully closed.
5. Check the adjustment of the seat.
6. Check the adjustment of the insideand outside mirrors.
7. Fasten your seatbelt. Check that yourpassengers have fastened their seatbelts.
8. Check the operation of the warningand indicator lights when the ignitionswitch is turned to the“ON”position.
9. Check the gauges, indicator and warn-ing lights after starting the engine.
NOTE
Engine oil, engine coolant, brake fluid,washer fluid and other fluid levelsshould be checked daily, weekly or atfuel stops.
Starting the engine
CAUTION
.Do not operate the starter motorcontinuously for more than 10seconds. If the engine fails tostart after operating the starterfor 5 to 10 seconds, wait for 10seconds or more before tryingagain.
.If you restart the engine while thevehicle is moving, shift the selectlever into the“N”position. Donot attempt to place the selectlever of a moving vehicle into the“P”position.
1. Apply the parking brake.
2. Turn off unnecessary lights and ac-cessories.
3. Shift the select lever to the“P”or“N”position (preferably“P”position). Thestarter will only operate when the selectlever is at the“P”or“N”position.
4. Turn the ignition switch to the“ON”position and check the operation of thewarning and indicator lights. Refer to“Warning and indicator lights”F3-9.
5. Turn the ignition switch to the“START”positionwithoutdepressing the accelera-
tor pedal. Release the key immediatelyafter the engine has started.
If the engine does not start, try thefollowing.(1) Turn the ignition switch to the“LOCK”position and wait for at least10 seconds. After checking that theparking brake is firmly set, turn theignition switch to the“START”positionwhile depressing the accelerator pedalslightly (approximately a quarter of thefull stroke).Release the acceleratorpedal as soon as the engine starts.(2) If this fails to start the engine, turnthe ignition switch back to the“LOCK”position and wait for at least 10seconds.Then fully depress the accel-erator pedal and turn the ignitionswitch to the“START”position. If theengine starts, quickly release theaccelerator pedal.(3) If this fails to start the engine, turnthe ignition switch again to the“LOCK”position.After waiting for 10 secondsor longer, turn the ignition switch to the“START”position without depressingthe accelerator pedal.(4) If the engine still refuses to start,contact your nearest SUBARU dealerfor assistance.
6. Confirm that all warning and indicatorlights have turned off after the engine has
Starting and operating7-7
–CONTINUED–
Page 256 of 426
&Starting your vehicle
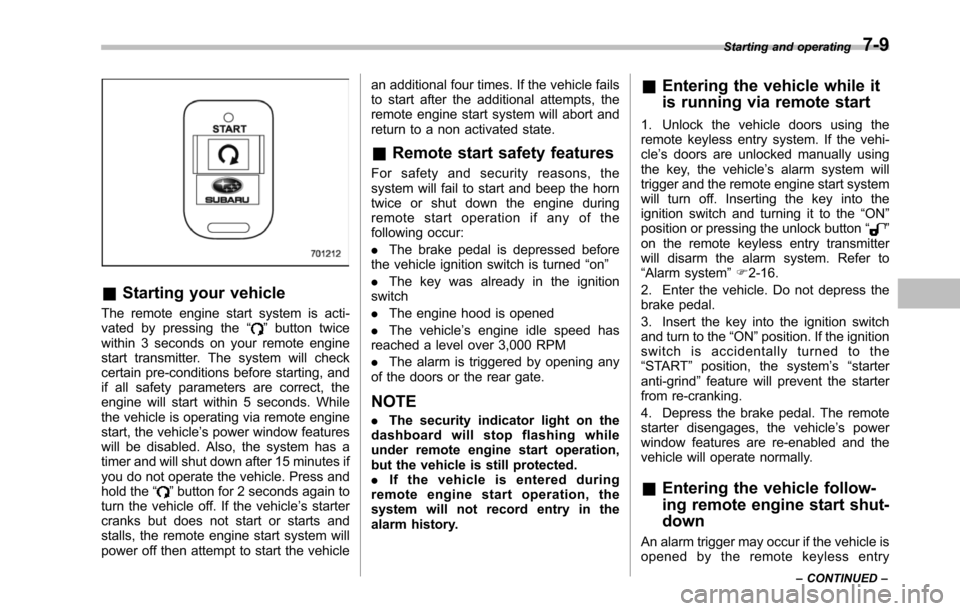
The remote engine start system is acti-vated by pressing the“”button twicewithin 3 seconds on your remote enginestart transmitter. The system will checkcertain pre-conditions before starting, andif all safety parameters are correct, theengine will start within 5 seconds. Whilethe vehicle is operating via remote enginestart, the vehicle’s power window featureswill be disabled. Also, the system has atimer and will shut down after 15 minutes ifyou do not operate the vehicle. Press andhold the“”button for 2 seconds again toturn the vehicle off. If the vehicle’s startercranks but does not start or starts andstalls, the remote engine start system willpower off then attempt to start the vehicle
an additional four times. If the vehicle failsto start after the additional attempts, theremote engine start system will abort andreturn to a non activated state.
&Remote start safety features
For safety and security reasons, thesystem will fail to start and beep the horntwice or shut down the engine duringremote start operation if any of thefollowing occur:
.The brake pedal is depressed beforethe vehicle ignition switch is turned“on”
.The key was already in the ignitionswitch
.The engine hood is opened
.The vehicle’s engine idle speed hasreached a level over 3,000 RPM
.The alarm is triggered by opening anyof the doors or the rear gate.
NOTE
.The security indicator light on thedashboard will stop flashing whileunder remote engine start operation,but the vehicle is still protected..If the vehicle is entered duringremote engine start operation, thesystem will not record entry in thealarm history.
&Entering the vehicle while it
is running via remote start
1. Unlock the vehicle doors using theremote keyless entry system. If the vehi-cle’s doors are unlocked manually usingthe key, the vehicle’s alarm system willtrigger and the remote engine start systemwill turn off. Inserting the key into theignition switch and turning it to the“ON”position or pressing the unlock button“”on the remote keyless entry transmitterwill disarm the alarm system. Refer to“Alarmsystem”F2-16.
2. Enter the vehicle. Do not depress thebrake pedal.
3. Insert the key into the ignition switchand turn to the“ON”position. If the ignitionswitch is accidentally turned to the“START”position, the system’s“starteranti-grind”feature will prevent the starterfrom re-cranking.
4. Depress the brake pedal. The remotestarter disengages, the vehicle’s powerwindow features are re-enabled and thevehicle will operate normally.
&Entering the vehicle follow-
ing remote engine start shut-
down
An alarm trigger may occur if the vehicle isopened by the remote keyless entry
Starting and operating7-9
–CONTINUED–
Page 282 of 426
exhaust fumes are entering thevehicle, have the problemchecked and corrected as soonas possible. If you must driveunder these conditions, driveonly with all windows fully open.
.Keep the rear gate closed whiledriving to prevent exhaust gasfrom entering the vehicle.
NOTE
Due to the expansion and contractionof the metals used in the manufactureof the exhaust system, you may hear acrackling sound coming from the ex-haust systemfor a short time after theengine has been shut off. This sound isnormal.
Catalytic converter
WARNING
.Avoid fire hazards. Do not driveor park the vehicle anywherenear flammable materials (e.g.grass, paper, rags or leaves),because the catalytic converteroperates at very high tempera-tures.
.Keep everyone and flammablematerials away from the exhaustpipe while the engine is running.The exhaust gas is very hot.
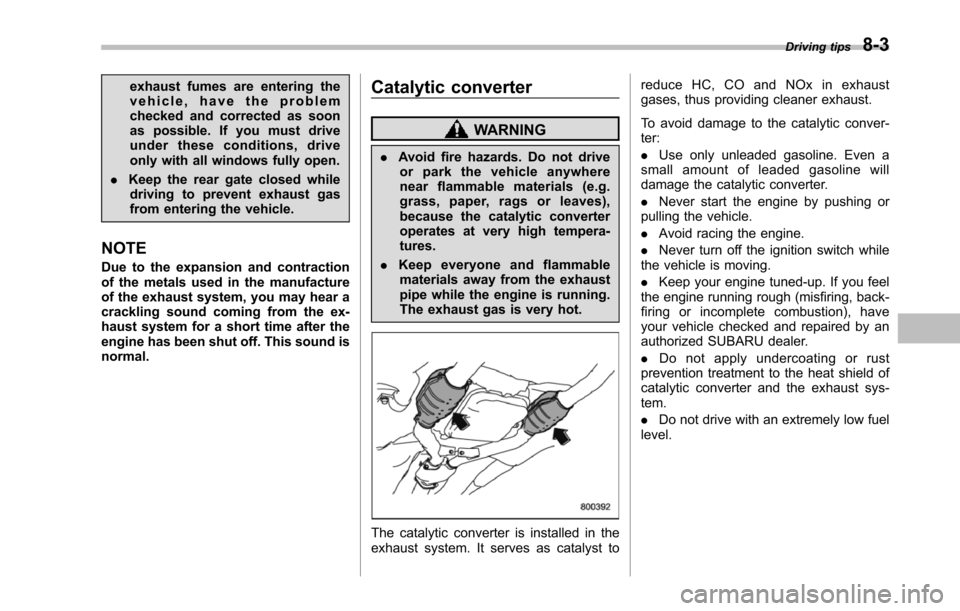
The catalytic converter is installed in theexhaust system. It serves as catalyst to
reduce HC, CO and NOx in exhaustgases, thus providing cleaner exhaust.
To avoid damage to the catalytic conver-ter:
.Use only unleaded gasoline. Even asmall amount of leaded gasoline willdamage the catalytic converter.
.Never start the engine by pushing orpulling the vehicle.
.Avoidracing the engine.
.Never turn off the ignition switch whilethe vehicle is moving.
.Keep your engine tuned-up. If you feelthe engine running rough (misfiring, back-firing or incomplete combustion), haveyour vehicle checked and repaired by anauthorized SUBARU dealer.
.Do not apply undercoating or rustprevention treatment to the heat shield ofcatalytic converter and the exhaust sys-tem.
.Do not drive with an extremely low fuellevel.
Driving tips8-3
Page 287 of 426
8-8Driving tips
Winter driving
&Operation during cold
weather
Carry some emergency equipment, suchas a window scraper, a bag of sand,flares, a small shovel and jumper cables.
Check the battery and cables. Coldtemperatures reduce battery capacity.The battery must be in good condition toprovide enough power for cold winterstarts.
Use an engine oil of proper grade andviscosity for cold weather. Heavy summeroil will cause harder starting.
Keep the door locks from freezing bysquirting them with deicer or glycerin.
Forcing a frozen door open may damageor separate the rubber weather stripsaround the door. If the door is frozen,use hot water to melt the ice, and after-wards thoroughly wipe the water away.
Use a windshield washer fluid that con-tains an antifreeze solution. Do not useengine antifreeze or other substitutesbecause they may damage the paint ofthe vehicle.
SUBARU Windshield Washer Fluid con-tains 58.5% methyl alcohol and 41.5%surfactant, by volume. Its freezing tem-perature varies according to how much itis diluted, as indicated in the followingtable.
Washer Fluid Con-centrationFreezing Temperature
30% 10.48F(!128C)
50%!48F(!208C)
100%!498F(!458C)
In order to prevent freezing of washerfluid, check the freezing temperatures inthe table above when adjusting the fluidconcentration to the outside temperature.
If you fill the reservoir tank with a fluid witha different concentration from the oneused previously, purge the old fluid fromthe piping between the reservoir tank and
washer nozzles by operating the washerfor a certain period of time. Otherwise, ifthe concentration of the fluid remaining inthe piping is too low for the outsidetemperature, it may freeze and block thenozzles.
CAUTION
.Adjust the washer fluid concen-tration appropriately for the out-side temperature. If the concen-tration is inappropriate, sprayedwasher fluid may freeze on thewindshield and obstruct yourview, and the fluid may freeze inthe reservoir tank.
.State or local regulations onvolatile organic compounds mayrestrict the use of methanol, acommon windshield washer anti-freeze additive. Washer fluidscontaining non-methanol anti-freeze agents should be usedonly if they provide cold weatherprotection without damagingyour vehicle’s paint, wiper bladesor washer system.
!Before driving your vehicle
Before entering the vehicle, remove anysnow or ice from your shoes because that
Page 289 of 426
8-10Driving tips
vior can cause the wheels to lock, possiblyleading to loss of vehicle control.
An anti-lock brake system (ABS) en-hances your vehicle’sbrakingperfor-mance on snowy and icy roads. Forinformation about braking on slipperysurfaces, refer to“ABS (Anti-lock BrakeSystem)”F7-20 and“Vehicle DynamicsControl system”F7-23.
!Wiper operation when snowing
Before driving in cold weather, make surethe wiper blades are not frozen to thewindshield or rear window. If the wiperblades are frozen to the windshield or rearwindow, use the defroster with the airflowcontrol button in the“”position and thetemperature control dial set for maximumwarmth until the wiper blades are com-pletely thawed out. The wiper deicer ishelpful to thaw the windshield wiperblades. To thaw out the rear wiper blade,use the rear window defogger.
When driving in snow, if frozen snow startsto stick on the surface of the windshielddespite wiper operation, use the defrosterwith the airflow control button in“”andthe temperature control dial set for max-imum warmth. After the windshield getswarmed enoughto melt the frozen snowon it, wash it away using the windshieldwasher.
Snow stuck on the wiper arm prevents thewiper from working effectively. If snow isstuck on the wiper arm, pull off the road toa safe place, then remove it. If you stopthe vehicle at road side, use the hazardwarning flasher to alert other drivers.
We recommend use of non-freezing typewiper blades (winter blades) during theseasons in which you could have snowand freezing temperatures. Blades of thistype givesuperior wiping performance insnowy conditions. Be sure to use bladesthat are suitable for your vehicle.
CAUTION
During high-speed driving, non-freezing type wiper blades may notperformas well as standard wiperblades. If this happens, reduce thevehicle speed.
NOTE
When the season requiring non-freez-ing type wiper blades is over, replacethem with standard wiper blades.
&Corrosion protection
Refer to“Corrosion protection”F10-4.
&Snow tires
WARNING
.When replacing original tires withwinter (snow) tires, make sureyou use only tires of the samesize, circumference, speed sym-bol and load index as the originaltires listed on the tire placard.Using tires of other sizes orconstructions may affect speed-ometer/odometer calibration andclearance between the body andtires. It also may be dangerousand lead to loss of vehicle con-trol.
.You must install four winter tiresthat are of the same size, circum-ferences,construction, manufac-turer, brand (tread pattern), de-gree of wear, speed symbol andload index. Mixing tires of othersizes, circumferences or con-structions may result in severemechanical damage to the drivetrain of your vehicle and mayaffect ride, handling, braking andspeedometer/odometer calibra-tion. It also may be dangerousand lead to loss of vehicle con-trol.
Page 329 of 426
10-2Appearance care
Exterior care
&Washing
CAUTION
.When washing the vehicle, thebrakes may get wet. As a result,the brake stopping distance willbe longer. To dry the brakes,drive the vehicle at a safe speedwhile lightly pressing the brakepedal to heat up the brakes.
.Do not wash the engine compart-ment and areas adjacent to it. Ifwater enters the engine air in-take, electrical parts or the powersteering fluid reservoir, it willcause engine trouble or a mal-functionof the power steering.
.Do not use any organic solventswhen washing the surface of thebulb assembly cover. However, ifa detergent with organic solventsis used to wash the cover sur-face, completely rinse off thedetergent with water. Otherwise,the cover surface may be da-maged.
.Since your vehicle is equippedwith a rear wiper, automatic car-wash brushes could become
tangled around it, damaging thewiper arm and other compo-nents. Ask the automatic car-wash operator not to let thebrushes touch the wiper arm orto fix the wiper arm on the rearwindow glass with adhesive tapebefore operating the machine.
NOTE
When having your vehicle washed inan automatic car wash, make surebeforehand that the car wash is ofsuitable type.
The best way to preserve your vehicle’sbeauty is frequent washing. Wash thevehicleat least once a month to avoidcontamination by road grime.
Wash dirt off with a wet sponge and plentyof lukewarm or cold water. Do not washthe vehicle with hot water and in directsunlight.
Salt, chemicals, insects, tar, soot, treesap, and bird droppings should be washedoff by using a light detergent, as required.If you use a light detergent, make certainthat it is a neutral detergent. Do not usestrong soap or chemical detergents. Allcleaning agents should be promptlyflushed from the surface and not allowed
to dry there. Rinse the vehicle thoroughlywith plenty of lukewarm water. Wipe theremaining water off with a chamois or softcloth.
!Washing the underbody
Chemicals, salts and gravel used fordeicing road surfaces are extremely cor-rosive, accelerating the corrosion of un-derbody components, such as the exhaustsystem, fuel and brake lines, brakecables, floor pan and fenders, and sus-pension.
Thoroughly flush the underbody and in-side of the fenders with lukewarm or coldwater at frequent intervals to reduce theharmful effects of such agents.
Mud and sand adhering to the underbodycomponents may accelerate their corro-sion.
Afterdriving off-road or muddy or sandyroads, wash the mud and sand off theunderbody.
Carefully flushthe suspension and axleparts, as they are particularly prone tomud and sand buildup. Do not use asharp-edged tool to remove caked mud.
NOTE
Be careful not to damage brake hoses,sensor harnesses, and other partswhen washing suspension compo-
Page 332 of 426
Cleaning the interior
Use a soft, damp cloth to clean the climatecontrol panel, audio equipment, instru-ment panel, center console, combinationmeter panel, and switches. (Do not useorganic solvents.)
&Seat fabric
Remove loose dirt, dust or debris with avacuum cleaner. If the dirt is caked on thefabric or hard to remove with a vacuumcleaner, use a soft blush then vacuum it.
Wipe the fabric surface with a tightlywrung cloth and dry the seat fabricthoroughly. If the fabric is still dirty, wipeusing a solution of mild soap and luke-warmwater then dry thoroughly.
If the stain does not come out, try acommercially available fabric cleaner. Usethe cleaner on a hidden place and makesure it does not affect the fabric adversely.Use the cleaner according to its instruc-tions.
NOTE
When cleaning the seat, do not usebenzine, paint thinner, or any similarmaterials.
&Leather seat materials
The leather used by SUBARU is a highquality natural product which will retain itsdistinctive appearance and feel for manyyears with proper care.
Allowing dust or road dirt to build up on thesurface can cause the material to becomebrittle and to wear prematurely. Regularcleaning witha soft, moist, natural fibercloth should be performed monthly, takingcare not to soak the leather or allow waterto penetrate the stitched seams.
A mild detergent suitable for cleaningwoolen fabrics may be used to removedifficult dirt spots, rubbing with a soft, drycloth afterwards to restore the luster. Ifyour SUBARU is to be parked for a longtime in bright sunlight, it is recommendedthat the seats and headrests be covered,or the windows shaded, to prevent fadingor shrinkage.
Minor surface blemishes or bald patchesmay be treated with a commercial leatherspray lacquer. You will discover that eachleather seat section will develop soft foldsor wrinkles, which is characteristic ofgenuine leather.
&Synthetic leather upholstery
The synthetic leather material used on theSUBARU may be cleaned using mild soap
or detergent and water, after first vacuum-ing or brushing away loose dirt. Allow thesoap to soak in for a few minutes and wipeoff with a clean, damp cloth. Commercialfoam-type cleaners suitable for syntheticleather materials may be used whennecessary.
NOTE
Strong cleaning agents such as sol-vents, paint thinners, window cleaneror gasoline must never be used onleather or synthetic interior materials.
&Climate control panel, audio
panel, instrument panel,
console panel, switches,
combination meter, and other
plastic surface
Use a soft, damp cloth to clean the climatecontrol panel, audio equipment, instru-ment panel, center console, combinationmeter panel, and switches.
CAUTION
.Do not use organic solvents suchas paint thinners or fuel, orstrongcleaning agents that con-tain those solvents.
.Do not use chemical solvents
Appearance care10-5
–CONTINUED–
Page 334 of 426

Maintenance schedule....................................... 11-3
Maintenance precautions................................... 11-3Before checking or servicing in the enginecompartment.................................................... 11-4When you do checking or servicing in the enginecompartment while the engine is running.......... 11-4
Engine hood....................................................... 11-4
Engine compartment overview.......................... 11-6
Engine oil............................................................ 11-7Checking the oil level......................................... 11-7Changing the oil and oil filter.............................. 11-8Recommendedgrade and viscosity.................... 11-9Synthetic oil....................................................... 11-9
Cooling system................................................ 11-10Hose and connections...................................... 11-10Engine coolant................................................. 11-11
Air cleaner element.......................................... 11-12Replacing the air cleaner element..................... 11-12
Spark plugs...................................................... 11-13Recommended spark plugs.............................. 11-13
Drive belts........................................................ 11-13
Automatic transmission fluid.......................... 11-14Checking the fluid level.................................... 11-14Recommended fluid......................................... 11-15
Front differential gear oil................................. 11-15Checking the oil level....................................... 11-15Recommended grade and viscosity.................. 11-16
Rear differential gear oil.................................. 11-16Recommended grade and viscosity.................. 11-16
Power steering fluid........................................ 11-16Checking the fluid level.................................... 11-16Recommended fluid......................................... 11-17
Brake fluid........................................................ 11-17Checking the fluid level.................................... 11-17Recommended brake fluid............................... 11-18
Brakebooster.................................................. 11-18
Brake pedal...................................................... 11-19Checking the brake pedal free play.................. 11-19Checking the brake pedal reserve distance....... 11-19
Replacement of brake pad and lining............ 11-19Breaking-in of new brake pads and linings....... 11-20
Parking brake stroke....................................... 11-20
Tires and wheels.............................................. 11-21Types of tires................................................... 11-21Tire pressure monitoring system (TPMS).......... 11-21Tire inspection................................................. 11-22Tire pressuresand wear.................................. 11-23Wheel balance................................................. 11-25Wear indicators............................................... 11-25Tire rotation direction mark.............................. 11-25Tire rotation..................................................... 11-26Tire replacement.............................................. 11-26Wheel replacement.......................................... 11-27
Aluminum wheels............................................ 11-27
Windshield washer fluid.................................. 11-28
Replacement of wiper blades......................... 11-29Windshield wiper blade assembly..................... 11-30Windshield wiper blade rubber ......................... 11-30Rear window wiper blade assembly.................. 11-31
Maintenance and service
11