window SUBARU TRIBECA 2014 1.G Workshop Manual
[x] Cancel search | Manufacturer: SUBARU, Model Year: 2014, Model line: TRIBECA, Model: SUBARU TRIBECA 2014 1.GPages: 426, PDF Size: 6.37 MB
Page 335 of 426
Maintenance and service
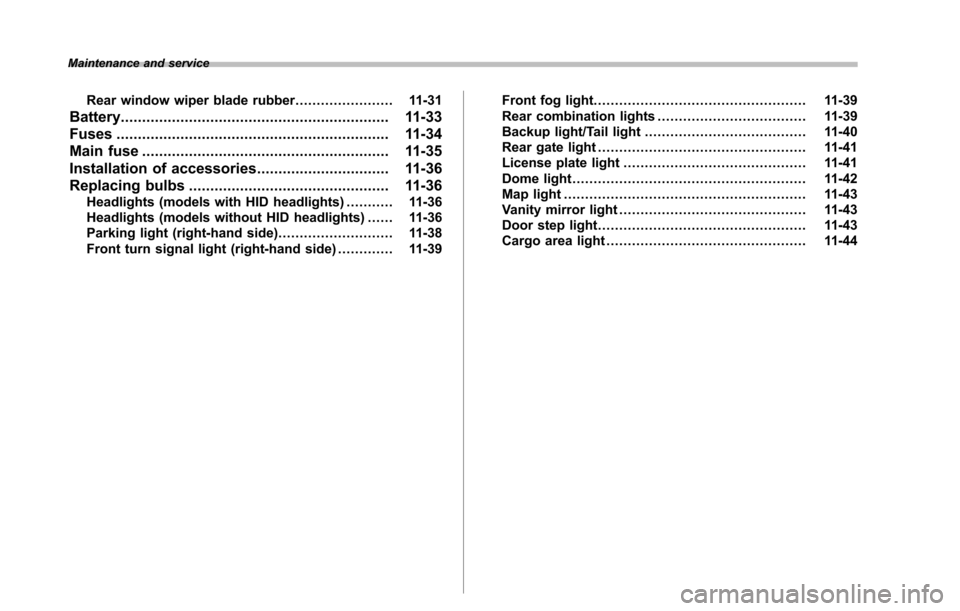
Rear window wiper blade rubber....................... 11-31
Battery............................................................... 11-33
Fuses................................................................ 11-34
Main fuse.......................................................... 11-35
Installation of accessories............................... 11-36
Replacing bulbs............................................... 11-36Headlights(models with HID headlights)........... 11-36Headlights (models without HID headlights) ...... 11-36Parking light (right-hand side)........................... 11-38Front turn signal light (right-hand side)............. 11-39
Front fog light.................................................. 11-39Rear combination lights................................... 11-39Backup light/Tail light...................................... 11-40Rear gate light................................................. 11-41License plate light........................................... 11-41Dome light....................................................... 11-42Map light......................................................... 11-43Vanity mirror light............................................ 11-43Door step light................................................. 11-43Cargo area light............................................... 11-44
Page 362 of 426

side temperature. If the concen-tration is inappropriate, sprayedwasher fluid may freeze on thewindshield and obstruct yourview, and the fluid may freeze inthe reservoir tank.
.State or local regulations onvolatileorganic compounds mayrestrict the use of methanol, acommon windshield washer anti-freeze additive. Washer fluidscontaining non-methanol anti-freeze agents should be usedonly if they provide cold weatherprotection without damagingyour vehicle’s paint, wiper bladesor washer system.
Replacement of wiper blades
Grease, wax, insects, or other materialson the windshield or the wiper bladeresults in jerky wiper operation and streak-ing on the glass. If you cannot remove thestreaks after operating the windshieldwasher or if the wiper operation is jerky,clean the outer surface of the windshield(or rear window) and the wiper bladesusing a sponge or soft cloth with a neutraldetergent or mild abrasive cleaner. Aftercleaning,rinse the windshield and wiperblades with clean water. The windshield isclean if beads do not form when you rinsethe windshield with water.
CAUTION
.Do not clean the wiper bladeswith gasoline or a solvent, suchas paint thinner or benzine. Thiswill cause deterioration of thewiper blades.
.When you wish to raise thepassenger-side wiper arm, firstraise the driver-side wiper arm.Otherwise, the passenger-sidewiper assembly and driver-sidewiper assembly will touch eachother, possibly resulting inscratches.
.While removing the wiper bladesfrom the wiper arms, do notreturn the wiper arms to theoriginal positions. Otherwise,the windshield surface may bescratched.
.When returning the raised wiperarms to the original positions,carefully return the wiper armson the windshield while support-ing them with your hands. Youshould not return the wiper armsto the windshield only by thereturn spring. Otherwise, the wi-per arms may be deformed and/or the windshield surface may bescratched.
.Return the passenger-side wiperarm to its original position beforereturning the driver-side wiperarm to its original position.Otherwise, the passenger-sidewiper assembly and driver-sidewiper assembly will touch eachother, possibly resulting inscratches.
If you cannot eliminate the streaking evenafter following this method, replace thewiperblades using the following proce-dures. Be sure to use genuine SUBARUwiper blade rubbers as replacements.
Maintenance and service11-29
–CONTINUED–
Page 364 of 426

3. Align the claws of the metal supportwith the grooves in the rubber and slidethe blade rubber assembly into the metalsupport until it locks.
1) Stopper
4. Be sure to position the claws at the
end of the metal support between thestoppers on the rubber as shown. If therubber is not retained properly, the wiperblade may scratch the windshield.
&Rear window wiper blade
assembly
1. Raise the wiper arm off the rearwindow.
2. Turn the wiper blade assembly coun-terclockwise.
3. Pull the wiper blade assembly towardyou to remove it from the wiper arm.
&Rear window wiper blade
rubber
Maintenance and service11-31
–CONTINUED–
Page 365 of 426

11-32Maintenance and service
1. Pull out the end of the blade rubberassembly to unlock it from the plasticsupport.
2. Pull the blade rubber assembly out ofthe plastic support.
1) Metal spines
3. If the new blade rubber is not providedwith two metal spines, remove the metalspines from the old blade rubber andinstall them in the new blade rubber.
4. Align the claws of the plastic supportwith the grooves in the blade rubberassembly, then slide the blade rubberassembly into place.
Securely retain both ends of the rubberwith thestoppers on the plastic supportends. If the rubber is not retained properly,the wiper may scratch the rear windowglass.
5. Install the wiper blade assembly to thewiperarm. Make sure that it locks in place.
6. Hold the wiper arm by hand and slowlylower it in position.
Page 387 of 426

12-10Specifications
FusepanelFuseratingCircuit
13 20A.Cargo socket
14 15A.Parking light.Tail light.Rear combination light
15Empty
16 10A.Illumination
17 15A.Seat heaters
18 10A.Backup light
19 7.5A.Headlight right side re-lay
20 Empty
21 7.5A.Starter relay
22 15A.Air conditioner.Rear window defoggerrelay coil
23 15A.Rear wiper.Rear window washer
24 15A.Audio unit
25 15A.SRS airbag system(main)
26 7.5A.Power window relay
27 15A.Rear blower fan
FusepanelFuseratingCircuit
28 15A.Rear blower fan
29 15A.Fog light
30 30A.Front wiper
31 7.5A.Auto air conditioner unit.Integrated unit
32 7.5A.Headlight left side relay
33 7.5A.Vehicle Dynamics Con-trol unit
Page 388 of 426
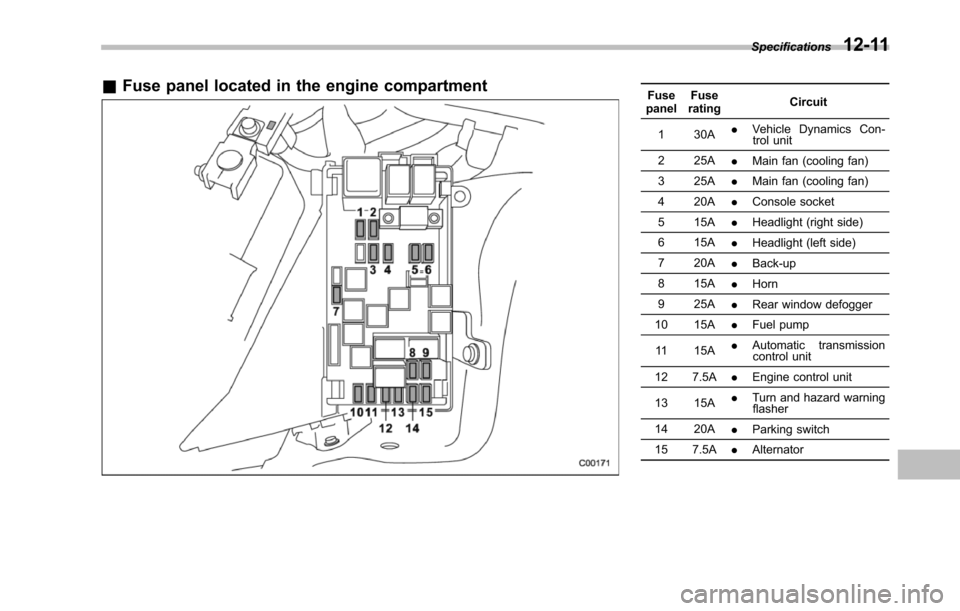
&Fuse panel located in the engine compartmentFusepanelFuseratingCircuit
1 30A.Vehicle Dynamics Con-trol unit
2 25A.Main fan (cooling fan)
3 25A.Main fan (cooling fan)
4 20A.Console socket
5 15A.Headlight (right side)
6 15A.Headlight (left side)
7 20A.Back-up
8 15A.Horn
9 25A.Rear window defogger
10 15A.Fuel pump
11 15A.Automatic transmissioncontrol unit
12 7.5A.Engine control unit
13 15A.Turn and hazard warningflasher
14 20A.Parking switch
15 7.5A.Alternator
Specifications12-11
Page 398 of 426
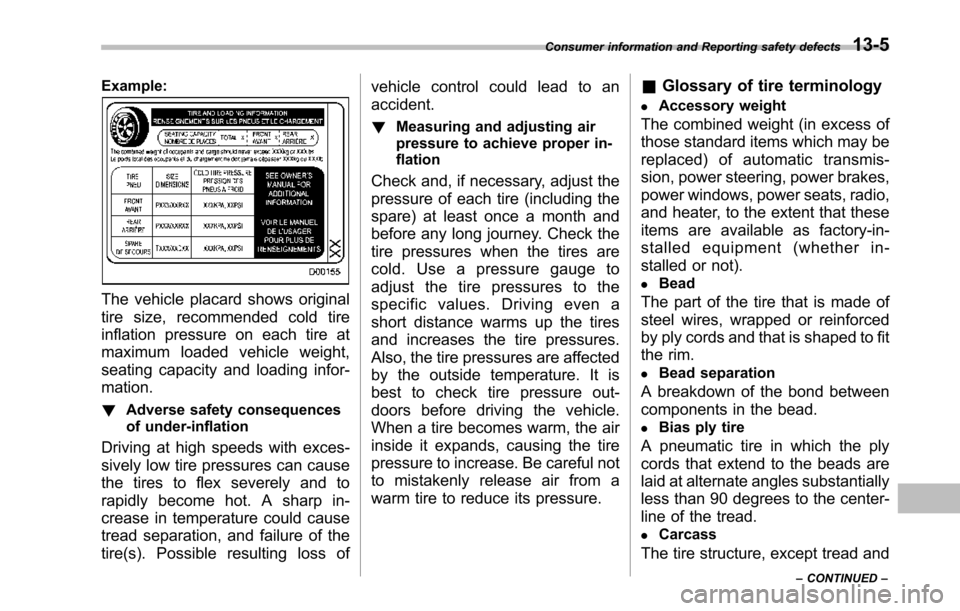
Example:
The vehicle placard shows original
tire size, recommended cold tire
inflation pressure on each tire at
maximum loaded vehicle weight,
seating capacity and loading infor-
mation.
!Adverse safety consequences
of under-inflation
Driving at high speeds with exces-
sively low tire pressures can cause
the tires to flex severely and to
rapidly become hot. A sharp in-
crease in temperature could cause
tread separation, and failure of the
tire(s). Possible resulting loss of
vehicle control could lead to an
accident.
!Measuring and adjusting air
pressure to achieve proper in-
flation
Check and, if necessary, adjust the
pressure of each tire (including the
spare) at least once a month and
before any long journey. Check the
tire pressures when the tires are
cold. Use a pressure gauge to
adjust the tire pressures to the
specific values. Driving even a
short distance warms up the tires
and increases the tire pressures.
Also, the tire pressures are affected
by the outside temperature. It is
best to check tire pressure out-
doors before driving the vehicle.
When a tire becomes warm, the air
inside it expands, causing the tire
pressure to increase. Be careful not
to mistakenly release air from a
warm tire to reduce its pressure.
&Glossary of tire terminology
.Accessory weight
The combined weight (in excess of
those standard items which may be
replaced) of automatic transmis-
sion, power steering, power brakes,
power windows, power seats, radio,
and heater, to the extent that these
items are available as factory-in-
stalled equipment (whether in-
stalled or not).
.Bead
The part of the tire that is made of
steel wires, wrapped or reinforced
by ply cords and that is shaped to fit
the rim.
.Bead separation
A breakdown of the bond between
components in the bead.
.Bias ply tire
A pneumatic tire in which the ply
cords that extend to the beads are
laid at alternate angles substantially
less than 90 degrees to the center-
line of the tread.
.Carcass
The tire structure, except tread and
Consumer information and Reporting safety defects13-5
–CONTINUED–
Page 416 of 426
Map light........................................................... 6-3, 11-43Maximum load limits................................................... 8-21Meters and gauges...................................................... 3-5Mirrors...................................................................... 3-38Moonroof.................................................................. 2-25Multi function display.................................................. 3-24
NNew vehicle break-in driving.......................................... 8-2
OOdometer.................................................................... 3-6Oil filter..................................................................... 11-8Oil levelEngine.................................................................. 11-7Front differential gear............................................ 11-15Rear differential gear............................................. 11-16Oilpressure warning light............................................ 3-13On-road and off-road driving...................................... 9, 8-6OutsideMirror defogger...................................................... 3-43Mirrors.................................................................. 3-42Temperature indicator............................................. 3-23Overhead console........................................................ 6-8Overheating engine.................................................... 9-14
PParkingBrake................................................................... 7-28Brake stroke......................................................... 11-20Light.................................................................... 11-38
Light switch........................................................... 3-32Tips . . . . . . . . . . . . . . . . . . . . . . . . . . . . . . . . . . . . . . . . . . . . . . . . . . . . . . . . . . . . . . . . . . . . . . 7-29Periodic inspections..................................................... 8-4Petrol fuel................................................................... 7-2PowerDoor locking switch.................................................. 2-7Outlets.................................................................. 6-10Outside mirrors...................................................... 3-42Seat....................................................................... 1-3Steering................................................................ 7-18Steering fluid................................................ 11-16, 12-7Windows............................................................... 2-21Precautions against vehicle modification................ 1-28, 1-72Preparing to drive........................................................ 7-7Printed antenna........................................................... 5-2
RRearAir conditioner......................................................... 4-9Combination lights................................................ 11-39Differential gear oil........................................ 11-16, 12-6Gate............................................................. 2-24, 9-18Gate light...................................................... 6-3, 11-41Turn signal light.................................................... 11-39Rear differentialOil temperature warning light................................... 3-13Rear Seat Entertainment............................................. 5-29Rear view camera...................................................... 6-21Rear windowDefogger button..................................................... 3-37Wiper and washer switch......................................... 3-35
Index14-7
Page 420 of 426

Rear differential oil temperature............................... 3-13Seatbelt........................................................ 1-18, 3-10SRS airbag system................................................ 3-11Vehicle Dynamics Control............................... 3-18, 3-19Windshield washer fluid.......................................... 3-17Warranties..................................................................... 1Warranties and maintenance....................................... 8-21Washing................................................................... 10-2Waxing and polishing................................................. 10-3Wear indicators......................................................... 11-25WheelAluminum............................................................. 11-27Balance............................................................... 11-25Nut tightening torque.............................................. 12-8Replacement........................................................ 11-27Windows................................................................... 2-21WindshieldWasher fluid......................................................... 11-28Wiper and washer switches..................................... 3-34Wiper blades........................................................ 11-30Wiper deicer.......................................................... 3-36WinterDriving.................................................................... 8-8Tires............................................................ 8-10, 11-21Wiper and washer...................................................... 3-33Wiper deicer.............................................................. 3-36
Index14-11