fuel cap SUBARU WRX 2016 Owners Manual
[x] Cancel search | Manufacturer: SUBARU, Model Year: 2016, Model line: WRX, Model: SUBARU WRX 2016Pages: 594, PDF Size: 19.43 MB
Page 16 of 594
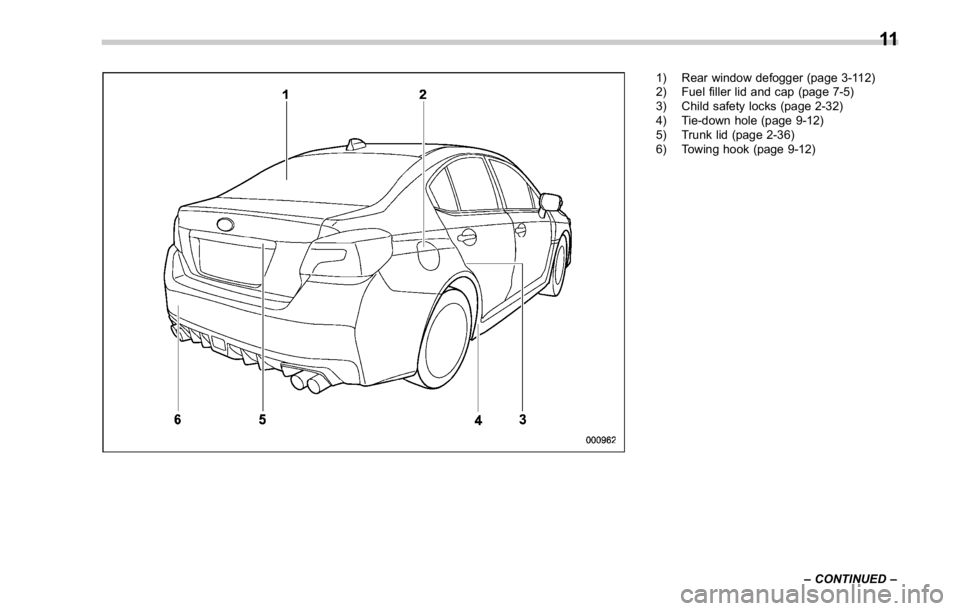
1) Rear window defogger (page 3-112)
2) Fuel filler lid and cap (page 7-5)
3) Child safety locks (page 2-32)
4) Tie-down hole (page 9-12)
5) Trunk lid (page 2-36)
6) Towing hook (page 9-12)
– CONTINUED –11
Page 146 of 594
NOTE This light also illuminates when the fuel
filler cap is not tightened until it clicks.
If you have recently refueled your vehicle,
the cause of the CHECK ENGINE warning
light/malfunction indicator light illuminating
could be a loose or missing fuel filler cap.
Remove the cap and retighten it until it
clicks. Make sure nothing is interfering
with the sealing of the cap. Tightening the
cap will not make the CHECK ENGINE
warning light/malfunction indicator light
turn off immediately. It may take several
driving trips. If the light does not turn off,
take your vehicle to your authorized
SUBARU dealer immediately.
! If the light is blinking
If the light is blinking while driving, an
engine misfire condition has been de-
tected which may damage the emission
control system.
To prevent serious damage to the emis-
sion control system, you should do the
following.
. Reduce vehicle speed.
. Avoid hard acceleration.
. Avoid steep uphill grades.
. Reduce the amount of cargo, if possi-
ble.
The CHECK ENGINE warning light may stop blinking and illuminate steadily after
several driving trips. You should have your
vehicle checked by an authorized
SUBARU dealer immediately.
& Charge warning light If this light illuminates when the engine is
running, it may indicate that the charging
system is not working properly.
If the light illuminates while driving or does
not turn off after the engine starts, stop the
engine at the first safe opportunity and
check the alternator belt. If the belt is
loose, broken or if the belt is in good
condition but the light remains illuminated,
contact your nearest SUBARU dealer
immediately.
& Oil pressure warning
light If this light illuminates when the engine is
running, it may indicate that the engine oil
pressure is low and the lubricating system
is not working properly.
If the light illuminates while driving or does
not turn off after the engine starts, stop the
engine at the first safe opportunity and
check the engine oil level. If the oil level is
low, add oil immediately. If the engine oil is
at the proper level but the light remains
illuminated, contact your nearest SUBARU dealer immediately.
For details about checking the engine oil
level or adding the engine oil, refer to
“ Engine oil ” F 11-13.
CAUTIONDo not operate the engine with the
oil pressure warning light on. This
may cause serious engine damage.
& Engine low oil level
warning indicator (ex-
cept STI) This indicator appears when the engine oil
level decreases to the lower limit.
If the engine low oil level warning indicator
appears while driving, park the vehicle in a
safe and level location, and then check
the engine oil level. When the engine oil
level is not within the normal range, refill
with engine oil. Refer to “ Engine oil ” F 11 -
13.
If the warning indicator does not disappear
after refilling the engine oil, or the warning
indicator appears even though the engine
oil level is within the normal range, have
the vehicle checked by a SUBARU dealer.Instruments and controls/Warning and indicator lights
– CONTINUED –3-17
Page 390 of 594

Fuel ...................................................................... 7-3Fuel requirements ............................................... 7-3
Fuel filler lid and cap ........................................... 7-5
State emission testing (U.S. only) ...................... 7-7
Preparing to drive ............................................... 7-8
Starting and stopping the engine (models
without push-button start system) .................. 7-9Starting engine .................................................... 7-9
Stopping the engine ........................................... 7-11
Starting and stopping engine (models with
push-button start system) .............................. 7-12Safety precautions ............................................. 7-12
Operating range for push-button start
system ............................................................. 7-12
Starting engine ................................................... 7-12
Stopping engine ................................................. 7-14
When access key does not operate properly ....... 7-14
Remote engine start system (dealer
option) .............................................................. 7-14Models with “ keyless access with push-button
start system ” ................................................... 7-15
Entering the vehicle while it is running via remote
start ................................................................. 7-16
Entering the vehicle following remote engine start
shutdown ......................................................... 7-16
Pre-heating or pre-cooling the interior of the
vehicle ............................................................. 7-16
System maintenance .......................................... 7-16
Manual transmission .......................................... 7-17
Shifting speeds .................................................. 7-18
Driving tips ........................................................ 7-18 Driver ’ s Control Center Differential (C.DIFF/
DCCD) (STI) ..................................................... 7-19To change mode of driver ’ s control center
differential ....................................................... 7-20
Auto mode ........................................................ 7-20
Manual mode ..................................................... 7-21
Temporary release ............................................. 7-23
Continuously variable transmission ................. 7-23Select lever ....................................................... 7-24
Selection of manual mode .................................. 7-26
Shift lock function ............................................. 7-27
Driving tips ........................................................ 7-28
SI-DRIVE (STI) .................................................... 7-29Intelligent (I) mode ............................................. 7-29
Sport (S) mode .................................................. 7-30
Sport Sharp (S#) mode. ...................................... 7-30
SI-DRIVE selector .............................................. 7-30
SI-DRIVE (except STI: CVT models) ................. 7-31Intelligent (I) mode ............................................. 7-31
Sport (S) mode .................................................. 7-31
Sport Sharp (S#) mode. ...................................... 7-32
SI-DRIVE switches ............................................. 7-32
Limited slip differential (LSD) (STI) .................. 7-33
Power steering ................................................... 7-33
STI .................................................................... 7-33
Except STI ......................................................... 7-34
Braking ............................................................... 7-35
Braking tips ....................................................... 7-35
Brake system .................................................... 7-35
Disc brake pad wear warning indicators ............. 7-36Starting and operating
7
Page 394 of 594
& Fuel filler lid and cap ! Refueling
Only one person should be involved in
refueling. Do not allow others to approach
the area of the vehicle near the fuel filler
pipe while refueling is in progress.
Be sure to observe any other precautions
that are posted at the service station.
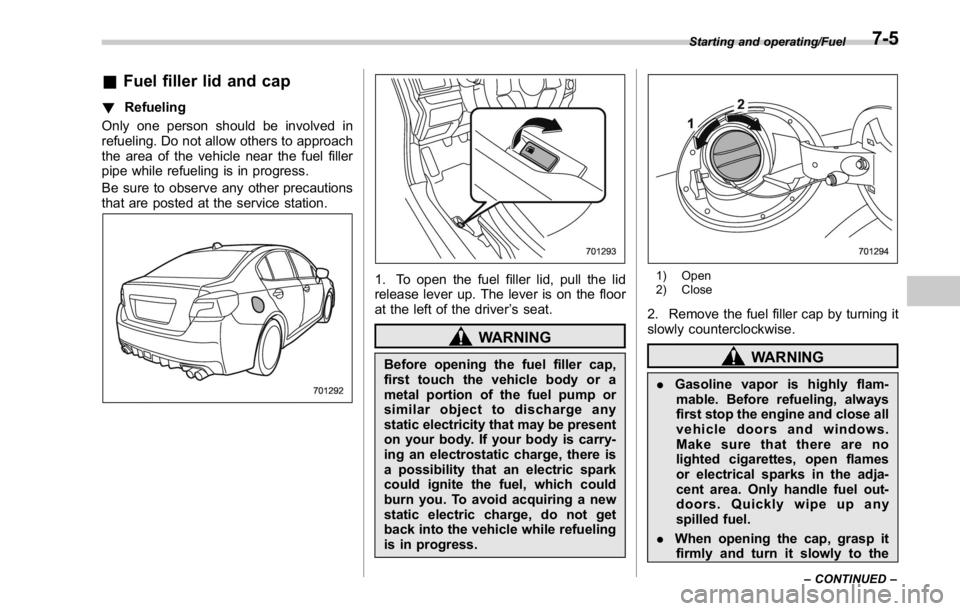
1. To open the fuel filler lid, pull the lid
release lever up. The lever is on the floor
at the left of the driver ’ s seat.
WARNINGBefore opening the fuel filler cap,
first touch the vehicle body or a
metal portion of the fuel pump or
similar object to discharge any
static electricity that may be present
on your body. If your body is carry-
ing an electrostatic charge, there is
a possibility that an electric spark
could ignite the fuel, which could
burn you. To avoid acquiring a new
static electric charge, do not get
back into the vehicle while refueling
is in progress. 1) Open
2) Close
2. Remove the fuel filler cap by turning it
slowly counterclockwise.
WARNING
. Gasoline vapor is highly flam-
mable. Before refueling, always
first stop the engine and close all
vehicle doors and windows.
Make sure that there are no
lighted cigarettes, open flames
or electrical sparks in the adja-
cent area. Only handle fuel out-
doors. Quickly wipe up any
spilled fuel.
. When opening the cap, grasp it
firmly and turn it slowly to the Starting and operating/Fuel
– CONTINUED –7-5
Page 395 of 594
Starting and operating/Fuel
left. Do not remove the cap
quickly. Fuel may be under pres-
sure and spray out of the fuel
filler neck, especially in hot
weather. If you hear a hissing
sound while you are removing
the cap, wait for the sound to
stop and then slowly open the
cap to prevent fuel from spraying
out and creating a fire hazard.
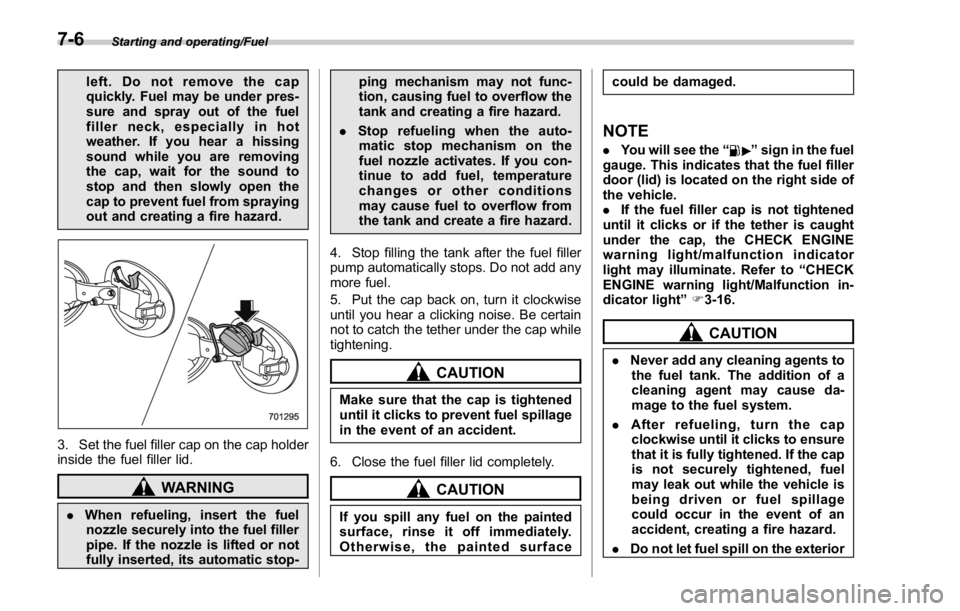
3. Set the fuel filler cap on the cap holder
inside the fuel filler lid.
WARNING
. When refueling, insert the fuel
nozzle securely into the fuel filler
pipe. If the nozzle is lifted or not
fully inserted, its automatic stop- ping mechanism may not func-
tion, causing fuel to overflow the
tank and creating a fire hazard.
. Stop refueling when the auto-
matic stop mechanism on the
fuel nozzle activates. If you con-
tinue to add fuel, temperature
changes or other conditions
may cause fuel to overflow from
the tank and create a fire hazard.
4. Stop filling the tank after the fuel filler
pump automatically stops. Do not add any
more fuel.
5. Put the cap back on, turn it clockwise
until you hear a clicking noise. Be certain
not to catch the tether under the cap while
tightening.
CAUTION
Make sure that the cap is tightened
until it clicks to prevent fuel spillage
in the event of an accident.
6. Close the fuel filler lid completely.
CAUTION
If you spill any fuel on the painted
surface, rinse it off immediately.
Otherwise, the painted surface could be damaged.
NOTE . You will see the “ ” sign in the fuel
gauge. This indicates that the fuel filler
door (lid) is located on the right side of
the vehicle.
. If the fuel filler cap is not tightened
until it clicks or if the tether is caught
under the cap, the CHECK ENGINE
warning light/malfunction indicator
light may illuminate. Refer to “ CHECK
ENGINE warning light/Malfunction in-
dicator light ” F 3-16.
CAUTION. Never add any cleaning agents to
the fuel tank. The addition of a
cleaning agent may cause da-
mage to the fuel system.
. After refueling, turn the cap
clockwise until it clicks to ensure
that it is fully tightened. If the cap
is not securely tightened, fuel
may leak out while the vehicle is
being driven or fuel spillage
could occur in the event of an
accident, creating a fire hazard.
. Do not let fuel spill on the exterior7-6
Page 396 of 594
surfaces of the vehicle. Because
fuel may damage the paint, be
sure to wipe off any spilled fuel
quickly. Paint damage caused by
spilled fuel is not covered under
the SUBARU Limited Warranty.
. Always use a genuine SUBARU
fuel filler cap. If you use the
wrong cap, it may not fit or have
proper venting and your fuel tank
and emission control system
may be damaged. It could also
lead to fuel spillage and a fire.
. Immediately put fuel in the tank
whenever the low fuel warning
light illuminates. Engine misfires
as a result of an empty tank
could cause damage to the en-
gine. Continuing to operate your
vehicle at an extremely low fuel
level may result in a reduction of
engine performance. State emission testing (U.S.
only) WARNINGTesting of an All-Wheel Drive model
must NEVER be performed on a
single two-wheel dynamometer. At-
tempting to do so will result in
uncontrolled vehicle movement and
may cause an accident or injuries to
persons nearby.
CAUTION. At state inspection time, remem-
ber to tell your inspection or
service station in advance not to
place your SUBARU AWD vehicle
on a two-wheel dynamometer.
Otherwise, serious transmission
damage will result.
. Resultant vehicle damage due to
improper testing is not covered
under the SUBARU Limited War-
ranty and is the responsibility of
the state inspection program or
its contractors or licensees.
California and a number of federal states have Inspection/Maintenance programs to
inspect your vehicle ’ s emission control
system. If your vehicle does not pass this
test, some states may deny renewal of
your vehicle ’ s registration.
Your vehicle is equipped with a computer
that monitors the performance of the
engine ’ s emission control system. Certi-
fied emission inspectors will inspect the
On-Board Diagnostic (OBDII) system as
part of the state emission inspection
process. The OBDII system is designed
to detect engine and transmission pro-
blems that might cause the vehicle emis-
sions to exceed allowable limits. OBDII
inspections apply to all 1996 model year
and newer passenger cars and trucks.
Over 30 states plus the District of Colum-
bia have implemented emission inspec-
tion of the OBDII system.
. The inspection of the OBDII system
consists of a visual operational check of
the “ CHECK ENGINE ” warning light/mal-
function indicator light (MIL) and an
examination of the OBDII system with an
electronic scan tool.
. A vehicle
passes the OBDII system
inspection if proper operation of the
“ CHECK ENGINE ” warning light is ob-
served, there are no stored diagnostic
trouble codes, and the OBDII readiness
monitors are all complete.Starting and operating/State emission testing (U.S. only)
– CONTINUED –7-7
Page 454 of 594
New vehicle break-in driving – the first
1,000 miles (1,600 km) ..................................... 8-2
Fuel economy hints ............................................ 8-2
Engine exhaust gas (carbon monoxide) ............ 8-2
Catalytic converter .............................................. 8-3
Periodic inspections ........................................... 8-4
Driving in foreign countries ............................... 8-4
Driving tips for AWD models .............................. 8-5
Driving precaution ............................................... 8-6
Winter driving ...................................................... 8-6Operation during cold weather ............................. 8-6 Driving on snowy and icy roads ........................... 8-8
Corrosion protection ............................................ 8-9
Snow tires ........................................................... 8-9
Tire chains ........................................................ 8-10
Rocking the vehicle ........................................... 8-10
Loading your vehicle ......................................... 8-10Vehicle capacity weight ...................................... 8-11
GVWR and GAWR (Gross Vehicle Weight Rating
and Gross Axle Weight Rating) ........................ 8-12
Trailer towing ..................................................... 8-12
Driving tips
8
Page 461 of 594
Driving tips/Winter driving
or ice buildup on the suspension,
disc brakes and brake hoses
underneath the vehicle. If there
is caked snow or ice, remove it,
being careful not to damage the
disc brakes and brake hoses and
ABS harness.
When parking for long periods in cold
weather, you should observe the following
tips.
1. For MT models, place the shift lever in
the “ 1 ” or “ R ” position. For CVT models,
place the select lever in the “ P ” position.
2. Use tire stops under the tires to
prevent the vehicle from moving.
! Refueling in cold weather
To help prevent moisture from forming in
the fuel system and the risk of its freezing,
use of an antifreeze additive in the fuel
tank is recommended during cold weather.
Use only additives that are specifically
designed for this purpose. When an
antifreeze additive is used, its effect lasts
longer if the tank is refilled whenever the
fuel level reaches half empty.
If your SUBARU is not going to be used
for an extended period, it is best to have
the fuel tank filled to capacity. & Driving on snowy and icy
roads To prevent skidding and slipping, avoid
sudden braking, abrupt acceleration, high-
speed driving, and sharp turning when
driving on snowy or icy roads.
Always maintain ample distance between
your vehicle and the vehicle ahead of you
to avoid the need for sudden braking.
To supplement the foot brake, use the
engine brake effectively to control the
vehicle speed. (Shift into a lower gear
when necessary.)
Avoid shifting down abruptly. Such beha-
vior can cause the wheels to lock, possibly
leading to loss of vehicle control.
An anti-lock brake system (ABS) en-
hances your vehicle ’ s braking perfor-
mance on snowy and icy roads. For
information on braking on slippery sur-
faces, refer to “ ABS (Anti-lock Brake
System) ” F 7-36 and “ Vehicle Dynamics
Control system ” F 7-38.
WARNING
Do not use the cruise control on
slippery roads such as snowy or icy
roads. This may cause loss of
vehicle control. CAUTIONAvoid prolonged continuous driving
in snowstorms. Snow will enter the
engine ’ s intake system and may
hinder the airflow, which could re-
sult in engine shutdown or even
breakdown.
! Wiper operation when snowing
Before driving in cold weather, make sure
the wiper blades are not frozen to the
windshield or rear window.
If the wiper blades are frozen to the
windshield, use the defroster and the
temperature set for maximum warmth until
the wiper blades are completely thawed.
Refer to “ Climate control ” F 4-1.
If your vehicle is equipped with a wiper
deicer, use it. It is helpful to thaw the
windshield wiper blades. Refer to “ Defog-
ger and deicer ” F 3-112.
When driving in snow, if frozen snow starts
to stick on the surface of the windshield
despite wiper operation, use the defroster
and the temperature set for maximum
warmth. After the windshield gets warmed
enough to melt the frozen snow on it,
wash it away using the windshield washer.
Refer to “ Windshield washer ” F 3-103.8-8
Page 464 of 594
possible.
. Stow cargo and luggage in the
trunk whenever possible.
. To prevent cargo and luggage
from sliding forward during brak-
ing, do not stack anything in the
enlarged trunk. Keep cargo and
luggage low, as close to the floor
as possible.
. When you carry something inside
the vehicle, secure it whenever
you can to prevent it from being
thrown around inside the vehicle
during sudden stops, sharp turns
or in an accident.
. Do not pile heavy loads on the
roof. These loads raise the vehi-
cle ’ s center of gravity and make it
more prone to tip over.
. Secure lengthy items properly to
prevent them from shooting for-
ward and causing serious injury
during a sudden stop.
. Never exceed the maximum load
limit. If you do, some parts on
your vehicle can break, or it can
change the way your vehicle
handles. This could result in loss
of control and cause personal
injury. Also, overloading can
shorten the life of your vehicle. . Do not place cargo or luggage in
or on the following locations as
the item may get under the
clutch, brake, or accelerator ped-
al and prevent the pedals from
being depressed properly, block
the driver ’ s vision, or hit the
driver or passengers, causing
an accident:
– At the feet of the driver
– On the front passenger or rear
seats (when stacking items)
– On the rear shelf
– On the instrument panel
– On the dashboard
CAUTION
Do not carry spray cans, containers
with flammable or corrosive liquids
or any other dangerous items inside
the vehicle.
NOTE For better fuel economy, do not carry
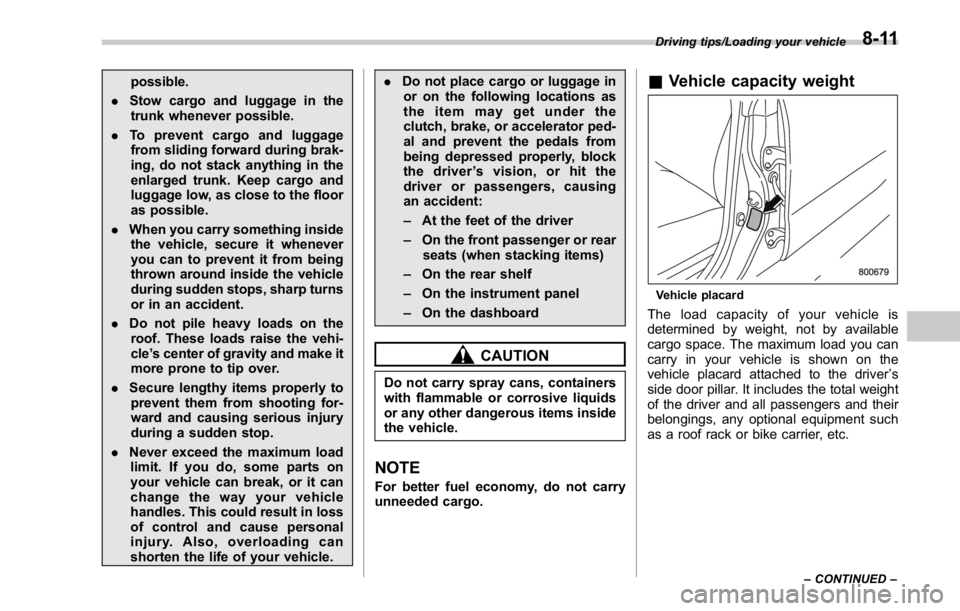
unneeded cargo. & Vehicle capacity weight
Vehicle placard
The load capacity of your vehicle is
determined by weight, not by available
cargo space. The maximum load you can
carry in your vehicle is shown on the
vehicle placard attached to the driver ’ s
side door pillar. It includes the total weight
of the driver and all passengers and their
belongings, any optional equipment such
as a roof rack or bike carrier, etc. Driving tips/Loading your vehicle
– CONTINUED –8-11
Page 465 of 594
Driving tips/Trailer towing
& GVWR and GAWR (Gross
Vehicle Weight Rating and
Gross Axle Weight Rating)
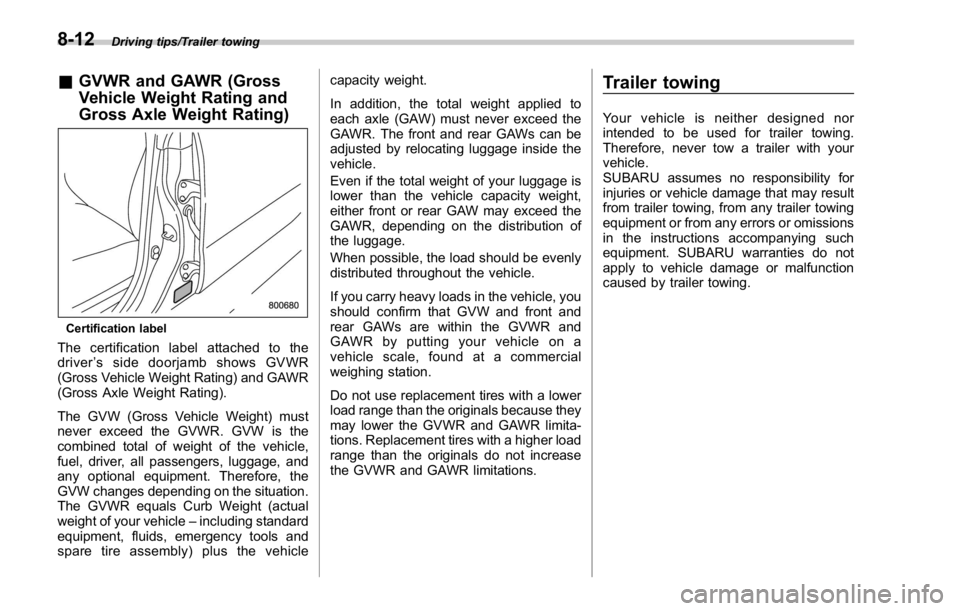
Certification label
The certification label attached to the
driver ’ s side doorjamb shows GVWR
(Gross Vehicle Weight Rating) and GAWR
(Gross Axle Weight Rating).
The GVW (Gross Vehicle Weight) must
never exceed the GVWR. GVW is the
combined total of weight of the vehicle,
fuel, driver, all passengers, luggage, and
any optional equipment. Therefore, the
GVW changes depending on the situation.
The GVWR equals Curb Weight (actual
weight of your vehicle – including standard
equipment, fluids, emergency tools and
spare tire assembly) plus the vehicle capacity weight.
In addition, the total weight applied to
each axle (GAW) must never exceed the
GAWR. The front and rear GAWs can be
adjusted by relocating luggage inside the
vehicle.
Even if the total weight of your luggage is
lower than the vehicle capacity weight,
either front or rear GAW may exceed the
GAWR, depending on the distribution of
the luggage.
When possible, the load should be evenly
distributed throughout the vehicle.
If you carry heavy loads in the vehicle, you
should confirm that GVW and front and
rear GAWs are within the GVWR and
GAWR by putting your vehicle on a
vehicle scale, found at a commercial
weighing station.
Do not use replacement tires with a lower
load range than the originals because they
may lower the GVWR and GAWR limita-
tions. Replacement tires with a higher load
range than the originals do not increase
the GVWR and GAWR limitations. Trailer towing Your vehicle is neither designed nor
intended to be used for trailer towing.
Therefore, never tow a trailer with your
vehicle.
SUBARU assumes no responsibility for
injuries or vehicle damage that may result
from trailer towing, from any trailer towing
equipment or from any errors or omissions
in the instructions accompanying such
equipment. SUBARU warranties do not
apply to vehicle damage or malfunction
caused by trailer towing.8-12