ECO mode SUZUKI CELERIO 2020 Owner's Manual
[x] Cancel search | Manufacturer: SUZUKI, Model Year: 2020, Model line: CELERIO, Model: SUZUKI CELERIO 2020Pages: 201, PDF Size: 5.82 MB
Page 118 of 201
5-22
OTHER CONTROLS AND EQUIPMENT
76MH1-74E
76MH1-74E
Points to remember when making MP3/ WMA/AAC files Common High bit rate and high sampling fre- quency are recommended for high qual- ity sounds. Selecting VBR (Variable Bit Rate) is not recommended. Selecting VBR may cause display of in correct playing time and jumpiness of playback. Playback sound quality varies depending on the encoding environment. Fordetails, refer to the user manual of the encoding software and the writing soft- ware in use.
Recording MP3/WMA/ AAC files on a CD media It is recommended not to write both CD- DA files and MP3/WMA/AAC files on adisc. If both CD-DA files and MP3/WMA/AAC files are on the same disc, tracks maynot be played in the correct order or some tracks may not be played at all.
When storing both MP3 data and WMA data on the same disc, sort and place them in different folders. Do not write files other than MP3/WMA/ AAC files and unnecessary folders on a disc. MP3/WMA/AAC files should be named to meet the standards and the file sys- tem specifications as shown below. The file extension “.mp3”, “.wma” or “.m4a” should be assigned to files based on their format independently. You may encounter a trouble in playing MP3/WMA/AAC files or displaying infor- mation of MP3/WMA/AAC files depend-ing on the writing software or CD recorder in use. This unit does not have a play list func-tion. It is recommended to write discs in Disc- at-Once mode even though Multi-ses-sion mode is supported.
Compression formats MP3 Bit rate: MPEG1 Audio Layer III: 32 k - 320 kbpsMPEG2 Audio Layer III: 8 k - 160 kbps MPEG2.5 Audio Layer III: 8 k - 160 kbps Sampling frequency: MPEG1 Audio Layer III: 32 k/44.1 k/ 48 kHz MPEG2 Audio Layer III: 16 k/22.05 k/24 kHz MPEG2.5 Audio Layer III: 8 k/11.025 k/ 12 kHz
WMA (Ver. 7, Ver. 8, Ver. 9*) Bit rate: CBR 32 k - 320 kbps Sampling frequency: 32 k/44.1 k/48 kHz* WMA 9 Professional/LossLess/Voice are not supported.
AAC* Bit rate: ABR 16k - 320 kbbs Sampling frequency: 32 k/44.1 k/48 kHz* Apple Lossless is not supported.
Supported file systems ISO 9660 Level 1/Level 2, Joliet, Romeo
Maximum number of files/folders Maximum number of files: 512 Maximum number of files in a folder: 255 Maximum depth of tree structure: 8 Maximum number of folders: 255 (Root folder is included.)
NOTICE
Never assign the “.mp3”, “.wma”, or “.m4a” file name extension to a file ifit is not in th e MP3/WMA/AAC format file. Failure to observe this may result in damage to the speaker due tonoise production.
107
Page 122 of 201
5-26
OTHER CONTROLS AND EQUIPMENT
76MH1-74E
76MH1-74E
Display change Press the DISP button (7). Each time the button is pressed, displaywill change as follows:
NOTE: If text data contains more than 12 charac- ters, the “>” mark will appear at the right end. Holding down the DISP button (7) for1 second or longer can display the next page.
Playing Mode selection 1) Press the button numbered [6] of the Preset buttons (8) for 1 second or lon-ger. 2) Turn the TUNE FOLDER PUSH SOUND knob (2).Each time the knob is turned, the mode will change as follows:
3) Press the TUNE FOLDER PUSH SOUND knob (2) to select the desired mode.
NOTE: • When the button numbered [6] of thePreset buttons (8) is pressed, the previ- ous mode will be displayed.
Notes on iPod®
Supported iPod®
® touch (5th generation)® touch (4rd generation) ® touch (3rd generation)® touch (2nd generation) ® touch (1st generation) ® classic® nano (7th generation) ® nano (6th generation) ® nano (5th generation)® nano (4th generation) ® nano (3rd generation) ® nano (2nd generation)® nano (1st generation) ® (5th generation) iPhone® 5 iPhone® 4S iPhone® 4 iPhone® 3GS iPhone® 3G iPhone®
* Some functions may not be available depending on the model of iPod®. *iPod® is a trademark of Apple Inc., regis- tered in the U.S. and other countries.* iPhone® is a trademark of Apple Inc., registered in the U.S. and other coun- tries.* Apple is not responsible for the operation of this device or its compliance with safety and regulatory standards.
Playlist name /Track title (Playlist mode only)
Artist name / Track title
Album name / Track title
Track title / Play time
PLAYLIST
ARTIST
ALBUM
SONGS
GENRE
111
Page 123 of 201
5-27
OTHER CONTROLS AND EQUIPMENT
76MH1-74E
76MH1-74E
iPod® connection Make sure to detach the iPod® after pressing the engine switch to change theignition switch is in “LOCK” position. The iPod® may not be shut down when it is being connected and may result in bat-tery depletion. Please do not connect iPod® accesso- ries such as an iPod® remote control orheadphones while connecting the iPod®
with the unit. The unit may not operatecorrectly.
AUX Function
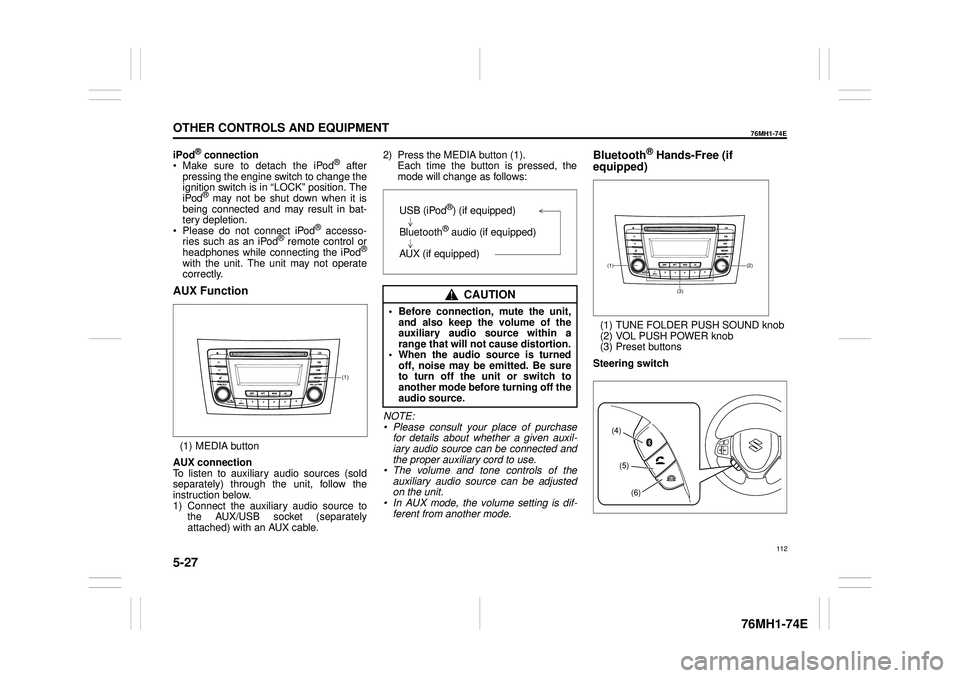
(1) MEDIA button
AUX connection To listen to auxiliary audio sources (sold separately) through the unit, follow theinstruction below. 1) Connect the auxiliary audio source to the AUX/USB socket (separatelyattached) with an AUX cable.
2) Press the MEDIA button (1). Each time the button is pressed, the mode will change as follows:
NOTE: • Please consult your place of purchasefor details about whether a given auxil- iary audio source can be connected and the proper auxiliary cord to use.• The volume and tone controls of the auxiliary audio source can be adjusted on the unit.• In AUX mode, the volume setting is dif- ferent from another mode.
Bluetooth® Hands-Free (if
equipped)
(1) TUNE FOLDER PUSH SOUND knob (2) VOL PUSH POWER knob(3) Preset buttons
Steering switch
(1)
CAUTION
• Before connection, mute the unit, and also keep the volume of the auxiliary audio source within arange that will not cause distortion. • When the audio source is turned off, noise may be emitted. Be sureto turn off the unit or switch to another mode before turning off the audio source.
USB (iPod®) (if equipped)
Bluetooth® audio (if equipped)
AUX (if equipped)(2)(1)
(3)
(4)
(5)
(6)
112
Page 133 of 201
5-37
OTHER CONTROLS AND EQUIPMENT
76MH1-74E
76MH1-74E
NOTE: When selecting “Go Back”, the previous menu will be displayed.
Deletion of audio device information (Delete Audio)Follow the instructions below to delete the registered information of audio device. 1) Press the Bluetooth® setup button (6). The Bluetooth® setup menu will be dis- played. 2) Turn the TUNE FOLDER PUSHSOUND knob (2) to select “Setup Blue- tooth”, and press the knob (2) to deter- mine the selection.3) Turn the TUNE FOLDER PUSH SOUND knob (2) to select “List Audio”, and press the knob (2) to determine theselection. 4) Turn the TUNE FOLDER PUSH SOUND knob (2) to select an audiodevice to be deleted, and press the knob (2) to determine the selection. 5) Turn the TUNE FOLDER PUSHSOUND knob (2) to select “Delete”, and press the knob (2) to determine the selection.6) Turn the TUNE FOLDER PUSH SOUND knob (2) to select “Delete?”, and press the knob (2) to determine theselection. 7) Turn the TUNE FOLDER PUSH SOUND knob (2) to select “Confirm”,and press the knob (2) to complete the deletion.
NOTE: When selecting “Go Back”, the previous menu will be displayed.
Disclaimer for Bluetooth® function Depending on the mobile phone models, some phones may not be compatible fully or partially (some function may berestricted). Connectivity or voice quality may get affected depending on circumstances. After the ignition switch is turned to the “ON” position, the audio system takes few seconds to detect and connect to theBluetooth® device (if already paired). Make sure that you are aware of all applicable local laws and accordinglyuse Bluetooth device.
Remote Audio Controls
(if equipped)Controlling of basic functions of the audio system is available us ing the switches on the steering wheel.
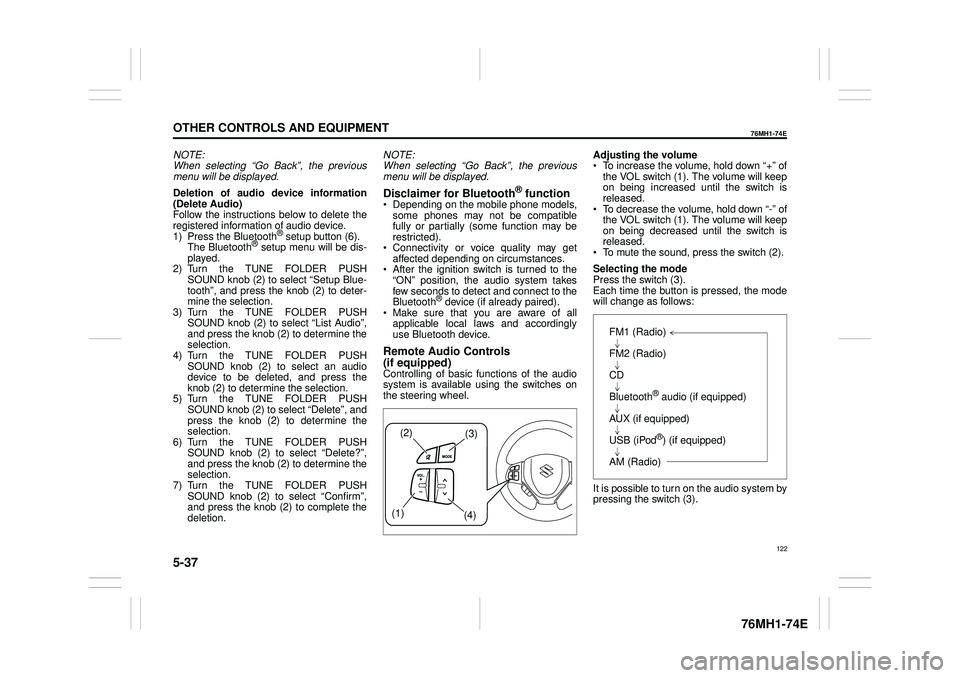
Adjusting the volume To increase the volume, hold down “+” of the VOL switch (1). The volume will keepon being increased until the switch is released. To decrease the volume, hold down “-” ofthe VOL switch (1). The volume will keep on being decreased until the switch is released. To mute the sound, press the switch (2).
Selecting the mode Press the switch (3). Each time the button is pressed, the mode will change as follows:
It is possible to turn on the audio system by pressing the switch (3).
(2)(3)
(1) (4)
FM1 (Radio)
FM2 (Radio)
CD
Bluetooth® audio (if equipped)
AUX (if equipped)
USB (iPod®) (if equipped)
AM (Radio)
122
Page 134 of 201
5-38
OTHER CONTROLS AND EQUIPMENT
76MH1-74E
76MH1-74E
Selecting the radio station (FM1, FM2, AM mode) To select the next pr eset station, press “ ” of the switch (4) only for a moment. To select the previous preset station, press “ ” of the switch (4) only for amoment. To scan a higher frequency radio station, press “ ” of the switch (4) for 1 secondor longer. To scan a lower frequency radio station, press “ ” of the switch (4) for 1 secondor longer.
Selecting the track (CD, USB (iPod®), Bluetooth® audio mode) To skip to the next track, press “ ” of the switch (4) only for a moment. To skip to the previous track, press “ ” of the switch (4) twice only for a moment. When the switch (4) is pushed downonce only for a moment, the track cur- rently being played will start from the beginning again.
Fast forwarding/Rewinding a track To fast forward, press “ ” of the switch(4) for 1 second or longer. To fast rewind, press “ ” of the switch (4) for 1 second or longer.
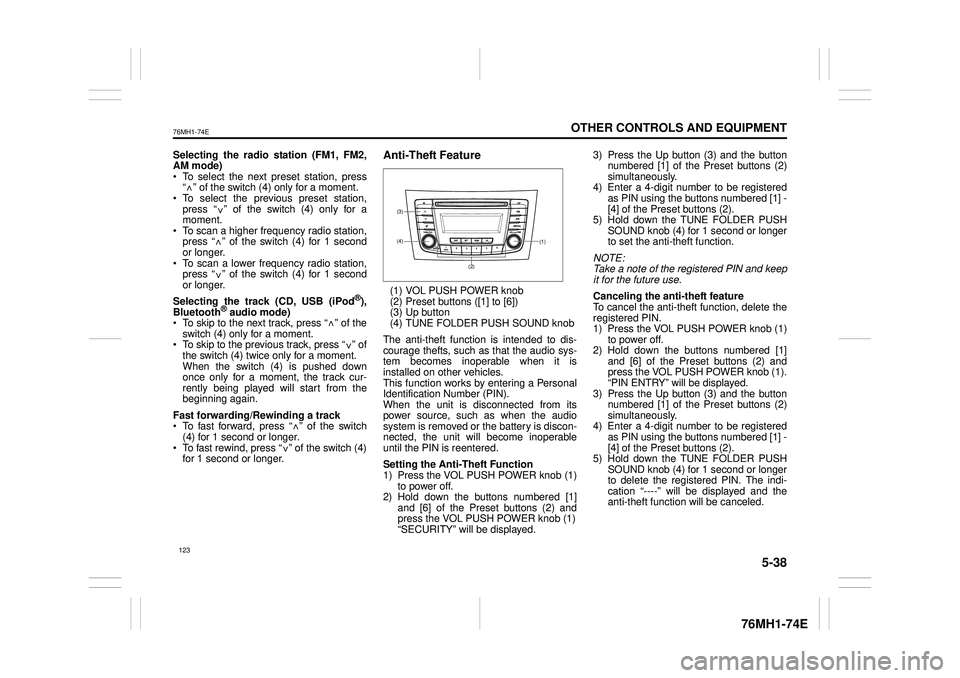
Anti-Theft Feature
(1) VOL PUSH POWER knob(2) Preset buttons ([1] to [6])(3) Up button (4) TUNE FOLDER PUSH SOUND knob
The anti-theft function is intended to dis- courage thefts, such as that the audio sys- tem becomes inoperable when it isinstalled on other vehicles. This function works by entering a Personal Identification Number (PIN).When the unit is disconnected from its power source, such as when the audio system is removed or the battery is discon-nected, the unit will become inoperable until the PIN is reentered.
Setting the Anti-Theft Function 1) Press the VOL PUSH POWER knob (1) to power off.2) Hold down the buttons numbered [1] and [6] of the Preset buttons (2) and press the VOL PUSH POWER knob (1)“SECURITY” will be displayed.
3) Press the Up button (3) and the button numbered [1] of the Preset buttons (2) simultaneously.4) Enter a 4-digit number to be registered as PIN using the buttons numbered [1] - [4] of the Preset buttons (2).5) Hold down the TUNE FOLDER PUSH SOUND knob (4) for 1 second or longer to set the anti-theft function.
NOTE: Take a note of the registered PIN and keepit for the future use.
Canceling the anti -theft feature To cancel the anti-theft function, delete the registered PIN. 1) Press the VOL PUSH POWER knob (1)to power off. 2) Hold down the buttons numbered [1] and [6] of the Preset buttons (2) andpress the VOL PUSH POWER knob (1). “PIN ENTRY” will be displayed. 3) Press the Up button (3) and the buttonnumbered [1] of the Preset buttons (2) simultaneously. 4) Enter a 4-digit number to be registeredas PIN using the buttons numbered [1] - [4] of the Preset buttons (2). 5) Hold down the TUNE FOLDER PUSHSOUND knob (4) for 1 second or longer to delete the registered PIN. The indi- cation “----” will be displayed and theanti-theft function will be canceled.
<
<
<
<
<
<
<
<
(1)(4)
(3)
(2)
123
Page 137 of 201

5-41
OTHER CONTROLS AND EQUIPMENT
76MH1-74E
Radio operations
/TUNE VOL - VOL + FLD
/TUNE
MODEASSOUND
1
54
FLD
ENTSEEK TRACKSEEKTRACK
RPT RDM6
MENU3 2
DISP
NOTE: When there are fewer than 6 stations that can be stored even if 1 round of auto store operation is performed, no station will be stored at the remaining preset buttons.
Press to return to the last received fre- quency in the previous auto store mode. Press it for 2 seconds or longer. It selects the stations with the stronger signals andstores them in order.
AS button
Press to select the radio station.
SEEK TRACK UP/DOWN button
Press to select the desired preset station.
PRESET buttons (1-6)
126
Page 138 of 201
5-42
OTHER CONTROLS AND EQUIPMENT
76MH1-74E
76MH1-74E
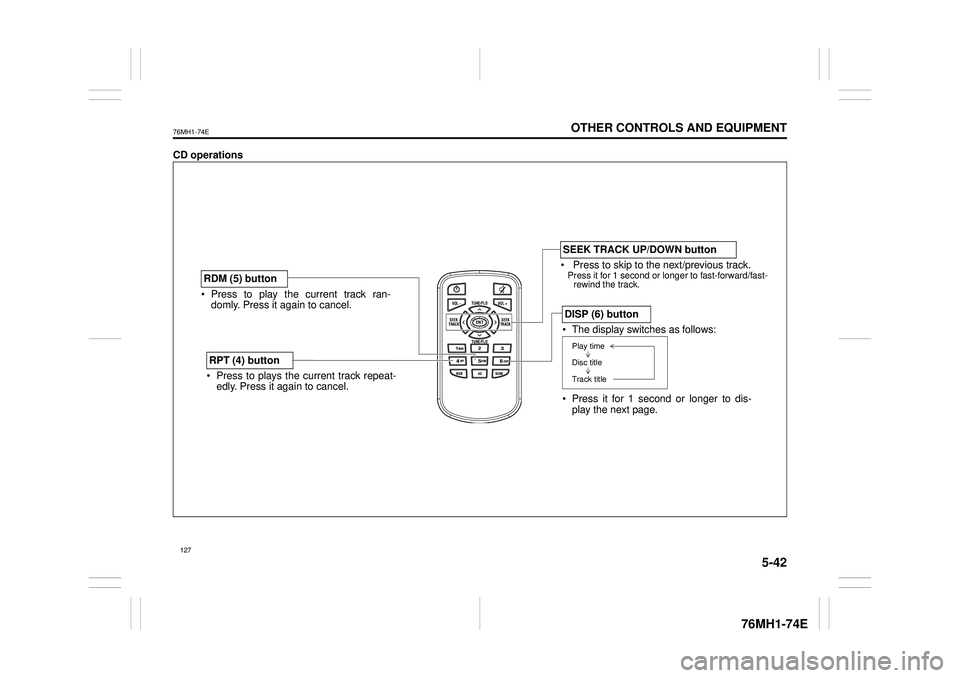
CD operations
/TUNE VOL - VOL + FLD
/TUNE
MODEASSOUND
1
54
FLD
ENTSEEK TRACKSEEKTRACK
RPT RDM6
MENU3 2
DISP
Press to play the current track ran- domly. Press it again to cancel.
RDM (5) button
Press to plays the current track repeat- edly. Press it again to cancel.
RPT (4) button
Press to skip to the next/previous track. Press it for 1 second or longer to fast-forward/fast- rewind the track.
SEEK TRACK UP/DOWN button
The display switches as follows:
Press it for 1 second or longer to dis- play the next page.
DISP (6) button
Play time
Disc title
Track title
127
Page 139 of 201

5-43
OTHER CONTROLS AND EQUIPMENT
76MH1-74E
76MH1-74E
MP3/WMA/AAC Disc operations
/TUNE VOL - VOL + FLD
/TUNE
MODEASSOUND
1
54
FLD
ENTSEEK TRACKSEEKTRACK
RPT RDM6
MENU3 2
DISP
The random mode switches as follows:
RDM (5) button
OFF
FOLDER RANDOM
ALL RANDOM
The repeat mode switches as follows:
RPT (4) button
OFF
FILE REPEAT
FOLDER REPEAT
Press to skip to the next/previous folder.
TUNE FOLDER UP/DOWN button
The display switches as follows:
Press it for 1 second or longer to display the next page.
DISP (6) button
Play time
Folder name
File name
Album name (MP3, AAC only)
Track title
Artist name
Press to skip to the next/previous track. Press it for 1 second or longer to fast-forward/ fast-rewind the track.
SEEK TRACK UP/DOWN button
128
Page 140 of 201

5-44
OTHER CONTROLS AND EQUIPMENT
76MH1-74E
76MH1-74E
USB operations
/TUNE VOL - VOL + FLD
/TUNE
MODEASSOUND
1
54
FLD
ENTSEEK TRACKSEEKTRACK
RPT RDM6
MENU3 2
DISP
Press to skip to the next/previous file. Press it for 1 second or longer to fast-forward/ fast-rewind the file.
SEEK TRACK UP/DOWN button
The repeat mode switches as follows:
RPT (4) button
OFF
FILE REPEAT
FOLDER REPEAT
The display switches as follows:
Press it for 1 second or longer to display the next page.
DISP (6) button
Play time
Folder name
File name
Album name (MP3, AAC only)
Track title
Artist name
Press to skip to the next/previous folder.
TUNE FOLDER UP/DOWN button
The random mode switches as follows:
RDM (5) button
OFF
FOLDER RANDOM
ALL RANDOM
129
Page 141 of 201

5-45
OTHER CONTROLS AND EQUIPMENT
76MH1-74E
76MH1-74E
iPod operations
/TUNE VOL - VOL + FLD
/TUNE
MODEASSOUND
1
54
FLD
ENTSEEK TRACKSEEKTRACK
RPT RDM6
MENU3 2
DISP
While displaying iPod menu, press to select the desired item and display the list. When a track is selected from the list, the playback starts.
ENT button
The random mode switches as follows:
RDM (5) button
OFF
SONG RANDOM
ALBUM RANDOM
Press to play the current track repeatedly. Press it again to cancel.
RPT (4) button
The display switches as follows:
Press it for 1 second or longer to display the next page.
DISP (6) button
Playlist name / Track title (Playlist mode only)
Artist name / Track title
Album name / Track title
Track title / Play time
During playback Press to display iPod menu. Press it for 1 second or longer to display the top menu. While iPod menu is displayed Press to display the folder in one layer upper. Press it for 1 second or longer to display the top menu.
MENU button
While displaying iPod menu, press to display the next/previous list in the same layer.
TUNE FOLDER UP/DOWN button
Press to skip to the next/previous file. Press it for 1 second or longer to fast-forward/ fast-rewind the file.
SEEK TRACK UP/DOWN button
130