warning SUZUKI GRAND VITARA 2008 3.G Owners Manual
[x] Cancel search | Manufacturer: SUZUKI, Model Year: 2008, Model line: GRAND VITARA, Model: SUZUKI GRAND VITARA 2008 3.GPages: 290, PDF Size: 4.99 MB
Page 5 of 290
66J22-03E
TABLE OF CONTENTSCalifornia Proposition 65 Warning
WARNING
Engine exhaust, some of its constitu-
ents, and certain product compo-
nents contain or emit chemicals
known to the State of California to
cause cancer and birth defects or
other reproductive harm.
FUEL RECOMMENDATION
1
BEFORE DRIVING
2
STEERING COLUMN CONTROLS
3
INSTRUMENT PANEL
4
OTHER CONTROLS AND EQUIPMENT
5
OPERATING YOUR VEHICLE
6
DRIVING TIPS
7
VEHICLE LOADING AND TOWING
8
INSPECTION AND MAINTENANCE
9
EMERGENCY SERVICE
10
APPEARANCE CARE
11
GENERAL INFORMATION
12
FUSES AND PROTECTED CIRCUITS
13
SPECIFICATIONS
14
INDEX
15
Page 6 of 290
66J22-03E
LOCATION OF WARNING
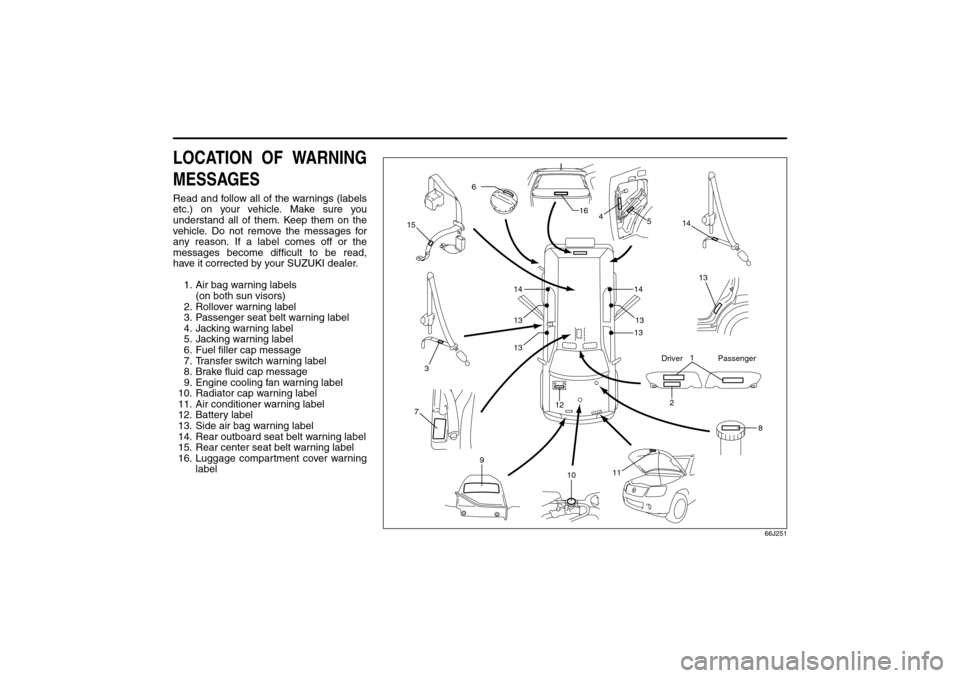
MESSAGESRead and follow all of the warnings (labels
etc.) on your vehicle. Make sure you
understand all of them. Keep them on the
vehicle. Do not remove the messages for
any reason. If a label comes off or the
messages become difficult to be read,
have it corrected by your SUZUKI dealer.
1. Air bag warning labels
(on both sun visors)
2. Rollover warning label
3. Passenger seat belt warning label
4. Jacking warning label
5. Jacking warning label
6. Fuel filler cap message
7. Transfer switch warning label
8. Brake fluid cap message
9. Engine cooling fan warning label
10. Radiator cap warning label
11. Air conditioner warning label
12. Battery label
13. Side air bag warning label
14. Rear outboard seat belt warning label
15. Rear center seat belt warning label
16. Luggage compartment cover warning
label
66J251
1
2
3
6
8 12
13 4 16
14
15
14
7
9
11
10
1413
13 1313
5
Driver Passenger
Location of Warning Messages: 1, 2, 3, 4, 5, 6, 7, 8, 9, 10,
14
Page 8 of 290
0-2
66J22-03E
If you purchased your SUZUKI in Canada
please contact the Suzuki Canada Cus-
tomer Relations Department by telephone
at 1-905-889-2677 extension 2254 or in
writing at:
Suzuki Canada Inc.
Customer Relations
100 East Beaver Creek Road
Richmond Hill, On
L4B 1J6
In the event you require assistance related
to your SUZUKI, while temporarily travel-
ling in either the United States or Canada,
you may wish to contact the Suzuki Cus-
tomer Relations Department directly of the
country in which you are temporarily oper-
ating your vehicle.
Please be certain to provide us with the fol-
lowing information: the model, Vehicle
Identification Number, mileage, accesso-
ries involved, event dates, your concern,
and any other comments which you may
have. When we receive your correspon-
dence, we will be pleased to contact the
Owner of your dealership and assist in
resolving your concern.
For owners outside the continental United
States, please refer to the distributor’s
address listed in your Warranty Information
booklet.
IMPORTANT
WARNING/CAUTION/NOTE
Please read this manual and follow its
instructions carefully. To emphasize spe-
cial information, the symbol and the
words WARNING, CAUTION and NOTE
have special meanings. Pay special atten-
tion to the messages highlighted by these
signal words:
NOTE:
Indicates special infor mation to make
maintenance easier or instructions clearer.
75F135
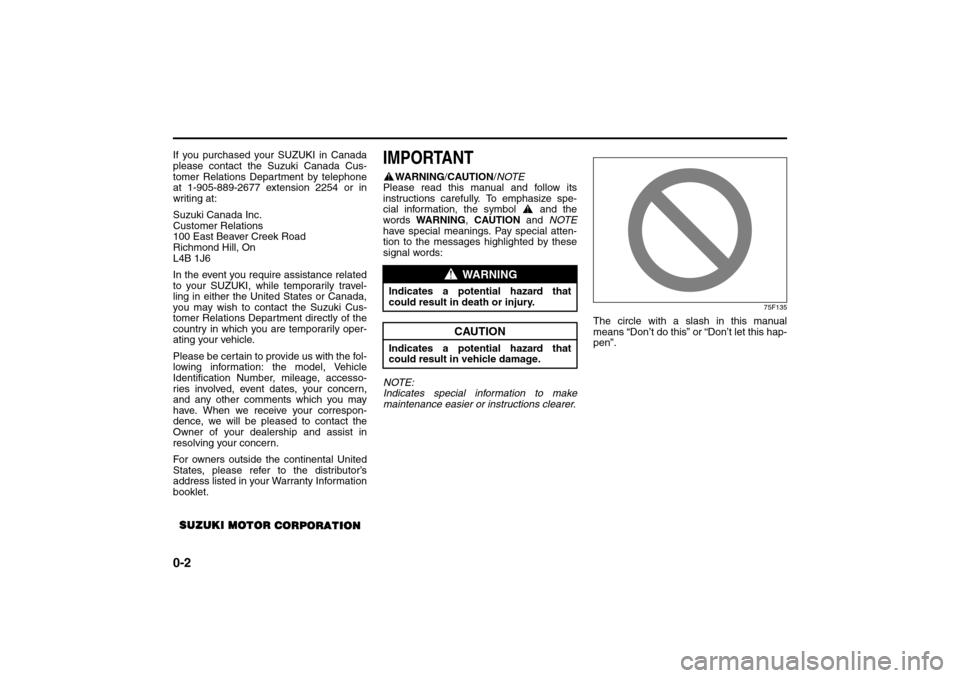
The circle with a slash in this manual
means “Don’t do this” or “Don’t let this hap-
pen”.
WARNING
Indicates a potential hazard that
could result in death or injury.
CAUTION
Indicates a potential hazard that
could result in vehicle damage.
Page 9 of 290
0-3
66J22-03E
MODIFICATION WARNING LEAK DETECTION PUMP
NOTE:
Your vehicle has a pump to regularly check
the vehicle’s evaporative emission control
system for leaks. This check is performed
approximately five hours after the engine is
turned off. During this leak check, you may
hear a sound coming from the vehicle for
several minutes. This sound is normal and
does not indicate a malfunction.
WARNING
Do not modify this vehicle. Modifica-
tion could adversely affect safety,
handling, performance or durability
and may violate governmental regula-
tions. In addition, damage or perfor-
mance problems resulting from
modification may not be covered
under warranty.
CAUTION
Improper installation of mobile com-
munication equipment such as cellu-
lar telephones or CB (Citizen’s Band)
radios may cause electronic interfer-
ence with your vehicle’s ignition sys-
tem, resulting in vehicle performance
problems. Consult your SUZUKI
dealer or qualified service technician
for advice on installing such mobile
communication equipment.
Page 15 of 290
2-2
BEFORE DRIVING
66J22-03E
Door LocksSide Door Locks
60A009
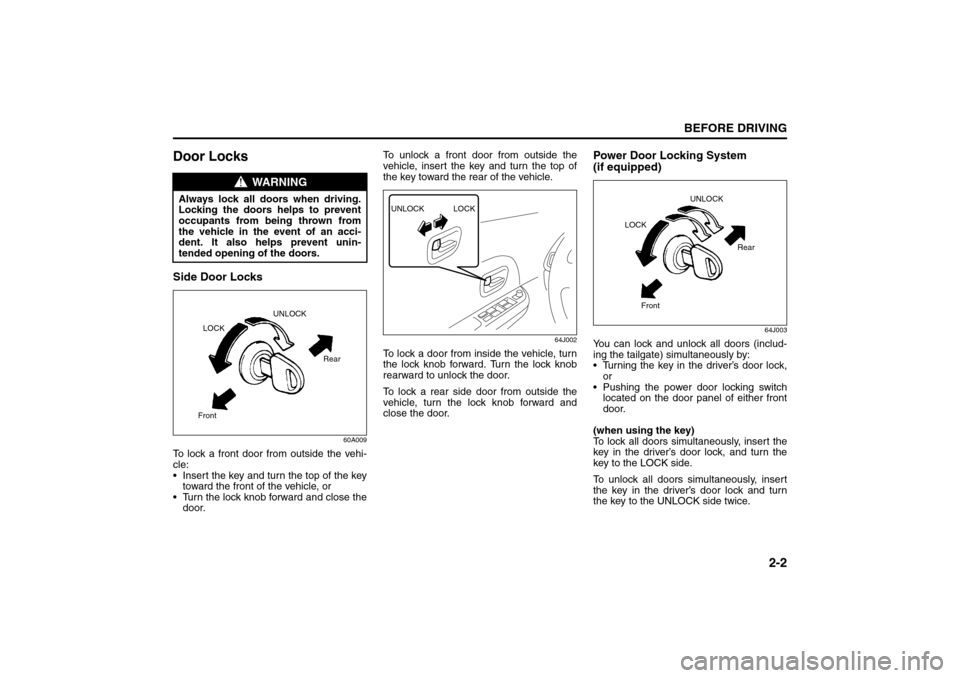
To lock a front door from outside the vehi-
cle:
Insert the key and turn the top of the key
toward the front of the vehicle, or
Turn the lock knob forward and close the
door.To unlock a front door from outside the
vehicle, insert the key and turn the top of
the key toward the rear of the vehicle.
64J002
To lock a door from inside the vehicle, turn
the lock knob forward. Turn the lock knob
rearward to unlock the door.
To lock a rear side door from outside the
vehicle, turn the lock knob forward and
close the door.
Power Door Locking System
(if equipped)
64J003
You can lock and unlock all doors (includ-
ing the tailgate) simultaneously by:
Turning the key in the driver’s door lock,
or
Pushing the power door locking switch
located on the door panel of either front
door.
(when using the key)
To lock all doors simultaneously, insert the
key in the driver’s door lock, and turn the
key to the LOCK side.
To unlock all doors simultaneously, insert
the key in the driver’s door lock and turn
the key to the UNLOCK side twice.
WARNING
Always lock all doors when driving.
Locking the doors helps to prevent
occupants from being thrown from
the vehicle in the event of an acci-
dent. It also helps prevent unin-
tended opening of the doors.
Rear
FrontLOCKUNLOCK
UNLOCK LOCK
UNLOCK
Rear
Front LOCK
Door Locks: 3, 5, 8
Page 21 of 290
2-8
BEFORE DRIVING
66J22-03E
66J017
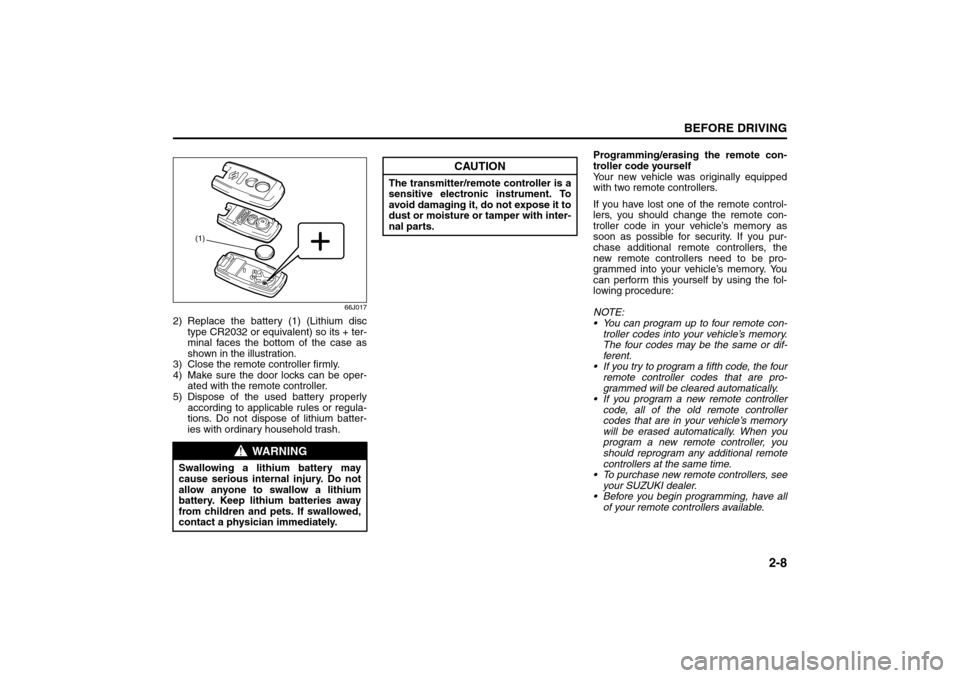
2) Replace the battery (1) (Lithium disc
type CR2032 or equivalent) so its + ter-
minal faces the bottom of the case as
shown in the illustration.
3) Close the remote controller firmly.
4) Make sure the door locks can be oper-
ated with the remote controller.
5) Dispose of the used battery properly
according to applicable rules or regula-
tions. Do not dispose of lithium batter-
ies with ordinary household trash.Programming/erasing the remote con-
troller code yourself
Your new vehicle was originally equipped
with two remote controllers.
If you have lost one of the remote control-
lers, you should change the remote con-
troller code in your vehicle’s memory as
soon as possible for security. If you pur-
chase additional remote controllers, the
new remote controllers need to be pro-
grammed into your vehicle’s memory. You
can perform this yourself by using the fol-
lowing procedure:
NOTE:
You can program up to four remote con-
troller codes into your vehicle’s memory.
The four codes may be the same or dif-
ferent.
If you try to program a fifth code, the four
remote controller codes that are pro-
grammed will be cleared automatically.
If you program a new remote controller
code, all of the old remote controller
codes that are in your vehicle’s memory
will be erased automatically. When you
program a new remote controller, you
should reprogram any additional remote
controllers at the same time.
To purchase new remote controllers, see
your SUZUKI dealer.
Before you begin programming, have all
of your remote controllers available.
WARNING
Swallowing a lithium battery may
cause serious internal injury. Do not
allow anyone to swallow a lithium
battery. Keep lithium batteries away
from children and pets. If swallowed,
contact a physician immediately.
(1)
CAUTION
The transmitter/remote controller is a
sensitive electronic instrument. To
avoid damaging it, do not expose it to
dust or moisture or tamper with inter-
nal parts.
Door Locks: 3, 5, 8
Page 24 of 290
2-11BEFORE DRIVING
66J22-03E
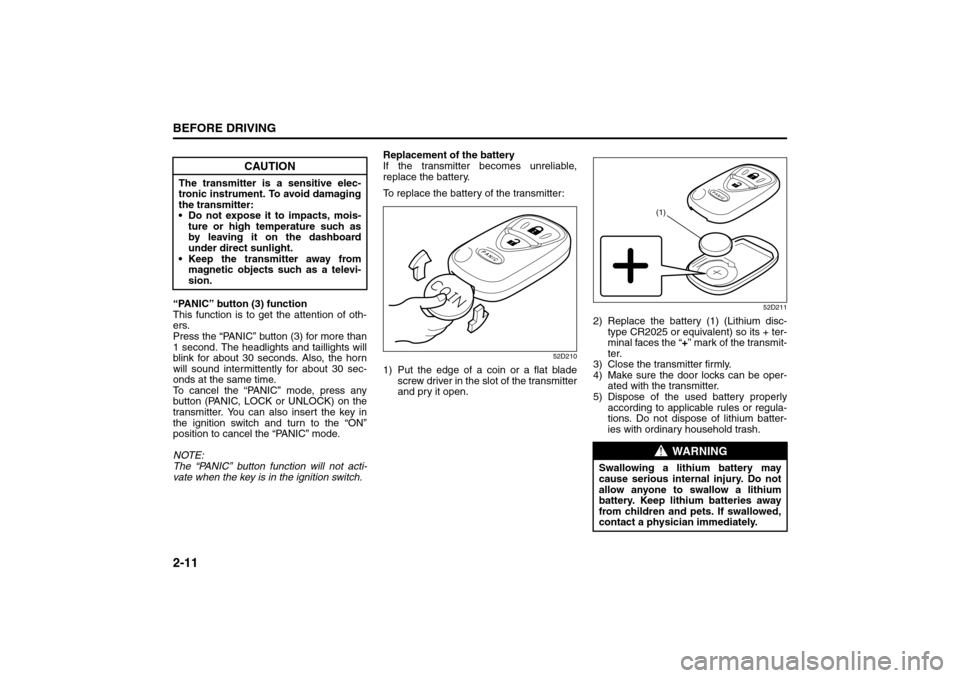
“PANIC” button (3) function
This function is to get the attention of oth-
ers.
Press the “PANIC” button (3) for more than
1 second. The headlights and taillights will
blink for about 30 seconds. Also, the horn
will sound intermittently for about 30 sec-
onds at the same time.
To cancel the “PANIC” mode, press any
button (PANIC, LOCK or UNLOCK) on the
transmitter. You can also insert the key in
the ignition switch and turn to the “ON”
position to cancel the “PANIC” mode.
NOTE:
The “PANIC” button function will not acti-
vate when the key is in the ignition switch.Replacement of the battery
If the transmitter becomes unreliable,
replace the battery.
To replace the battery of the transmitter:
52D210
1) Put the edge of a coin or a flat blade
screw driver in the slot of the transmitter
and pry it open.
52D211
2) Replace the battery (1) (Lithium disc-
type CR2025 or equivalent) so its + ter-
minal faces the “+” mark of the transmit-
ter.
3) Close the transmitter firmly.
4) Make sure the door locks can be oper-
ated with the transmitter.
5) Dispose of the used battery properly
according to applicable rules or regula-
tions. Do not dispose of lithium batter-
ies with ordinary household trash.
CAUTION
The transmitter is a sensitive elec-
tronic instrument. To avoid damaging
the transmitter:
Do not expose it to impacts, mois-
ture or high temperature such as
by leaving it on the dashboard
under direct sunlight.
Keep the transmitter away from
magnetic objects such as a televi-
sion.
WARNING
Swallowing a lithium battery may
cause serious internal injury. Do not
allow anyone to swallow a lithium
battery. Keep lithium batteries away
from children and pets. If swallowed,
contact a physician immediately.
(1)
Door Locks: 3, 5, 8
Page 27 of 290
2-14
BEFORE DRIVING
66J22-03E
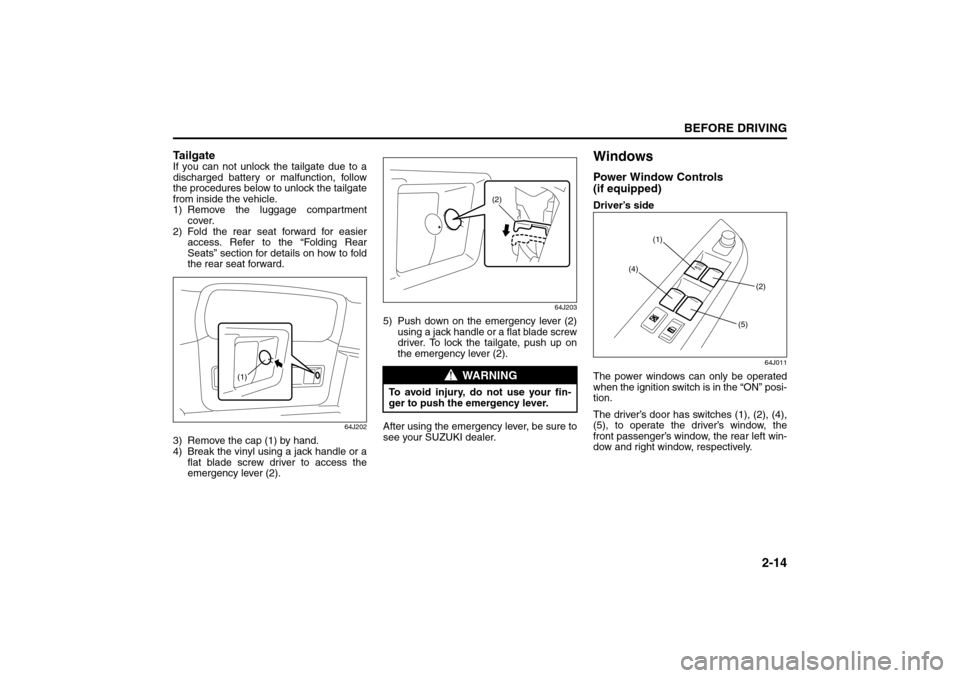
Ta i l g a t eIf you can not unlock the tailgate due to a
discharged battery or malfunction, follow
the procedures below to unlock the tailgate
from inside the vehicle.
1) Remove the luggage compartment
cover.
2) Fold the rear seat forward for easier
access. Refer to the “Folding Rear
Seats” section for details on how to fold
the rear seat forward.
64J202
3) Remove the cap (1) by hand.
4) Break the vinyl using a jack handle or a
flat blade screw driver to access the
emergency lever (2).
64J203
5) Push down on the emergency lever (2)
using a jack handle or a flat blade screw
driver. To lock the tailgate, push up on
the emergency lever (2).
After using the emergency lever, be sure to
see your SUZUKI dealer.
WindowsPower Window Controls
(if equipped)Driver’s side
64J011
The power windows can only be operated
when the ignition switch is in the “ON” posi-
tion.
The driver’s door has switches (1), (2), (4),
(5), to operate the driver’s window, the
front passenger’s window, the rear left win-
dow and right window, respectively.
(1)
WARNING
To avoid injury, do not use your fin-
ger to push the emergency lever.
(2)
(1)
(2) (4)
(5)
Windows: 3, 8
Page 29 of 290
2-16
BEFORE DRIVING
66J22-03E
NOTE:
If you drive with one of the rear windows
open, you may hear a loud sound caused
by air vibration. To reduce the sound, open
the driver’s or front passenger’s window, or
narrow the rear window opening.
MirrorsInside Rearview Mirror
65D410
65D409
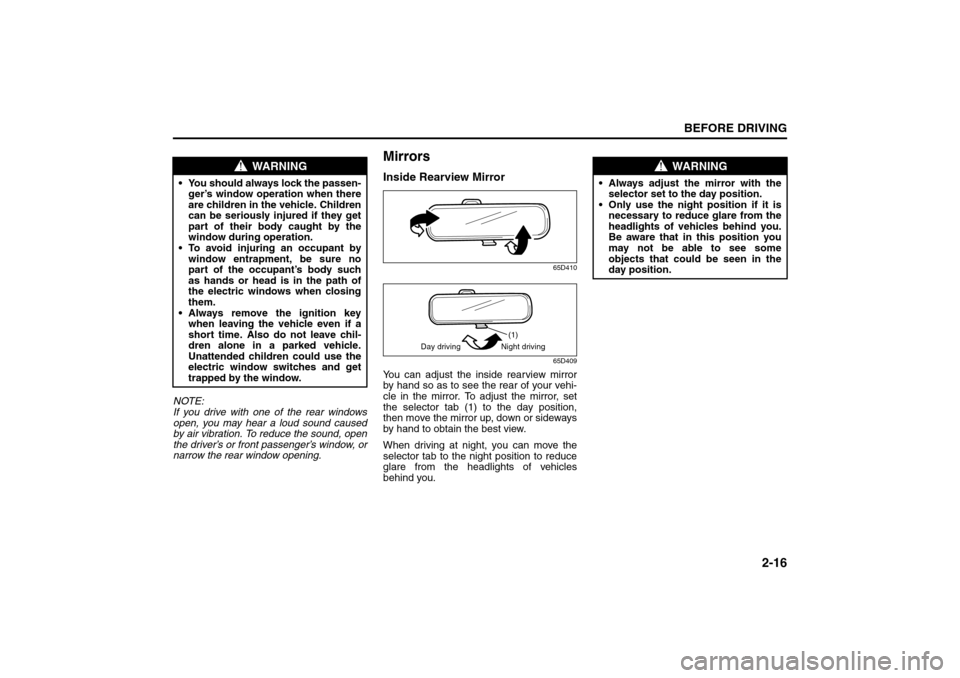
You can adjust the inside rearview mirror
by hand so as to see the rear of your vehi-
cle in the mirror. To adjust the mirror, set
the selector tab (1) to the day position,
then move the mirror up, down or sideways
by hand to obtain the best view.
When driving at night, you can move the
selector tab to the night position to reduce
glare from the headlights of vehicles
behind you.
WARNING
You should always lock the passen-
ger’s window operation when there
are children in the vehicle. Children
can be seriously injured if they get
part of their body caught by the
window during operation.
To avoid injuring an occupant by
window entrapment, be sure no
part of the occupant’s body such
as hands or head is in the path of
the electric windows when closing
them.
Always remove the ignition key
when leaving the vehicle even if a
short time. Also do not leave chil-
dren alone in a parked vehicle.
Unattended children could use the
electric window switches and get
trapped by the window.
(1)
Day driving Night driving
WARNING
Always adjust the mirror with the
selector set to the day position.
Only use the night position if it is
necessary to reduce glare from the
headlights of vehicles behind you.
Be aware that in this position you
may not be able to see some
objects that could be seen in the
day position.
Mirrors: 3, 8
Page 30 of 290
2-17BEFORE DRIVING
66J22-03E
Outside Rearview Mirrors
64J014
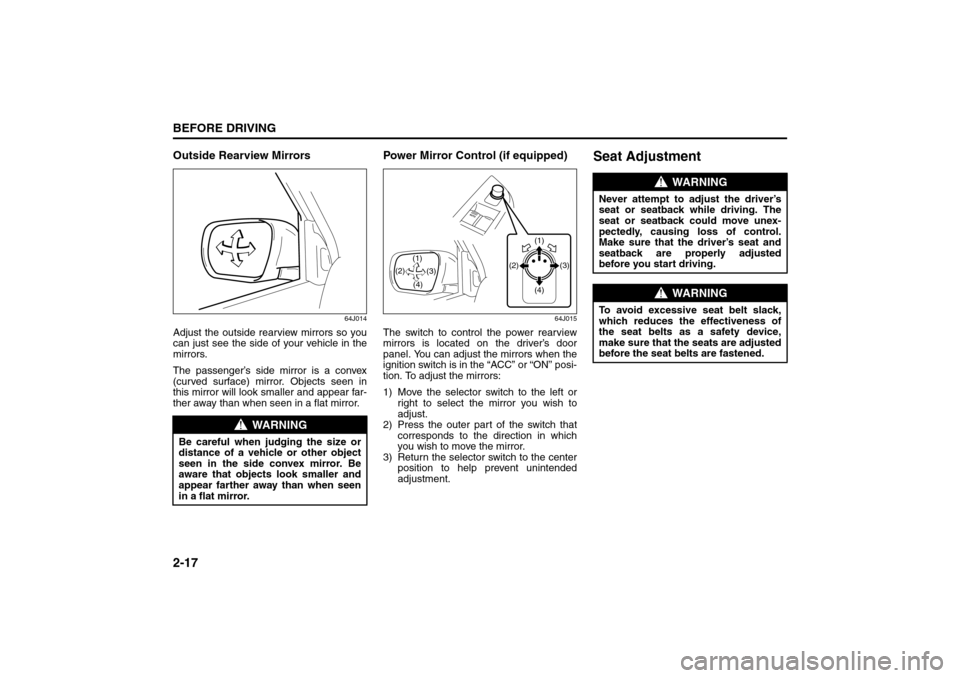
Adjust the outside rearview mirrors so you
can just see the side of your vehicle in the
mirrors.
The passenger’s side mirror is a convex
(curved surface) mirror. Objects seen in
this mirror will look smaller and appear far-
ther away than when seen in a flat mirror.
Power Mirror Control (if equipped)
64J015
The switch to control the power rearview
mirrors is located on the driver’s door
panel. You can adjust the mirrors when the
ignition switch is in the “ACC” or “ON” posi-
tion. To adjust the mirrors:
1) Move the selector switch to the left or
right to select the mirror you wish to
adjust.
2) Press the outer part of the switch that
corresponds to the direction in which
you wish to move the mirror.
3) Return the selector switch to the center
position to help prevent unintended
adjustment.
Seat Adjustment
WARNING
Be careful when judging the size or
distance of a vehicle or other object
seen in the side convex mirror. Be
aware that objects look smaller and
appear farther away than when seen
in a flat mirror.
(1)
(3) (2)
(4) (2)
(4)(3) (1)
WARNING
Never attempt to adjust the driver’s
seat or seatback while driving. The
seat or seatback could move unex-
pectedly, causing loss of control.
Make sure that the driver’s seat and
seatback are properly adjusted
before you start driving.
WARNING
To avoid excessive seat belt slack,
which reduces the effectiveness of
the seat belts as a safety device,
make sure that the seats are adjusted
before the seat belts are fastened.
Seat Adjustment: 14