display SUZUKI IGNIS 2020 Workshop Manual
[x] Cancel search | Manufacturer: SUZUKI, Model Year: 2020, Model line: IGNIS, Model: SUZUKI IGNIS 2020Pages: 505, PDF Size: 8.36 MB
Page 181 of 505

3-28
OPERATING YOUR VEHICLE
75RM4-01E
Downhill
1) Depress the brake pedal and shift thegearshift lever to the “D” position. Make
sure that the gear is in 1st by checking
the gear position indicator.
2) Release the brake pedal and depress
the accelerator pedal slowly. Even if the
accelerator pedal is not depressed, the
clutch will be engaged when the vehicle
speed increases.
Using engine braking:
When driving on a downhill slope, down-
shifting is recommended. So you can use
engine braking.
By placing the gearshift lever in the “M”
position, the Manual (M) mode is selected,
and you can shift to a lower gear manually.
For details of downshift operation, refer to
“Upshift and downshift” in the “Manual (M)
mode”. Manual (M) mode
The gears are not shifted automatically. To
shift the transaxle, the driver must operate
the gearshift lever to
the “+” or “–” direc-
tion. As for conventional manual transaxle
vehicles, releasing the accelerator pedal a
little may help the transaxle to shift
smoothly.
Upshift and downshift:
Upshifting
75RM258
Pull the gearshift lever to the “+” direction
and release it. Every time the lever is oper-
ated, the transaxle is upshifting 1 step in
the order of 1st 2nd 3rd 4th 5th
gear. Downshifting
75RM259
Push the gearshift lever to the “–” direction
and release it. Every time the lever is oper-
ated, the transaxle is downshifted in the
order 5th
4th 3rd 2nd 1st gear.
The gear position is displayed on the gear
position indicator. The gear position indica-
tor shows the transaxle gear position.
Before starting off, always check the gear
position indicator to make sure that the
transaxle is engaged in 1st or reverse,
then depress the accelerator pedal.
NOTE:
• To downshift smoothly, the engine runs fast in some cases. This is done inten-
tionally by the system and is not mal-
function.
• When driving down a hill, downshift and use the engine braking appropriately. If
necessary, continuous downshifting is
Page 183 of 505
3-30
OPERATING YOUR VEHICLE
75RM4-01E
3) Release the parking brake and brakepedal. Depress the accelerator pedal
slowly for smooth starting. Starting off on an uphill/downhill slope:
Uphill
1) Apply the parking brake firmly so that
the vehicle does no t roll backwards.
2) Shift the gearshift lever to the “M” posi-
tion while depressing the brake pedal.
Make sure that the ge ar position indica-
tor in the instrumental cluster displays
1st gear.
3) Release the brake pedal and depress the accelerator pedal gradually, and
when the vehicle starts to move,
release the parking brake and depress
the accelerator pedal to start off.
Downhill
1) Depress the brake pedal and shift the gearshift lever to the “M” position.
Check the gear position indicator to
make sure that the gear is in 1st.
2) Release the brake pedal and depress the accelerator pedal slowly. Even
though the accelerator pedal is not
depressed, the clutch will be engaged
when the vehicle speed increases. Backing up
After the vehicle has stopped completely,
depress the brake pedal and shift the gear-
shift lever to the “R” position. Depress the
accelerator pedal slowly as when starting
off in 1st gear. Before backing up, make
sure that reverse gear is selected by
checking the gear position indicator.
NOTE:
• If reverse gear cannot be engaged even
though the gearshift lever has been
shifted from the “N” to the “R” position,
the system will re-try shifting automati-
cally. This will take some time, noise
may be heard from the gears, and shift-
ing gear shock may occur. However,
they do not indicate malfunction.
• The “N” indicator will flush, the depress brake pedal indicator will come on and a
warning buzzer (long pulse sound) will
sound if any of the following cases
occur;
– If you shift the gearshift lever from the “N” to the “R” position without depress-
ing the brake pedal
– If the system is unable to re-try shifting
You should depress the brake pedal and
shift the gearshift lever to “N” position,
then shift to “R” position again a few sec-
onds later.
WA R N I N G
Always keep your foot on the brake
pedal while stopped with the engine
running. These operations prevent
the vehicle from starting due to unin-
tended activation of the creeping
function.
NOTICE
Do not operate the system as
described below. The life cycle of the
clutch may be reduced.
• Using the accelerator pedal to hold the vehicle on an uphill slope oper-
ation with the gearshift lever in the
“M” or “D” position. If you perform
this operation for a certain period
of time, a warning buzzer will
sound.
• Shifting the gearshift lever to the
“M”, “D” or “R” po sition while rac-
ing the engine.
• Driving at low speed using a high
gear.
• Stopping on a slope using the creeping function. If you perform
this operation for a certain period
of time, a warning buzzer will
sound.
NOTICE
On an uphill slope, never hold the
vehicle at a stop using only the accel-
erator pedal or creeping function. If
you perform this operation for a cer-
tain period of time, a warning buzzer
will sound, and in some cases the
engine will stall. This can also cause
excessive damage to the clutch.
Page 186 of 505
3-33OPERATING YOUR VEHICLE
75RM4-01E
“N” indicator blinking
When the gear indicator lamp blinks “N”,
you should depress the brake pedal and
shift the gearshift lever to “N” position.
“1st” indicator blinking
When the gear indicator lamp blinks “1st”,
you should depress the brake pedal and
shift the gearshift lever to “N” position, then
shift to “D” or “M” position again a few sec-
onds later.
“R” indicator blinking
When the gear indicator lamp blinks “R”,
you should depress the brake pedal and
shift the gearshift lever to “N” position, then
shift to “R” position again a few seconds
later.
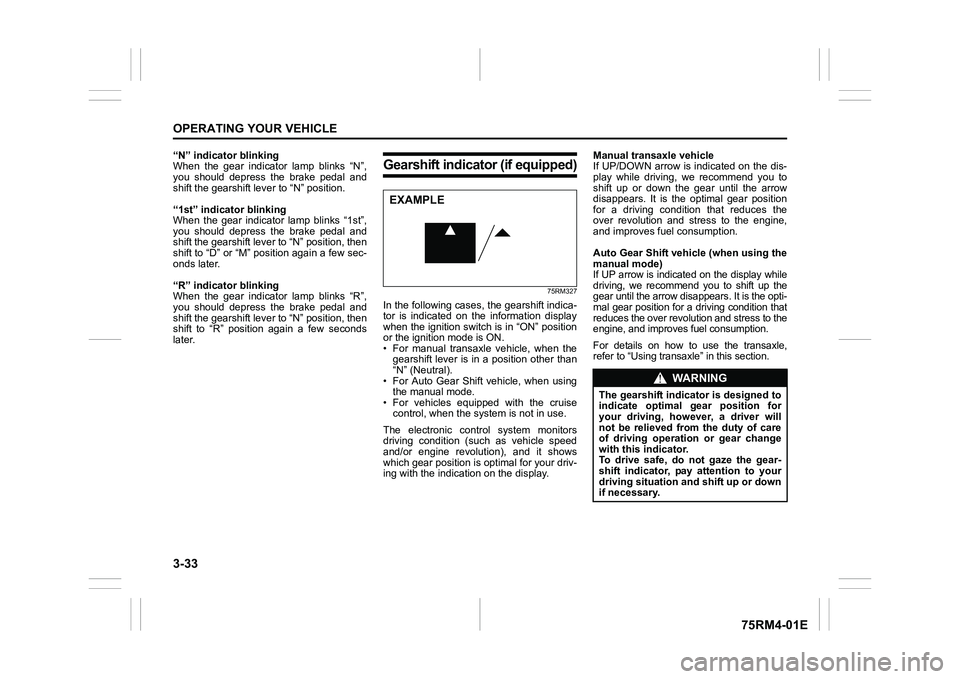
Gearshift indicator (if equipped)
75RM327
In the following cases, the gearshift indica-
tor is indicated on the information display
when the ignition switch is in “ON” position
or the ignition mode is ON.
• For manual transaxle vehicle, when thegearshift lever is in a position other than
“N” (Neutral).
• For Auto Gear Shift vehicle, when using the manual mode.
• For vehicles equipped with the cruise control, when the syst em is not in use.
The electronic control system monitors
driving condition (such as vehicle speed
and/or engine revolution), and it shows
which gear position is optimal for your driv-
ing with the indicati on on the display. Manual transaxle vehicle
If UP/DOWN arrow is indicated on the dis-
play while driving, we recommend you to
shift up or down the gear until the arrow
disappears. It is the optimal gear position
for a driving condition that reduces the
over revolution and stress to the engine,
and improves fuel consumption.
Auto Gear Shift vehicle (when using the
manual mode)
If UP arrow is indicated on the display while
driving, we recommend you to shift up the
gear until the arrow disappears. It is the opti-
mal gear position for a driving condition that
reduces the over revolut
ion and stress to the
engine, and improves fuel consumption.For details on how to use the transaxle,
refer to “Using transa xle” in this section.
EXAMPLE
WA R N I N G
The gearshift indicator is designed to
indicate optimal gear position for
your driving, however, a driver will
not be relieved from the duty of care
of driving operation or gear change
with this indicator.
To drive safe, do not gaze the gear-
shift indicator, pay attention to your
driving situation and shift up or down
if necessary.
Page 187 of 505

3-34
OPERATING YOUR VEHICLE
75RM4-01E
NOTE:
• For manual transaxle vehicle, the gear-shift indicator is not indicated when the
gear position is in “N” (Neutral).
• For manual transaxle vehicle, if you depress the clutch pedal while UP/
DOWN arrow is indicated, the indication
will disappear.
• For Auto Gear Shif t vehicle, if you
release your foot from the accelerator
pedal while UP arrow is indicated, the
indication will display the currently
selected gear position.
• The indication of gearshift indicator tim- ing may differ depending on the vehicle
condition and/or driv ing situation even in
the same vehicle speed and engine rev-
olution.
• If any of the electrical systems such as the dual camera brake support or the
ESP
® (if equipped) is working, the gear-
shift indicator will disappear temporarily. Example of the gearshift indicator
Manual transaxle
Auto Gear Shift (when using the manual mode)
Indication Description
Lower gear position is selected for the vehicle speed and/
or engine revolution. Changing to a higher gear position is
recommended.
Higher gear position is sele cted for the vehicle speed
and/or engine revolution. Chan ging to a lower gear posi-
tion is recommended.
Indication Description Lower gear position is selected for the vehicle speed and/
or engine revolution. Changing to a higher gear position is
recommended.
• In this case, shifting up 5th or upper gear position isrecommended.
Page 188 of 505
3-35OPERATING YOUR VEHICLE
75RM4-01E
ENG A-STOP system
(engine auto stop start system) (if equipped)The ENG A-STOP system (engine auto
stop start system) automatically stops and
restarts the engine when decelerating
before stopping and when the vehicle is
stopped, such as at a traffic signal, in order
to reduce exhaust gases, fuel consumption
and engine noise.
• This system automatically stops the engine under certain conditions. When
the vehicle will be stopped for a long
time or when you will leave the vehicle
unattended, set the parking brake firmly,
and then turn the ignition switch or press
the engine switch to stop the engine.
• If certain conditions are met, the engine is stopped automatically when decelerat-
ing (approximately 15 km/h (9 mph) or
less for manual transaxle vehicles,
approximately 13 km/h (8 mph) or less
for CVT vehicles) before stopping. How-
ever, the engine will not be stopped
automatically during deceleration until
confirmation of the system function is fin-
ished. NOTE:
If your vehicle is equipped with the auto-
matic heating and ai
r conditioning system,
you can change the automatic engine stop
condition via the information display. Refer
to “Setting mode” in “Information display
(instrument cluster with tachometer)” in the
“BEFORE DRIVING” section.
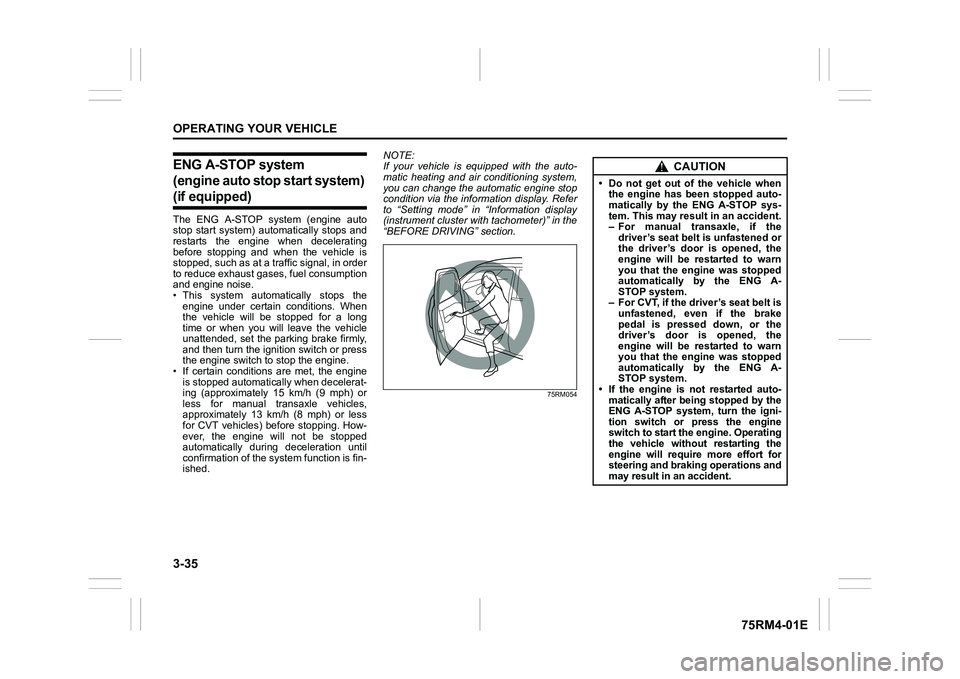
75RM054
CAUTION
• Do not get out of the vehicle when the engine has been stopped auto-
matically by the ENG A-STOP sys-
tem. This may result in an accident.
– For manual transaxle, if the
driver’s seat belt is unfastened or
the driver’s door is opened, the
engine will be restarted to warn
you that the engine was stopped
automatically by the ENG A-
STOP system.
– For CVT, if the driver’s seat belt is unfastened, even if the brake
pedal is pressed down, or the
driver’s door is opened, the
engine will be restarted to warn
you that the engine was stopped
automatically by the ENG A-
STOP system.
• If the engine is not restarted auto- matically after being stopped by the
ENG A-STOP system, turn the igni-
tion switch or press the engine
switch to start the engine. Operating
the vehicle without restarting the
engine will require more effort for
steering and braking operations and
may result in an accident.
Page 200 of 505
3-47OPERATING YOUR VEHICLE
75RM4-01E
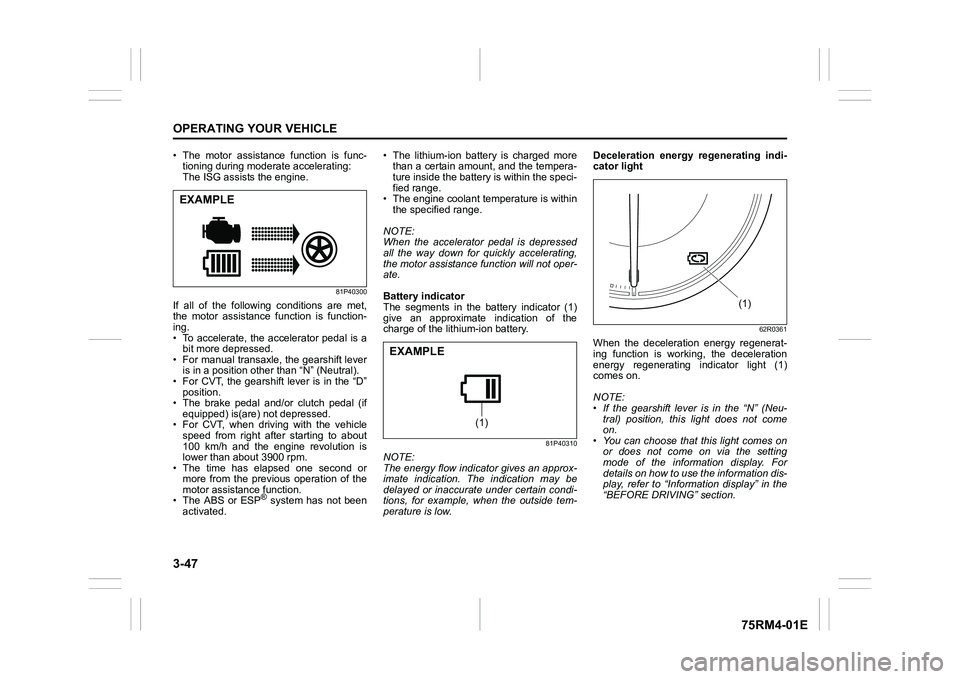
• The motor assistance function is func-tioning during moderate accelerating:
The ISG assists the engine.
81P40300
If all of the following conditions are met,
the motor assistance function is function-
ing.
• To accelerate, the accelerator pedal is a
bit more depressed.
• For manual transaxle, the gearshift lever is in a position other than “N” (Neutral).
• For CVT, the gearshift lever is in the “D” position.
• The brake pedal and/or clutch pedal (if
equipped) is(are) not depressed.
• For CVT, when driving with the vehicle speed from right after starting to about
100 km/h and the engine revolution is
lower than about 3900 rpm.
• The time has elapsed one second or
more from the previous operation of the
motor assistance function.
• The ABS or ESP
® system has not been
activated. • The lithium-ion battery is charged more
than a certain amount, and the tempera-
ture inside the battery is within the speci-
fied range.
• The engine coolant temperature is within the specified range.
NOTE:
When the accelerator pedal is depressed
all the way down for quickly accelerating,
the motor assistance function will not oper-
ate.
Battery indicator
The segments in the battery indicator (1)
give an approximate indication of the
charge of the lithium-ion battery.
81P40310
NOTE:
The energy flow indicator gives an approx-
imate indication. The indication may be
delayed or inaccurate under certain condi-
tions, for example, when the outside tem-
perature is low. Deceleration energy regenerating indi-
cator light
62R0361
When the deceleration energy regenerat-
ing function is working, the deceleration
energy regenerating indicator light (1)
comes on.
NOTE:
• If the gearshift lever is in the “N” (Neu-
tral) position, this light does not come
on.
• You can choose that this light comes on or does not come on via the setting
mode of the information display. For
details on how to use the information dis-
play, refer to “Informa tion display” in the
“BEFORE DRIVING” section.
EXAMPLE
(1)
EXAMPLE
(1)
Page 201 of 505
3-48
OPERATING YOUR VEHICLE
75RM4-01E
Eco-Cool (if equipped)When driving while using the air condi-
tioner, cold air is stored in the cooling stor-
age medium of the air conditioner unit.
Since stored cold air will be blown into the
vehicle when the engine has been stopped
automatically by the ENG A-STOP system,
the rise of the inside temperature can be
reduced when the air conditioner is not
running.
For the automatic heating and air condi-
tioning system, reducing the rise of the
inside temperature increases the length of
time that the engine is stopped automati-
cally, leading to improved fuel economy.
NOTE:
Sufficient cold air may not be stored if the
vehicle has not been running for very long
or in a traffic jam. The effect varies
depending on the outside temperature and
the air conditioner settings.
I/S AC Settings (if equipped)• When using the automatic heating andair conditioning system (if equipped),
you can select one of the following set-
tings via the setting mode of the informa-
tion display.
– Standard
– Economy
–Comfort
For details on how to use the information
display, refer to “Information display” in
the “BEFORE DRIVING” section.
• When “Economy” is selected, engine auto stop condition is eased, compared
with “Standard”. Engine auto stop condi-
tion will occur more f requently, the stop
time will be longer, leading to reduction
of fuel consumption.
• When “Comfort” is sel ected, engine auto
stop condition becomes severe, com-
pared with “Standard”. Engine auto stop
condition will occur less frequently, the
stop time will be shorter, leading to more
comfortable cabin condition by air condi-
tioner.
Cruise control (if equipped)The cruise control system allows you to
maintain a steady speed without keeping
your foot on the accelerator pedal. The
controls for operating the cruise control
system are on the steering wheel.
You can use the cruise control system
under the following conditions:
• For manual transaxle vehicle, the gear position is in 3rd, 4th or 5th.
• For CVT vehicle, the select lever is in “D” position, or the gear position is in 3rd,
4th, 5th, 6th or 7th in the manual mode
(if equipped).
• For Auto Gear Shift vehicle, the select lever is in “D” position, or the gear posi-
tion is in 3rd, 4th or 5th in the manual
mode.
• The vehicle speed is about 45 km/h (28
mph) or higher.
WA R N I N G
To help avoid loss of vehicle control,
do not use the cruise control system
when driving in heavy traffic, on slip-
pery or winding roads, or on steep
downhills.
Page 205 of 505

3-52
OPERATING YOUR VEHICLE
75RM4-01E
Setting maximum speed1) Turn on the speed limiter system bypushing “LIMIT” switch (1). When the
limit indicator (4) comes on, you can set
the maximum speed.
2) Accelerate or decelerate to the desired
speed.
3) Push down the “RES +/SET –” switch (3) and turn on the set indicator (5). The
current vehicle speed is set as the max-
imum speed.
NOTE:If you push down the “RES +/SET –” switch
(3) when the vehicle speed is less than 30
km/h or 20 mph, the maximum speed will be
set to 30 km/h or 20 mph.Information display
75RM117
(4) Limit indicator
(5) Set indicator
(6) Speed indication
When you push “LIMIT” switch (1), the sys-
tem is on and the limit indicator (4) will come
on. When the vehicle’s maximum speed is
set, the set indicator (5) will come on.
Exceeding maximum speedYou can exceed the maximum speed tem-
porarily by quickly depressing the acceler-
ator pedal all the way down . While the
vehicle speed is exceeded, the speed indi-
cation (6) on the information display will
flash and the buzzer will sound briefly.
If the accelerator pedal is released to
return below the maximum speed, the
speed indication (6) will stop flashing and
then stay lit, and the function will restore.
NOTE:
• When you depress the accelerator pedal slowly, the vehicl e speed may not
exceed the maximum speed. If you wish
to exceed the maximum speed, depress
the accelerator pedal all the way down
quickly or push “CANCEL” switch (2) to
cancel the maximum speed temporarily.
• The speed indication (6) will also flash
and the buzzer will sound if the speed
limiter cannot prevent the vehicle from
exceeding the maximum speed in such
cases as when going down a steep hill,
or under excessive acceleration. In this
case, decelerate to return below the
maximum speed using the brake pedal.
Changing speed settingSetting to the current speed
1) Push “CANCEL” switch (2).
2) Accelerate or decelerate to the desired speed.
3) Push down the “RES +/SET –” switch (3) and turn on the se t indicator (5). The
current vehicle speed is set as the max-
imum speed.
Using “RES +/ SET –” switch
To change to a faster speed, press repeat-
edly or hold push up the “RES +/SET –”
switch (3).
To change to a slower speed, press
repeatedly or hold push down the “RES +/
SET –” switch (3).
NOTE:
• You can adjust the set speed by 1 km/h or 1 mph by pushing “RES +/SET –”
switch (3) quickly.
• You can adjust the set speed by 5 km/h or 5 mph by pushing and holding “RES +/
SET –” switch (3)
• If the current vehicle speed exceeds the maximum speed when changing to the
slower speed using “RES +/SET –”
switch (3), the speed indication (6) will
flash and the buzzer will sound.
(4) (5) (6)
EXAMPLE
Page 207 of 505

3-54
OPERATING YOUR VEHICLE
75RM4-01E
Frontal collision warning
When there is a risk of a frontal crash, a warning will be given through the information dis-
play and sound.
75RM282
Warning brake system
If the driver cannot take or is insufficient to take evasive ac tion such as brake operation
and steering operation after frontal collision warning activate s, the system applies brake
lightly.
75RM283
EXAMPLE
buzzer
with tachometer without
tachometer
Information display
EXAMPLE
buzzer
with tachometer without
tachometer
Information display
Indicator
light
Page 208 of 505
3-55OPERATING YOUR VEHICLE
75RM4-01E
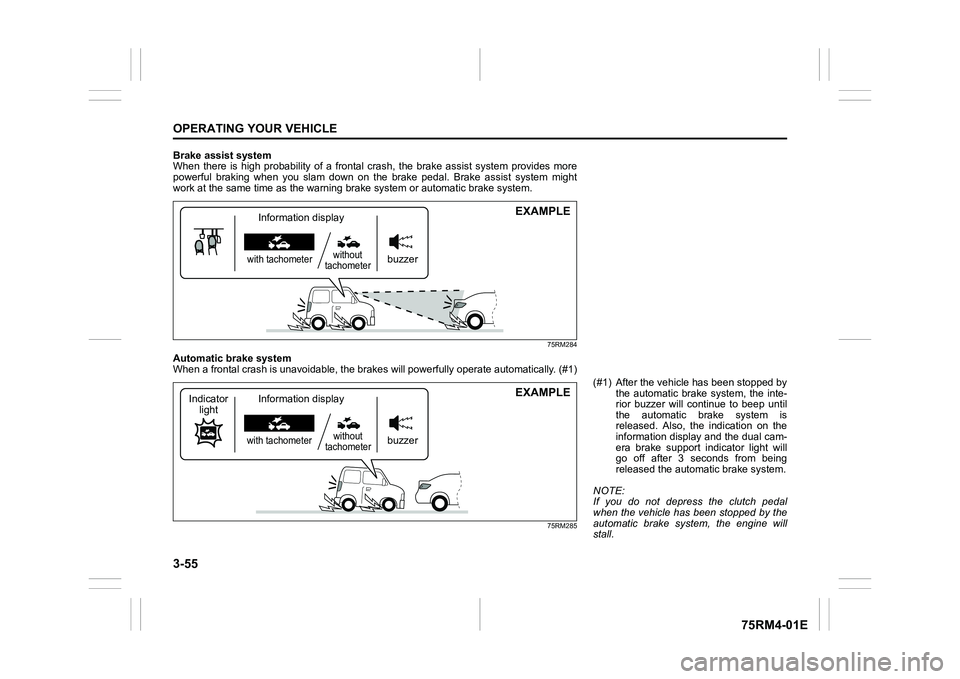
Brake assist system
When there is high probability of a frontal crash, the brake assist system provides more
powerful braking when you slam down on the brake pedal. Brake a ssist system might
work at the same tim e as the warning brak e system or automatic brake system.
75RM284
Automatic brake system
When a frontal crash is unavoidable, the brakes will powerfully operate automatically. (#1)
75RM285
EXAMPLE
buzzer
with tachometerwithout
tachometerInformation display
EXAMPLE
buzzer
with tachometer without
tachometer
Information display
Indicator
light
(#1) After the vehicl e has been stopped by
the automatic brake system, the inte-
rior buzzer will continue to beep until
the automatic brake system is
released. Also, the indication on the
information display and the dual cam-
era brake support indicator light will
go off after 3 seconds from being
released the automatic brake system.
NOTE:
If you do not depress the clutch pedal
when the vehicle has been stopped by the
automatic brake system, the engine will
stall.