filler plug SUZUKI IGNIS 2020 Owners Manual
[x] Cancel search | Manufacturer: SUZUKI, Model Year: 2020, Model line: IGNIS, Model: SUZUKI IGNIS 2020Pages: 505, PDF Size: 8.36 MB
Page 374 of 505
7-25INSPECTION AND MAINTENANCE
75RM4-01E
It is important to keep the engine oil at the
correct level for proper lubrication of your
vehicle’s engine. Check the oil level with
the vehicle on a level surface. The oil level
indication may be inaccurate if the vehicle
is on a slope. The oil level should be
checked either before starting the engine
or at least 5 minutes after stopping the
engine.
The handle of the engine oil dipstick is col-
ored with yellow for ea sy identification.
Pull out the oil dipstick, wipe oil off with a
clean cloth, insert the dipstick all the way
into the engine, and then remove it again.
The oil on the stick should be between the
upper and lower limits shown on the stick.
If the oil level indication is near the lower
limit, add enough oil to raise the level to
the upper limit.
Refilling
81A147
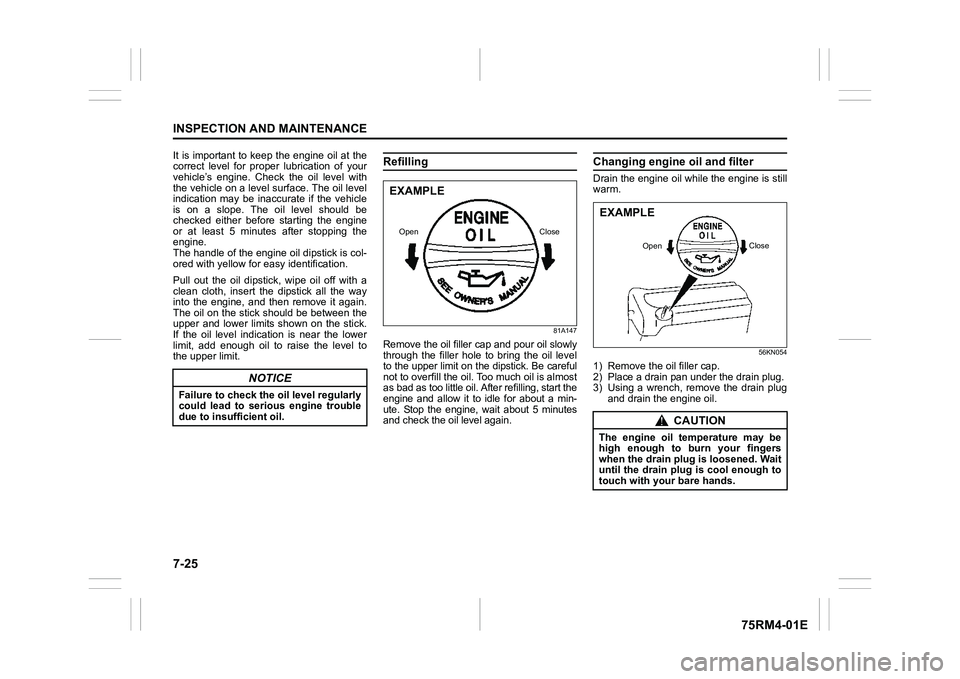
Remove the oil filler cap and pour oil slowly
through the filler hole to bring the oil level
to the upper limit on the dipstick. Be careful
not to overfill the oil. Too much oil is almost
as bad as too little oil. A fter refilling, start the
engine and allow it to idle for about a min-
ute. Stop the engine, wait about 5 minutes
and check the oil level again.
Changing engine oil and filterDrain the engine oil while the engine is still
warm.
56KN054
1) Remove the oil filler cap.
2) Place a drain pan under the drain plug.
3) Using a wrench, remove the drain plug and drain the engine oil.
NOTICE
Failure to check the oil level regularly
could lead to serious engine trouble
due to insufficient oil.
EXAMPLEOpen Close
CAUTION
The engine oil temperature may be
high enough to burn your fingers
when the drain plug is loosened. Wait
until the drain plug is cool enough to
touch with your bare hands.EXAMPLE
Open Close
Page 376 of 505
7-27INSPECTION AND MAINTENANCE
75RM4-01E
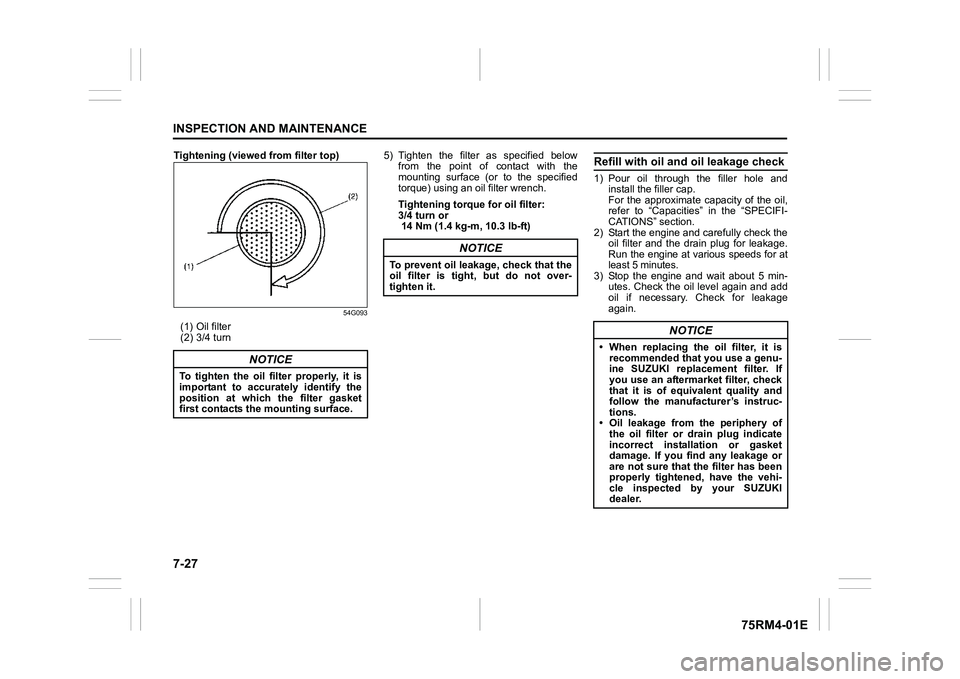
Tightening (viewed from filter top)
54G093
(1) Oil filter
(2) 3/4 turn5) Tighten the filter as specified below
from the point of contact with the
mounting surface (or to the specified
torque) using an oil filter wrench.
Tightening torque for oil filter:
3/4 turn or
14 Nm (1.4 kg -m, 10.3 lb-ft)
Refill with oil and oil leakage check1) Pour oil through the filler hole and
install the filler cap.
For the approximate capacity of the oil,
refer to “Capacities” in the “SPECIFI-
CATIONS” section.
2) Start the engine and carefully check the oil filter and the drain plug for leakage.
Run the engine at various speeds for at
least 5 minutes.
3) Stop the engine and wait about 5 min- utes. Check the oil level again and add
oil if necessary. Check for leakage
again.
NOTICE
To tighten the oil filter properly, it is
important to accurately identify the
position at which the filter gasket
first contacts the mounting surface.
NOTICE
To prevent oil leakage, check that the
oil filter is tight, but do not over-
tighten it.
NOTICE
• When replacing the oil filter, it is recommended that you use a genu-
ine SUZUKI replacement filter. If
you use an aftermarket filter, check
that it is of equi valent quality and
follow the manufacturer’s instruc-
tions.
• Oil leakage from the periphery of the oil filter or drain plug indicate
incorrect installation or gasket
damage. If you find any leakage or
are not sure that the filter has been
properly tightened, have the vehi-
cle inspected by your SUZUKI
dealer.
Page 383 of 505
7-34
INSPECTION AND MAINTENANCE
75RM4-01E
Gear oilManual transaxle oil / Auto Gear
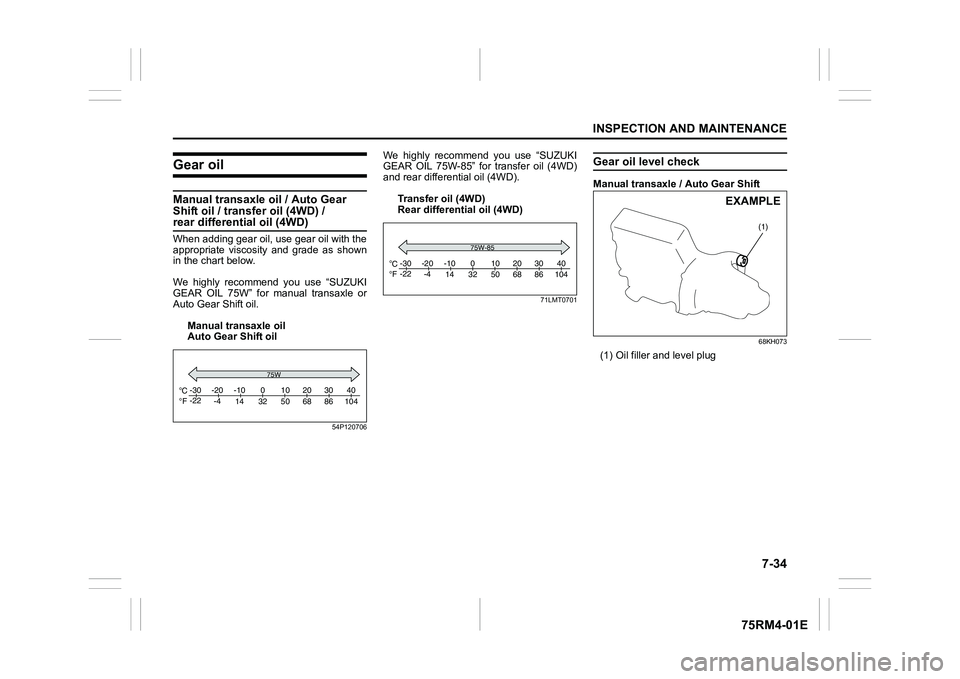
Shift oil / transfer oil (4WD) / rear differential oil (4WD)When adding gear oil, use gear oil with the
appropriate viscosity and grade as shown
in the chart below.
We highly recommend you use “SUZUKI
GEAR OIL 75W” for manual transaxle or
Auto Gear Shift oil.Manual transaxle oil
Auto Gear Shift oil
54P120706
We highly recommend you use “SUZUKI
GEAR OIL 75W-85” for transfer oil (4WD)
and rear differential oil (4WD).Transfer oil (4WD)
Rear differential oil (4WD)
71LMT0701
Gear oil level checkManual transaxle / Auto Gear Shift
68KH073
(1) Oil filler and level plug
C
Fo
o-30
-22
-20
-4 -10
14 32 50 68 86 104 010203040
75W
C
Fo
o-30
-22
-20
-4 -10
14 32 50 68 86 104 010203040
75W-85
(1)
EXAMPLE
Page 384 of 505
7-35INSPECTION AND MAINTENANCE
75RM4-01E
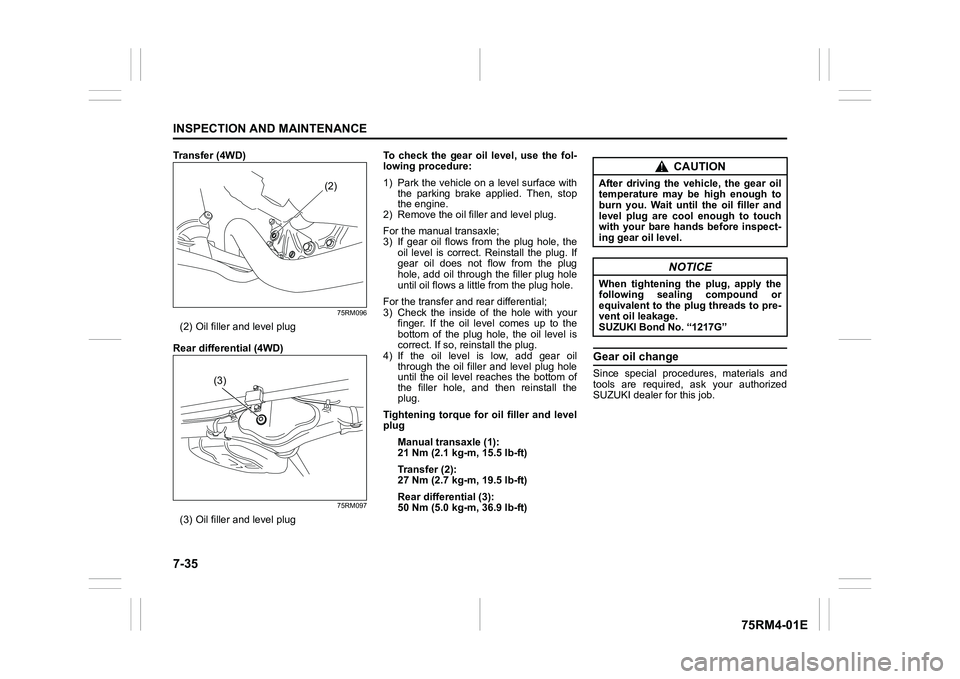
Transfer (4WD)
75RM096
(2) Oil filler and level plug
Rear differential (4WD)
75RM097
(3) Oil filler and level plug To check the gear oil level, use the fol-
lowing procedure:
1) Park the vehicle on a level surface with
the parking brake applied. Then, stop
the engine.
2) Remove the oil filler and level plug.
For the manual transaxle;
3) If gear oil flows from the plug hole, the
oil level is correct. Reinstall the plug. If
gear oil does not flow from the plug
hole, add oil through the filler plug hole
until oil flows a littl e from the plug hole.
For the transfer and rear differential;
3) Check the inside of the hole with your finger. If the oil level comes up to the
bottom of the plug hole, the oil level is
correct. If so, reinstall the plug.
4) If the oil level is low, add gear oil through the oil filler and level plug hole
until the oil level reaches the bottom of
the filler hole, and then reinstall the
plug.
Tightening torque for oil filler and level
plug
Manual transaxle (1):
21 Nm (2.1 kg-m, 15.5 lb-ft)
Transfer (2):
27 Nm (2.7 kg-m, 19.5 lb-ft)
Rear differential (3):
50 Nm (5.0 kg-m, 36.9 lb-ft)
Gear oil changeSince special procedures, materials and
tools are required, ask your authorized
SUZUKI dealer for this job.
(2)
(3)
CAUTION
After driving the vehicle, the gear oil
temperature may be high enough to
burn you. Wait until the oil filler and
level plug are cool enough to touch
with your bare hands before inspect-
ing gear oil level.
NOTICE
When tightening the plug, apply the
following sealing compound or
equivalent to the plug threads to pre-
vent oil leakage.
SUZUKI Bond No. “1217G”
Page 417 of 505
8-8
EMERGENCY SERVICE
75RM4-01E
81PN248
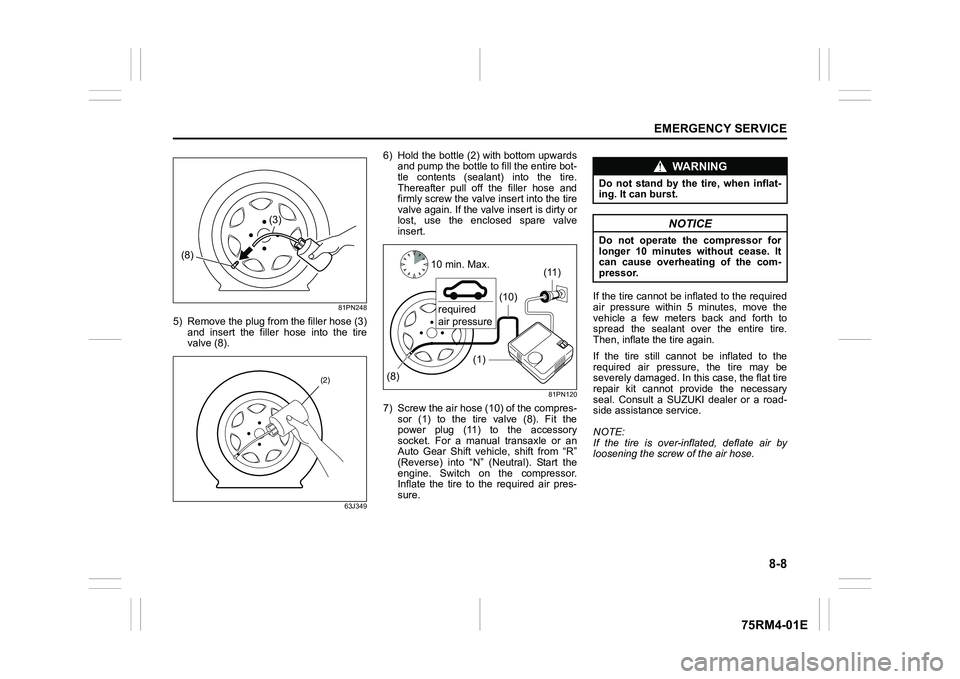
5) Remove the plug from the filler hose (3)and insert the filler hose into the tire
valve (8).
63J349
6) Hold the bottle (2) with bottom upwardsand pump the bottle to fill the entire bot-
tle contents (sealant) into the tire.
Thereafter pull off the filler hose and
firmly screw the valve insert into the tire
valve again. If the valve insert is dirty or
lost, use the enclosed spare valve
insert.
81PN120
7) Screw the air hose (10) of the compres- sor (1) to the tire valve (8). Fit the
power plug (11) to the accessory
socket. For a manual transaxle or an
Auto Gear Shift vehicle, shift from “R”
(Reverse) into “N” (Neutral). Start the
engine. Switch on the compressor.
Inflate the tire to the required air pres-
sure. If the tire cannot be inflated to the required
air pressure within 5 minutes, move the
vehicle a few meters back and forth to
spread the sealant over the entire tire.
Then, inflate the tire again.
If the tire still cannot be inflated to the
required air pressure, the tire may be
severely damaged. In this case, the flat tire
repair kit cannot provide the necessary
seal. Consult a SUZUKI dealer or a road-
side assistance service.
NOTE:
If the tire is over-inflated, deflate air by
loosening the screw of the air hose.
(3)
(8)
(2)
(1)
(8) (11)
(10)
10 min. Max.required
air pressure
WA R N I N G
Do not stand by the tire, when inflat-
ing. It can burst.
NOTICE
Do not operate the compressor for
longer 10 minutes without cease. It
can cause overheating of the com-
pressor.