SUZUKI IGNIS 2021 Owners Manual
Manufacturer: SUZUKI, Model Year: 2021, Model line: IGNIS, Model: SUZUKI IGNIS 2021Pages: 505, PDF Size: 8.36 MB
Page 141 of 505
2-118
BEFORE DRIVING
75RM4-01E
Light reminder buzzerThe interior buzzer continuously beeps if
you open the driver’s door without turning
off the headlights and position lights. This
function is triggered under the following
condition:
The headlights and/or position lights are
on even after the ignition switch is turned
off, or the engine switch is pressed to
change the ignition mode to LOCK (OFF).
The buzzer stops sounding when you turn
off the headlights and position lights.
NOTE:
A message is indicated on the information
display in the instrument cluster with
tachometer while the buzzer is sounding.Daytime running light (D.R.L.) sys-tem (if equipped)When the engine is started, this system
turns on the daytime running lights.
Conditions for D.R.L. system operation
1) The engine is running.
2) Headlights and front fog light (if equipped) are off.
NOTE:
Brightness of the daytime running lights is
different from the bri ghtness of the position
lights, but it is not a malfunction.
Guide me light (if equipped)To home function
This function turns on the front position
lights and the headlights in the low beam
setting for about 10 seconds after the igni-
tion switch is turned to “LOCK” position or
the engine switch is pressed to change the
ignition mode to LOCK (OFF).
To set the function:
1) Turn the lighting switch to “AUTO” posi- tion
2) Turn the ignition switch to “LOCK” posi- tion or press the engine switch to
change the ignition mode to LOCK
(OFF).
3) Pull the lighting control lever toward you once and open the driver’s side
door within 60 seconds. Or pull the
lighting control lever toward you once
while the driver’s side door is open.
To cancel the function:
Perform any of the following operations.
• Pull the lighting control lever toward you once.
• Insert the key into the ignition switch or
change the ignition mode to ACC or ON
by pressing the engine switch.
• Turn the lighting switch to any other
position than “AUTO” position. NOTE:
• When the “To home” is functioning, the
front fog lights, rear fog lights and the
headlights (high beam) are not turned
on.
• Lighting time of the “To home” function
can be changed on the information dis-
play. Refer to “Information display” in this
section.
To car function
If UNLOCK button of the keyless push start
system remote controller or the keyless
entry system transmitter is pressed while
the lighting switch is positioned in “AUTO”,
the front position lights and the headlights
in the low beam are turned on for 10 sec-
onds.
This function will operate only when it is
dark outside the vehicle.
To cancel the function:
Perform any of the following operations.
• Lock the doors by using the keyless push start system rem ote controller, the
request switch or the keyless entry sys-
tem transmitter, or insert the key into the
driver’s door lock.
• Insert the key into the ignition switch or
change the ignition mode to ACC or ON
by pressing the engine switch.
• Turn the lighting switch to any other
position than “AUTO” position.
Page 142 of 505
2-119BEFORE DRIVING
75RM4-01E
NOTE:
• When the “To car” is functioning, thefront fog lights, rear fog lights and the
headlights (high beam) are not turned
on.
• Lighting time of the “To car” function can
be changed on the information display.
Refer to “Information display” in this sec-
tion.
Front fog light swi tch (if equipped)
68PM00232
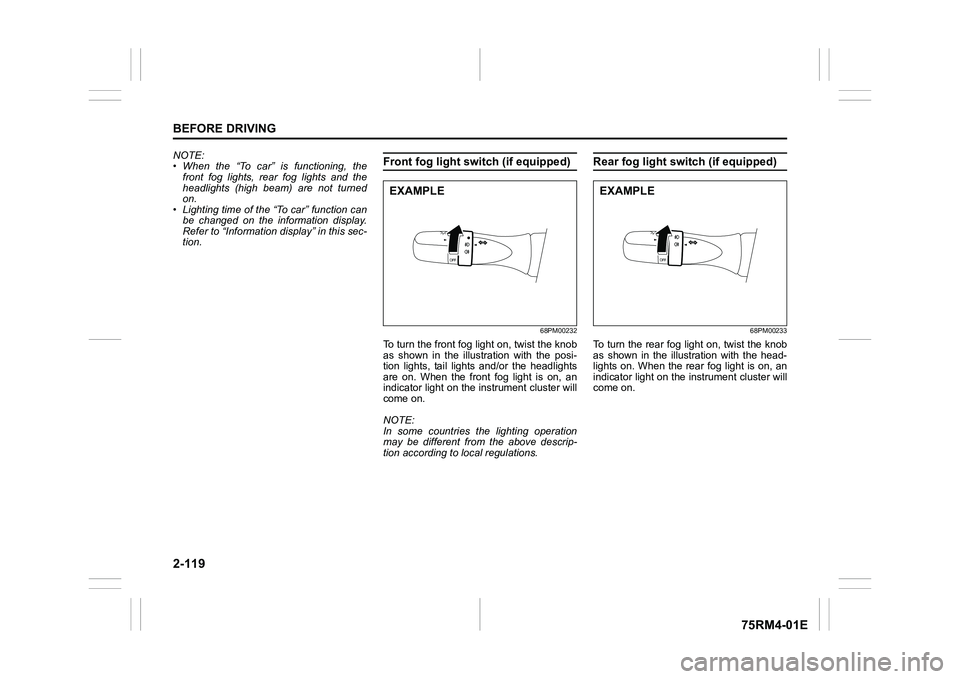
To turn the front fog light on, twist the knob
as shown in the illustration with the posi-
tion lights, tail lights and/or the headlights
are on. When the front fog light is on, an
indicator light on the in strument cluster will
come on.
NOTE:
In some countries the lighting operation
may be different from the above descrip-
tion according to local regulations.
Rear fog light switch (if equipped)
68PM00233
To turn the rear fog light on, twist the knob
as shown in the illustration with the head-
lights on. When the rear fog light is on, an
indicator light on the in strument cluster will
come on.
EXAMPLE
EXAMPLE
Page 143 of 505
2-120
BEFORE DRIVING
75RM4-01E
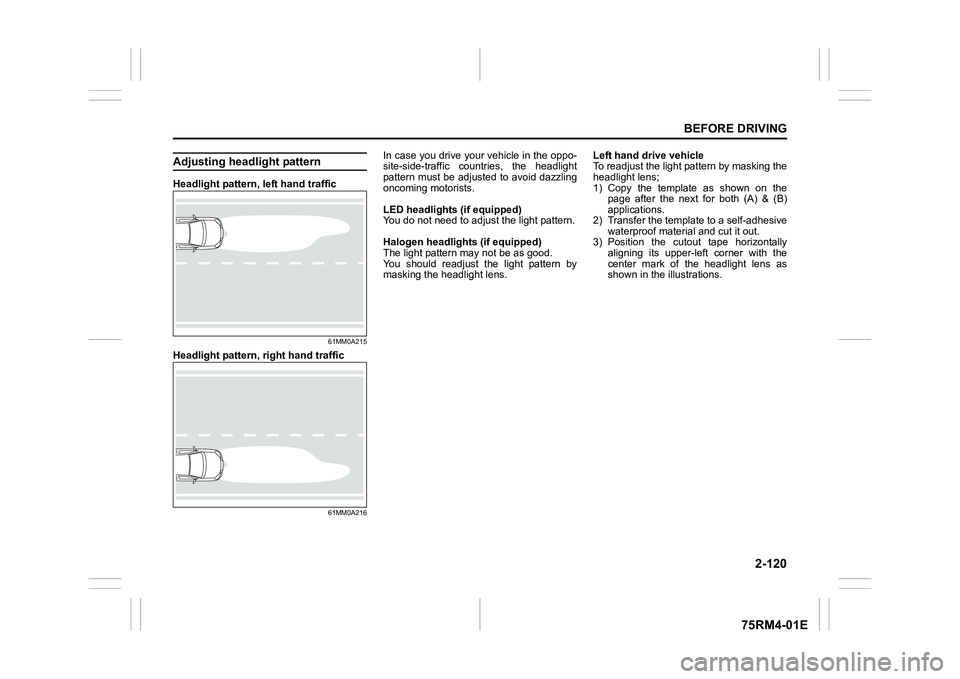
Adjusting headlight patternHeadlight pattern, left hand traffic
61MM0A215
Headlight pattern, right hand traffic
61MM0A216
In case you drive your vehicle in the oppo-
site-side-traffic countries, the headlight
pattern must be adjusted to avoid dazzling
oncoming motorists.
LED headlights (if equipped)
You do not need to adjus t the light pattern.
Halogen headlights (if equipped)
The light pattern m ay not be as good.
You should readjust the light pattern by
masking the headlight lens. Left hand drive vehicle
To readjust the light pattern by masking the
headlight lens;
1) Copy the template as shown on the
page after the next for both (A) & (B)
applications.
2) Transfer the template to a self-adhesive waterproof mater ial and cut it out.
3) Position the cutout tape horizontally
aligning its upper-left corner with the
center mark of the headlight lens as
shown in the illustrations.
Page 144 of 505
2-121BEFORE DRIVING
75RM4-01E
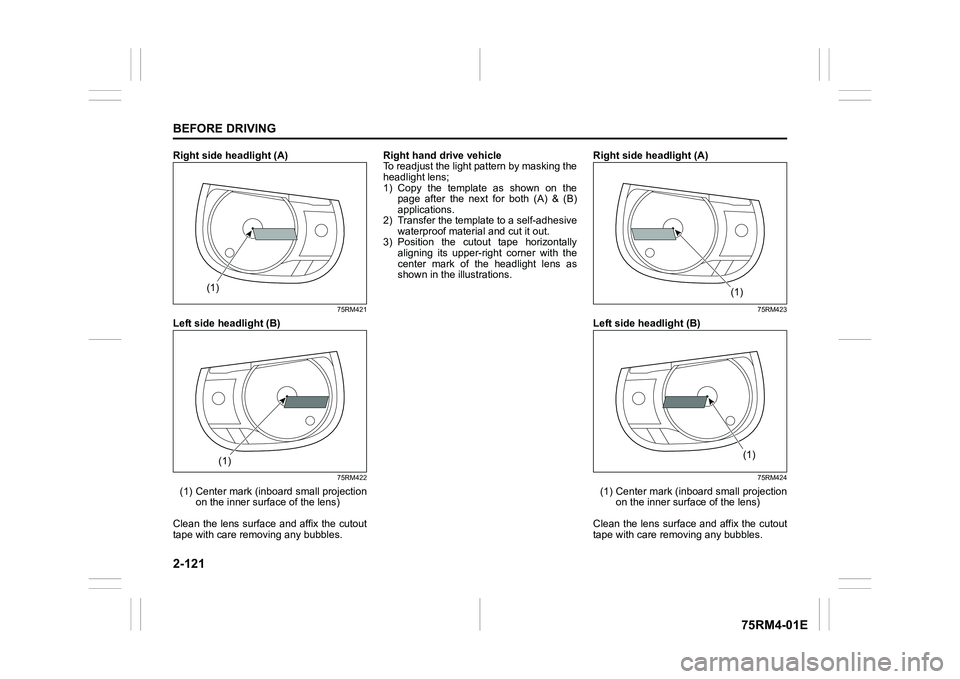
Right side headlight (A)
75RM421
Left side headlight (B)
75RM422
(1) Center mark (inboard small projection
on the inner surface of the lens)
Clean the lens surface and affix the cutout
tape with care removing any bubbles. Right hand d
rive vehicle
To readjust the light pattern by masking the
headlight lens;
1) Copy the template as shown on the page after the next for both (A) & (B)
applications.
2) Transfer the template to a self-adhesive waterproof mater ial and cut it out.
3) Position the cutout tape horizontally
aligning its upper-ri ght corner with the
center mark of the headlight lens as
shown in the illustrations. Right side headlight (A)
75RM423
Left side headlight (B)
75RM424
(1) Center mark (inboard small projection
on the inner surface of the lens)
Clean the lens surface and affix the cutout
tape with care removing any bubbles.
(1)
(1)
(1)
(1)
Page 145 of 505

2-122
BEFORE DRIVING
75RM4-01E
Templates for halogen headlights
75RM323
A
B
Page 146 of 505
2-123BEFORE DRIVING
75RM4-01E
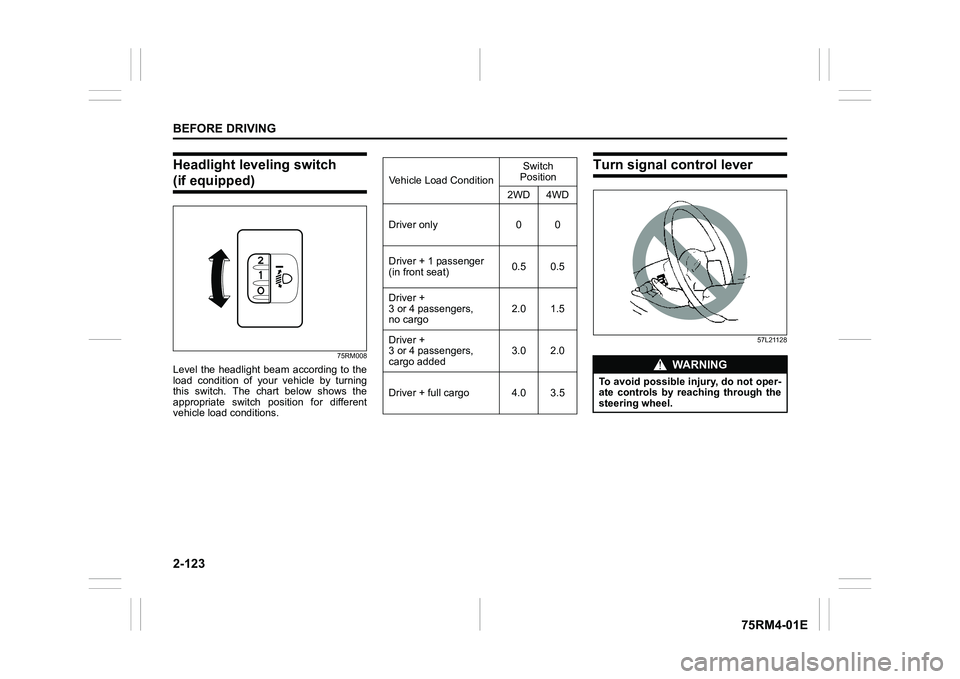
Headlight leveling switch (if equipped)
75RM008
Level the headlight beam according to the
load condition of your vehicle by turning
this switch. The chart below shows the
appropriate switch position for different
vehicle load conditions.
Turn signal control lever
57L21128
Vehicle Load ConditionSwitch
Position
2WD 4WD
Driver only 0 0
Driver + 1 passenger
(in front seat) 0.5 0.5
Driver +
3 or 4 passengers,
no cargo 2.0 1.5
Driver +
3 or 4 passengers,
cargo added 3.0 2.0
Driver + full cargo 4.0 3.5
WA R N I N G
To avoid possible injury, do not oper-
ate controls by reaching through the
steering wheel.
Page 147 of 505

2-124
BEFORE DRIVING
75RM4-01E
Turn signal operationWith the ignition switch in “ON” position or
the ignition mode ON, move the lever
upward or downward to activate the right
or left turn signals.
Normal turn signal
68PM00234
Move the lever all the way upward or
downward to signal. When the turn is com-
pleted, the signal will cancel and the lever
will return to its normal position.Lane change signal
68PM00235
Move the lever partway upward or down-
ward to turn right or left and hold the lever
in the moved position.
• The turn signal and its indicator flash
while the lever is held at the moved posi-
tion.
The turn signal and its indicator flash 3
times even if you return the lever immedi-
ately after moving it.
NOTE:
The turn signal and its indicator can be set
whether they flash 3 times after the turn
signal lever is returned via the information
display. Refer to “Information display” in
this section. NOTE:
You can customize the setting for the num-
ber of flashing times of the turn signal and
its indicator (1 to 4 times). Please ask an
authorized SUZUKI dealer for the customi-
zation.
EXAMPLE
EXAMPLE
Page 148 of 505
2-125BEFORE DRIVING
75RM4-01E
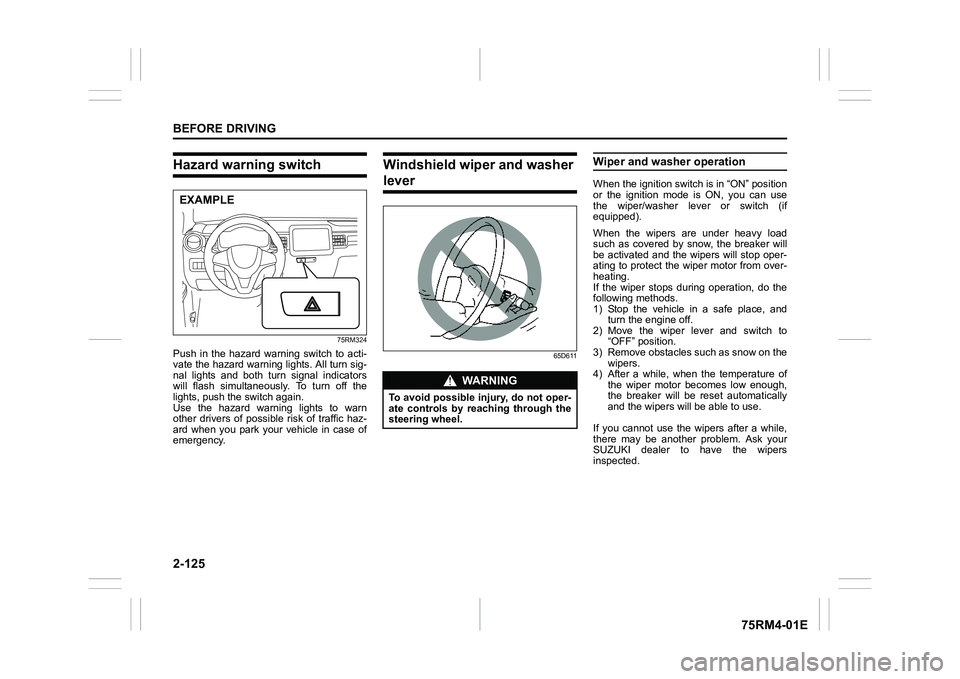
Hazard warning switch
75RM324
Push in the hazard warning switch to acti-
vate the hazard warning lights. All turn sig-
nal lights and both turn signal indicators
will flash simultaneously. To turn off the
lights, push the switch again.
Use the hazard warning lights to warn
other drivers of possible risk of traffic haz-
ard when you park your vehicle in case of
emergency.
Windshield wiper and washer lever
65D611
Wiper and washer operationWhen the ignition switch is in “ON” position
or the ignition mode is ON, you can use
the wiper/washer lever or switch (if
equipped).
When the wipers are under heavy load
such as covered by snow, the breaker will
be activated and the wipers will stop oper-
ating to protect the wiper motor from over-
heating.
If the wiper stops during operation, do the
following methods.
1) Stop the vehicle in a safe place, andturn the engine off.
2) Move the wiper lever and switch to “OFF” position.
3) Remove obstacles such as snow on the wipers.
4) After a while, when the temperature of
the wiper motor becomes low enough,
the breaker will be reset automatically
and the wipers will be able to use.
If you cannot use the wipers after a while,
there may be another problem. Ask your
SUZUKI dealer to have the wipers
inspected.
EXAMPLE
WA R N I N G
To avoid possible injury, do not oper-
ate controls by reaching through the
steering wheel.
Page 149 of 505
2-126
BEFORE DRIVING
75RM4-01E
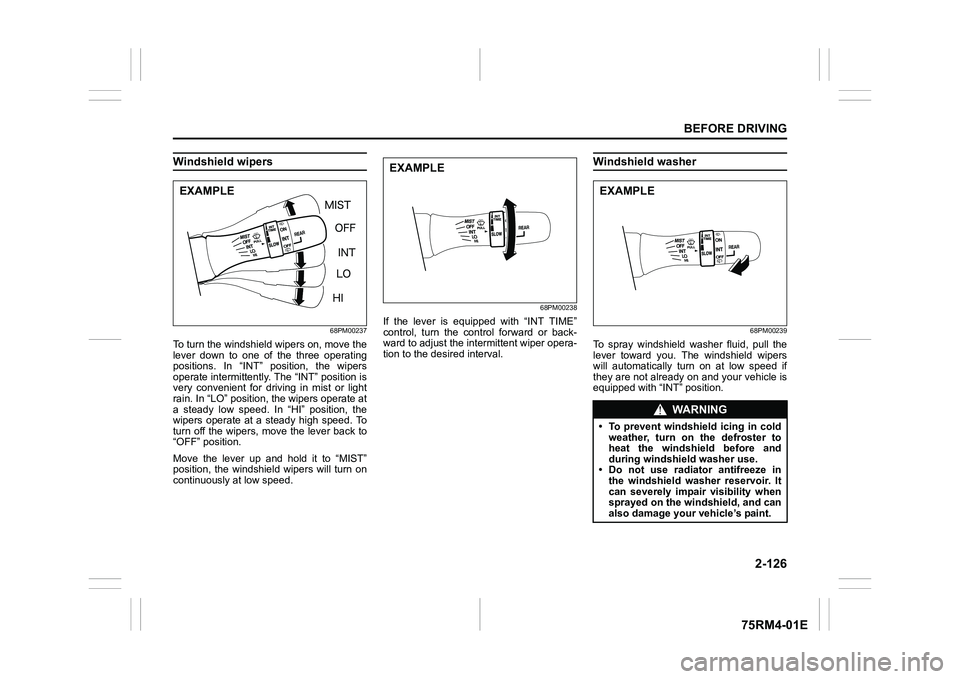
Windshield wipers
68PM00237
To turn the windshield wipers on, move the
lever down to one of the three operating
positions. In “INT” position, the wipers
operate intermittently. The “INT” position is
very convenient for driving in mist or light
rain. In “LO” position, the wipers operate at
a steady low speed. In “HI” position, the
wipers operate at a steady high speed. To
turn off the wipers, move the lever back to
“OFF” position.
Move the lever up and hold it to “MIST”
position, the windshield wipers will turn on
continuously at low speed.
68PM00238
If the lever is equipped with “INT TIME”
control, turn the control forward or back-
ward to adjust the int ermittent wiper opera-
tion to the desired interval.
Windshield washer
68PM00239
To spray windshield washer fluid, pull the
lever toward you. The windshield wipers
will automatically turn on at low speed if
they are not already on and your vehicle is
equipped with “INT” position.
EXAMPLE
EXAMPLE
WA R N I N G
• To prevent windshield icing in cold weather, turn on the defroster to
heat the windshield before and
during windshield washer use.
• Do not use radiator antifreeze in
the windshield washer reservoir. It
can severely impair visibility when
sprayed on the windshield, and can
also damage your vehicle’s paint.EXAMPLE
Page 150 of 505
2-127BEFORE DRIVING
75RM4-01E
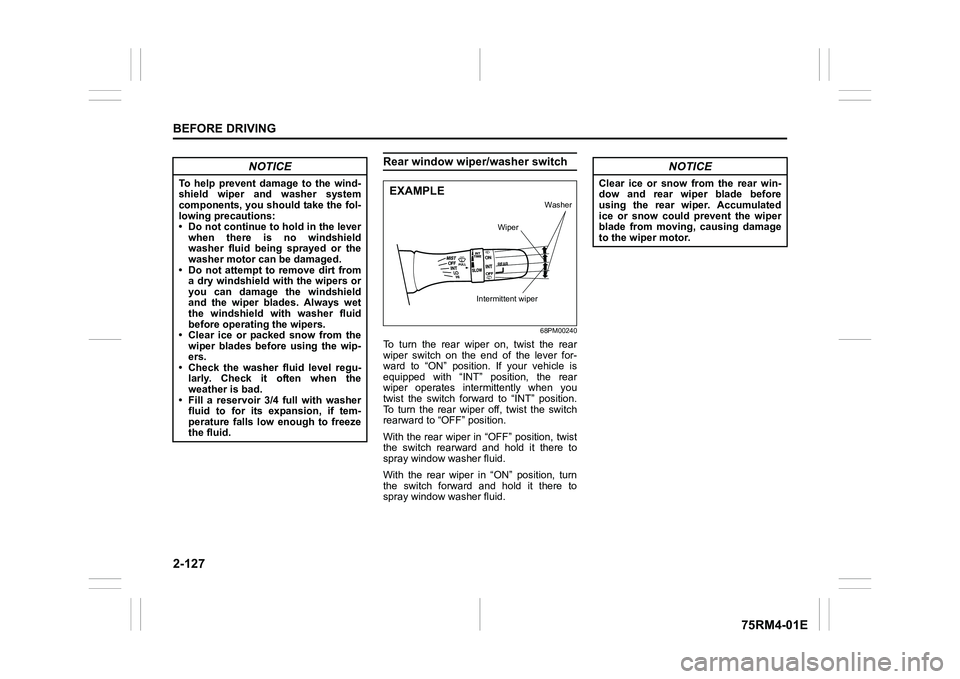
Rear window wiper/washer switch
68PM00240
To turn the rear wiper on, twist the rear
wiper switch on the end of the lever for-
ward to “ON” position. If your vehicle is
equipped with “INT” position, the rear
wiper operates intermittently when you
twist the switch forward to “INT” position.
To turn the rear wiper off, twist the switch
rearward to “OFF” position.
With the rear wiper in “OFF” position, twist
the switch rearward and hold it there to
spray window washer fluid.
With the rear wiper in “ON” position, turn
the switch forward and hold it there to
spray window washer fluid.
NOTICE
To help prevent damage to the wind-
shield wiper and washer system
components, you should take the fol-
lowing precautions:
• Do not continue to hold in the leverwhen there is no windshield
washer fluid being sprayed or the
washer motor can be damaged.
• Do not attempt to remove dirt from
a dry windshield with the wipers or
you can damage the windshield
and the wiper blades. Always wet
the windshield with washer fluid
before operating the wipers.
• Clear ice or packed snow from the wiper blades before using the wip-
ers.
• Check the washer fluid level regu- larly. Check it often when the
weather is bad.
• Fill a reservoir 3/4 full with washer fluid to for its expansion, if tem-
perature falls low enough to freeze
the fluid.
EXAMPLE
Intermittent wiper Washer
Wiper
NOTICE
Clear ice or snow from the rear win-
dow and rear wiper blade before
using the rear wiper. Accumulated
ice or snow could prevent the wiper
blade from moving, causing damage
to the wiper motor.