ECO mode SUZUKI IGNIS 2022 Manual PDF
[x] Cancel search | Manufacturer: SUZUKI, Model Year: 2022, Model line: IGNIS, Model: SUZUKI IGNIS 2022Pages: 505, PDF Size: 8.36 MB
Page 273 of 505
5-18
OTHER CONTROLS AND EQUIPMENT
75RM4-01E
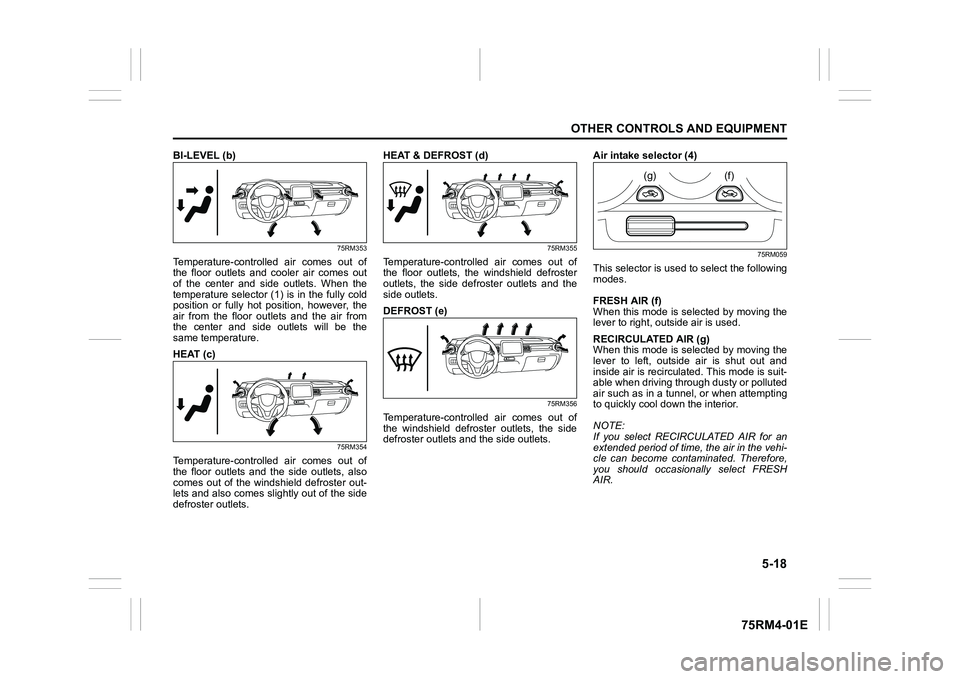
BI-LEVEL (b)
75RM353
Temperature-controlled air comes out of
the floor outlets and cooler air comes out
of the center and side outlets. When the
temperature selector (1) is in the fully cold
position or fully hot position, however, the
air from the floor outlets and the air from
the center and side outlets will be the
same temperature.
HEAT (c)
75RM354
Temperature-controlled air comes out of
the floor outlets and the side outlets, also
comes out of the windshield defroster out-
lets and also comes slightly out of the side
defroster outlets.HEAT & DEFROST (d)
75RM355
Temperature-controlled air comes out of
the floor outlets, the windshield defroster
outlets, the side defroster outlets and the
side outlets.
DEFROST (e)
75RM356
Temperature-controlled air comes out of
the windshield defroster outlets, the side
defroster outlets and the side outlets.
Air intake selector (4)
75RM059
This selector is used to select the following
modes.
FRESH AIR (f)
When this mode is se
lected by moving the
lever to right, outside air is used.
RECIRCULATED AIR (g)
When this mode is se lected by moving the
lever to left, outside air is shut out and
inside air is recirculated. This mode is suit-
able when driving through dusty or polluted
air such as in a tunnel, or when attempting
to quickly cool dow n the interior.
NOTE:
If you select RECIRCULATED AIR for an
extended period of time, the air in the vehi-
cle can become contam inated. Therefore,
you should occasio nally select FRESH
AIR.
(g)
(f)
Page 277 of 505
5-22
OTHER CONTROLS AND EQUIPMENT
75RM4-01E
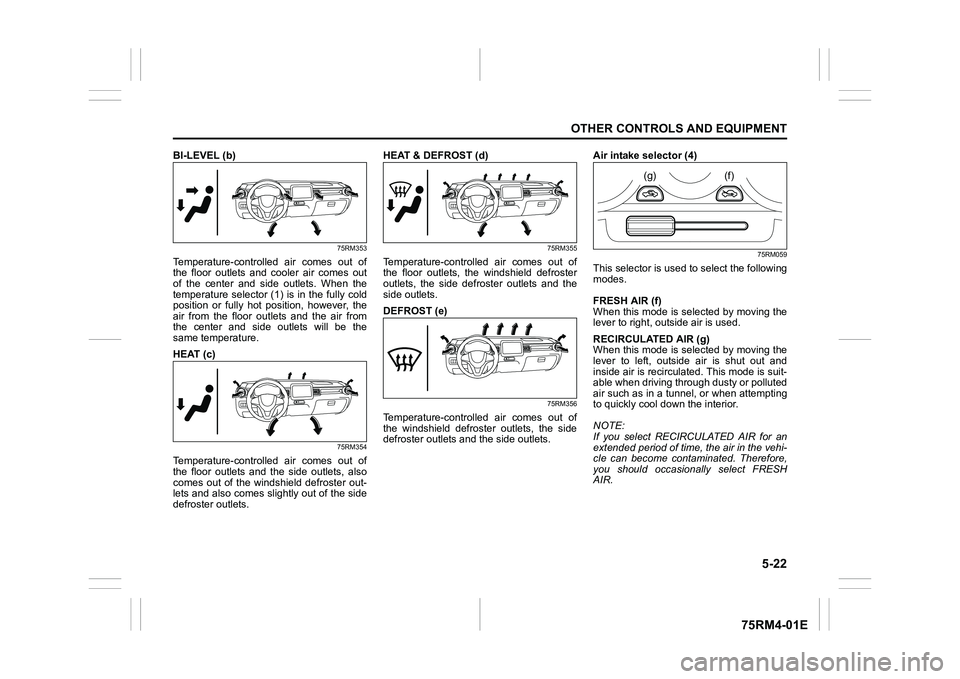
BI-LEVEL (b)
75RM353
Temperature-controlled air comes out of
the floor outlets and cooler air comes out
of the center and side outlets. When the
temperature selector (1) is in the fully cold
position or fully hot position, however, the
air from the floor outlets and the air from
the center and side outlets will be the
same temperature.
HEAT (c)
75RM354
Temperature-controlled air comes out of
the floor outlets and the side outlets, also
comes out of the windshield defroster out-
lets and also comes slightly out of the side
defroster outlets.HEAT & DEFROST (d)
75RM355
Temperature-controlled air comes out of
the floor outlets, the windshield defroster
outlets, the side defroster outlets and the
side outlets.
DEFROST (e)
75RM356
Temperature-controlled air comes out of
the windshield defroster outlets, the side
defroster outlets and the side outlets.
Air intake selector (4)
75RM059
This selector is used to select the following
modes.
FRESH AIR (f)
When this mode is se
lected by moving the
lever to right, outside air is used.
RECIRCULATED AIR (g)
When this mode is se lected by moving the
lever to left, outside air is shut out and
inside air is recirculated. This mode is suit-
able when driving through dusty or polluted
air such as in a tunnel, or when attempting
to quickly cool dow n the interior.
NOTE:
If you select RECIRCULATED AIR for an
extended period of time, the air in the vehi-
cle can become contam inated. Therefore,
you should occasio nally select FRESH
AIR.
(g)
(f)
Page 282 of 505
5-27OTHER CONTROLS AND EQUIPMENT
75RM4-01E
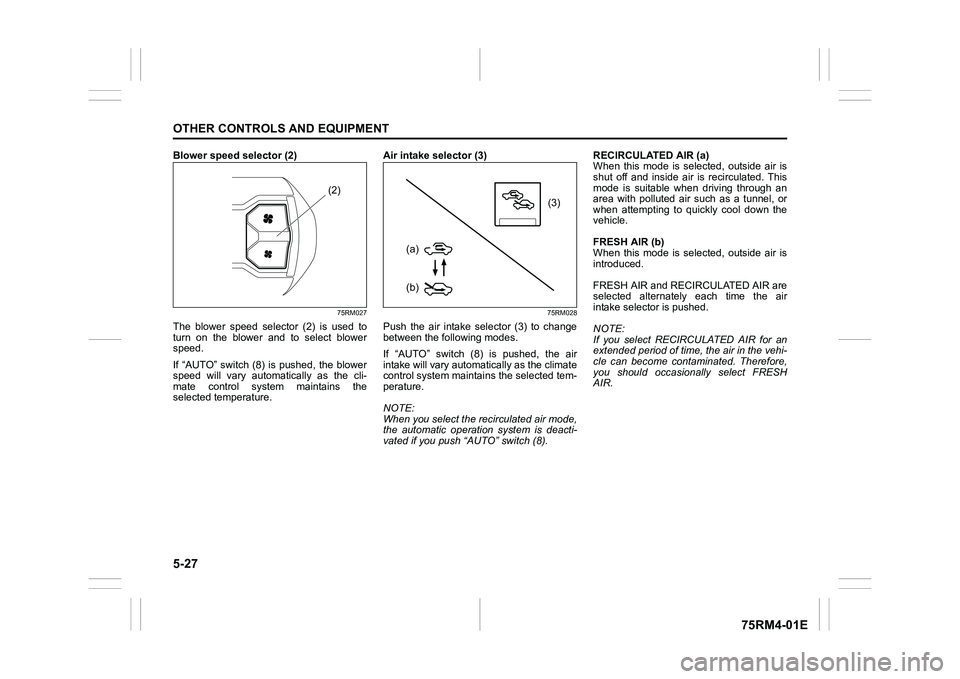
Blower speed selector (2)
75RM027
The blower speed selector (2) is used to
turn on the blower and to select blower
speed.
If “AUTO” switch (8) is pushed, the blower
speed will vary automatically as the cli-
mate control system maintains the
selected temperature. Air intake selector (3)
75RM028
Push the air intake selector (3) to change
between the following modes.
If “AUTO” switch (8) is pushed, the air
intake will vary automat
ically as the climate
control system maintai ns the selected tem-
perature.
NOTE:
When you select the recirculated air mode,
the automatic operation system is deacti-
vated if you push “AUTO” switch (8). RECIRCULATED AIR (a)
When this mode is selected, outside air is
shut off and inside air is recirculated. This
mode is suitable when driving through an
area with polluted air such as a tunnel, or
when attempting to quickly cool down the
vehicle.
FRESH AIR (b)
When this mode is selected, outside air is
introduced.
FRESH AIR and REC
IRCULATED AIR are
selected alternately each time the air
intake selector is pushed.
NOTE:
If you select RECIRCULATED AIR for an
extended period of time, the air in the vehi-
cle can become contam inated. Therefore,
you should occasio nally select FRESH
AIR.
(2)
(3)
(b)
(a)
Page 299 of 505
5-44
OTHER CONTROLS AND EQUIPMENT
75RM4-01E
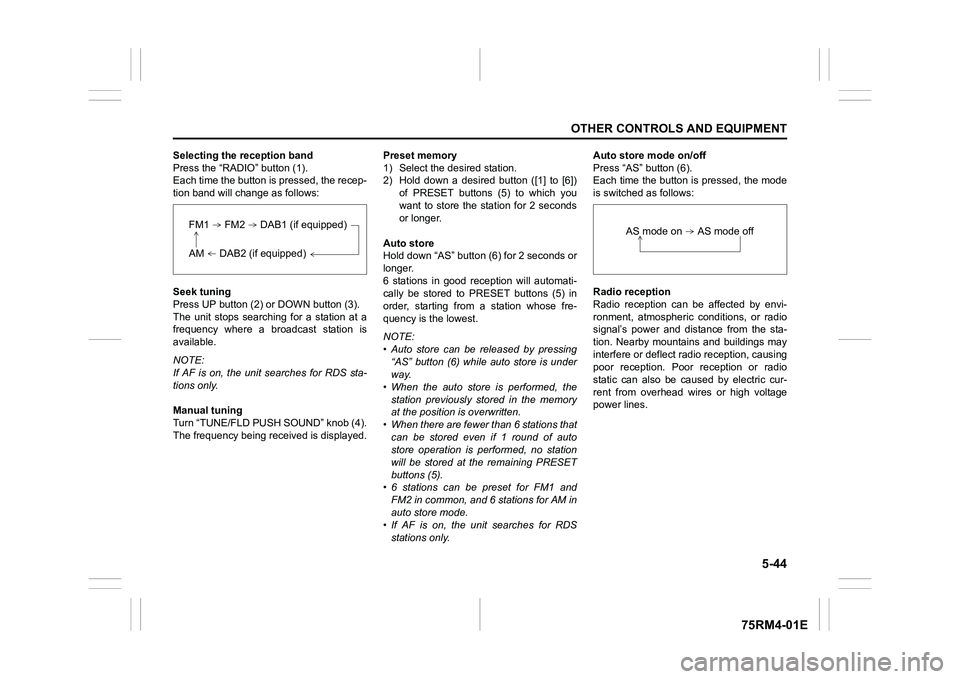
Selecting the reception band
Press the “RADIO” button (1).
Each time the button is pressed, the recep-
tion band will change as follows:
Seek tuning
Press UP button (2) or DOWN button (3).
The unit stops searching for a station at a
frequency where a broadcast station is
available.
NOTE:
If AF is on, the unit searches for RDS sta-
tions only.
Manual tuning
Turn “TUNE/FLD PUSH SOUND” knob (4).
The frequency being received is displayed. Preset memory
1) Select the desired station.
2) Hold down a desired button ([1] to [6])
of PRESET buttons (5) to which you
want to store the station for 2 seconds
or longer.
Auto store
Hold down “AS” button (6) for 2 seconds or
longer.
6 stations in good re ception will automati-
cally be stored to PRESET buttons (5) in
order, starting from a station whose fre-
quency is the lowest.
NOTE:
• Auto store can be released by pressing
“AS” button (6) while auto store is under
way.
• When the auto store is performed, the
station previously stored in the memory
at the position is overwritten.
• When there are fewer than 6 stations that
can be stored even if 1 round of auto
store operation is performed, no station
will be stored at the remaining PRESET
buttons (5).
• 6 stations can be preset for FM1 and FM2 in common, and 6 stations for AM in
auto store mode.
• If AF is on, the unit searches for RDS stations only. Auto store mode on/off
Press “AS” button (6).
Each time the button is pressed, the mode
is switched as follows:
Radio reception
Radio reception can be affected by envi-
ronment, atmospheric conditions, or radio
signal’s power and distance from the sta-
tion. Nearby mountains and buildings may
interfere or deflect r
adio reception, causing
poor reception. Poor reception or radio
static can also be caused by electric cur-
rent from overhead wires or high voltage
power lines.
FM1 FM2 DAB1 (if equipped)AM DAB2 (if equipped)
AS mode on AS mode off
Page 301 of 505
5-46
OTHER CONTROLS AND EQUIPMENT
75RM4-01E
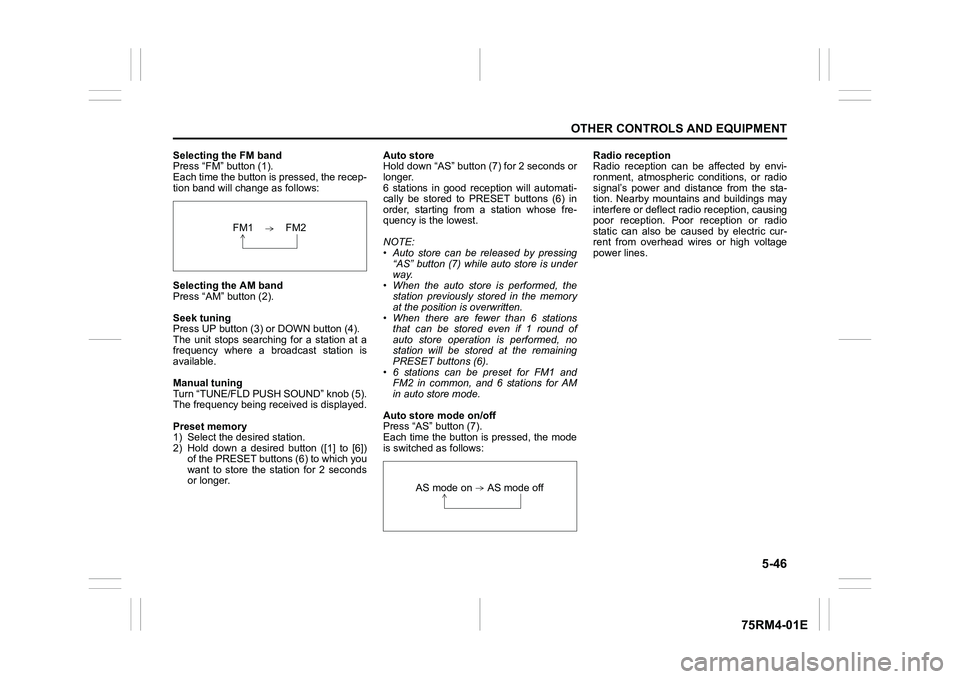
Selecting the FM band
Press “FM” button (1).
Each time the button is pressed, the recep-
tion band will change as follows:
Selecting the AM band
Press “AM” button (2).
Seek tuning
Press UP button (3) or DOWN button (4).
The unit stops searching for a station at a
frequency where a broadcast station is
available.
Manual tuning
Turn “TUNE/FLD PUSH SOUND” knob (5).
The frequency being received is displayed.
Preset memory
1) Select the desired station.
2) Hold down a desired button ([1] to [6])
of the PRESET buttons (6) to which you
want to store the station for 2 seconds
or longer. Auto store
Hold down “AS” button (7) for 2 seconds or
longer.
6 stations in good re
ception will automati-
cally be stored to PRESET buttons (6) in
order, starting from a station whose fre-
quency is the lowest.
NOTE:
• Auto store can be released by pressing “AS” button (7) while auto store is under
way.
• When the auto store is performed, the station previously stored in the memory
at the position is overwritten.
• When there are fewer than 6 stations that can be stored even if 1 round of
auto store operation is performed, no
station will be stored at the remaining
PRESET buttons (6).
• 6 stations can be preset for FM1 and FM2 in common, and 6 stations for AM
in auto store mode.
Auto store mode on/off
Press “AS” button (7).
Each time the button is pressed, the mode
is switched as follows: Radio reception
Radio reception can be affected by envi-
ronment, atmospheric conditions, or radio
signal’s power and distance from the sta-
tion. Nearby mountains and buildings may
interfere or deflect r
adio reception, causing
poor reception. Poor reception or radio
static can also be caused by electric cur-
rent from overhead wires or high voltage
power lines.
FM1 FM2
AS mode on AS mode off
Page 303 of 505
5-48
OTHER CONTROLS AND EQUIPMENT
75RM4-01E
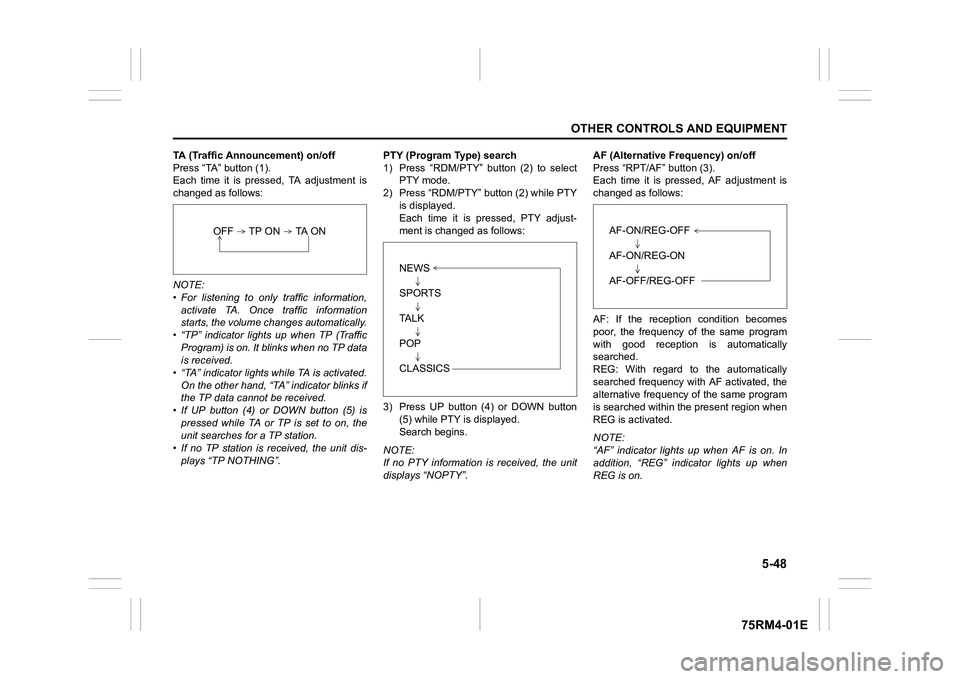
TA (Traffic Announcement) on/off
Press “TA” button (1).
Each time it is pressed, TA adjustment is
changed as follows:
NOTE:
• For listening to only traffic information,activate TA. Once traffic information
starts, the volume ch anges automatically.
• “TP” indicator lights up when TP (Traffic
Program) is on. It blinks when no TP data
is received.
• “TA” indicator lights while TA is activated.
On the other hand, “TA” indicator blinks if
the TP data cannot be received.
• If UP button (4) or DOWN button (5) is
pressed while TA or TP is set to on, the
unit searches for a TP station.
• If no TP station is received, the unit dis-
plays “TP NOTHING”. PTY (Program T
ype) search
1) Press “RDM/PTY” button (2) to select PTY mode.
2) Press “RDM/PTY” bu tton (2) while PTY
is displayed.
Each time it is pressed, PTY adjust-
ment is changed as follows:
3) Press UP button (4) or DOWN button (5) while PTY is displayed.
Search begins.
NOTE:
If no PTY information is received, the unit
displays “NOPTY”. AF (Alternative Frequency) on/off
Press “RPT/AF” button (3).
Each time it is pressed, AF adjustment is
changed as follows:
AF: If the reception condition becomes
poor, the frequency of the same program
with good reception is automatically
searched.
REG: With regard to the automatically
searched frequency with AF activated, the
alternative frequency of the same program
is searched within the present region when
REG is activated.
NOTE:
“AF” indicator lights up when AF is on. In
addition, “REG” indicator lights up when
REG is on.
OFF TP ON TA ON
NEWS
SPORTS
TA L K
POP
CLASSICS
AF-ON/REG-OFF
AF-ON/REG-ON
AF-OFF/REG-OFF
Page 306 of 505
5-51OTHER CONTROLS AND EQUIPMENT
75RM4-01E
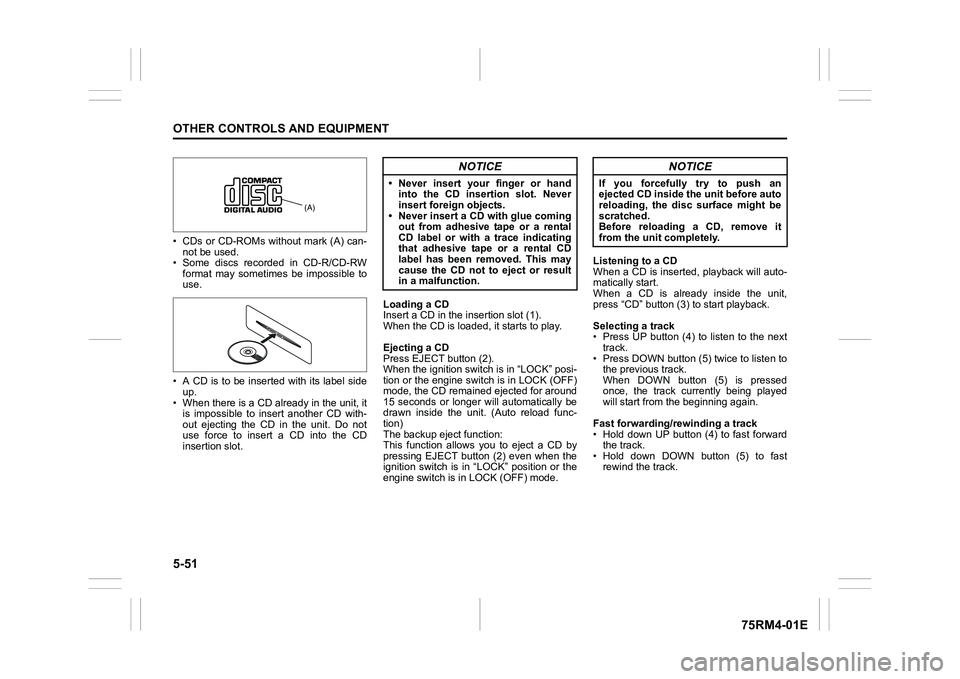
• CDs or CD-ROMs without mark (A) can-not be used.
• Some discs recorded in CD-R/CD-RW format may sometime s be impossible to
use.
• A CD is to be inserted with its label side up.
• When there is a CD already in the unit, it is impossible to insert another CD with-
out ejecting the CD in the unit. Do not
use force to insert a CD into the CD
insertion slot. Loading a CD
Insert a CD in the insertion slot (1).
When the CD is loaded, it starts to play.
Ejecting a CD
Press EJECT button (2).
When the ignition switch is in “LOCK” posi-
tion or the engine switch is in LOCK (OFF)
mode, the CD remained ejected for around
15 seconds or longer will automatically be
drawn inside the unit. (Auto reload func-
tion)
The backup eject function:
This function allows you to eject a CD by
pressing EJECT button (2) even when the
ignition switch is in “LOCK” position or the
engine switch is in LOCK (OFF) mode. Listening to a CD
When a CD is inserted, playback will auto-
matically start.
When a CD is already inside the unit,
press “CD” button (3
) to start playback.
Selecting a track
• Press UP button (4) to listen to the next track.
• Press DOWN button (5) twice to listen to the previous track.
When DOWN button (5) is pressed
once, the track currently being played
will start from the beginning again.
Fast forwarding/rewinding a track
• Hold down UP button (4) to fast forward the track.
• Hold down DOWN button (5) to fast rewind the track.
(A)
NOTICE
• Never insert your finger or handinto the CD insertion slot. Never
insert foreign objects.
• Never insert a CD with glue coming out from adhesive tape or a rental
CD label or with a trace indicating
that adhesive tape or a rental CD
label has been removed. This may
cause the CD not to eject or result
in a malfunction.
NOTICE
If you forcefully try to push an
ejected CD inside the unit before auto
reloading, the disc surface might be
scratched.
Before reloading a CD, remove it
from the unit completely.
Page 307 of 505

5-52
OTHER CONTROLS AND EQUIPMENT
75RM4-01E
Random playback
Press “RDM” button (7).
Each time the button is pressed, the mode
will change as follows:
• TRACK RANDOMThe random indicato r “RDM” will light.
The tracks in the loaded disc will be
played in random order.
Repeat playback
Press “RPT” button (6).
Each time the button is pressed, the mode
will change as follows:
• TRACK REPEAT The repeat indicator “RPT” will light.
The track currently being played will be
played repeatedly. Display change
Press “DISP” button (8).
Each time the button is pressed, display
will change as follows:
NOTE:
• “NO TITLE” will be displayed when there
is no text information in the disc currently
being played.
• If text data contains more than 16 char- acters, “>” mark will appear at the right
end. Holding down “DISP” button (8) for
1 second or longer can display the next
page.
OFF TRACK RANDOMOFF TRACK REPEAT
Play time
Disc title
Track title
Page 311 of 505

5-56
OTHER CONTROLS AND EQUIPMENT
75RM4-01E
Recording MP3/WMA/AAC files on a CD
media
• It is recommended not to write both CD-DA files and MP3/WMA/AAC files on a
disc.
• If both CD-DA files and MP3/WMA/AAC
files are on the sa me disc, tracks may
not be played in the correct order or
some tracks may no t be played at all.
• When storing both MP3 data and WMA data on the same disc, sort and place
them in different folders.
• Do not write files other than MP3/WMA/ AAC files and unnecessary folders on a
disc.
• MP3/WMA/AAC files should be named to meet the standards and the file sys-
tem specifications as shown below.
• The file extension “.mp3”, “.wma” or “.m4a” should be assigned to files based
on their format independently.
• You may encounter a trouble in playing MP3/WMA/AAC files or displaying infor-
mation of MP3/WMA/AAC files depend-
ing on the writing software or CD
recorder in use.
• This unit does not have a playlist func- tion.
• It is recommended to write discs in Disc-
at-Once mode even though Multi-ses-
sion mode is supported. These modes
are the methods for writing audio data in
CD. Compression formats
MP3
• Bit rate
:
MPEG1 Audio Layer III: 32 k - 320 kbps
MPEG2 Audio Layer III: 8 k - 160 kbps
MPEG2.5 Audio Layer III: 8 k - 160 kbps
• Sampling frequency
:
MPEG1 Audio Layer III: 32 k/44.1 k/
48 kHz
MPEG2 Audio Layer III: 16 k/22.05 k/
24 kHz
MPEG2.5 Audio Layer III: 8 k/11.025 k/
12 kHz
WMA (Ver. 7, Ver. 8, Ver. 9*)
• Bit rate: CBR 32 k - 320 kbps
• Sampling frequency: 32 k/44.1 k/48 kHz
* WMA 9 Professional/LossLess/Voice are not supported.
AAC*
• Bit rate: ABR 16 k - 320 kbps
• Sampling frequency: 32 k/44.1 k/48 kHz
* Apple Lossless is not supported.
Supported file systems
ISO 9660 Level 1/Lev el 2, Joliet, Romeo
Maximum number o f files/folders
• Maximum number of files: 512
• Maximum number of files in a folder: 255
• Maximum depth of tree structure: 8
• Maximum number of folders: 255 (Root folder is included.)
Page 313 of 505
5-58
OTHER CONTROLS AND EQUIPMENT
75RM4-01E
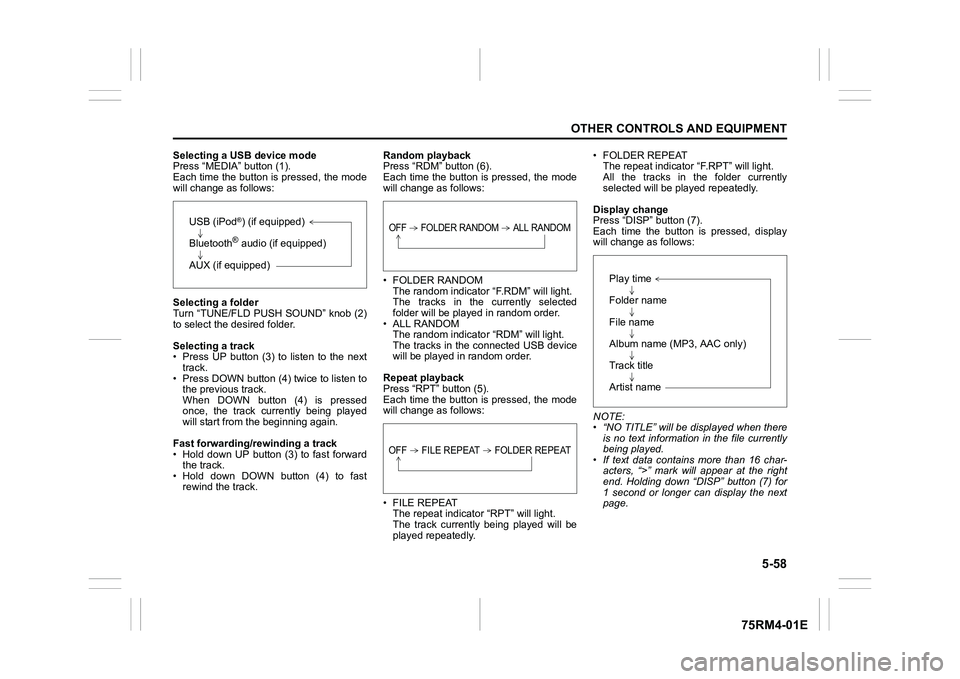
Selecting a USB device mode
Press “MEDIA” button (1).
Each time the button is pressed, the mode
will change as follows:
Selecting a folder
Turn “TUNE/FLD PUSH SOUND” knob (2)
to select the desired folder.
Selecting a track
• Press UP button (3) to listen to the next track.
• Press DOWN button (4) twice to listen to the previous track.
When DOWN button (4) is pressed
once, the track currently being played
will start from the beginning again.
Fast forwarding/rewinding a track
• Hold down UP button (3) to fast forward the track.
• Hold down DOWN button (4) to fast rewind the track. Random playback
Press “RDM” button (6).
Each time the button is pressed, the mode
will change as follows:
• FOLDER RANDOM
The random indicator “F.RDM” will light.
The tracks in the currently selected
folder will be played in random order.
•ALL RANDOM The random indicato r “RDM” will light.
The tracks in the connected USB device
will be played in random order.
Repeat playback
Press “RPT” button (5).
Each time the button is pressed, the mode
will change as follows:
• FILE REPEAT The repeat indicator “RPT” will light.
The track currently being played will be
played repeatedly. • FOLDER REPEAT
The repeat indicator “F.RPT” will light.
All the tracks in t he folder currently
selected will be played repeatedly.
Display change
Press “DISP” button (7).
Each time the button is pressed, display
will change as follows:
NOTE:
• “NO TITLE” will be displayed when there is no text information in the file currently
being played.
• If text data contains more than 16 char- acters, “>” mark will appear at the right
end. Holding down “DISP” button (7) for
1 second or longer can display the next
page.
USB (iPod
®) (if equipped)
Bluetooth® audio (if equipped)
AUX (if equipped)
OFF FOLDER RANDOM ALL RANDOMOFF FILE REPEAT FOLDER REPEAT
Play time
Folder name
File name
Album name (MP3, AAC only)
Track title
Artist name