brakes SUZUKI JIMNY 2019 Owners Manual
[x] Cancel search | Manufacturer: SUZUKI, Model Year: 2019, Model line: JIMNY, Model: SUZUKI JIMNY 2019Pages: 421, PDF Size: 6.35 MB
Page 7 of 421
Vehicle Data Recordings
There are certain components of your vehicle (the "Vehicle") incorporating data storage modules or memories, which temporarily or permanently store the technical data below listed. These data are exclusively technical and serve for (i) identifying and correcting faults occurred in the Vehicle and/or (ii) optimizing functions of the Vehicle.
Recorded data (the "Recorded Data") • Malfunctions, faults, and errors in important system components. (e.g. lights, brakes) Reactions of the Vehicle in certain situations (e.g. inflation of SRS airbags, activation of stability control system). Operating conditions of system components (e.g. filling levels). Status messages of the Vehicle and its individual components (e.g. vehicle speed, acceleration, deceleration, lateral acceleration). Ambient conditions (e.g. outside temperature).
Recorded data vary depending on vehicle model or grade.
(For EU countries)
Parties who can read out the technical data using specific diagnostic devices (the "Parties"); • Authorized distributors, dealers and repairers/service workshops of SUZUKI vehicles, and independent repairers/service workshops Manufacturer of SUZUKI vehicles (e.g. SUZUKI MOTOR CORPORATION ("SUZUKI"), Magyar Suzuki Corporation Ltd., • Maruti Suzuki India Limited, Suzuki Motor (Thailand) Co., Ltd., Thai Suzuki Motor Co., Ltd.) • Suppliers of SUZUKI vehicle parts, components and accessories (the "Suppliers")
Data usage (the "Data Usage") SUZUKI and the Parties may use the Recorded Data in the modules or memories for the purpose of: Diagnostic, service, repair and warranty processes Research and further vehicle developments • Implementation of or investigation for field actions including recall and service campaign • Quality improvements, etc.
After an error has been corrected, data related to such error are basically deleted from error storage module or memory, while certain data are overwritten or kept further.
Page 112 of 421
BEFORE DRIVING
Brake system warning light
(CD)
82K170
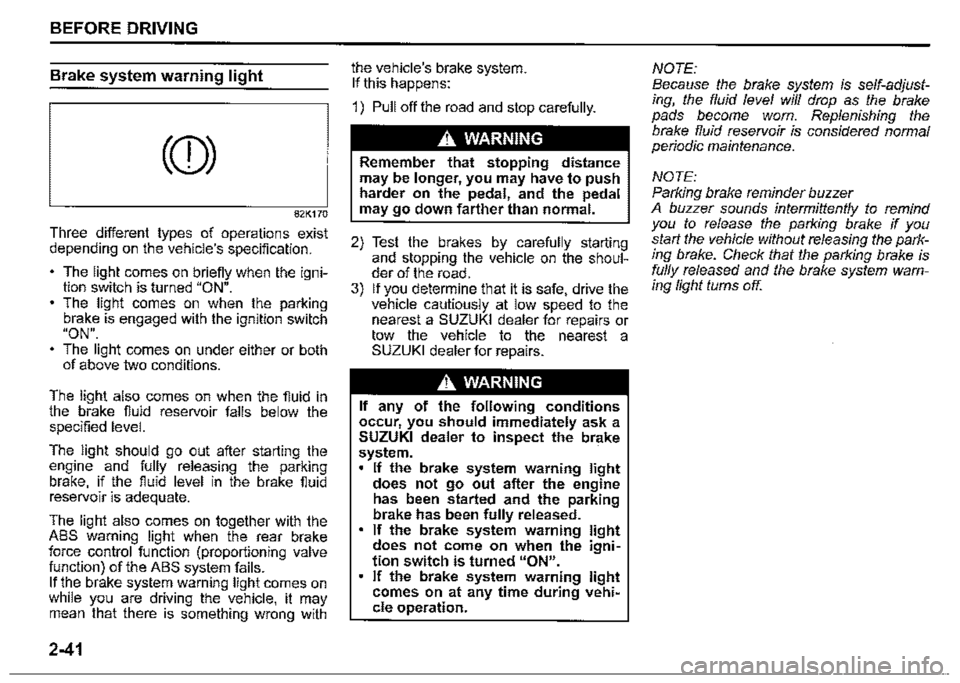
Three different types of operations exist depending on the vehicle's specification.
• The light comes on briefiy when the ignition switch is turned "ON". The light comes on when the parking brake is engaged with the ignition switch "ON". The light comes on under either or both of above two conditions.
The light also comes on when the fiuid in the brake fiuid reservoir falls below the specified level.
The light should go out after starting the engine and fully releasing the parking brake, if the fluid level in the brake fiuid reservoir is adequate.
The light also comes on together with the ABS warning light when the rear brake force control function (proportioning valve function) of the ABS system fails. If the brake system warning light comes on while you are driving the vehicle, it may mean that there is something wrong with
2-41
the vehicle's brake system. If this happens:
1) Pull off the road and stop carefully.
A WARNING
Remember that stopping distance may be longer, you may have to push harder on the pedal, and the pedal may go down farther than normal.
2) Test the brakes by carefully starting and stopping the vehicle on the shoulder of the road. 3) If you determine that it is safe, drive the vehicle cautiously at low speed to the nearest a SUZUKI dealer for repairs or tow the vehicle to the nearest a SUZUKI dealer for repairs.
A WARNING
If any of the following conditions occur, you should immediately ask a SUZUKI dealer to inspect the brake system. If the brake system warning light does not go out after the engine has been started and the parking brake has been fully released. If the brake system warning light does not come on when the ignition switch is turned "ON". If the brake system warning light comes on at any time during vehicle operation.
NOTE: Because the brake system is self-adjusting, the fluid level will drop as the brake pads become worn. Replenishing the brake fluid reservoir is considered normal periodic maintenance.
NOTE: Parking brake reminder buzzer A buzzer sounds intermittently to remind you to release the parking brake if you start the vehicle without releasing the parking brake. Check that the parking brake is fully released and the brake system warning light turns off.
Page 144 of 421
BEFORE DRIVING
Maximum towing capacity (gross trailer weight; trailer with integrated drawbar, and cargo)
Braked trailer: 1300 kg (2866 lbs) Unbraked trailer: 350 kg (772 lbs)
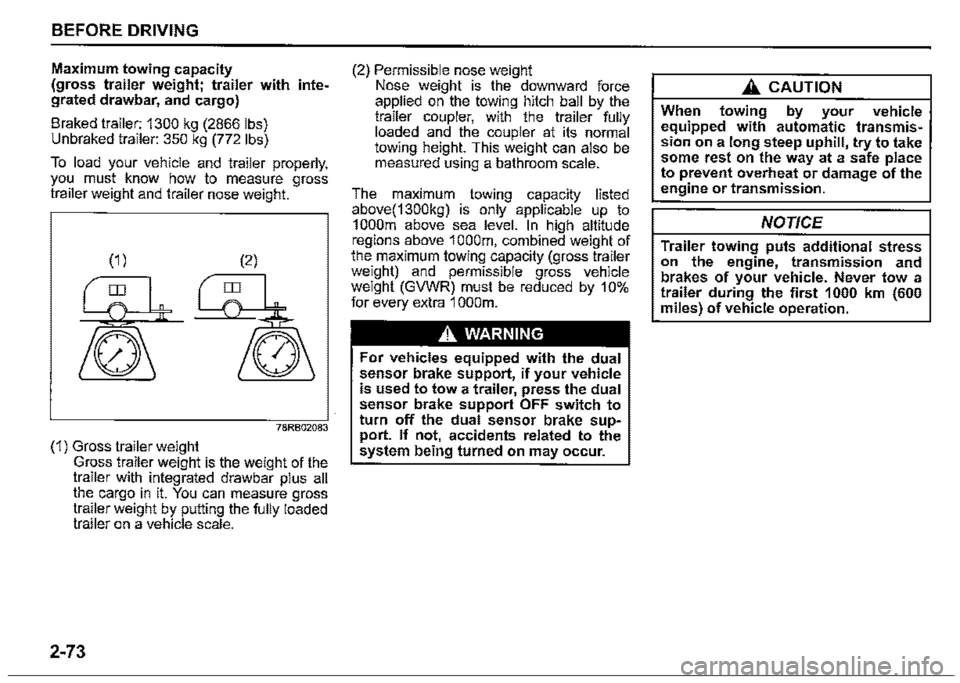
To load your vehicle and trailer properly, you must know how to measure gross trailer weight and trailer nose weight.
78RB02083
(1) Gross trailer weight Gross trailer weight is the weight of the trailer with integrated drawbar plus all the cargo in it. You can measure gross trailer weight by putting the fully loaded trailer on a vehicle scale.
2-73
(2) Permissible nose weight Nose weight is the downward force applied on the towing hitch ball by the trailer coupler, with the trailer fully loaded and the coupler at its normal towing height. This weight can also be measured using a bathroom scale.
The maximum towing capacity listed above(1300kg) is only applicable up to 1 000m above sea level. In high altitude regions above 1 000m, combined weight of the maximum towing capacity (gross trailer weight) and permissible gross vehicle weight (GVWR) must be reduced by 10% for every extra 1 000m.
A WARNING
For vehicles equipped with the dual sensor brake support, if your vehicle is used to tow a trailer, press the dual sensor brake support OFF switch to turn off the dual sensor brake support. If not, accidents related to the system being turned on may occur.
A CAUTION
When towing by your vehicle equipped with automatic transmission on a long steep uphill, try to take some rest on the way at a safe place to prevent overheat or damage of the engine or transmission.
NOTICE
Trailer towing puts additional stress on the engine, transmission and brakes of your vehicle. Never tow a trailer during the first 1000 km (600 miles) of vehicle operation.
Page 145 of 421
Tow bars
Only use a tow bar that is designed to attach to the chassis of your vehicle, and a hitch that is designed to bolt to this tow bar. We recommend that you use a genuine SUZUKI tow bar kit (available as an option), or equivalent.
A WARNING
Never use a tow bar which attaches to the axle or the bumper of your vehicle.
Safety chains
Always attach safety chains between your vehicle and the trailer. Cross safety chains under the nose of the trailer so that the nose will not drop to the road if the trailer becomes separated from the tow bar. Follow the manufacturer's recommendation for attaching safety chains. Always leave just enough slack to permit full turning. Never allow safety chains to drag on the road.
A WARNING
Never attach safety chains to the bumper of your vehicle. Secure connections so that they cannot come loose.
-----------------------
Trailer lights
Check that your trailer is equipped with lights which meet local requirements. Always check for the proper operation of all trailer lights before you start to tow.
A WARNING
Never connect trailer lights directly into your vehicle's electrical system, or electrical system damage may occur.
Brakes
A WARNING
If the trailer is equipped with the brakes, follow all instructions provided by the manufacturer. Never connect to the brake system of your vehicle and never take an electrical supply directly from the wiring har
ness.
BEFORE DRIVING
Tyres
A WARNING
When towing a trailer, it is very important for your vehicle and trailer to have properly inflated tyres. Your vehicle's tyres should be inflated to the pressures listed on your vehicle's tyre information label. The tyres should be inflated to the laden pressures. Inflate trailer tyres according to the specifications provided by the trailer manufacturer.
Mirrors
Check if your vehicle's mirrors meet local requirements for mirrors used on towing vehicles. If they do not, you must install the required mirrors before you tow.
2-74
Page 147 of 421
A WARNING
Your vehicle should be handled in a different way when towing a trailer. For the safety of yourself and others, observe the following precautions: Practice turning, stopping, and reversing before you begin towing a trailer in traffic. Do not tow a trailer in traffic until you are confident that you can handle the vehicle and trailer safely. Never exceed local towing speed limits or 80 km/h (50 mph), whichever is lower. Never drive at a speed that causes shaking or swaying of the trailer. If you notice even the slightest sign of shaking or swaying, slow down. • When roads are wet, slippery or rough, drive at a slower speed than you would on dry or smooth roads. Failure to slow down when road conditions are bad can result in loss of control. Always have someone guide you when reversing. (Continued)
A WARNING
(Continued) Always admit greater stopping distance. Stopping distance is increased when you tow a trailer. For each 16 km/h (10 mph) of speed, allow at least one vehicle and trailer length between you and the vehicle ahead. Allow a greater stopping distance if roads are wet or slippery. If the trailer has over-run brakes, apply the brakes gradually to avoid snatching caused by the trailer wheels locking. Slow down before corners and maintain a steady speed while cornering. Deceleration or acceleration while cornering can result in loss of control. Remember that a larger than normal turning radius is needed because the trailer wheels will go inside than vehicle's wheels. Avoid sudden acceleration and stopping of the vehicle. Do not make quick maneuvers unless they are necessary. Slow down in cross winds and be prepared for gusts of wind from large passing vehicles. (Continued)
BEFORE DRIVING
A WARNING
(Continued) Be careful when overtaking other vehicles. Allow enough room for your trailer before changing lanes, and use turn signal lights properly in advance. Slow down and shift into a lower gear for better engine braking before you reach long or steep downhill grades. It is hazardous to attempt downshifting while you are descending a hill. Do not step on the brake pedal excessively. This could cause the brakes to over-heat resulting in reduced braking efficiency. Use engine braking as much as possible. Because of the added trailer weight, your engine may overheat on hot days when going up long or steep hills. Pay attention to your engine coolant temperature. If it indicates overheating, pull off the road and stop the vehicle in a safe place. Refer to "Engine trouble: Overheating" in "EMERGENCY SERVICE" section.
2-76
Page 148 of 421
BEFORE DRIVING
60A186
A WARNING
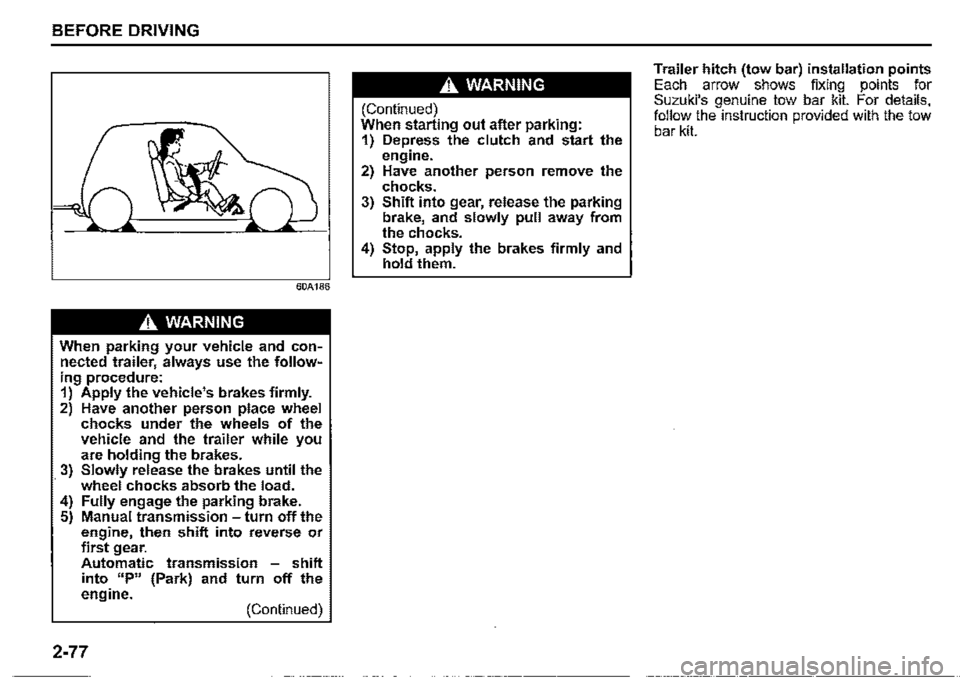
When parking your vehicle and connected trailer, always use the following procedure: 1) Apply the vehicle's brakes firmly. 2) Have another person place wheel chocks under the wheels of the vehicle and the trailer while you are holding the brakes. 3) Slowly release the brakes until the · wheel chocks absorb the load.
4) Fully engage the parking brake. 5) Manual transmission -turn off the engine, then shift into reverse or first gear. Automatic transmission -shift into "P" (Park) and turn off the engine. (Continued)
2-77
A WARNING
(Continued) When starting out after parking: 1) Depress the clutch and start the engine. 2) Have another person remove the chocks. 3) Shift into gear, release the parking brake, and slowly pull away from the chocks. 4) Stop, apply the brakes firmly and hold them.
Trailer hitch (tow bar) installation points Each arrow shows fixing points for Suzuki's genuine tow bar kit. For details, follow the instruction provided with the tow bar kit.
Page 158 of 421
OPERATING YOUR VEHICLE
Clutch pedal (1)
A clutch pedal is used to disengage the driving force to the wheels when starting the engine, stopping, or shifting the gearshift lever. Depressing the pedal disengages the clutch.
A WARNING
Do not drive with your foot resting on the clutch pedal. It could result in excessive clutch wear, clutch damage, or unexpected loss of engine braking.
Brake pedal (2)
Your vehicle is equipped with either front and rear disc brakes or front disc brakes and rear drum brakes. Depressing a brake pedal applies both sets of brakes.
You may hear occasional brake squeal when you apply the brakes. This is a normal condition caused by environmental factors such as temperature, humidity or dust, etc.
A WARNING
If brake squeal is excessive and occurs each time the brakes are applied, you should have the brakes checked by a SUZUKI dealer.
3-7
A WARNING
Do not apply brakes continuously or rest your foot on the brake pedal. This will result in overheating of the brakes which could cause unpredictable braking action, longer stopping distances, or permanent brake dam
age.
Accelerator pedal (3)
An accelerator pedal controls the speed of the engine. Depressing the accelerator pedal increases power output and speed.
Starting engine
Before starting engine
~ 2 4 R
AT
NOTE: Your vehicle is equipped with Brake Over-fl..l""'"-i ® ride System. If you depress both the accelerator pedal and the brake pedal simultaneously, the engine power output may be suppressed.
78RB03001
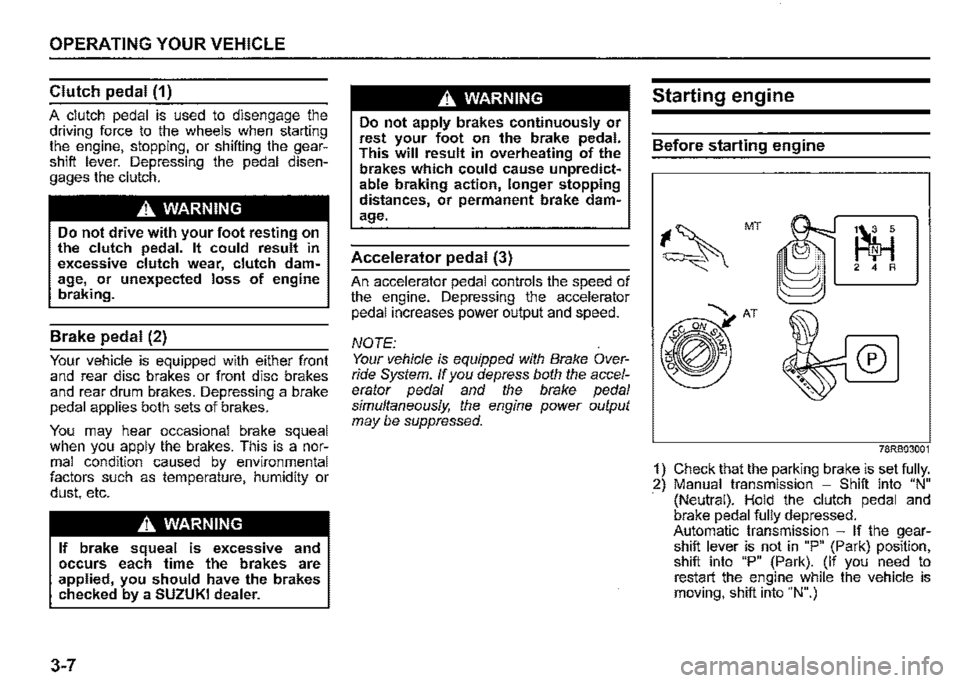
1) Check that the parking brake is set fully. 2) Manual transmission -Shift into "N" (Neutral). Hold the clutch pedal and brake pedal fully depressed. Automatic transmission -If the gearshift lever is not in "P" (Park) position, shift into "P" (Park). (If you need to restart the engine while the vehicle is moving, shift into "N".)
Page 160 of 421
OPERATING YOUR VEHICLE
Starting off To start off, depress the clutch pedal all the way to the floor and shift into 1 st gear. After releasing the parking brake, gradually release the clutch. When you hear a change in the engine's sound, slowly press the accelerator while continuing to gradually release the clutch.
Shifting All forward gears are synchronized and provide quiet and easy shifting. Always depress the clutch pedal all the way to the floor before shifting gears. Keep the engine speed from rising into the red zone of the tachometer.
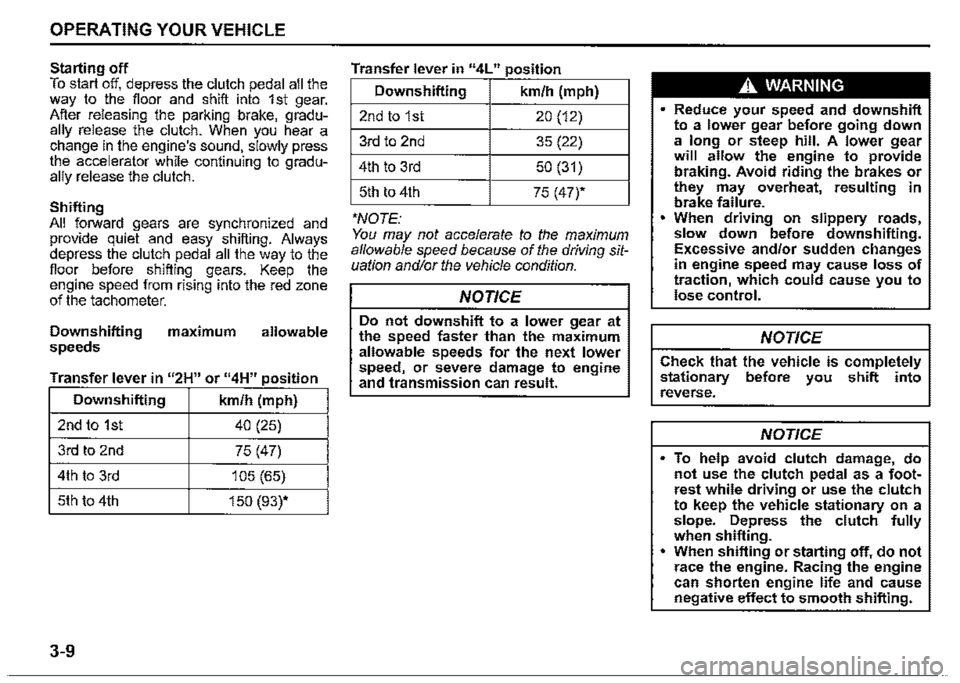
Downshifting maximum allowable speeds
Transfer lever in "2H" or "4H" position
Downshifting km/h (mph)
2nd to 1st 40 (25)
3rd to 2nd 75 (47)
4th to 3rd 105 (65)
5th to 4th 150 (93)*
3-9
Transfer lever in "4L" position
Downshifting km/h (mph)
2ndto1st 20 (12)
3rd to 2nd 35 (22)
4th to 3rd 50 (31)
5th to 4th 75 (47)*
*NOTE: You may not accelerate to the maximum allowable speed because of the driving situation and/or the vehicle condition.
NOTICE
Do not downshift to a lower gear at the speed faster than the maximum allowable speeds for the next lower speed) or severe damage to engine and transmission can result.
A WARNING
• Reduce your speed and downshift to a lower gear before going down a long or steep hill. A lower gear will allow the engine to provide braking. Avoid riding the brakes or they may overheat, resulting in brake failure. When driving on slippery roads, slow down before downshifting. Excessive and/or sudden changes in engine speed may cause loss of traction, which could cause you to lose control.
NOTICE
Check that the vehicle is completely stationary before you shift into reverse.
NOTICE
To help avoid clutch damage, do not use the clutch pedal as a footrest while driving or use the clutch to keep the vehicle stationary on a slope. Depress the clutch fully when shifting. • When shifting or starting off, do not race the engine. Racing the engine can shorten engine life and cause negative effect to smooth shifting.
Page 162 of 421
OPERATING YOUR VEHICLE
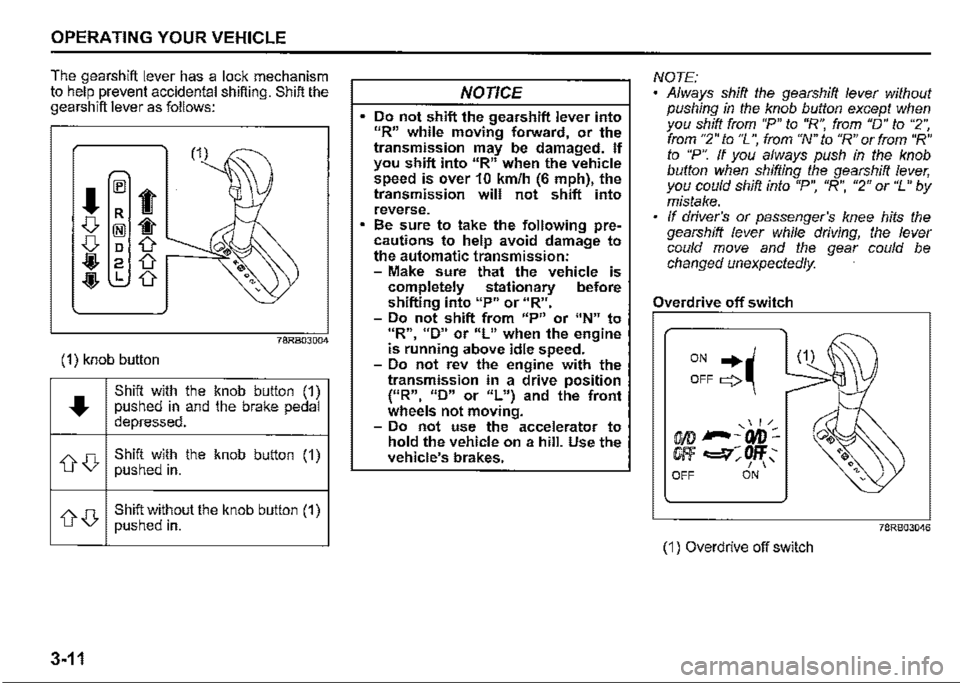
The gearshift lever has a lock mechanism to help prevent accidental shifting. Shift the gearshift lever as follows:
•
®
t R D IN) it
D D D-,@, 2 D-
,@, L D-
78RB03004
( 1 ) knob button
Shift with the knob button (1)
•
pushed in and the brake pedal depressed.
-OD Shift with the knob button (1) pushed in.
D-D Shift without the knob button (1) pushed in.
3-11
NOTICE
• Do not shift the gearshifl lever into 11R" while moving forward, or the transmission may be damaged. If you shift into "R" when the vehicle speed is over 10 km/h (6 mph),_the transmission will not shift mto reverse. Be sure to take the following precautions to help avoid damage to the automatic transmission: -Make sure that the vehicle is completely stationary before shifting into 11P" or "R". -Do not shift from up" or "N" to "R" "D" or "L11 when the engine is r~nning above idle speed. -Do not rev the engine with the transmission in a drive position {uR", 11D" or 11~") and the front wheels not movmg. -Do not use the accelerator to hold the vehicle on a hill. Use the vehicle's brakes.
NOTE: • Always shift the gearshift lever without pushing in the knob button except when ou shift from "P" to "R", from "D" to "2", rrom "2" to "L ", from "N" to "R''. or from "R" to "P". If you always push m the knob button when shifting the gearsh1ft lever. Id h.ft · t "P" "R" "2" or "L" by youcou s1 mo , , mistake. If driver's or passenger's knee hits the gearshift lever while driving, the lever could move and the gear could be changed unexpectedly.
Overdrive off switch
ON ...
OFF c;>~
' / < .. 00---00-@ff ~-ow-,, I \" OFF ON
(1) Overdrive off switch
78RB03046
Page 170 of 421
OPERATING YOUR VEHICLE
NOTE: When you select the "4L" position the ESF'® systems (other than ABS) w/11 be canceled to provide improved vehicle traction, and the ESF'® OFF indicator light, dual sensor brake support OFF indicator light and lane departure warning OFF indicator light will come on. When you select the "4L" position braketraction control can be activated'. Braketraction control brakes the spinning wheel to distribute drive power to the other wheels for increased climbing ability or for better performance on a rolling hill or a slippery surface. If dual sensor brake support OFF indicator light and lane departure warning OFF indicator light come on or go off, the intenor buzzer beeps. This is not a ma/function.
3-19
Transfer lever operation
NOTICE
Unevenly worn tyres can cause problems in the operation of the transfer lever. Be sure to rotate the tyres according to the maintenance schedule. Refer to "Tyres" and "Maintenance Schedule" in the "INSPECTION AND MAINTENANCE" section for proper tyre rotation procedures. If a problem exists during the shifting function, all lights of the 4WD indicator will blink continuously and the transfer lever operation will not work. If the shift function does not work after trying the shifting operation several times, it may be the result of a system failure. Have the system inspected by a SUZUKI dealer.
NOTE: When the temperature of 4-whee/ drive system or the transmission is not warm ':'nder the low temperature, you may feel ,t hard to shift the transfer lever or gear n01se may occur. Unless you can shift the transfer lever drive your vehicle for a while and the/2 shift the transfer lever again.
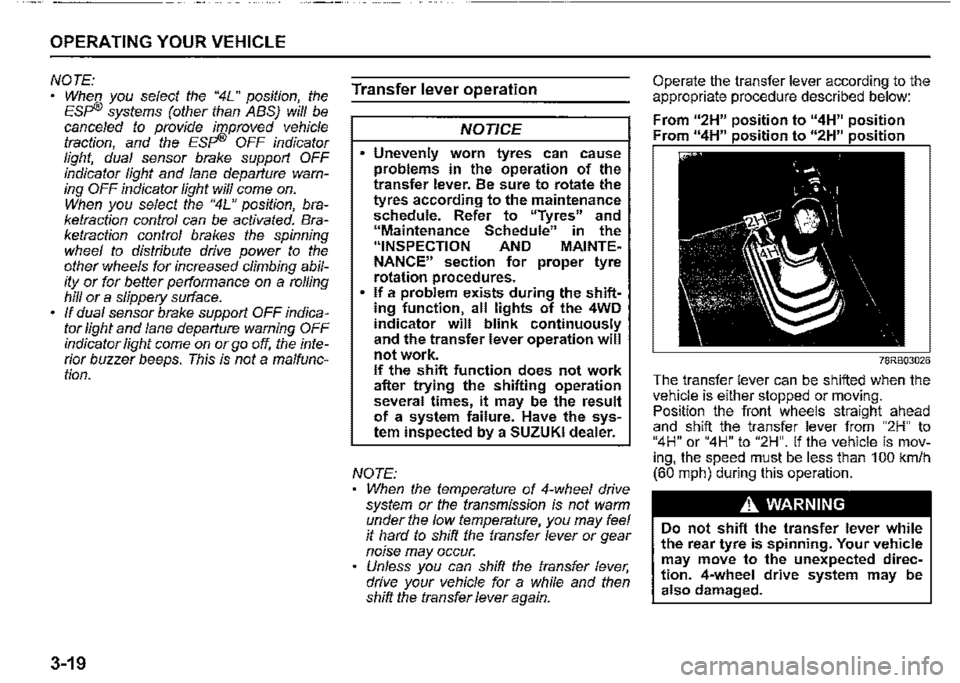
Operate the transfer lever according to the appropriate procedure described below:
From u2H" position to "4H" position Fr " 11 • • " " • •
78RB03026
The transfer lever can be shifted when the vehi_c_le is either stopped or moving. Pos1t1on the front wheels straight ahead and shift the transfer lever from "2H" to "4H" or "4H" to "2H". If the vehicle is moving, the speed must be less than 100 km/h (60 mph) during this operation.
A WARNING
Do not shift the transfer lever while the rear tyre is spinning. Your vehicle may move to the unexpected direction. 4-wheel drive system may be also damaged.