Automatic lock SUZUKI SWIFT 2017 5.G User Guide
[x] Cancel search | Manufacturer: SUZUKI, Model Year: 2017, Model line: SWIFT, Model: SUZUKI SWIFT 2017 5.GPages: 336, PDF Size: 6.24 MB
Page 51 of 336
2-32
BEFORE DRIVING
74LH0-74E
NOTE:
The word “CENTER” is molded on the
buckle and latch plate of the center lap
belt. The buckles are designed so a latch
plate can not be inserted into the wrong
buckle.
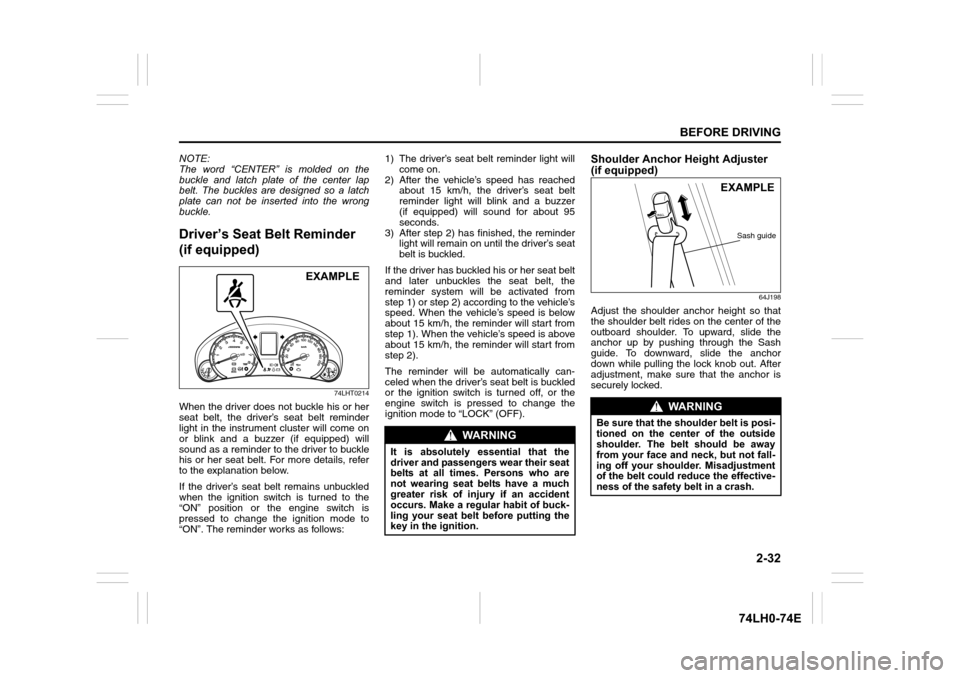
Driver’s Seat Belt Reminder
(if equipped)
74LHT0214
When the driver does not buckle his or her
seat belt, the driver’s seat belt reminder
light in the instrument cluster will come on
or blink and a buzzer (if equipped) will
sound as a reminder to the driver to buckle
his or her seat belt. For more details, refer
to the explanation below.
If the driver’s seat belt remains unbuckled
when the ignition switch is turned to the
“ON” position or the engine switch is
pressed to change the ignition mode to
“ON”. The reminder works as follows:1) The driver’s seat belt reminder light will
come on.
2) After the vehicle’s speed has reached
about 15 km/h, the driver’s seat belt
reminder light will blink and a buzzer
(if equipped) will sound for about 95
seconds.
3) After step 2) has finished, the reminder
light will remain on until the driver’s seat
belt is buckled.
If the driver has buckled his or her seat belt
and later unbuckles the seat belt, the
reminder system will be activated from
step 1) or step 2) according to the vehicle’s
speed. When the vehicle’s speed is below
about 15 km/h, the reminder will start from
step 1). When the vehicle’s speed is above
about 15 km/h, the reminder will start from
step 2).
The reminder will be automatically can-
celed when the driver’s seat belt is buckled
or the ignition switch is turned off, or the
engine switch is pressed to change the
ignition mode to “LOCK” (OFF).
Shoulder Anchor Height Adjuster
(if equipped)
64J198
Adjust the shoulder anchor height so that
the shoulder belt rides on the center of the
outboard shoulder. To upward, slide the
anchor up by pushing through the Sash
guide. To downward, slide the anchor
down while pulling the lock knob out. After
adjustment, make sure that the anchor is
securely locked.
EXAMPLE
WA R N I N G
It is absolutely essential that the
driver and passengers wear their seat
belts at all times. Persons who are
not wearing seat belts have a much
greater risk of injury if an accident
occurs. Make a regular habit of buck-
ling your seat belt before putting the
key in the ignition.
WA R N I N G
Be sure that the shoulder belt is posi-
tioned on the center of the outside
shoulder. The belt should be away
from your face and neck, but not fall-
ing off your shoulder. Misadjustment
of the belt could reduce the effective-
ness of the safety belt in a crash.
EXAMPLE
Sash guide
Page 71 of 336
2-52
BEFORE DRIVING
74LH0-74E
When the low fuel warning light (1) comes
on, a ding sounds once to remind you to fill
the fuel.
If you do not fill the fuel, a ding sounds
every time when the ignition switch is
turned to “ON” position.
NOTE:
The activation point of the low fuel warning
light (1) varies depending on road condi-
tions (for example, slope or curve) and
driving conditions because of fuel moving
in the tank.
The mark (2) indicates that the fuel filler
door is located on the left side of the vehi-
cle.
Temperature Gauge
74LHT0221
When the ignition switch is in the “ON”
position or the ignition mode is "ON", this
gauge indicates the engine coolant tem-perature. Under normal driving conditions,
the indicator should stay within the normal,
acceptable temperature range between “H”
and “C”. If the indicator approaches “H”,
overheating is indicated. Follow the
instructions for engine overheating in the
“EMERGENCY SERVICE” section.
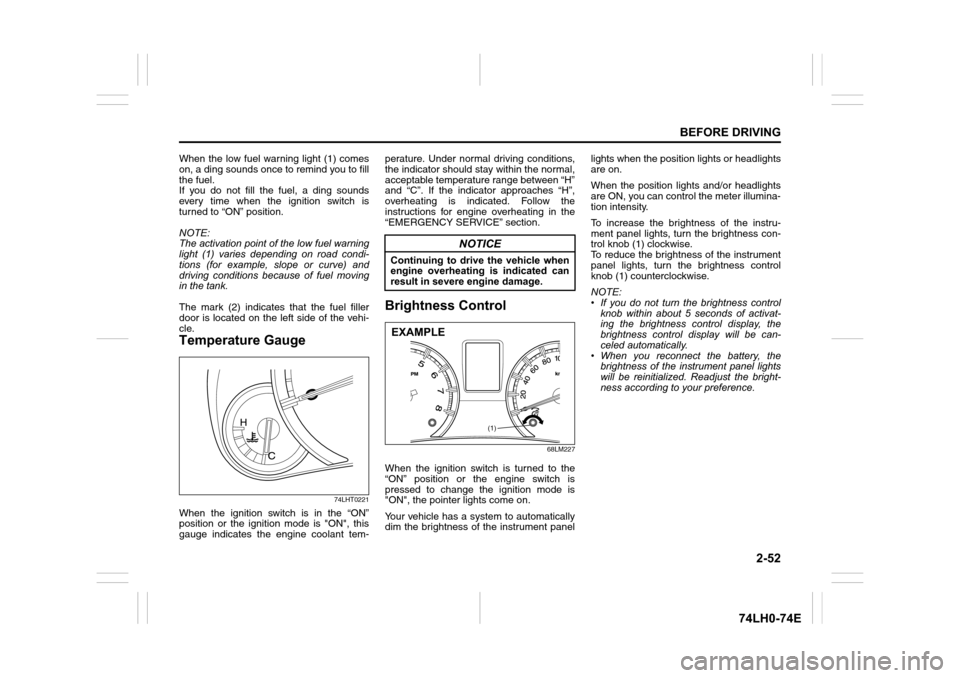
Brightness Control
68LM227
When the ignition switch is turned to the
“ON” position or the engine switch is
pressed to change the ignition mode is
"ON", the pointer lights come on.
Your vehicle has a system to automatically
dim the brightness of the instrument panellights when the position lights or headlights
are on.
When the position lights and/or headlights
are ON, you can control the meter illumina-
tion intensity.
To increase the brightness of the instru-
ment panel lights, turn the brightness con-
trol knob (1) clockwise.
To reduce the brightness of the instrument
panel lights, turn the brightness control
knob (1) counterclockwise.
NOTE:
• If you do not turn the brightness control
knob within about 5 seconds of activat-
ing the brightness control display, the
brightness control display will be can-
celed automatically.
• When you reconnect the battery, the
brightness of the instrument panel lights
will be reinitialized. Readjust the bright-
ness according to your preference.
NOTICE
Continuing to drive the vehicle when
engine overheating is indicated can
result in severe engine damage.
(1)
EXAMPLE
Page 72 of 336
2-53
BEFORE DRIVING
74LH0-74E
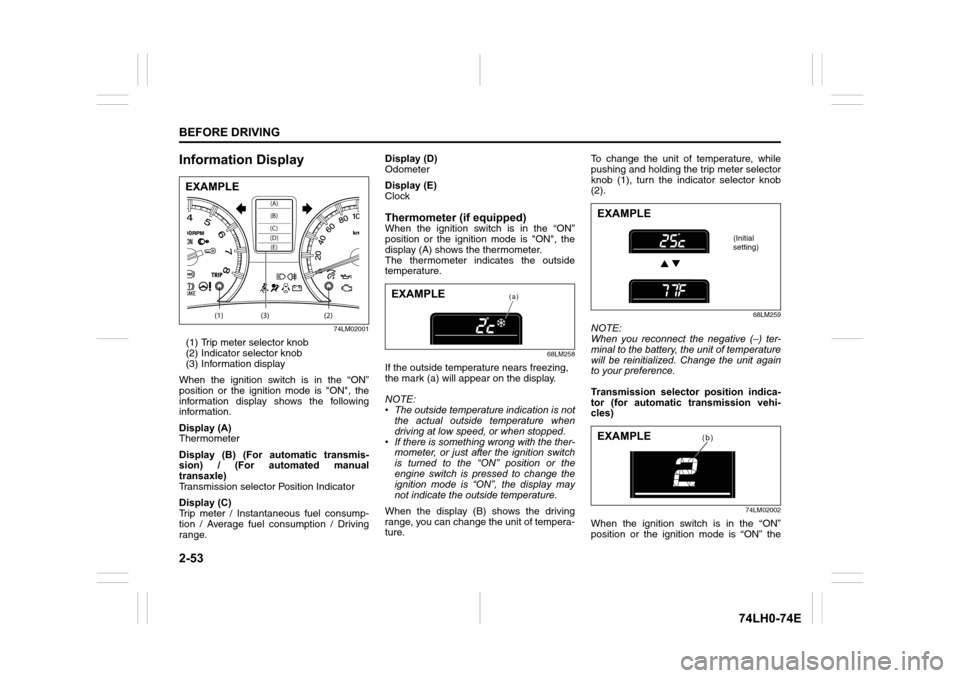
Information Display
74LM02001
(1) Trip meter selector knob
(2) Indicator selector knob
(3) Information display
When the ignition switch is in the “ON”
position or the ignition mode is "ON", the
information display shows the following
information.
Display (A)
Thermometer
Display (B) (For automatic transmis-
sion) / (For automated manual
transaxle)
Transmission selector Position Indicator
Display (C)
Trip meter / Instantaneous fuel consump-
tion / Average fuel consumption / Driving
range.Display (D)
Odometer
Display (E)
Clock
Thermometer (if equipped)When the ignition switch is in the “ON”
position or the ignition mode is "ON", the
display (A) shows the thermometer.
The thermometer indicates the outside
temperature.
68LM258
If the outside temperature nears freezing,
the mark (a) will appear on the display.
NOTE:
• The outside temperature indication is not
the actual outside temperature when
driving at low speed, or when stopped.
• If there is something wrong with the ther-
mometer, or just after the ignition switch
is turned to the “ON” position or the
engine switch is pressed to change the
ignition mode is “ON”, the display may
not indicate the outside temperature.
When the display (B) shows the driving
range, you can change the unit of tempera-
ture.To change the unit of temperature, while
pushing and holding the trip meter selector
knob (1), turn the indicator selector knob
(2).
68LM259
NOTE:
When you reconnect the negative (–) ter-
minal to the battery, the unit of temperature
will be reinitialized. Change the unit again
to your preference.
Transmission selector position indica-
tor (for automatic transmission vehi-
cles)
74LM02002
When the ignition switch is in the “ON”
position or the ignition mode is “ON” the
(1) (2)(3)
(D)(B) (A)
(C)(E)
EXAMPLE
(a)EXAMPLE
EXAMPLE
(Initial
setting)
(b)EXAMPLE
Page 76 of 336
2-57
BEFORE DRIVING
74LH0-74E
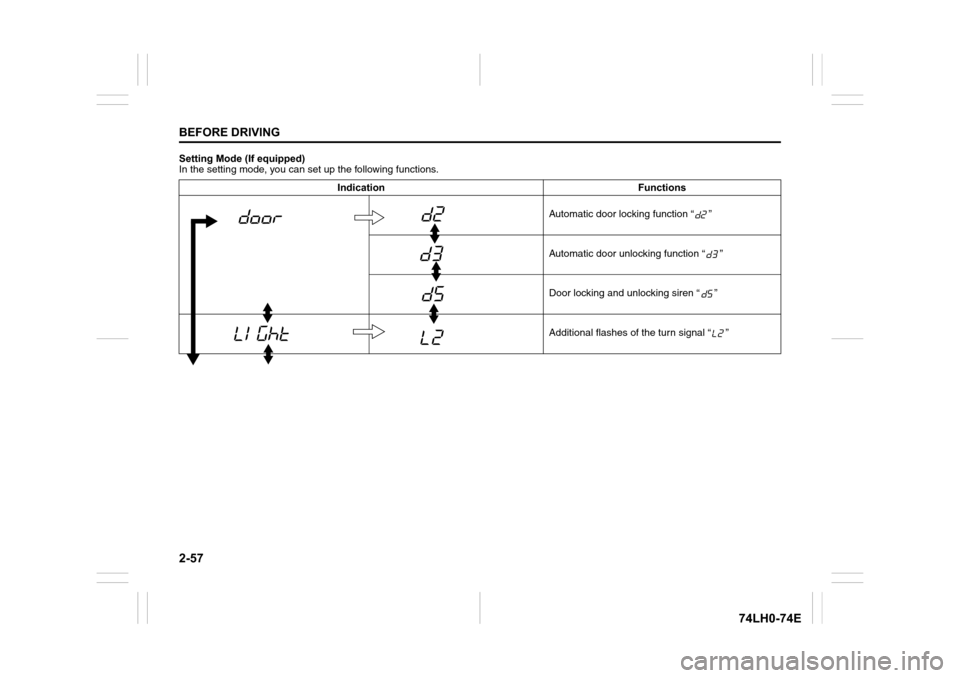
Setting Mode (If equipped)
In the setting mode, you can set up the following functions.
Indication Functions
Automatic door locking function “ ”
Automatic door unlocking function “ ”
Door locking and unlocking siren “ ”
Additional flashes of the turn signal “ ”
Page 78 of 336
2-59
BEFORE DRIVING
74LH0-74E
Automatic door locking function “ ”
• : Disable the automatic door
locking function
• : Lock all doors when the vehi-
cle speed reaches 15 km/h
(default setting)
•:
(For automatic transaxle vehi-
cle)
Lock all door when the gear-
shift lever is in other than “P”
Shock sensor “ ”
• : Enable the shock sensor
• : Disable the shock sensor
(default setting)
Pre-warning sensitivity of
the shock sensor “ ”
• : Disable the pre-warning
• to :
Adjust the pre-warning sensi-
tivity of shock sensor (Lowest
sensitivity level is L01 and
highest is L15, and default
setting is L14)Automatic door unlocking
function “ ”
• : Disable the automatic door
unlocking function
(default setting of vehicle with
keyless push start system)
• : (For automatic transaxle vehi-
cle)
Unlock all doors when the
gearshift lever is moved to the
“P” from other position
• : (Vehicle with keyless entry
system)
Unlock all doors when the key
is pulled out from the ignition
switch (default setting of vehi-
cle with keyless entry)
(Vehicle with keyless push
start system)
Unlock all doors when the
ignition mode is “LOCK”
(OFF)
Full blast warning sensitivity
of the shock sensor “ ”
• : Disable the full blast warning
to :
Adjust the full blast warning
sensitivity of shock sensor
(Lowest sensitivity level is L01
and highest is L15, and
default setting is L09)Door locking and unlocking
siren “ ”
• : Siren sounds when the
door(s) is(are) locked or
unlocked by using the keyless
entry system transmitter, key-
less push start system remote
controller or request switch
(default setting)
• : Siren does not sound when
the door(s) is(are) locked or
unlocked by using the keyless
entry system transmitter, key-
less push start system remote
controller or request switch
Additional flashes
of the turn signal “ ”
• : Turn signal flashes three
times after the turn signal
lever is returned
(default setting)
• : Disable the additional flashes
of turn signal
Initialization setting “ ”
• : Initialize all settings
Page 88 of 336
3-3OPERATING YOUR VEHICLE
74LH0-74E
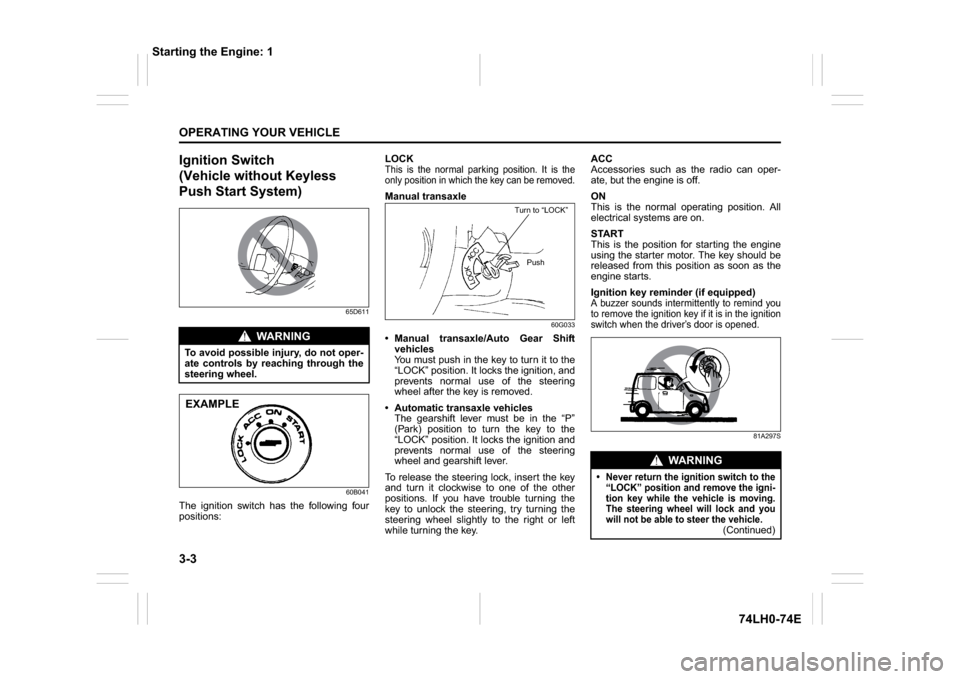
Ignition Switch
(Vehicle without Keyless
Push Start System)
65D611
60B041
The ignition switch has the following four
positions:LOCK
This is the normal parking position. It is the
only position in which the key can be removed.Manual transaxle
60G033
Manual transaxle/Auto Gear Shift
vehicles
You must push in the key to turn it to the
“LOCK” position. It locks the ignition, and
prevents normal use of the steering
wheel after the key is removed.
Automatic transaxle vehicles
The gearshift lever must be in the “P”
(Park) position to turn the key to the
“LOCK” position. It locks the ignition and
prevents normal use of the steering
wheel and gearshift lever.
To release the steering lock, insert the key
and turn it clockwise to one of the other
positions. If you have trouble turning the
key to unlock the steering, try turning the
steering wheel slightly to the right or left
while turning the key.ACC
Accessories such as the radio can oper-
ate, but the engine is off.
ON
This is the normal operating position. All
electrical systems are on.
START
This is the position for starting the engine
using the starter motor. The key should be
released from this position as soon as the
engine starts.
Ignition key reminder (if equipped)
A buzzer sounds intermittently to remind you
to remove the ignition key if it is in the ignition
switch when the driver’s door is opened.
81A297S
WA R N I N G
To avoid possible injury, do not oper-
ate controls by reaching through the
steering wheel.EXAMPLE
Turn to “LOCK”
Push
WA R N I N G
Never return the ignition switch to the
“LOCK” position and remove the igni-
tion key while the vehicle is moving.
The steering wheel will lock and you
will not be able to steer the vehicle.
(Continued)
Starting the Engine: 1
Page 89 of 336
3-4
OPERATING YOUR VEHICLE
74LH0-74E
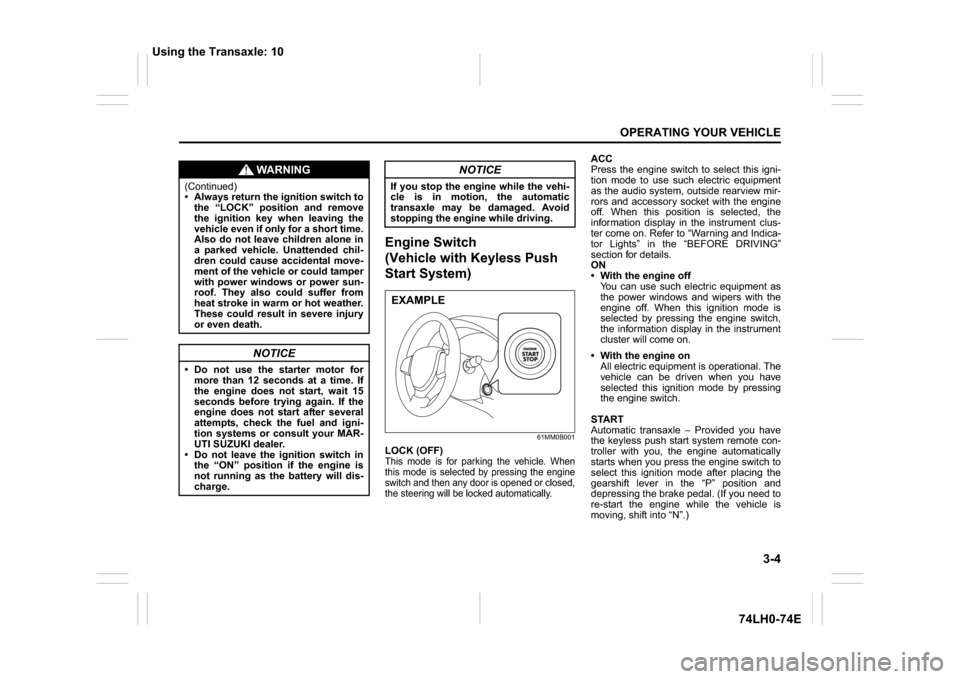
Engine Switch
(Vehicle with Keyless Push
Start System)
61MM0B001
LOCK (OFF)This mode is for parking the vehicle. When
this mode is selected by pressing the engine
switch and then any door is opened or closed,
the steering will be locked automatically.
ACC
Press the engine switch to select this igni-
tion mode to use such electric equipment
as the audio system, outside rearview mir-
rors and accessory socket with the engine
off. When this position is selected, the
information display in the instrument clus-
ter come on. Refer to “Warning and Indica-
tor Lights” in the “BEFORE DRIVING”
section for details.
ON
With the engine off
You can use such electric equipment as
the power windows and wipers with the
engine off. When this ignition mode is
selected by pressing the engine switch,
the information display in the instrument
cluster will come on.
With the engine on
All electric equipment is operational. The
vehicle can be driven when you have
selected this ignition mode by pressing
the engine switch.
START
Automatic transaxle – Provided you have
the keyless push start system remote con-
troller with you, the engine automatically
starts when you press the engine switch to
select this ignition mode after placing the
gearshift lever in the “P” position and
depressing the brake pedal. (If you need to
re-start the engine while the vehicle is
moving, shift into “N”.)
WA R N I N G
(Continued)
Always return the ignition switch to
the “LOCK” position and remove
the ignition key when leaving the
vehicle even if only for a short time.
Also do not leave children alone in
a parked vehicle. Unattended chil-
dren could cause accidental move-
ment of the vehicle or could tamper
with power windows or power sun-
roof. They also could suffer from
heat stroke in warm or hot weather.
These could result in severe injury
or even death.
NOTICE
Do not use the starter motor for
more than 12 seconds at a time. If
the engine does not start, wait 15
seconds before trying again. If the
engine does not start after several
attempts, check the fuel and igni-
tion systems or consult your MAR-
UTI SUZUKI dealer.
Do not leave the ignition switch in
the “ON” position if the engine is
not running as the battery will dis-
charge.
NOTICE
If you stop the engine while the vehi-
cle is in motion, the automatic
transaxle may be damaged. Avoid
stopping the engine while driving.EXAMPLE
Using the Transaxle: 10
Page 90 of 336
3-5OPERATING YOUR VEHICLE
74LH0-74E
Manual transaxle – Provided you have the
keyless push start system remote control-
ler with you, the engine automatically
starts when you press the engine switch to
select this ignition mode after shifting to
“N” (Neutral) and depressing the brake and
clutch pedals.
Auto Gear Shift – Provided you have the
keyless push start system remote control-
ler with you, the engine automatically
starts when you press the engine switch to
select this ignition mode after placing the
gearshift lever in the “N” position and
depressing the brake pedal.
NOTE:
You do not need to keep the engine switch
pressed to start the engine.
NOTE:
The steering lock may not be released if
some load is acting on the steering
wheel. If this happens, turn the steering
wheel to the right or left to relieve it from
the load before you press the engineswitch again to change to the desired
ignition mode.
In the presence of strong radio signals or
noise, you may not be able to change
the ignition mode to “ACC” or “ON” or to
start the engine using the engine switch.
Keyless Push Start System
(if equipped)Provided the keyless push start system
remote controller is within the “interior work-
able area” (refer to the related explanation
in this section), you can use the engine
switch for starting the engine and selecting
an ignition mode (“ACC” or “ON”). In addi-
tion, the following functions can be used: Keyless entry function. Refer to “Keyless
Push Start System Remote Controller” in the
“BEFORE DRIVING” section for details. Locking and unlocking doors using a
request switch. Refer to “Keyless Push
Start System Remote Controller” in the
“BEFORE DRIVING” section for details.
Immobilizer (anti-theft) function. Refer to
“Immobilizer System” in the “BEFORE
DRIVING” section for details.
Engine Switch IlluminationThe engine switch is illuminated (lit) in the
following situations:
When the engine is off and the driver’s
door is open, or for 15 seconds after the
driver’s door is closed. The illumination
will fade out after the 15 seconds past.
When the engine is off and the position
lights are on. The illumination will go out
when the position lights are turned off.
When the engine is on and the position
lights and/or the headlights are on. The
illumination will go out when the head-
lights are turned off.
82K253
NOTE:
To save the battery, the illumination will be
automatically turned off when both of the
following conditions are simultaneously
met:
The headlights and position lights are
turned off.
A period of 15 minutes has elapsed after
opening the driver’s door.
NOTICE
Do not leave the engine switch in the
“ACC” or “ON” mode when the
engine is not running. Avoid using
the radio or other electric accesso-
ries for a long time when the engine
switch is in the “ACC” or “ON” mode
when the engine is not running, oth-
erwise the battery may discharge.
Using the Transaxle: 10
Page 95 of 336
3-10
OPERATING YOUR VEHICLE
74LH0-74E
Starting the Engine
(Vehicle without Keyless
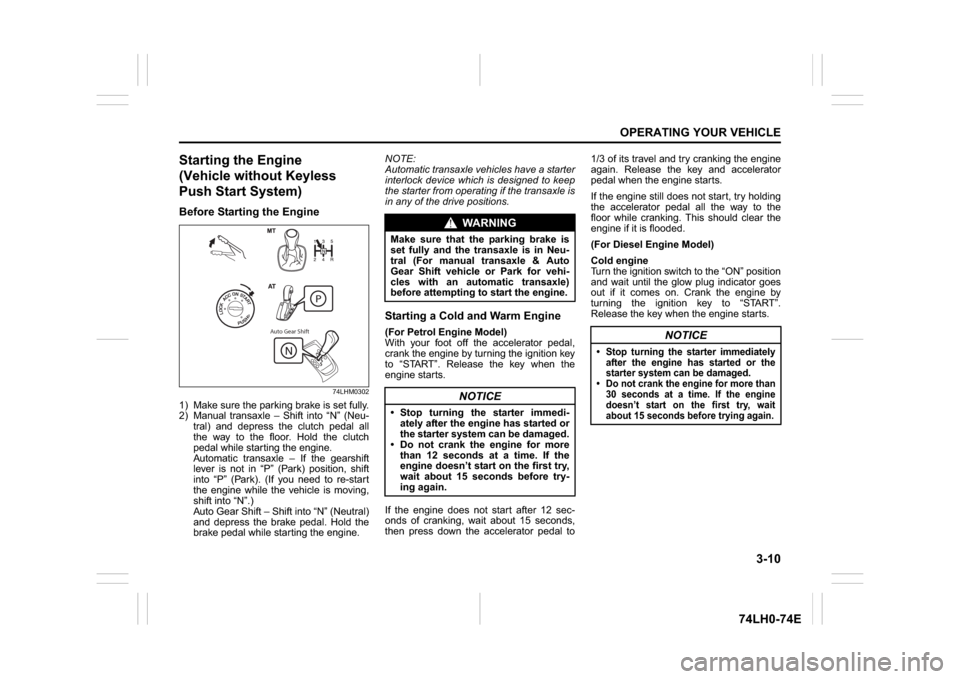
Push Start System)Before Starting the Engine
74LHM0302
1) Make sure the parking brake is set fully.
2) Manual transaxle – Shift into “N” (Neu-
tral) and depress the clutch pedal all
the way to the floor. Hold the clutch
pedal while starting the engine.
Automatic transaxle – If the gearshift
lever is not in “P” (Park) position, shift
into “P” (Park). (If you need to re-start
the engine while the vehicle is moving,
shift into “N”.)
Auto Gear Shift – Shift into “N” (Neutral)
and depress the brake pedal. Hold the
brake pedal while starting the engine.NOTE:
Automatic transaxle vehicles have a starter
interlock device which is designed to keep
the starter from operating if the transaxle is
in any of the drive positions.
Starting a Cold and Warm Engine(For Petrol Engine Model)
With your foot off the accelerator pedal,
crank the engine by turning the ignition key
to “START”. Release the key when the
engine starts.
If the engine does not start after 12 sec-
onds of cranking, wait about 15 seconds,
then press down the accelerator pedal to1/3 of its travel and try cranking the engine
again. Release the key and accelerator
pedal when the engine starts.
If the engine still does not start, try holding
the accelerator pedal all the way to the
floor while cranking. This should clear the
engine if it is flooded.
(For Diesel Engine Model)
Cold engine
Turn the ignition switch to the “ON” position
and wait until the glow plug indicator goes
out if it comes on. Crank the engine by
turning the ignition key to “START”.
Release the key when the engine starts.
Auto Gear Shift
WA R N I N G
Make sure that the parking brake is
set fully and the transaxle is in Neu-
tral (For manual transaxle & Auto
Gear Shift vehicle or Park for vehi-
cles with an automatic transaxle)
before attempting to start the engine.
NOTICE
Stop turning the starter immedi-
ately after the engine has started or
the starter system can be damaged.
Do not crank the engine for more
than 12 seconds at a time. If the
engine doesn’t start on the first try,
wait about 15 seconds before try-
ing again.
NOTICE
Stop turning the starter immediately
after the engine has started or the
starter system can be damaged. Do not crank the engine for more than
30 seconds at a time. If the engine
doesn’t start on the first try, wait
about 15 seconds before trying again.
Page 96 of 336
3-11OPERATING YOUR VEHICLE
74LH0-74E
Warm engine
Crank the engine by turning the ignition
key to “START”. Release the key when the
engine starts.
Caution when stopping the engine with
turbocharger
When stopping the engine after climbing or
high speed driving, let the engine idle for
about one minute or more (if it is not pro-
hibited) to cool down the turbocharger and
engine oil. This is to prevent the engine oil
from over-deteriorating. Deteriorated
engine oil will damage the bearings of the
turbocharger.
Restarting diesel engine after fuel-
empty stop
If the engine stops and the low fuel warn-
ing light and the malfunction indicator light
come on, use the following procedure:
1) Fill the fuel tank.
2) Hold the ignition key in “ON” position for
5-10 seconds to feed fuel.
3) Perform above engine starting proce-
dure to start the engine.
If the malfunction indicator light still comes
on after the engine started, there may be
some problem with the engine. Ask your
MARUTI SUZUKI dealer to have the
engine inspected.
Starting the Engine
(Vehicle with Keyless Push
Start System)Before Starting the Engine
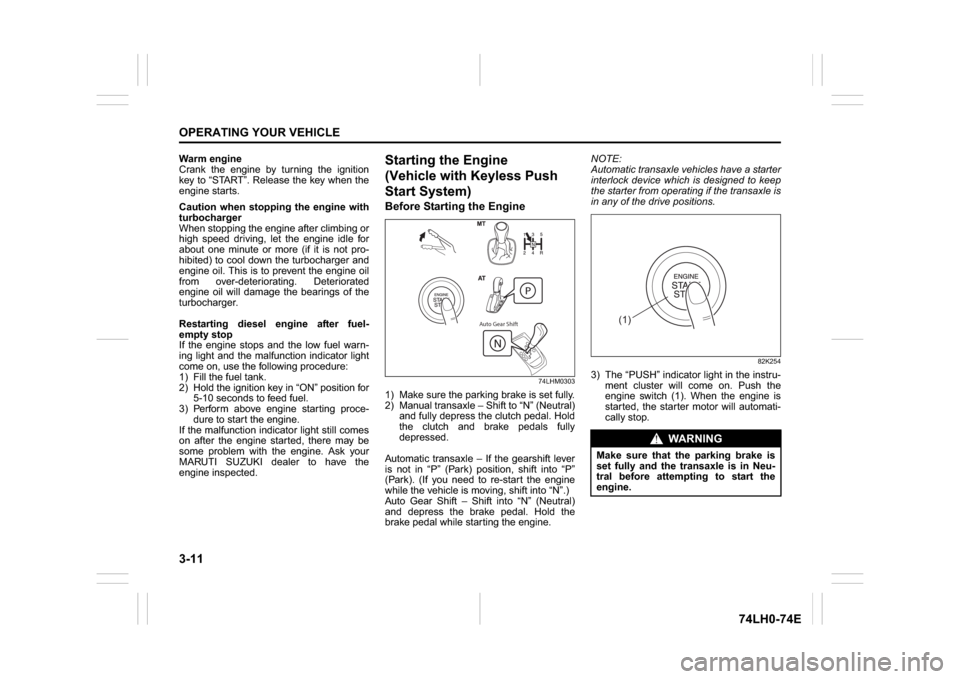
74LHM0303
1) Make sure the parking brake is set fully.
2) Manual transaxle – Shift to “N” (Neutral)
and fully depress the clutch pedal. Hold
the clutch and brake pedals fully
depressed.
Automatic transaxle – If the gearshift lever
is not in “P” (Park) position, shift into “P”
(Park). (If you need to re-start the engine
while the vehicle is moving, shift into “N”.)
Auto Gear Shift – Shift into “N” (Neutral)
and depress the brake pedal. Hold the
brake pedal while starting the engine.NOTE:
Automatic transaxle vehicles have a starter
interlock device which is designed to keep
the starter from operating if the transaxle is
in any of the drive positions.
82K254
3) The “PUSH” indicator light in the instru-
ment cluster will come on. Push the
engine switch (1). When the engine is
started, the starter motor will automati-
cally stop.
Auto Gear Shift
WA R N I N G
Make sure that the parking brake is
set fully and the transaxle is in Neu-
tral before attempting to start the
engine.
(1)