ignition SUZUKI SWIFT 2017 5.G User Guide
[x] Cancel search | Manufacturer: SUZUKI, Model Year: 2017, Model line: SWIFT, Model: SUZUKI SWIFT 2017 5.GPages: 336, PDF Size: 6.24 MB
Page 32 of 336
2-13
BEFORE DRIVING
74LH0-74E
NOTE:
1) Three siren chirps and one light flash of
all indicator lights will indicate that
engine hood is open. However, locking
of all doors take place but security sys-
tem will not be armed.
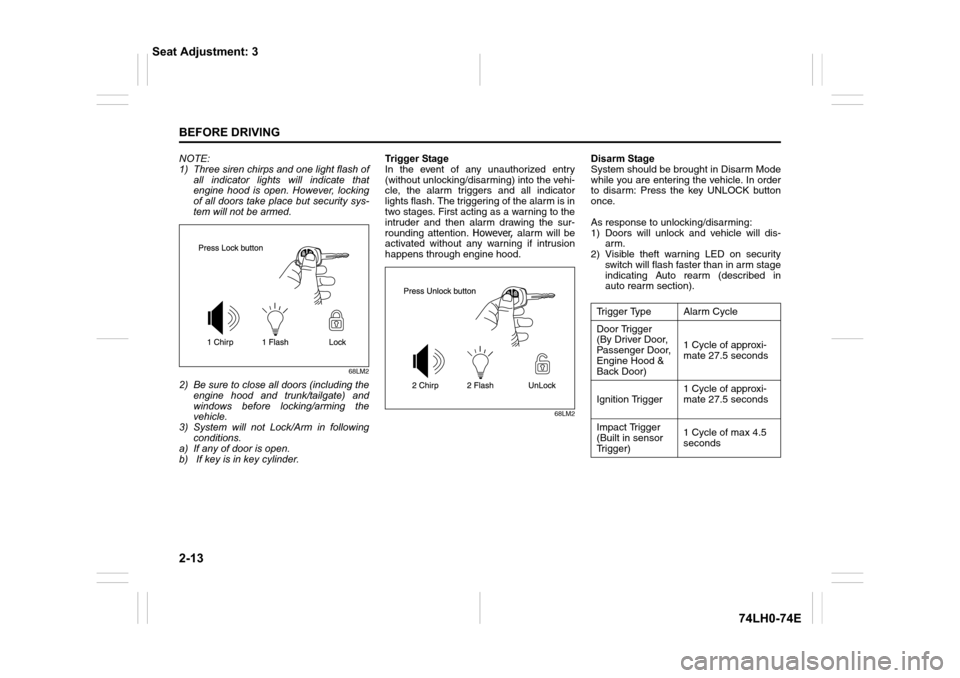
68LM2
2) Be sure to close all doors (including the
engine hood and trunk/tailgate) and
windows before locking/arming the
vehicle.
3) System will not Lock/Arm in following
conditions.
a) If any of door is open.
b) If key is in key cylinder.Tri gg er Stag e
In the event of any unauthorized entry
(without unlocking/disarming) into the vehi-
cle, the alarm triggers and all indicator
lights flash. The triggering of the alarm is in
two stages. First acting as a warning to the
intruder and then alarm drawing the sur-
rounding attention. However, alarm will be
activated without any warning if intrusion
happens through engine hood.
68LM2
Disarm Stage
System should be brought in Disarm Mode
while you are entering the vehicle. In order
to disarm: Press the key UNLOCK button
once.
As response to unlocking/disarming:
1) Doors will unlock and vehicle will dis-
arm.
2) Visible theft warning LED on security
switch will flash faster than in arm stage
indicating Auto rearm (described in
auto rearm section).
Trigger Type Alarm Cycle
Door Trigger
(By Driver Door,
Passenger Door,
Engine Hood &
Back Door)1 Cycle of approxi-
mate 27.5 seconds
Ignition Trigger 1 Cycle of approxi-
mate 27.5 seconds
Impact Trigger
(Built in sensor
Trigger)1 Cycle of max 4.5
seconds
Seat Adjustment: 3
Page 33 of 336
2-14
BEFORE DRIVING
74LH0-74E
GENERAL FEATURES
Illuminated Entry
When vehicle is unlocked, the room lamp
will turn ON to facilitate illuminated entry
into the vehicle. If no door is opened in
about 15 seconds of above operation,
room lamp will fade out.
If any door is opened after 15 seconds, the
room lamp turns ON again and after 15
seconds of closing all doors room lamp will
fade out.
If within 15 seconds after closing all the
doors the driver inserts the key into the key
cylinder, then the room lamp will fade out.
Illuminated Exit
When key is removed from the key cylin-
der,the room lamp will turn ON to facilitate
illuminated exit. If no door is opened in
about 15 seconds of key removal from key
cylinder, the room lamp will fade out.
When door is opened to exit the vehicle,
the room lamp will turn ON again (if it has
turned OFF after 15 seconds of key
removal from key cylinder) and will turn
OFF after 15 seconds of closing all the
doors.
If within 15 seconds of all doors closure,
vehicle is locked by pressing the LOCK
button, the room lamp will fade out.
NOTE: Room lamp will fade out gradually
approximately in 2 seconds.Mute Lock/Unlock
To Lock/Unlock the vehicle without siren
chirps use this function.
a) Press and release the Key LOCK &
UNLOCK buttons simultaneously.
b) Press and release Key LOCK or
UNLOCK button for desired function.
Example: To Lock the system without the
Siren chirp sound, press and release the
Key LOCK & UNLOCK button simultane-
ously, then press and release the Key
LOCK button once.
Auto Rearm
In case of accidental Unlock/Disarm of
vehicle by Key, vehicle will automatically
Lock & Arm within 30 sec. without any indi-
cation. Auto rearm cycle gets canceled if
user does any of the following operation
within 30sec :
1. Open any door (including back door).
2. Open Engine Hood.
3. Key On.Radio Frequency Lock Out
Key Lock/Unlock/Car locator function will
cease to function when Key is inside Key
cylinder.
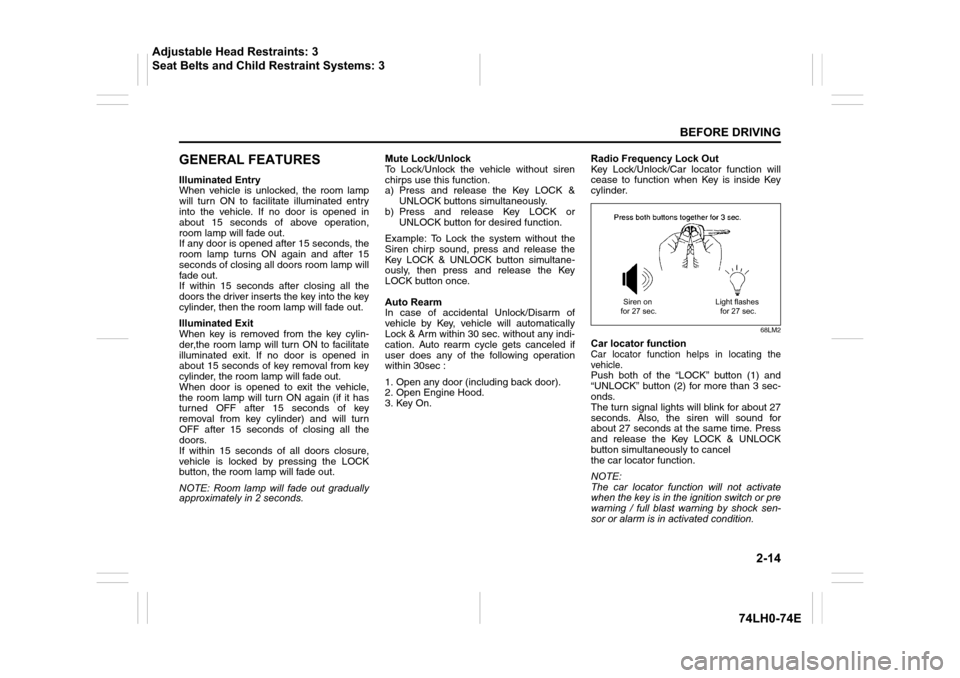
68LM2
Car locator functionCar locator function helps in locating the
vehicle.
Push both of the “LOCK” button (1) and
“UNLOCK” button (2) for more than 3 sec-
onds.
The turn signal lights will blink for about 27
seconds. Also, the siren will sound for
about 27 seconds at the same time. Press
and release the Key LOCK & UNLOCK
button simultaneously to cancel
the car locator function.
NOTE:
The car locator function will not activate
when the key is in the ignition switch or pre
warning / full blast warning by shock sen-
sor or alarm is in activated condition.
Siren on
for 27 sec.Light flashes
for 27 sec.
Adjustable Head Restraints: 3
Seat Belts and Child Restraint Systems: 3
Page 34 of 336
2-15
BEFORE DRIVING
74LH0-74E
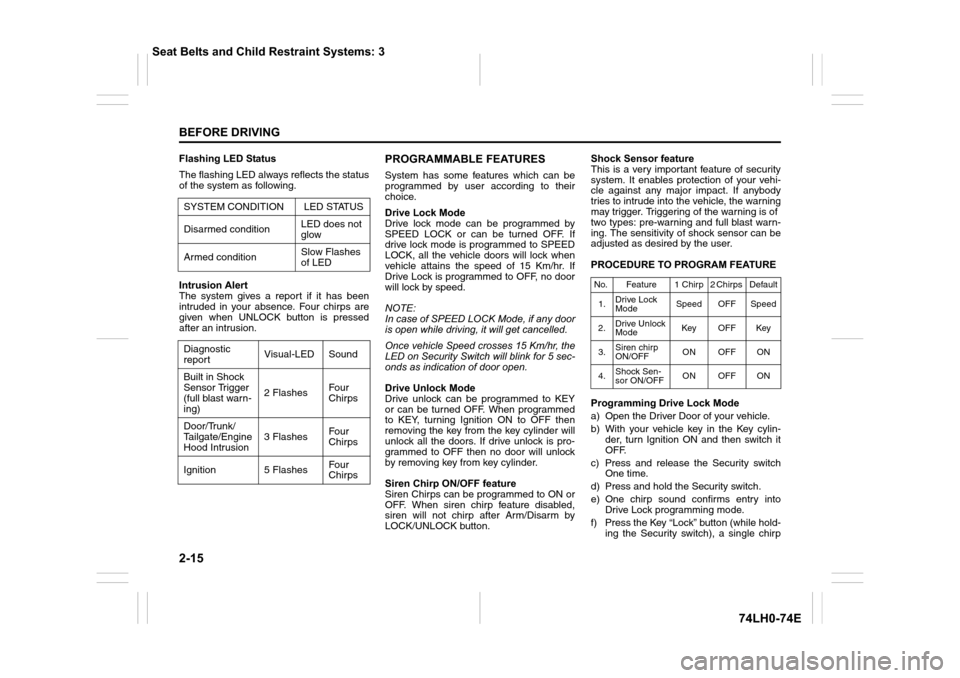
Flashing LED Status
The flashing LED always reflects the status
of the system as following.
Intrusion Alert
The system gives a report if it has been
intruded in your absence. Four chirps are
given when UNLOCK button is pressed
after an intrusion. PROGRAMMABLE FEATURES
System has some features which can be
programmed by user according to their
choice.
Drive Lock Mode
Drive lock mode can be programmed by
SPEED LOCK or can be turned OFF. If
drive lock mode is programmed to SPEED
LOCK, all the vehicle doors will lock when
vehicle attains the speed of 15 Km/hr. If
Drive Lock is programmed to OFF, no door
will lock by speed.
NOTE:
In case of SPEED LOCK Mode, if any door
is open while driving, it will get cancelled.
Once vehicle Speed crosses 15 Km/hr, the
LED on Security Switch will blink for 5 sec-
onds as indication of door open.
Drive Unlock Mode
Drive unlock can be programmed to KEY
or can be turned OFF. When programmed
to KEY, turning Ignition ON to OFF then
removing the key from the key cylinder will
unlock all the doors. If drive unlock is pro-
grammed to OFF then no door will unlock
by removing key from key cylinder.
Siren Chirp ON/OFF feature
Siren Chirps can be programmed to ON or
OFF. When siren chirp feature disabled,
siren will not chirp after Arm/Disarm by
LOCK/UNLOCK button. Shock Sensor feature
This is a very important feature of security
system. It enables protection of your vehi-
cle against any major impact. If anybody
tries to intrude into the vehicle, the warning
may trigger. Triggering of the warning is of
two types: pre-warning and full blast warn-
ing. The sensitivity of shock sensor can be
adjusted as desired by the user.
PROCEDURE TO PROGRAM FEATURE
Programming Drive Lock Mode
a) Open the Driver Door of your vehicle.
b) With your vehicle key in the Key cylin-
der, turn Ignition ON and then switch it
OFF.
c) Press and release the Security switch
One time.
d) Press and hold the Security switch.
e) One chirp sound confirms entry into
Drive Lock programming mode.
f) Press the Key “Lock” button (while hold-
ing the Security switch), a single chirp SYSTEM CONDITION LED STATUS
Disarmed conditionLED does not
glow
Armed conditionSlow Flashes
of LED
Diagnostic
reportVisual-LED Sound
Built in Shock
Sensor Trigger
(full blast warn-
ing)2 FlashesFour
Chirps
Door/Trunk/
Tailgate/Engine
Hood Intrusion3 FlashesFour
Chirps
Ignition 5 FlashesFour
Chirps
No. Feature 1 Chirp 2 Chirps Default
1.Drive Lock
ModeSpeed OFF Speed
2.Drive Unlock
ModeKey OFF Key
3.Siren chirp
ON/OFFON OFF ON
4.Shock Sen-
sor ON/OFFON OFF ON
Seat Belts and Child Restraint Systems: 3
Page 35 of 336
2-16
BEFORE DRIVING
74LH0-74E
sound confirms mode changed to
speed lock.
g) Two-Siren chirp sound confirms Drive
lock mode OFF.
h) Release the Security switch.
i) Turn the Ignition ON.
Programming Drive Unlock Mode
a) Open the Driver Door of your vehicle.
b) With your vehicle key in the Key cylin-
der, turn Ignition ON and then switch it
OFF.
c) Press and release the Security switch
two times.
d) Press and hold the Security switch.
e) Two-chirp sound confirms entry into
Drive unlock programming mode.
f) Press the Key Lock button (while hold-
ing the Security switch), a single chirp
sound confirms the mode changed to
key Unlock.
g) Two-siren chirp sound confirms the
mode changed to Drive Unlock mode
OFF.
h) Release the Security switch.
i) Turn the Ignition ON.Programming Siren Chirp ON/OFF
a) Open the Driver Door of your vehicle.
b) With your vehicle key in the Key cylin-
der, turn Ignition ON and then switch it
OFF.
c) Press and release the Security switch
Three times.
d) Press and hold the Security switch.
e) Three-chirp sound confirms entry into
Siren Chirp ON/OFF programming
mode.
f) Press the Key Lock button (while hold-
ing the Security switch), a single chirp
sound confirms the mode changed to
Siren Chirp ON.
g) Two-Siren chirp sound confirms the
mode changed to Siren Chirp OFF.
h) Release the Security switch.
i) Turn the Ignition ON.
Programming Shock Sensor ON/OFF
a) Open the Driver Door of your vehicle.
b) With your vehicle key in the Key cylin-
der, turn Ignition ON and then switch it
OFF.
c) Press and release the Security switch
Four times.
d) Press and hold the Security switch.
e) Four-chirp sound confirms entry into
Shock Sensor ON/OFF programming
mode.
f) Press the Key Lock button (while hold-
ing the Security switch), a single chirpsound confirms the mode changed to
shock sensor ON.
g) Two-Siren chirp sound confirms the
mode changed to shock sensor OFF.
h) Release the Security switch.
i) Turn the Ignition ON.
Shock Sensor Sensitivity Adjustment
via Key
Full Blast adjustment
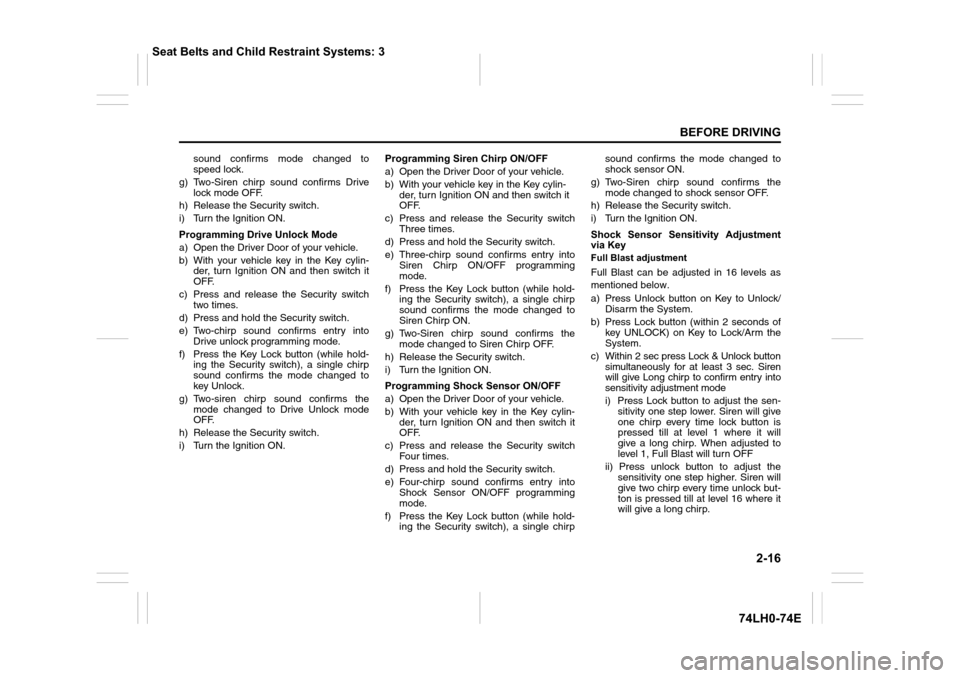
Full Blast can be adjusted in 16 levels as
mentioned below.
a) Press Unlock button on Key to Unlock/
Disarm the System.
b) Press Lock button (within 2 seconds of
key UNLOCK) on Key to Lock/Arm the
System.
c) Within 2 sec press Lock & Unlock button
simultaneously for at least 3 sec. Siren
will give Long chirp to confirm entry into
sensitivity adjustment mode
i) Press Lock button to adjust the sen-
sitivity one step lower. Siren will give
one chirp every time lock button is
pressed till at level 1 where it will
give a long chirp. When adjusted to
level 1, Full Blast will turn OFF
ii) Press unlock button to adjust the
sensitivity one step higher. Siren will
give two chirp every time unlock but-
ton is pressed till at level 16 where it
will give a long chirp.
Seat Belts and Child Restraint Systems: 3
Page 36 of 336
2-17
BEFORE DRIVING
74LH0-74E
Pre-warn Adjustment
Pre-warn can be adjusted in 16 levels as
mentioned below:
a) Press Lock button on Key to Lock/Arm
the System
b) Press Unlock button (within 2 seconds
of key LOCK) on Key to Unlock/Disarm
the System
c) Within 2 sec press Lock & Unlock button
simultaneously for at least 3 sec. Siren
will give Long chirp to confirm entry into
Sensitivity Adjustment Mode.
i) Press Lock button to adjust the sen-
sitivity one step lower. Siren will give
one chirp every time lock button is
pressed till at level 1 where it will
give a long chirp. When adjusted to
level 1, pre-warn will turn OFF.
ii) Press Unlock button to adjust the
sensitivity one step higher. Siren will
give two Chirp every time Unlock
button is pressed till at level 16
where it will give a long chirp.
Program Customer Pin-code
(Personalized Pin-code)
If transmitter is not working properly, then it
is possible to disarm the system by Per-
sonalized pin code.
The Personalized 4-digit number can be
changed from the factory default to ensure
Personalized Security.Pin code entry
a) Disarm the system.
b) Open the Driver Door.
c) Turn Ignition ON then OFF.
d) Within 5 seconds press and release
Valet switch 5 times. A short chirp fol-
lowed by long chirps confirms entry into
Pin Code programming mode.
e) Press Lock button on Key, after a single
chirp enter the First digit (within 1-9) by
pressing Valet switch (for e.g. to enter 2
press and release Valet switch two
times).
f) Press Lock button on Key, after two
chirp enter the Second digit (within 1-9)
by pressing Valet switch.
g) Press Lock button on Key, after 3-chirps
enter the Third digit (within 1-9) by
pressing Valet switch.
h) Press Lock button on Key, after 4-chirps
enter the Fourth digit (within 1-9) by
pressing Valet switch.
Emergency Disarm by Personalized pin
code
The Personalized 4- Digit Pin Code acts as
a secret Key, to Emergency Disarm the
vehicle.
a) Turn the Ignition ON, OFF and then ON.
b) Enter the First digit (for e. g. to enter 2
press and release Valet switch twice)
c) Turn the Ignition OFF then ON.
d) Enter the Second digit.e) Turn the Ignition OFF and then ON.
f) Enter the Third Digit.
g) Turn the Ignition OFF and then ON
h) Enter the Last Digit.
i) Turn the Ignition OFF and then ON.
j) The vehicle will get disarmed.
NOTE:
The default pin will be provided by the
dealer at the time of delivery. It is recom-
mended to personalize the pin for
increased security. The pin must be
remembered as it is not possible to retrieve
a lost pin.
Seat Belts and Child Restraint Systems: 3
Page 40 of 336
2-21
BEFORE DRIVING
74LH0-74E
• If any door is not operated within approx-
imately 30 seconds after the doors have
been unlocked using the keyless push
start system remote controller, the doors
are automatically locked again. When
the doors are locked, the security sys-
tem will be armed.
• If the security system indicator (1) blinks
when the ignition mode is “ON”, there
may be something wrong with the secu-
rity system. Ask your MARUTI SUZUKI
dealer to inspect the system.
How to disarm the security system
Simply unlock the doors using the keyless
push start system remote controller. The
security system indicator will go out, indi-
cating that the security system is dis-
armed.
How to stop the alarm
Should the alarm be triggered accidentally,
unlock the doors using the keyless push
start system remote controller or request
switch, or in case of emergency, press the
engine switch to change the ignition mode
to “ON”.
NOTE:
• Even after the alarm has stopped, if you
lock the doors using the keyless push
start system remote controller, the secu-
rity system will be rearmed.
• If you disconnect the battery while the
security system is in the armed condition
or the alarm is actually in operation, thealarm will be re-triggered when the bat-
tery is then reconnected.
• Even after the alarm has stopped at the
end of the predetermined operation time,
it will be triggered again if any of the
doors, trunk/tailgate or engine hood is
opened, or the warning may be triggered
if the vehicle feels a shock (if the shock
sensor is in the enabled state), without
disarming the security system.
Checking whether the alarm has been
triggered during parking
If the alarm was triggered and you then
turn the ignition mode is “ON”, the security
system indicator will blink rapidly for about
8 seconds and a buzzer will beep 4 times
during this period. If this happens, check
whether the vehicle has been broken into
while you were away from it.
Security system indication
• If any of the doors or trunk/tailgate are
opened without unlocking by the keyless
push start system remote controller, all
turn signal lights start to blink and the
interior buzzer beeps intermittently. After
5 seconds, the siren will sound for about
27.5 seconds. The security system indi-
cator continues to blink during this time.
• If the engine hood is opened, all turn sig-
nal lights blink, and the siren sounds for
about 27.5 seconds. The security sys-
tem indicator continues to blink during
this time.• If the shock sensor is in the enabled
state and the vehicle feels a shock
higher than the pre-warning sensitivity,
the siren sounds for about 2 seconds
(pre-warning). If the vehicle feel a shock
higher than the full blast warning sensi-
tivity, siren will sound for about 4.5 sec-
onds (full blast warning). The security
system indicator continues to blink
during this time.
NOTE:
If you set the full blast warning sensitivity
higher than the pre-warning sensitivity in
the setting mode of the information display,
or the vehicle feels such shock as to be
able to trigger the full blast warning, the full
blast warning will be triggered preferen-
tially. In this case, the pre-warning will not
be triggered.
Seat Belts and Child Restraint Systems: 3
Page 41 of 336
2-22
BEFORE DRIVING
74LH0-74E
Windows
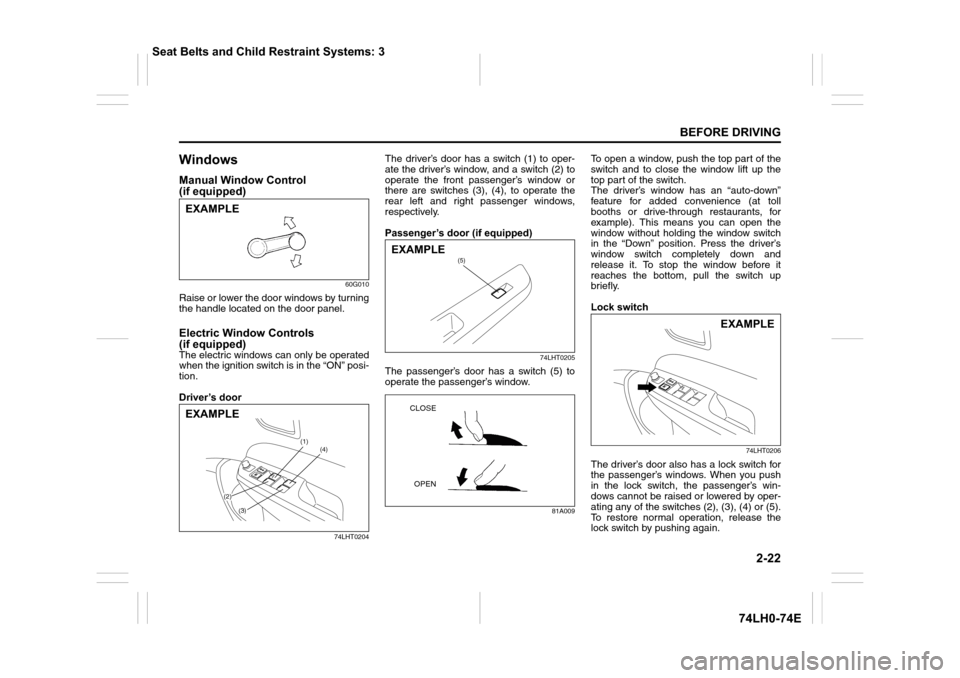
Manual Window Control
(if equipped)
60G010
Raise or lower the door windows by turning
the handle located on the door panel.
Electric Window Controls
(if equipped)
The electric windows can only be operated
when the ignition switch is in the “ON” posi-
tion.
Driver’s door
74LHT0204
The driver’s door has a switch (1) to oper-
ate the driver’s window, and a switch (2) to
operate the front passenger’s window or
there are switches (3), (4), to operate the
rear left and right passenger windows,
respectively.
Passenger’s door (if equipped)
74LHT0205
The passenger’s door has a switch (5) to
operate the passenger’s window.
81A009
To open a window, push the top part of the
switch and to close the window lift up the
top part of the switch.
The driver’s window has an “auto-down”
feature for added convenience (at toll
booths or drive-through restaurants, for
example). This means you can open the
window without holding the window switch
in the “Down” position. Press the driver’s
window switch completely down and
release it. To stop the window before it
reaches the bottom, pull the switch up
briefly.
Lock switch
74LHT0206
The driver’s door also has a lock switch for
the passenger’s windows. When you push
in the lock switch, the passenger’s win-
dows cannot be raised or lowered by oper-
ating any of the switches (2), (3), (4) or (5).
To restore normal operation, release the
lock switch by pushing again.
EXAMPLE
(1)
(2)
(3)
(4)
EXAMPLE
(5)EXAMPLE
CLOSE
OPEN
EXAMPLE
Seat Belts and Child Restraint Systems: 3
Page 42 of 336
2-23
BEFORE DRIVING
74LH0-74E
NOTE:
If you drive with one of the rear windows
open, you may hear a loud sound caused
by air vibration. To reduce the sound, open
the driver’s or front passenger’s window, or
narrow the rear window opening.
Mirrors
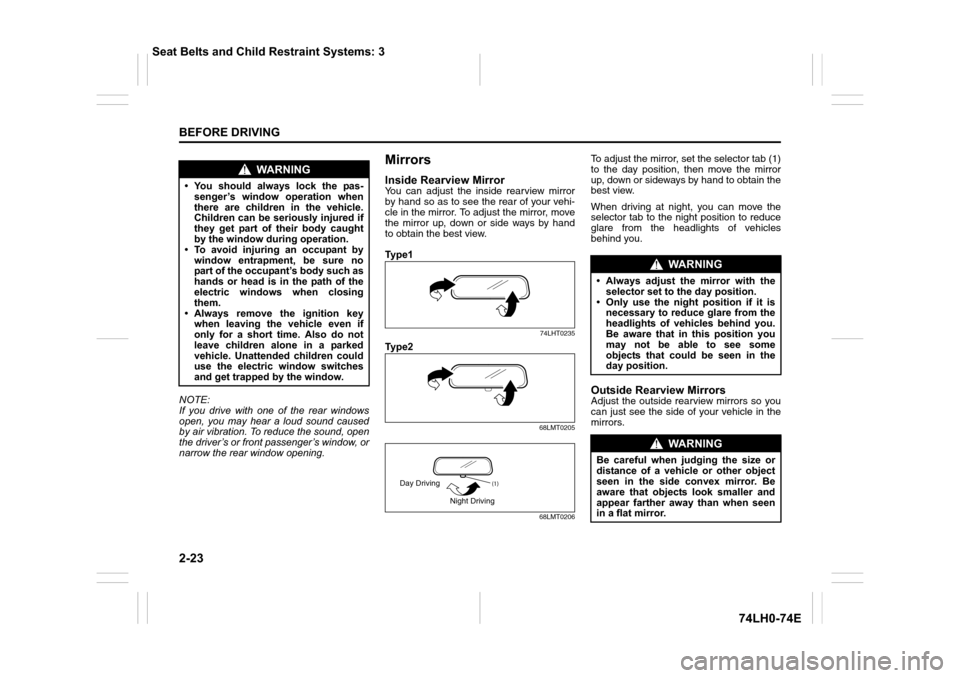
Inside Rearview MirrorYou can adjust the inside rearview mirror
by hand so as to see the rear of your vehi-
cle in the mirror. To adjust the mirror, move
the mirror up, down or side ways by hand
to obtain the best view.
Ty p e 1
74LHT0235
Ty p e 2
68LMT0205
68LMT0206
To adjust the mirror, set the selector tab (1)
to the day position, then move the mirror
up, down or sideways by hand to obtain the
best view.
When driving at night, you can move the
selector tab to the night position to reduce
glare from the headlights of vehicles
behind you.
Outside Rearview MirrorsAdjust the outside rearview mirrors so you
can just see the side of your vehicle in the
mirrors.
WA R N I N G
• You should always lock the pas-
senger’s window operation when
there are children in the vehicle.
Children can be seriously injured if
they get part of their body caught
by the window during operation.
• To avoid injuring an occupant by
window entrapment, be sure no
part of the occupant’s body such as
hands or head is in the path of the
electric windows when closing
them.
• Always remove the ignition key
when leaving the vehicle even if
only for a short time. Also do not
leave children alone in a parked
vehicle. Unattended children could
use the electric window switches
and get trapped by the window.
(1)Day Driving
Night Driving
WA R N I N G
• Always adjust the mirror with the
selector set to the day position.
• Only use the night position if it is
necessary to reduce glare from the
headlights of vehicles behind you.
Be aware that in this position you
may not be able to see some
objects that could be seen in the
day position.
WA R N I N G
Be careful when judging the size or
distance of a vehicle or other object
seen in the side convex mirror. Be
aware that objects look smaller and
appear farther away than when seen
in a flat mirror.
Seat Belts and Child Restraint Systems: 3
Page 43 of 336
2-24
BEFORE DRIVING
74LH0-74E
Ty p e 1
75J003
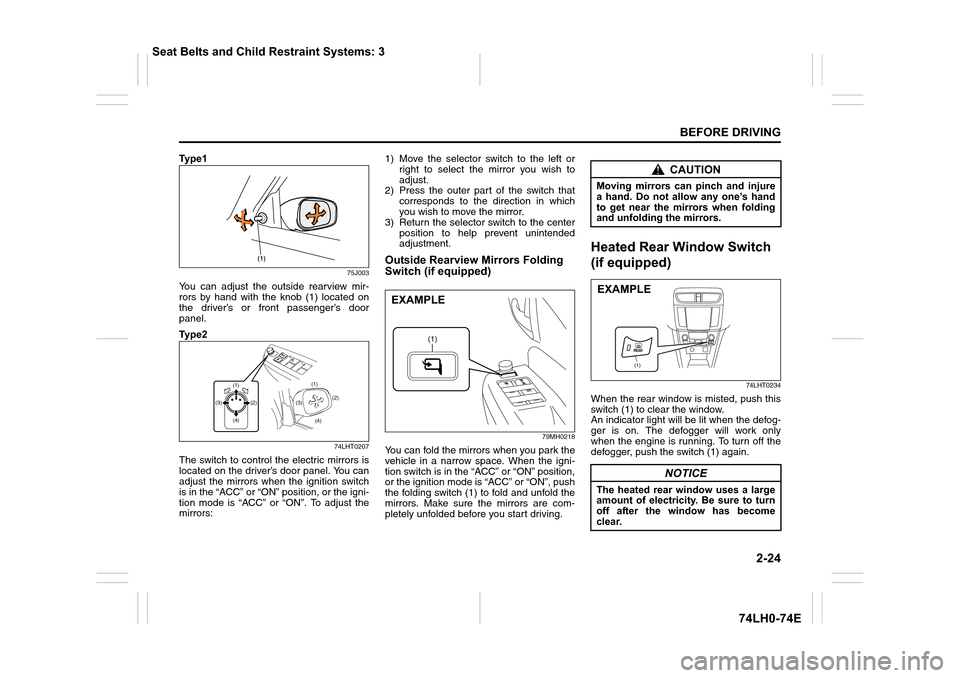
You can adjust the outside rearview mir-
rors by hand with the knob (1) located on
the driver’s or front passenger’s door
panel.
Ty p e 2
74LHT0207
The switch to control the electric mirrors is
located on the driver’s door panel. You can
adjust the mirrors when the ignition switch
is in the “ACC” or “ON” position, or the igni-
tion mode is “ACC” or “ON”. To adjust the
mirrors:1) Move the selector switch to the left or
right to select the mirror you wish to
adjust.
2) Press the outer part of the switch that
corresponds to the direction in which
you wish to move the mirror.
3) Return the selector switch to the center
position to help prevent unintended
adjustment.
Outside Rearview Mirrors Folding
Switch (if equipped)
79MH0218
You can fold the mirrors when you park the
vehicle in a narrow space. When the igni-
tion switch is in the “ACC” or “ON” position,
or the ignition mode is “ACC” or “ON”, push
the folding switch (1) to fold and unfold the
mirrors. Make sure the mirrors are com-
pletely unfolded before you start driving.
Heated Rear Window Switch
(if equipped)
74LHT0234
When the rear window is misted, push this
switch (1) to clear the window.
An indicator light will be lit when the defog-
ger is on. The defogger will work only
when the engine is running. To turn off the
defogger, push the switch (1) again.
(1)(1)
(4) (4)(2)(2)
(3)(3)
(1)
EXAMPLE
CAUTION
Moving mirrors can pinch and injure
a hand. Do not allow any one’s hand
to get near the mirrors when folding
and unfolding the mirrors.
NOTICE
The heated rear window uses a large
amount of electricity. Be sure to turn
off after the window has become
clear.
(1)
EXAMPLE
Seat Belts and Child Restraint Systems: 3
Page 51 of 336
2-32
BEFORE DRIVING
74LH0-74E
NOTE:
The word “CENTER” is molded on the
buckle and latch plate of the center lap
belt. The buckles are designed so a latch
plate can not be inserted into the wrong
buckle.
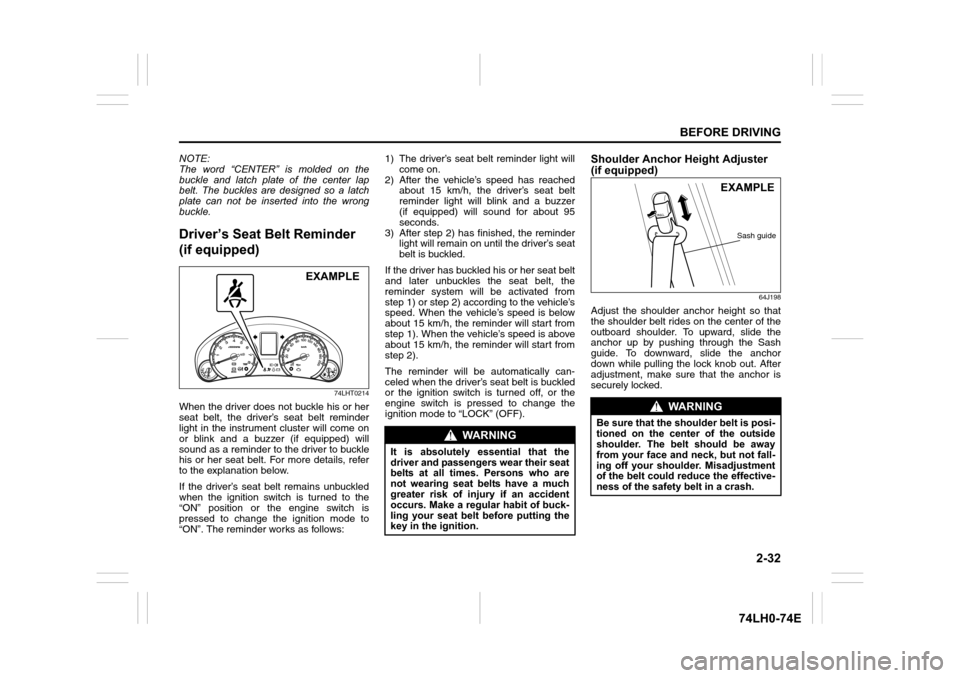
Driver’s Seat Belt Reminder
(if equipped)
74LHT0214
When the driver does not buckle his or her
seat belt, the driver’s seat belt reminder
light in the instrument cluster will come on
or blink and a buzzer (if equipped) will
sound as a reminder to the driver to buckle
his or her seat belt. For more details, refer
to the explanation below.
If the driver’s seat belt remains unbuckled
when the ignition switch is turned to the
“ON” position or the engine switch is
pressed to change the ignition mode to
“ON”. The reminder works as follows:1) The driver’s seat belt reminder light will
come on.
2) After the vehicle’s speed has reached
about 15 km/h, the driver’s seat belt
reminder light will blink and a buzzer
(if equipped) will sound for about 95
seconds.
3) After step 2) has finished, the reminder
light will remain on until the driver’s seat
belt is buckled.
If the driver has buckled his or her seat belt
and later unbuckles the seat belt, the
reminder system will be activated from
step 1) or step 2) according to the vehicle’s
speed. When the vehicle’s speed is below
about 15 km/h, the reminder will start from
step 1). When the vehicle’s speed is above
about 15 km/h, the reminder will start from
step 2).
The reminder will be automatically can-
celed when the driver’s seat belt is buckled
or the ignition switch is turned off, or the
engine switch is pressed to change the
ignition mode to “LOCK” (OFF).
Shoulder Anchor Height Adjuster
(if equipped)
64J198
Adjust the shoulder anchor height so that
the shoulder belt rides on the center of the
outboard shoulder. To upward, slide the
anchor up by pushing through the Sash
guide. To downward, slide the anchor
down while pulling the lock knob out. After
adjustment, make sure that the anchor is
securely locked.
EXAMPLE
WA R N I N G
It is absolutely essential that the
driver and passengers wear their seat
belts at all times. Persons who are
not wearing seat belts have a much
greater risk of injury if an accident
occurs. Make a regular habit of buck-
ling your seat belt before putting the
key in the ignition.
WA R N I N G
Be sure that the shoulder belt is posi-
tioned on the center of the outside
shoulder. The belt should be away
from your face and neck, but not fall-
ing off your shoulder. Misadjustment
of the belt could reduce the effective-
ness of the safety belt in a crash.
EXAMPLE
Sash guide