TOYOTA AVALON 2003 XX20 / 2.G Navigation Manual
Manufacturer: TOYOTA, Model Year: 2003, Model line: AVALON, Model: TOYOTA AVALON 2003 XX20 / 2.GPages: 122, PDF Size: 3.9 MB
Page 81 of 122
AVALON_Navi_U (L/O 0205)
732003 AVALON NAVI (OM41403U)
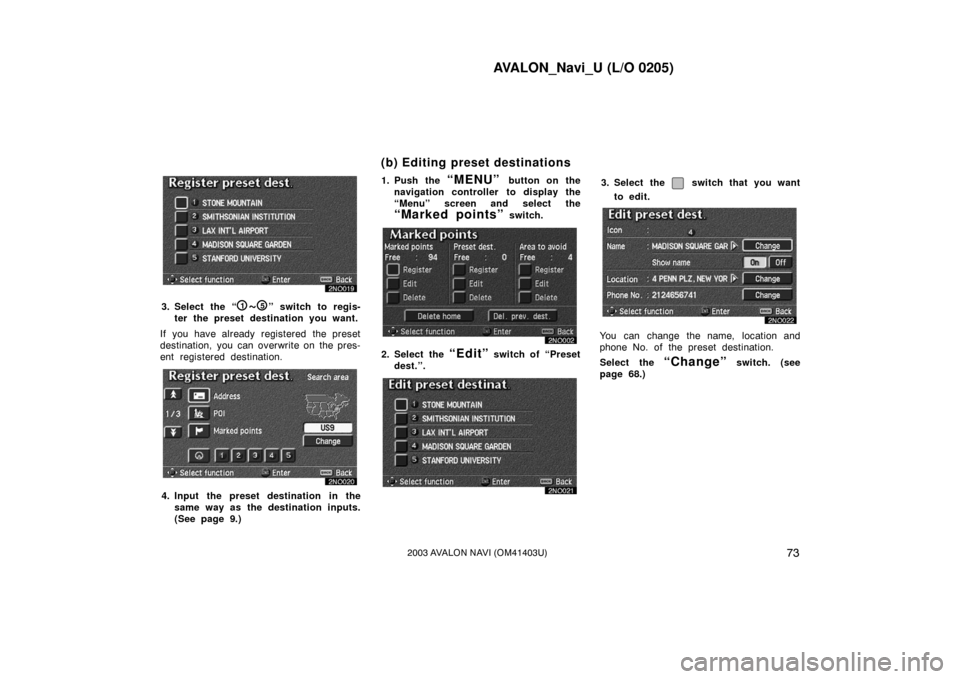
3. Select the “1~5” switch to regis-
ter the preset destination you want.
If you have already registered the preset
destination, you can overwrite on the pres-
ent registered destination.
4. Input the preset destination in the same way as the destination inputs.
(See page 9.) 1. Push the
“MENU” button on the
navigation controller to display the
“Menu” screen and select the
“Marked points” switch.
2. Select the “Edit” switch of “Preset
dest.”.
3. Select the switch that you want
to edit.
You can change the name, location and
phone No. of the preset destination.
Select the
“Change” switch. (see
page 68.)
(b) Editing preset destinations
Page 82 of 122
AVALON_Navi_U (L/O 0205)
742003 AVALON NAVI (OM41403U)
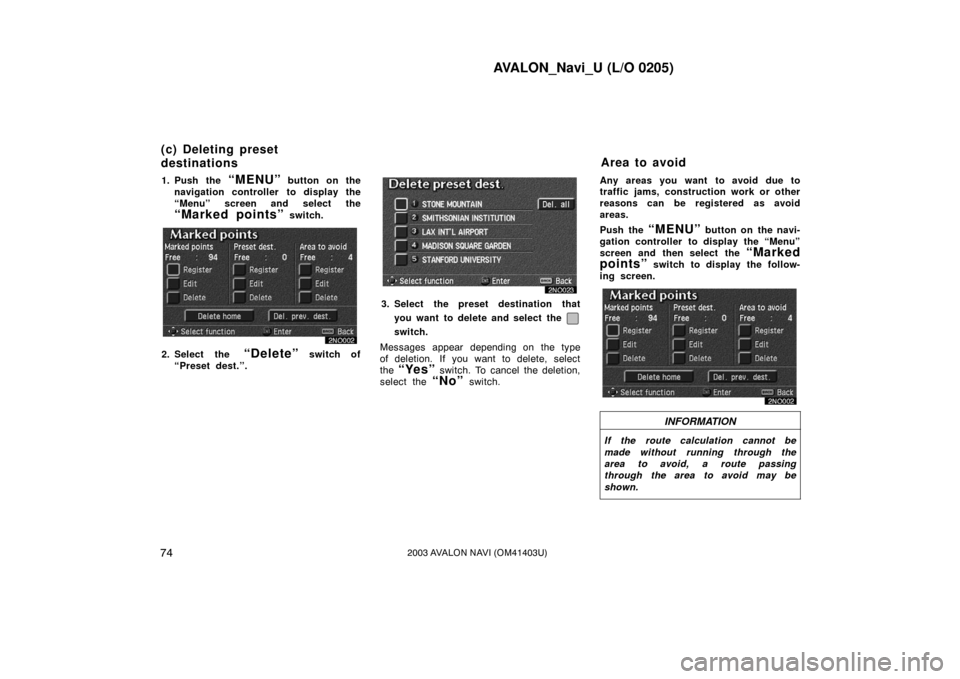
1. Push the “MENU” button on the
navigation controller to display the
“Menu” screen and select the
“Marked points” switch.
2. Select the “Delete” switch of
“Preset dest.”.
3. Select the preset destination that
you want to delete and select the
switch.
Messages appear depending on the type
of deletion. If you want to delete, select
the
“Yes” switch. To cancel the deletion,
select the
“No” switch. Any areas you want to avoid due to
traffic jams, construction work or other
reasons can be registered as avoid
areas.
Push the
“MENU” button on the navi-
gation controller to display the “Menu”
screen and then select the
“Marked
points”
switch to display the follow-
ing screen.
INFORMATION
If the route calculation cannot be
made without running through the
area to avoid, a route passing
through the area to avoid may be
shown.
(c) Deleting preset
destinations Area to avoid
Page 83 of 122
AVALON_Navi_U (L/O 0205)
752003 AVALON NAVI (OM41403U)
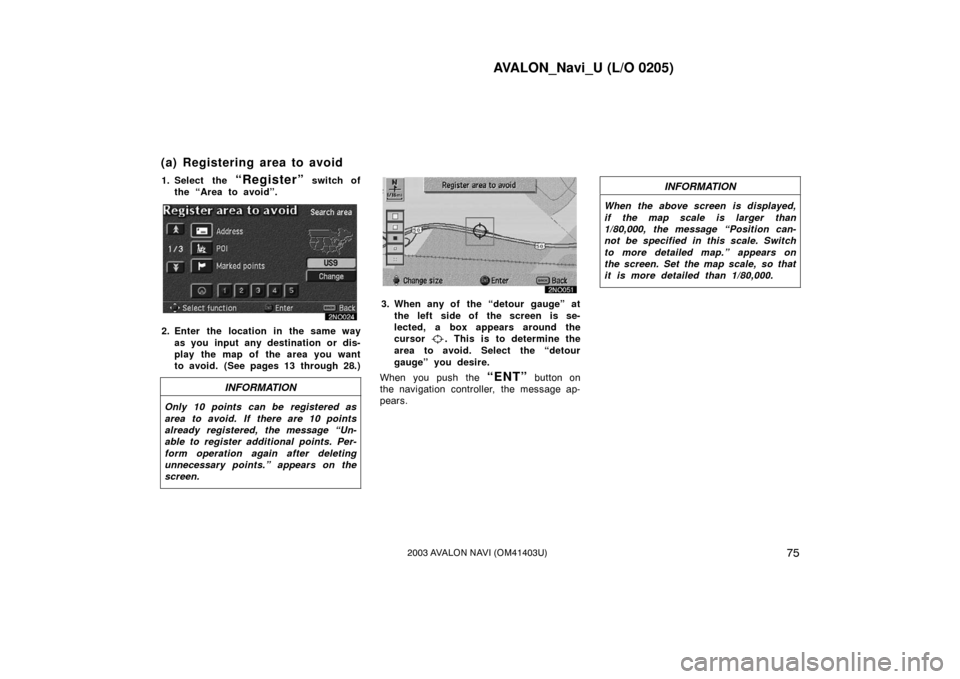
1. Select the “Register” switch of
the “Area to avoid”.
2. Enter the location in the same way
as you input any destination or dis-
play the map of the area you want
to avoid. (See pages 13 through 28.)
INFORMATION
Only 10 points can be registered as
area to avoid. If there are 10 points
already registered, the message “Un-
able to register additional points. Per-
form operation again after deleting
unnecessary points.” appears on the
screen.
3. When any of the “detour gauge” atthe left side of the screen is se-
lected, a box appears around the
cursor
. This is to determine the
area to avoid. Select the “detour
gauge” you desire.
When you push the
“ENT” button on
the navigation controller, the message ap-
pears.
INFORMATION
When the above screen is displayed,
if the map scale is larger than
1/80,000, the message “Position can-
not be specified in this scale. Switch
to more detailed map.” appears on
the screen. Set the map scale, so that
it is more detailed than 1/80,000.
(a) Registering area to avoid
Page 84 of 122
AVALON_Navi_U (L/O 0205)
762003 AVALON NAVI (OM41403U)
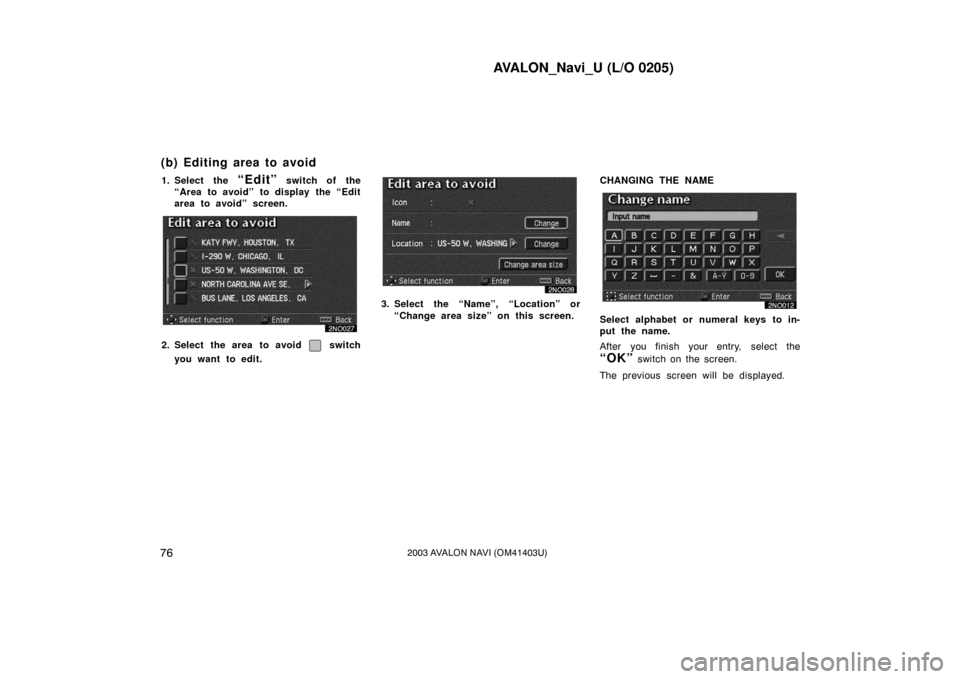
1. Select the “Edit” switch of the
“Area to avoid” to display the “Edit
area to avoid” screen.
2. Select the area to avoid switch
you want to edit.
3. Select the “Name”, “Location” or “Change area size” on this screen. CHANGING THE NAME
Select alphabet or numeral keys to in-
put the name.
After you finish your entry, select the
“OK” switch on the screen.
The previous screen will be displayed.
(b) Editing area to avoid
Page 85 of 122
AVALON_Navi_U (L/O 0205)
772003 AVALON NAVI (OM41403U)
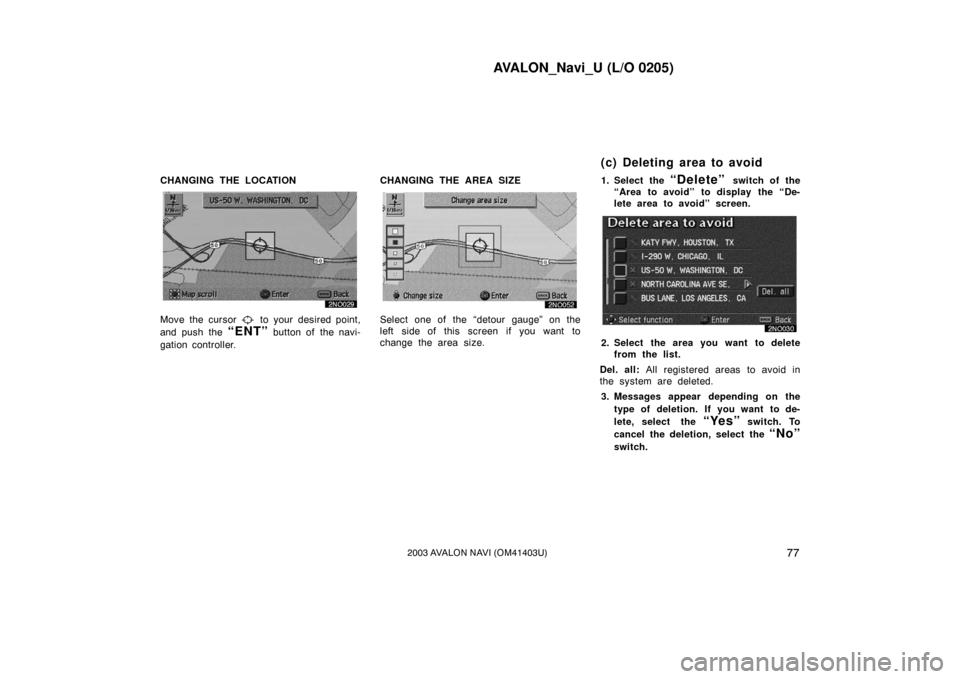
CHANGING THE LOCATION
Move the cursor to your desired point,
and push the
“ENT” button of the navi-
gation controller. CHANGING THE AREA SIZE
Select one of the “detour gauge” on the
left side of this screen if you want to
change the area size.
1. Select the
“Delete” switch of the
“Area to avoid” to display the “De-
lete area to avoid” screen.
2. Select the area you want to delete from the list.
Del. all: All registered areas to avoid in
the system are deleted.
3. Messages appear depending on the type of deletion. If you want to de-
lete, select the
“Yes” switch. To
cancel the deletion, select the
“No”
switch.
(c) Deleting area to avoid
Page 86 of 122
AVALON_Navi_U (L/O 0205)
782003 AVALON NAVI (OM41403U)
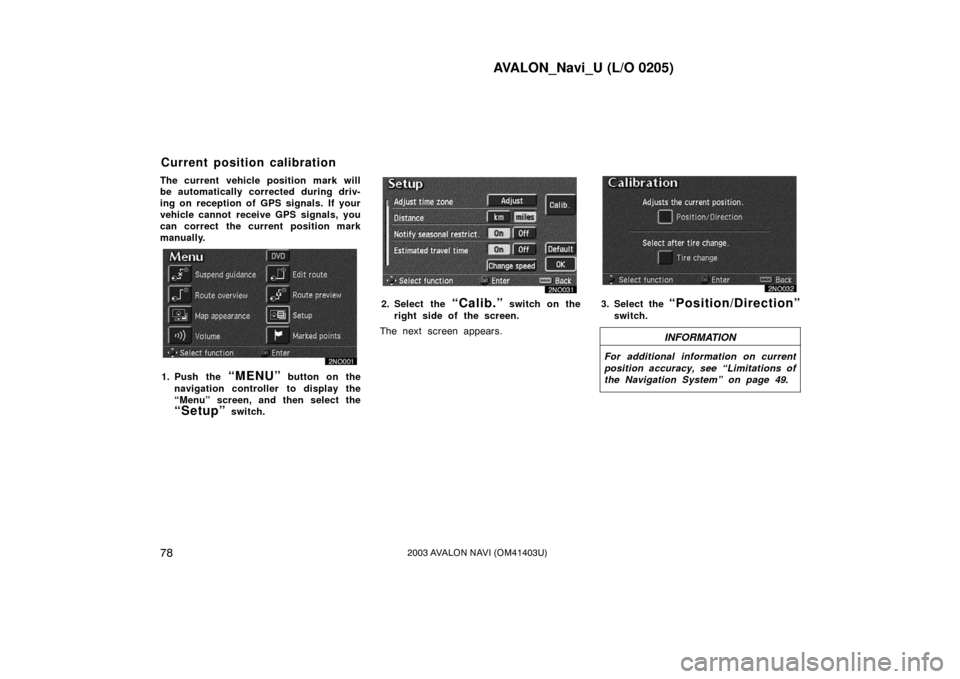
The current vehicle position mark will
be automatically corrected during driv-
ing on reception of GPS signals. If your
vehicle cannot receive GPS signals, you
can correct the current position mark
manually.
1. Push the “MENU” button on the
navigation controller to display the
“Menu” screen, and then select the
“Setup” switch.
2. Select the “Calib.” switch on the
right side of the screen.
The next screen appears.3. Select the “Position/Direction”
switch.
INFORMATION
For additional information on current
position accuracy, see “Limitations of
the Navigation System” on page 49.
Current position calibration
Page 87 of 122
AVALON_Navi_U (L/O 0205)
792003 AVALON NAVI (OM41403U)
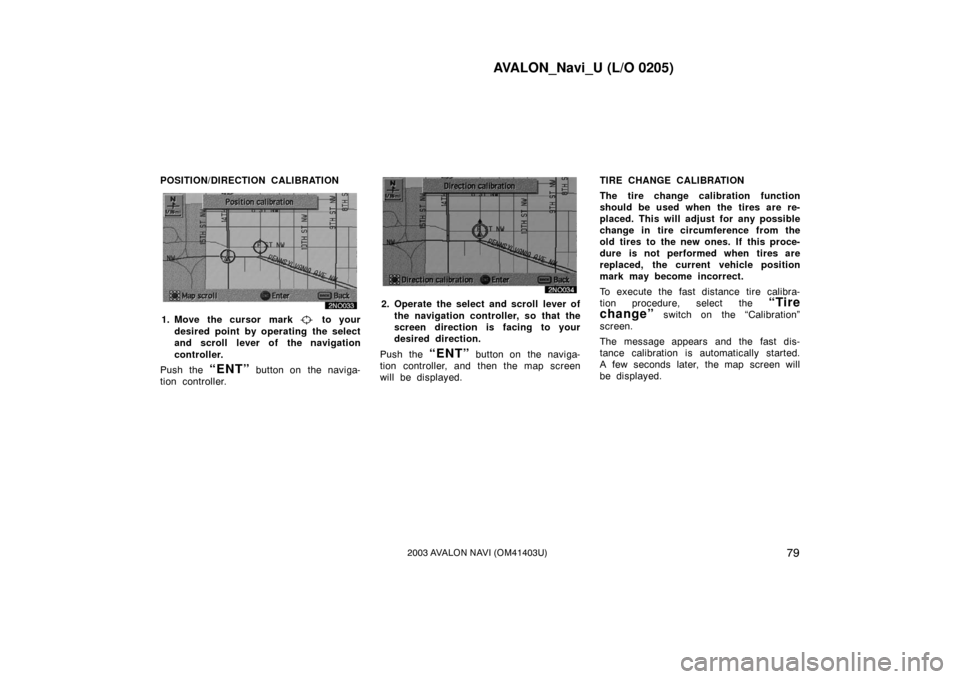
POSITION/DIRECTION CALIBRATION
1. Move the cursor mark to your
desired point by operating the select
and scroll lever of the navigation
controller.
Push the
“ENT” button on the naviga-
tion controller.
2. Operate the select and scroll lever of
the navigation controller, so that the
screen direction is facing to your
desired direction.
Push the
“ENT” button on the naviga-
tion controller, and then the map screen
will be displayed. TIRE CHANGE CALIBRATION
The tire change calibration function
should be used when the tires are re-
placed. This will adjust for any possible
change in tire circumference from the
old tires to the new ones. If this proce-
dure is not performed when tires are
replaced, the current vehicle position
mark may become incorrect.
To execute the fast distance tire calibra-
tion procedure, select the
“Tire
change”
switch on the “Calibration”
screen.
The message appears and the fast dis-
tance calibration is automatically started.
A few seconds later, the map screen will
be displayed.
Page 88 of 122
AVALON_Navi_U (L/O 0205)
802003 AVALON NAVI (OM41403U)
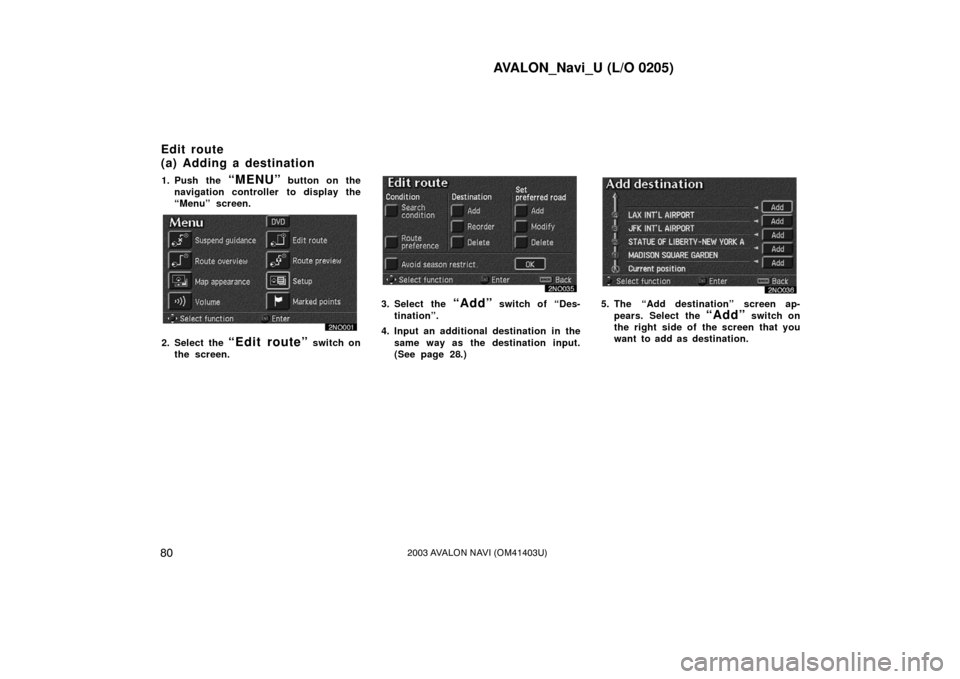
1. Push the “MENU” button on the
navigation controller to display the
“Menu” screen.
2. Select the “Edit route” switch on
the screen.
3. Select the “Add” switch of “Des-
tination”.
4. Input an additional destination in the same way as the destination input.
(See page 28.)5. The “Add destination” screen ap-pears. Select the
“Add” switch on
the right side of the screen that you
want to add as destination.
Edit route
(a) Adding a destination
Page 89 of 122
AVALON_Navi_U (L/O 0205)
812003 AVALON NAVI (OM41403U)
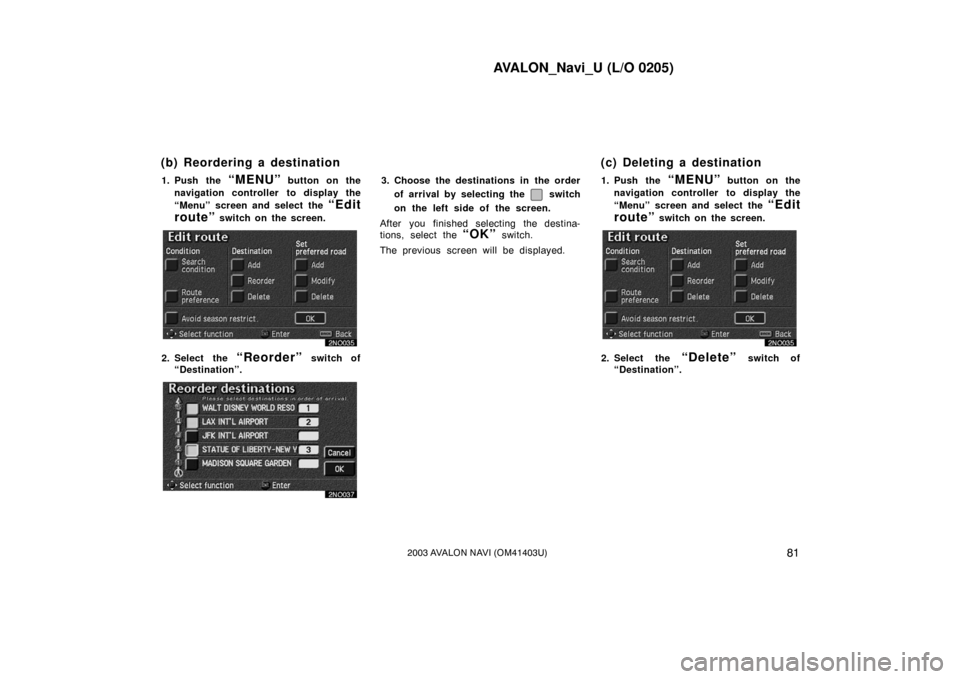
1. Push the “MENU” button on the
navigation controller to display the
“Menu” screen and select the
“Edit
route”
switch on the screen.
2. Select the “Reorder” switch of
“Destination”.
3. Choose the destinations in the order
of arrival by selecting the
switch
on the left side of the screen.
After you finished selecting the destina-
tions, select the
“OK” switch.
The previous screen will be displayed. 1. Push the
“MENU” button on the
navigation controller to display the
“Menu” screen and select the
“Edit
route”
switch on the screen.
2. Select the “Delete” switch of
“Destination”.
(b) Reordering a destination (c) Deleting a destination
Page 90 of 122
AVALON_Navi_U (L/O 0205)
822003 AVALON NAVI (OM41403U)
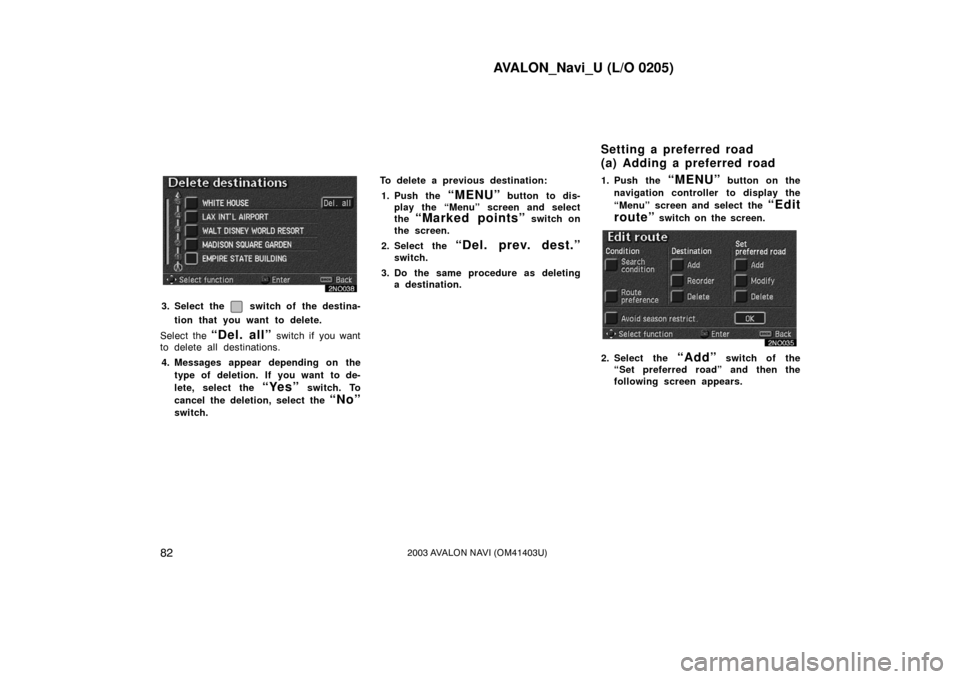
3. Select the switch of the destina-
tion that you want to delete.
Select the
“Del. all” switch if you want
to delete all destinations.
4. Messages appear depending on the type of deletion. If you want to de-
lete, select the
“Yes” switch. To
cancel the deletion, select the
“No”
switch. To delete a previous destination:
1. Push the
“MENU” button to dis-
play the “Menu” screen and select
the
“Marked points” switch on
the screen.
2. Select the
“Del. prev. dest.”
switch.
3. Do the same procedure as deleting a destination. 1. Push the
“MENU” button on the
navigation controller to display the
“Menu” screen and select the
“Edit
route”
switch on the screen.
2. Select the “Add” switch of the
“Set preferred road” and then the
following screen appears.
Setting a preferred road
(a) Adding a preferred road