TOYOTA AVENSIS 2018 Owners Manual
Manufacturer: TOYOTA, Model Year: 2018, Model line: AVENSIS, Model: TOYOTA AVENSIS 2018Pages: 660, PDF Size: 63.16 MB
Page 321 of 660
321
5
5-1. Basic Operations
Audio system
AVENSIS_OM_OM20C79E_(EE)
Steering wheel audio switches
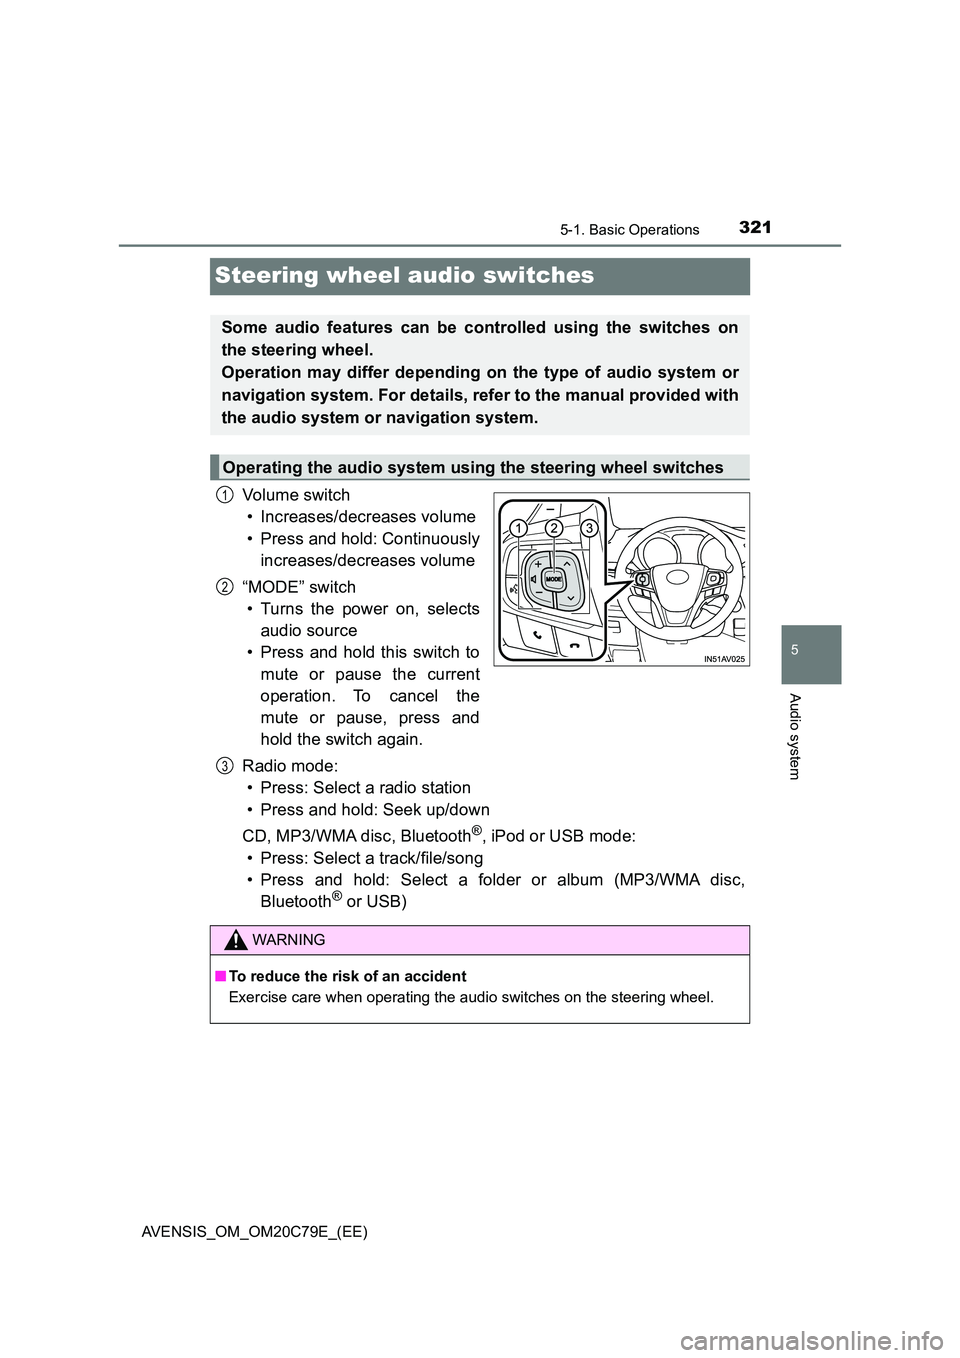
Vo lu m e swi tc h
• Increases/decreases volume
• Press and hold: Continuously
increases/decreases volume
“MODE” switch
• Turns the power on, selects
audio source
• Press and hold this switch to
mute or pause the current
operation. To cancel the
mute or pause, press and
hold the switch again.
Radio mode:
• Press: Select a radio station
• Press and hold: Seek up/down
CD, MP3/WMA disc, Bluetooth®, iPod or USB mode:
• Press: Select a track/file/song
• Press and hold: Select a folder or album (MP3/WMA disc,
Bluetooth® or USB)
Some audio features can be controlled using the switches on
the steering wheel.
Operation may differ depending on the type of audio system or
navigation system. For details, refer to the manual provided with
the audio system or navigation system.
Operating the audio system using the steering wheel switches
1
2
WARNING
■ To reduce the risk of an accident
Exercise care when operating the audio switches on the steering wheel.
3
Page 322 of 660
3225-1. Basic Operations
AVENSIS_OM_OM20C79E_(EE)
AUX port/USB port
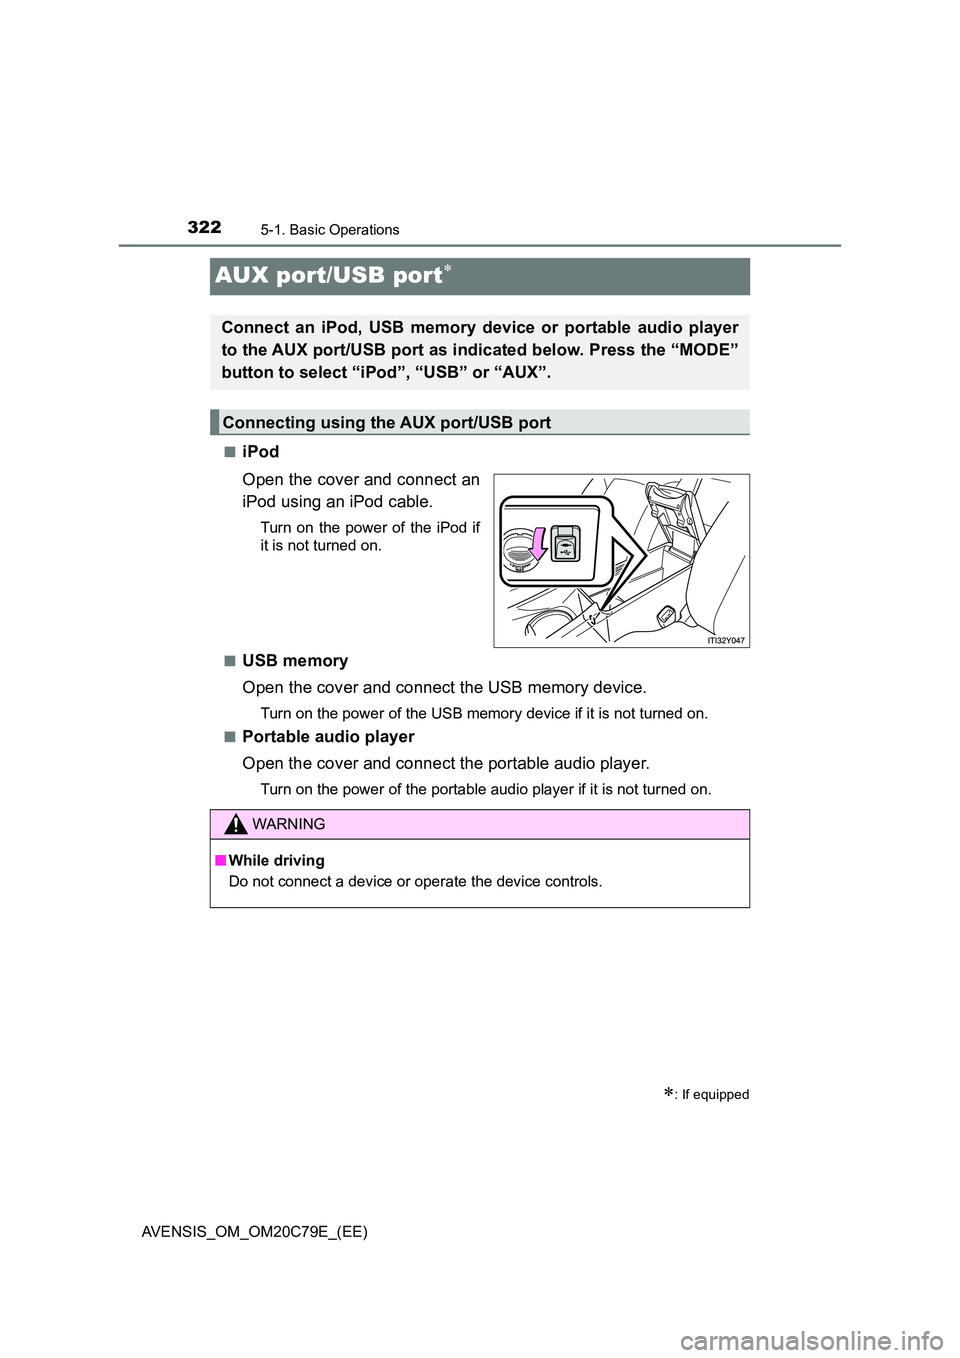
■iPod
Open the cover and connect an
iPod using an iPod cable.
Turn on the power of the iPod if
it is not turned on.
■USB memory
Open the cover and connect the USB memory device.
Turn on the power of the USB memory device if it is not turned on.
■Portable audio player
Open the cover and connect the portable audio player.
Turn on the power of the portable audio player if it is not turned on.
: If equipped
Connect an iPod, USB memory device or portable audio player
to the AUX port/USB port as indicated below. Press the “MODE”
button to select “iPod”, “USB” or “AUX”.
Connecting using the AUX port/USB port
WARNING
■ While driving
Do not connect a device or operate the device controls.
Page 323 of 660
323
5
5-2. Using the audio system
Audio system
AVENSIS_OM_OM20C79E_(EE)
Optimal use of the audio system
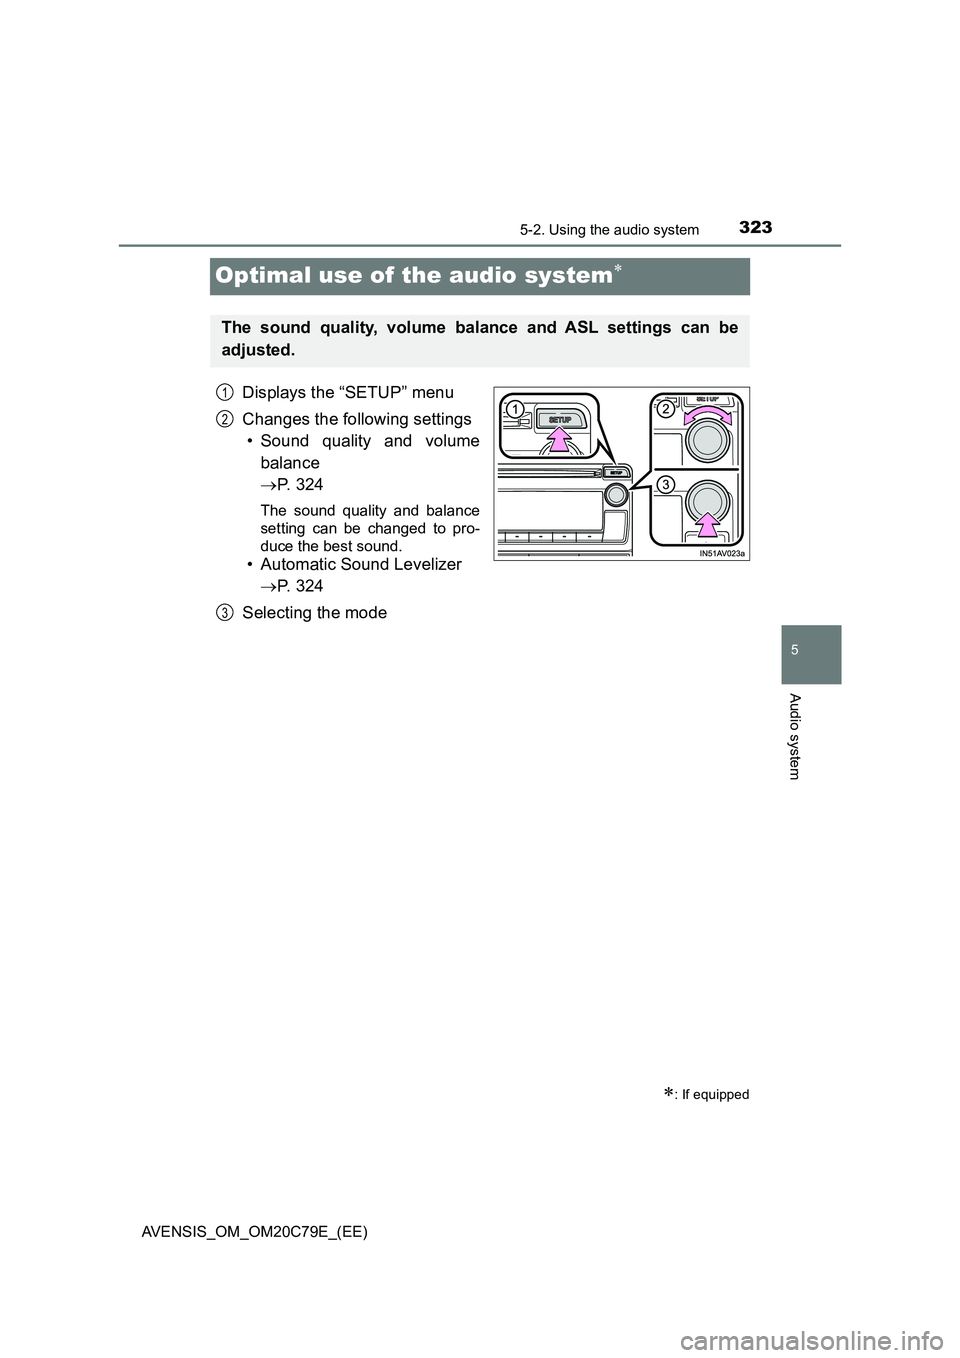
Displays the “SETUP” menu
Changes the following settings
• Sound quality and volume
balance
P. 3 2 4
The sound quality and balance
setting can be changed to pro-
duce the best sound.
• Automatic Sound Levelizer
P. 3 2 4
Selecting the mode
: If equipped
The sound quality, volume balance and ASL settings can be
adjusted.
1
2
3
Page 324 of 660
3245-2. Using the audio system
AVENSIS_OM_OM20C79E_(EE)■
Changing sound quality modes
Press the “SETUP” button.
Turn the tune/scroll knob to select “Sound Setting”.
Press the knob.
Turn the knob as corresponds to the desired mode.
“BASS”, “TREBLE”, “FADER”, “BALANCE”, or “ASL” can be selected.
Press the knob.
■Adjusting sound quality
Turning the tune/scroll knob adjusts the level.
*: The sound quality level is adjusted individually in each audio mode.
■
Adjusting the Automatic Sound Levelizer (ASL) (if equipped)
When ASL is selected, turning the tune/scroll knob to the right
changes the amount of ASL in the order of LOW, MID and HIGH.
Turning the knob to the left turns ASL off.
ASL automatically adjusts the volume and tone quality according to
vehicle speed.
Using the audio control function
1
2
3
4
5
Sound
quality modeMode
displayedLevelTurn to the
leftTurn to the
right
Bass*“BASS”-5 to 5LowHighTreble*“TREBLE”-5 to 5
Front/rear volume
balance“FADER”F7 to R7Shifts to rearShifts to front
Left/right
volume
balance
“BALANCE”L7 to R7Shifts to leftShifts to right
Page 325 of 660
325
5
5-3. Using the radio
Audio system
AVENSIS_OM_OM20C79E_(EE)
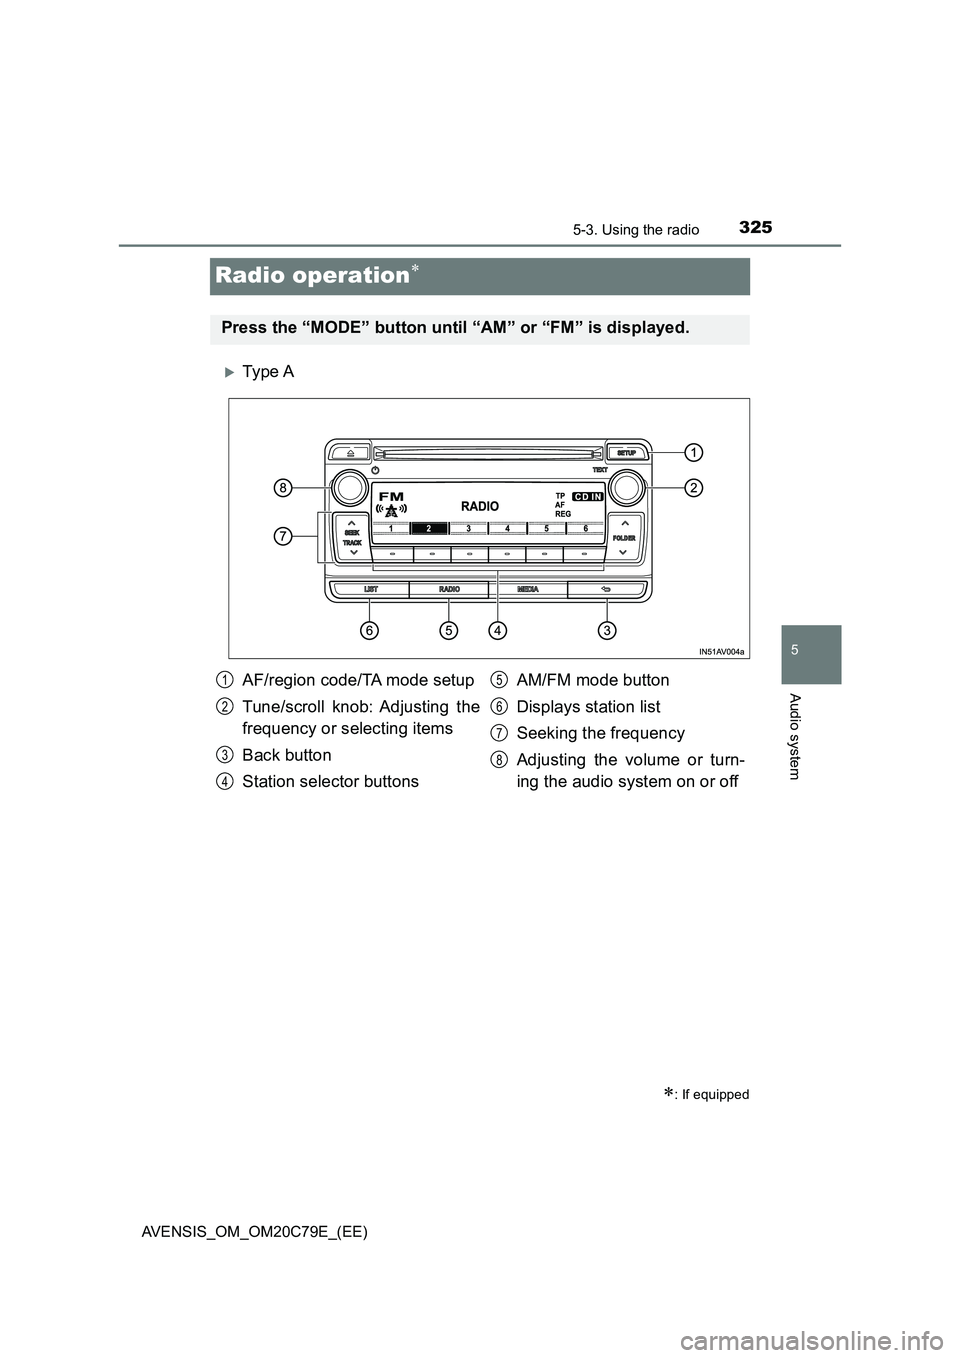
Radio operation
Ty pe A
: If equipped
Press the “MODE” button until “AM” or “FM” is displayed.
AF/region code/TA mode setup
Tune/scroll knob: Adjusting the
frequency or selecting items
Back button
Station selector buttonsAM/FM mode button
Displays station list
Seeking the frequency
Adjusting the volume or turn-
ing the audio system on or off1
2
3
4
5
6
7
8
Page 326 of 660
3265-3. Using the radio
AVENSIS_OM_OM20C79E_(EE)
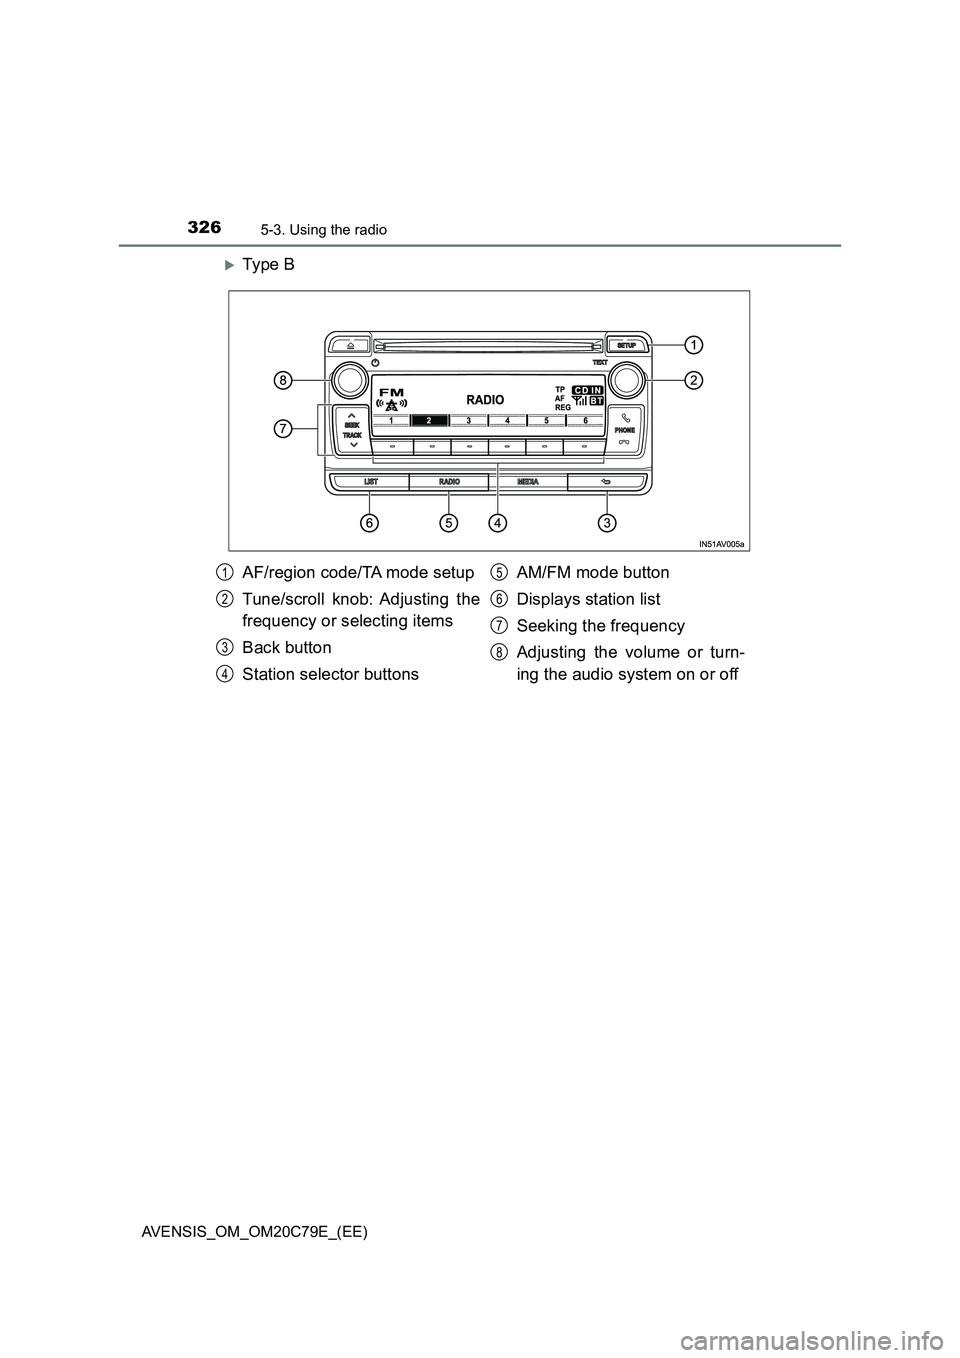
Ty pe B
AF/region code/TA mode setup
Tune/scroll knob: Adjusting the
frequency or selecting items
Back button
Station selector buttonsAM/FM mode button
Displays station list
Seeking the frequency
Adjusting the volume or turn-
ing the audio system on or off1
2
3
4
5
6
7
8
Page 327 of 660
3275-3. Using the radio
5
Audio system
AVENSIS_OM_OM20C79E_(EE)
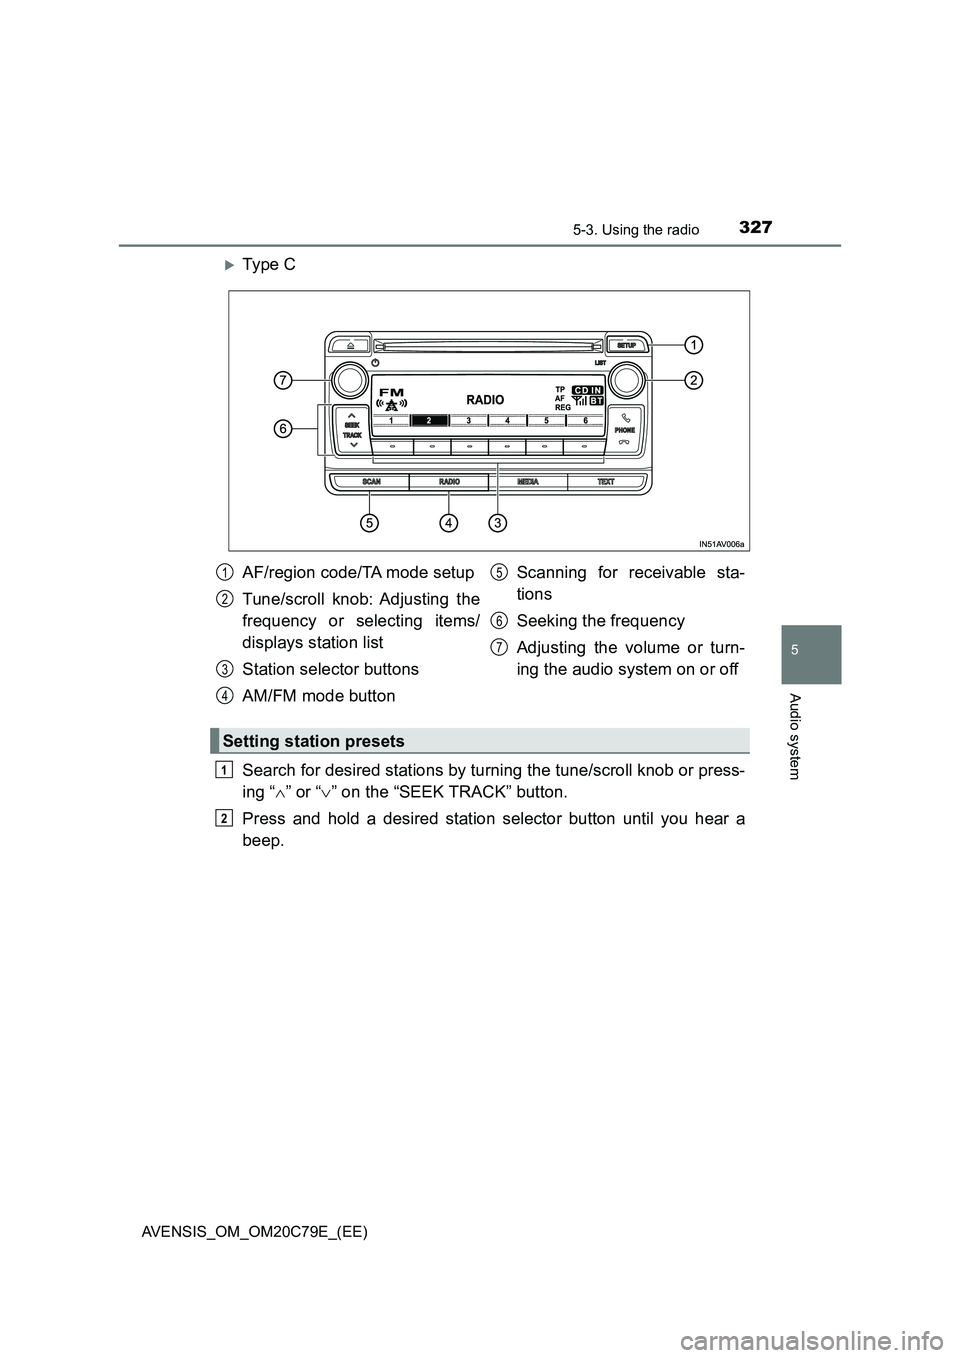
Ty pe C
Search for desired stations by turning the tune/scroll knob or press-
ing “” or “” on the “SEEK TRACK” button.
Press and hold a desired station selector button until you hear a
beep.
AF/region code/TA mode setup
Tune/scroll knob: Adjusting the
frequency or selecting items/
displays station list
Station selector buttons
AM/FM mode buttonScanning for receivable sta-
tions
Seeking the frequency
Adjusting the volume or turn-
ing the audio system on or off1
2
3
4
5
6
7
Setting station presets
1
2
Page 328 of 660
3285-3. Using the radio
AVENSIS_OM_OM20C79E_(EE)
■Scanning the preset radio stations
Press and hold the “SCAN” button until you hear a beep.
When the desired station is reached, press the button once
again.
■Scanning all radio stations within range
Press the “SCAN” button.
All stations with reception will be played for 5 seconds each.
When the desired station is reached, press the button once
again.
■Updating the station list
Press the “LIST” button (type A and B) or the tune/scroll knob
(type C).
The station list will be displayed.
Press [UPDATE] to update the list.
“Updating” is displayed while the searching is in process, and then avail-
able stations will be listed on the display.
To cancel the updating process, press the back button (type A and B) or
[BACK] (type C).
■Selecting a station from the station list
Press the “LIST” button (type A and B) or the tune/scroll knob
(type C).
The station list will be displayed.
Turn the tune/scroll knob to select a station.
Press the knob to tune in the station.
To return to the previous display, press the back button (type A and B)
or [BACK] (type C).
Scanning radio stations (type C only)
Using the station list
1
2
1
2
1
2
1
2
3
Page 329 of 660
3295-3. Using the radio
5
Audio system
AVENSIS_OM_OM20C79E_(EE)
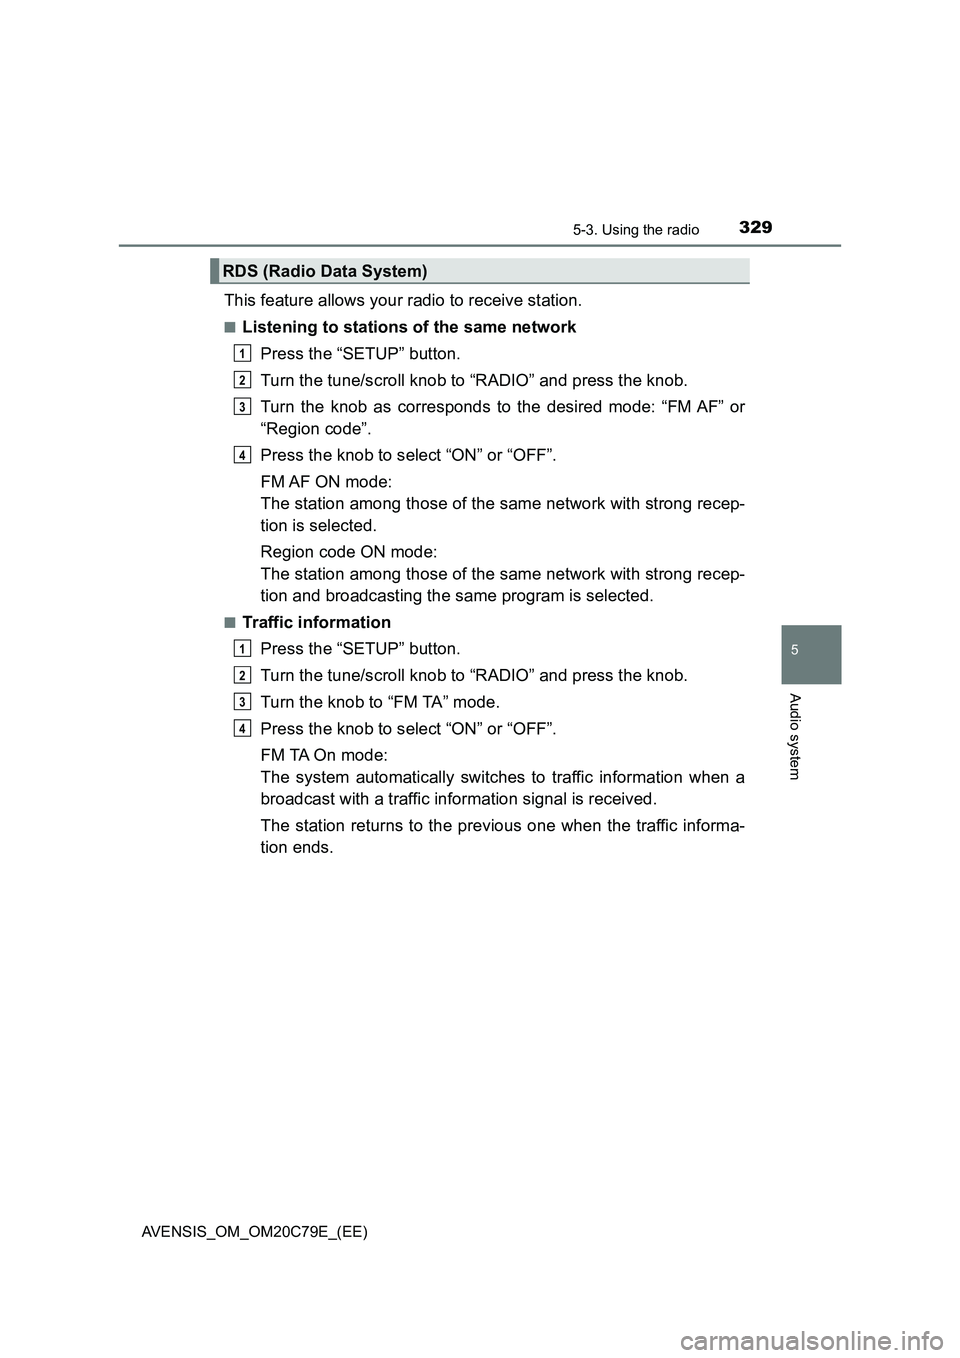
This feature allows your radio to receive station.
■Listening to stations of the same network
Press the “SETUP” button.
Turn the tune/scroll knob to “RADIO” and press the knob.
Turn the knob as corresponds to the desired mode: “FM AF” or
“Region code”.
Press the knob to select “ON” or “OFF”.
FM AF ON mode:
The station among those of the same network with strong recep-
tion is selected.
Region code ON mode:
The station among those of the same network with strong recep-
tion and broadcasting the same program is selected.
■Traffic information
Press the “SETUP” button.
Turn the tune/scroll knob to “RADIO” and press the knob.
Turn the knob to “FM TA” mode.
Press the knob to select “ON” or “OFF”.
FM TA On mode:
The system automatically switches to traffic information when a
broadcast with a traffic information signal is received.
The station returns to the previous one when the traffic informa-
tion ends.
RDS (Radio Data System)
1
2
3
4
1
2
3
4
Page 330 of 660
3305-3. Using the radio
AVENSIS_OM_OM20C79E_(EE)
■EON (Enhanced Other Network) system (for traffic announcement func-
tion)
If the RDS station (with EON data) you are listening to is not broadcasting a
traffic information program and the audio system is in the TA (traffic
announcement) mode, the radio will be switched automatically to a station
broadcasting a traffic information program in the EON AF list when traffic
information begins.
■When the battery is disconnected
Stations presets are erased.
■Reception sensitivity
●Maintaining perfect radio reception at all times is difficult due to the continu-
ally changing position of the antenna, differences in signal strength and sur-
rounding objects, such as trains, transmitters, etc.
●Sedan: The radio antenna is mounted inside the rear window. To maintain
clear radio reception, do not attach metallic window tinting or other metallic
objects to the antenna wire mounted inside the rear window.
●Short pole type antenna: The radio antennas are mounted inside the rear
quarter window and on the rear roof. To maintain clear radio reception, do
not attach metallic window tinting or other metallic objects to the antenna
wire mounted inside the rear quarter window. The rear roof antenna can be
removed from the base by turning.
●Shark fin type antenna: The radio antenna is mounted on the rear roof.
■Digital Audio Broadcast (DAB) radio
The optional radio antenna and tuner are necessary for the use of Digital
Audio Broadcast (DAB) radio.