sensor TOYOTA BZ4X 2022 (in English) Owner's Manual
[x] Cancel search | Manufacturer: TOYOTA, Model Year: 2022, Model line: BZ4X, Model: TOYOTA BZ4X 2022Pages: 674, PDF Size: 120.02 MB
Page 203 of 674
201
4
Owners Manual_Europe_M42D76_en
4-2. Opening, closing and locking the doors
Before driving
NOTICE
●Do not apply excessive force to the back door while the power back
door is operating.
●Take care not to damage the sen-
sors (installed on the right and left edges of the power back door) with a knife or other sharp object. If the
sensor is disconnected, the power back door will not close automati-cally.
■Close & lock function
When closing the power back door
using the close & lock function, a dif- ferent buzzer than the normal one will sound before the operation begins.
To check that the operation has started correctly, check that a different buzzer than the normal one has
sounded.
Additionally, when the power back door is fully closed and locked, opera-
tion signals will indicate that all of the doors have been locked.
Before leaving the vehicle, make sure
that the operation signals have oper- ated and that all of the doors are locked.
■Hands Free Power Back Door (if equipped) precautions
The kick sensor is located behind lower center part of the rear bumper. Observe the following to ensure that
the Hands Free Power Back Door function operates properly:
●Keep the lower center part of the rear bumper clean at all times. If the lower center part of the rear bumper
is dirty or covered with snow, the kick sensor may not operate. In this situation, clean off the dirt or snow,
move the vehicle from the current position and then check if the kick sensor operates. If it does not oper-
ate, have the vehicle inspected by any authorized Toyota retailer or Toyota authorized repairer, or any
reliable repairer.
●Do not apply coatings that have a
rain clearing (hydrophilic) effect, or other coatings, to the lower center part of the rear bumper.
●Do not park the vehicle near objects that may move and contact the
lower center part of the rear bumper, such as grass or trees. If the vehicle has been parked for a
while near objects that may move and contact the lower center part of the rear bumper, such as grass or
trees, the kick sensor may not oper- ate. In this situation, move the vehi-cle from the current position and
then check if the kick sensor oper- ates. If it does not operate, have the vehicle inspected by any authorized
Toyota retailer or Toyota authorized repairer, or any reliable repairer.
●Do not subject the rear bumper to a strong impact.If the rear bumper has been sub-
jected to a strong impact, the Hands Free Power Back Door may not operate properly. If the Hands
Free Power Back Door does not operate in the following situations, have the vehicle inspected by any
authorized Toyota retailer or Toyota authorized repairer, or any reliable repairer.
• The kick sensor or its surrounding area has been subjected to a strong
impact.
Page 207 of 674
205
4
Owners Manual_Europe_M42D76_en
4-2. Opening, closing and locking the doors
Before driving
and immobilizer system from operating
properly. (Ways of coping: P.542)
●When the electronic key battery is
depleted
●Near a TV tower, electric power plant,
gas station, radio station, large dis- play, airport or other facility that gen-erates strong radio waves or electrical
noise
●When carrying a portable radio, cellu-
lar phone, cordless phone or other wireless communication device
●When the electronic key is in contact with, or is covered by the following metallic objects
• Cards to which aluminum foil is attached• Cigarette boxes that have aluminum
foil inside • Metallic wallets or bags• Coins
• Hand warmers made of metal • Media such as CDs and DVDs
●When other wireless keys (that emit radio waves) are being used nearby
●When carrying the electronic key together with the following devices that emit radio waves
• Another vehicle’s electronic key or a wireless key that emits radio waves• Personal computers or personal digi-
tal assistants (PDAs) • Digital audio players• Portable game systems
●If window tint with a metallic content or metallic objects are attached to the
rear window
●When the electronic key is placed
near a battery charger or electronic devices
●When the vehicle is parked in a pay parking spot where radio waves are emitted
■Note for the entry function
●Even when the electronic key is within the effective range (detection areas),
the system may not operate properly in the following cases:
• The electronic key is too close to the
window or outside door handle, near the ground, or in a high place when the doors are locked or unlocked.
• The electronic key is on the instru- ment panel, luggage room, floor, or in the door pockets or glove box when
the EV system is started or power switch modes are changed.
●Do not leave the electronic key on top of the instrument panel or near the door pockets when exiting the vehicle.
Depending on the radio wave recep- tion conditions, it may be detected by the antenna outside the cabin and the
door will become lockable from the outside, possibly trapping the elec-tronic key inside the vehicle.
●As long as the electronic key is within the effective range, the doors may be
locked or unlocked by anyone. How- ever, only the doors detecting the electronic key can be used to unlock
the vehicle.
●Even if the electronic key is not inside
the vehicle, it may be possible to start the EV system if the electronic key is near the window.
●The doors may unlock if a large amount of water splashes on the door
handle, such as in the rain or in a car wash when the electronic key is within the effective range. (The doors will
automatically be locked after approxi- mately 30 seconds if the doors are not opened and closed.)
●When the lock operation is performed using the lock sensor, recognition sig-
nals will be shown up to two consecu- tive times. After this, no recognition signals will be given.
●If the wireless remote control is used to lock the doors when the electronic
key is near the vehicle, there is a pos- sibility that the door may not be unlocked by the entry function. (Use
the wireless remote control to unlock the doors.)
●Touching the door lock sensor while wearing gloves may delay or prevent
Page 208 of 674
206
Owners Manual_Europe_M42D76_en
4-2. Opening, closing and locking the doors
lock operation. Remove the gloves
and touch the lock sensor again.
●If the door handle becomes wet while
the electronic key is within the effec- tive range, the door may lock and unlock repeatedly. In that case, follow
the following correction procedures to wash the vehicle:• P l ac e t h e e l ec t ro n ic ke y i n a l oc at i o n 2
m (6 ft.) or more away from the vehi- cle. (Take care to ensure that the key is not stolen.)
• Set the electronic key to battery-sav- ing mode to disable the smart entry & start system. ( P.204)
●If the electronic key is inside the vehi- cle and a door handle becomes wet
during a car wash, a message may be shown on the multi-information dis-play and a buzzer will sound outside
the vehicle. To turn off the alarm, lock all the doors.
●The lock sensor may not work prop-erly if it comes into contact with ice, snow, mud, etc. Clean the lock sensor
and attempt to operate it again.
●A sudden approach to the effective
range or door handle may prevent the doors from being unlocked. In this case, return the door handle to the
original position and check that the doors unlock before pulling the door handle again.
●If there is another electronic key in the detection area, it may take slightly lon-
ger to unlock the doors after the door handle is gripped.
■When the vehicle is not driven for extended periods
●To prevent theft of the vehicle, do not leave the electronic key within 2 m (6
ft.) of the vehicle.
●The smart entry & start system can be
deactivated in advance.
●Setting the electronic key to battery-
saving mode helps to reduce key bat- tery depletion. ( P.204)
■To operate the system properly
Make sure to carry the electronic key when operating the system. Do not get the electronic key too close to the vehi-
cle when operating the system from the outside of the vehicle.
Depending on the position and holding
condition of the electronic key, the key may not be detected correctly and the system may not operate properly. (The
alarm may go off accidentally, or the door lock prevention may not operate.)
■If the smart entry & start system does not operate properly
●If the doors cannot be locked or unlocked, perform the following.
• Bring the electronic key close to the door handle and perform a lock or unlock operation.
• Use the wireless remote control.
If the doors cannot be locked or
unlocked by perform the above, use the
mechanical key. ( P.542)
However, if the mechanical key is used
while the alarm system is set, the warn-
ing will sound. ( P.77)
●If the EV system cannot be started,
refer to P.543
■Customization
Settings (e.g. smart entry & start sys- tem) can be changed.
(Customizable features:P.565)
If the smart entry & start system has been deactivated by a customized set-
ting, refer to the explanations for the fol- lowing operations.
●Locking and unlocking the doors:Use the wireless remote control or mechanical key. ( P.185, 542)
●Starting the EV system and changing power switch modes: P. 5 4 3
●Stopping the EV system:P. 2 4 5
Page 218 of 674
216
Owners Manual_Europe_M42D76_en
4-4. Adjusting the steering wheel and mirrors
The height of the rear view mirror
can be adjusted to suit your driving
posture.
Adjust the height of the rear view
mirror by moving it up and down.
Responding to the level of bright-
ness of the headlights of vehicles
behind, the reflected light is auto-
matically reduced.
Turn the automatic anti-glare func-
tion mode on/off
When the automatic anti-glare function
is in ON mode, the indicator illumi-
nates. The function will set to ON mode
each time the power switch is turned to
ON.
Pressing the button turns the function
to OFF mode. (The indicator also
turns off.)
■To prevent sensor error
To ensure that the sensors operate
properly, do not touch or cover them.
Inside rear view mirror
The rear view mirror’s position
can be adjusted to enable suf-
ficient confirmation of the rear
view.
Adjusting the height of rear
view mirror
WARNING
■Caution while driving
Do not adjust the position of the mir-
ror while driving. Doing so may lead to mishandling of the vehicle and cause an accident,
resulting in death or serious injury.
Anti-glare function
Page 229 of 674
5
227
Owners Manual_Europe_M42D76_en
5
Driving
Driving
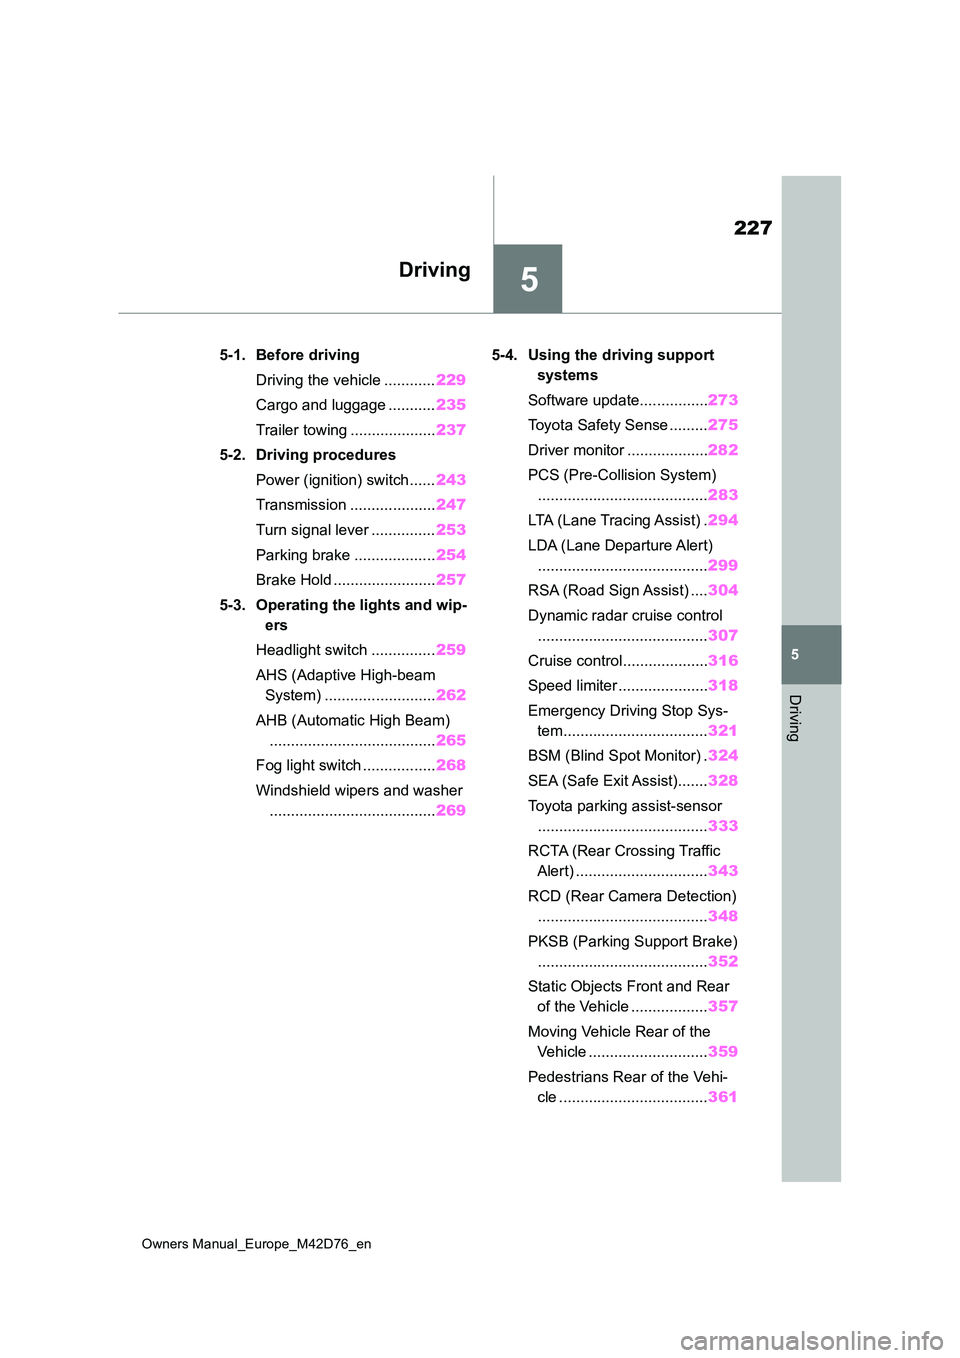
5-1. Before driving
Driving the vehicle ............ 229
Cargo and luggage ........... 235
Trailer towing .................... 237
5-2. Driving procedures
Power (ignition) switch ...... 243
Transmission .................... 247
Turn signal lever ............... 253
Parking brake ................... 254
Brake Hold ........................ 257
5-3. Operating the lights and wip-
ers
Headlight switch ............... 259
AHS (Adaptive High-beam
System) .......................... 262
AHB (Automatic High Beam)
....................................... 265
Fog light switch ................. 268
Windshield wipers and washer
....................................... 269
5-4. Using the driving support
systems
Software update................ 273
Toyota Safety Sense ......... 275
Driver monitor ................... 282
PCS (Pre-Collision System)
........................................ 283
LTA (Lane Tracing Assist) . 294
LDA (Lane Departure Alert)
........................................ 299
RSA (Road Sign Assist) .... 304
Dynamic radar cruise control
........................................ 307
Cruise control.................... 316
Speed limiter ..................... 318
Emergency Driving Stop Sys-
tem.................................. 321
BSM (Blind Spot Monitor) . 324
SEA (Safe Exit Assist)....... 328
Toyota parking assist-sensor
........................................ 333
RCTA (Rear Crossing Traffic
Alert) ............................... 343
RCD (Rear Camera Detection)
........................................ 348
PKSB (Parking Support Brake)
........................................ 352
Static Objects Front and Rear
of the Vehicle .................. 357
Moving Vehicle Rear of the
Vehicle ............................ 359
Pedestrians Rear of the Vehi-
cle ................................... 361
Page 261 of 674
259
5
Owners Manual_Europe_M42D76_en
5-3. Operating the lights and wipers
Driving
5-3.Operating the lights and wipers
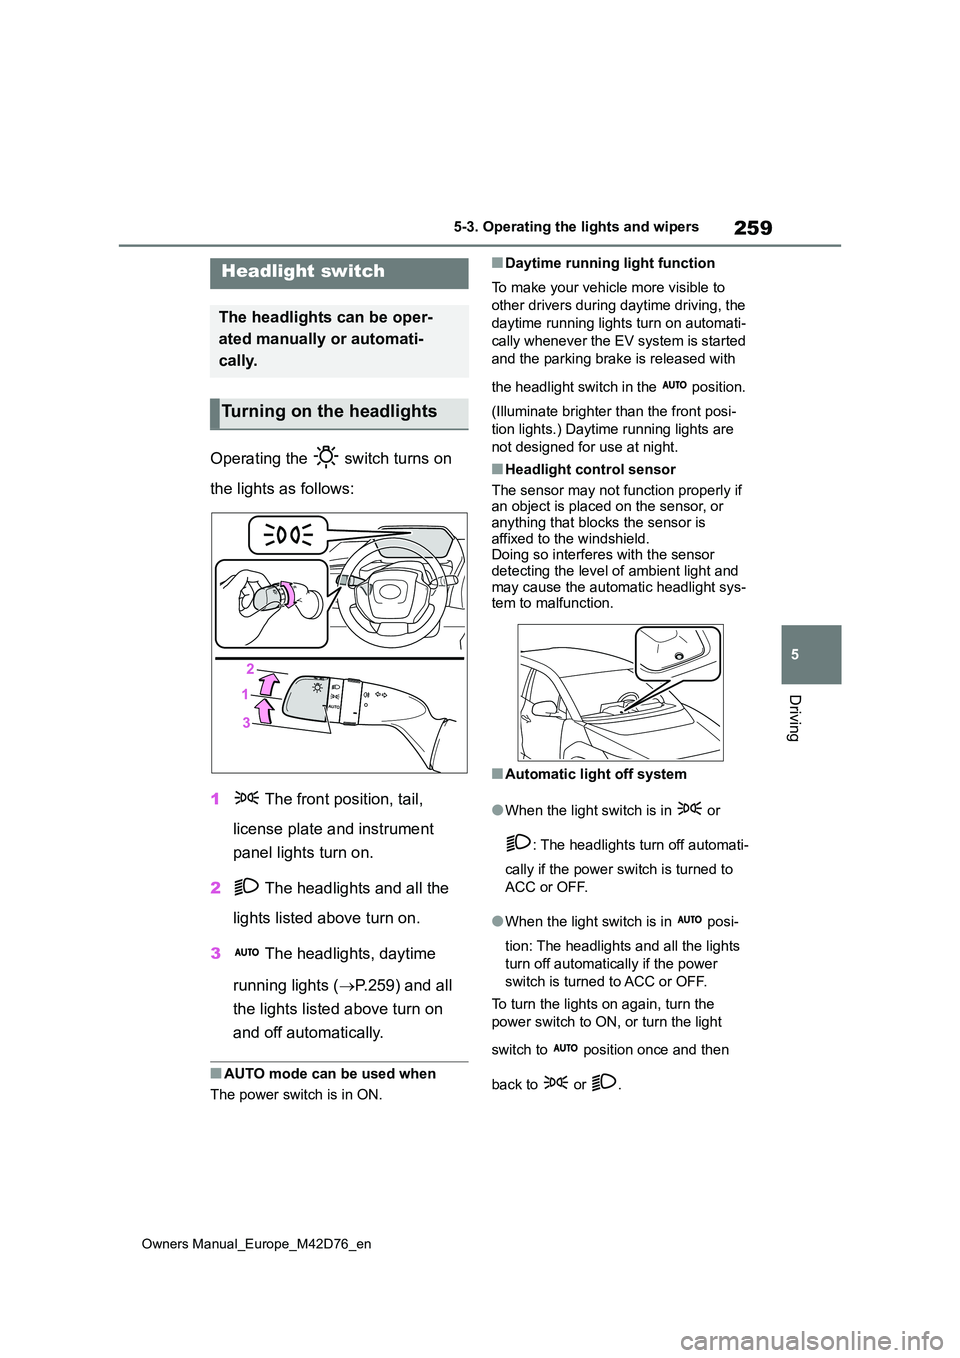
Operating the switch turns on
the lights as follows:
1 The front position, tail,
license plate and instrument
panel lights turn on.
2 The headlights and all the
lights listed above turn on.
3 The headlights, daytime
running lights ( P.259) and all
the lights listed above turn on
and off automatically.
■AUTO mode can be used when
The power switch is in ON.
■Daytime running light function
To make your vehicle more visible to
other drivers during daytime driving, the
daytime running lights turn on automati-
cally whenever the EV system is started
and the parking brake is released with
the headlight switch in the position.
(Illuminate brighter than the front posi-
tion lights.) Daytime running lights are
not designed for use at night.
■Headlight control sensor
The sensor may not function properly if an object is placed on the sensor, or
anything that blocks the sensor is affixed to the windshield. Doing so interferes with the sensor
detecting the level of ambient light and may cause the automatic headlight sys-tem to malfunction.
■Automatic light off system
●When the light switch is in or
: The headlights turn off automati-
cally if the power switch is turned to
ACC or OFF.
●When the light switch is in posi-
tion: The headlights and all the lights
turn off automatically if the power
switch is turned to ACC or OFF.
To turn the lights on again, turn the
power switch to ON, or turn the light
switch to position once and then
back to or .
Headlight switch
The headlights can be oper-
ated manually or automati-
cally.
Turning on the headlights
Page 262 of 674
260
Owners Manual_Europe_M42D76_en
5-3. Operating the lights and wipers
■Light reminder buzzer
A buzzer sounds when the power switch is turned off or turned to ACC and the driver’s door is opened while the lights
are turned on.
■Automatic headlight leveling sys- tem (if equipped)
The level of the headlights is automati-
cally adjusted according to the number of passengers and the loading condition of the vehicle to ensure that the head-
lights do not interfere with other road users.
■12-volt battery-saving function
In order to prevent 12-volt the battery of
the vehicle from discharging, if the light
switch is in the or position
when the power switch is turned off, the
12-volt battery saving function will oper-
ate and automatically turn off all the
lights after approximately 20 minutes.
When the power switch is turned to ON, the 12-volt battery-saving function will be disabled.
When any of the following are per- formed, the 12-volt battery-saving func-tion is canceled once and then
reactivated. All the lights will turn off automatically 20 minutes after the 12-volt battery- saving function has been
reactivated:
●When the headlight switch is operated
●When a door is opened or closed
■Customization
Settings (e.g. light sensor sensitivity)
can be changed. (Customizable features: P.567)
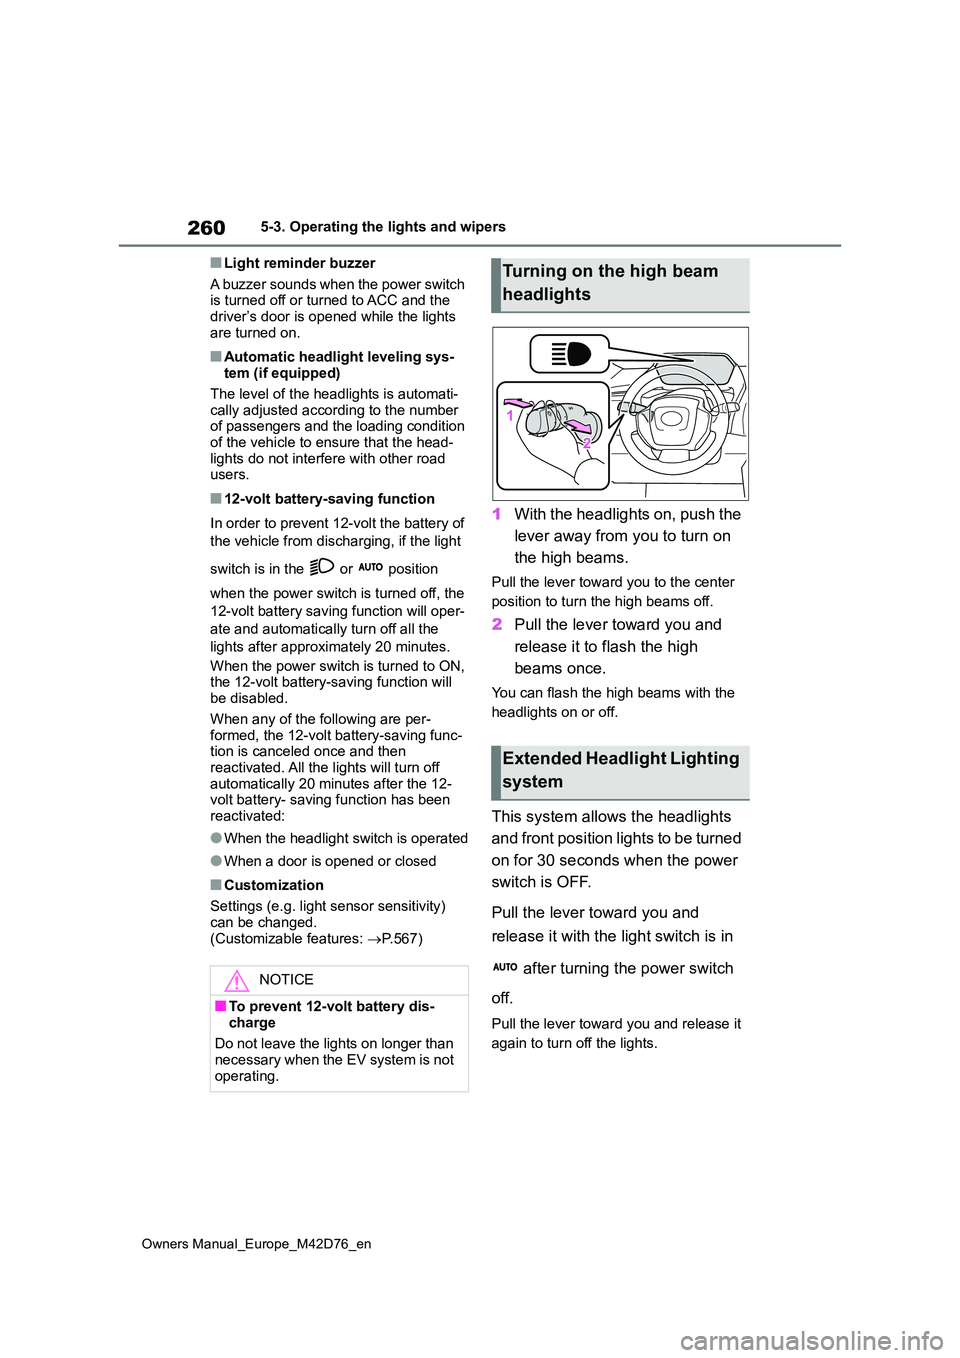
1With the headlights on, push the
lever away from you to turn on
the high beams.
Pull the lever toward you to the center
position to turn the high beams off.
2 Pull the lever toward you and
release it to flash the high
beams once.
You can flash the high beams with the
headlights on or off.
This system allows the headlights
and front position lights to be turned
on for 30 seconds when the power
switch is OFF.
Pull the lever toward you and
release it with the light switch is in
after turning the power switch
off.
Pull the lever toward you and release it
again to turn off the lights.
NOTICE
■To prevent 12-volt battery dis-
charge
Do not leave the lights on longer than necessary when the EV system is not
operating.
Turning on the high beam
headlights
Extended Headlight Lighting
system
Page 265 of 674
263
5
Owners Manual_Europe_M42D76_en
5-3. Operating the lights and wipers
Driving
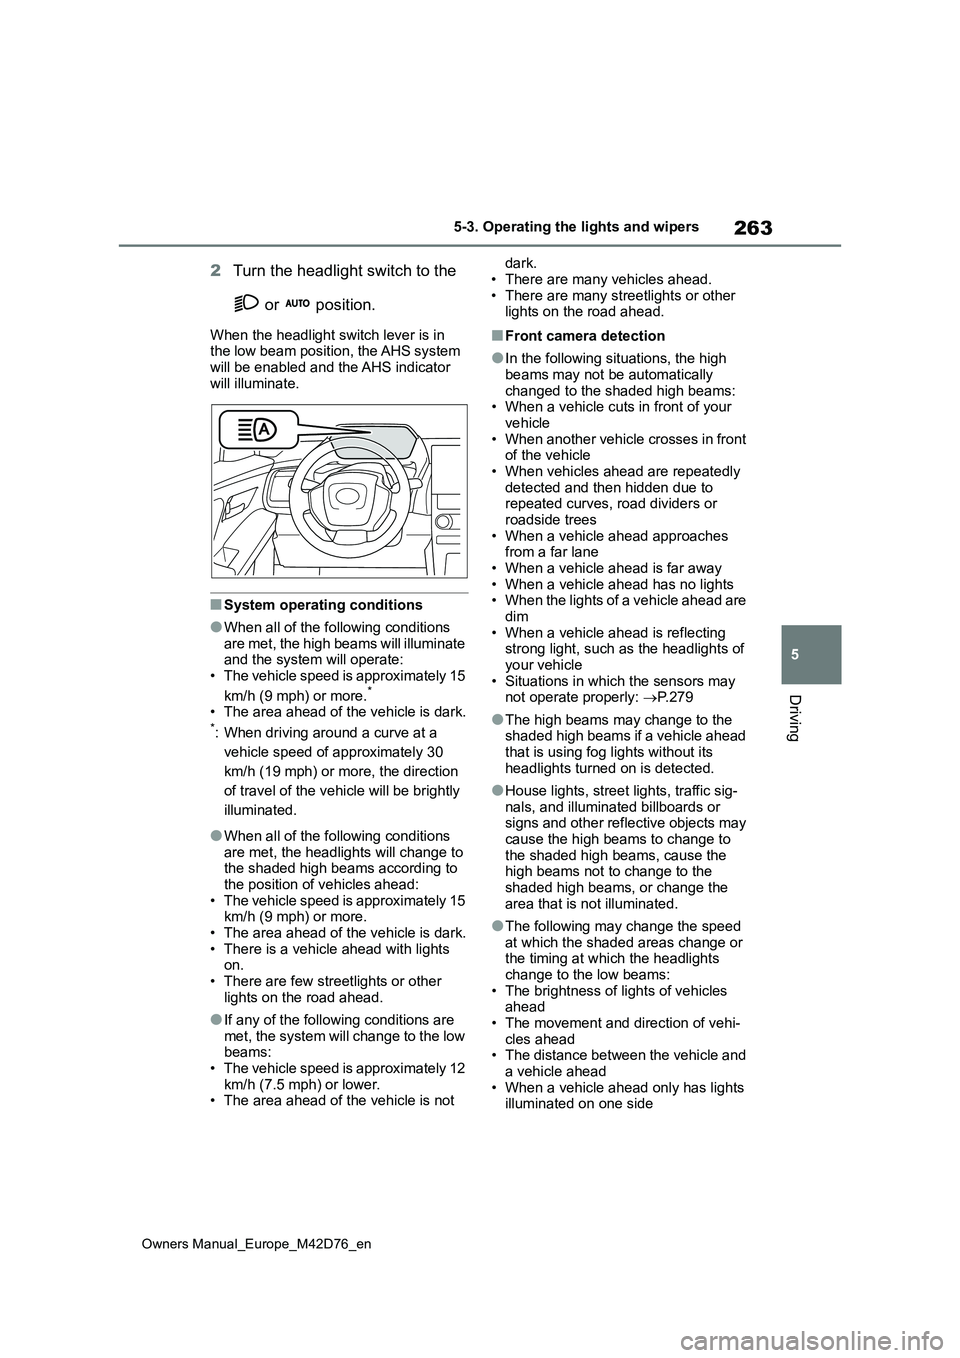
2Turn the headlight switch to the
or position.
When the headlight switch lever is in the low beam position, the AHS system
will be enabled and the AHS indicator will illuminate.
■System operating conditions
●When all of the following conditions
are met, the high beams will illuminate and the system will operate:• The vehicle speed is approximately 15
km/h (9 mph) or more.*
• The area ahead of the vehicle is dark.*: When driving around a curve at a
vehicle speed of approximately 30
km/h (19 mph) or more, the direction
of travel of the vehicle will be brightly
illuminated.
●When all of the following conditions are met, the headlights will change to the shaded high beams according to
the position of vehicles ahead: • The vehicle speed is approximately 15 km/h (9 mph) or more.
• The area ahead of the vehicle is dark. • There is a vehicle ahead with lights on.
• There are few streetlights or other lights on the road ahead.
●If any of the following conditions are met, the system will change to the low beams:
• The vehicle speed is approximately 12 km/h (7.5 mph) or lower.• The area ahead of the vehicle is not
dark.
• There are many vehicles ahead. • There are many streetlights or other lights on the road ahead.
■Front camera detection
●In the following situations, the high beams may not be automatically
changed to the shaded high beams: • When a vehicle cuts in front of your vehicle
• When another vehicle crosses in front of the vehicle• When vehicles ahead are repeatedly
detected and then hidden due to repeated curves, road dividers or roadside trees
• When a vehicle ahead approaches from a far lane• When a vehicle ahead is far away
• When a vehicle ahead has no lights • When the lights of a vehicle ahead are dim
• When a vehicle ahead is reflecting strong light, such as the headlights of your vehicle
• Situations in which the sensors may not operate properly: P. 2 7 9
●The high beams may change to the shaded high beams if a vehicle ahead that is using fog lights without its
headlights turned on is detected.
●House lights, street lights, traffic sig-
nals, and illuminated billboards or signs and other reflective objects may cause the high beams to change to
the shaded high beams, cause the high beams not to change to the shaded high beams, or change the
area that is not illuminated.
●The following may change the speed
at which the shaded areas change or the timing at which the headlights change to the low beams:
• The brightness of lights of vehicles ahead• The movement and direction of vehi-
cles ahead • The distance between the vehicle and a vehicle ahead
• When a vehicle ahead only has lights illuminated on one side
Page 266 of 674
264
Owners Manual_Europe_M42D76_en
5-3. Operating the lights and wipers
• When a vehicle ahead is a two-
wheeled vehicle • The condition of the road (gradient, curve, condition of the road surface,
etc.) • The number of passengers and amount of luggage
●The light distribution control of the headlights may not match the driver’s
expectations
●Bicycles and other small vehicles may
not be detected.
●In the following situations, the system
may not be able to correctly detect the brightness of the surroundings. This may cause the low beams to remain
on or the high beams to flash or daz- zle pedestrians or vehicles ahead. In such a case, it is necessary to manu-
ally change between the high beams and low beams.• When there are lights similar to head-
lights or tail lights in the surrounding area• When headlights or tail lights of vehi-
cles ahead are turned off, dirty, chang- ing color, or not aimed properly• When the headlights are repeatedly
changing between the high beams and low beams.• When use of the high beams is inap-
propriate or when the high beams may be flashing or dazzling pedestri-ans or other drivers.
• When the vehicle is used in an area in which vehicles travel on the opposite side of the road of the country for
which the vehicle was designed, for example using a vehicle designed for right-hand traffic in a left-hand traffic
area, or vice versa • When it is necessary to disable the system: P. 2 7 5
• Situations in which the sensors may not operate properly: P. 2 7 9
■Customization
The settings of some functions can be
changed. ( P.567)
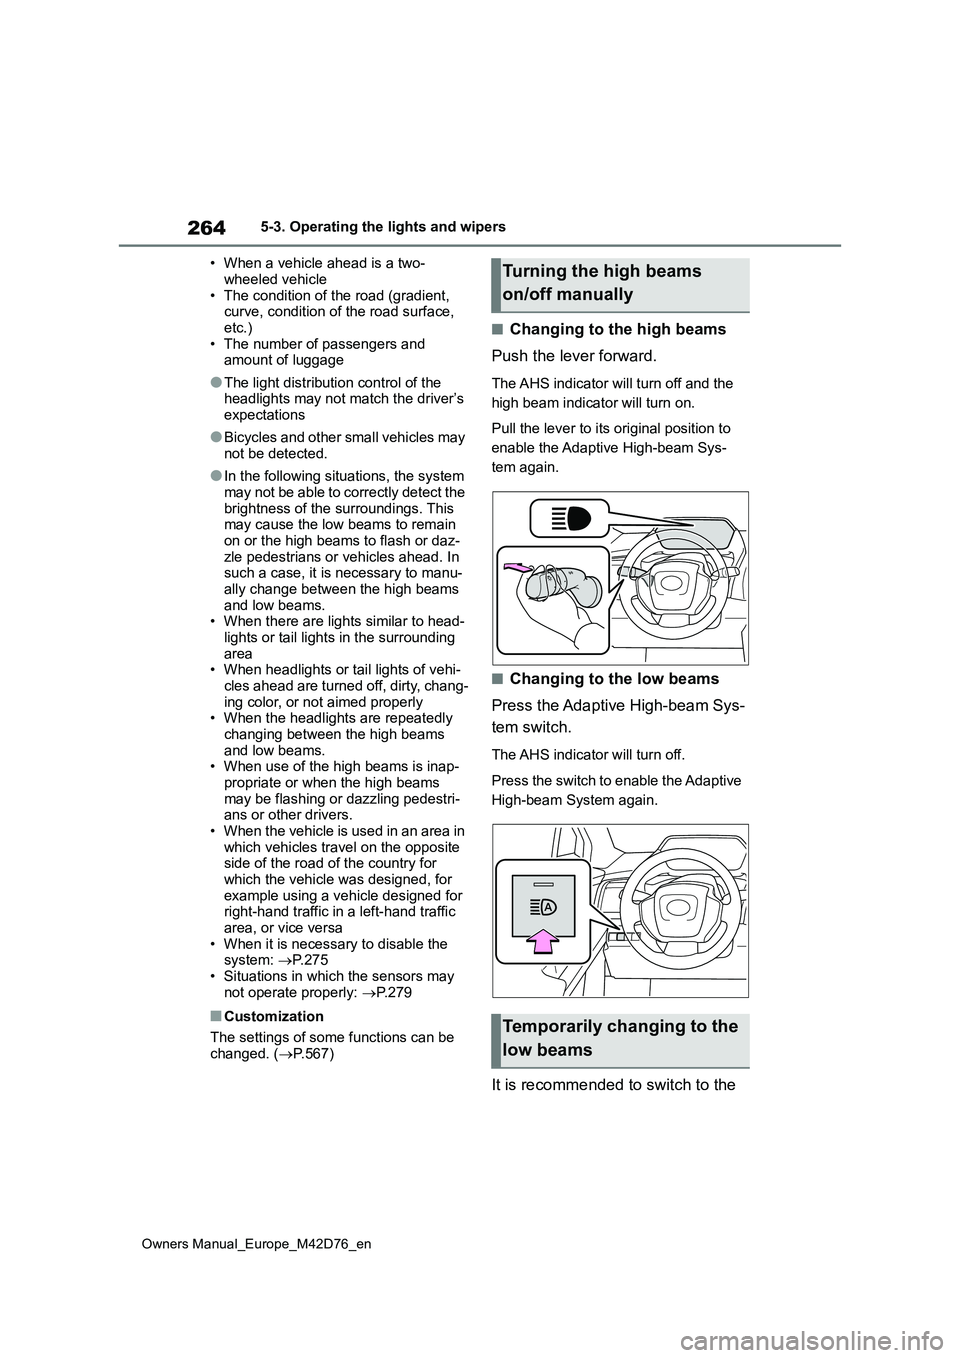
■Changing to the high beams
Push the lever forward.
The AHS indicator will turn off and the
high beam indicator will turn on.
Pull the lever to its original position to
enable the Adaptive High-beam Sys-
tem again.
■Changing to the low beams
Press the Adaptive High-beam Sys-
tem switch.
The AHS indicator will turn off.
Press the switch to enable the Adaptive
High-beam System again.
It is recommended to switch to the
Turning the high beams
on/off manually
Temporarily changing to the
low beams
Page 268 of 674
266
Owners Manual_Europe_M42D76_en
5-3. Operating the lights and wipers
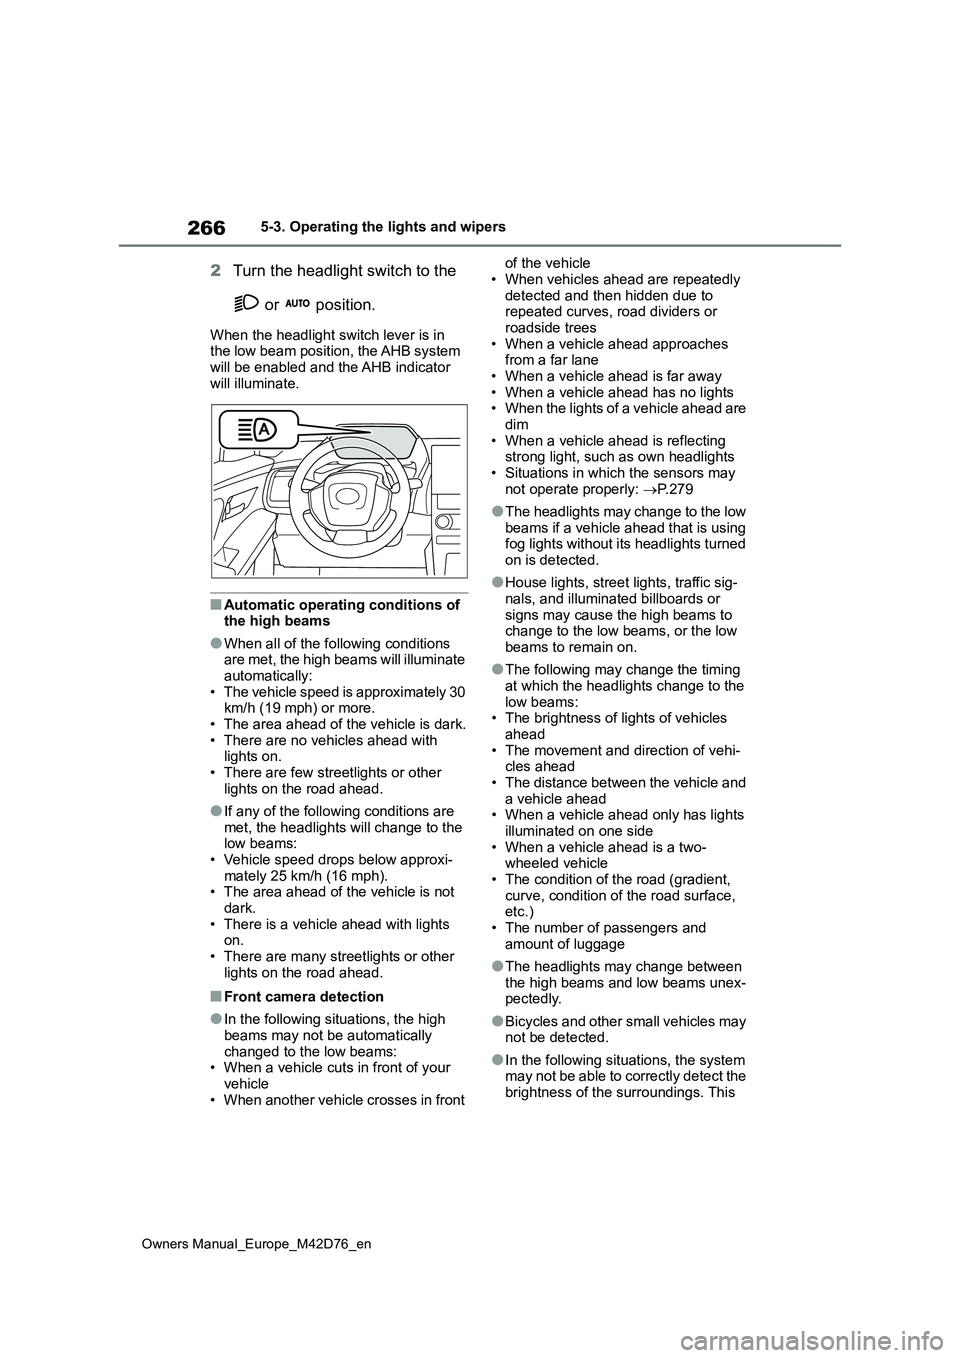
2Turn the headlight switch to the
or position.
When the headlight switch lever is in the low beam position, the AHB system
will be enabled and the AHB indicator will illuminate.
■Automatic operating conditions of the high beams
●When all of the following conditions are met, the high beams will illuminate automatically:
• The vehicle speed is approximately 30 km/h (19 mph) or more.• The area ahead of the vehicle is dark.
• There are no vehicles ahead with lights on.• There are few streetlights or other
lights on the road ahead.
●If any of the following conditions are
met, the headlights will change to the low beams:• Vehicle speed drops below approxi-
mately 25 km/h (16 mph). • The area ahead of the vehicle is not dark.
• There is a vehicle ahead with lights on.• There are many streetlights or other
lights on the road ahead.
■Front camera detection
●In the following situations, the high
beams may not be automatically changed to the low beams:• When a vehicle cuts in front of your
vehicle • When another vehicle crosses in front
of the vehicle
• When vehicles ahead are repeatedly detected and then hidden due to repeated curves, road dividers or
roadside trees • When a vehicle ahead approaches from a far lane
• When a vehicle ahead is far away • When a vehicle ahead has no lights• When the lights of a vehicle ahead are
dim • When a vehicle ahead is reflecting strong light, such as own headlights
• Situations in which the sensors may not operate properly: P. 2 7 9
●The headlights may change to the low beams if a vehicle ahead that is using fog lights without its headlights turned
on is detected.
●House lights, street lights, traffic sig-
nals, and illuminated billboards or signs may cause the high beams to change to the low beams, or the low
beams to remain on.
●The following may change the timing
at which the headlights change to the low beams:• The brightness of lights of vehicles
ahead • The movement and direction of vehi-cles ahead
• The distance between the vehicle and a vehicle ahead• When a vehicle ahead only has lights
illuminated on one side • When a vehicle ahead is a two-wheeled vehicle
• The condition of the road (gradient, curve, condition of the road surface, etc.)
• The number of passengers and amount of luggage
●The headlights may change between the high beams and low beams unex-pectedly.
●Bicycles and other small vehicles may not be detected.
●In the following situations, the system may not be able to correctly detect the
brightness of the surroundings. This