display TOYOTA BZ4X 2023 User Guide
[x] Cancel search | Manufacturer: TOYOTA, Model Year: 2023, Model line: BZ4X, Model: TOYOTA BZ4X 2023Pages: 628, PDF Size: 11.91 MB
Page 94 of 628
942-2. Charging
Owners Manual_USA_M42C01_en
3Press or of the meter
control switches to select
“Charging Settings”, and then
press .
The “Charging Settings” screen will
be displayed.
4Press or of the meter
control switches to select
“Connector Lock”, and then
press .
The “Connector L ock” screen will
be displayed.
Multimedia operation
1 Select on the main menu.
2 Select “Vehicle customize”.
3 Select “Charging”.
4 Select “Connector lock”.
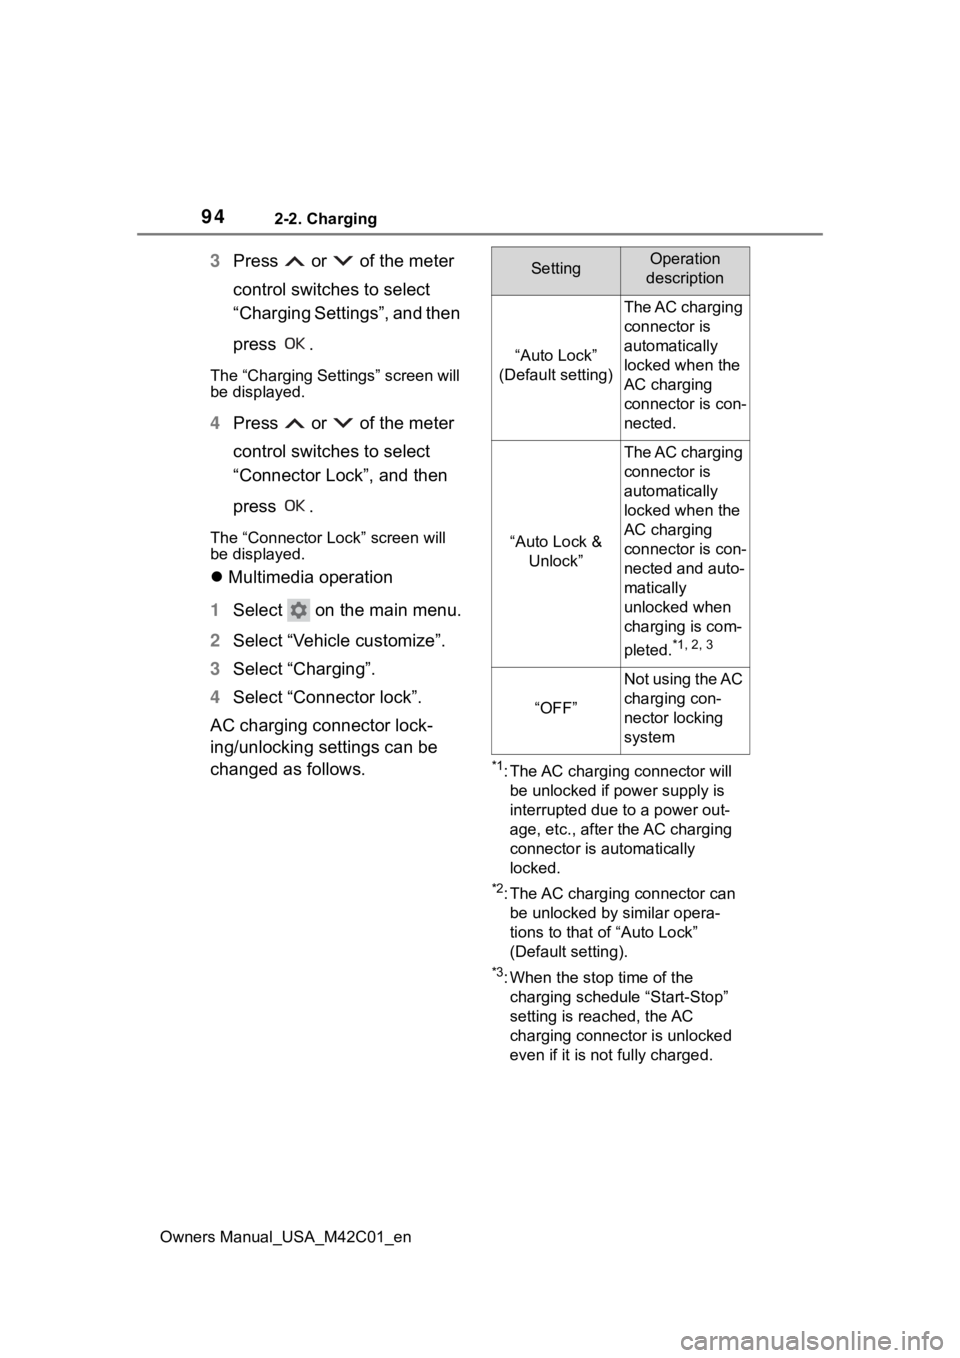
AC charging connector lock-
ing/unlocking settings can be
changed as follows.
*1: The AC charging connector will be unlocked if power supply is
interrupted due to a power out-
age, etc., after the AC charging
connector is automatically
locked.
*2: The AC charging connector can be unlocked by similar opera-
tions to that of “Auto Lock”
(Default setting).
*3: When the stop time of the charging schedule “Start-Stop”
setting is reached, the AC
charging connector is unlocked
even if it is not fully charged.
SettingOperation
description
“Auto Lock”
(Default setting)
The AC charging
connector is
automatically
locked when the
AC charging
connector is con-
nected.
“Auto Lock & Unlock”
The AC charging
connector is
automatically
locked when the
AC charging
connector is con-
nected and auto-
matically
unlocked when
charging is com-
pleted.
*1, 2, 3
“OFF”
Not using the AC
charging con-
nector locking
system
Page 99 of 628
992-2. Charging
Owners Manual_USA_M42C01_en
2
Electric Vehicle system
tem can be used by the power
supply from an external power
source
*.
*: Depending on the situation, elec-
tricity of the traction battery may
be consumed.
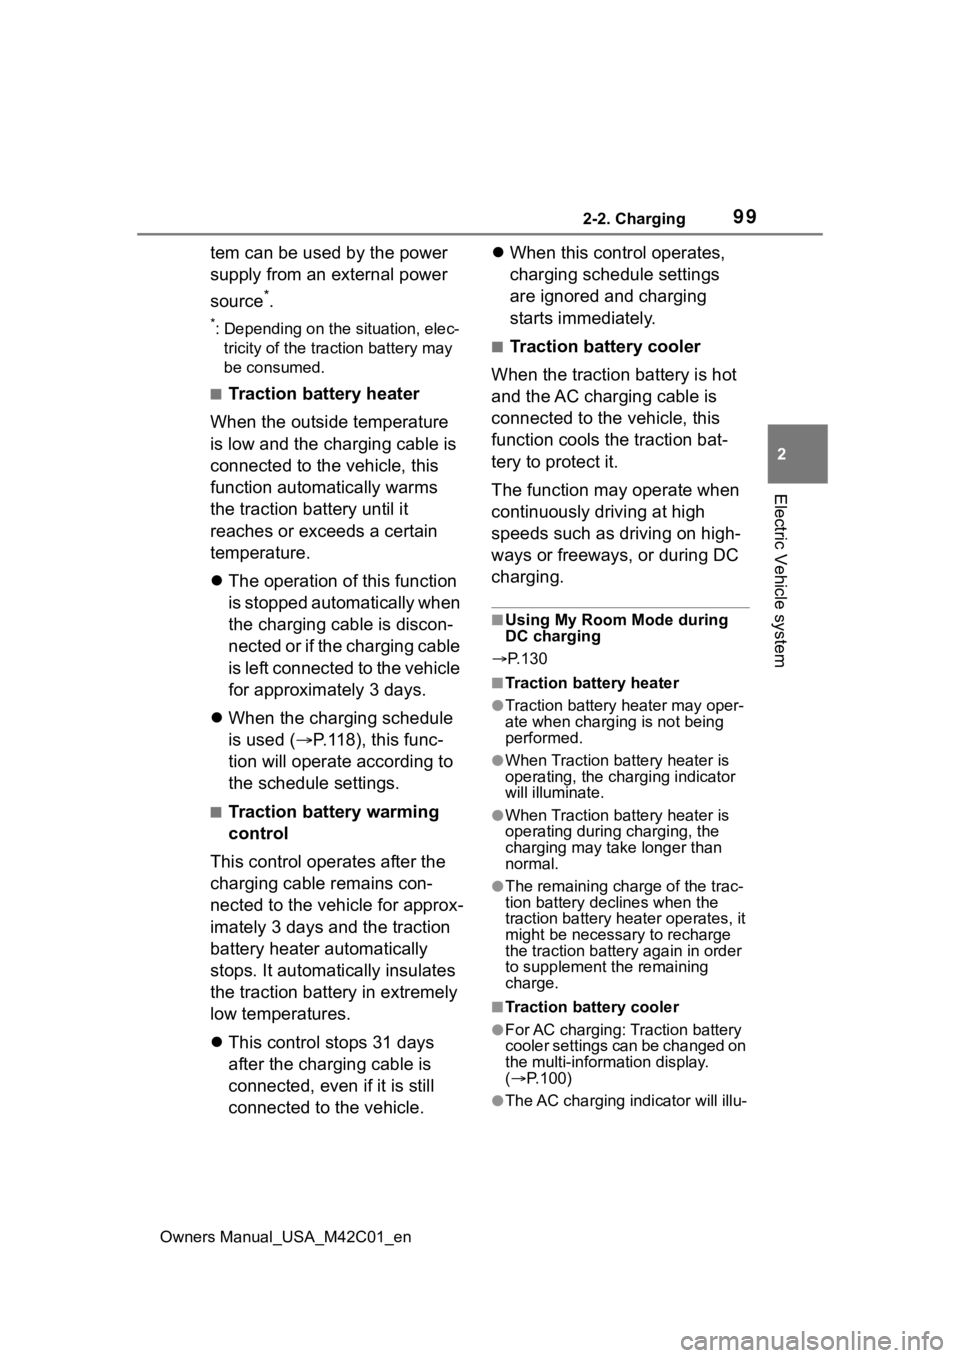
■Traction battery heater
When the outside temperature
is low and the charging cable is
connected to the vehicle, this
function automatically warms
the traction battery until it
reaches or exceeds a certain
temperature.
The operation of this function
is stopped automatically when
the charging cable is discon-
nected or if the charging cable
is left connected to the vehicle
for approximately 3 days.
When the charging schedule
is used ( P.118), this func-
tion will operate according to
the schedule settings.
■Traction battery warming
control
This control operates after the
charging cable remains con-
nected to the vehicle for approx-
imately 3 days and the traction
battery heater automatically
stops. It automatically insulates
the traction battery in extremely
low temperatures.
This control stops 31 days
after the charging cable is
connected, even if it is still
connected to the vehicle.
When this control operates,
charging schedule settings
are ignored and charging
starts immediately.
■Traction battery cooler
When the traction battery is hot
and the AC charging cable is
connected to the vehicle, this
function cools the traction bat-
tery to protect it.
The function may operate when
continuously driving at high
speeds such as driving on high-
ways or freeways, or during DC
charging.
■Using My Room Mode during
DC charging
P.130
■Traction battery heater
●Traction battery heater may oper-
ate when charging is not being
performed.
●When Traction battery heater is
operating, the charging indicator
will illuminate.
●When Traction battery heater is
operating during charging, the
charging may take longer than
normal.
●The remaining charge of the trac-
tion battery declines when the
traction battery hea ter operates, it
might be necessary to recharge
the traction battery again in order
to supplement the remaining
charge.
■Traction battery cooler
●For AC charging: Traction battery
cooler settings can be changed on
the multi-information display.
( P.100)
●The AC charging indicator will illu-
Page 100 of 628
1002-2. Charging
Owners Manual_USA_M42C01_enminate when the tr
action battery
cooler is on standby or operating.
●When the charge level of the trac-
tion battery is low, the traction bat-
tery cooler may n ot operate, even
if the temperature of the traction
battery is high.
●When the following conditions are
met while the trac tion battery
cooler is operating, the cooling
operation will stop.
• The hood is opened
• The power switch is turned to ACC or ON.
• The shift position is changed to any position other than P
• The Remote Air Conditioning Sys- tem is operated ( P.409)
• The remaining charge of the trac-
tion battery drops below a certain
amount
●The traction battery cooler oper-
ates using power s upplied by the
traction battery and an external
power source.
• While the traction battery cooler is
operating, the charge of the trac-
tion battery will increase and
decrease within a certain range,
and will not increase as during AC
charging.
• When the traction battery cooler operates, charger will recognize it
as the battery being charged. If
this function ope rates while a
charger which charges a charging
fee is connected to the vehicle,
AC charging fees will apply.
■Changing of the traction battery
cooler setting
Setting can be changed on the
multi-information display.
Use the meter control switches
( P.156) and select “Vehicle Set-
tings”, “Charging Se ttings”, “Battery
Cooler”, and change the setting.
When selecting to off, the traction
battery output may be restricted
depending on the driving situation.
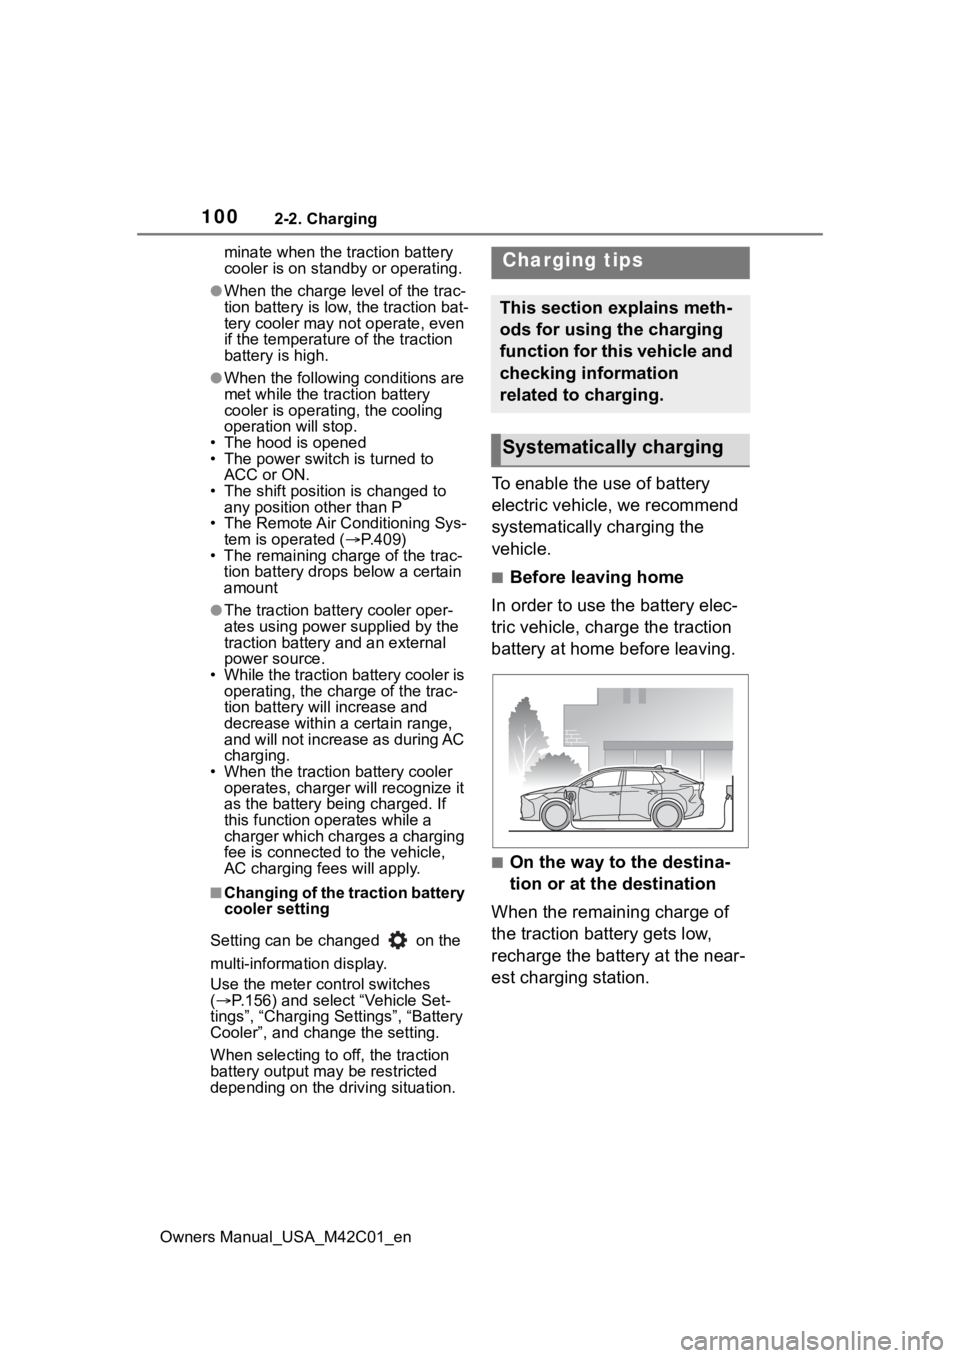
To enable the use of battery
electric vehicle, we recommend
systematically charging the
vehicle.
■Before leaving home
In order to use the battery elec-
tric vehicle, charge the traction
battery at home before leaving.
■On the way to the destina-
tion or at the destination
When the remaining charge of
the traction battery gets low,
recharge the battery at the near-
est charging station.
Charging tips
This section explains meth-
ods for using the charging
function for this vehicle and
checking information
related to charging.
Systematically charging
Page 101 of 628
1012-2. Charging
Owners Manual_USA_M42C01_en
2
Electric Vehicle system
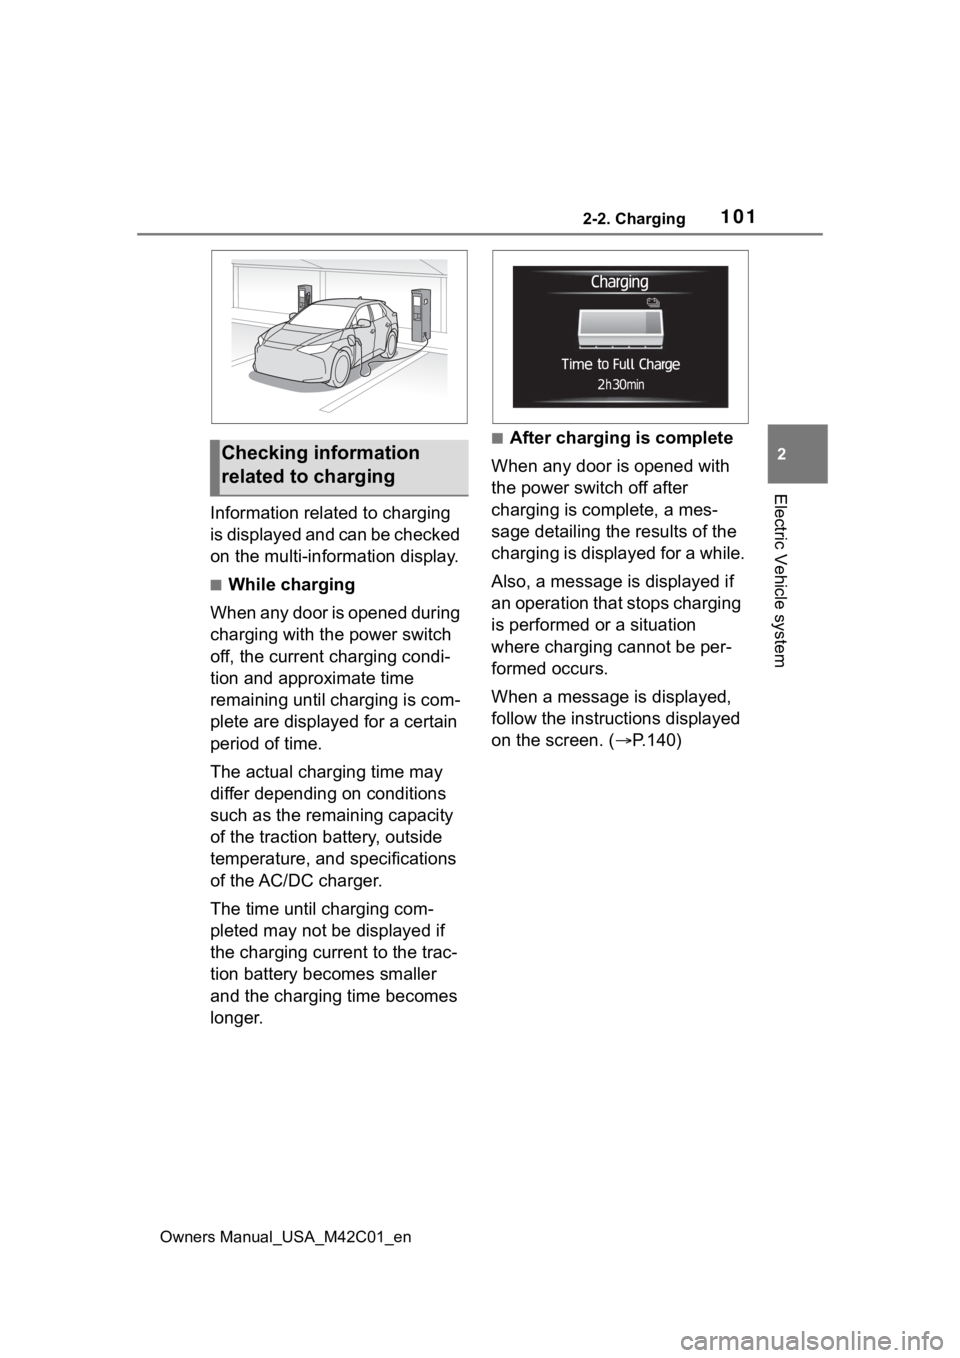
Information related to charging
is displayed and can be checked
on the multi-information display.
■While charging
When any door is opened during
charging with the power switch
off, the current charging condi-
tion and approximate time
remaining until charging is com-
plete are displayed for a certain
period of time.
The actual charging time may
differ depending on conditions
such as the remaining capacity
of the traction battery, outside
temperature, and specifications
of the AC/DC charger.
The time until charging com-
pleted may not be displayed if
the charging current to the trac-
tion battery becomes smaller
and the charging time becomes
longer.
■After charging is complete
When any door is opened with
the power switch off after
charging is complete, a mes-
sage detailing the results of the
charging is displayed for a while.
Also, a message is displayed if
an operation that stops charging
is performed or a situation
where charging cannot be per-
formed occurs.
When a message is displayed,
follow the instructions displayed
on the screen. ( P.140)Checking information
related to charging
Page 104 of 628
1042-2. Charging
Owners Manual_USA_M42C01_en
●Avoid frequent DC charging
Also, if the capacit y of the traction
battery capacity reduces, the dis-
tance that can be driven decreases.
However, vehicle performance does
not significantly become worse.
■When the remaining charge of
the traction battery is low after
charging
In the following situations, the
remaining charge of the traction bat-
tery after charging completes may
be less than normal in order to pro-
tect the traction bat tery (the driving
range after the battery is fully
charged may be shorter).
*
●Charging is perf ormed when the
outside temperature is low or high
●Charging is perf ormed immedi-
ately after high-l oad driving or in
extreme heat
In any other situati on, if the remain-
ing charge of the traction battery is
significantly lower than normal after
charging completes, have the vehi-
cle inspected by your Toyota dealer.
*: When this occurs, even if the remaining charge display of the
traction battery shows that it is
fully charged, the remaining
charge rapidly decreases faster
than normal.
■When the charging amount sent
to the traction battery
decreases
When the amount of power supplied
by the charger is low or operation of
the battery heater, etc., reduces the
charging power sent to the traction
battery, the charging amount sent to
the traction battery may decrease.
■Certification
This device complies with Part 15 of
the FCC Rules. Operation is subject
to the following two conditions:
(1) this device may not cause harm- ful interference, and (2) this device
must accept any interference
received, including interference that
may cause undesired operation.
■Charging time may increase
In the following situ ations, charging
time may become longer than nor-
mal:
●In very hot or very cold tempera-
tures.
●When the traction battery
becomes hot, such as immedi-
ately after high-load driving.
●The vehicle is consuming a lot of
electricity, for e xample, when the
headlights are on, etc.
●When using “My Room Mode”.
( P.129)
●There is a power outage during
charging.
●There is an interruption in the
electrical supply.
●There is a drop in the voltage of
external power source.
●The charge in the 12-volt battery
is low, for example due to the
vehicle being left unused for a
long period of time.
●When the upper limit of charging
current is changed in the charging
current setting of the vehicle
( P.108)
●When the battery heater operates.
( P. 9 9 )
●When the “Battery Cooler” is oper-
ated before charging. ( P. 9 9 )
●When the plug generates heat
due to a loose outlet connection,
etc.
●When adjusting the power supply
with the charger.
●When frequently and repeatedly
using DC charging.
●When selecting “DC charging
power” setting other than “MAX”.
●When the temperature of
charging-related parts is high.
Page 108 of 628
1082-2. Charging
Owners Manual_USA_M42C01_enthe charging schedule and start
charging, perform any of the follow-
ing procedures.
●Turn “Charge Now” on (
P.124,
128)
●While the charging indicator is
flashing, remove and reconnect
the charging conn ector immedi-
ately
■When the charging connector
cannot be inserted into the AC
charging inlet
P. 9 3
■Safety function
If the latch release button is
pressed, charging will not begin
even if the AC charging cable is
connected.
Also, charging will be stopped if the
latch release button is pressed and
held for several seconds during
charging. When restarting charging,
reinsert the charging connector after
pulling it out , and check that the
charging indicator of the charging
port illuminates.
■Charging time may increase
P. 1 0 4
■When your circuit breaker trips
during charging
The upper limit of the charging cur-
rent can be chan ged on the multi-
information display or multimedia.
●Setting operations on multi-infor-
mation display
1 Press or of the meter
control switches to select .
2 Press or of the meter
control switches to select “Vehi-
cle Settings”, and then press and
hold .
3 Press or of the meter
control switches to select “Charging Settings”, and then
press .
The “Charging Se ttings” screen will
be displayed.
4 Press or of the meter
control switches to select
“Charging Current”, and then
press .
The “Charging Curr ent” screen will
be displayed.
5 Press or of the meter
control switches to select “16A”
or “8A” and then press .
●Setting operations on multimedia
1 Select .
2 Select “Vehicle customize”.
3 Select “Charging”.
4 Select “Charging current”.
5 S e l e c t “ 1 6 A” o r “ 8 A” .
The maximum charging current is
limited to less than or equal to the
selected current.
*
If the breaker still trips while
charging, even after changing the
upper limit of the charging current,
check if the connected power
source meets the specified charging
conditions. ( P.96)
*: Restricting the charging current
will lengthen the c harging time.
■Changing the “Cha rging Limit”
settings
The upper limit of the charge capac-
ity can be chang ed on the multi-
information display or multimedia.
The selected upper limit value is
common to AC charging and DC
charging.
●Setting operations on multi-infor-
mation display
Page 109 of 628
1092-2. Charging
Owners Manual_USA_M42C01_en
2
Electric Vehicle system
1 Press or of the meter
control switches to select .
2 Press or of the meter
control switches to select “Vehi-
cle Settings”, and then press and
hold .
3 Press or of the meter
control switches to select
“Charging Settings”, and then
press .
The “Charging Sett ings” screen will
be displayed.
4 Press or of the meter
control switches to select
“Charging Limit”, and then press
.
The “Charging Limit” screen will be
displayed.
5 Select “Full”, “90%”, “80%”,
“70%”, “60%” or “50%” and then
press .
●Setting operations on multimedia
1 Select .
2 Select “Vehicle customize”.
3 Select “Charging”.
4 Select “Charging limit”.
5 Select “Full”, “90%”, “80%”,
“70%”, “60%” or “50%”.
If the setting is changed during DC
charging, charging may stop due to
the operation of the DC charger
timer and the traction battery cannot
be fully charged.
■Protection function of AC
charging inlet overheating
By installing a temp erature sensor
to the AC charging inlet, prevents
parts from melting when the tem-
perature rises due to foreign matter
entering the charging connector. When a certain temperature
increase is detected, charging is
stopped immediately.
After this, when the power switch is
off, a message will be displayed on
the multi-information display
(
P.140)
WARNING
■When charging
Observe the following precau-
tions.
Failure to do so may cause an
unexpected accident, resulting in
death or serious injury.
●Connect to a power source suit-
able for charging. ( P. 9 6 )
●Check that the AC charging
cable, plug and outlet are free of
foreign matter.
●Before charging, check that the
AC charging inlet is not
deformed, damaged or cor-
roded, and check that the inlet
is free of foreign matter such as
dirt, snow and ice.
If there is dirt or dust in these
areas, remove completely
before inserting the charging
connector.
●Do not get the te rminals of the
AC charging inlet wet.
●Only use outlets where the plug
can be securely inserted.
●Do not bundle or wind the AC
charging cable while charging,
as doing so may result in over-
heating.
●Do not touch the terminals of
the charging connector and AC
charging inlet with a sharp metal
objects (needles, etc.,) or
hands, or short them with for-
eign objects.
Page 114 of 628
1142-2. Charging
Owners Manual_USA_M42C01_ennate.
2
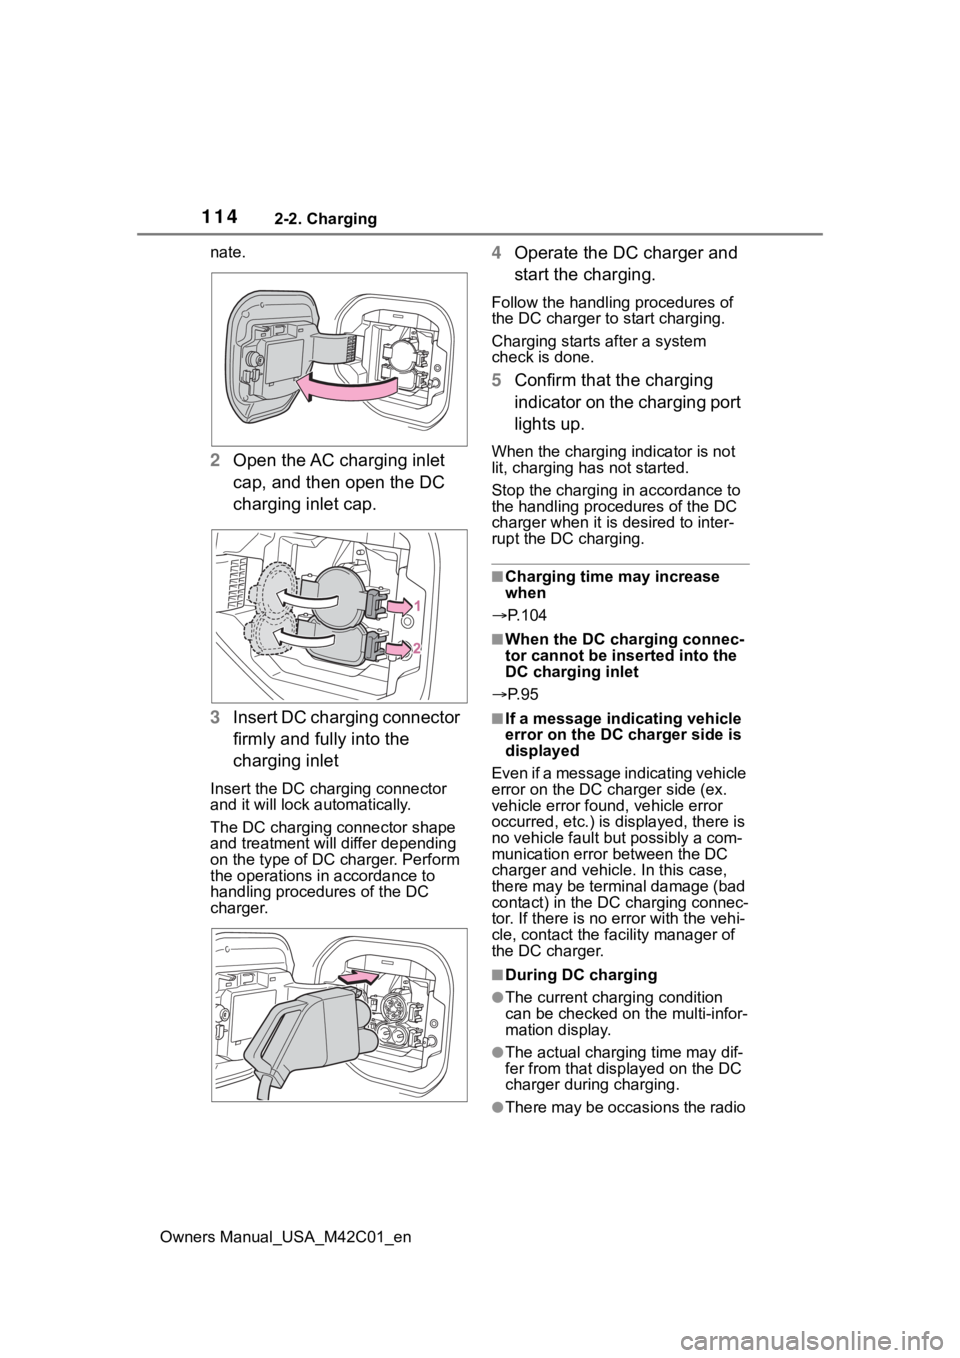
Open the AC charging inlet
cap, and then open the DC
charging inlet cap.
3 Insert DC charging connector
firmly and fully into the
charging inlet
Insert the DC charging connector
and it will lock automatically.
The DC charging connector shape
and treatment will differ depending
on the type of DC charger. Perform
the operations in accordance to
handling procedures of the DC
charger.
4Operate the DC charger and
start the charging.
Follow the handling procedures of
the DC charger to start charging.
Charging starts after a system
check is done.
5 Confirm that the charging
indicator on the charging port
lights up.
When the charging indicator is not
lit, charging has not started.
Stop the charging in accordance to
the handling procedures of the DC
charger when it is desired to inter-
rupt the DC charging.
■Charging time may increase
when
P.104
■When the DC charging connec-
tor cannot be inserted into the
DC charging inlet
P. 9 5
■If a message indicating vehicle
error on the DC charger side is
displayed
Even if a message indicating vehicle
error on the DC charger side (ex.
vehicle error found, vehicle error
occurred, etc.) is displayed, there is
no vehicle fault but possibly a com-
munication error between the DC
charger and vehicle. In this case,
there may be terminal damage (bad
contact) in the DC charging connec-
tor. If there is no er ror with the vehi-
cle, contact the fa cility manager of
the DC charger.
■During DC charging
●The current charging condition
can be checked on the multi-infor-
mation display.
●The actual charging time may dif-
fer from that dis played on the DC
charger during charging.
●There may be occasions the radio
Page 115 of 628
1152-2. Charging
Owners Manual_USA_M42C01_en
2
Electric Vehicle system
cannot be hear d due to noise
occurrence during DC charging
●As the battery approaches full
charge, the charging speed will
decrease and it will take longer to
complete charging.
●The time to complete charging
may change, or charging may
stop before reaching the upper
limit of the charge capacity, due to
the remaining charge of the trac-
tion battery, the outside tempera-
ture, the specifications of the
charger (stand), etc.
●It is recommended to avoid fre-
quent DC charging to prevent a
decline in the traction battery
capacity.
●Quickly move from the DC
charging space for other users
after the DC charging is com-
pleted.
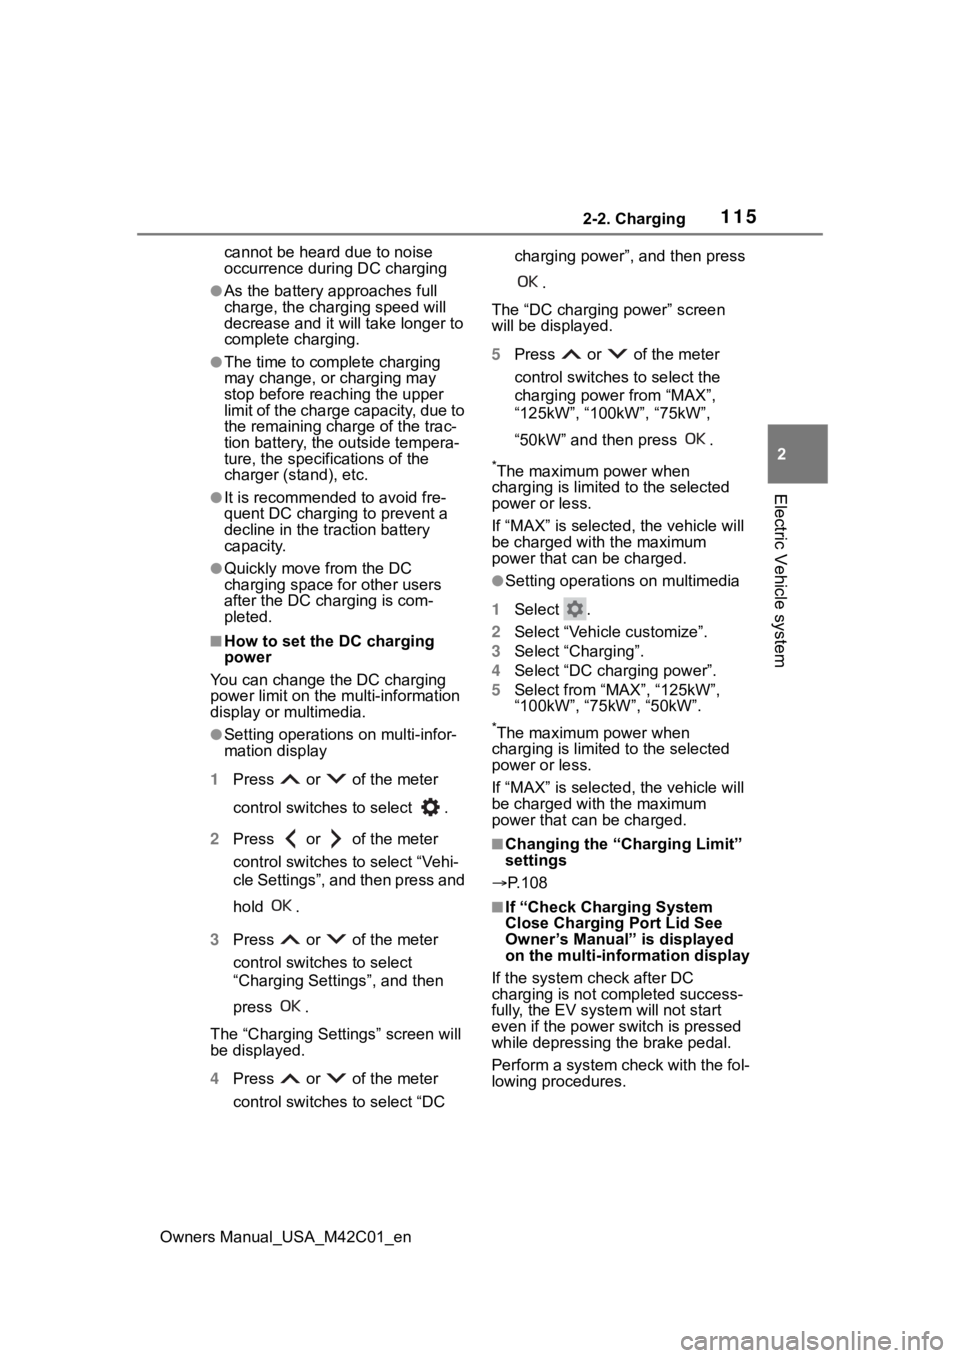
■How to set the DC charging
power
You can change the DC charging
power limit on the multi-information
display or multimedia.
●Setting operations on multi-infor-
mation display
1 Press or of the meter
control switches to select .
2 Press or of the meter
control switches to select “Vehi-
cle Settings”, and then press and
hold .
3 Press or of the meter
control switches to select
“Charging Settings”, and then
press .
The “Charging Sett ings” screen will
be displayed.
4 Press or of the meter
control switches to select “DC charging power”, and then press
.
The “DC charging power” screen
will be displayed.
5 Press or of the meter
control switches to select the
charging power from “MAX”,
“125kW”, “100kW”, “75kW”,
“50kW” and then press .
*The maximum power when
charging is limited to the selected
power or less.
If “MAX” is selected , the vehicle will
be charged with the maximum
power that can be charged.
●Setting operations on multimedia
1 Select .
2 Select “Vehicle customize”.
3 Select “Charging”.
4 Select “DC charging power”.
5 Select from “MAX”, “125kW”,
“100kW”, “75kW”, “50kW”.
*The maximum power when
charging is limited to the selected
power or less.
If “MAX” is selected , the vehicle will
be charged with the maximum
power that can be charged.
■Changing the “Cha rging Limit”
settings
P.108
■If “Check Charging System
Close Charging Port Lid See
Owner’s Manual” is displayed
on the multi-information display
If the system check after DC
charging is not completed success-
fully, the EV system will not start
even if the power switch is pressed
while depressing the brake pedal.
Perform a system check with the fol-
lowing procedures.
Page 116 of 628
1162-2. Charging
Owners Manual_USA_M42C01_en1
Be sure to engage the parking
brake and then turn the power
switch off.
2 Close the charging inlet cap,
close the charging port lid.
3 Check if “Checking Charging
System” is displayed on the
multi-information display when
the power switch is turned to ON.
Do not open the c harging port lid
while the charging system is check-
ing.
When the system check is com-
pleted, the power switch automati-
cally turns off.
4 Press the power switch while
depressing the brake pedal. The
“READY” indicator turns on.
Contact your Toyot a dealer if the
charging system check is done and
the message on the multi-informa-
tion display does not go off.
WARNING
■Warnings for DC charging
Be sure to observe the following
when using DC charging.
Failure to do so may cause an
accident that could lead to death
or serious injury.
●Check that the DC charger and
DC charging inlet are not dam-
aged. If there is any damage to
the DC charging inlet, do not
perform a DC charge and have
it inspected immediately at your
Toyota dealer.
●Do not touch the terminals of
the DC charging connector or
inlet with metallic sharp tips
(wires and needles), or allow a
short circuit to occur with foreign
objects.
●Do not insert anything other
than the DC charging connector
into the DC charging inlet.
●Check that the DC charging
cable is not coiled up or pinned
underneath heavy objects.
●Be sure the DC charging inlet
makes direct contact with the
DC charging connector.
Do not connect conversion
adapters, extension cords, etc.,
between the DC charging con-
nector and DC ch arging inlet.
●When DC charging is inter-
rupted, follow the handling pro-
cedures of the DC charger.
Immediately stop the DC
charging when the re is an out-
break of heat, smoke, strange
noises or smells, etc., during
charging.
●Check that the DC charging
connector and DC charging inlet
do not have foreign objects or
snow or ice attached to it. If any-
thing is attached t o the inlet, be
sure to complete ly remove the
material before connecting the
DC charging connector.
●Do not charge the vehicle when
there is a possibility of lightning.
If you notice lightning while
charging the vehicle, do not
touch the vehicle and the DC
charging cable.
●Do not get the DC charging inlet
terminals wet.
●Close the hood when using DC
charging. The cooling fan may
suddenly start to run. Keep
hands and clothing (especially a
tie, a scarf or a muffler) away
from the fan. Fa ilure to do so
may cause the hands or cloth-
ing to be caught, resulting in
serious injury.