Light TOYOTA C-HR 2018 1.G Owners Manual
[x] Cancel search | Manufacturer: TOYOTA, Model Year: 2018, Model line: C-HR, Model: TOYOTA C-HR 2018 1.GPages: 516, PDF Size: 9.32 MB
Page 427 of 516

4277-2. Steps to take in an emergency
7
When trouble arises
C-HR_OM_USA_OM10526U
Chock the tires.
Slightly loosen the wheel nuts
(one turn).
Turn the tire jack portion by
hand until the center of the
recessed portion of the jack is
in contact with the center of the
jack point.
Replacing a flat tire
1
Flat tireWheel chock positions
FrontLeft-hand sideBehind the rear right-hand side tire
Right-hand sideBehind the rear left-hand side tire
RearLeft-hand sideIn front of the front right-hand side tire
Right-hand sideIn front of the front left-hand side tire
2
3
Page 428 of 516

4287-2. Steps to take in an emergency
C-HR_OM_USA_OM10526U
Assemble the jack handle and
the wheel nut wrench as shown
in the illustration.
Raise the vehicle until the tire is
slightly raised off the ground.
Remove all the wheel nuts and
the tire.
When resting the tire on the
ground, place the tire so that the
wheel design faces up to avoid
scratching the wheel surface.
4
5
6
Page 431 of 516

4317-2. Steps to take in an emergency
7
When trouble arises
C-HR_OM_USA_OM10526U
■The compact spare tire
●The compact spare tire is identified by the label “TEMPORARY USE
ONLY” on the tire sidewall.
Use the compact spare tire temporarily, and only in an emergency.
●Make sure to check the tire inflation pressure of the compact spare tire.
(→ P. 456)
■After completing the tire change
The tire pressure warning system must be reset. ( →P. 355)
■When using the compact spare tire
As the compact spare tire is not equipped with a tire pressure warning
valve and transmitter, low inflation pressure of the spare tire will not be
indicated by the tire pressure warning system. Also, if you replace the
compact spare tire after the tire pressure warning light comes on, the light
remains on.
■When the compact spare tire is equipped
The vehicle becomes lower when driving with the compact spare tire
compared to when driving with standard tires.
■If you have a flat front tire on a road covered with snow or ice
Install the compact spare tire on one of the rear wheels of the vehicle.
Perform the following steps and fit tire chains to the front tires:
Replace a rear tire with the compact spare tire.
Replace the flat front tire with the tire removed from the rear of the vehi-
cle.
Fit tire chains to the front tires.
1
2
3
Page 434 of 516
4347-2. Steps to take in an emergency
C-HR_OM_USA_OM10526U
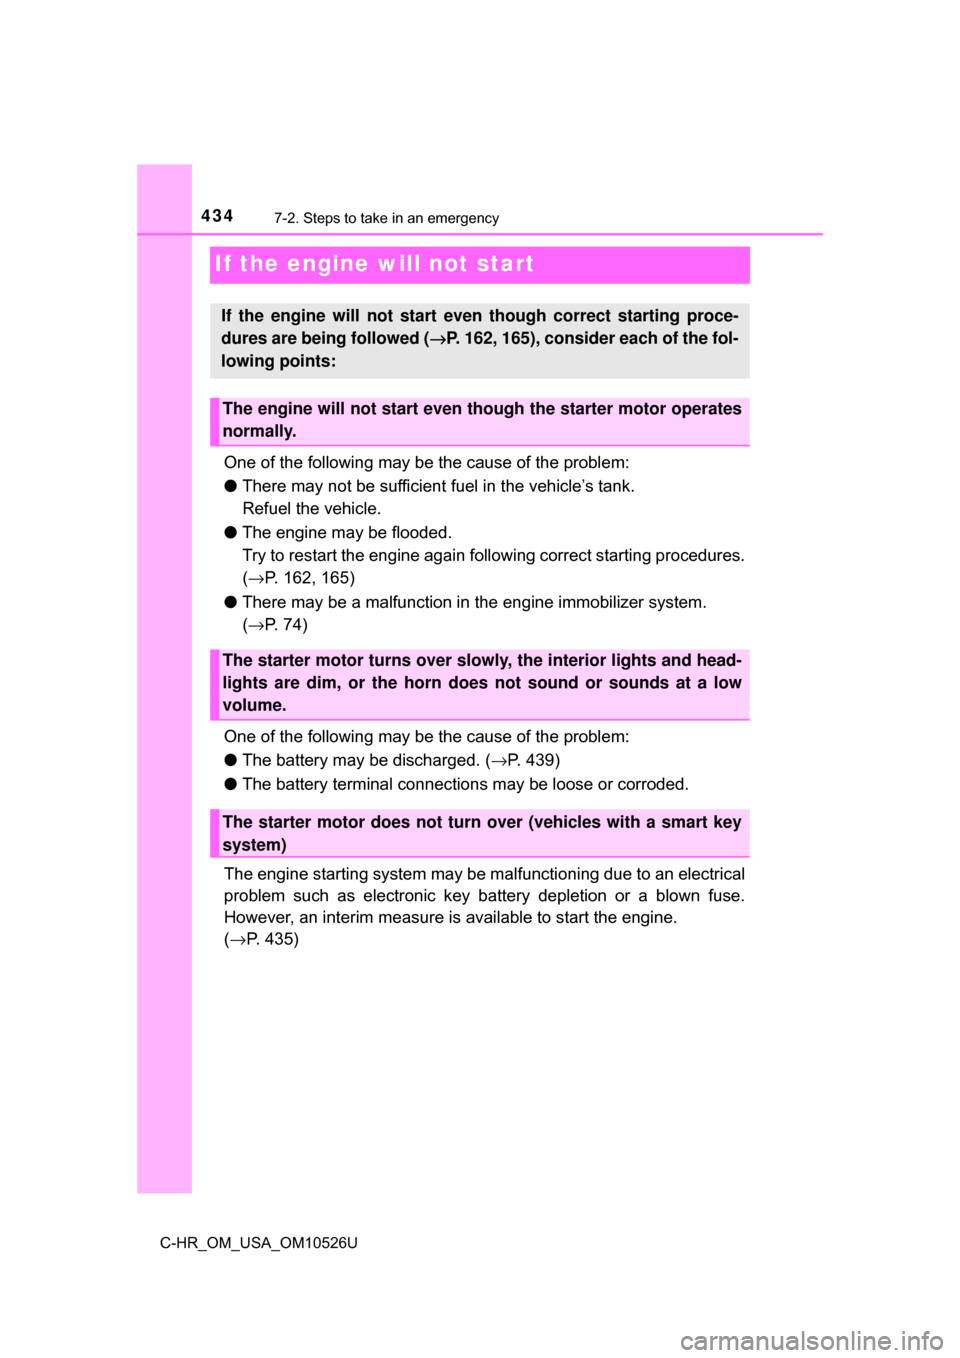
If the engine will not start
One of the following may be the cause of the problem:
●There may not be sufficient fuel in the vehicle’s tank.
Refuel the vehicle.
● The engine may be flooded.
Try to restart the engine again following correct starting procedures.
(→ P. 162, 165)
● There may be a malfunction in the engine immobilizer system.
(→ P. 74)
One of the following may be the cause of the problem:
● The battery may be discharged. ( →P. 439)
● The battery terminal connections may be loose or corroded.
The engine starting system may be malfunctioning due to an electrical
problem such as electronic key battery depletion or a blown fuse.
However, an interim measure is available to start the engine.
( → P. 435)
If the engine will not start eve n though correct starting proce-
dures are being followed ( →P. 162, 165), consider each of the fol-
lowing points:
The engine will not start even though the starter motor operates
normally.
The starter motor turns over slowly, the interior lights and head-
lights are dim, or the horn does not sound or sounds at a low
volume.
The starter motor does not turn over (vehicles with a smart key
system)
Page 435 of 516
4357-2. Steps to take in an emergency
7
When trouble arises
C-HR_OM_USA_OM10526U
One of the following may be the cause of the problem:
●One or both of the battery terminals may be disconnected.
● The battery may be discharged. ( →P. 439)
● There may be a malfunction in th e steering lock system. (vehicles
with a smart key system)
Contact your Toyota dealer if the problem cannot be repaired, or if repair
procedures are unknown.
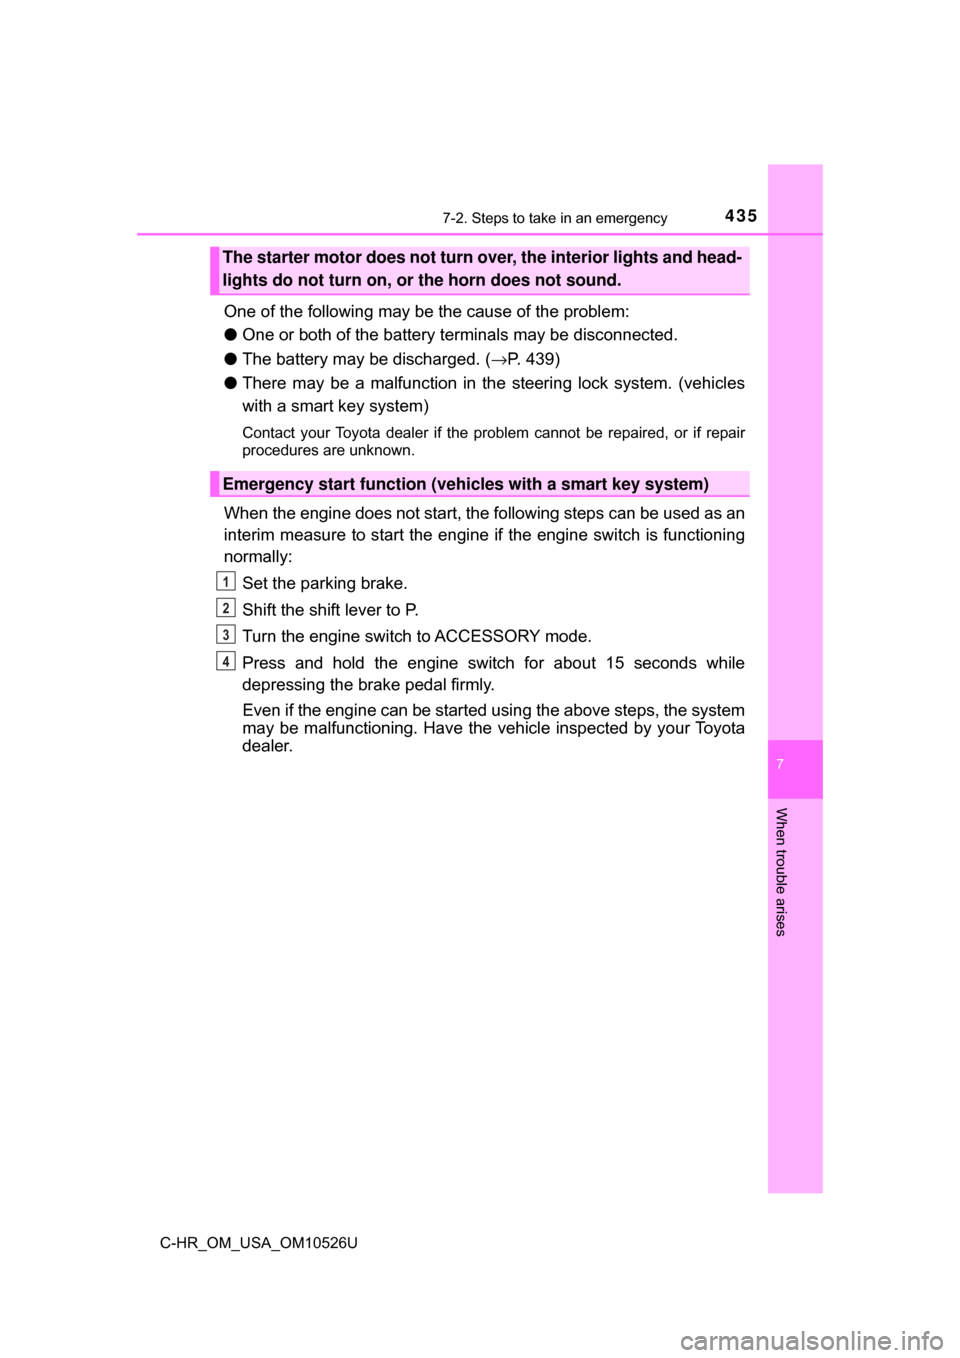
When the engine does not start, the following steps can be used as an
interim measure to start the engine if the engine switch is functioning
normally:
Set the parking brake.
Shift the shift lever to P.
Turn the engine switch to ACCESSORY mode.
Press and hold the engine switch for about 15 seconds while
depressing the brake pedal firmly.
Even if the engine can be started using the above steps, the system
may be malfunctioning. Have the ve hicle inspected by your Toyota
dealer.
The starter motor does not turn over, the interior lights and head-
lights do not turn on, or the horn does not sound.
Emergency start function (vehicles with a smart key system)
1
2
3
4
Page 440 of 516
4407-2. Steps to take in an emergency
C-HR_OM_USA_OM10526U
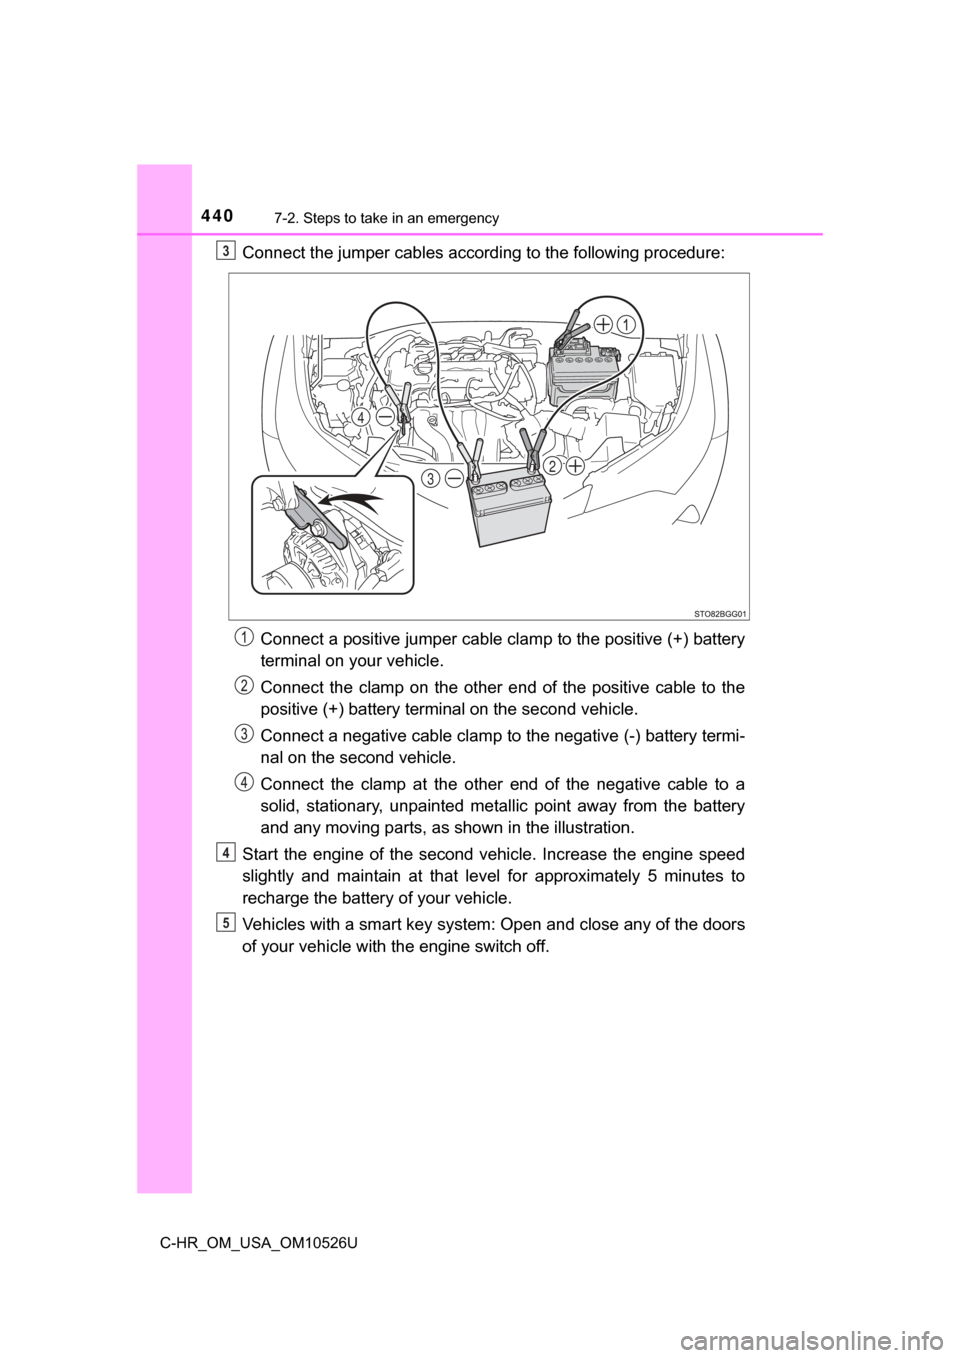
Connect the jumper cables according to the following procedure:Connect a positive jumper cable clamp to the positive (+) battery
terminal on your vehicle.
Connect the clamp on the other e nd of the positive cable to the
positive (+) battery terminal on the second vehicle.
Connect a negative cable clamp to the negative (-) battery termi-
nal on the second vehicle.
Connect the clamp at the other end of the negative cable to a
solid, stationary, unpainted metallic point away from the battery
and any moving parts, as shown in the illustration.
Start the engine of the second v ehicle. Increase the engine speed
slightly and maintain at that level for approximately 5 minutes to
recharge the batter y of your vehicle.
Vehicles with a smart key system: Open and close any of the doors
of your vehicle with the engine switch off.3
32
4
4
5
Page 441 of 516
4417-2. Steps to take in an emergency
7
When trouble arises
C-HR_OM_USA_OM10526U
Vehicles without a smart key system:
Maintain the engine speed of the second vehicle and turn the
engine switch to the “ON” position, then start the vehicle’s engine.
Vehicles with a smart key system:
Maintain the engine speed of the second vehicle and turn the
engine switch to IGNITION ON mode, then start the vehicle’s
engine.
Once the vehicle’s engine has started, remove the jumper cables in
the exact reverse order from which they were connected.
To install the engine cover, conduct the removal procedure in
reverse. After installing, check that the fixed pins are inserted
securely.
Once the engine starts, have the v ehicle inspected at your Toyota
dealer as soon as possible.
■ Starting the engine when the battery is discharged
The engine cannot be started by push-starting.
■ To prevent battery discharge
●Turn off the headlights and the air conditioning system while the engine is
stopped.
● Turn off any unnecessary electrical components when the vehicle is running
at a low speed for an extended period, such as in heavy traffic.
■ Charging the battery
The electricity stored in the battery will discharge gradually even when the
vehicle is not in use, due to natural discharge and the draining effects of cer-
tain electrical appliances. If the vehicle is left for a long time, the battery may
discharge, and the engine may be unable to start. (The battery recharges
automatically during driving.)
■ When exchanging the battery
●Use a battery that conforms to European regulations.
● Use a battery that the case size is same as the previous one (LN2), 20 hour
rate capacity (20HR) is equivalent ( 60Ah) or greater, and performance rating
(CCA) is equivalent (520A) or greater.
• If the sizes differ, the battery cannot be properly secured.
• If the 20 hour rate capacity is low, even if the time period where the vehi- cle is not used is a short time, the battery may discharge and the engine
may not be able to start.
● For details, consult your Toyota dealer.
6
7
8
Page 442 of 516
4427-2. Steps to take in an emergency
C-HR_OM_USA_OM10526U
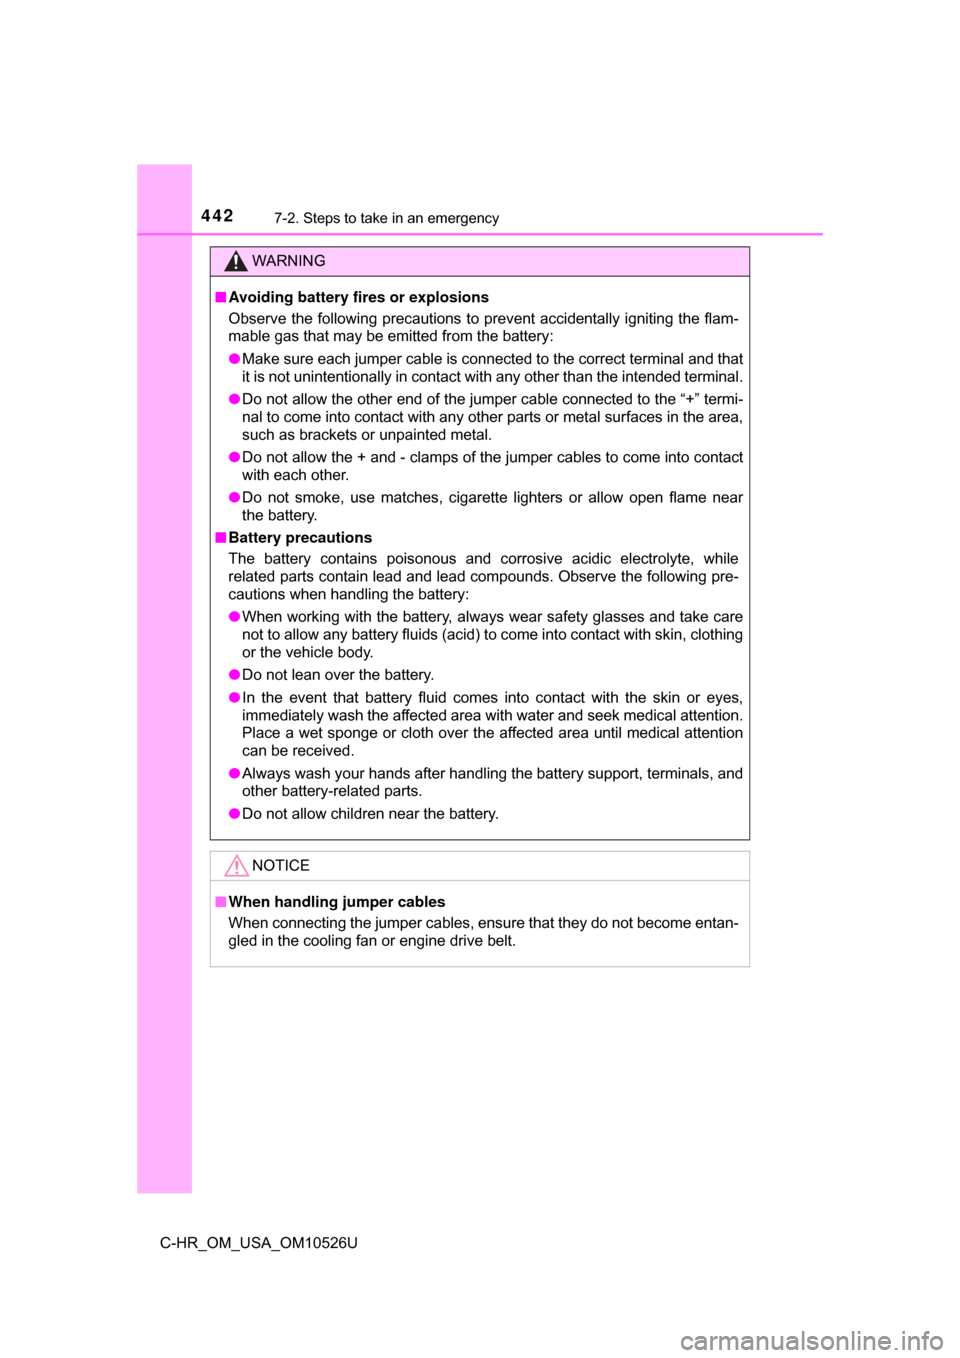
WARNING
■Avoiding battery fires or explosions
Observe the following precautions to prevent accidentally igniting the flam-
mable gas that may be emitted from the battery:
● Make sure each jumper cable is connected to the correct terminal and that
it is not unintentionally in contact with any other than the intended terminal.
● Do not allow the other end of the jumper cable connected to the “+” termi-
nal to come into contact with any other parts or metal surfaces in the area,
such as brackets or unpainted metal.
● Do not allow the + and - clamps of the jumper cables to come into contact
with each other.
● Do not smoke, use matches, cigarette lighters or allow open flame near
the battery.
■ Battery precautions
The battery contains poisonous and corrosive acidic electrolyte, while
related parts contain lead and lead compounds. Observe the following pre-
cautions when handling the battery:
● When working with the battery, always wear safety glasses and take care
not to allow any battery fluids (acid) to come into contact with skin, clothing
or the vehicle body.
● Do not lean over the battery.
● In the event that battery fluid comes into contact with the skin or eyes,
immediately wash the affected area with water and seek medical attention.
Place a wet sponge or cloth over the affected area until medical attention
can be received.
● Always wash your hands after handling the battery support, terminals, an\
d
other battery-related parts.
● Do not allow children near the battery.
NOTICE
■When handling jumper cables
When connecting the jumper cables, ensure that they do not become entan-
gled in the cooling fan or engine drive belt.
Page 454 of 516
4548-1. Specifications
C-HR_OM_USA_OM10526U
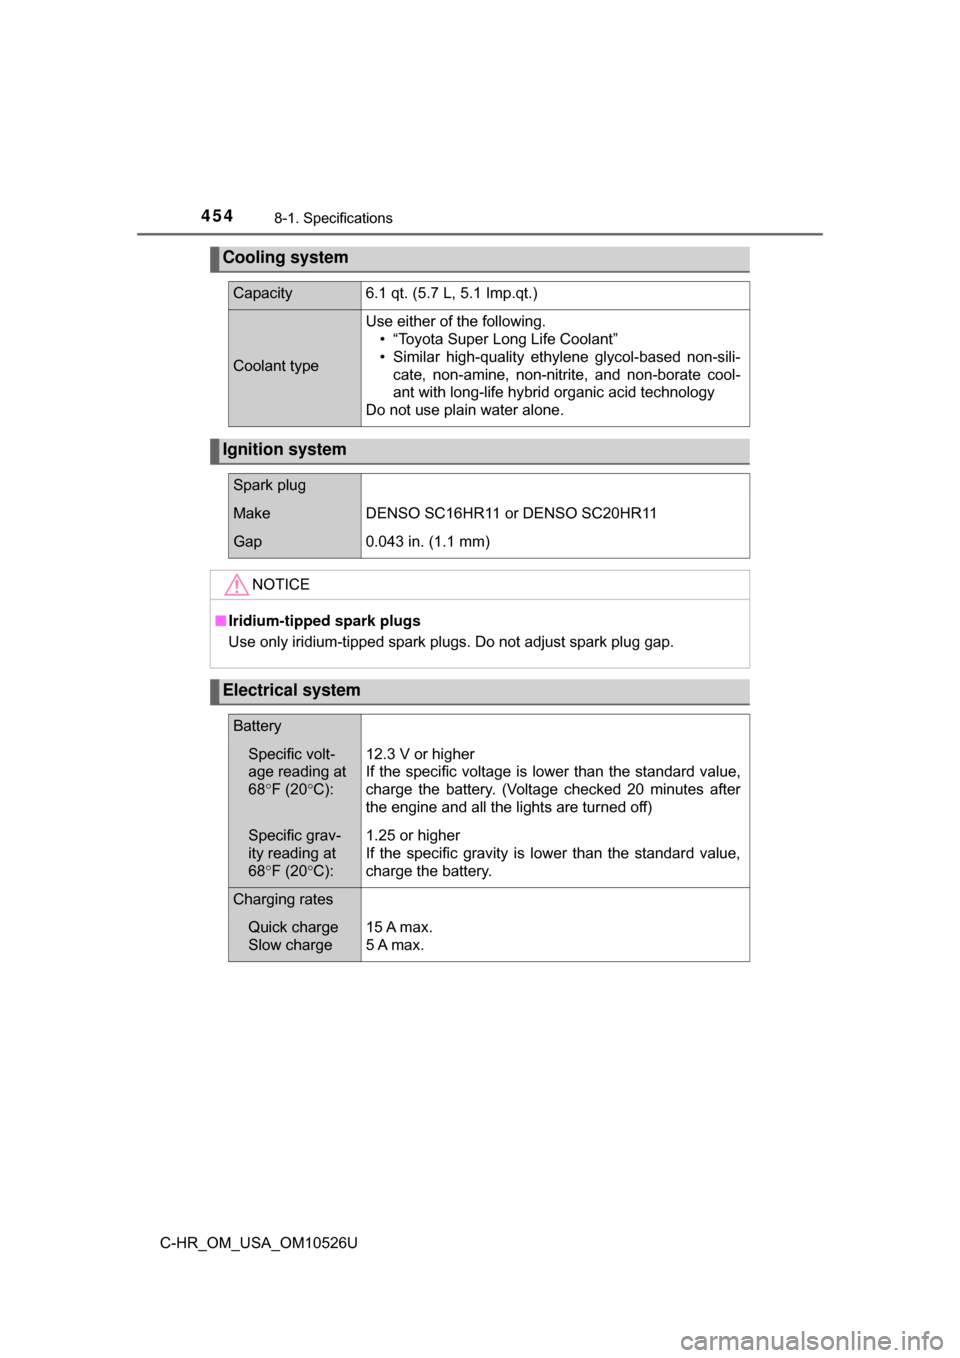
Cooling system
Capacity6.1 qt. (5.7 L, 5.1 Imp.qt.)
Coolant type
Use either of the following.• “Toyota Super Long Life Coolant”
• Similar high-quality ethylene glycol-based non-sili-cate, non-amine, non-nitrite, and non-borate cool-
ant with long-life hybrid organic acid technology
Do not use plain water alone.
Ignition system
Spark plug
MakeDENSO SC16HR11 or DENSO SC20HR11
Gap0.043 in. (1.1 mm)
NOTICE
■ Iridium-tipped spark plugs
Use only iridium-tipped spark plugs. Do not adjust spark plug gap.
Electrical system
Battery
Specific volt-
age reading at
68° F (20 °C):12.3 V or higher
If the specific voltage is lower than the standard value,
charge the battery. (Voltage checked 20 minutes after
the engine and all the lights are turned off)
Specific grav-
ity reading at
68° F (20 °C):1.25 or higher
If the specific gravity is lower than the standard value,
charge the battery.
Charging rates
Quick charge
Slow charge15 A max.
5 A max.
Page 457 of 516

4578-1. Specifications
8
Vehicle specifications
C-HR_OM_USA_OM10526U
*: If equipped
Light bulbs
Light bulbsBulb No.WTy p e
ExteriorHeadlights 9012 55 A
Front side marker lights
―5B
Front turn signal lights ―21 C
Side turn signal lights ―5D
Rear side marker lights ―5B
Rear turn signal lights ―21 D
Back-up lights 921 16 B
License plate lights ―5B
InteriorVanity lights
*―
5B
Front interior lights/
front personal lights ―
8B
Rear interior light ―8E
Luggage compartment
light ―
5B
A: HIR2 halogen bulbs
C: Single end bulbs (amber) E: Double end bulbs B: Wedge base bulbs (clear)
D: Wedge base bulbs (amber)