USB port TOYOTA C-HR 2020 Accessories, Audio & Navigation (in English)
[x] Cancel search | Manufacturer: TOYOTA, Model Year: 2020, Model line: C-HR, Model: TOYOTA C-HR 2020Pages: 170, PDF Size: 5.37 MB
Page 43 of 170
432-3. Apple CarPlay®/Android Auto™
2
Basic function
2-3.Apple CarPlay®/Android Auto™
*: This function is not made avail-able in some countries or areas
1 Enable Siri on the device to
be connected.
2 Connect the device to the
USB port. ( P. 6 2 ) 3
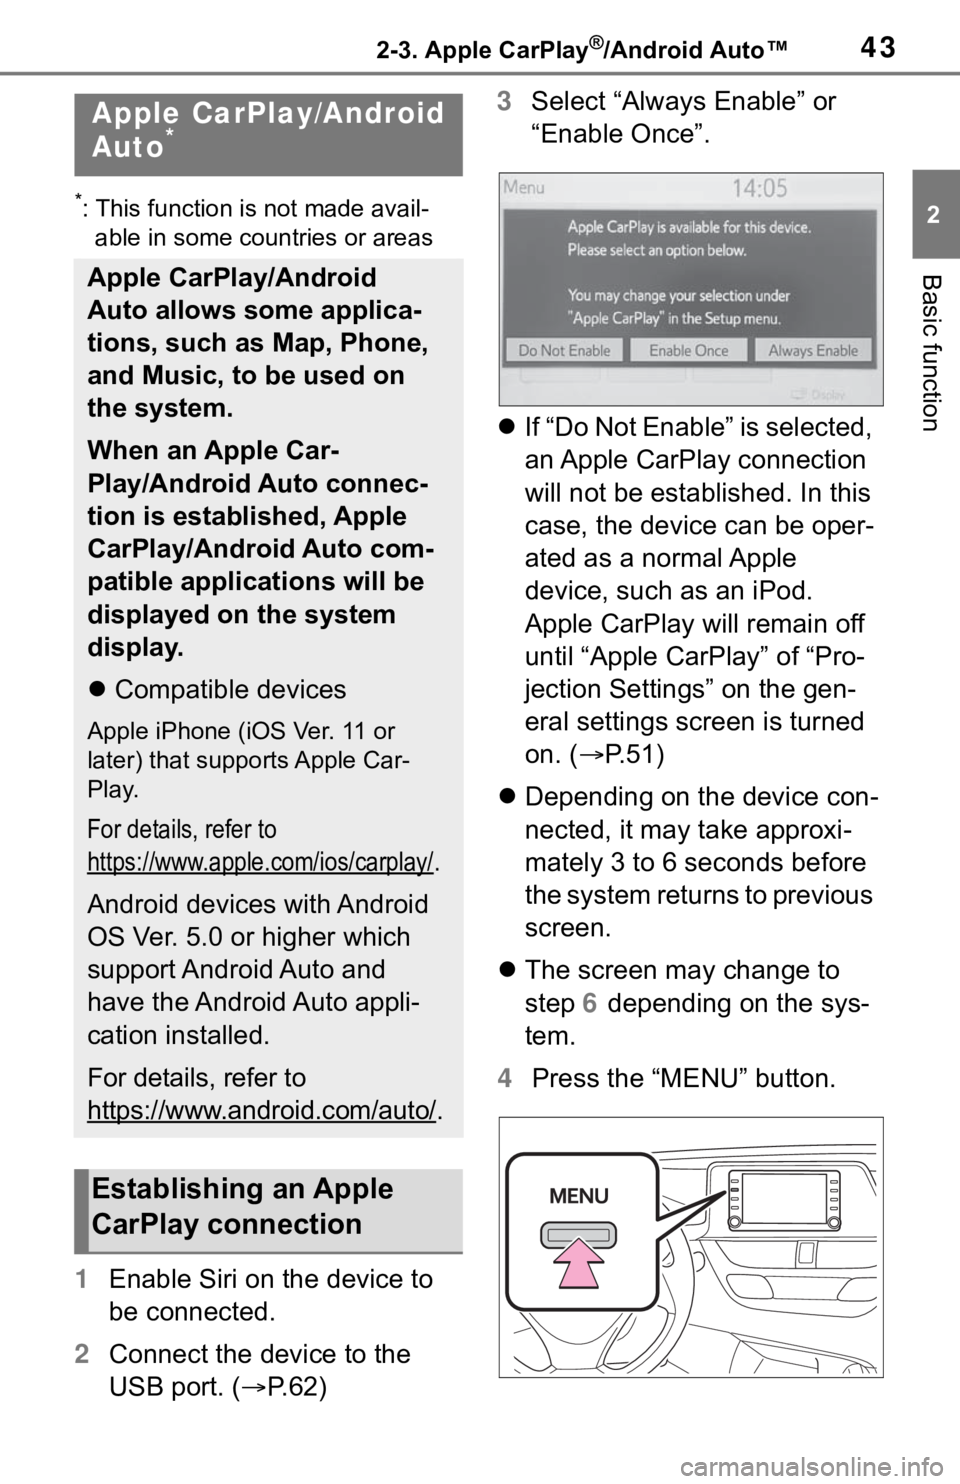
Select “Always Enable” or
“Enable Once”.
If “Do Not Enable” is selected,
an Apple CarPlay connection
will not be established. In this
case, the device can be oper-
ated as a normal Apple
device, such as an iPod.
Apple CarPlay will remain off
until “Apple CarPlay” of “Pro-
jection Settings” on the gen-
eral settings screen is turned
on. ( P. 5 1 )
Depending on the device con-
nected, it may take approxi-
mately 3 to 6 seconds before
the system returns to previous
screen.
The screen may change to
step 6 depending on the sys-
tem.
4 Press the “MENU” button.
Apple CarPlay/Android
Auto*
Apple CarPlay/Android
Auto allows some applica-
tions, such as Map, Phone,
and Music, to be used on
the system.
When an Apple Car-
Play/Android Auto connec-
tion is established, Apple
CarPlay/Android Auto com-
patible applications will be
displayed on the system
display.
Compatible devices
Apple iPhone (iOS Ver. 11 or
later) that supports Apple Car-
Play.
For details, refer to
https://www.apple.com/ios/carplay/
.
Android devices with Android
OS Ver. 5.0 or higher which
support Android Auto and
have the Android Auto appli-
cation installed.
For details, refer to
https://www.android.com/auto/
.
Establishing an Apple
CarPlay connection
Page 44 of 170
442-3. Apple CarPlay®/Android Auto™
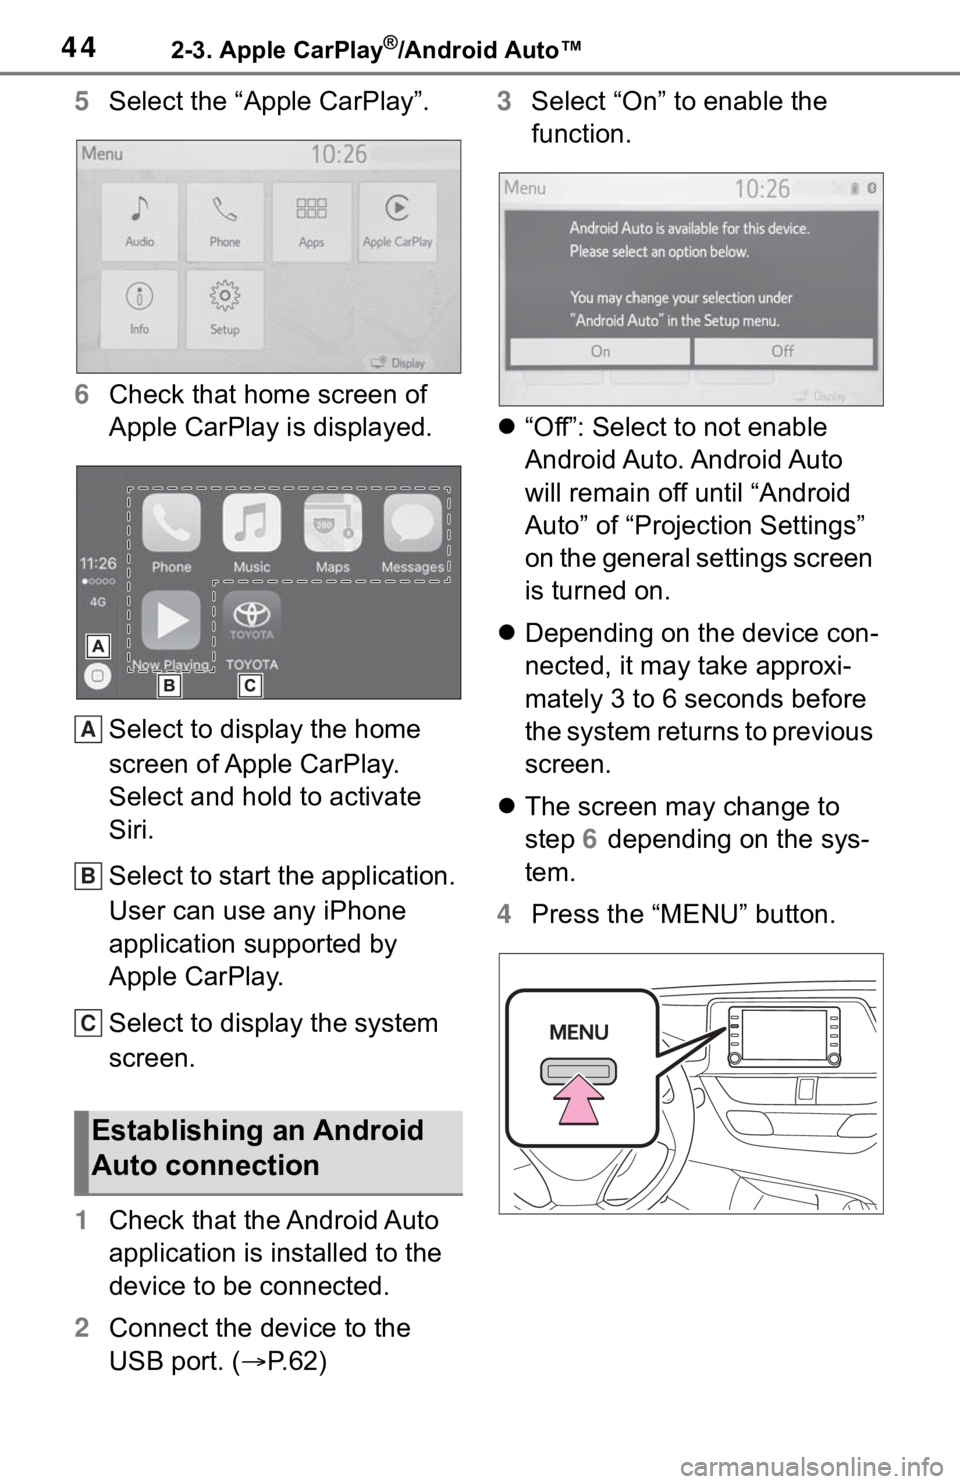
5Select the “Apple CarPlay”.
6 Check that home screen of
Apple CarPlay is displayed.
Select to display the home
screen of Apple CarPlay.
Select and hold to activate
Siri.
Select to start the application.
User can use any iPhone
application supported by
Apple CarPlay.
Select to display the system
screen.
1 Check that the Android Auto
application is installed to the
device to be connected.
2 Connect the device to the
USB port. ( P. 6 2 ) 3
Select “On” to enable the
function.
“Off”: Select to not enable
Android Auto. Android Auto
will remain off until “Android
Auto” of “Projection Settings”
on the general settings screen
is turned on.
Depending on the device con-
nected, it may take approxi-
mately 3 to 6 seconds before
the system returns to previous
screen.
The screen may change to
step 6 depending on the sys-
tem.
4 Press the “MENU” button.
Establishing an Android
Auto connection
A
B
C
Page 45 of 170
452-3. Apple CarPlay®/Android Auto™
2
Basic function
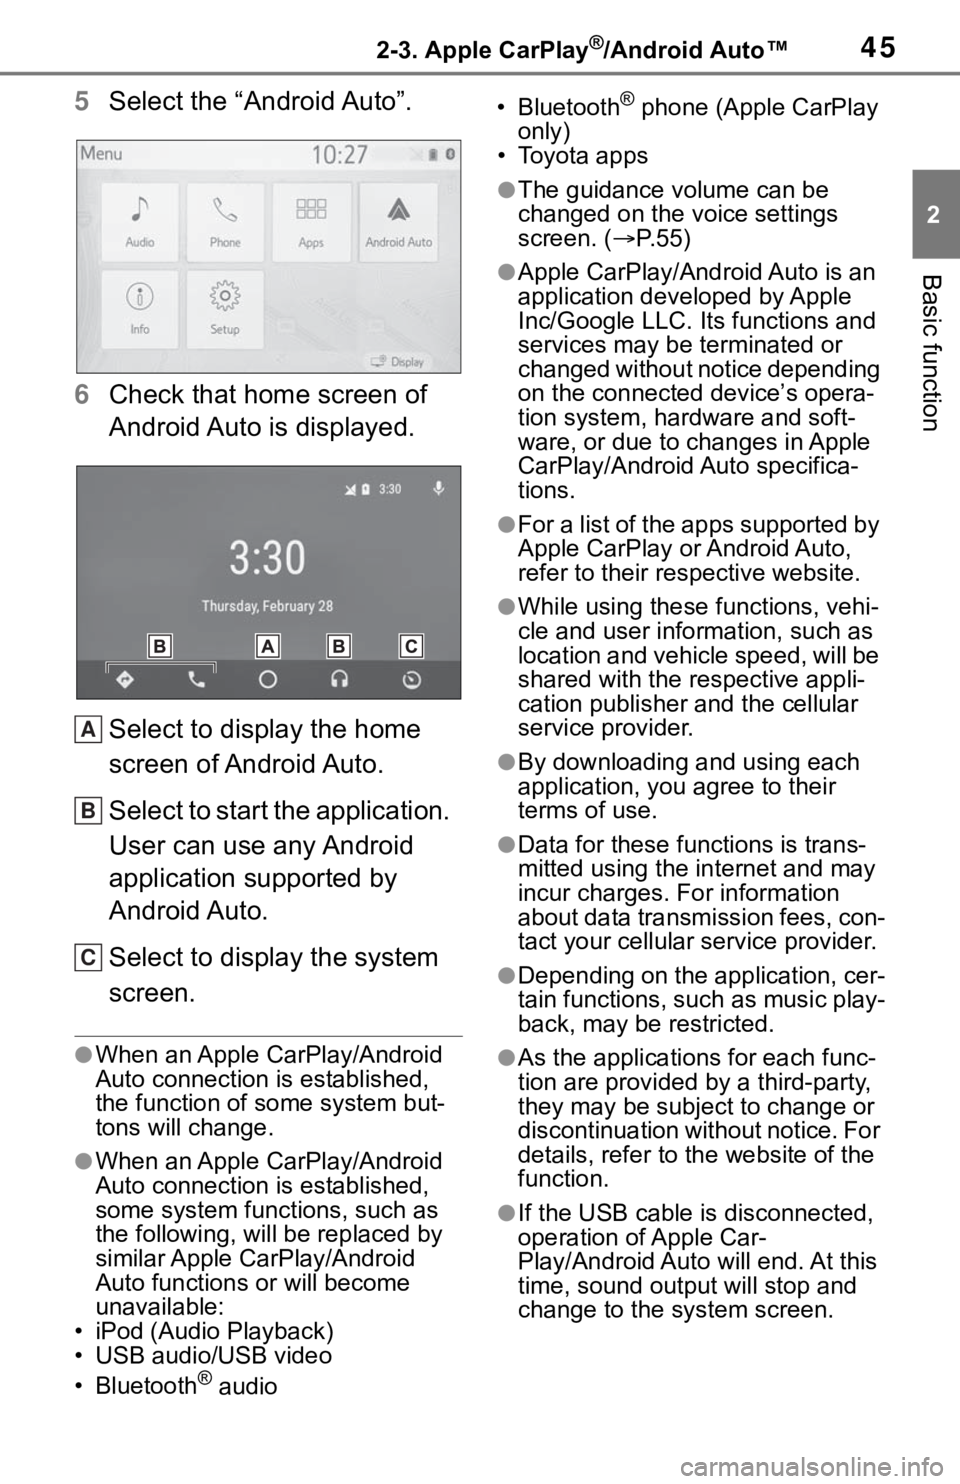
5Select the “Android Auto”.
6 Check that home screen of
Android Auto is displayed.
Select to display the home
screen of Android Auto.
Select to start the application.
User can use any Android
application supported by
Android Auto.
Select to display the system
screen.
●When an Apple CarPlay/Android
Auto connection is established,
the function of some system but-
tons will change.
●When an Apple CarPlay/Android
Auto connection is established,
some system functions, such as
the following, will be replaced by
similar Apple CarPlay/Android
Auto functions or will become
unavailable:
• iPod (Audio Playback)
• USB audio/USB video
• Bluetooth
® audio • Bluetooth
® phone (Apple CarPlay
only)
• Toyota apps
●The guidance volume can be
changed on the voice settings
screen. ( P. 5 5 )
●Apple CarPlay/Android Auto is an
application developed by Apple
Inc/Google LLC. Its functions and
services may be terminated or
changed without notice depending
on the connected device’s opera-
tion system, hardware and soft-
ware, or due to changes in Apple
CarPlay/Android Auto specifica-
tions.
●For a list of the apps supported by
Apple CarPlay or Android Auto,
refer to their respective website.
●While using these functions, vehi-
cle and user information, such as
location and vehicle speed, will be
shared with the respective appli-
cation publisher and the cellular
service provider.
●By downloading and using each
application, you agree to their
terms of use.
●Data for these functions is trans-
mitted using the in ternet and may
incur charges. For information
about data transmission fees, con-
tact your cellular service provider.
●Depending on the application, cer-
tain functions, such as music play-
back, may be restricted.
●As the applications for each func-
tion are provided by a third-party,
they may be subject to change or
discontinuation without notice. For
details, refer to th e website of the
function.
●If the USB cable is disconnected,
operation of Apple Car-
Play/Android Auto will end. At this
time, sound outp ut will stop and
change to the system screen.
A
B
C
Page 47 of 170
472-3. Apple CarPlay®/Android Auto™
2
Basic function
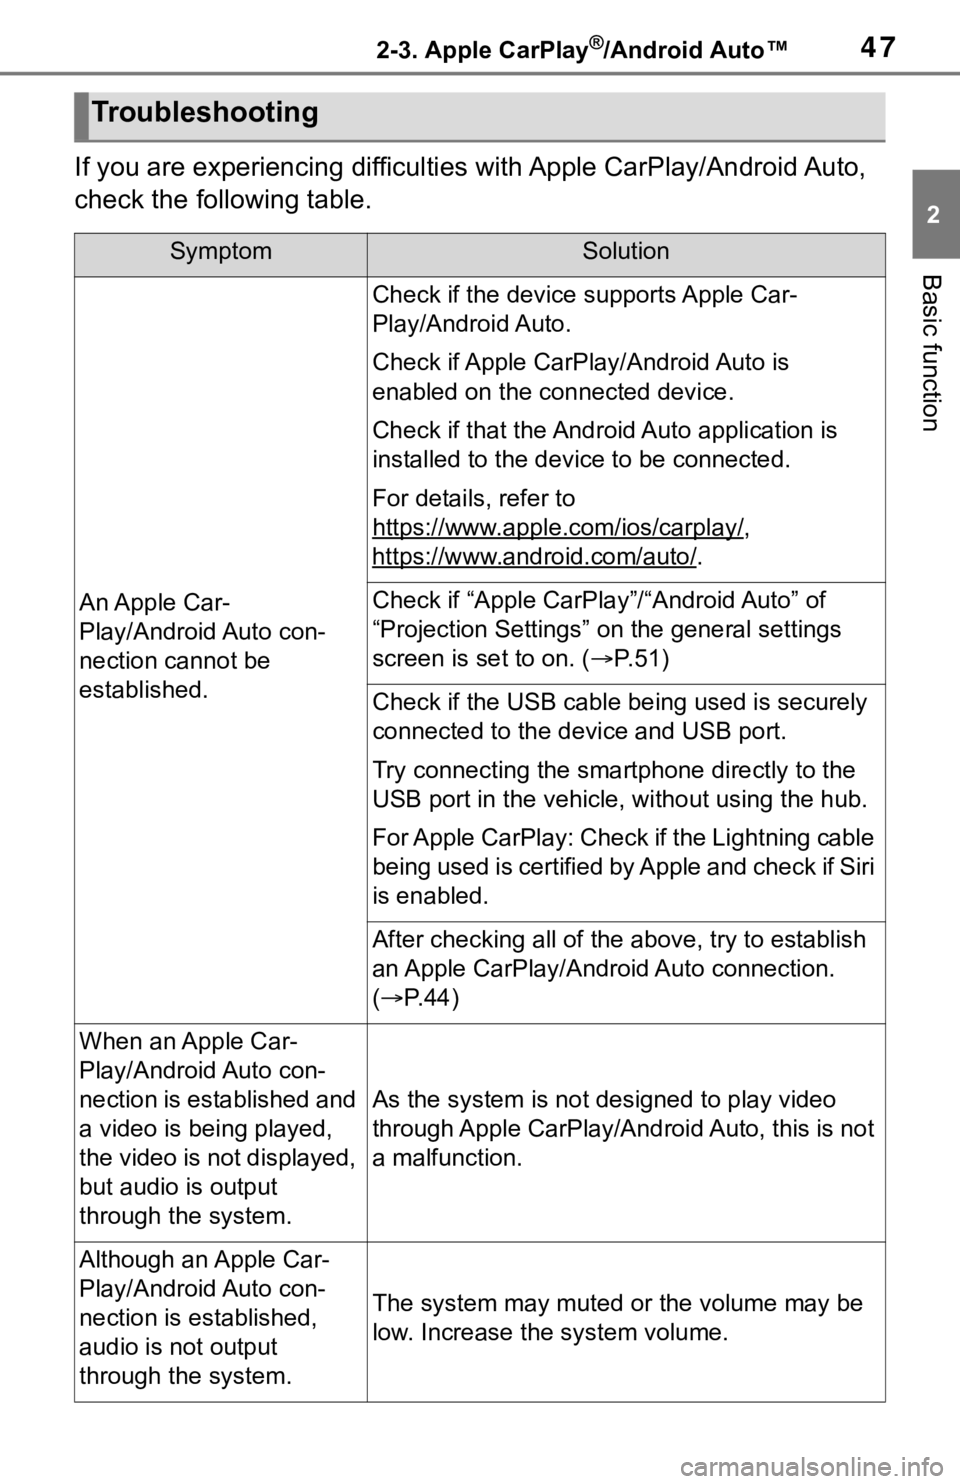
If you are experiencing difficulties with Apple CarPlay/Android Auto,
check the following table.
Troubleshooting
SymptomSolution
An Apple Car-
Play/Android Auto con-
nection cannot be
established.
Check if the device supports Apple Car-
Play/Android Auto.
Check if Apple CarPl ay/Android Auto is
enabled on the connected device.
Check if that the Androi d Auto application is
installed to the device to be connected.
For details, refer to
https://www.apple.com/ios/carplay/
,
https://www.android.com/auto/
.
Check if “Apple CarPla y”/“Android Auto” of
“Projection Settings” on the general settings
screen is set to on. ( P. 5 1 )
Check if the USB cable be ing used is securely
connected to the device and USB port.
Try connecting the smartphone directly to the
USB port in the vehicle, without using the hub.
For Apple CarPlay: Check if the Lightning cable
being used is certified by Apple and check if Siri
is enabled.
After checking all of the above, try to establish
an Apple CarPlay/Android Auto connection.
( P. 4 4 )
When an Apple Car-
Play/Android Auto con-
nection is established and
a video is being played,
the video is not displayed,
but audio is output
through the system.
As the system is not designed to play video
through Apple CarPlay/Android Auto, this is not
a malfunction.
Although an Apple Car-
Play/Android Auto con-
nection is established,
audio is not output
through the system.
The system may muted or the volume may be
low. Increase the system volume.
Page 60 of 170
623-1. Basic operation
1Display the audio source
selection screen. ( P. 6 1 )
2 Select “Reorder”.
3 Select the desired audio
source then or to reor-
der.
4 Select “OK”.
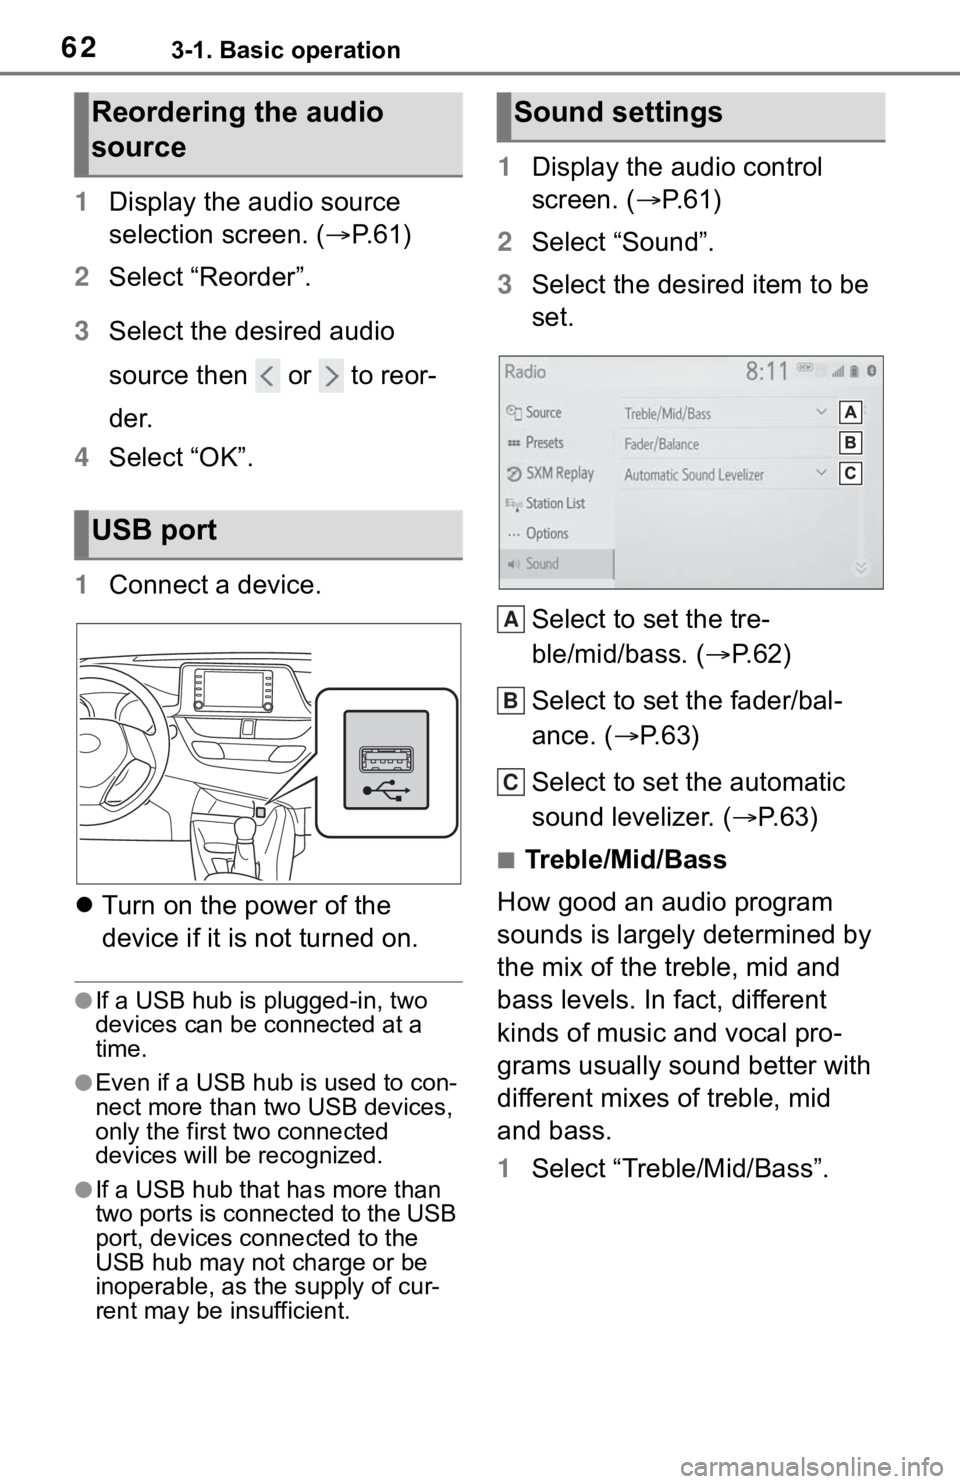
1 Connect a device.
Turn on the power of the
device if it is not turned on.
●If a USB hub is plugged-in, two
devices can be connected at a
time.
●Even if a USB hub is used to con-
nect more than two USB devices,
only the first two connected
devices will be recognized.
●If a USB hub that has more than
two ports is connected to the USB
port, devices connected to the
USB hub may not charge or be
inoperable, as the supply of cur-
rent may be insufficient.
1 Display the audio control
screen. ( P. 6 1 )
2 Select “Sound”.
3 Select the desired item to be
set.
Select to set the tre-
ble/mid/bass. ( P.62)
Select to set the fader/bal-
ance. ( P.63)
Select to set the automatic
sound levelizer. ( P.63)
■Treble/Mid/Bass
How good an audio program
sounds is largely determined by
the mix of the treble, mid and
bass levels. In fact, different
kinds of music and vocal pro-
grams usually sound better with
different mixes of treble, mid
and bass.
1 Select “Treble/Mid/Bass”.
Reordering the audio
source
USB port
Sound settings
A
B
C
Page 61 of 170
633-1. Basic operation
3
Audio/visual system
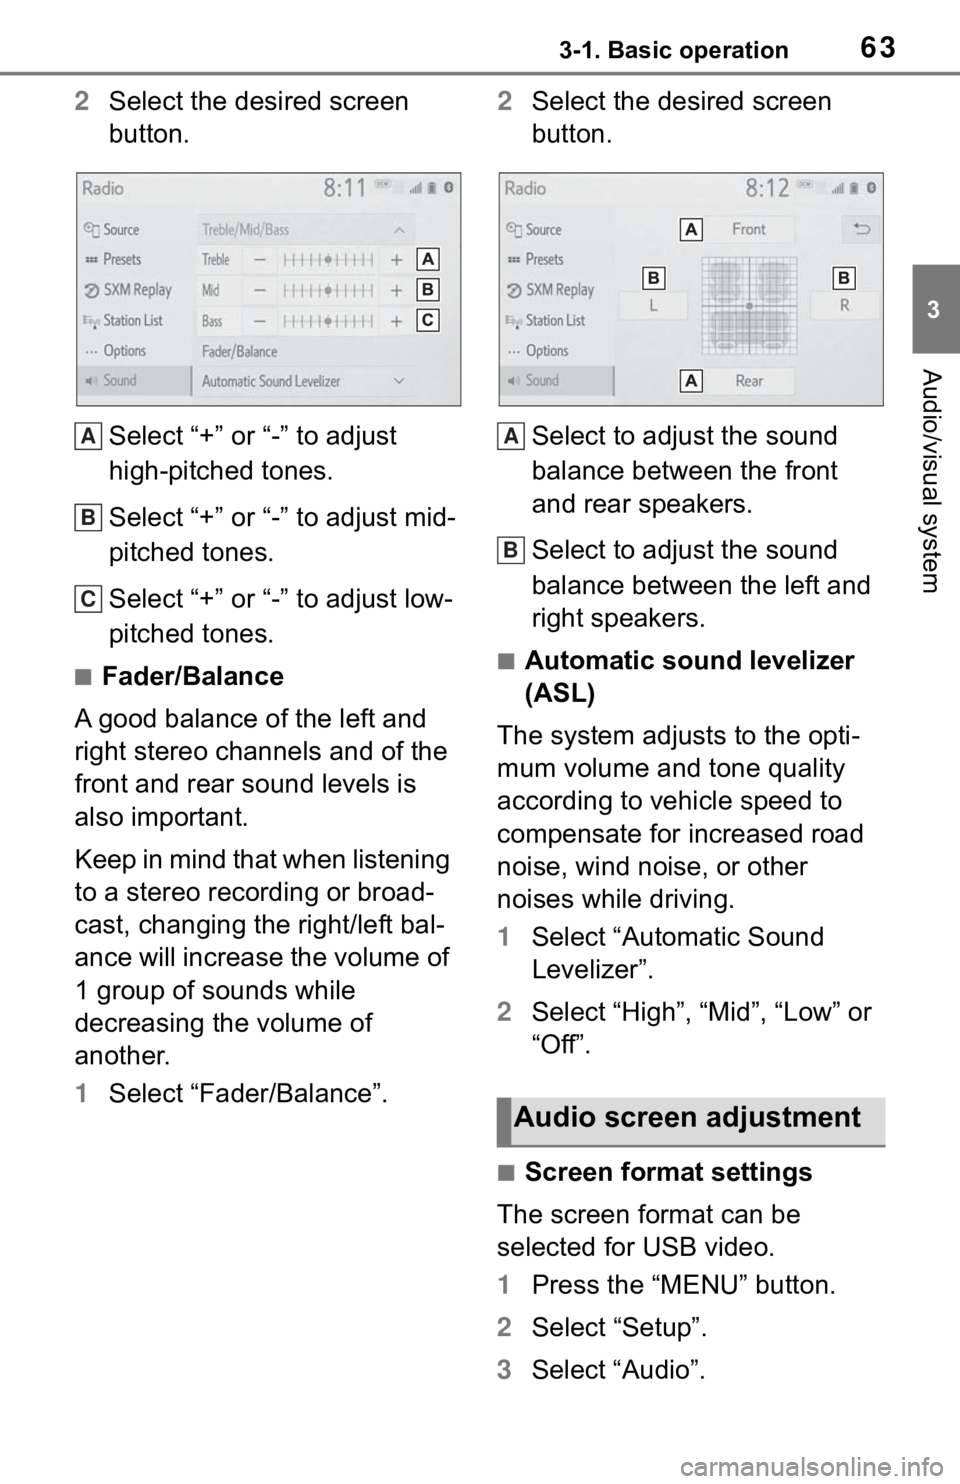
2Select the desired screen
button.
Select “+” or “-” to adjust
high-pitched tones.
Select “+” or “-” to adjust mid-
pitched tones.
Select “+” or “-” to adjust low-
pitched tones.
■Fader/Balance
A good balance of the left and
right stereo channels and of the
front and rear sound levels is
also important.
Keep in mind that when listening
to a stereo recording or broad-
cast, changing the right/left bal-
ance will increase the volume of
1 group of sounds while
decreasing the volume of
another.
1 Select “Fader/Balance”. 2
Select the desired screen
button.
Select to adjust the sound
balance between the front
and rear speakers.
Select to adjust the sound
balance between the left and
right speakers.■Automatic sound levelizer
(ASL)
The system adjusts to the opti-
mum volume and tone quality
according to vehicle speed to
compensate for increased road
noise, wind noise, or other
noises while driving.
1 Select “Automatic Sound
Levelizer”.
2 Select “High”, “Mid”, “Low” or
“Off”.
■Screen format settings
The screen format can be
selected for USB video.
1 Press the “MENU” button.
2 Select “Setup”.
3 Select “Audio”.
A
B
C
Audio screen adjustment
A
B
Page 75 of 170
773-3. Media operation
3
Audio/visual system
used.
●Depending on the iPod/iPhone
that is connected to the system,
certain functions may not be avail-
able.
●If an iPhone is connected via
Bluetooth® and USB at the same
time, system operation may
become unstable. For known
phone compatibility information,
refer to
https://www.toyota.com/
audio-multimedia.
●Tracks selected by operating a
connected iPod/i Phone may not
be recognized or displayed prop-
erly.
●The system may not function
properly if a conversion adapter is
used to connect a device.
The track currently being lis-
tened to can be repeated.
1 Select .
●Each time is selected, the
mode changes as follows:
When shuffle is off (iPhone 5 or
later)
• track repeat album repeat off
When shuffle is off (iPhone 4s or
earlier)
• track repeat off
When shuffle is on
• track repeat off
Tracks or albums can be auto-
matically and randomly
selected.
1 Select .
●Each time is selected, the
mode changes as follows:
• shuffle (1 album shuffle) album
shuffle (all album shuffle) off
Repeating
Random order
WA R N I N G
●Do not operate the player’s con-
trols or connect the iPod/iPhone
while driving.
NOTICE
●Do not leave your portable
player in the car. In particular,
high temperatures inside the
vehicle may damage the porta-
ble player.
●Do not push down on or apply
unnecessary pressure to the
portable player while it is con-
nected as this may damage the
portable player or its terminal.
●Do not insert foreign objects into
the port as this may damage the
portable player or its terminal.
Page 86 of 170
883-6. Tips for operating the audio/visual system
• iPhone SE
• iPhone 6s
• iPhone 6s Plus
• iPhone 6
• iPhone 6 Plus
• iPhone 5s
• iPhone 5c
• iPhone 5
• iPod touch (6th generation)
• iPod touch (5th generation)
●This system only supports audio
playback.
●Depending on difference between
models or software versions etc.,
some models might be incompati-
ble with this system.
This device supports high-reso-
lution sound sources.
The definition of high-resolution
is based on the standards of
groups such as the CTA (Con-
sumer Technology Association).
Supported formats and play-
able media are as follows.
■Supported formats
WAV, FLAC, ALAC, OGG Vorbis
■Playable media
USB*: USB video only
High-resolution sound
source
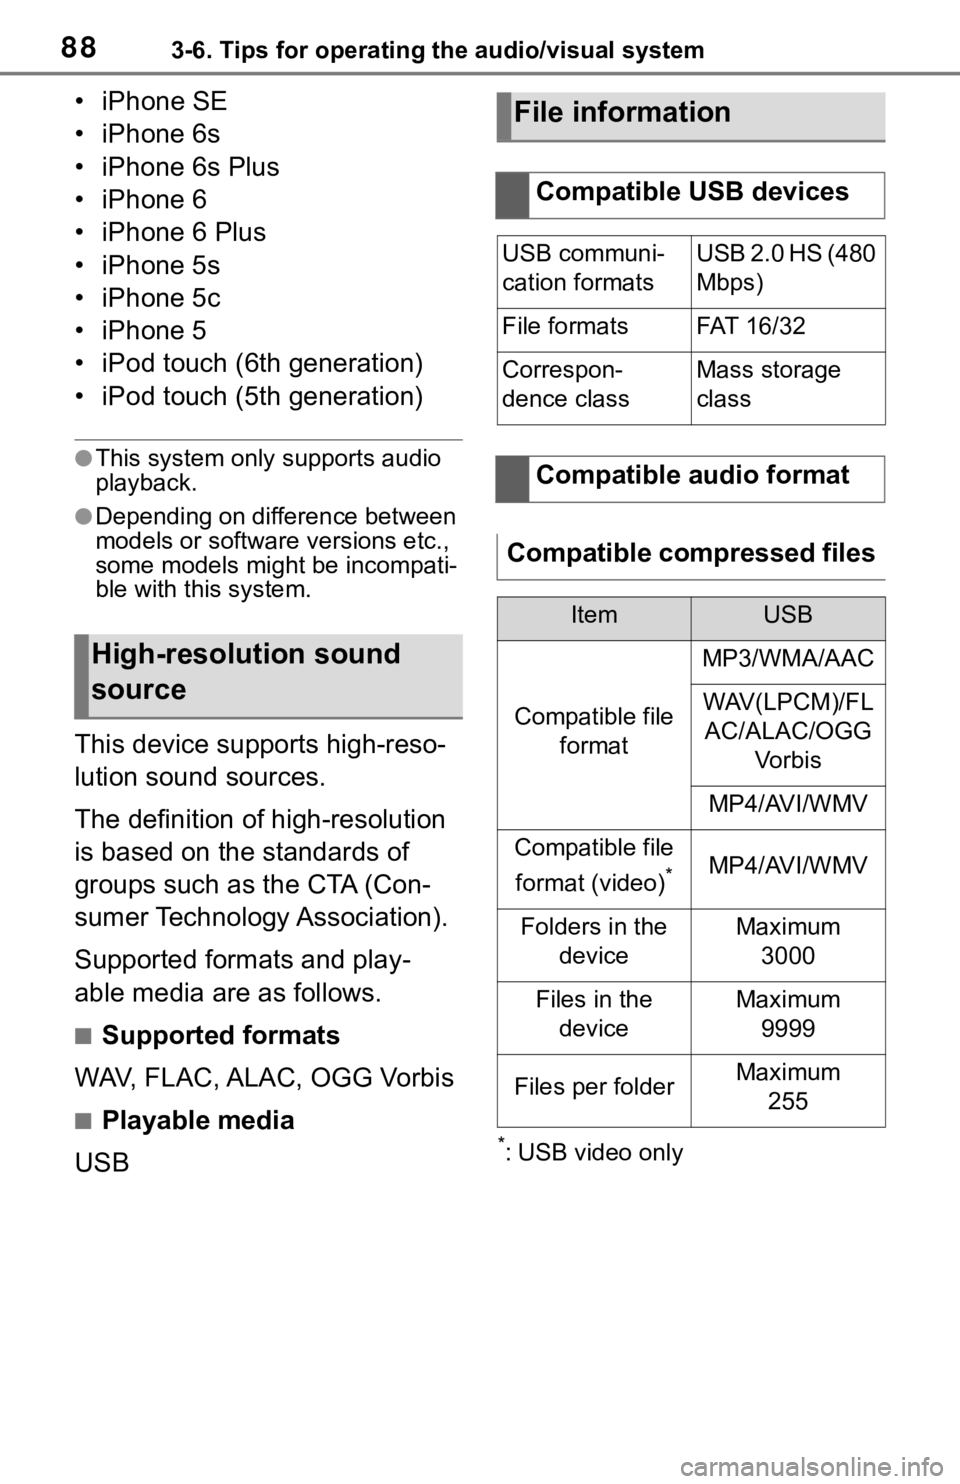
File information
Compatible USB devices
USB communi-
cation formatsUSB 2.0 HS (480
Mbps)
File formatsFAT 16 /3 2
Correspon-
dence classMass storage
class
Compatible audio format
Compatible compressed files
ItemUSB
Compatible file format
MP3/WMA/AAC
WAV(LPCM)/FLAC/ALAC/OGG Vo r b i s
MP4/AVI/WMV
Compatible file
format (video)
*MP4/AVI/WMV
Folders in the deviceMaximum3000
Files in the deviceMaximum 9999
Files per folderMaximum 255
Page 88 of 170

903-6. Tips for operating the audio/visual system
MP3 (MPEG Audio Layer 3),
WMA (Windows Media Audio)
and AAC (Advanced Audio
Coding) are audio compres-
sion standards.
This system can play
MP3/WMA/AAC files on USB
memory.
MP4, WMV and AVI files can
use the following resolutions:
128x96, 160x120, 176x144
(QCIF), 320x240 (QVGA),
352x240 (SIF), 352x288
(CIF), 640x480 (VGA),
720x480 (NTSC), 720x576
(PAL)
When naming an
MP3/WMA/AAC file, add an
appropriate file extension
(.mp3/.wma/.m4a).
This system plays back files
with .mp3/.wma/.m4a file
extensions as
MP3/WMA/AAC files respec-
tively. To prevent noise and
playback errors, use the
appropriate file extension.
MP3 files are compatible with
the ID3 Tag Ver. 1.0, Ver. 1.1,
Ver. 2.2 and Ver. 2.3 formats.
This system cannot display disc title, track title and artist
name in other formats.
WMA/AAC files can contain a
WMA/AAC tag that is used in
the same way as an ID3 tag.
WMA/AAC tags carry infor-
mation such as track title and
artist name.
The emphasis function is
available only when playing
MP3 files.
This system can play back
AAC files encoded by iTunes.
The sound quality of
MP3/WMA files generally
improves with higher bit rates.
m3u playlists are not compati-
ble with the audio player.
MP3i (MP3 interactive) and
MP3PRO formats are not
compatible with the audio
player.
The player is compatible with
VBR (Variable Bit Rate).
When playing back files
recorded as VBR (Variable Bit
Rate) files, the play time will
not be correctly displayed if
the fast forward or reverse
operations are used.
It is not possible to check fold-
ers that do not include
MP3/WMA/AAC files.
MP3/WMA/AAC files in fold-
ers up to 8 levels deep can be
played. However, the start of
playback may be delayed
AAC files
1ch, 2ch (Dual
channel is not
supported)
WAV (LPCM)/
FLAC/ALAC/OGG Vorbis
2ch
File typeChannel mode
Page 91 of 170
933-6. Tips for operating the audio/visual system
3
Audio/visual system
WMA files are Ver. 7, 8 and 9.
Trademark Acknowledge-
ment Windows Media is either
a registered trademark or
trademark of Microsoft Corpo-
ration in the United States
and/or other countries. This
product includes technology
owned by Microsoft Corpora-
tion and cannot be used or
distributed without a license
from Microsoft Licensing, Inc.
■AAC
AAC is short for Advanced
Audio Coding and refers to an
audio compression technol-
ogy standard used with
MPEG2 and MPEG4.
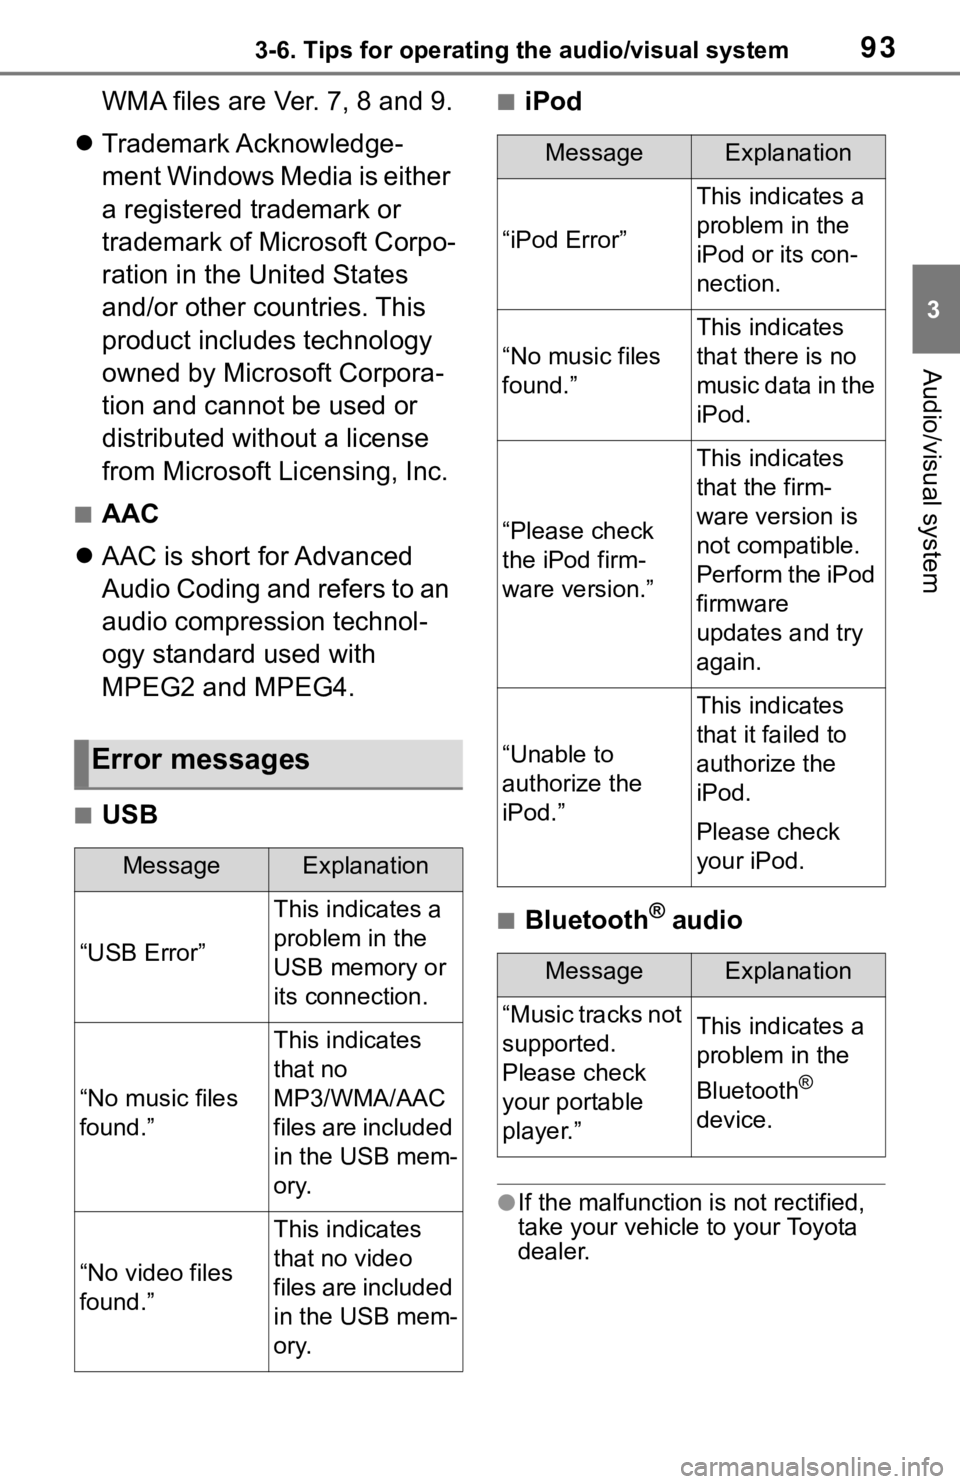
■USB
■iPod
■Bluetooth® audio
●If the malfunction is not rectified,
take your vehicle to your Toyota
dealer.
Error messages
MessageExplanation
“USB Error”
This indicates a
problem in the
USB memory or
its connection.
“No music files
found.”
This indicates
that no
MP3/WMA/AAC
files are included
in the USB mem-
ory.
“No video files
found.”
This indicates
that no video
files are included
in the USB mem-
ory.
MessageExplanation
“iPod Error”
This indicates a
problem in the
iPod or its con-
nection.
“No music files
found.”
This indicates
that there is no
music data in the
iPod.
“Please check
the iPod firm-
ware version.”
This indicates
that the firm-
ware version is
not compatible.
Perform the iPod
firmware
updates and try
again.
“Unable to
authorize the
iPod.”
This indicates
that it failed to
authorize the
iPod.
Please check
your iPod.
MessageExplanation
“Music tracks not
supported.
Please check
your portable
player.”This indicates a
problem in the
Bluetooth
®
device.