engine TOYOTA CAMRY 2012 XV50 / 9.G Navigation Manual
[x] Cancel search | Manufacturer: TOYOTA, Model Year: 2012, Model line: CAMRY, Model: TOYOTA CAMRY 2012 XV50 / 9.GPages: 328, PDF Size: 5.67 MB
Page 28 of 328
28
1. BASIC INFORMATION BEFORE OPERATION
1. INITIAL SCREEN
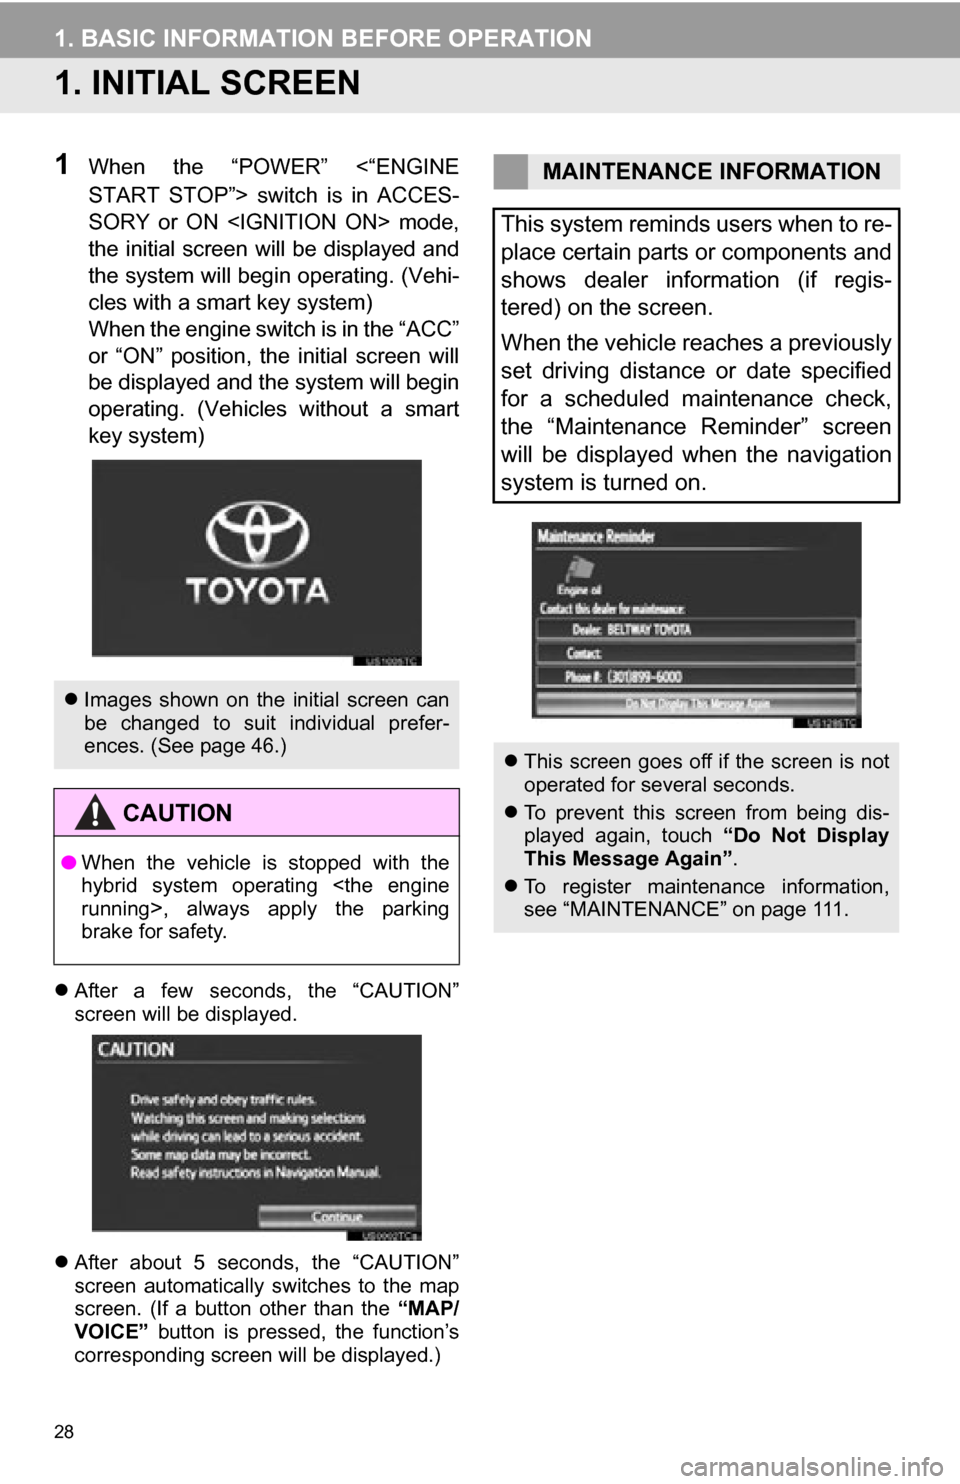
1When the “POWER” <“ENGINE
START STOP”> switch is in ACCES-
SORY or ON
the initial screen will be displayed and
the system will begin operating. (Vehi-
cles with a smart key system)
When the engine switch is in the “ACC”
or “ON” position, the initial screen will
be displayed and the system will begin
operating. (Vehicles without a smart
key system)
After a few seconds, the “CAUTION”
screen will be displayed.
After about 5 seconds, the “CAUTION”
screen automatically switches to the map
screen. (If a button other than the “MAP/
VOICE” button is pressed, the function’s
corresponding screen will be displayed.)
Images shown on the initial screen can
be changed to suit individual prefer-
ences. (See page 46.)
CAUTION
●When the vehicle is stopped with the
hybrid system operating
>, always apply the parking
brake for safety.
MAINTENANCE INFORMATION
This system reminds users when to re-
place certain parts or components and
shows dealer information (if regis-
tered) on the screen.
When the vehicle reaches a previously
set driving distance or date specified
for a scheduled maintenance check,
the “Maintenance Reminder” screen
will be displayed when the navigation
system is turned on.
This screen goes off if the screen is not
operated for several seconds.
To prevent this screen from being dis-
played again, touch “Do Not Display
This Message Again” .
To register maintenance information,
see “MAINTENANCE” on page 111.
Page 33 of 328
33
1. BASIC INFORMATION BEFORE OPERATION
2
BASIC FUNCTION
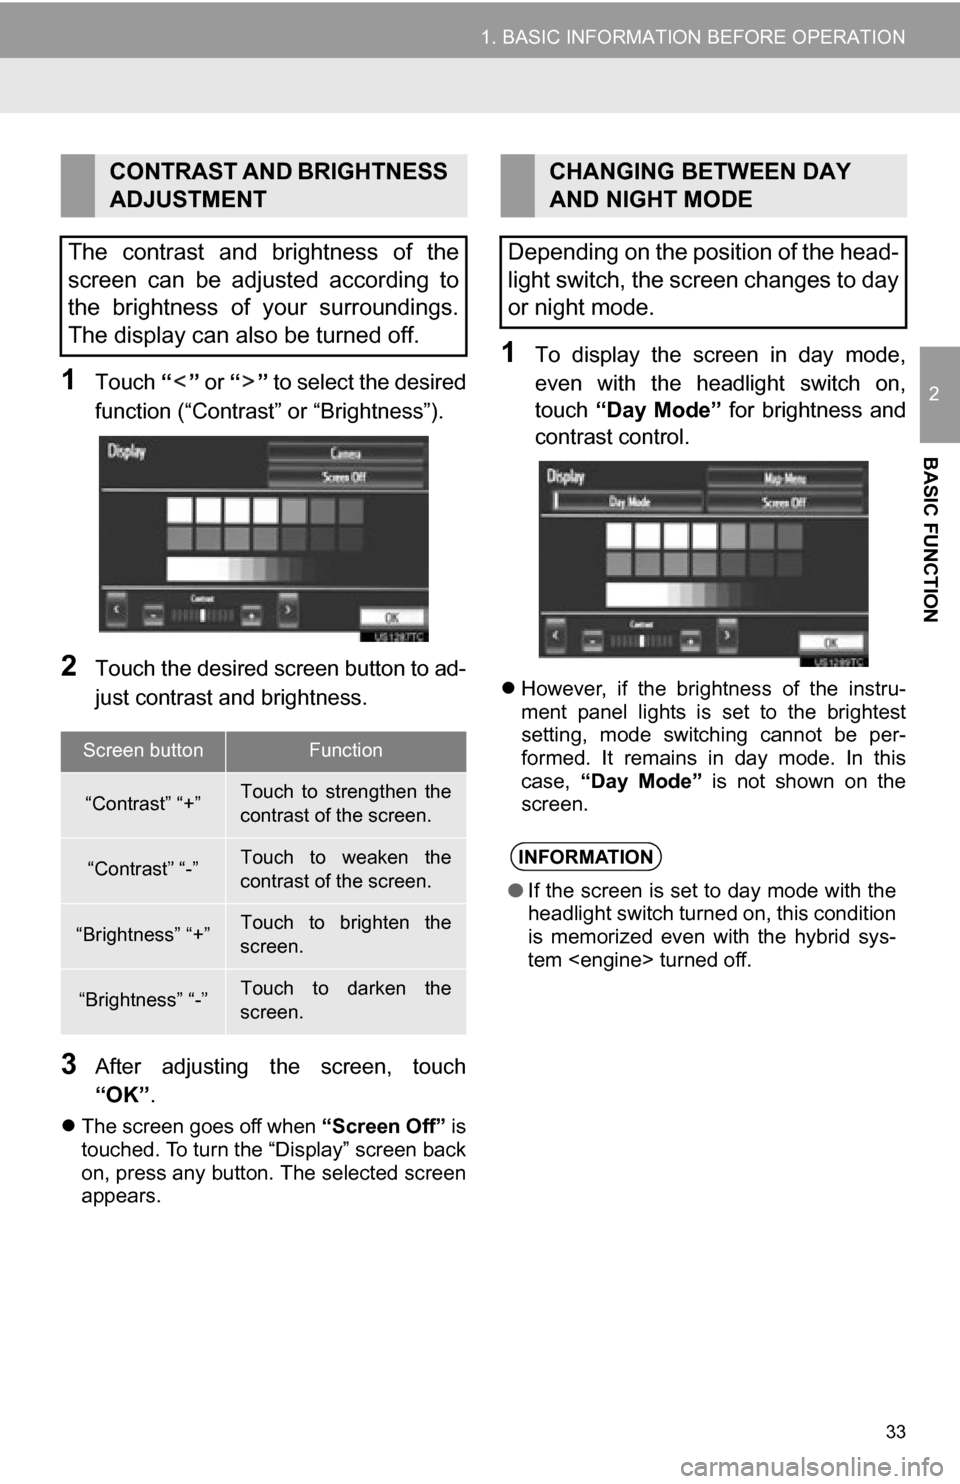
1Touch “” or “” to select the desired
function (“Contrast” or “Brightness”).
2Touch the desired screen button to ad-
just contrast and brightness.
3After adjusting t he screen, touch
“OK” .
The screen goes off when “Screen Off” is
touched. To turn the “Display” screen back
on, press any button. The selected screen
appears.
1To display the screen in day mode,
even with the headlight switch on,
touch “Day Mode” for brightness and
contrast control.
However, if the brightness of the instru-
ment panel lights is set to the brightest
setting, mode switching cannot be per-
formed. It remains in day mode. In this
case, “Day Mode” is not shown on the
screen.
CONTRAST AND BRIGHTNESS
ADJUSTMENT
The contrast and brightness of the
screen can be adjusted according to
the brightness of your surroundings.
The display can also be turned off.
Screen buttonFunction
“Contrast” “+”Touch to strengthen the
contrast of the screen.
“Contrast” “-”Touch to weaken the
contrast of the screen.
“Brightness” “+”Touch to brighten the
screen.
“Brightness” “-”Touch to darken the
screen.
CHANGING BETWEEN DAY
AND NIGHT MODE
Depending on the position of the head-
light switch, the screen changes to day
or night mode.
INFORMATION
● If the screen is set to day mode with the
headlight switch turned on, this condition
is memorized even with the hybrid sys-
tem
Page 39 of 328
39
1. BASIC INFORMATION BEFORE OPERATION
2
BASIC FUNCTION
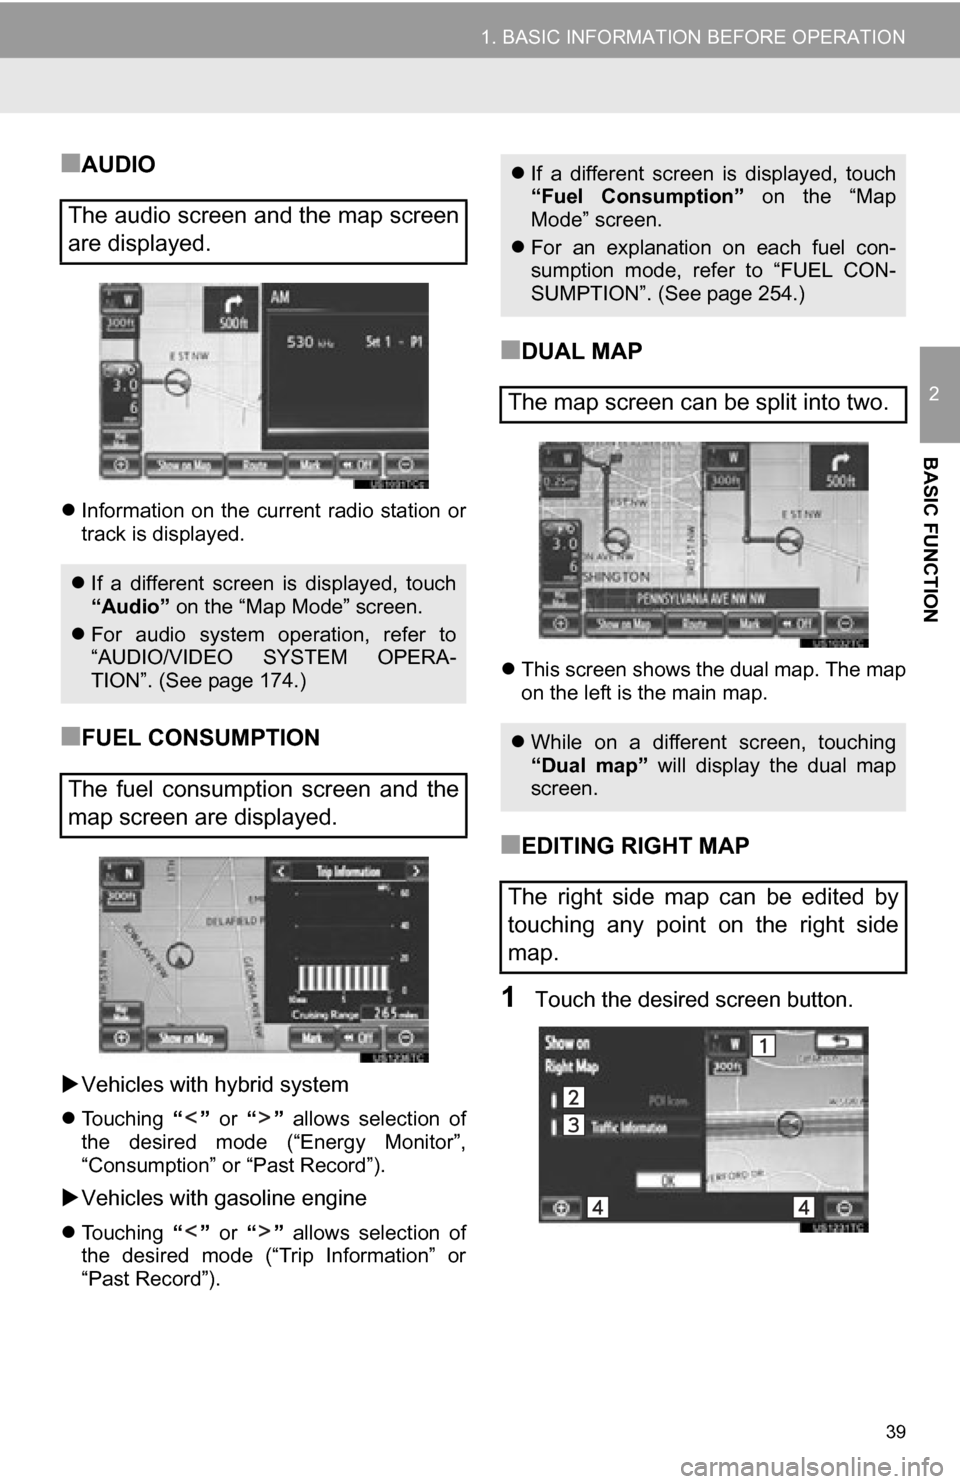
■AUDIO
Information on the current radio station or
track is displayed.
■FUEL CONSUMPTION
Vehicles with hybrid system
Touching “” or “” allows selection of
the desired mode (“Energy Monitor”,
“Consumption” or “Past Record”).
Vehicles with gasoline engine
Touching “” or “” allows selection of
the desired mode (“Trip Information” or
“Past Record”).
■DUAL MAP
This screen shows the dual map. The map
on the left is the main map.
■EDITING RIGHT MAP
1Touch the desired screen button.
The audio screen and the map screen
are displayed.
If a different screen is displayed, touch
“Audio” on the “Map Mode” screen.
For audio system operation, refer to
“AUDIO/VIDEO SYSTEM OPERA-
TION”. (See page 174.)
The fuel consumption screen and the
map screen are displayed.
If a different screen is displayed, touch
“Fuel Consumption” on the “Map
Mode” screen.
For an explanation on each fuel con-
sumption mode, refer to “FUEL CON-
SUMPTION”. (See page 254.)
The map screen can be split into two.
While on a different screen, touching
“Dual map” will display the dual map
screen.
The right side map can be edited by
touching any point on the right side
map.
Page 46 of 328
46
2. SETUP
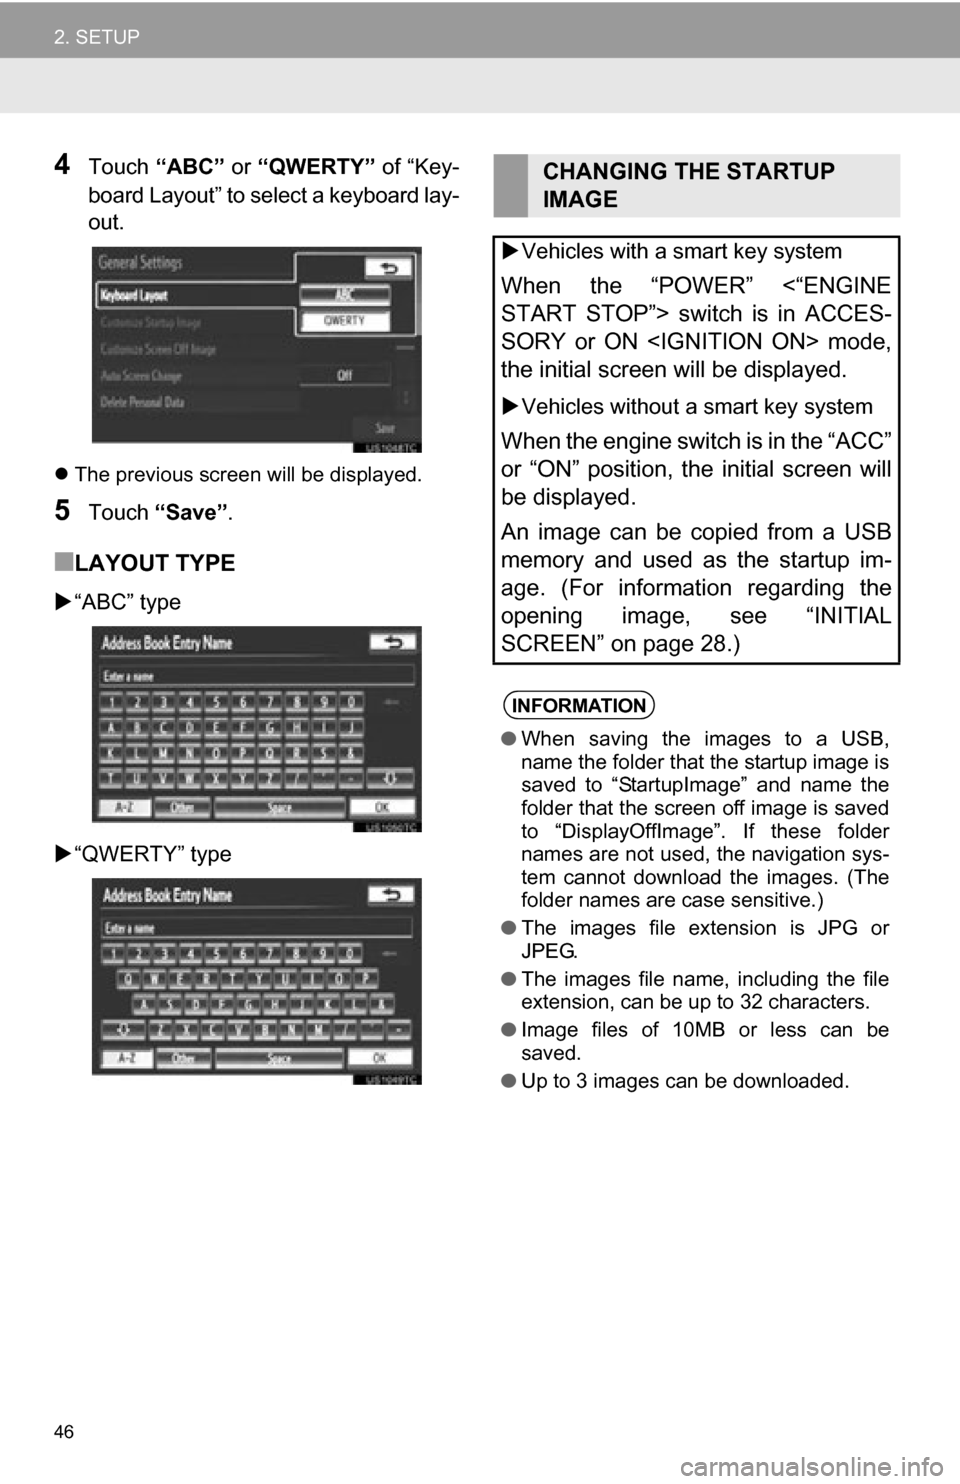
4Touch “ABC” or “QWERTY” of “Key-
board Layout” to select a keyboard lay-
out.
The previous screen will be displayed.
5Touch “Save” .
■LAYOUT TYPE
“ABC” type
“QWERTY” type
CHANGING THE STARTUP
IMAGE
Vehicles with a smart key system
When the “POWER” <“ENGINE
START STOP”> switch is in ACCES-
SORY or ON
the initial screen will be displayed.
Vehicles without a smart key system
When the engine switch is in the “ACC”
or “ON” position, the initial screen will
be displayed.
An image can be copied from a USB
memory and used as the startup im-
age. (For information regarding the
opening image, see “INITIAL
SCREEN” on page 28.)
INFORMATION
● When saving the images to a USB,
name the folder that the startup image is
saved to “StartupImage” and name the
folder that the screen off image is saved
to “DisplayOffImage”. If these folder
names are not used, the navigation sys-
tem cannot download the images. (The
folder names are case sensitive.)
● The images file extension is JPG or
JPEG.
● The images file name, including the file
extension, can be up to 32 characters.
● Image files of 10MB or less can be
saved.
● Up to 3 images can be downloaded.
Page 111 of 328
111
4. SETUP
3
NAVIGATION SYSTEM
2. VEHICLE SETTINGS
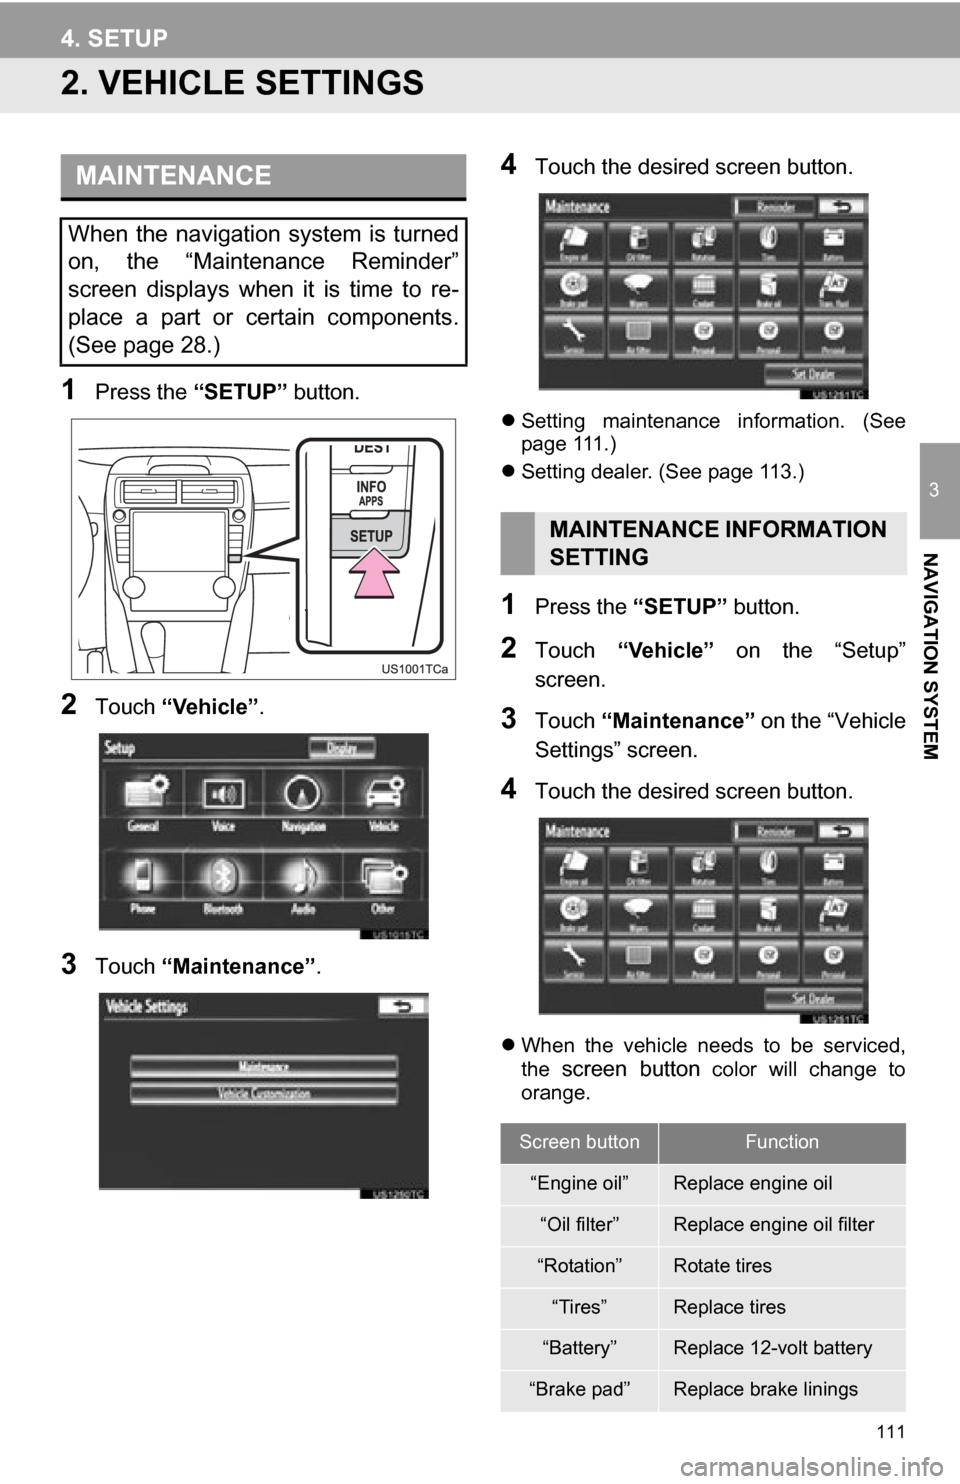
1Press the “SETUP” button.
2Touch “Vehicle”.
3Touch “Maintenance” .
4Touch the desired screen button.
Setting maintenance information. (See
page 111.)
Setting dealer. (See page 113.)
1Press the “SETUP” button.
2Touch “Vehicle” on the “Setup”
screen.
3Touch “Maintenance” on the “Vehicle
Settings” screen.
4Touch the desired screen button.
When the vehicle needs to be serviced,
the screen button color will change to
orange.
MAINTENANCE
When the navigation system is turned
on, the “Maintenance Reminder”
screen displays when it is time to re-
place a part or certain components.
(See page 28.)
MAINTENANCE INFORMATION
SETTING
Screen buttonFunction
“Engine oil”Replace engine oil
“Oil filter”Replace engine oil filter
“Rotation”Rotate tires
“Tires”Replace tires
“Battery”Replace 12-volt battery
“Brake pad”Replace brake linings
Page 112 of 328
112
4. SETUP
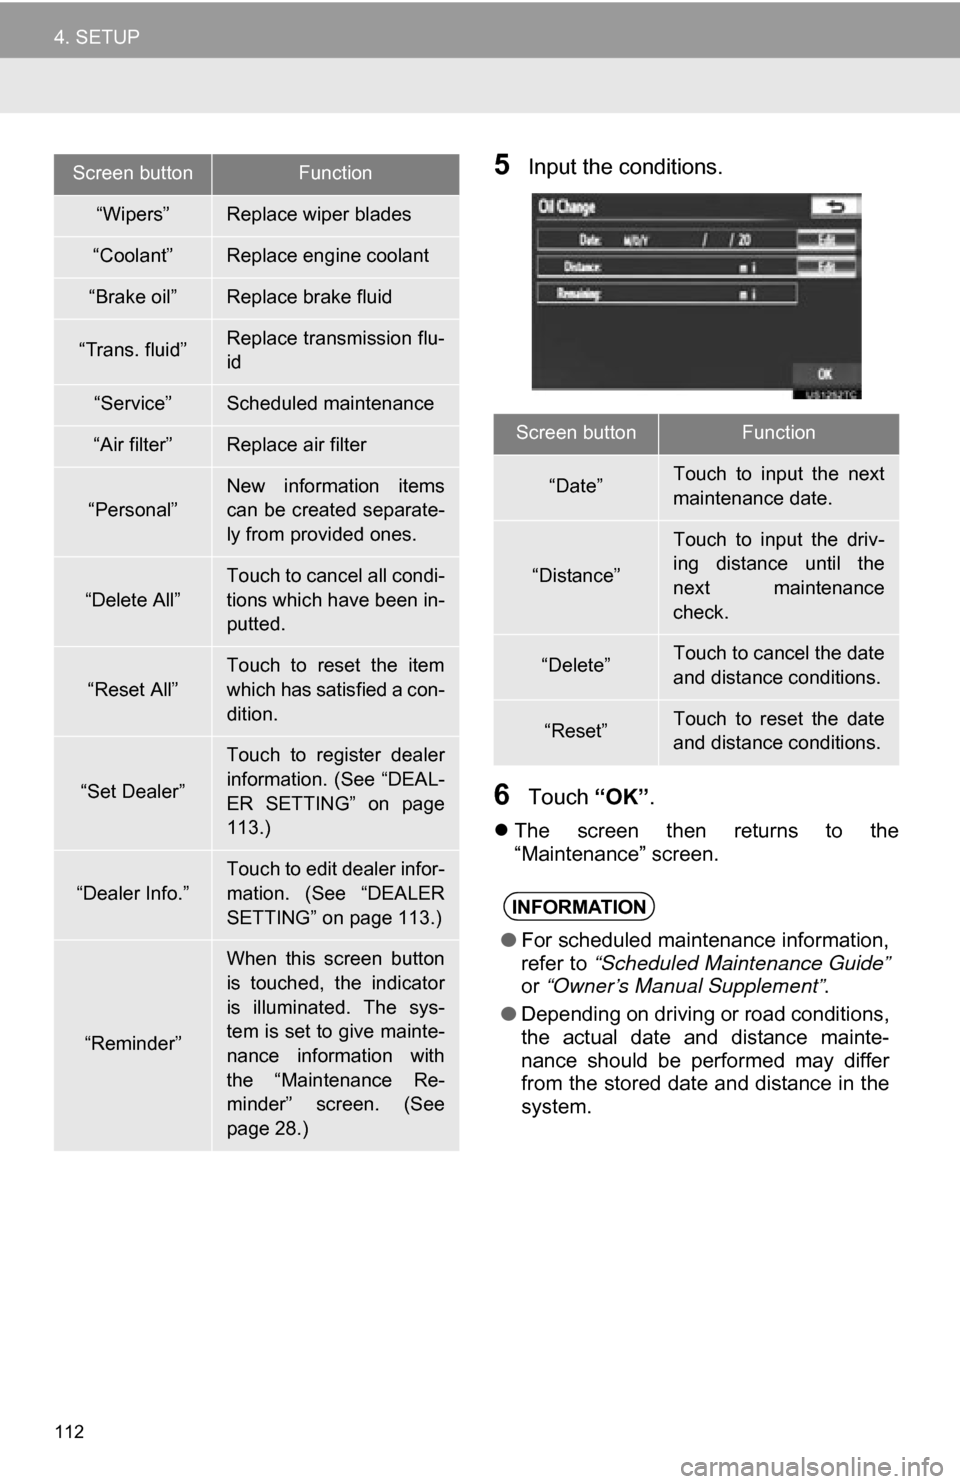
5Input the conditions.
6Touch “OK”.
The screen then returns to the
“Maintenance” screen.
“Wipers”Replace wiper blades
“Coolant”Replace engine coolant
“Brake oil”Replace brake fluid
“Trans. fluid”Replace transmission flu-
id
“Service”Scheduled maintenance
“Air filter”Replace air filter
“Personal”New information items
can be created separate-
ly from provided ones.
“Delete All”
Touch to cancel all condi-
tions which have been in-
putted.
“Reset All”
Touch to reset the item
which has satisfied a con-
dition.
“Set Dealer”
Touch to register dealer
information. (See “DEAL-
ER SETTING” on page
113.)
“Dealer Info.”
Touch to edit dealer infor-
mation. (See “DEALER
SETTING” on page 113.)
“Reminder”
When this screen button
is touched, the indicator
is illuminated. The sys-
tem is set to give mainte-
nance information with
the “Maintenance Re-
minder” screen. (See
page 28.)
Screen buttonFunction
Screen buttonFunction
“Date”Touch to input the next
maintenance date.
“Distance”
Touch to input the driv-
ing distance until the
next maintenance
check.
“Delete”Touch to cancel the date
and distance conditions.
“Reset”Touch to reset the date
and distance conditions.
INFORMATION
●For scheduled maintenance information,
refer to “Scheduled Maintenance Guide”
or “Owner’s Manual Supplement” .
● Depending on driving or road conditions,
the actual date and distance mainte-
nance should be performed may differ
from the stored date and distance in the
system.
Page 115 of 328
115
4. SETUP
3
NAVIGATION SYSTEM
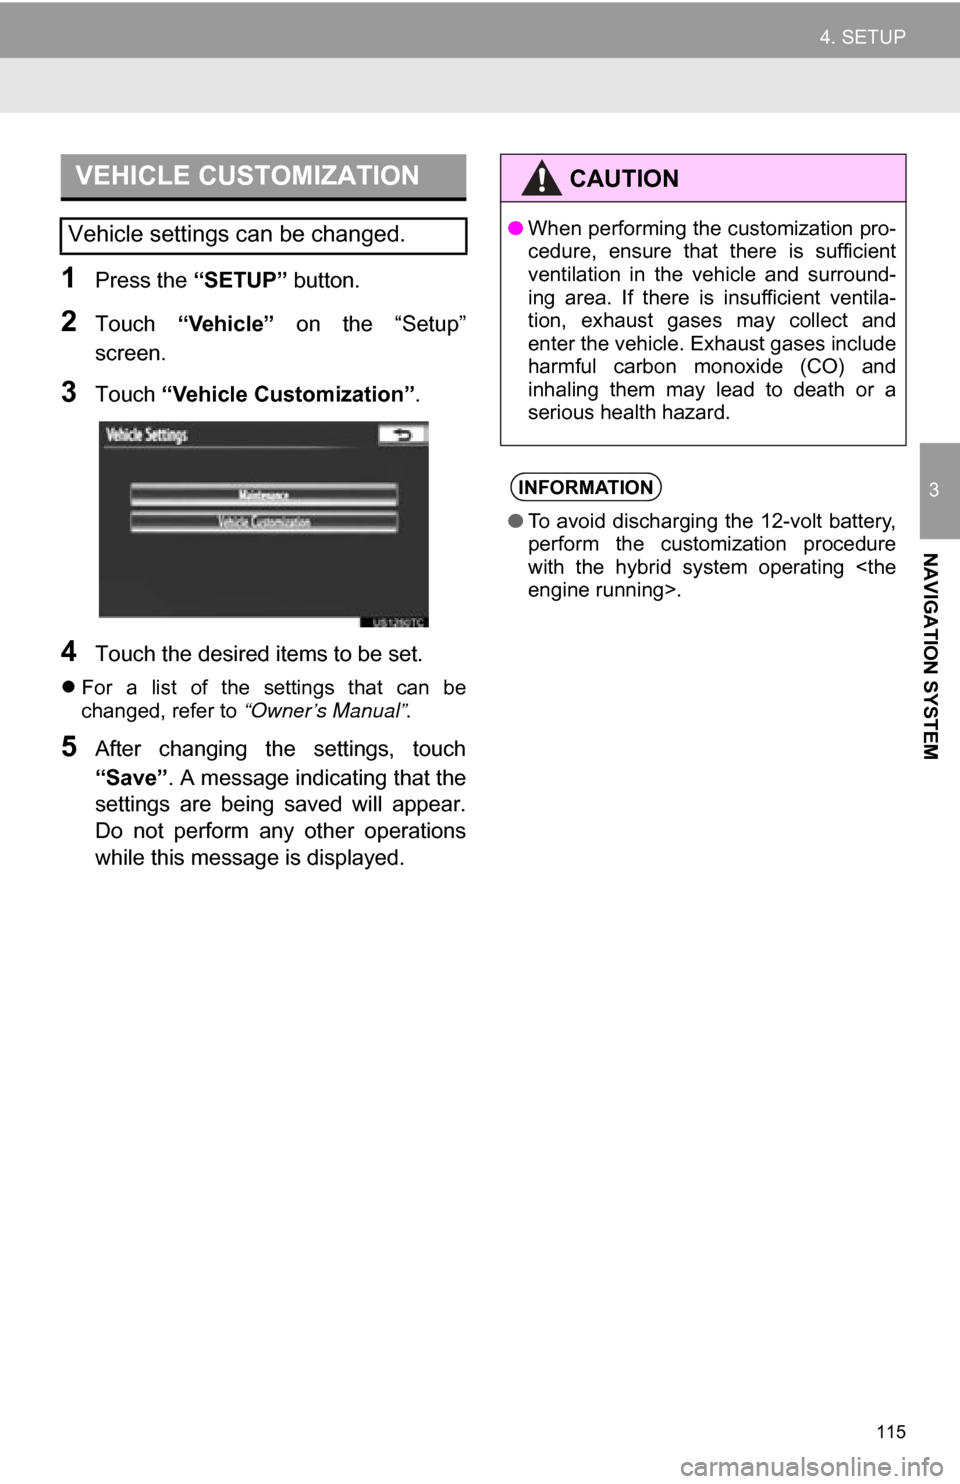
1Press the “SETUP” button.
2Touch “Vehicle” on the “Setup”
screen.
3Touch “Vehicle Customization”.
4Touch the desired items to be set.
For a list of the settings that can be
changed, refer to “Owner’s Manual” .
5After changing the settings, touch
“Save”. A message indicating that the
settings are being saved will appear.
Do not perform any other operations
while this message is displayed.
VEHICLE CUSTOMIZATION
Vehicle settings can be changed.
CAUTION
● When performing the customization pro-
cedure, ensure that there is sufficient
ventilation in the vehicle and surround-
ing area. If there is insufficient ventila-
tion, exhaust gases may collect and
enter the vehicle. Exhaust gases include
harmful carbon monoxide (CO) and
inhaling them may lead to death or a
serious health hazard.
INFORMATION
●To avoid discharging the 12-volt battery,
perform the customization procedure
with the hybrid system operating
Page 128 of 328
128
1. PHONE OPERATION
Vehicles with a smart key system
When the “POWER” <“ENGINE START
STOP”> switch is in ACCESSORY or ON
searches for a nearby registered cellular
phone.
The system will connect with the phone
that was last connected, if it is nearby.
When “Display Phone Status” is set to
“On” , the connection status is displayed.
(See “Bluetooth
® DEVICE CONNEC-
TION STATUS DISPLAY SETTINGS” on
page 169.)
This screen appears when the Bluetooth
®
phone is first connected after the
“POWER” <“ENGINE START STOP”>
switch is in ACCESSORY or ON
Vehicles without a smart key system
When the engine switch is in the “ACC” or
“ON” position, the system searches for a
nearby registered cellular phone.
The system will connect with the phone
that was last connected, if it is nearby.
When “Display Phone Status” is set to
“On” , the connection status is displayed.
(See “Bluetooth
® DEVICE CONNEC-
TION STATUS DISPLAY SETTINGS” on
page 169.)
This screen appears when the Bluetooth
®
phone is first connected after the engine
switch is in the “ACC” or “ON” position.
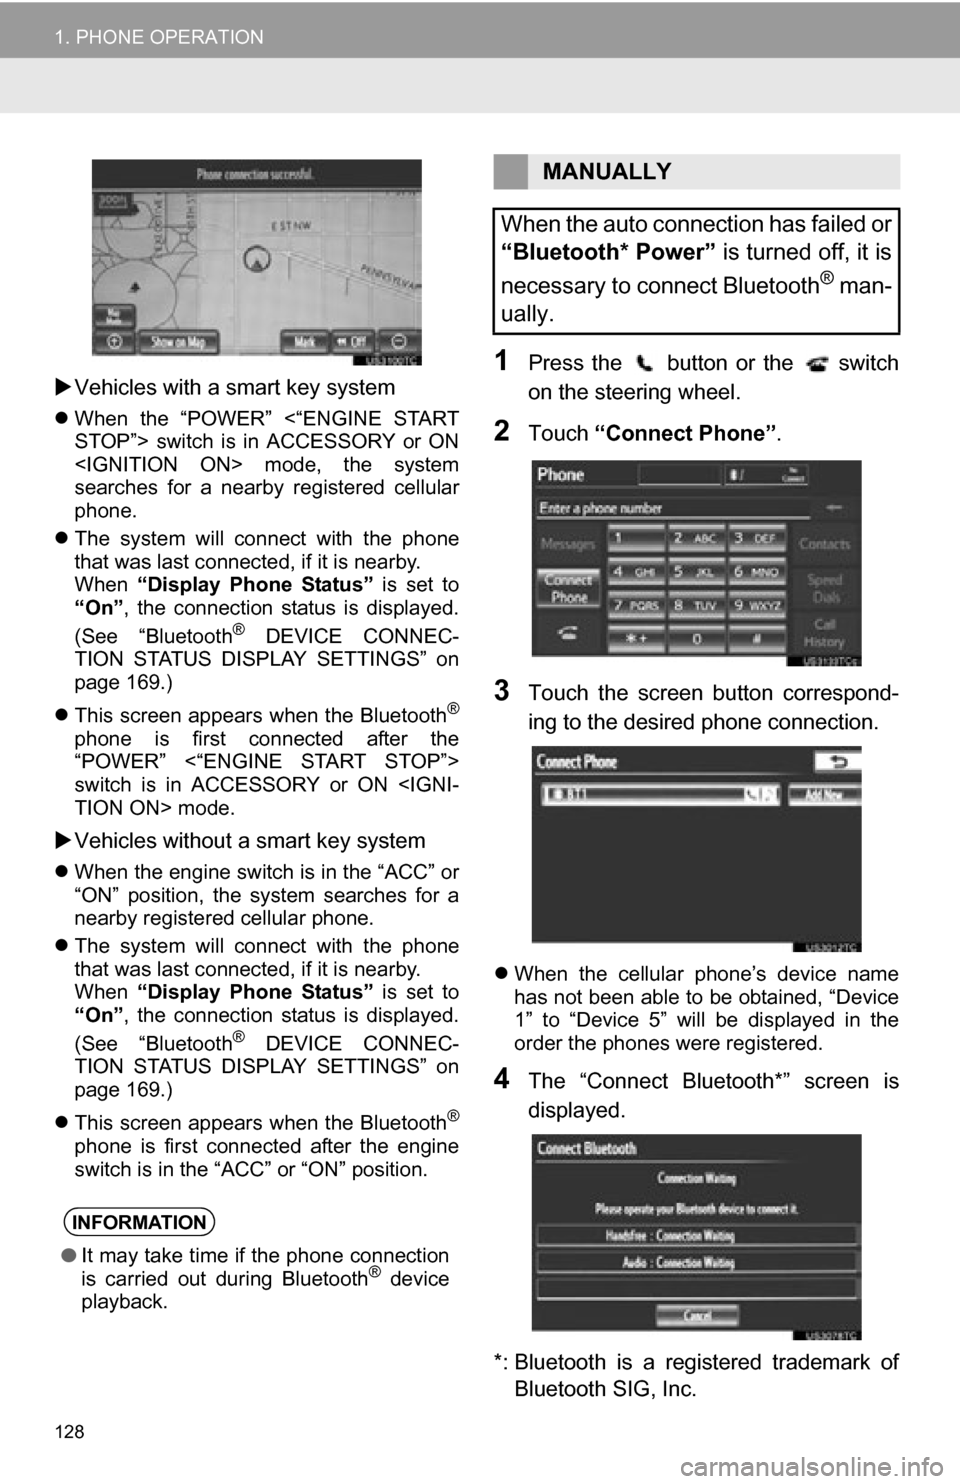
1Press the button or the switch
on the steering wheel.
2Touch “Connect Phone” .
3Touch the screen button correspond-
ing to the desired phone connection.
When the cellular phone’s device name
has not been able to be obtained, “Device
1” to “Device 5” will be displayed in the
order the phones were registered.
4The “Connect Bluetooth*” screen is
displayed.
*: Bluetooth is a registered trademark of Bluetooth SIG, Inc.
INFORMATION
● It may take time if the phone connection
is carried out during Bluetooth® device
playback.
MANUALLY
When the auto connection has failed or
“Bluetooth* Power” is turned off, it is
necessary to connect Bluetooth
® man-
ually.
Page 129 of 328
129
1. PHONE OPERATION
4
PHONE
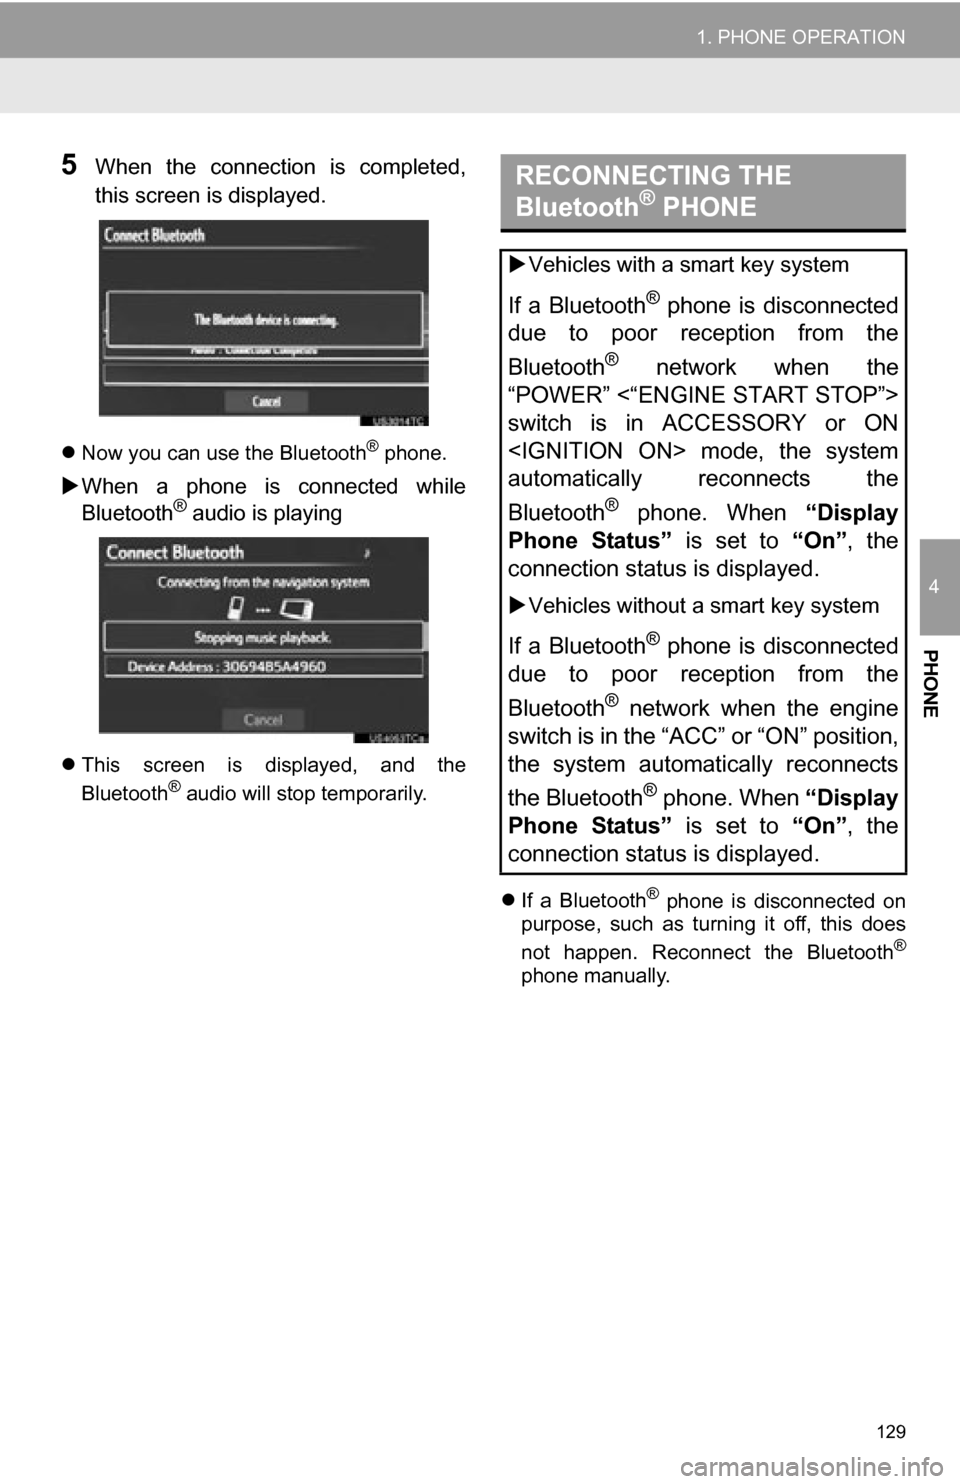
5When the connection is completed,
this screen is displayed.
Now you can use the Bluetooth® phone.
When a phone is connected while
Bluetooth® audio is playing
This screen is displayed, and the
Bluetooth® audio will stop temporarily.
If a Bluetooth
® phone is disconnected on
purpose, such as turning it off, this does
not happen. Reconnect the Bluetooth
®
phone manually.
RECONNECTING THE
Bluetooth® PHONE
Vehicles with a smart key system
If a Bluetooth® phone is disconnected
due to poor reception from the
Bluetooth
® network when the
“POWER” <“ENGINE START STOP”>
switch is in ACCESSORY or ON
automatically reconnects the
Bluetooth
® phone. When “Display
Phone Status” is set to “On”, the
connection status is displayed.
Vehicles without a smart key system
If a Bluetooth® phone is disconnected
due to poor reception from the
Bluetooth
® network when the engine
switch is in the “ACC” or “ON” position,
the system automatically reconnects
the Bluetooth
® phone. When “Display
Phone Status” is set to “On”, the
connection status is displayed.
Page 168 of 328
168
2. SETUP
■CHANGING “Bluetooth* Power”
When “Bluetooth* Power” is “On” :
Vehicles with a smart key system
The Bluetooth
® device is automatically
connected when the “POWER” <“ENGINE
START STOP”> switch is in ACCESSORY
or ON
Vehicles without a smart key system
The Bluetooth
® device is automatically
connected when the engine switch is
turned to the “ACC” or “ON” position.
When “Bluetooth* Power” is “Off” : The
Bluetooth
® device is disconnected, and
the system will not connect to it next time.
The “Bluetooth* Power” auto connection
state can be set on or off.
• “On” : The auto connection is turned on.
• “Off” : The auto connection is turned off.
The auto connection state cannot be
changed from “On” to “Off” while driving,
but it can be changed from “Off” to “On” .
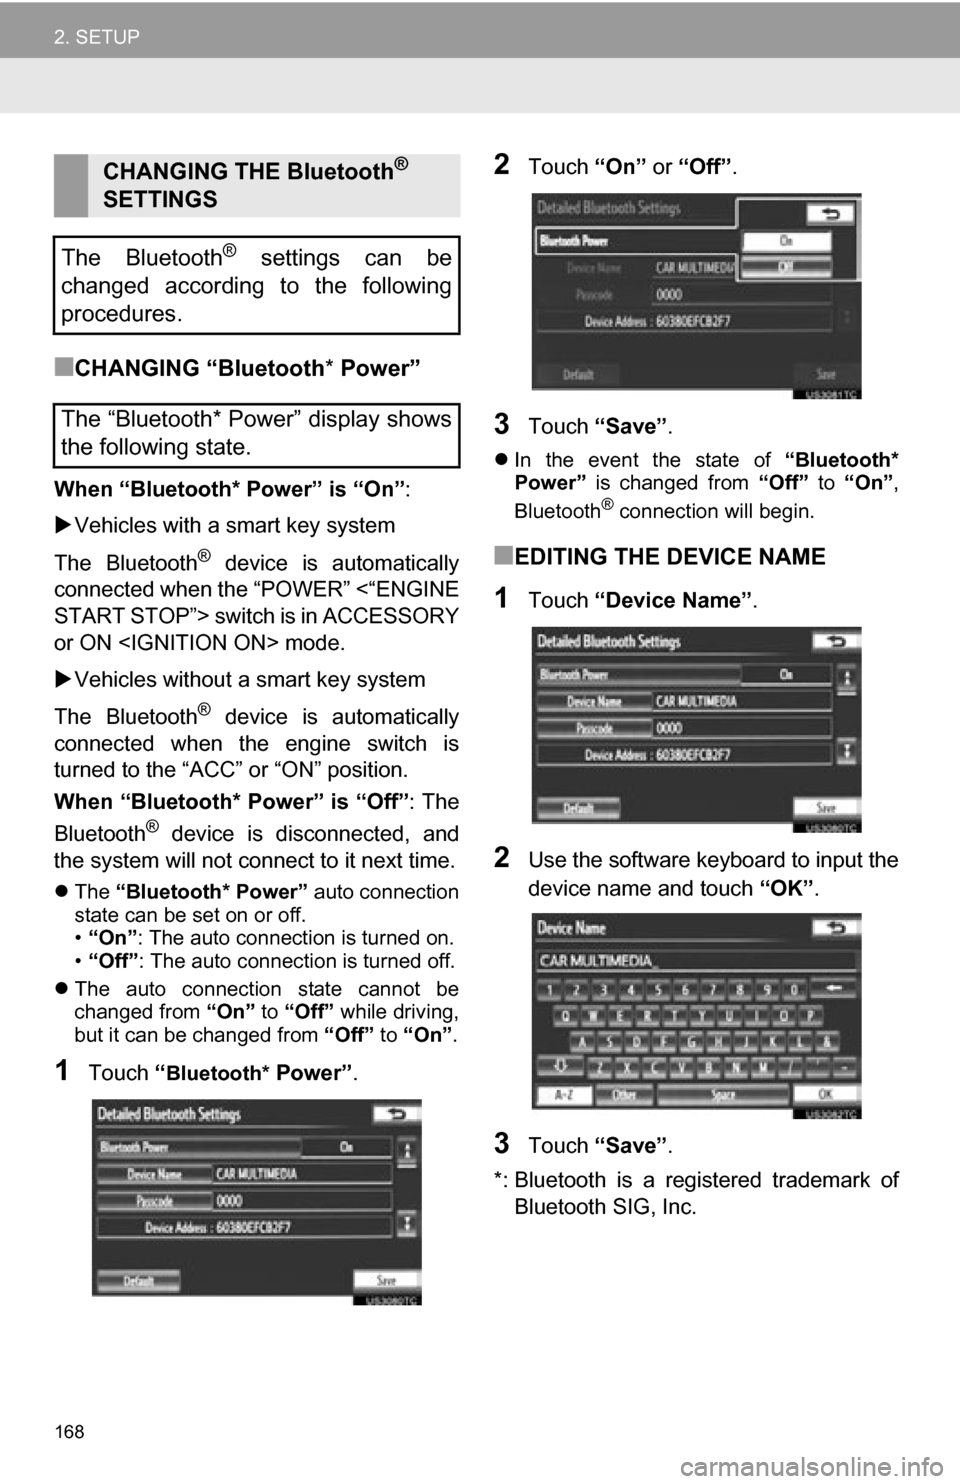
1Touch “Bluetooth* Power” .
2Touch “On” or “Off” .
3Touch “Save” .
In the event the state of “Bluetooth*
Power” is changed from “Off” to “On” ,
Bluetooth
® connection will begin.
■EDITING THE DEVICE NAME
1Touch “Device Name” .
2Use the software keyboard to input the
device name and touch “OK”.
3Touch “Save” .
*: Bluetooth is a registered trademark of Bluetooth SIG, Inc.
CHANGING THE Bluetooth®
SETTINGS
The Bluetooth
® settings can be
changed according to the following
procedures.
The “Bluetooth* Power” display shows
the following state.