TOYOTA CAMRY 2020 Accessories, Audio & Navigation (in English)
Manufacturer: TOYOTA, Model Year: 2020, Model line: CAMRY, Model: TOYOTA CAMRY 2020Pages: 350, PDF Size: 8.63 MB
Page 151 of 350
151
1. USEFUL INFORMATION
INFORMATION
5
2. RECEIVING WEATHER INFORMATION*
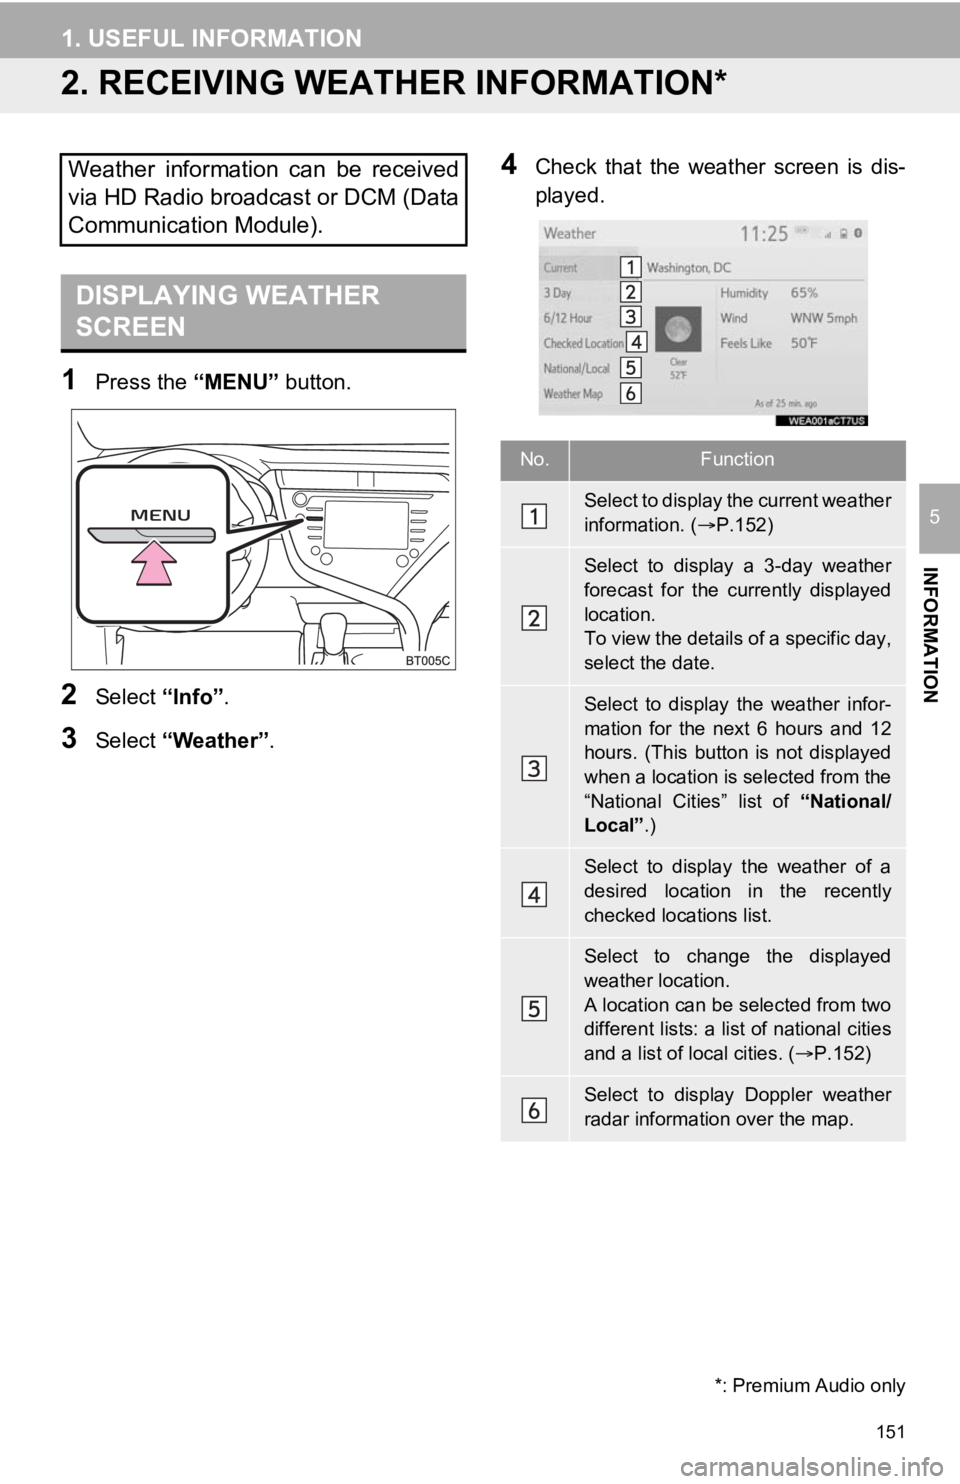
1Press the “MENU” button.
2Select “Info”.
3Select “Weather” .
4Check that the weather screen is dis-
played.Weather information can be received
via HD Radio broadcast or DCM (Data
Communication Module).
DISPLAYING WEATHER
SCREEN
No.Function
Select to display the current weather
information. ( P.152)
Select to display a 3-day weather
forecast for the currently displayed
location.
To view the details of a specific day,
select the date.
Select to display the weather infor-
mation for the next 6 hours and 12
hours. (This button is not displayed
when a location is selected from the
“National Cities” list of “National/
Local” .)
Select to display the weather of a
desired location in the recently
checked locations list.
Select to change the displayed
weather location.
A location can be selected from two
different lists: a list of national cities
and a list of local cities. ( P.152)
Select to display Doppler weather
radar information over the map.
*: Premium Audio only
Page 152 of 350
152
1. USEFUL INFORMATION
1Display the weather screen. (P.151)
2Select “Current” .
3Check the weather information for the
current location.
By selecting “3 Day” or “6/12 Hour”, dif-
ferent types of weathe r information for the
current location will be displayed.
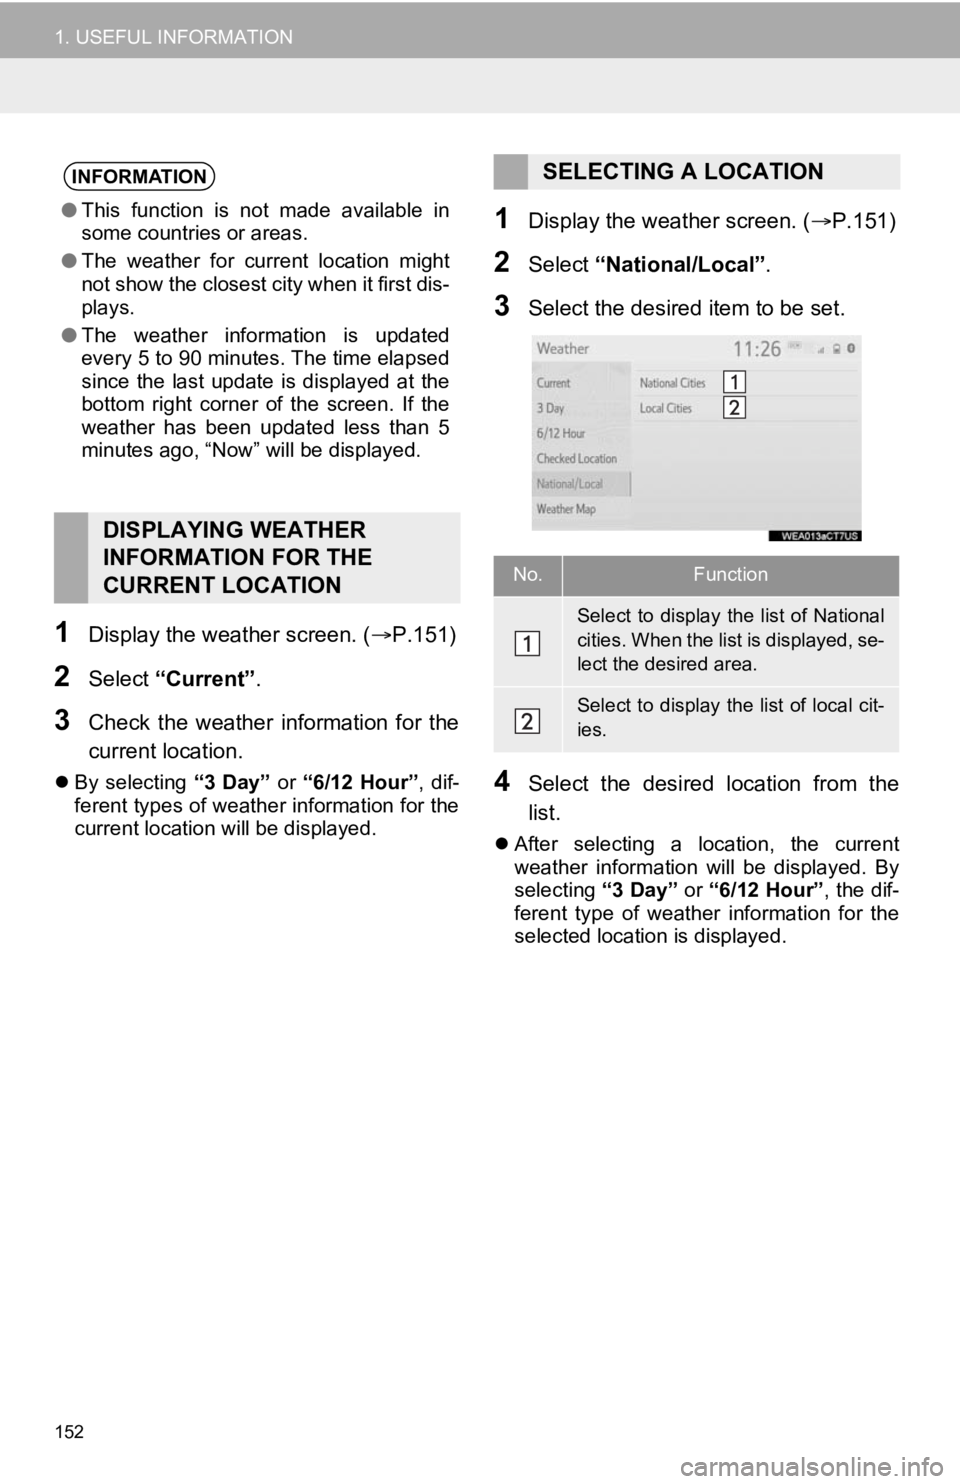
1Display the weather screen. ( P.151)
2Select “National/Local” .
3Select the desired item to be set.
4Select the desired location from the
list.
After selecting a location, the current
weather information will be displayed. By
selecting “3 Day” or “6/12 Hour”, the dif-
ferent type of weather information for the
selected location is displayed.
INFORMATION
● This function is not made available in
some countries or areas.
● The weather for current location might
not show the closest city when it first dis-
plays.
● The weather information is updated
every 5 to 90 minutes. The time elapsed
since the last update is displayed at the
bottom right corner of the screen. If the
weather has been updated less than 5
minutes ago, “Now” will be displayed.
DISPLAYING WEATHER
INFORMATION FOR THE
CURRENT LOCATION
SELECTING A LOCATION
No.Function
Select to display the list of National
cities. When the lis t is displayed, se-
lect the desired area.
Select to display the list of local cit-
ies.
Page 153 of 350
153
1. USEFUL INFORMATION
INFORMATION
51Select “Yes” when the pop-up mes-
sage appears.
2Check that the weather information is
displayed.
The time since the information was last
updated is displayed.
When detailed audio weather information
is available, an icon will be displayed on
the weather map. Select the icon to listen
to the weather information.
WEATHER GUIDANCE
SERVICE
When weather information for areas
around the current position,
destination, or along the set route is
available, important information will be
output through the speakers and a
pop-up message asking if you would
like to view the full weather information
will be displayed.
Page 154 of 350
154
1. USEFUL INFORMATION
3. DATA SERVICES SETTINGS*
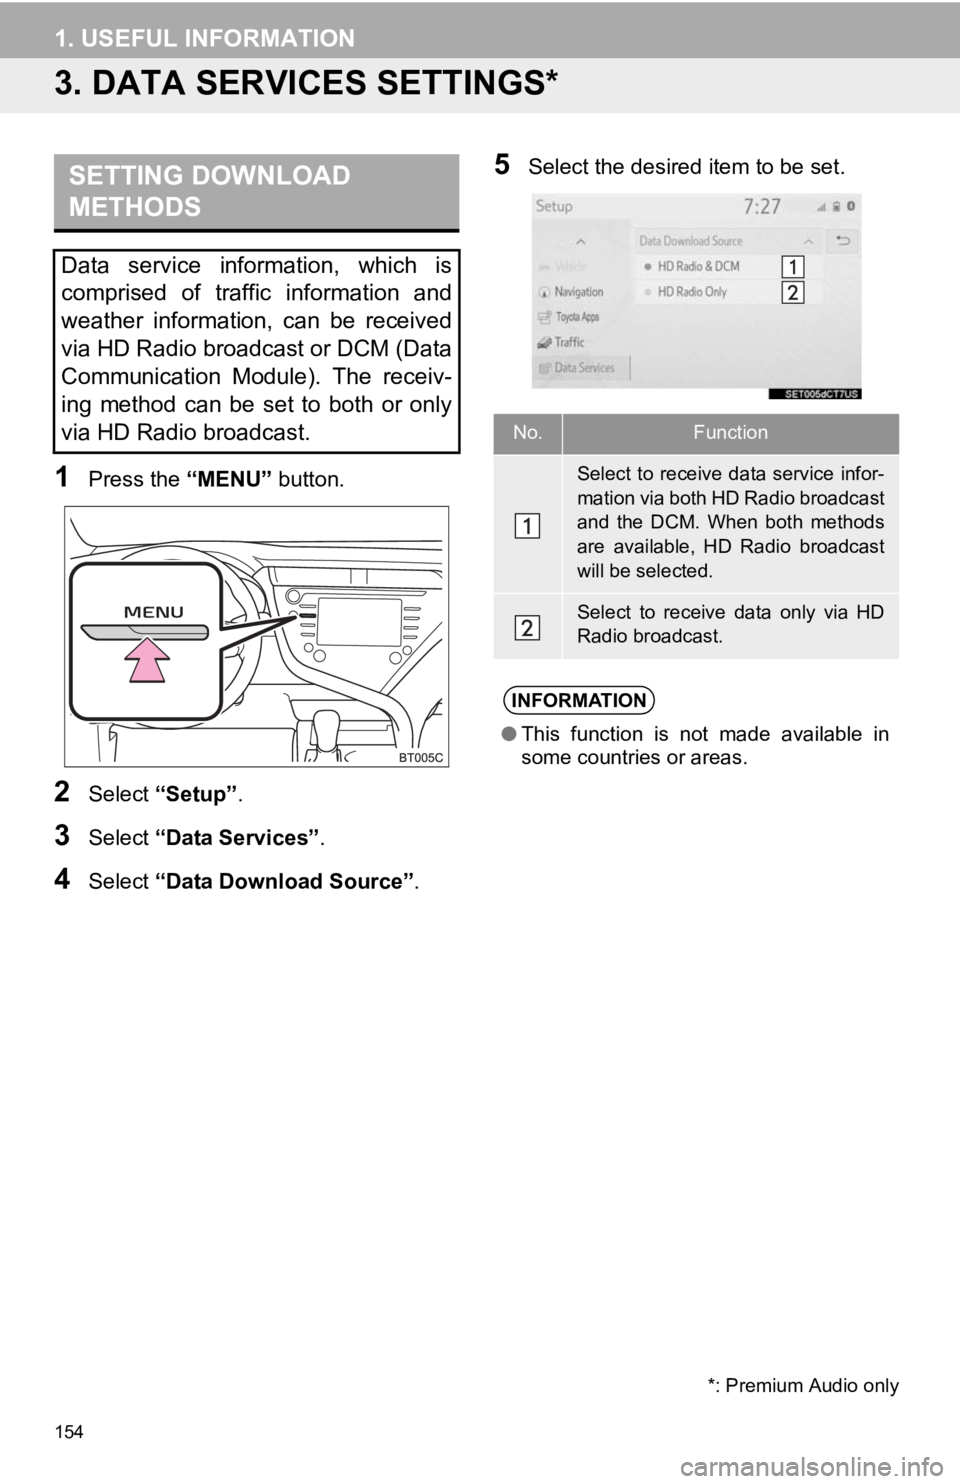
1Press the “MENU” button.
2Select “Setup” .
3Select “Data Services” .
4Select “Data Download Source” .
5Select the desired item to be set.SETTING DOWNLOAD
METHODS
Data service information, which is
comprised of traffic information and
weather information, can be received
via HD Radio broadcast or DCM (Data
Communication Module). The receiv-
ing method can be set to both or only
via HD Radio broadcast.
*: Premium Audio only
No.Function
Select to receive data service infor-
mation via both HD Radio broadcast
and the DCM. When both methods
are available, HD Radio broadcast
will be selected.
Select to receive data only via HD
Radio broadcast.
INFORMATION
●This function is not made available in
some countries or areas.
Page 155 of 350
155
1. USEFUL INFORMATION
INFORMATION
5
Page 156 of 350
156
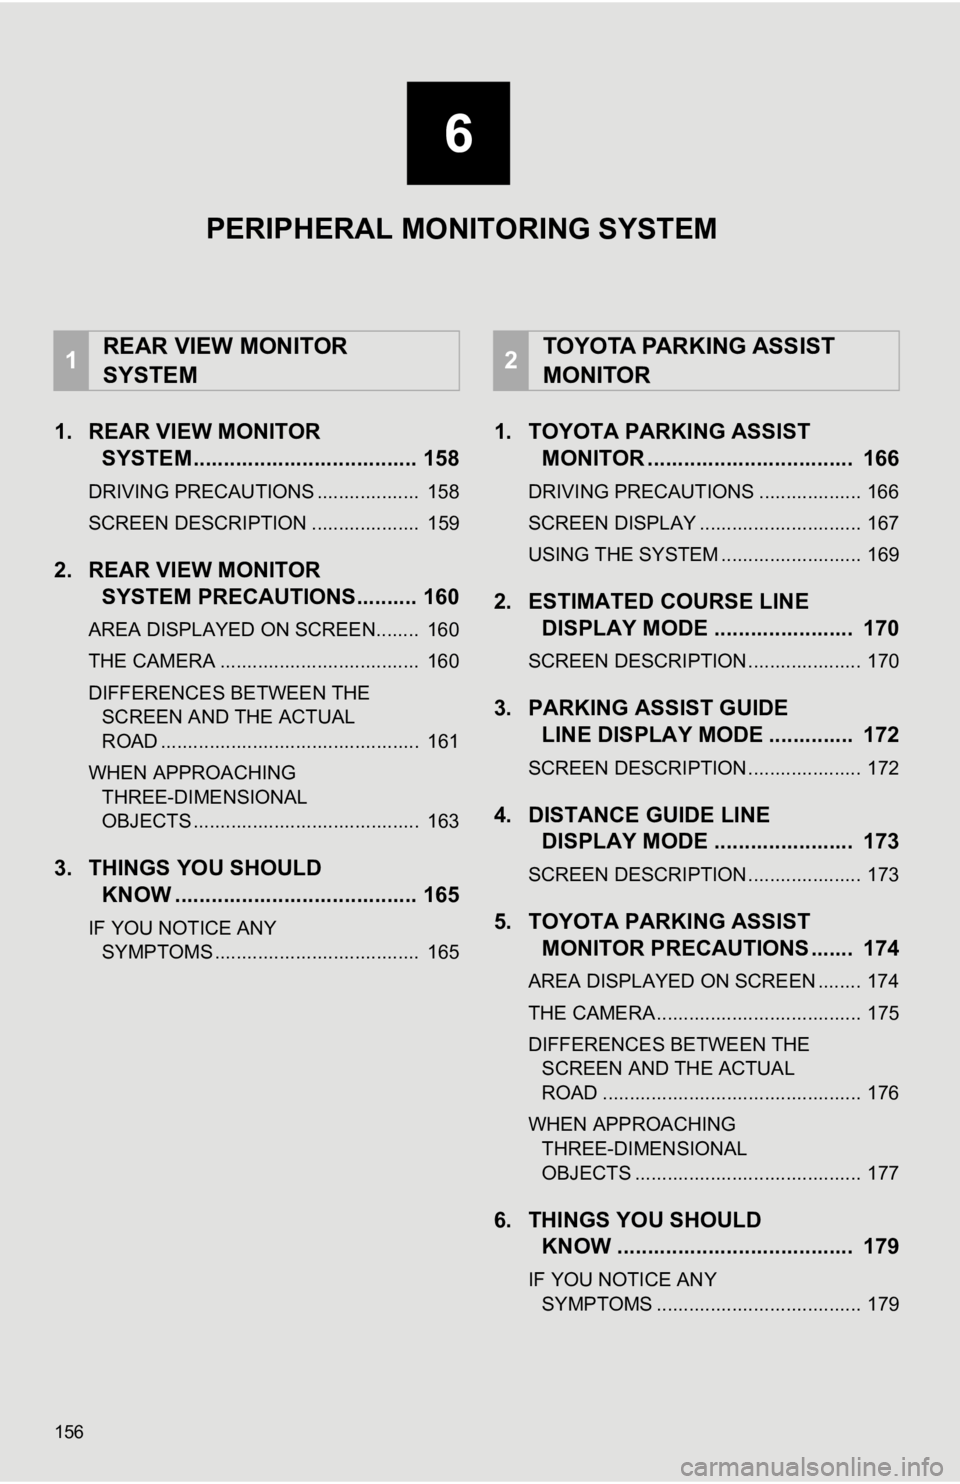
1. REAR VIEW MONITORSYSTEM..................................... 158
DRIVING PRECAUTIONS ................... 158
SCREEN DESCRIPTION .................... 159
2. REAR VIEW MONITORSYSTEM PRECAUTIONS .......... 160
AREA DISPLAYED ON SCREEN........ 160
THE CAMERA ..................................... 160
DIFFERENCES BETWEEN THE
SCREEN AND THE ACTUAL
ROAD ................................................ 161
WHEN APPROACHING THREE-DIMENSIONAL
OBJECTS .......................................... 163
3. THINGS YOU SHOULD KNOW ........................................ 165
IF YOU NOTICE ANY
SYMPTOMS ...................................... 165
1. TOYOTA PARKING ASSIST MONITOR .................................. 166
DRIVING PRECAUTIONS ................... 166
SCREEN DISPLAY .............................. 167
USING THE SYSTEM .......................... 169
2. ESTIMATED C OURSE LINE
DISPLAY MODE ....................... 170
SCREEN DESCRIPTION ..................... 170
3. PARKING ASSIST GUIDE LINE DISPLAY MODE .............. 172
SCREEN DESCRIPTION ..................... 172
4. DISTANCE GUIDE LINEDISPLAY MODE ....................... 173
SCREEN DESCRIPTION ..................... 173
5. TOYOTA PARKING ASSIST
MONITOR PRECAUTIONS ....... 174
AREA DISPLAYED ON SCREEN ........ 174
THE CAMERA ...................................... 175
DIFFERENCES BETWEEN THE
SCREEN AND THE ACTUAL
ROAD ................................................ 176
WHEN APPROACHING THREE-DIMENSIONAL
OBJECTS .......................................... 177
6. THINGS YOU SHOULD KNOW ....................................... 179
IF YOU NOTICE ANY
SYMPTOMS ...................................... 179
1REAR VIEW MONITOR
SYSTEM2TOYOTA PARKING ASSIST
MONITOR
6
PERIPHERAL MONITORING SYSTEM
Page 157 of 350
6
157
4
5
7
8
9
1
2
3
6
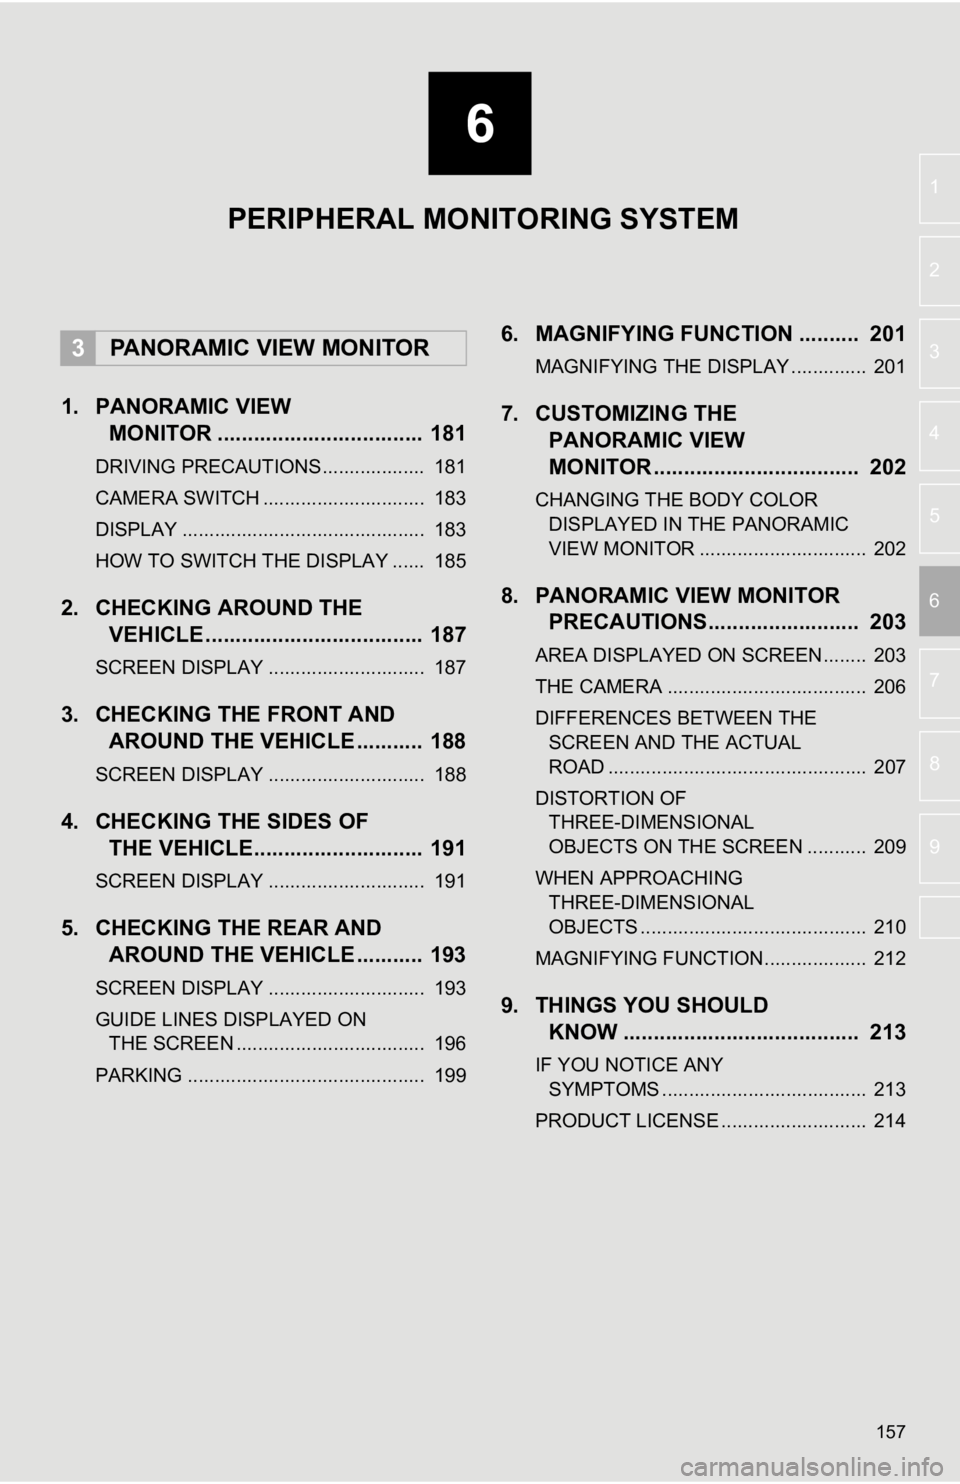
1. PANORAMIC VIEWMONITOR .................................. 181
DRIVING PRECAUTIONS ................... 181
CAMERA SWITCH .............................. 183
DISPLAY ............................................. 183
HOW TO SWITCH THE DISPLAY ...... 185
2. CHECKING AROUND THEVEHICLE .................................... 187
SCREEN DISPLAY ............................. 187
3. CHECKING THE FRONT AND
AROUND THE VEHICLE ........... 188
SCREEN DISPLAY ............................. 188
4. CHECKING THE SIDES OFTHE VEHICLE............................ 191
SCREEN DISPLAY ............................. 191
5. CHECKING THE REAR ANDAROUND THE VEHICLE ........... 193
SCREEN DISPLAY ............................. 193
GUIDE LINES DISPLAYED ON
THE SCREEN ................................... 196
PARKING ............................................ 199
6. MAGNIFYING FUNCTION .......... 201
MAGNIFYING THE DISPLAY .............. 201
7. CUSTOMIZING THE PANORAMIC VIEW
MONITOR .................................. 202
CHANGING THE BODY COLOR
DISPLAYED IN THE PANORAMIC
VIEW MONITOR ............................... 202
8. PANORAMIC V IEW MONITOR
PRECAUTIONS......................... 203
AREA DISPLAYED ON SCREEN........ 203
THE CAMERA ..................................... 206
DIFFERENCES BETWEEN THE
SCREEN AND THE ACTUAL
ROAD ................................................ 207
DISTORTION OF THREE-DIMENSIONAL
OBJECTS ON THE SCREEN ........... 209
WHEN APPROACHING THREE-DIMENSIONAL
OBJECTS .......................................... 210
MAGNIFYING FUNCTION ................... 212
9. THINGS YOU SHOULD KNOW ....................................... 213
IF YOU NOTICE ANY
SYMPTOMS ...................................... 213
PRODUCT LICENSE ........................... 214
3PANORAMIC VIEW MONITOR
PERIPHERAL MONITORING SYSTEM
Page 158 of 350
158
1. REAR VIEW MONITOR SYSTEM
1. REAR VIEW MONITOR SYSTEM*
The rear view monitor system assists
the driver by displaying an image of the
view behind the vehicle with fixed
guide lines on the screen while backing
up, for example while parking.
INFORMATION
●The screen illustrations used in this text
are intended as examples, and may dif-
fer from the image that is actually dis-
played on the screen.
DRIVING PRECAUTIONS
The rear view monitor system is a sup-
plemental device intended to assist the
driver when backing up. When backing
up, be sure to visually check all around
the vehicle both directly and using the
mirrors before proceeding. If you do
not, you may hit another vehicle, and
could possibly cause an accident.
Pay attention to the following precau-
tions when using the rear view monitor
system.
*: If equipped
WA R N I N G
●Never depend on the rear view monitor
system entirely when backing up. The
image and the position of the guide lines
displayed on the screen may differ from
the actual state.
Use caution, just as you would when
backing up any vehicle.
● Be sure to back up slowly, depressing
the brake pedal to control vehicle speed.
● The instructions given are only guide
lines. When and how much to turn the
steering wheel will vary according to
traffic conditions, road surface condi-
tions, vehicle condition, etc. when park-
ing. It is necessary to be fully aware of
this before using the rear view monitor
system.
● When parking, be sure to check that the
parking space will accommodate your
vehicle before maneuvering into it.
● Do not use the rear view monitor system
in the following cases:
• On icy or slick road surfaces, or in
snow
• When using tire chains or emergency tires
• When the trunk is not closed com-
pletely
• On roads that are not flat or straight, such as curves or slopes
● In low temperatures, the screen may
darken or the image may become faint.
The image could distort when the vehi-
cle is moving, or you may become
unable to see the image on the screen.
Be sure to visually check all around the
vehicle both directly and using the mir-
rors before proceeding.
● If the tire sizes are changed, the position
of the fixed guide lines displayed on the
screen may change.
● The camera uses a special lens. The
distances between objects and pedestri-
ans that appear in the image displayed
on the screen will differ from the actual
distances. ( P.161)
Page 159 of 350
159
1. REAR VIEW MONITOR SYSTEM
PERIPHERAL MONITORING SYSTEM
6
SCREEN DESCRIPTION
Vehicles without a smart key system
The rear view monitor system screen will be displayed if the shift lever is shifted to the
“R” position while the engine s witch is in the “ON” position.
Vehicles with a smart key system
The rear view monitor system screen will be displayed if the shift lever is shifted to the
“R” position while the engine
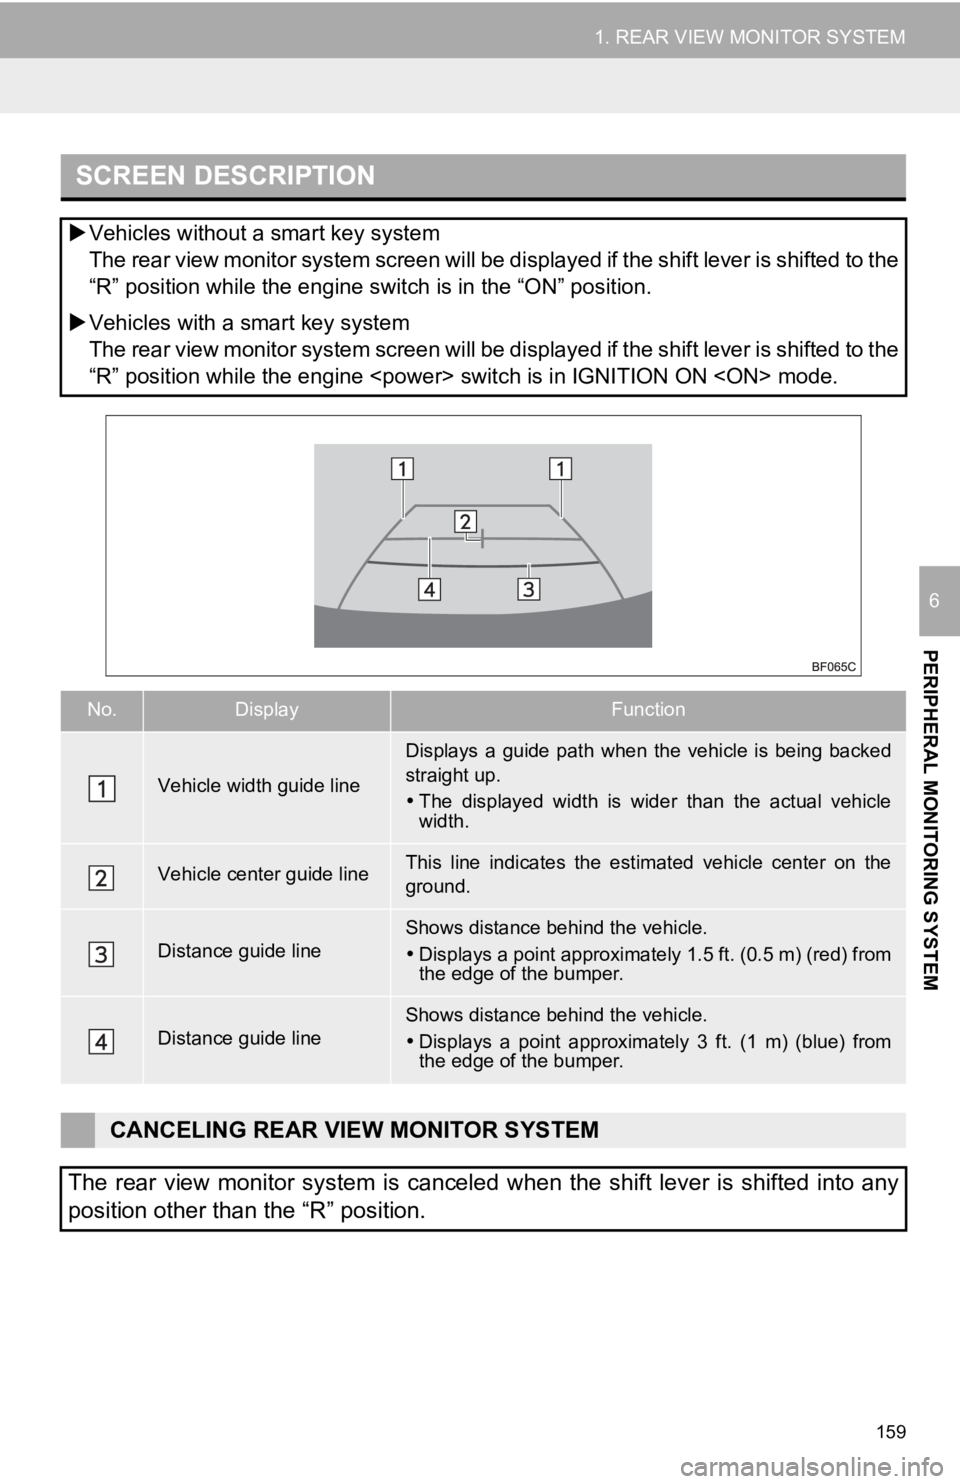
No.DisplayFunction
Vehicle width guide line
Displays a guide path when the vehicle is being backed
straight up.
The displayed width is wider than the actual vehicle
width.
Vehicle center guide lineThis line indicates the estimated vehicle center on the
ground.
Distance guide lineShows distance behind the vehicle.
Displays a point approximately 1.5 ft. (0.5 m) (red) from
the edge of the bumper.
Distance guide lineShows distance behind the vehicle.
Displays a point approximatel y 3 ft. (1 m) (blue) from
the edge of the bumper.
CANCELING REAR VIEW MONITOR SYSTEM
The rear view monitor system is canceled when the shift lever i s shifted into any
position other than the “R” position.
Page 160 of 350
160
1. REAR VIEW MONITOR SYSTEM
2. REAR VIEW MONITOR SYSTEM PRECAUTIONS
The image adjustment procedure for the
rear view monitor system screen is the
same as the procedure for adjusting the
screen. ( P. 4 1 )
AREA DISPLAYED ON
SCREEN
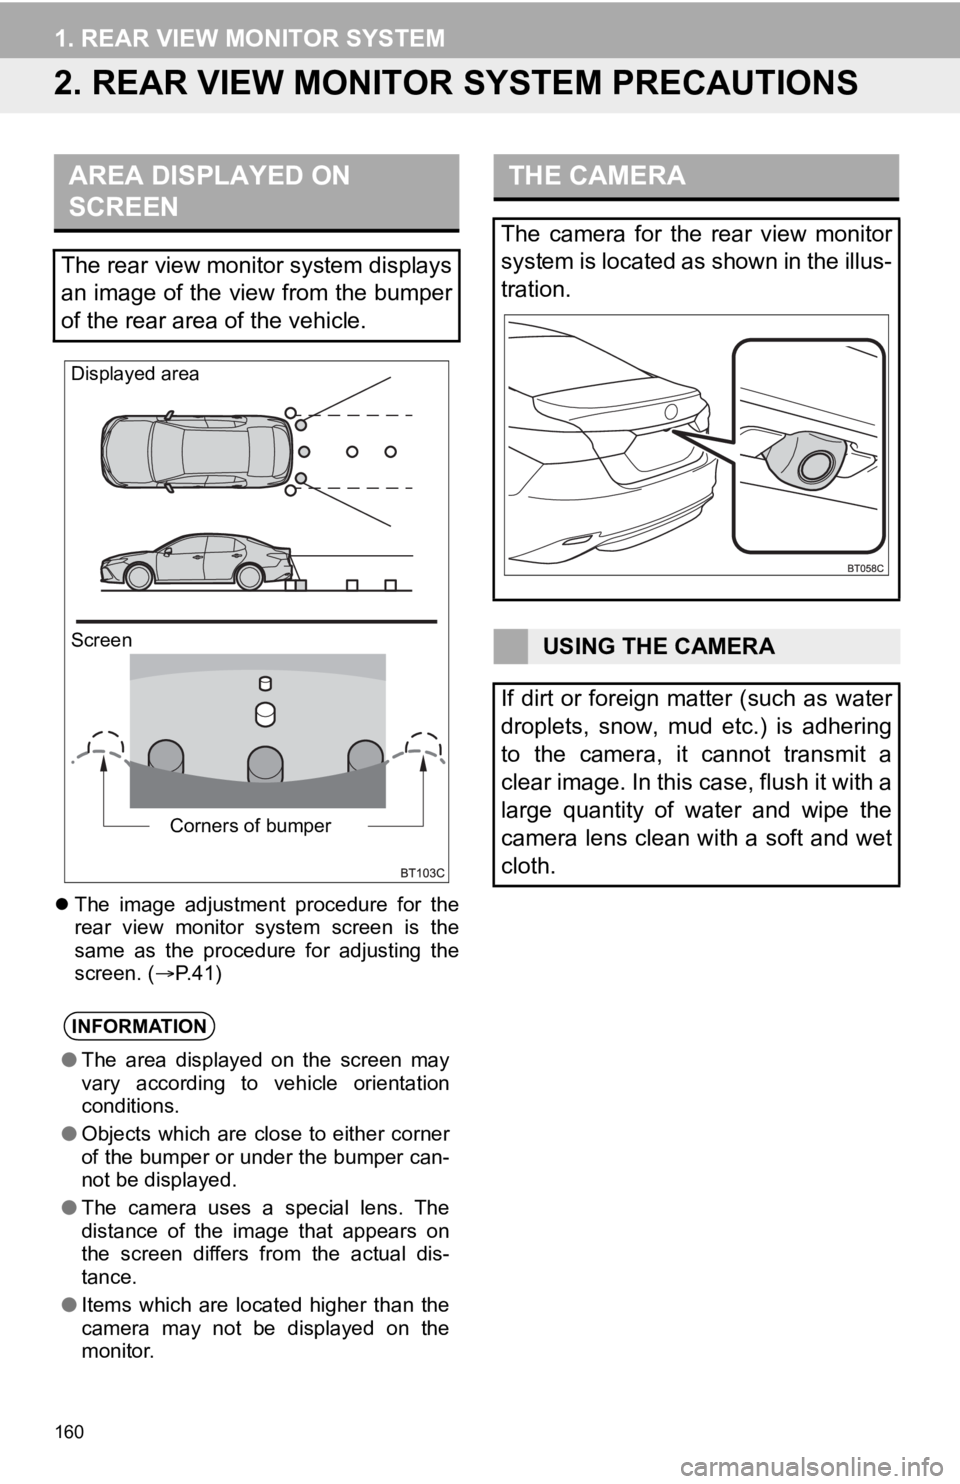
The rear view monitor system displays
an image of the view from the bumper
of the rear area of the vehicle.
INFORMATION
● The area displayed on the screen may
vary according to vehicle orientation
conditions.
● Objects which are close to either corner
of the bumper or under the bumper can-
not be displayed.
● The camera uses a special lens. The
distance of the image that appears on
the screen differs from the actual dis-
tance.
● Items which are located higher than the
camera may not be displayed on the
monitor.
Screen Displayed area
Corners of bumper
THE CAMERA
The camera for the rear view monitor
system is located as shown in the illus-
tration.
USING THE CAMERA
If dirt or foreign matter (such as water
droplets, snow, mud etc.) is adhering
to the camera, it cannot transmit a
clear image. In this case, flush it with a
large quantity of water and wipe the
camera lens clean with a soft and wet
cloth.