TOYOTA COROLLA 2011 10.G Owners Manual
Manufacturer: TOYOTA, Model Year: 2011, Model line: COROLLA, Model: TOYOTA COROLLA 2011 10.GPages: 529, PDF Size: 9.69 MB
Page 241 of 529
241
3-2. Using the audio system
3
Interior features
■
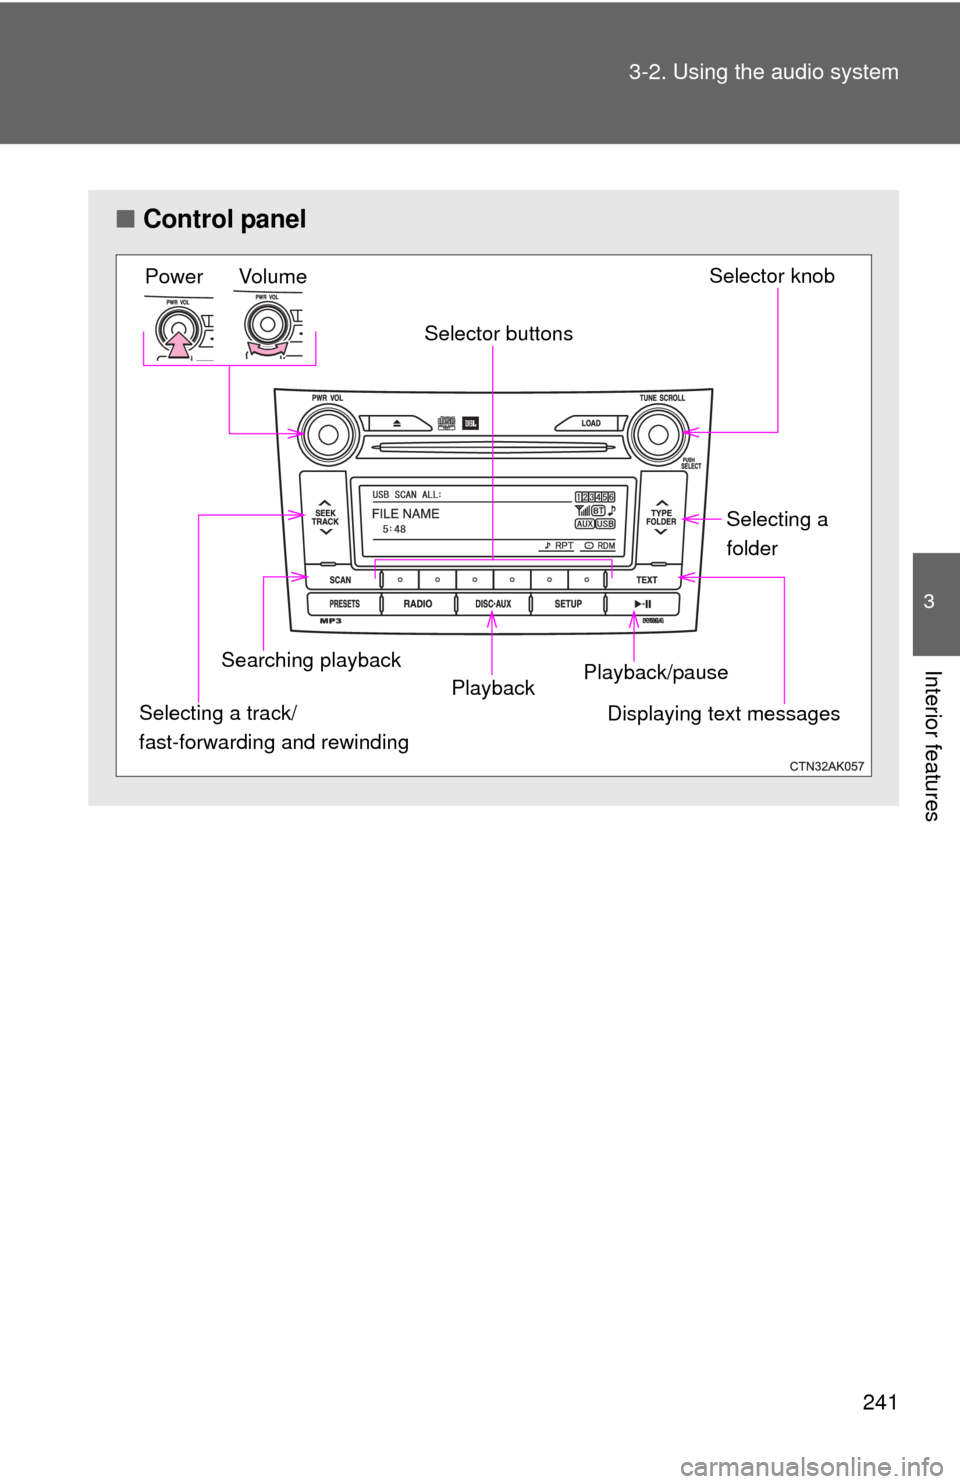
Control panel
Power Volume Selector knob
Displaying text messages
Playback
Playback/pause
Searching playback Selector buttons
Selecting a
folder
Selecting a track/
fast-forwarding and rewinding
Page 242 of 529
242 3-2. Using the audio system
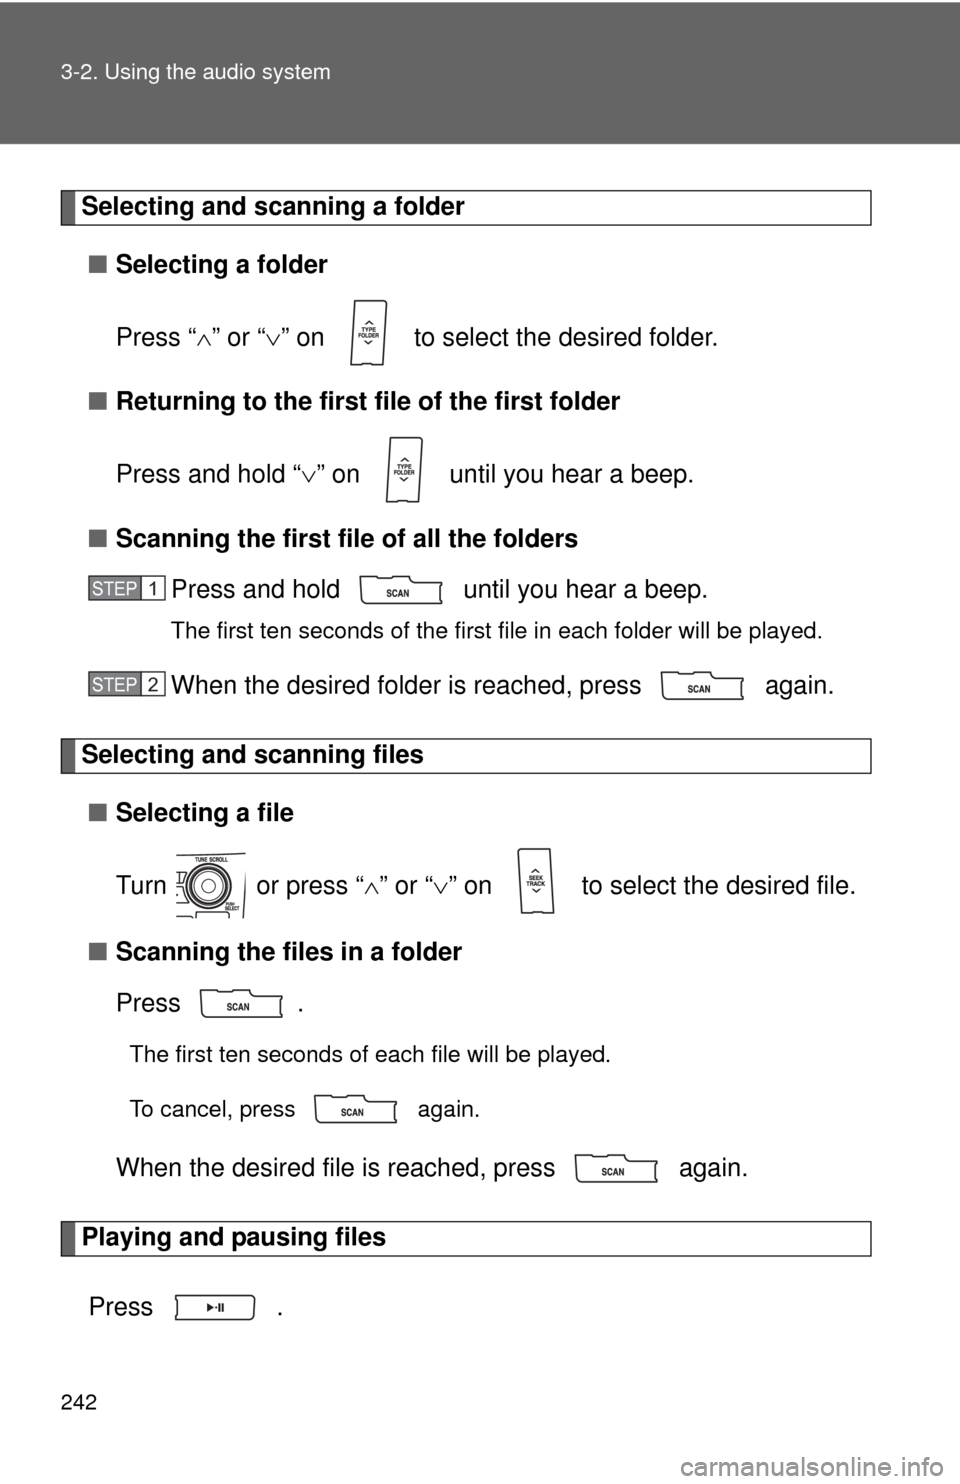
Selecting and scanning a folder■ Selecting a folder
Press “ ” or “ ” on to select the desired folder.
■ Returning to the first file of the first folder
Press and hold “ ” on until you hear a beep.
■ Scanning the first file of all the folders
Press and hold until you hear a beep.
The first ten seconds of the first file in each folder will be played.
When the desired folder is reached, press again.
Selecting and scanning files
■ Selecting a file
Turn or press “ ” or “ ” on to select the desired file.
■ Scanning the files in a folder
Press .
The first ten seconds of each file will be played.
To cancel, press again.
When the desired file is reached, press again.
Playing and pausing files
Press .
STEP 1
STEP 2
Page 243 of 529
243
3-2. Using the audio system
3
Interior features
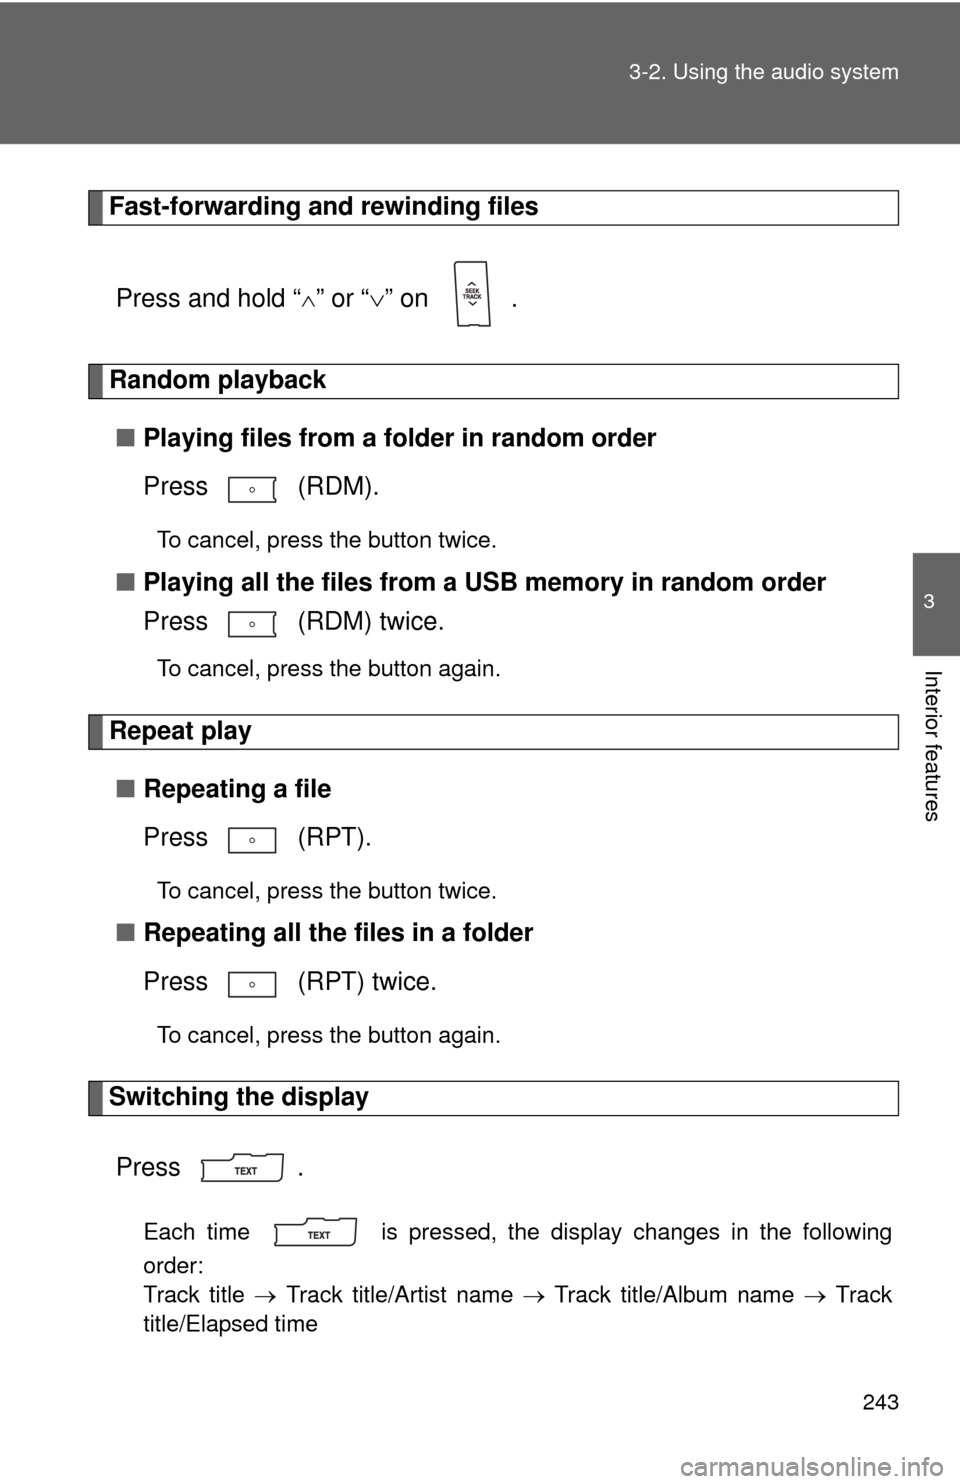
Fast-forwarding and rewinding files
Press and hold “
” or “ ” on .
Random playback
■ Playing files from a folder in random order
Press (RDM).
To cancel, press the button twice.
■Playing all the files from a USB memory in random order
Press (RDM) twice.
To cancel, press the button again.
Repeat play
■ Repeating a file
Press (RPT).
To cancel, press the button twice.
■Repeating all the files in a folder
Press (RPT) twice.
To cancel, press the button again.
Switching the display
Press .
Each time is pressed, the display changes in the following
order:
Track title Track title/Artist name Track title/Album name Track
title/Elapsed time
Page 244 of 529
244 3-2. Using the audio system
■USB memory functions
Depending on the USB memory that is connected to the system, certain
functions may not be available. Disconnecting the device and reconnecting it
once again may resolve some malfunctions.
■ Error messages
“USB ERROR”: This indicates a problem either in the USB memory or
inside the USB box or connection between them.
“NO SUPPORT”: This indicates that no MP3/WMA files are included in the USB memory.
■ USB memory
●Compatible device
USB memory that can be used for MP3 and WMA playback.
Depending on the type of USB device, playback may not be possible.
● Compatible device formats
The following device formats can be used:
• USB communication formats: USB2.0 FS (12 mbps)
• File formats: FAT16/32 (Windows)
• Correspondence class: Mass storage class
MP3 and WMA files written in any format other than those listed above
may not play correctly, and their file names and folder names may not
be displayed correctly.
Items related to standards and limitations are as follows:
• Maximum directory hierarchy: 8 levels
• Maximum number of folder in device: 999 (including the root)
• Maximum number of files in device: 65025
• Maximum number of files per folder: 255
Page 245 of 529
245
3-2. Using the audio system
3
Interior features
●
MP3 and WMA files
MP3 (MPEG Audio LAYER 3) is a standard audio compression format.
Files can be compressed to approximately 1/10 of their original size using
MP3 compression.
WMA (Windows Media Audio) is a Microsoft audio compression format.
This format compresses audio data to a size smaller than that of the MP3
format.
There is a limit to the MP3 and WMA file standards that can be used and to
the media/formats on which the files are recorded.
● MP3 file compatibility
• Compatible standards
MP3 (MPEG1 AUDIO LAYERII, III, MPEG2 AUDIO LAYERII, III,
MPEG2.5)
• Compatible sampling frequencies MPEG1 AUDIO LAYERII, III: 32, 44.1, 48 (kHz)
MPEG2 AUDIO LAYERII, III: 16, 22.05, 24 (kHz)
MPEG2.5: 8, 11.025, 12 (kHz)
• Compatible bit rates (compatible with VBR) MPEG1 AUDIO LAYERII, III: 32-320 (kbps)
MPEG2 AUDIO LAYERII, III: 32-160 (kbps)
MPEG2.5: 32-160 (kbps)
• Compatible channel modes: stereo, joint stereo, dual channel and monaural
● WMA file compatibility
• Compatible standards
WMA Ver. 9
• Compatible sampling frequencies HIGH PROFILE 32, 44.1, 48 (kHz)
• Compatible bit rates HIGH PROFILE 32-320 (kbps, VBR)
● File names
The only files that can be recognized as MP3/WMA and played are those
with the extension .mp3 or .wma.
Page 246 of 529
246 3-2. Using the audio system
●ID3 and WMA tags
ID3 tags can be added to MP3 files, making it possible to record the track
title, artist name, etc.
The system is compatible with ID3 Ver. 1.0, 1.1, and Ver. 2.2, 2.3, 2.4 ID3
tags. (The number of characters is based on ID3 Ver. 1.0 and 1.1.)
WMA tags can be added to WMA files, making it possible to record the
track title and artist name in the same way as with ID3 tags.
● MP3 and WMA playback
When a device containing MP3 or WMA files is plugged in, all files in the
USB memory device are first checked. Once the file check is finished, the
first MP3 or WMA file is played. To make the file check finish more quickly,
we recommend you do not write in any files other than MP3 or WMA files
or create any unnecessary folders.
● Extensions
If the file extensions .mp3 and .wma are used for files other than MP3 and
WMA files, they will be mistakenly recognized and played as MP3 and
WMA files. This may result in large amounts of interference and damage
to the speakers.
● Playback
• To play MP3 files with steady sound quality, we recommend a fixed bit
rate of at least 128 kbps and a sampling frequency of 44.1 kHz.
• There is a wide variety of freeware and other encoding software for MP3 and WMA files on the market, and depending on the status of the
encoding and the file format, poor sound quality or noise at the start of
playback may result. In some cases, playback may not be possible at
all.
• Microsoft, Windows, and Windows Media are the registered trade- marks of Microsoft Corporation in the U.S.A. and other countries.
CAUTION
■ Caution while driving
Do not use a USB memory, or connect a USB memory.
Page 247 of 529
247
3-2. Using the audio system
3
Interior features
NOTICE
■
To prevent damage to a USB memory
●Do not leave a USB memory in the vehicle. The temperature inside may
become high, resulting in damage to the player.
● Do not push down on or apply unnecessary pressure to the USB memory
while it is connected as this may damage the USB memory or its terminal.
● Do not insert foreign objects into the port as this may damage the USB
memory or its terminal.
Page 248 of 529
248
3-2. Using the audio system
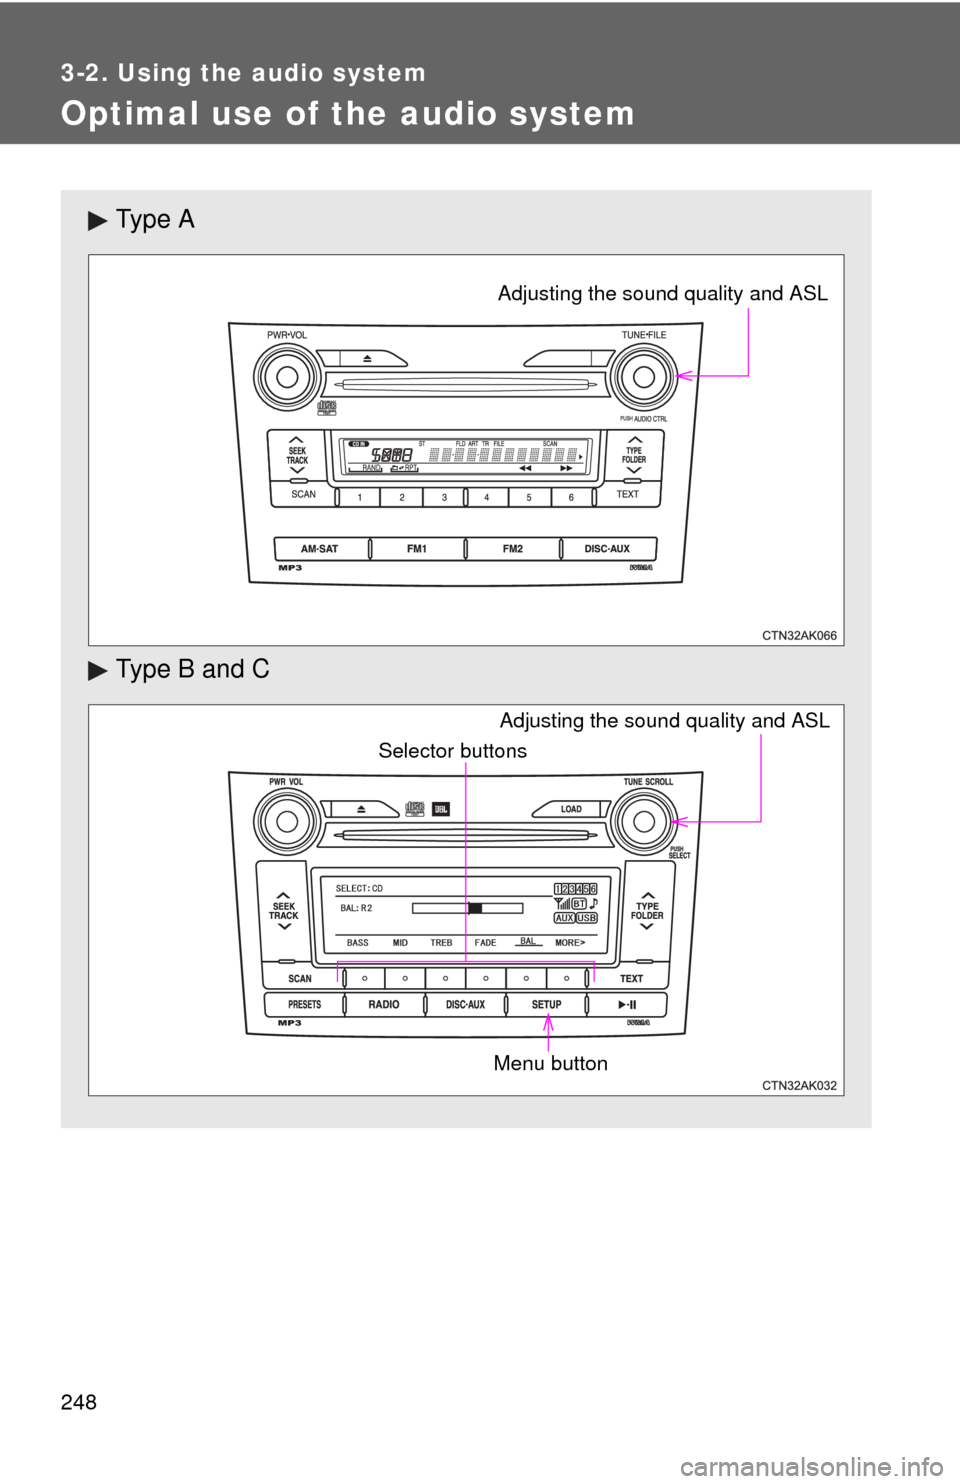
Optimal use of the audio system
Ty p e A
Type B and C
Adjusting the sound quality and ASL
Adjusting the sound quality and ASL
Selector buttons
Menu button
Page 249 of 529
249
3-2. Using the audio system
3
Interior features
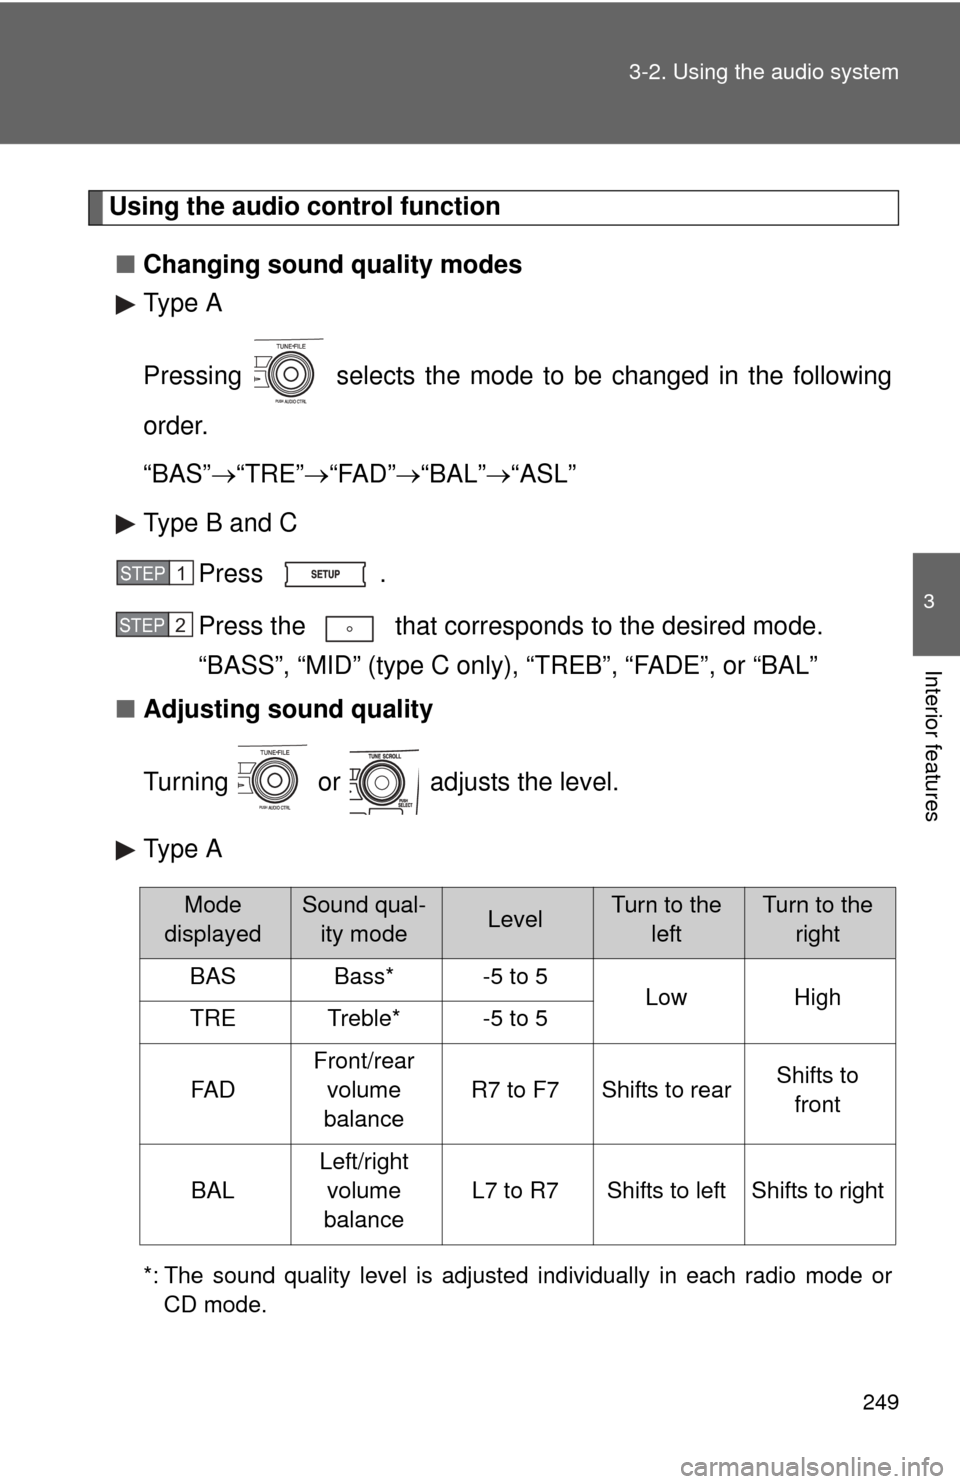
Using the audio control function
■ Changing sound quality modes
Type A
Pressing selects the mode to be changed in the following
order.
“BAS” “TRE” “FAD”“BAL” “ASL”
Type B and C
Press .
Press the that corresponds to the desired mode.
“BASS”, “MID” (type C only), “TREB”, “FADE”, or “BAL”
■ Adjusting sound quality
Turning or adjusts the level.
Type A
*: The sound quality level is adjusted individually in each radio mode or
CD mode.
STEP 1
STEP 2
Mode
displayedSound qual- ity modeLevelTurn to the leftTurn to the right
BASBass*-5 to 5LowHighTRETreble*-5 to 5
FA D
Front/rear volume
balance
R7 to F7Shifts to rearShifts to front
BAL
Left/right volume
balance
L7 to R7Shifts to leftShifts to right
Page 250 of 529
250 3-2. Using the audio system
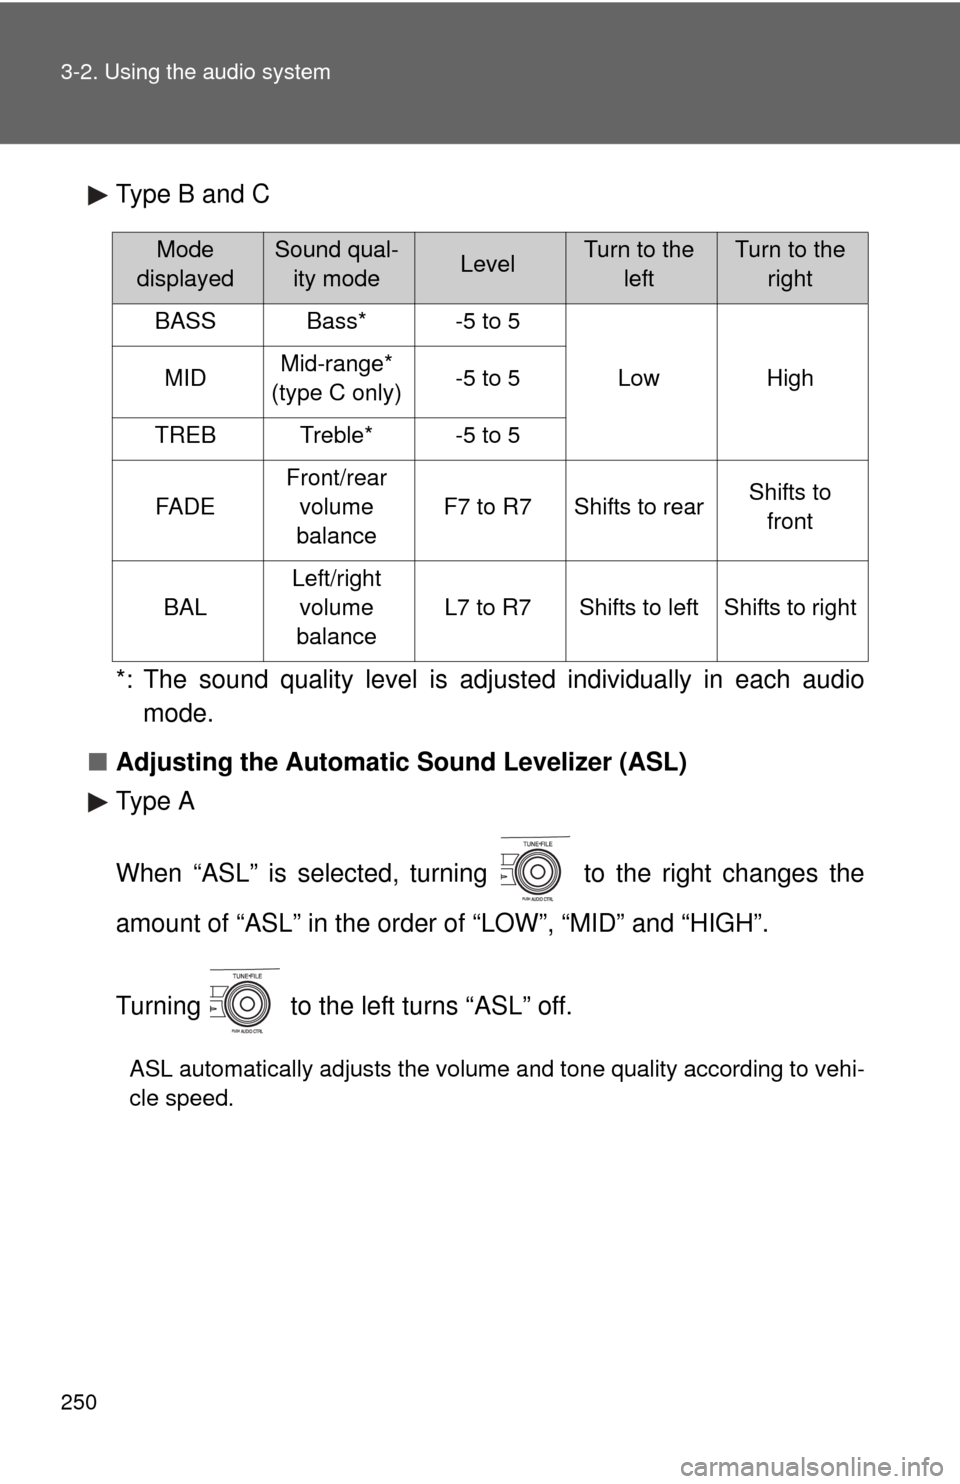
Type B and C
*: The sound quality level is adjusted individually in each audiomode.
■ Adjusting the Automatic Sound Levelizer (ASL)
Type A
When “ASL” is selected, turning to the right changes the
amount of “ASL” in the order of “LOW”, “MID” and “HIGH”.
Turning to the left turns “ASL” off.
ASL automatically adjusts the volume and tone quality according to vehi-
cle speed.
Mode
displayedSound qual- ity modeLevelTurn to the leftTurn to the right
BASSBass*-5 to 5
LowHighMIDMid-range*
(type C only)-5 to 5
TREBTreble*-5 to 5
FA D E
Front/rear volume
balance
F7 to R7Shifts to rearShifts to front
BAL
Left/right volume
balance
L7 to R7Shifts to leftShifts to right