display TOYOTA COROLLA 2012 10.G Owners Manual
[x] Cancel search | Manufacturer: TOYOTA, Model Year: 2012, Model line: COROLLA, Model: TOYOTA COROLLA 2012 10.GPages: 529, PDF Size: 8.07 MB
Page 2 of 529

TABLE OF CONTENTSIndex
2
1-1. Key informationKeys ..................................... 22
1-2. Opening, closing and locking the doors and
trunk
Smart key system................. 25
Wireless remote control ....... 36
Doors.................................... 41
Trunk .................................... 47
1-3. Adjustable components (seats, mirrors,
steering wheel)
Front seats ........................... 51
Rear seats ............................ 54
Head restraints ..................... 56
Seat belts ............................. 58
Steering wheel ..................... 66
Anti-glare inside rear view mirror .................................. 67
Outside rear view mirrors ..... 69
1-4. Opening and closing the windows
Power windows .................... 71
Moon roof ............................. 73
1-5. Refueling Opening the fuel tank cap .... 77
1-6. Theft deterrent system Engine immobilizer system ................................ 81 1-7. Safety information
Correct driving posture ......... 84
SRS airbags ......................... 86
Front passenger occupant classification system ........... 98
Child restraint systems ....... 103
Installing child restraints ..... 107
2-1. Driving procedures Driving the vehicle .............. 120
Engine (ignition) switch (vehicles with smart
key system) ...................... 131
Engine (ignition) switch (vehicles without smart
key system) ...................... 135
Automatic transmission ...... 139
Manual transmission........... 145
Turn signal lever ................. 146
Parking brake ..................... 147
Horn .................................... 148
2-2. Instrument cluster Gauges and meters ............ 149
Indicators and warning lights ................................. 152
Multi-information display ..... 156
2-3. Operating the lights and wipers
Headlight switch ................. 160
Fog light switch ................... 164
Windshield wipers and washer .............................. 166
1Before driving
2When driving
Page 9 of 529
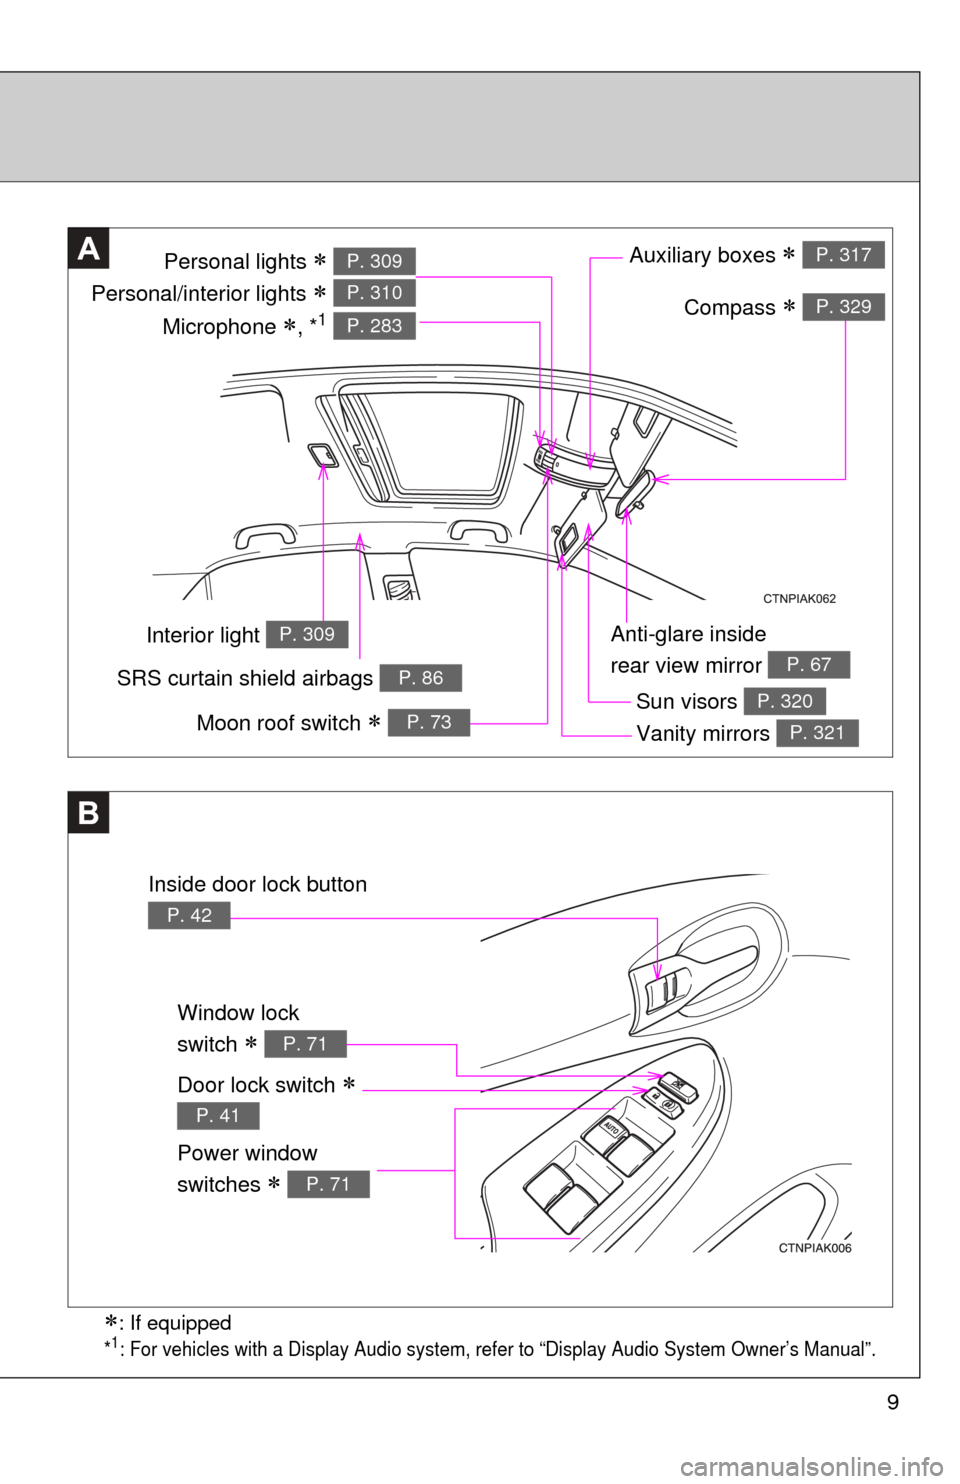
9
Anti-glare inside
rear view mirror
P. 67
Personal lights
Personal/interior lights
P. 309
P. 310
SRS curtain shield airbags P. 86
A
Sun visors P. 320
Vanity mirrors P. 321
Auxiliary boxes P. 317
Window lock
switch
P. 71
Power window
switches
P. 71
B
Door lock switch
P. 41
Compass P. 329
Moon roof switch P. 73
Interior light P. 309
Inside door lock button
P. 42
Microphone , *1 P. 283
: If equipped
*1: For vehicles with a Display Audio system, refer to “Display Audio System Owner’s Manual”.
Page 10 of 529
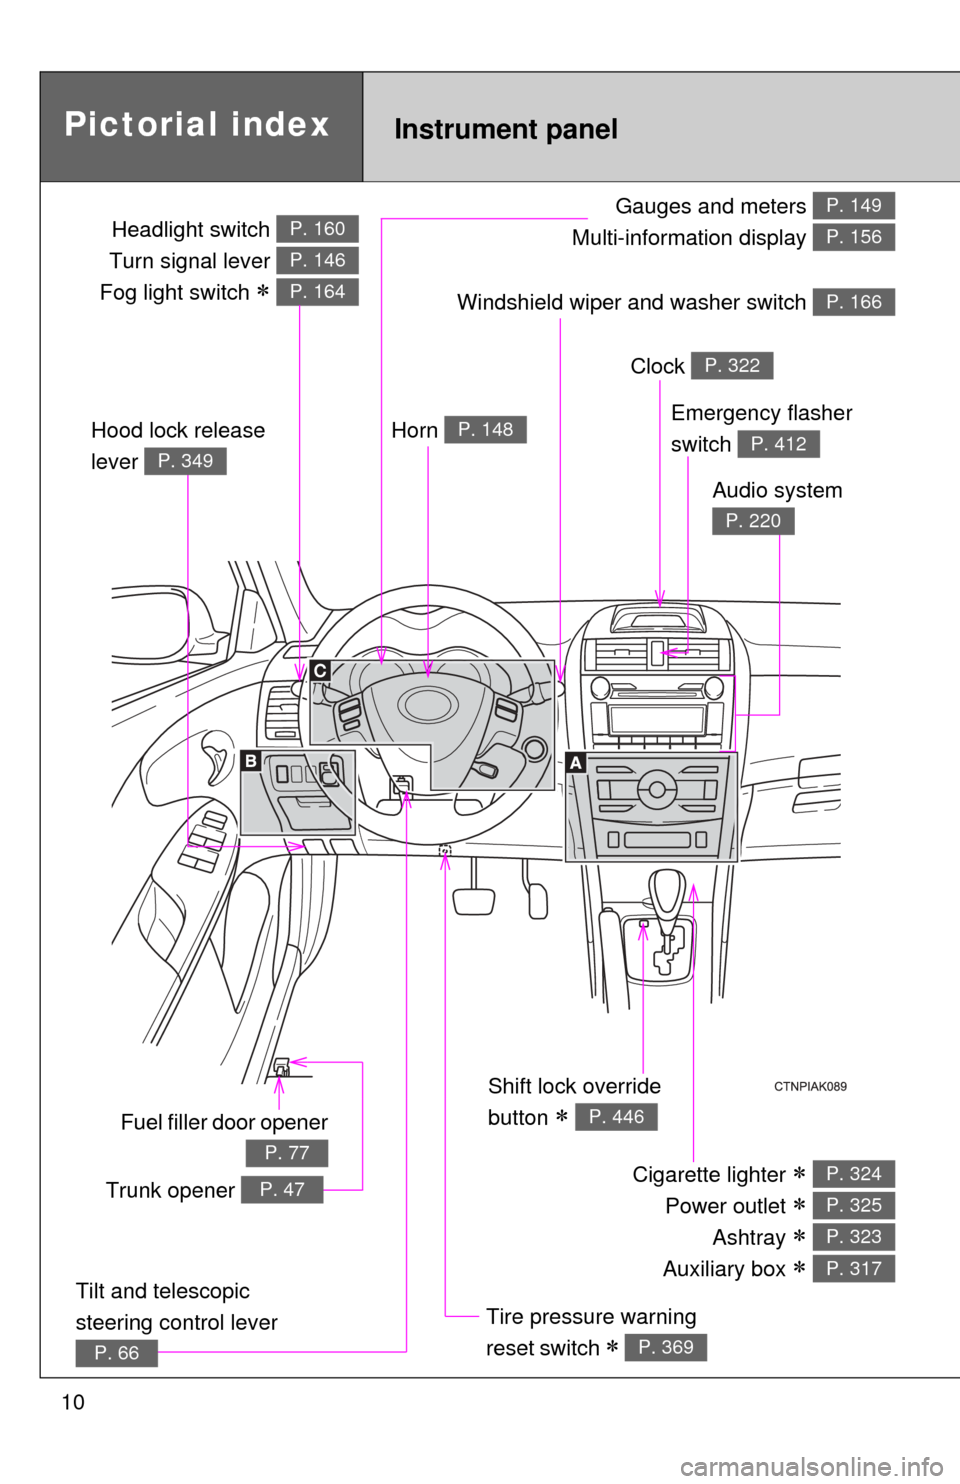
10
Gauges and meters
Multi-information display P. 149
P. 156
Pictorial index
Headlight switch
Turn signal lever
Fog light switch
P. 160
P. 146
P. 164
Instrument panel
Windshield wiper and washer switch P. 166
Fuel filler door opener
P. 77
Emergency flasher
switch
P. 412
Shift lock override
button
P. 446
Cigarette lighter
Power outlet
Ashtray
Auxiliary box
P. 324
P. 325
P. 323
P. 317
Tire pressure warning
reset switch
P. 369
Horn P. 148
Clock P. 322
Audio system
P. 220
Hood lock release
lever
P. 349
Trunk opener P. 47
Tilt and telescopic
steering control lever
P. 66
Page 13 of 529
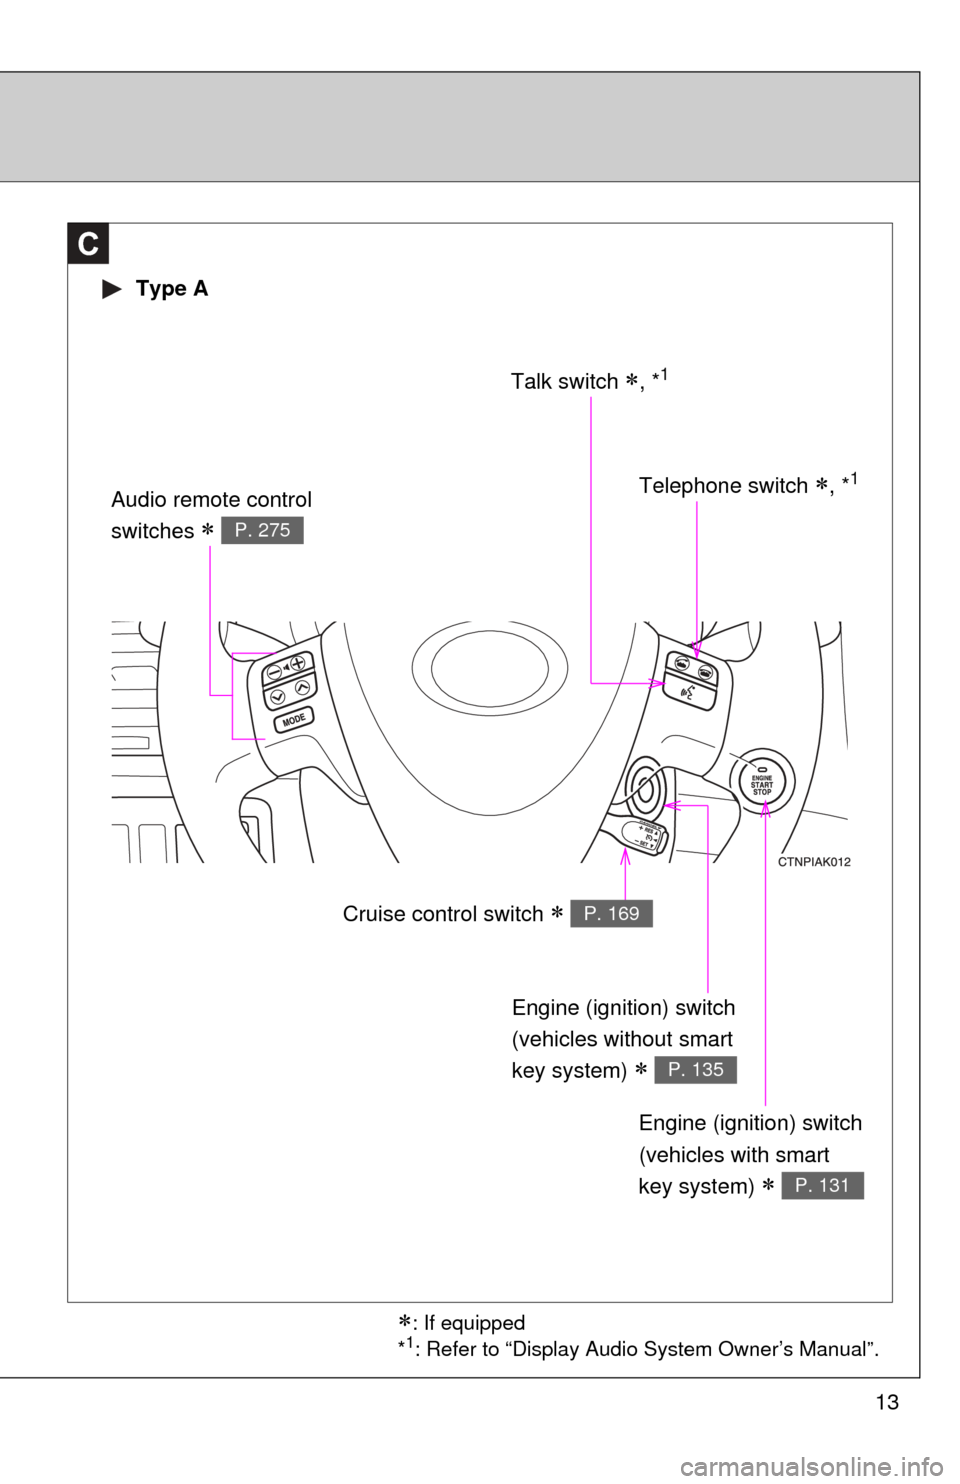
13
C
Talk switch , *1
Engine (ignition) switch
(vehicles without smart
key system)
P. 135
Engine (ignition) switch
(vehicles with smart
key system)
P. 131
Audio remote control
switches
P. 275
Type A
Telephone switch , *1
Cruise control switch P. 169
: If equipped
*1: Refer to “Display Audio System Owner’s Manual”.
Page 14 of 529
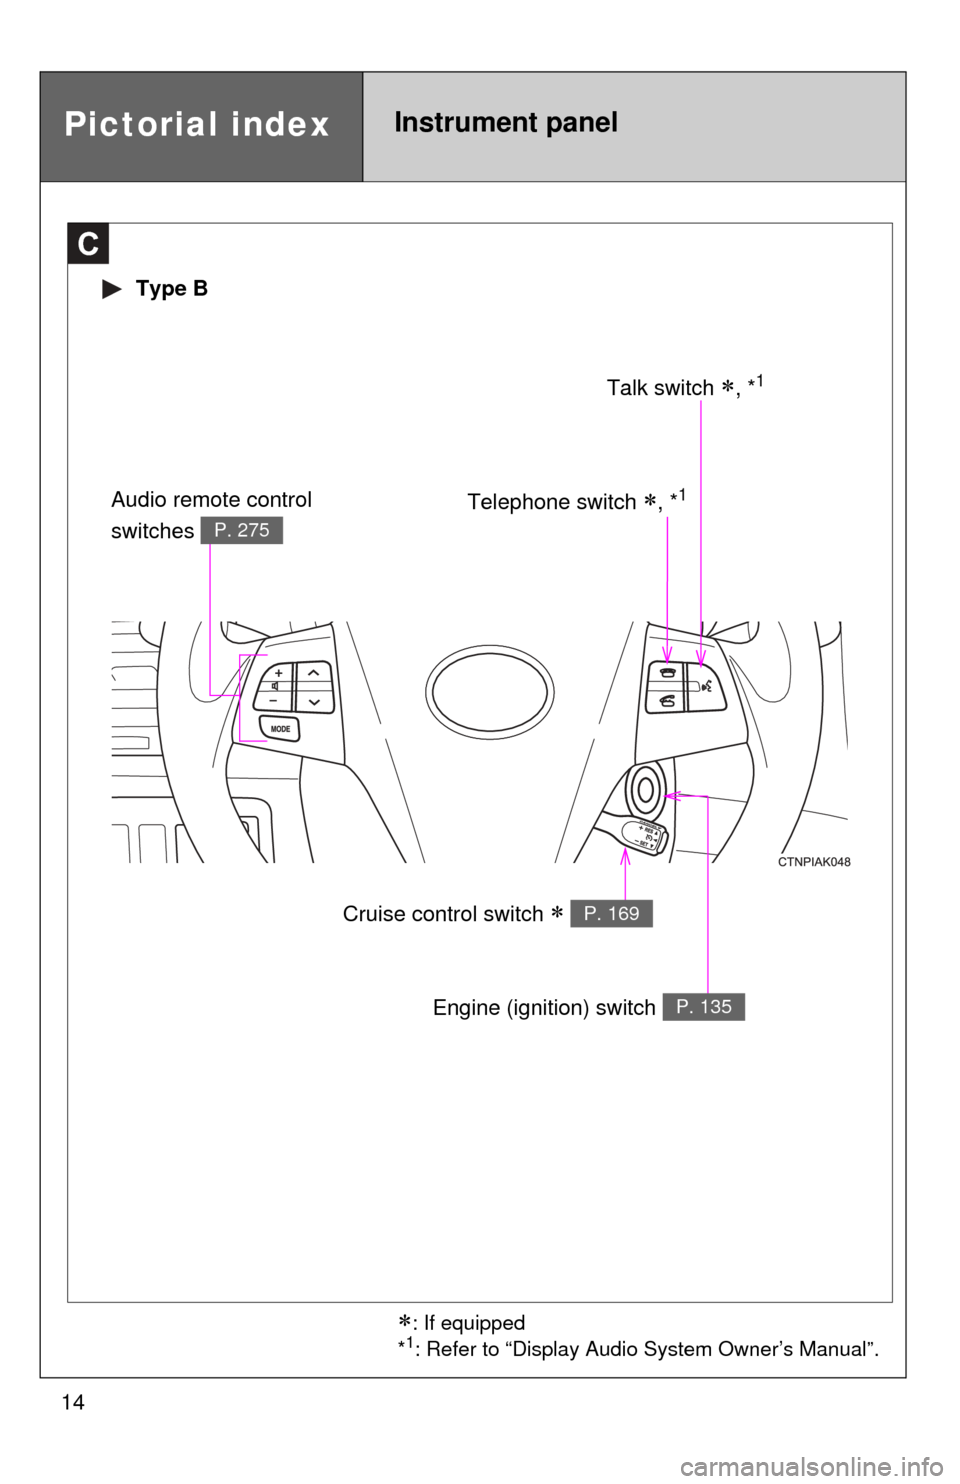
14
C
Talk switch , *1
Pictorial indexInstrument panel
Type B
Telephone switch , *1
Cruise control switch P. 169
Engine (ignition) switch P. 135
Audio remote control
switches
P. 275
: If equipped
*1: Refer to “Display Audio System Owner’s Manual”.
Page 107 of 529
107
1
1-7. Safety information
Before driving
Installing child restraints
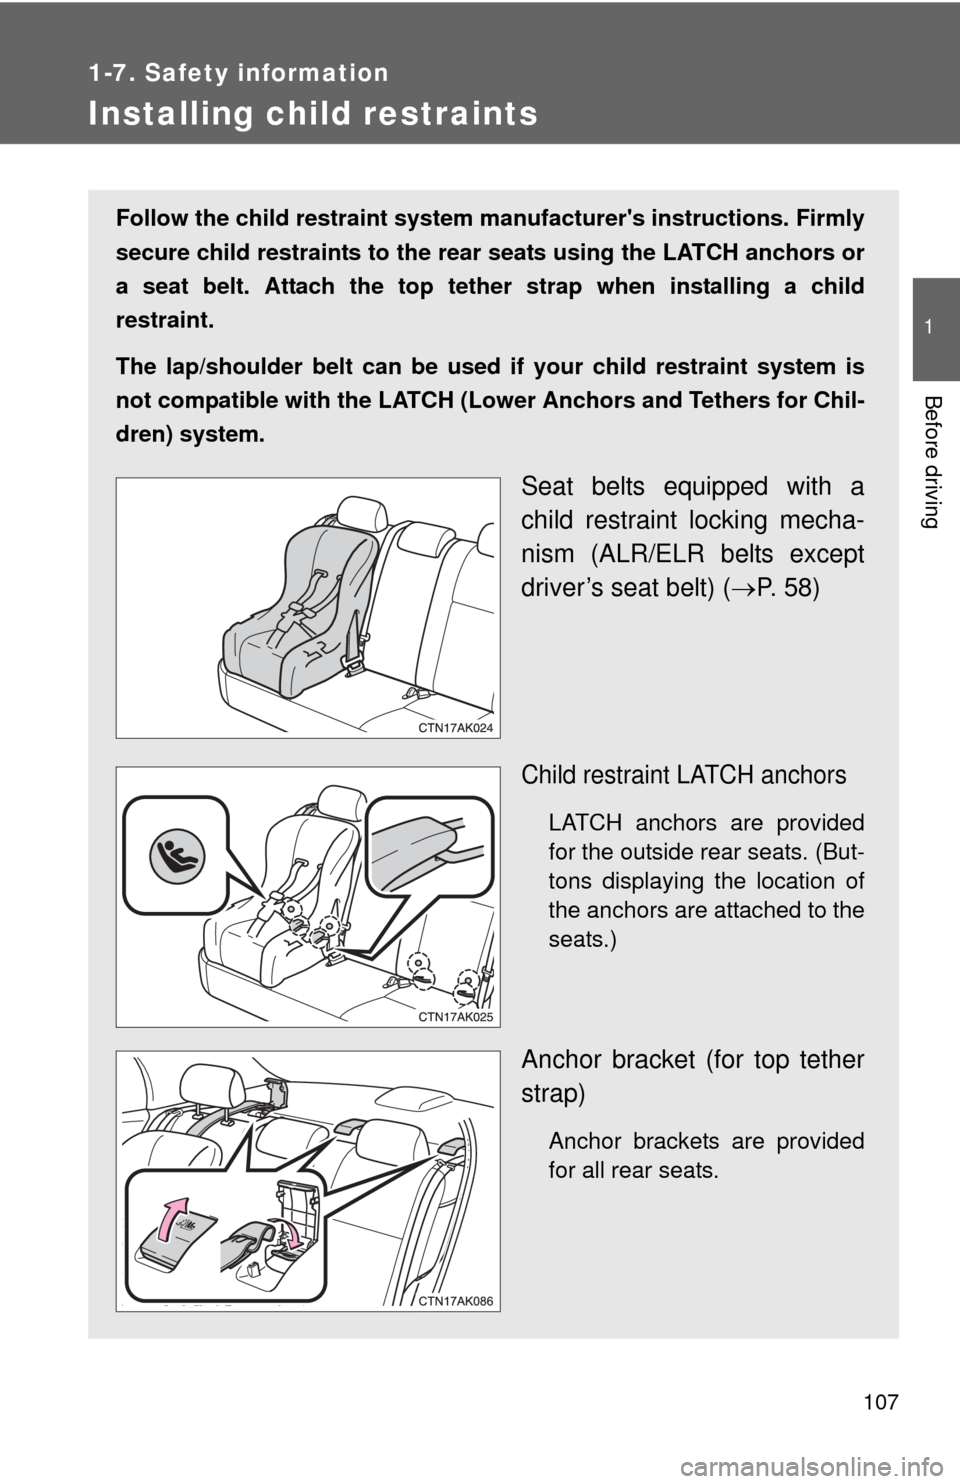
Follow the child restraint system manufacturer's instructions. Firmly
secure child restraints to the r ear seats using the LATCH anchors or
a seat belt. Attach the top teth er strap when installing a child
restraint.
The lap/shoulder belt can be used if your child restraint system is
not compatible with the LATCH (Low er Anchors and Tethers for Chil-
dren) system.
Seat belts equipped with a
child restraint locking mecha-
nism (ALR/ELR belts except
driver’s seat belt) ( P. 58)
Child restraint LATCH anchors
LATCH anchors are provided
for the outside rear seats. (But-
tons displaying the location of
the anchors are attached to the
seats.)
Anchor bracket (for top tether
strap)
Anchor brackets are provided
for all rear seats.
Page 119 of 529
When driving2
119
2-1. Driving proceduresDriving the vehicle............ 120
Engine (ignition) switch (vehicles with smart
key system).................... 131
Engine (ignition) switch (vehicles without smart
key system).................... 135
Automatic transmission .... 139
Manual transmission ........ 145
Turn signal lever .............. 146
Parking brake ................... 147
Horn ................................. 148
2-2. Instrument cluster Gauges and meters ......... 149
Indicators and warning lights .............................. 152
Multi-information display............................ 156
2-3. Operating the lights and wipers
Headlight switch ............... 160
Fog light switch ................ 164
Windshield wipers and washer ........................... 166 2-4. Using other driving
systems
Cruise control ................... 169
Driving assist systems ..... 173
2-5. Driving information Cargo and luggage .......... 177
Vehicle load limits ............ 180
Winter driving tips ............ 181
Trailer towing (2.4 L 4-cylinder
[2AZ-FE] engine) ........... 185
Trailer towing (1.8 L 4-cylinder
[2ZR-FE] engine) ........... 200
Dinghy towing (automatic
transmission) ................. 201
Dinghy towing (manual transmission) ... 202
Page 150 of 529
150 2-2. Instrument cluster
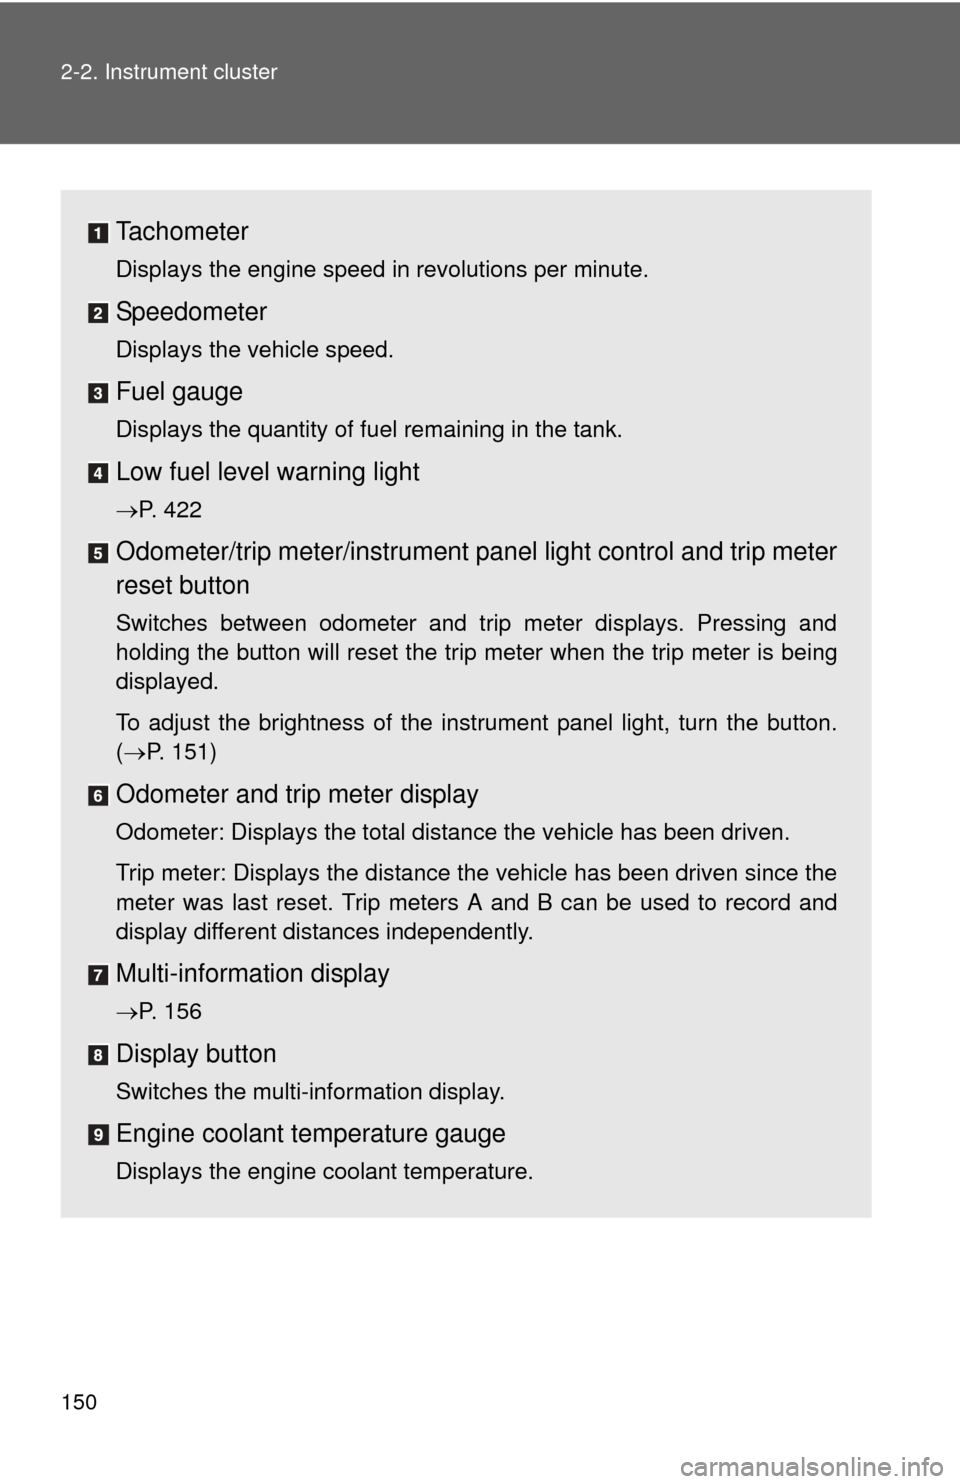
Tachometer
Displays the engine speed in revolutions per minute.
Speedometer
Displays the vehicle speed.
Fuel gauge
Displays the quantity of fuel remaining in the tank.
Low fuel level warning light
P. 422
Odometer/trip meter/instrument panel light control and trip meter
reset button
Switches between odometer and trip meter displays. Pressing and
holding the button will reset the trip meter when the trip meter is being
displayed.
To adjust the brightness of the instrument panel light, turn the button.
( P. 151)
Odometer and trip meter display
Odometer: Displays the total distance the vehicle has been driven.
Trip meter: Displays the distance the vehicle has been driven since the
meter was last reset. Trip meters A and B can be used to record and
display different distances independently.
Multi-informat ion display
P. 156
Display button
Switches the multi-information display.
Engine coolant temperature gauge
Displays the engine coolant temperature.
Page 156 of 529
156
2-2. Instrument cluster
Multi-information display
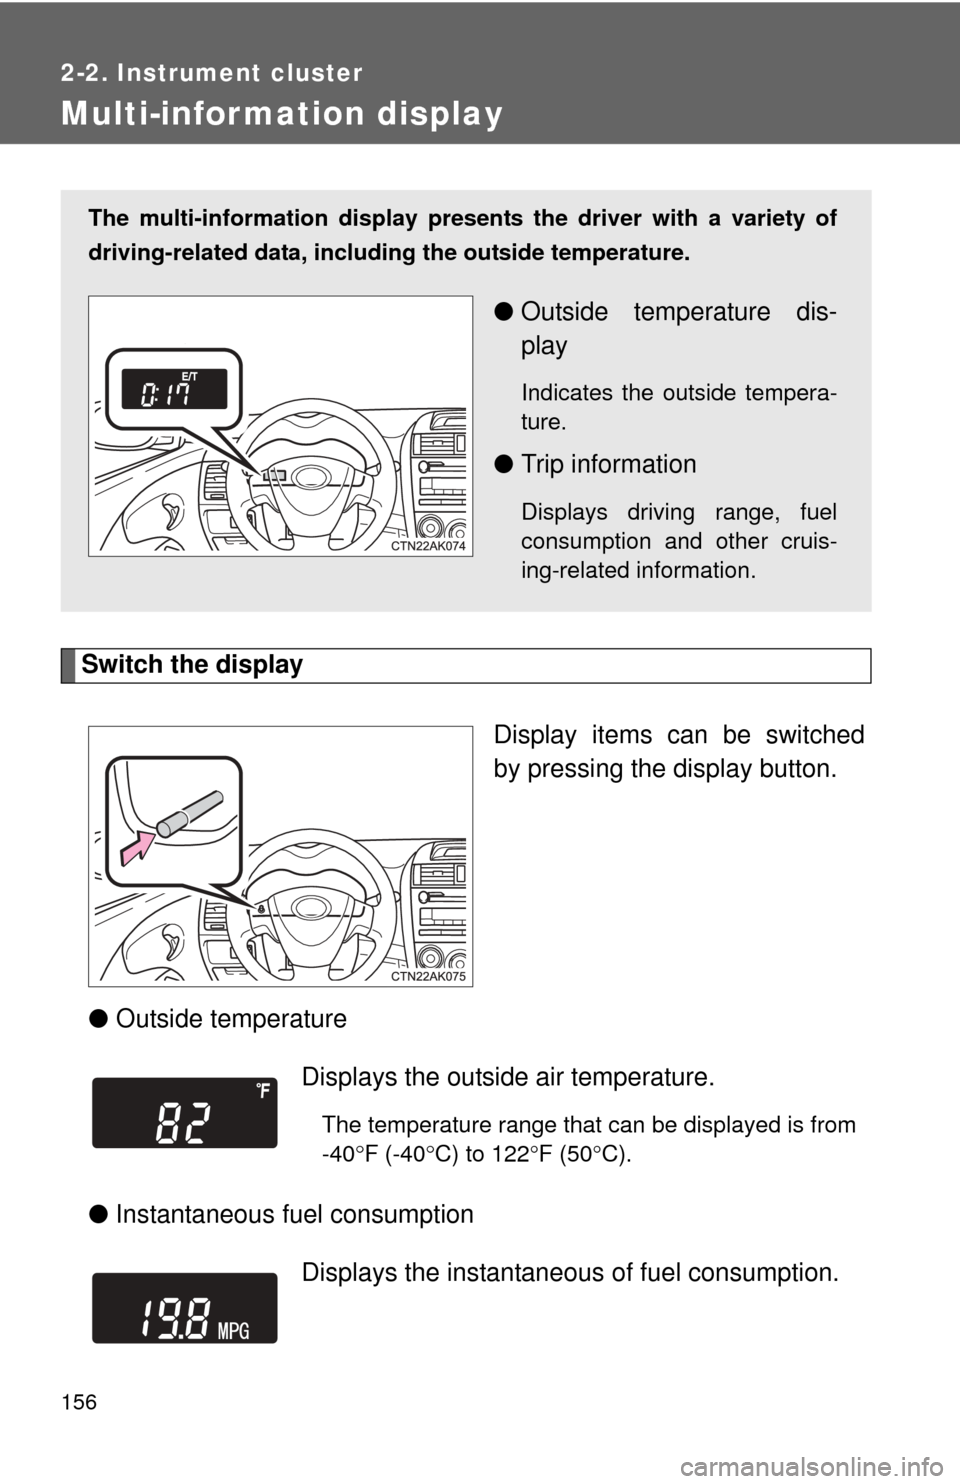
Switch the displayDisplay items can be switched
by pressing the display button.
● Outside temperature
● Instantaneous fuel consumption
The multi-information display presen ts the driver with a variety of
driving-related data, includ ing the outside temperature.
●Outside temperature dis-
play
Indicates the outside tempera-
ture.
●Trip information
Displays driving range, fuel
consumption and other cruis-
ing-related information.
Displays the outside air temperature.
The temperature range that can be displayed is from
-40 F (-40 C) to 122 F (50 C).
Displays the instantaneous of fuel consumption.
Page 157 of 529
157
2-2. Instrument cluster
2
When driving
●
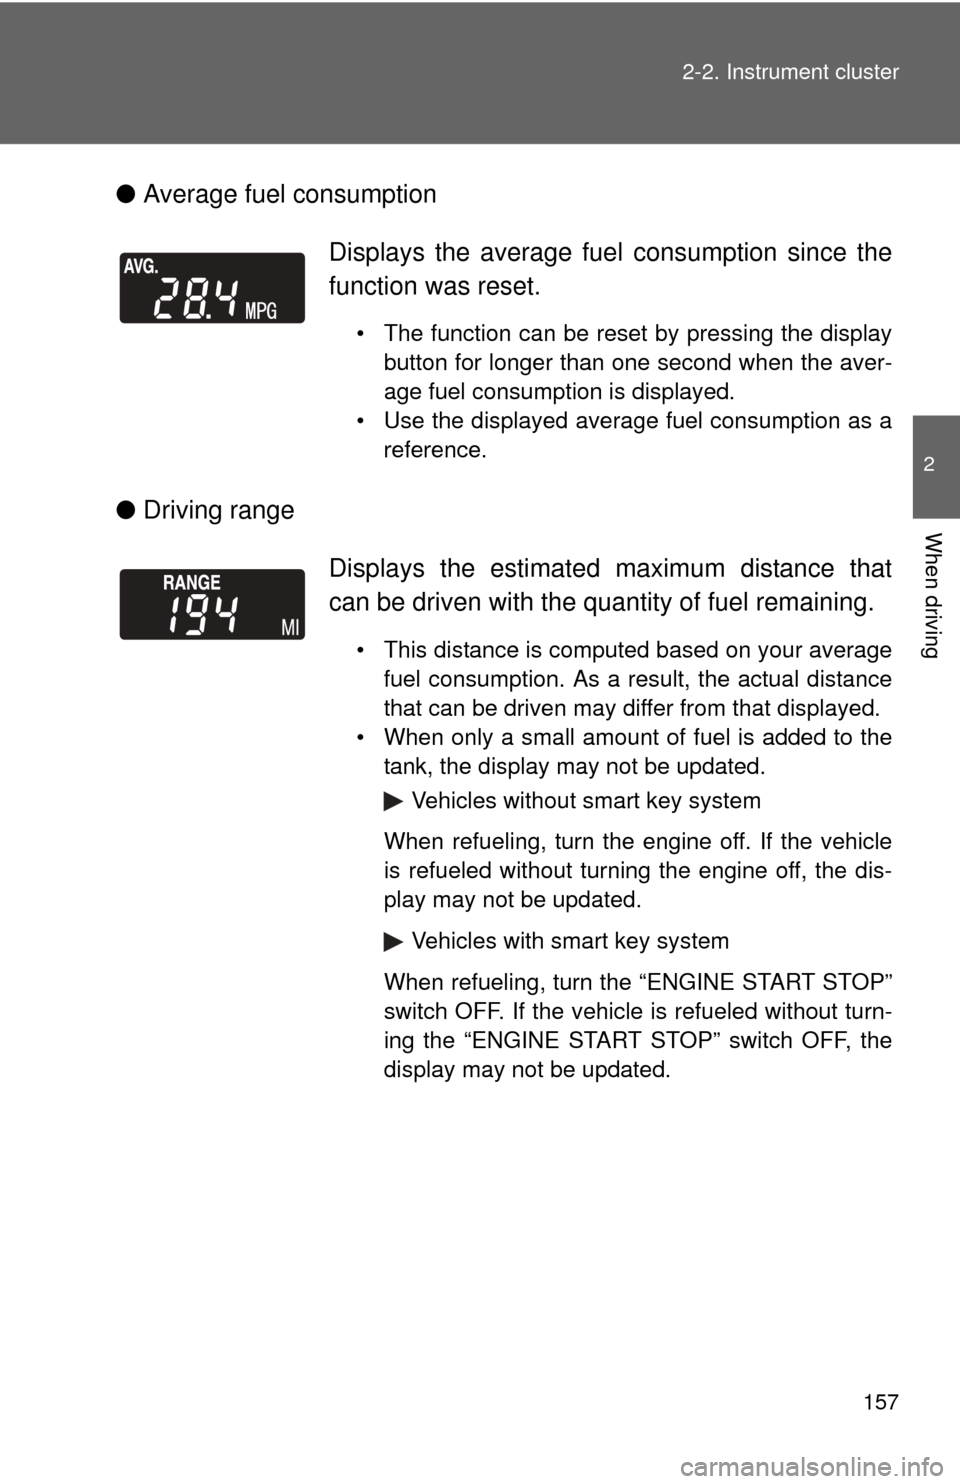
Average fuel consumption
● Driving range Displays the average fuel
consumption since the
function was reset.
• The function can be reset by pressing the display button for longer than one second when the aver-
age fuel consumption is displayed.
• Use the displayed average fuel consumption as a reference.
Displays the estimated maximum distance that
can be driven with the quantity of fuel remaining.
• This distance is computed based on your averagefuel consumption. As a result, the actual distance
that can be driven may differ from that displayed.
• When only a small amount of fuel is added to the tank, the display may not be updated.
Vehicles without smart key system
When refueling, turn the engine off. If the vehicle
is refueled without turning the engine off, the dis-
play may not be updated.
Vehicles with smart key system
When refueling, turn the “ENGINE START STOP”
switch OFF. If the vehicle is refueled without turn-
ing the “ENGINE START STOP” switch OFF, the
display may not be updated.