display TOYOTA COROLLA 2017 11.G Navigation Manual
[x] Cancel search | Manufacturer: TOYOTA, Model Year: 2017, Model line: COROLLA, Model: TOYOTA COROLLA 2017 11.GPages: 300, PDF Size: 8.56 MB
Page 8 of 300
TABLE OF CONTENTS
8
COROLLA_Navi_U_OM02496U
1. BASIC FUNCTION........................... 12
BUTTONS OVERVIEW ......................... 12
“Apps” SCREEN .................................... 14
HOME SCREEN .................................... 16
2. QUICK REFERENCE....................... 20
“Setup” SCREEN ................................... 20
3. NAVIGATION OPERATION ............ 22
REGISTERING HOME .......................... 22
REGISTERING PRESET DESTINATIONS .................................. 24
OPERATION FLOW: GUIDING THE ROUTE ....................... 26
SETTING HOME AS THE DESTINATION .................................... 27
4. FUNCTION INDEX .. ......................... 28
FUNCTION INDEX ................................ 28
1. BASIC INFORMATION
BEFORE OPERATION .................. 32
INITIAL SCREEN ................................... 32
CAPACITIVE TOUCH SWITCHES ........ 34
TOUCH SCREEN GESTURES .............. 35
TOUCH SCREEN OPERATION ............ 36
HOME SCREEN OPERATION .............. 37
ENTERING LETTERS AND
NUMBERS/LIST SCREEN
OPERATION........................................ 38
SCREEN ADJUSTMENT ....................... 42
LINKING MULTI-INFORMATION DISPLAY AND THE SYSTEM ............. 44
2. Bluetooth® SETTINGS ................... 45
REGISTERING/CONNECTING Bluetooth® DEVICE ............................. 45
SETTING Bluetooth® DETAILS ............. 52
3. OTHER SETTINGS ......................... 60
GENERAL SETTINGS ........................... 60
VOICE SETTINGS ................................. 66
DRIVER SETTINGS ............................... 67
MAINTENANCE ..................................... 68
1. BASIC OPERATION ....................... 74
QUICK REFERENCE ............................. 74
SOME BASICS....................................... 75
2. RADIO OPERATION ....................... 81
AM/FM RADIO ....................................... 81
XM Satellite Radio .................................. 92
INTERNET RADIO ................................. 98
1QUICK GUIDE2BASIC FUNCTION
3AUDIO SYSTEM
Page 11 of 300
1
11
COROLLA_Navi_U_OM02496U
1
2
3
4
5
6
7
8
9
1. BUTTONS OVERVIEW ................. 12
2. “Apps” SCREEN .......................... 14
3. HOME SCREEN ............................ 16
STATUS DISPLAY................................. 18
1. “Setup” SCREEN ......................... 20
1. REGISTERING HOME .................. 22
2. REGISTERING PRESET DESTINATIONS ........................... 24
3. OPERATION FLOW: GUIDING THE ROUTE................ 26
4. SETTING HOME AS THE DESTINATION ............................ 27
1. FUNCTION INDEX ........................ 28
1BASIC FUNCTION
2QUICK REFERENCE
3NAVIGATION OPERATION
4FUNCTION INDEX
QUICK GUIDE
Page 13 of 300
13
1. BASIC FUNCTION
QUICK GUIDE
COROLLA_Navi_U_OM02496U
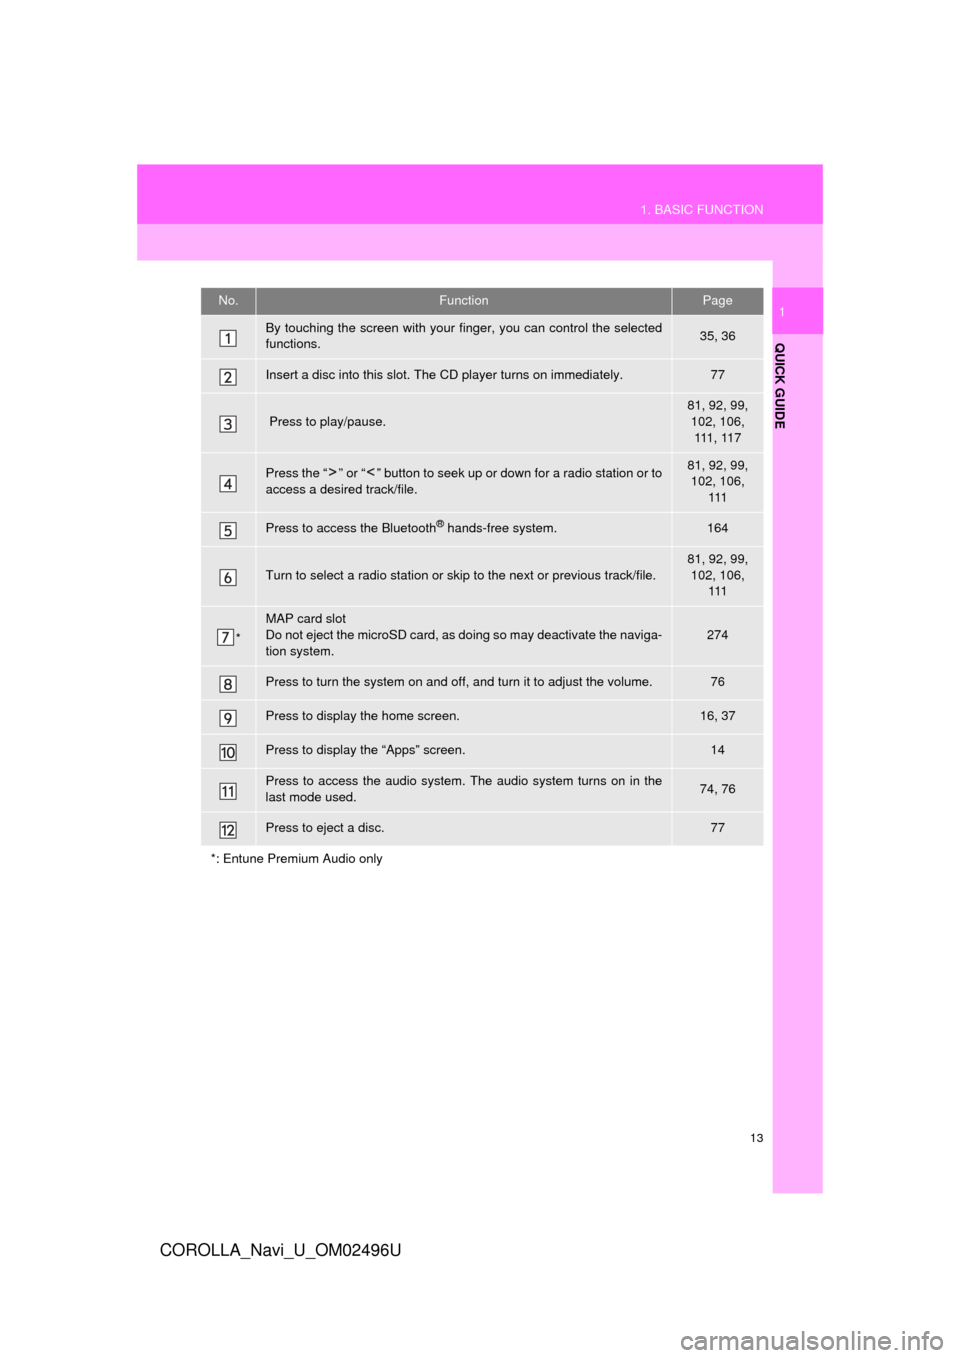
1No.FunctionPage
By touching the screen with your finger, you can control the selected
functions.35, 36
Insert a disc into this slot. The CD player turns on immediately.77
Press to play/pause.
81, 92, 99, 102, 106, 111 , 11 7
Press the “ ” or “ ” button to seek up or down for a radio station or to
access a desired track/file.81, 92, 99, 102, 106, 111
Press to access the Bluetooth® hands-free system.164
Turn to select a radio station or skip to the next or previous track/file.
81, 92, 99,
102, 106, 111
*
MAP card slot
Do not eject the microSD card, as doing so may deactivate the naviga-
tion system.
274
Press to turn the system on and off, and turn it to adjust the volume.76
Press to display the home screen.16, 37
Press to display the “Apps” screen.14
Press to access the audio system. The audio system turns on in the
last mode used.74, 76
Press to eject a disc.77
*: Entune Premium Audio only
Page 14 of 300
14
1. BASIC FUNCTION
COROLLA_Navi_U_OM02496U
2. “Apps” SCREEN
Entune Audio Plus
Entune Premium Audio
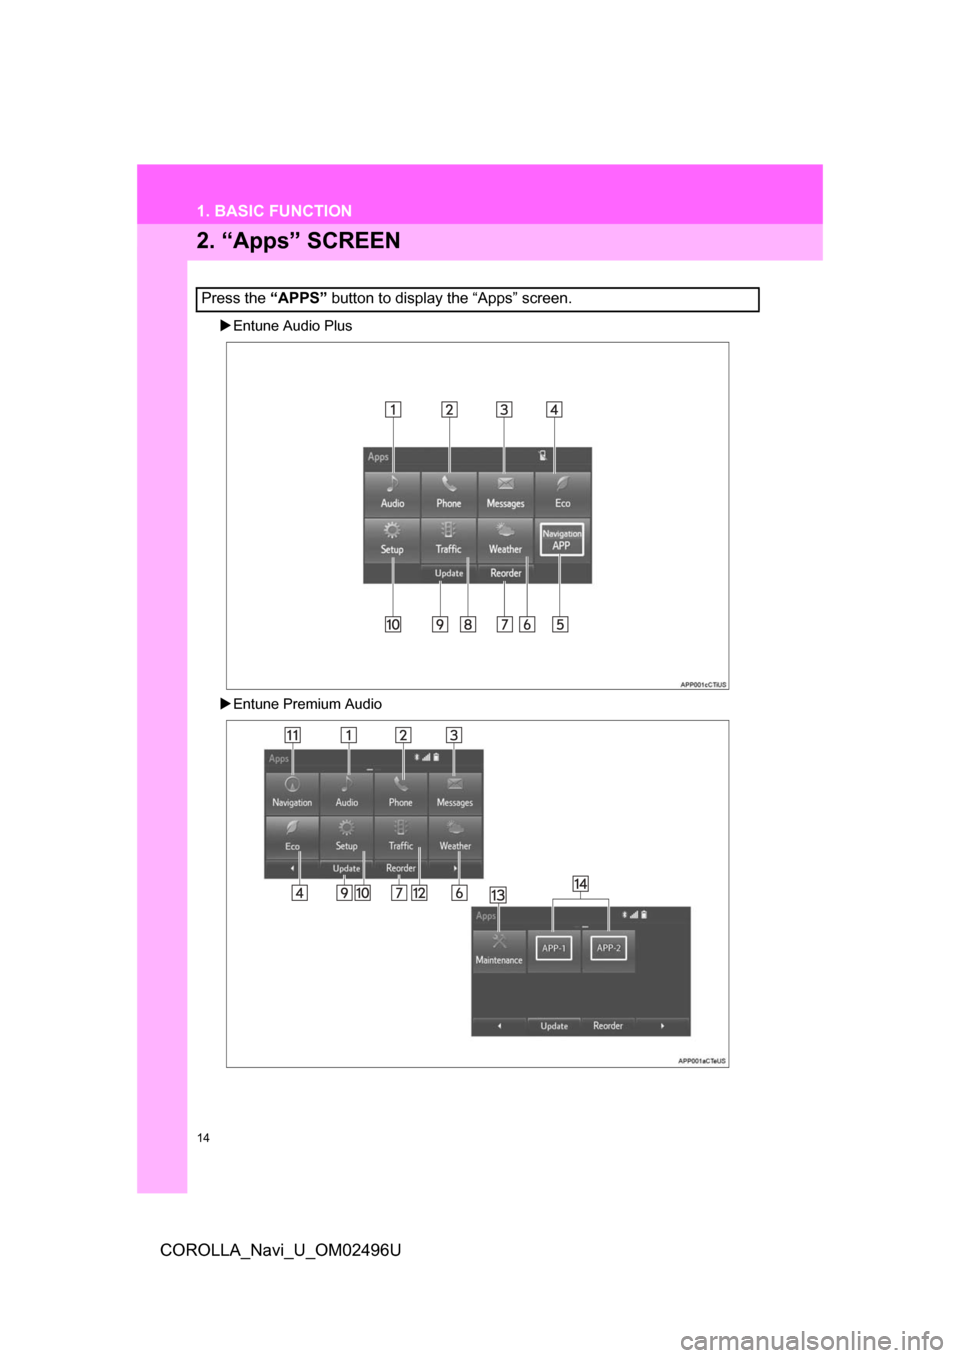
Press the “APPS” button to display the “Apps” screen.
Page 15 of 300
15
1. BASIC FUNCTION
QUICK GUIDE
COROLLA_Navi_U_OM02496U
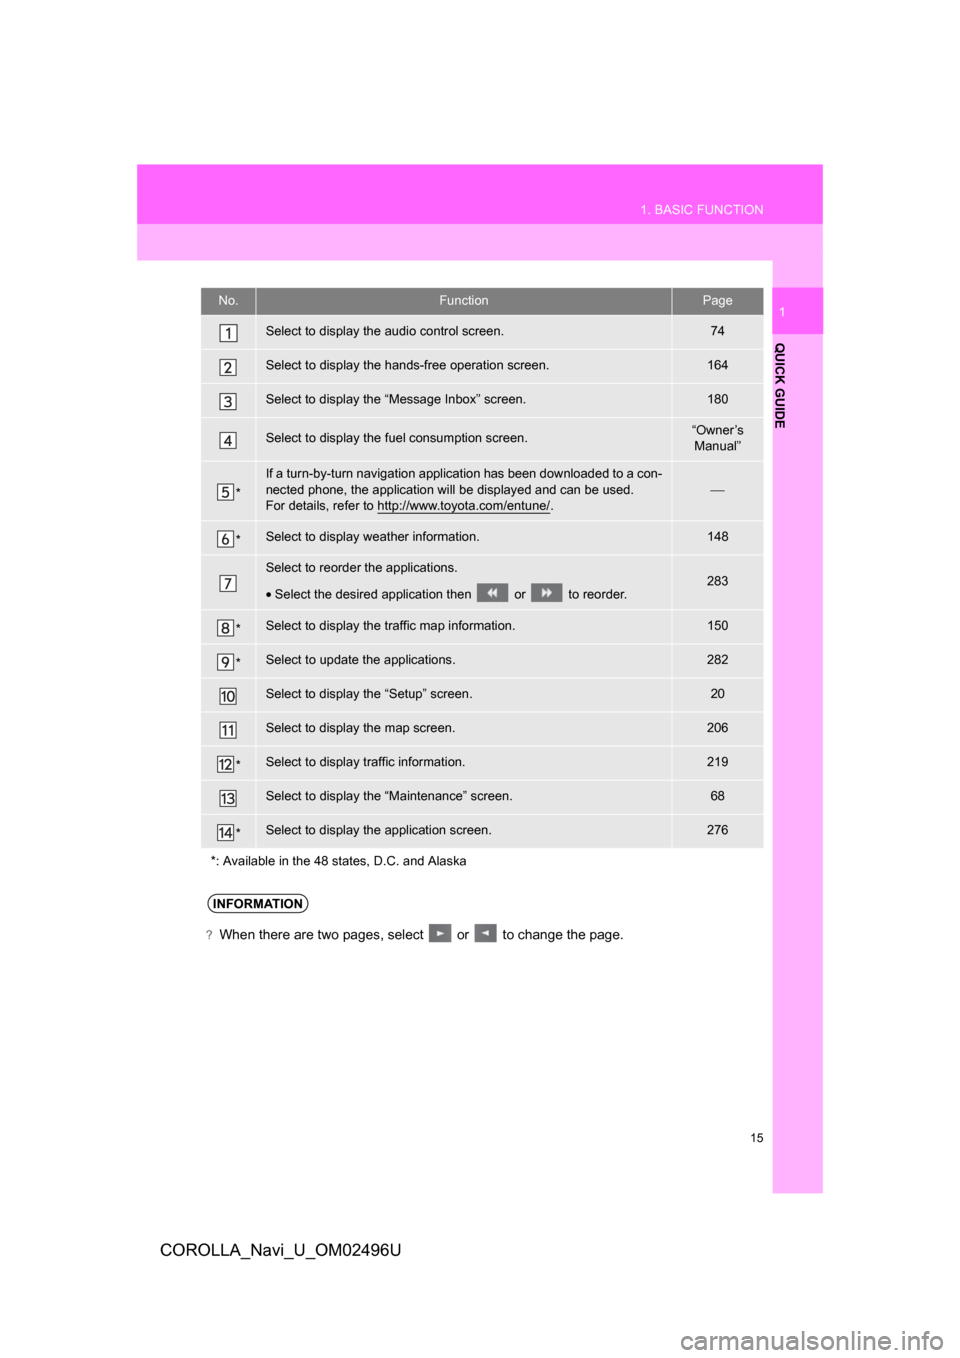
1No.FunctionPage
Select to display the audio control screen.74
Select to display the hands-free operation screen.164
Select to display the “Message Inbox” screen.180
Select to display the fuel consumption screen.“Owner’s Manual”
*
If a turn-by-turn navigation application has been downloaded to a con-
nected phone, the application will be displayed and can be used.
For details, refer to http://www.toyota.com/entune/
.⎯
*Select to display weather information.148
Select to reorder the applications.
• Select the desired application then or to reorder.283
*Select to display the traffic map information.150
*Select to update the applications.282
Select to display the “Setup” screen.20
Select to display the map screen.206
*Select to display traffic information.219
Select to display the “Maintenance” screen.68
*Select to display the application screen.276
*: Available in the 48 states, D.C. and Alaska
INFORMATION
?When there are two pages, select or to change the page.
Page 16 of 300
16
1. BASIC FUNCTION
COROLLA_Navi_U_OM02496U
3. HOME SCREEN
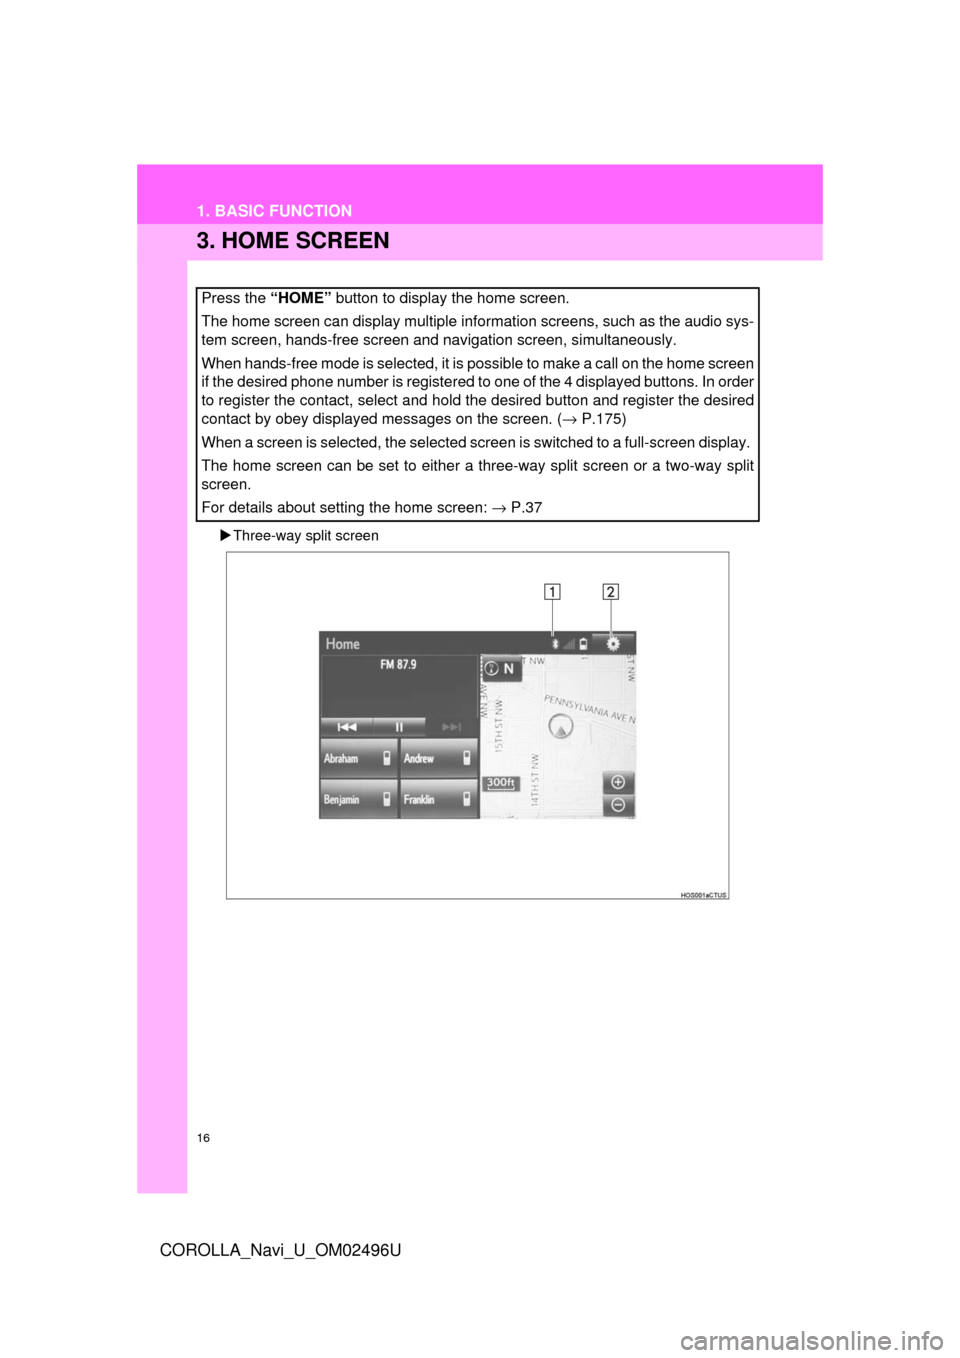
Three-way split screen
Press the “HOME” button to display the home screen.
The home screen can display multiple information screens, such as the audio sys-
tem screen, hands-free screen and navigation screen, simultaneously.
When hands-free mode is selected, it is possible to make a call on the home screen
if the desired phone number is registered to one of the 4 displayed buttons. In order
to register the contact, select and hold the desired button and register the desired
contact by obey displayed messages on the screen. ( → P.175)
When a screen is selected, the selected screen is switched to a full-screen display.
The home screen can be set to either a three-way split screen or a two-way split
screen.
For details about setting the home screen: → P.37
Page 17 of 300
17
1. BASIC FUNCTION
QUICK GUIDE
COROLLA_Navi_U_OM02496U
1
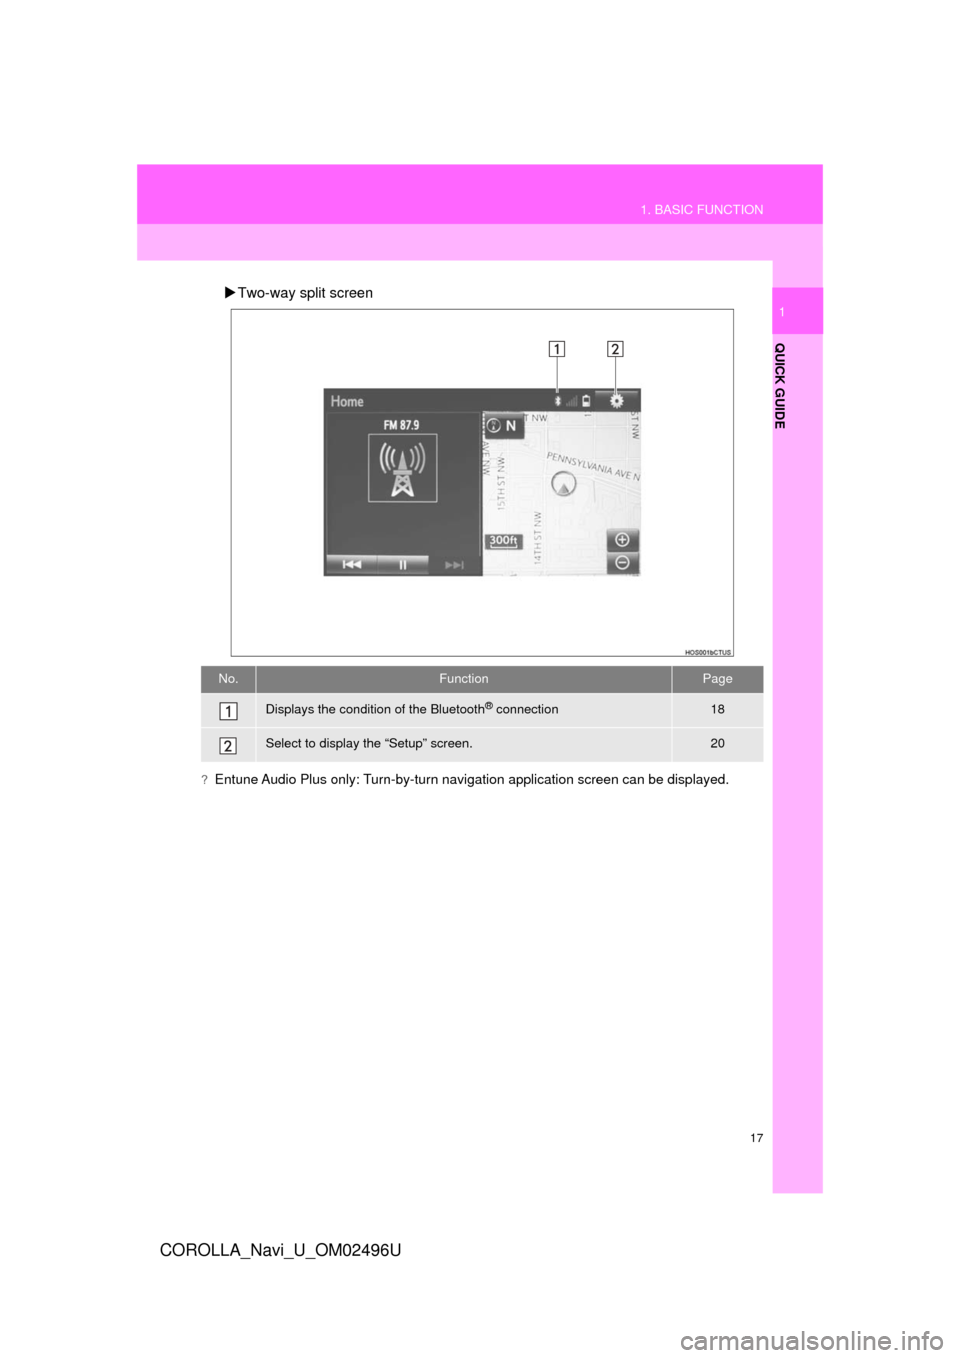
Two-way split screen
?Entune Audio Plus only: Turn-by-turn navigation application screen can be displayed.
No.FunctionPage
Displays the condition of the Bluetooth® connection18
Select to display the “Setup” screen.20
Page 18 of 300
18
1. BASIC FUNCTION
COROLLA_Navi_U_OM02496U
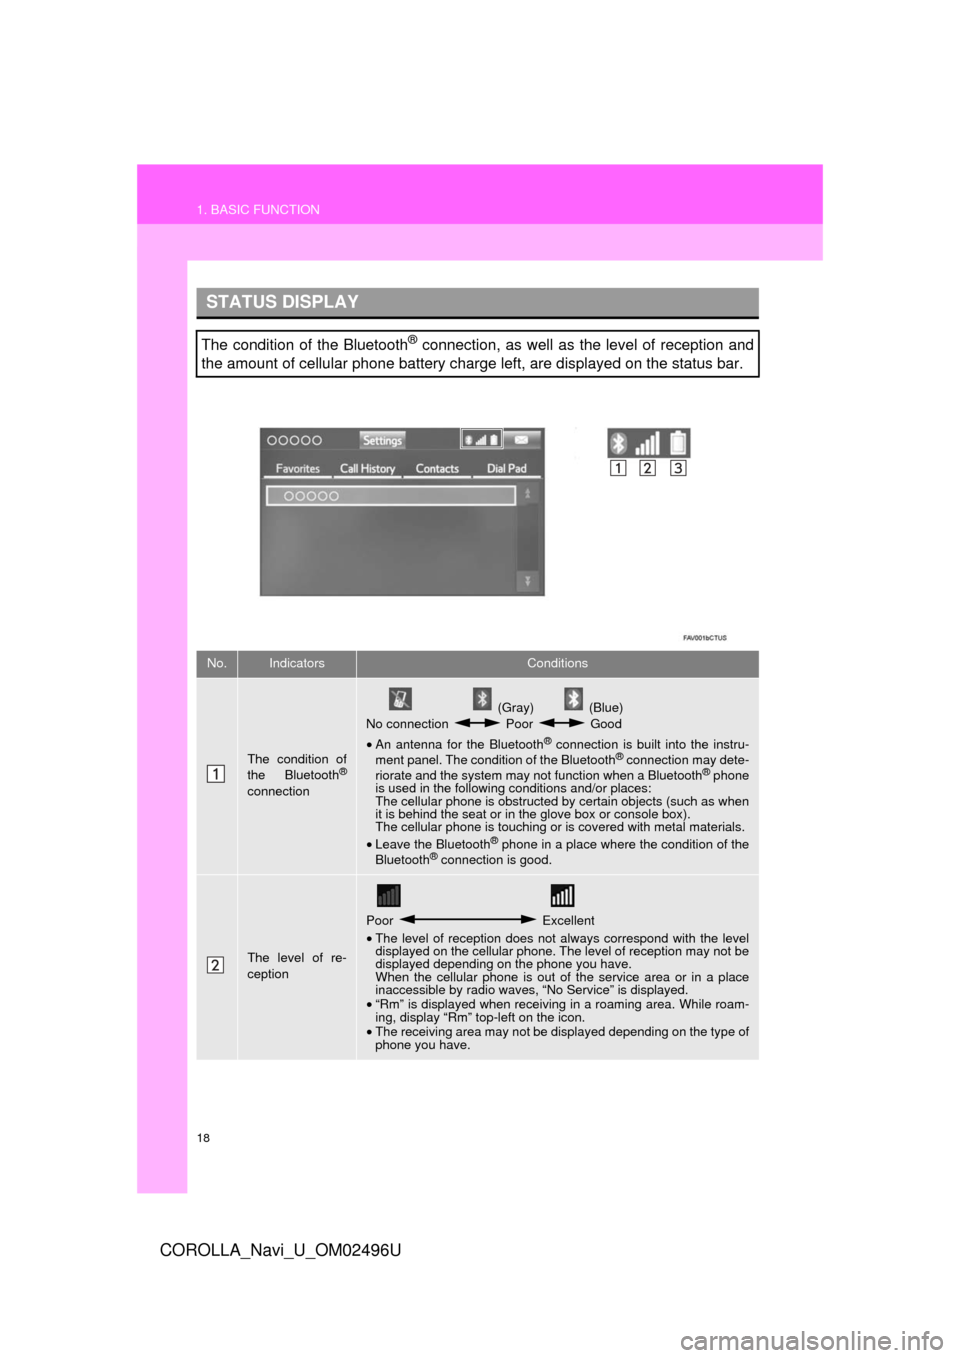
STATUS DISPLAY
The condition of the Bluetooth® connection, as well as the level of reception and
the amount of cellular phone battery charge left, are displayed on the status bar.
No.IndicatorsConditions
The condition of
the Bluetooth®
connection
(Gray) (Blue)
No connection Poor Good
• An antenna for the Bluetooth
® connection is built into the instru-
ment panel. The condition of the Bluetooth® connection may dete-
riorate and the system may not function when a Bluetooth® phone
is used in the following conditions and/or places:
The cellular phone is obstructed by certain objects (such as when
it is behind the seat or in the glove box or console box).
The cellular phone is touching or is covered with metal materials.
• Leave the Bluetooth
® phone in a place where the condition of the
Bluetooth® connection is good.
The level of re-
ception
Poor Excellent
• The level of reception does not always correspond with the level
displayed on the cellular phone. The level of reception may not be
displayed depending on the phone you have.
When the cellular phone is out of the service area or in a place
inaccessible by radio waves, “No Service” is displayed.
• “Rm” is displayed when receiving in a roaming area. While roam-
ing, display “Rm” top-left on the icon.
• The receiving area may not be displayed depending on the type of
phone you have.
Page 19 of 300
19
1. BASIC FUNCTION
QUICK GUIDE
COROLLA_Navi_U_OM02496U
1
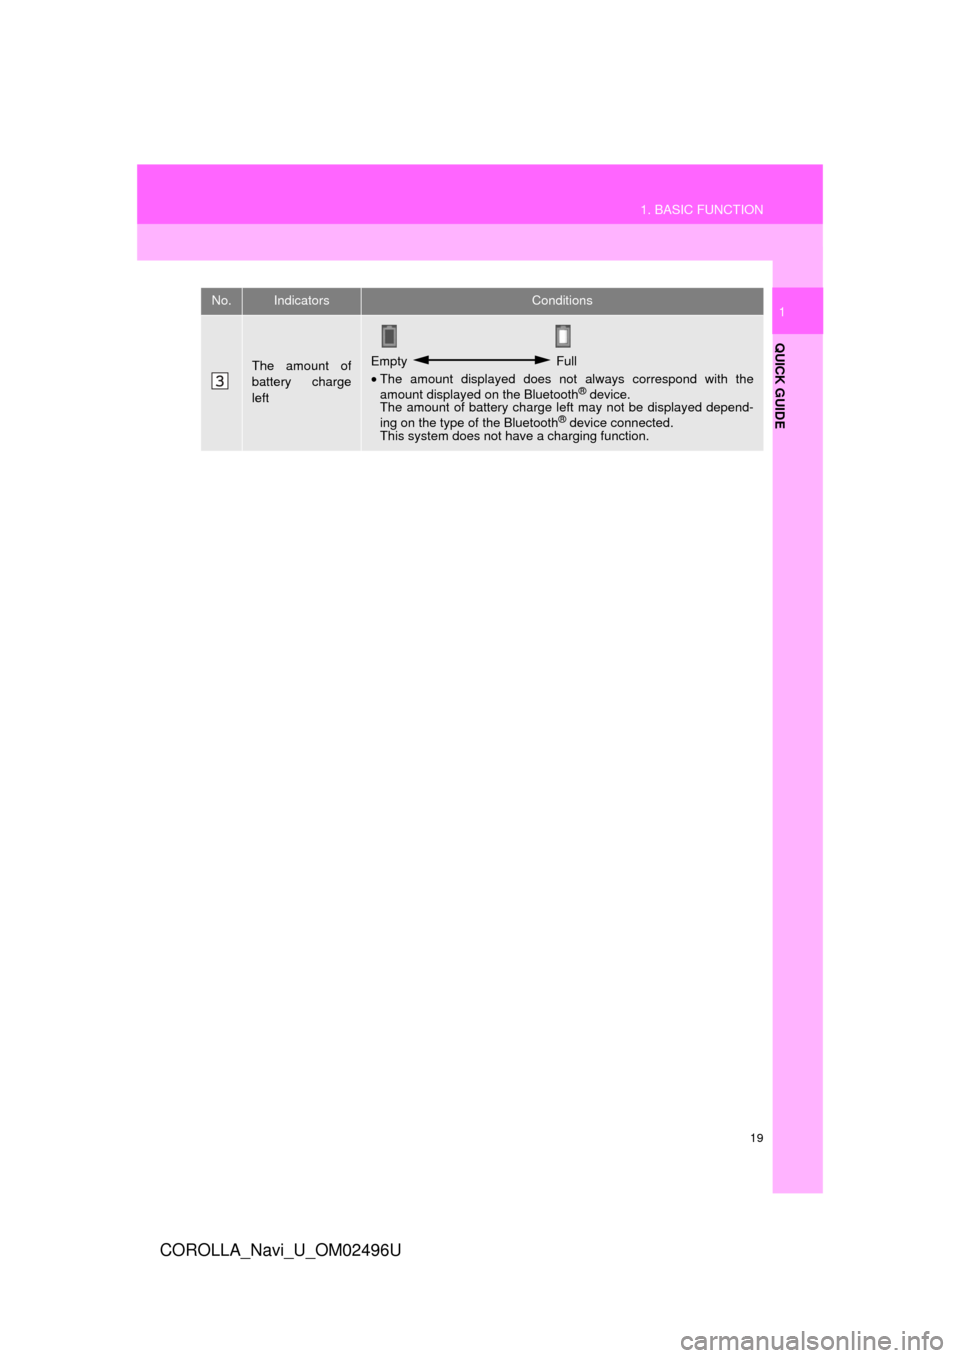
The amount of
battery charge
leftEmpty Full
• The amount displayed does not always correspond with the
amount displayed on the Bluetooth
® device.
The amount of battery charge left may not be displayed depend-
ing on the type of the Bluetooth
® device connected.
This system does not have a charging function.
No.IndicatorsConditions
Page 20 of 300
20
2. QUICK REFERENCE
COROLLA_Navi_U_OM02496U
1. “Setup” SCREEN
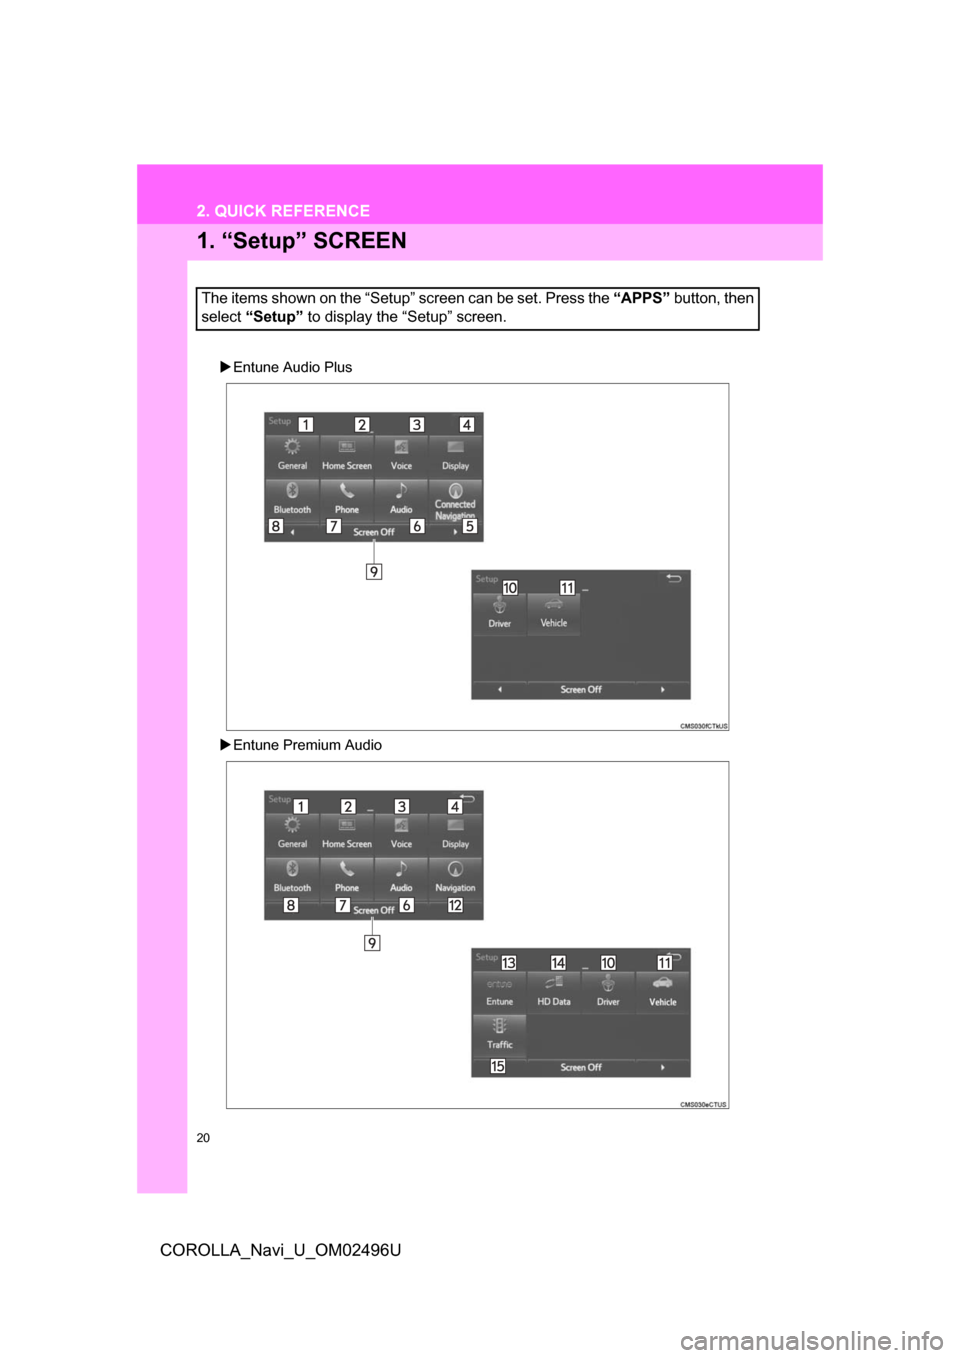
Entune Audio Plus
Entune Premium Audio
The items shown on the “Setup” screen can be set. Press the “APPS” button, then
select “Setup” to display the “Setup” screen.
2. QUICK REFERENCE