light TOYOTA COROLLA 2023 Owners Manual
[x] Cancel search | Manufacturer: TOYOTA, Model Year: 2023, Model line: COROLLA, Model: TOYOTA COROLLA 2023Pages: 468, PDF Size: 14.4 MB
Page 292 of 468
2926-1. Maintenance and care
Remove dirt using a
water-dampened soft cloth or
synthetic chamois.
Wipe the surface with a dry,
soft cloth to remove any
remaining moisture.
■Cleaning the areas with
satin-finish metal accents
The metal areas use a layer of real
metal for the surface. It is necessary
to clean them regularly. If dirty areas
are left uncleaned for long periods
of time, they may be difficult to
clean.
Remove dirt and dust using a
vacuum cleaner.
Wipe off any excess dirt and
dust with a soft cloth damp-
ened with diluted detergent.
Use a diluted water solution of
approximately 5% neutral wool
NOTICE
• Seats: Alkaline or acidic solu-
tions, such as thinner, benzene,
and alcohol
• Steering wheel: Organic sub- stances, such as thinner, and
cleaner that contains alcohol
●Do not use polish wax or polish
cleaner. The instrument panel’s
or other interior part’s painted
surface may be damaged.
■Preventing damage to leather
surfaces
Observe the following precautions
to avoid damage to and deteriora-
tion of leather surfaces:
●Remove any dust or dirt from
leather surfaces immediately.
●Do not expose the vehicle to
direct sunlight for extended peri-
ods of time. Park the vehicle in
the shade, especially during
summer.
●Do not place items made of
vinyl, plastic, or containing wax
on the upholstery, as they may
stick to the leather surface if the
vehicle interior heats up signifi-
cantly.
■Water on the floor
Do not wash the vehicle floor with
water.
Vehicle systems such as the
audio system may be damaged if
water comes into contact with
electrical components such as the
audio system above or under the
floor of the vehicle. Water may
also cause the body to rust.
■When cleaning the inside of
the windshield
Do not allow glass cleaner to con-
tact the lens. Also, do not touch
the lens. (
P.185)
■Cleaning the inside of the rear
window
●Do not use glass cleaner to
clean the rear window, as this
may cause damage to the rear
window defogger heater wires
or antenna. Use a cloth damp-
ened with lukewarm water to
gently wipe the window clean.
Wipe the window in strokes run-
ning parallel to the heater wires
or antenna.
●Be careful not to scratch or
damage the heater wires or
antenna.
Cleaning the areas with
satin-finish metal accents
Cleaning the leather areas
Page 297 of 468
2976-2. Maintenance
6
Maintenance and care
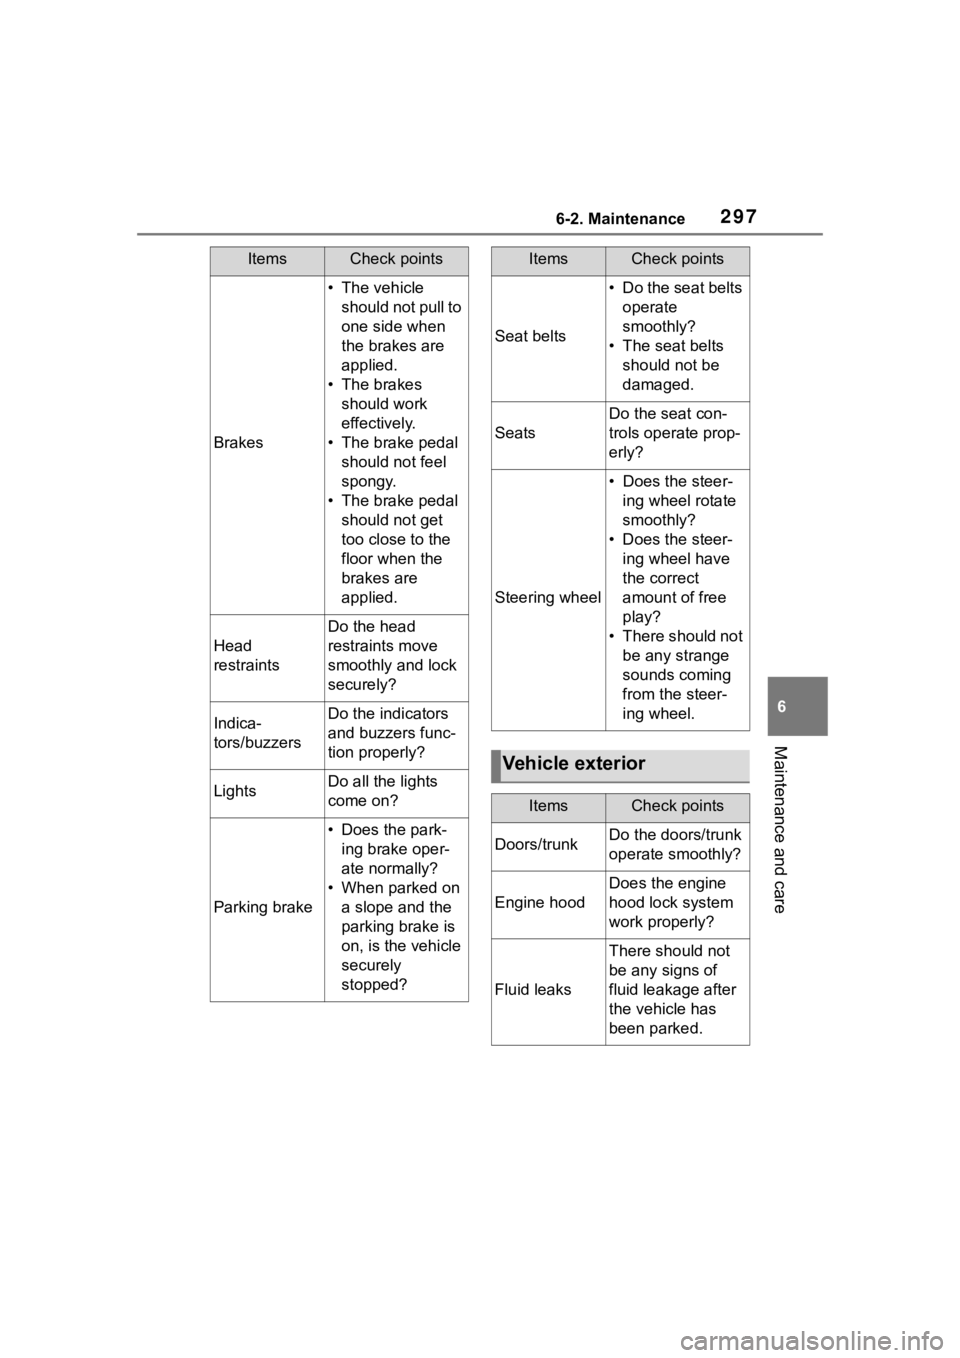
Brakes
• The vehicle should not pull to
one side when
the brakes are
applied.
• The brakes should work
effectively.
• The brake pedal should not feel
spongy.
• The brake pedal should not get
too close to the
floor when the
brakes are
applied.
Head
restraints
Do the head
restraints move
smoothly and lock
securely?
Indica-
tors/buzzersDo the indicators
and buzzers func-
tion properly?
LightsDo all the lights
come on?
Parking brake
• Does the park-ing brake oper-
ate normally?
• When parked on a slope and the
parking brake is
on, is the vehicle
securely
stopped?
ItemsCheck points
Seat belts
• Do the seat belts operate
smoothly?
• The seat belts should not be
damaged.
Seats
Do the seat con-
trols operate prop-
erly?
Steering wheel
• Does the steer-ing wheel rotate
smoothly?
• Does the steer- ing wheel have
the correct
amount of free
play?
• There should not be any strange
sounds coming
from the steer-
ing wheel.
Vehicle exterior
ItemsCheck points
Doors/trunkDo the doors/trunk
operate smoothly?
Engine hood
Does the engine
hood lock system
work properly?
Fluid leaks
There should not
be any signs of
fluid leakage after
the vehicle has
been parked.
ItemsCheck points
Page 300 of 468
3006-3. Do-it-yourself maintenance
6-3.Do-it-yourself maintenance
Do-it-yourself ser vice
precautions
If you perform maintenance
by yourself, be sure to fol-
low the correct procedure
as given in these sections.
Maintenance
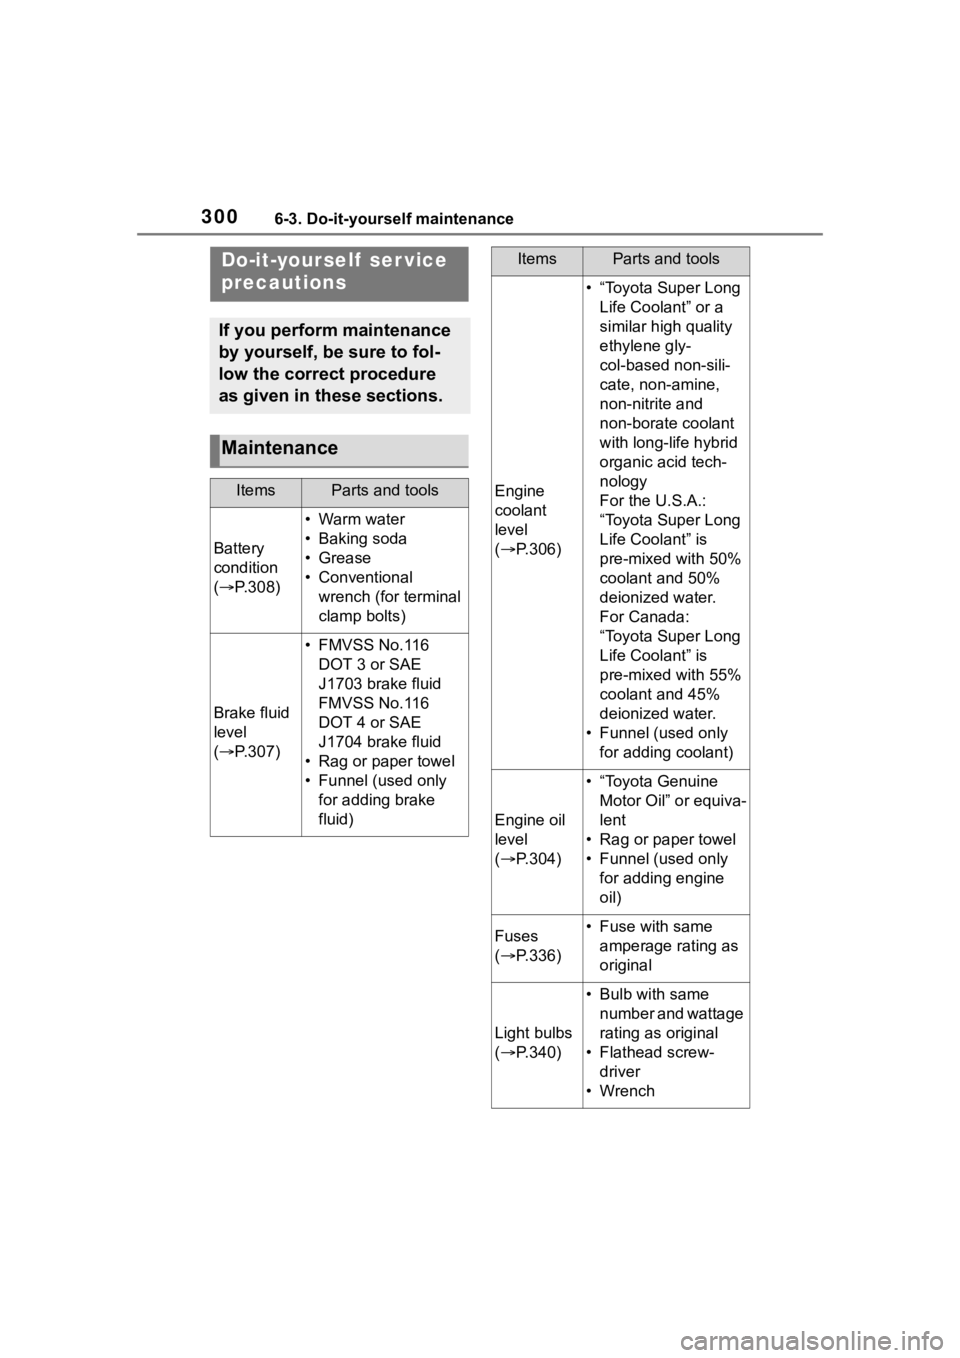
ItemsParts and tools
Battery
condition
( P.308)
•Warm water
• Baking soda
•Grease
• Conventional
wrench (for terminal
clamp bolts)
Brake fluid
level
( P.307)
• FMVSS No.116
DOT 3 or SAE
J1703 brake fluid
FMVSS No.116
DOT 4 or SAE
J1704 brake fluid
• Rag or paper towel
• Funnel (used only for adding brake
fluid)
Engine
coolant
level
( P.306)
• “Toyota Super Long
Life Coolant” or a
similar high quality
ethylene gly-
col-based non-sili-
cate, non-amine,
non-nitrite and
non-borate coolant
with long-life hybrid
organic acid tech-
nology
For the U.S.A.:
“Toyota Super Long
Life Coolant” is
pre-mixed with 50%
coolant and 50%
deionized water.
For Canada:
“Toyota Super Long
Life Coolant” is
pre-mixed with 55%
coolant and 45%
deionized water.
• Funnel (used only for adding coolant)
Engine oil
level
( P.304)
• “Toyota Genuine
Motor Oil” or equiva-
lent
• Rag or paper towel
• Funnel (used only for adding engine
oil)
Fuses
( P.336)• Fuse with same
amperage rating as
original
Light bulbs
( P.340)
• Bulb with same
number and wattage
rating as original
• Flathead screw- driver
•Wrench
ItemsParts and tools
Page 302 of 468
3026-3. Do-it-yourself maintenance
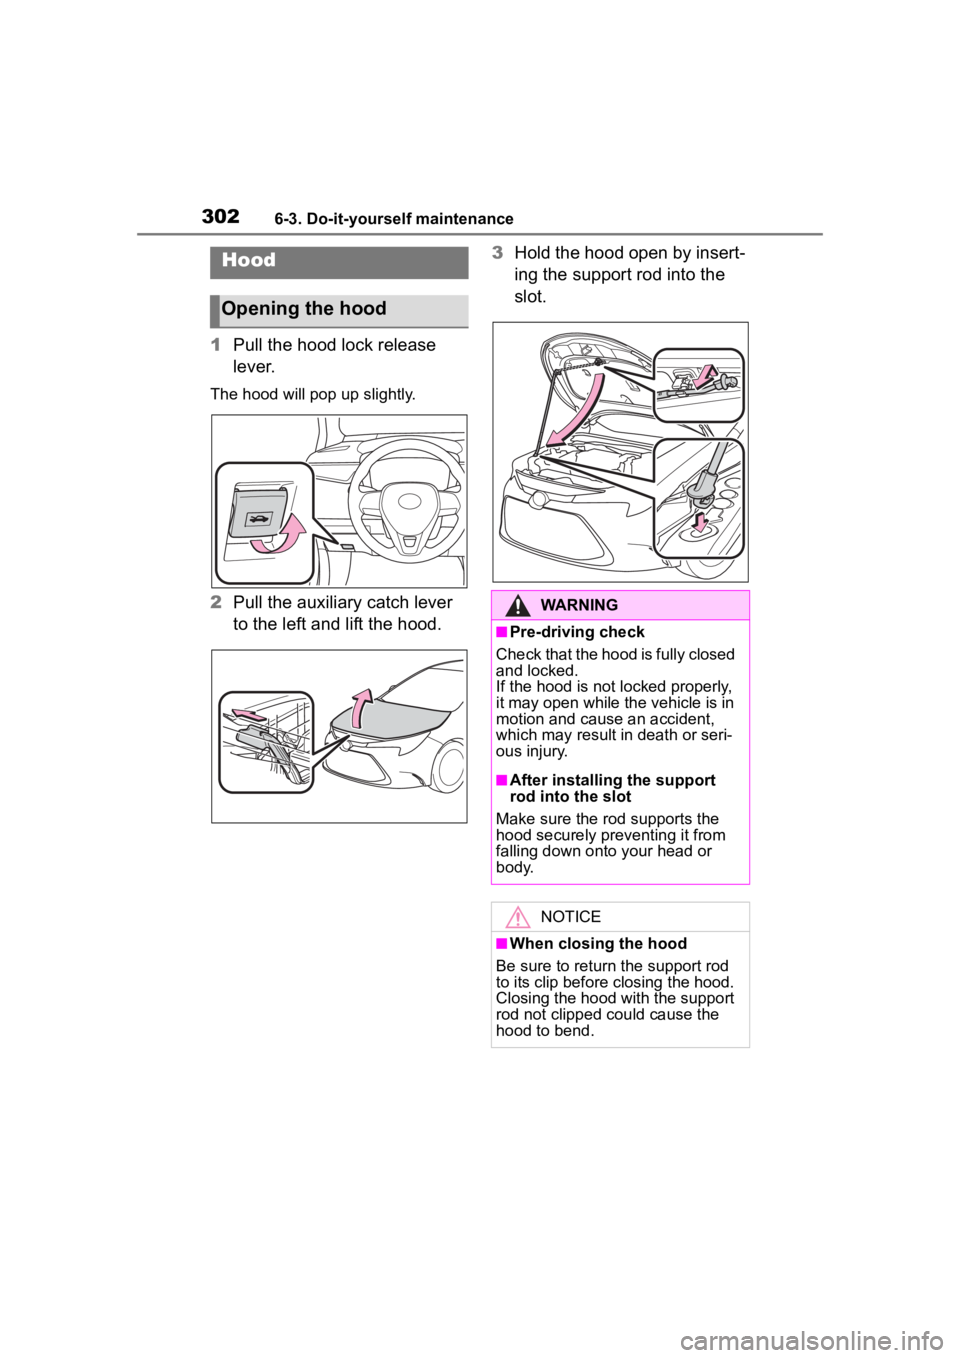
1Pull the hood lock release
lever.
The hood will pop up slightly.
2Pull the auxiliary catch lever
to the left and lift the hood. 3
Hold the hood open by insert-
ing the support rod into the
slot.
Hood
Opening the hood
WARNING
■Pre-driving check
Check that the hood is fully closed
and locked.
If the hood is not locked properly,
it may open while the vehicle is in
motion and cause an accident,
which may result i n death or seri-
ous injury.
■After installing the support
rod into the slot
Make sure the rod supports the
hood securely preventing it from
falling down onto your head or
body.
NOTICE
■When closing the hood
Be sure to return the support rod
to its clip before closing the hood.
Closing the hood with the support
rod not clipped could cause the
hood to bend.
Page 308 of 468
3086-3. Do-it-yourself maintenance
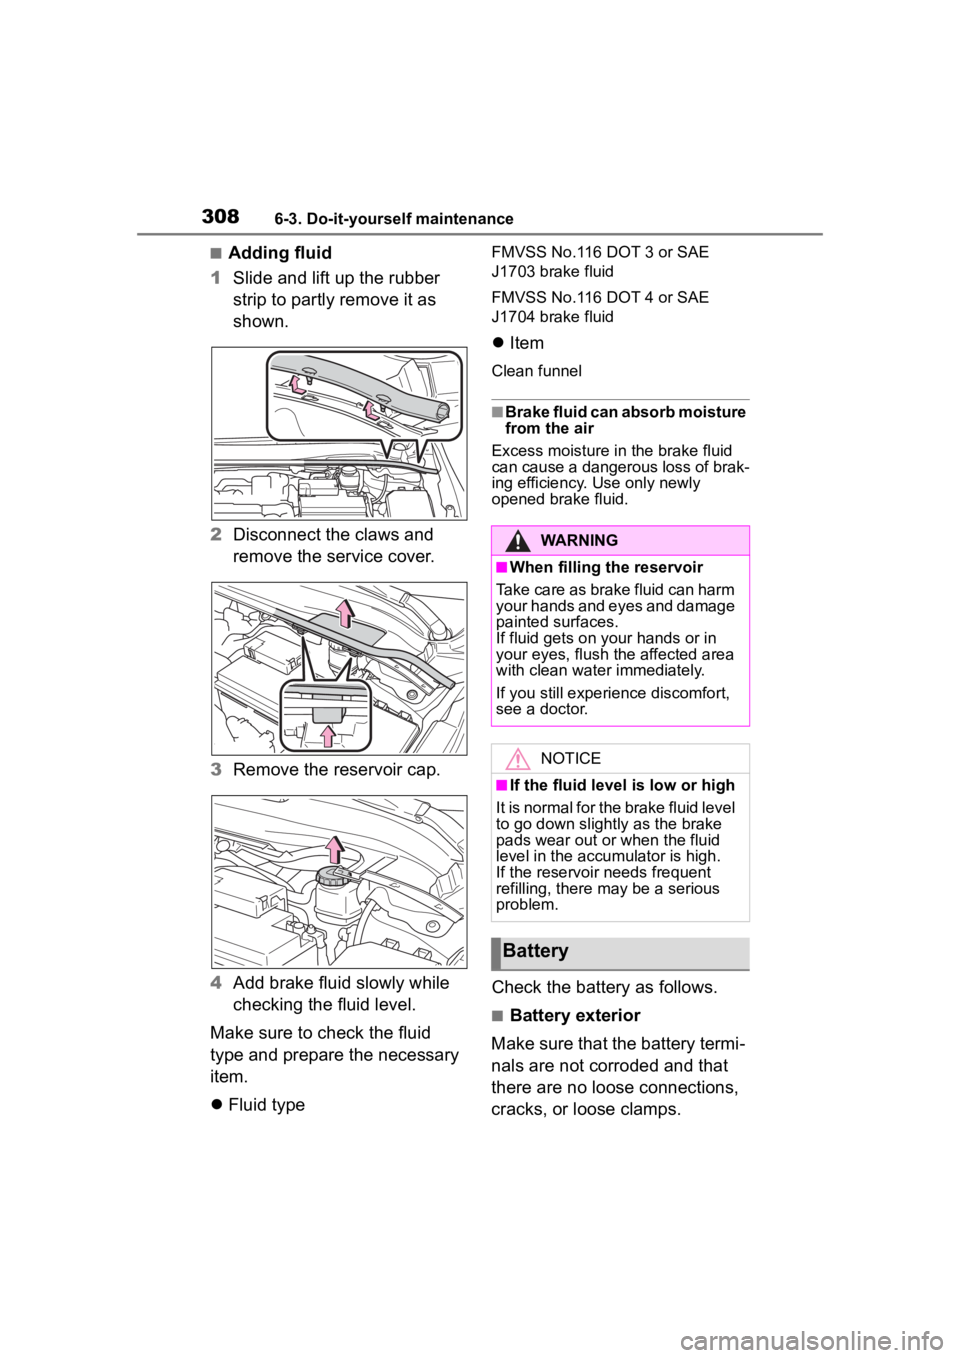
■Adding fluid
1 Slide and lift up the rubber
strip to partly remove it as
shown.
2 Disconnect the claws and
remove the service cover.
3 Remove the reservoir cap.
4 Add brake fluid slowly while
checking the fluid level.
Make sure to check the fluid
type and prepare the necessary
item.
Fluid typeFMVSS No.116 DOT 3 or SAE
J1703 brake fluid
FMVSS No.116 DOT 4 or SAE
J1704 brake fluid
Item
Clean funnel
■Brake fluid can absorb moisture
from the air
Excess moisture in the brake fluid
can cause a dangerous loss of brak-
ing efficiency. Use only newly
opened brake fluid.
Check the battery as follows.
■Battery exterior
Make sure that the battery termi-
nals are not corroded and that
there are no loose connections,
cracks, or loose clamps.
WARNING
■When filling the reservoir
Take care as brake fluid can harm
your hands and eyes and damage
painted surfaces.
If fluid gets on your hands or in
your eyes, flush the affected area
with clean water immediately.
If you still experi ence discomfort,
see a doctor.
NOTICE
■If the fluid level is low or high
It is normal for the brake fluid level
to go down slight ly as the brake
pads wear out or when the fluid
level in the accumulator is high.
If the reservoir needs frequent
refilling, there m ay be a serious
problem.
Battery
Page 309 of 468
3096-3. Do-it-yourself maintenance
6
Maintenance and care
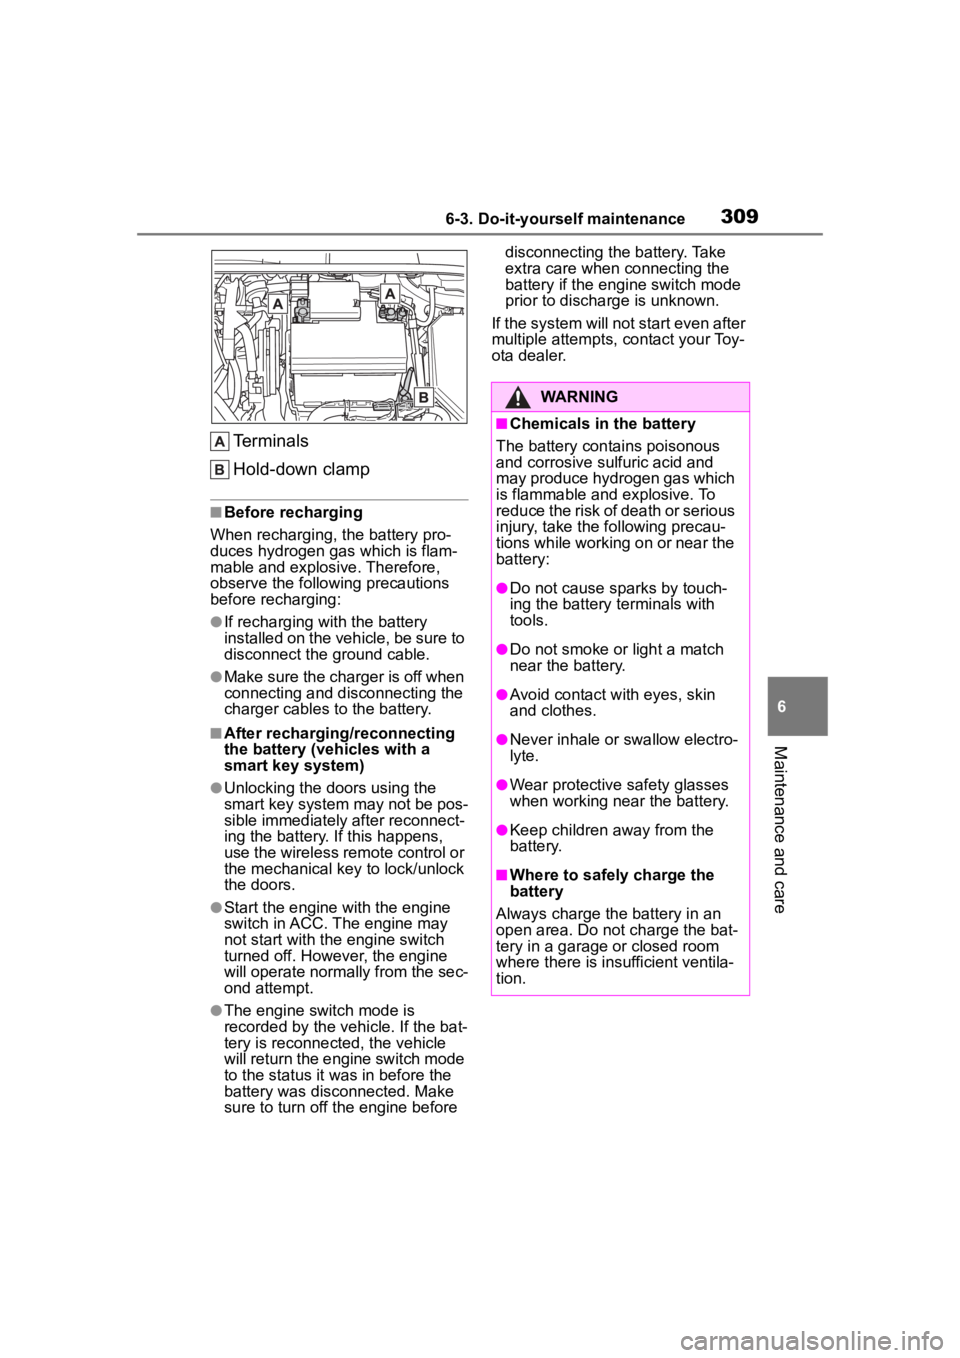
Terminals
Hold-down clamp
■Before recharging
When recharging, t he battery pro-
duces hydrogen ga s which is flam-
mable and explosive. Therefore,
observe the following precautions
before recharging:
●If recharging wi th the battery
installed on the vehicle, be sure to
disconnect the ground cable.
●Make sure the charger is off when
connecting and disconnecting the
charger cables to the battery.
■After recharging/reconnecting
the battery (vehicles with a
smart key system)
●Unlocking the doors using the
smart key system may not be pos-
sible immediately after reconnect-
ing the battery. If this happens,
use the wireless remote control or
the mechanical key to lock/unlock
the doors.
●Start the engine with the engine
switch in ACC. The engine may
not start with the engine switch
turned off. However, the engine
will operate normally from the sec-
ond attempt.
●The engine switch mode is
recorded by the vehicle. If the bat-
tery is reconnected, the vehicle
will return the engi ne switch mode
to the status it was in before the
battery was disconnected. Make
sure to turn off the engine before disconnecting the battery. Take
extra care when connecting the
battery if the engine switch mode
prior to discharge is unknown.
If the system will not start even after
multiple attempts, contact your Toy-
ota dealer.
WARNING
■Chemicals in the battery
The battery contains poisonous
and corrosive sulfuric acid and
may produce hydrogen gas which
is flammable and explosive. To
reduce the risk of death or serious
injury, take the following precau-
tions while working on or near the
battery:
●Do not cause sparks by touch-
ing the battery terminals with
tools.
●Do not smoke or light a match
near the battery.
●Avoid contact with eyes, skin
and clothes.
●Never inhale or swallow electro-
lyte.
●Wear protective safety glasses
when working near the battery.
●Keep children away from the
battery.
■Where to safely charge the
battery
Always charge the battery in an
open area. Do not charge the bat-
tery in a garage or closed room
where there is ins ufficient ventila-
tion.
Page 313 of 468
3136-3. Do-it-yourself maintenance
6
Maintenance and care
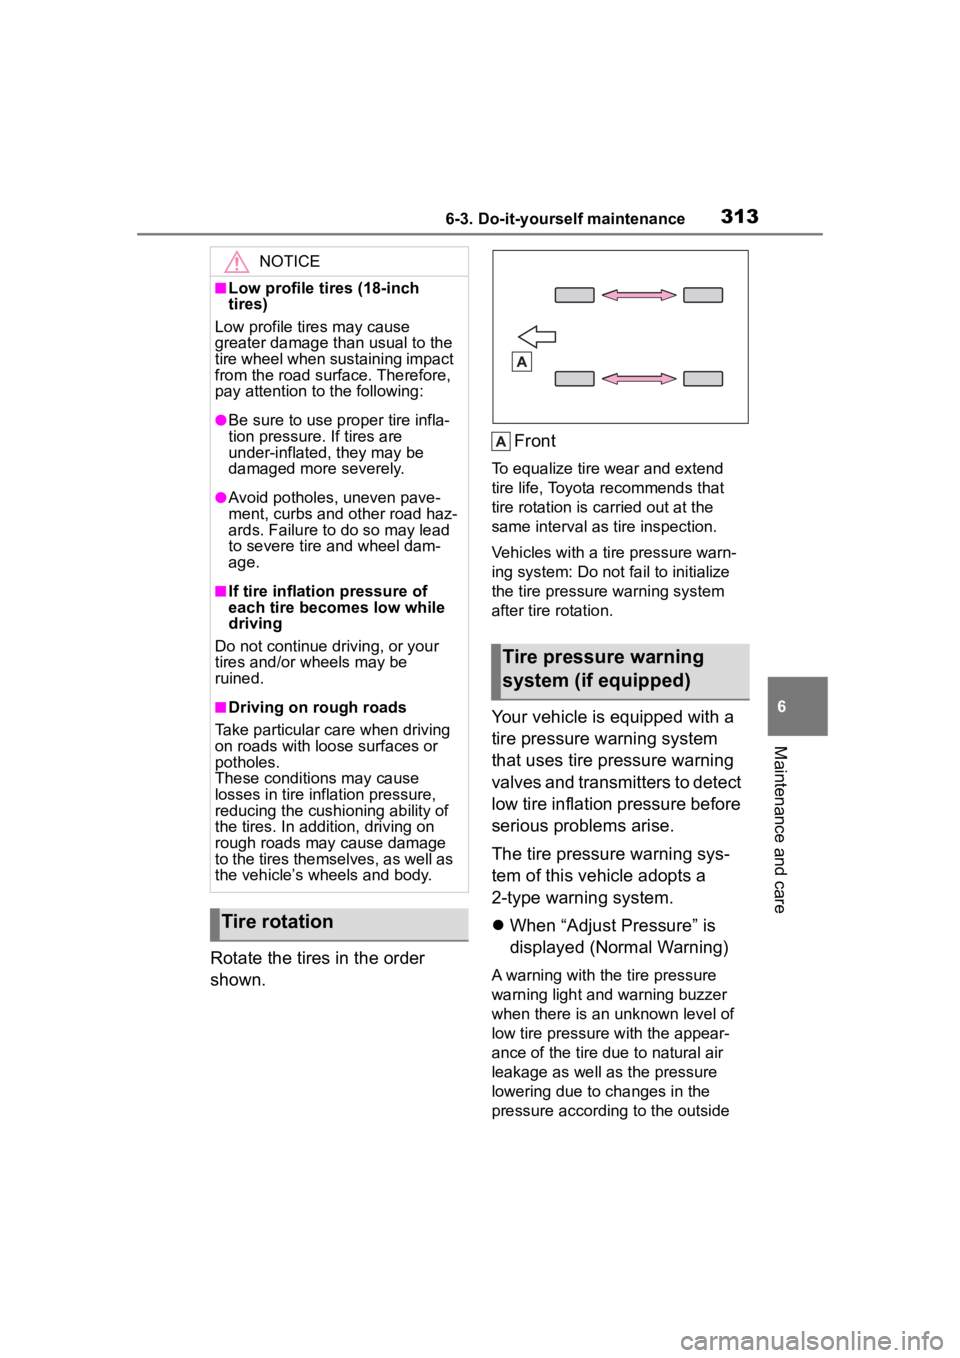
Rotate the tires in the order
shown.Front
To equalize tire w
ear and extend
tire life, Toyota recommends that
tire rotation is carried out at the
same interval as tire inspection.
Vehicles with a tire pressure warn-
ing system: Do not fa il to initialize
the tire pressure warning system
after tire rotation.
Your vehicle is equipped with a
tire pressure warning system
that uses tire pressure warning
valves and transmitters to detect
low tire inflation pressure before
serious problems arise.
The tire pressure warning sys-
tem of this vehicle adopts a
2-type warning system.
When “Adjust Pressure” is
displayed (Normal Warning)
A warning with the tire pressure
warning light and warning buzzer
when there is an unknown level of
low tire pressure with the appear-
ance of the tire due to natural air
leakage as well as the pressure
lowering due to changes in the
pressure according to the outside
NOTICE
■Low profile tires (18-inch
tires)
Low profile tires may cause
greater damage th an usual to the
tire wheel when sustaining impact
from the road surface. Therefore,
pay attention to the following:
●Be sure to use pro per tire infla-
tion pressure. If tires are
under-inflated, they may be
damaged more severely.
●Avoid potholes, uneven pave-
ment, curbs and other road haz-
ards. Failure to do so may lead
to severe tire and wheel dam-
age.
■If tire inflation pressure of
each tire becomes low while
driving
Do not continue driving, or your
tires and/or wheels may be
ruined.
■Driving on rough roads
Take particular care when driving
on roads with loose surfaces or
potholes.
These conditions may cause
losses in tire inf lation pressure,
reducing the cushio ning ability of
the tires. In addit ion, driving on
rough roads may cause damage
to the tires themselves, as well as
the vehicle’s wheels and body.
Tire rotation
Tire pressure warning
system (if equipped)
Page 314 of 468
3146-3. Do-it-yourself maintenance
temperature. (Ways of coping:
P.360, 397)
When “Immediately Check
Tire when Safe” is displayed
(Emergency Warning)
A warning with the tire pressure
warning light and warning buzzer
when there is a known level of low
tire pressure with the appearance
of the tire due to pressure suddenly
lowering. (Ways of coping: P.360,
370)
However, the system may not be
able to detect sud den tire ruptures
(bursting, etc.).
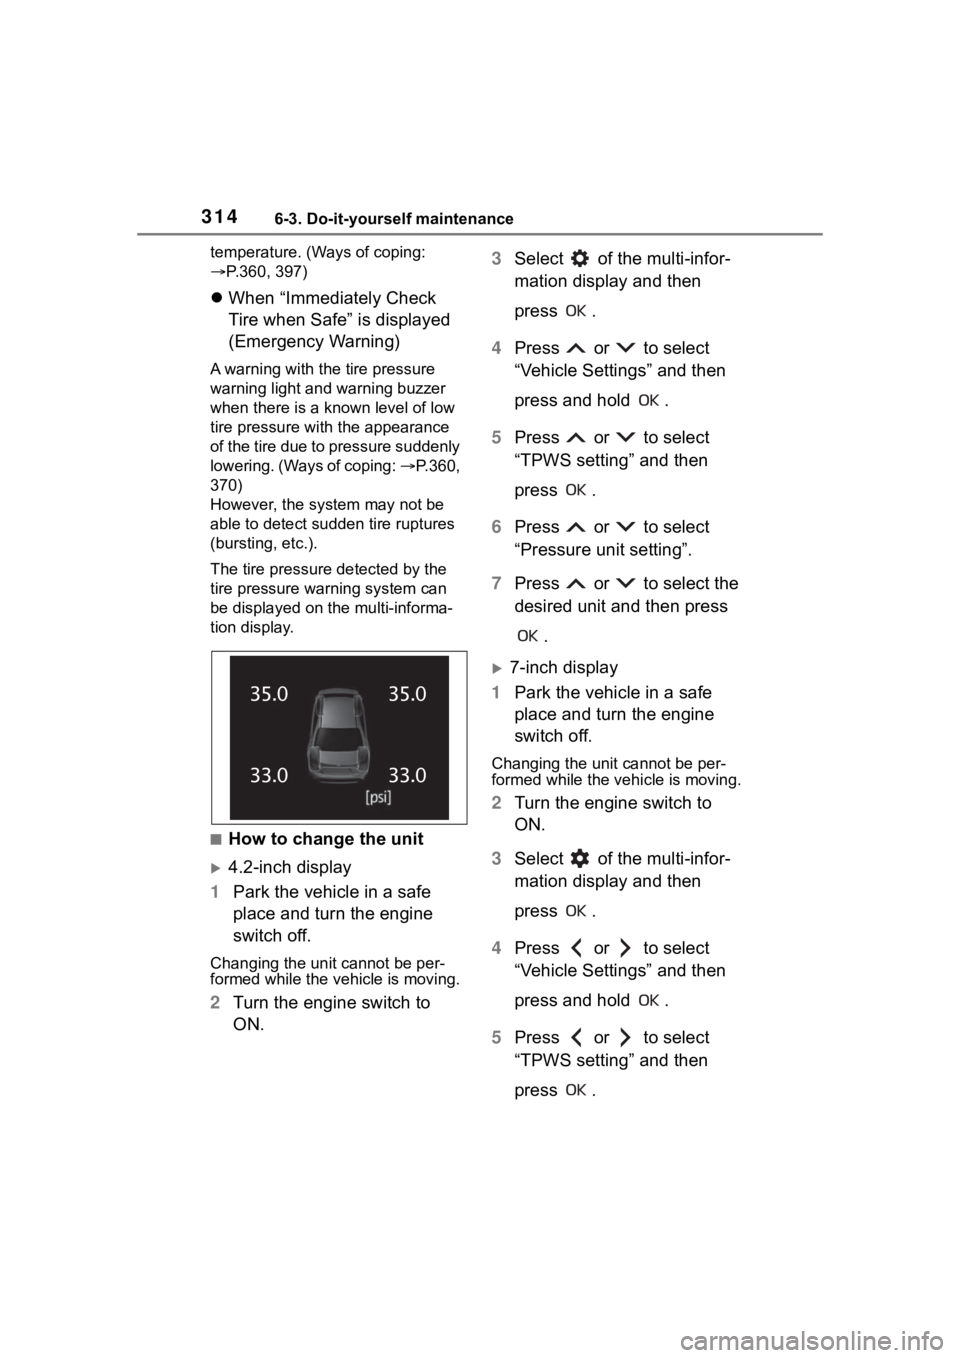
The tire pressure detected by the
tire pressure warning system can
be displayed on the multi-informa-
tion display.
■How to change the unit
4.2-inch display
1 Park the vehicle in a safe
place and turn the engine
switch off.
Changing the unit cannot be per-
formed while the vehicle is moving.
2Turn the engine switch to
ON. 3
Select of the multi-infor-
mation display and then
press .
4 Press or to select
“Vehicle Settings” and then
press and hold .
5 Press or to select
“TPWS setting” and then
press .
6 Press or to select
“Pressure unit setting”.
7 Press or to select the
desired unit and then press
.
7-inch display
1 Park the vehicle in a safe
place and turn the engine
switch off.
Changing the unit cannot be per-
formed while the vehicle is moving.
2Turn the engine switch to
ON.
3 Select of the multi-infor-
mation display and then
press .
4 Press or to select
“Vehicle Settings” and then
press and hold .
5 Press or to select
“TPWS setting” and then
press .
Page 316 of 468
3166-3. Do-it-yourself maintenance
transmitters must also be
installed.
When new tire pressure warning
valves and transmitters are
installed, new ID codes must be
registered in the tire pressure
warning computer and the tire
pressure warning system must
be initialized. Have tire pressure
warning valves and transmitter
ID codes registered by your Toy-
ota dealer. (P.322)
■Replacing tires and wheels
If the ID code of the tire pressure
warning valve and transmitter is not
registered, the tire pressure warning
system will not work properly. After
driving for about 20 minutes, the tire
pressure warning light blinks for 1
minute and stays on to indicate a
system malfunction.
It is necessary to register the
position of each wheel after per-
forming a tire rotation.
Wheel position registration can
be performed by oneself. Wheel
position registration is per-
formed by driving forward with
moderate left and right turns.
However, depending on the driv-
ing conditions and driving envi-
ronment, registration may take
some time to complete.
4.2-inch display
1 Park the vehicle in a safe
place and turn the engine
switch off, wait for approxi-
mately 20 minutes or more,
and then start the engine.
NOTICE
■Repairing or replacing tires,
wheels, tire pressure warn-
ing valves, transmitters and
tire valve caps
●When removing or fitting the
wheels, tires or the tire pressure
warning valves and transmit-
ters, contact your Toyota dealer
as the tire pr essure warning
valves and transmitters may be
damaged if not handled cor-
rectly.
●Make sure to install the tire
valve caps. If the tire valve caps
are not installed, water could
enter the tire pressure warning
valves and the tire pressure
warning valves could be bound.
●When replacing tire valve caps,
do not use tire valve caps other
than those specified. The cap
may become stuck.
■To avoid damage to the tire
pressure warning valves and
transmitters
When a tire is repa ired with liquid
sealants, the tire pressure warn-
ing valve and transmitter may not
operate properly. If a liquid seal-
ant is used, contact your Toyota
dealer or other qualified service
shop as soon as possible. Make
sure to replace the tire pressure
warning valve and transmitter
when replacing the tire. ( P.315)
Registration of the posi-
tion of each wheel after
performing a tire rotation
(vehicles with a tire pres-
sure warning system)
Page 318 of 468
3186-3. Do-it-yourself maintenance
7Drive straight (with occa-
sional left and right turns) at
approximately 25 mph (40
km/h) or more for approxi-
mately 10 to 30 minutes.
When wheel position registration is
complete, a message indicating
that registration has been com-
pleted and the inflation pressure of
each tire will be d isplayed on the
multi-information display.
Even if it is not possible to drive
continuously at a pproximately 25
mph (40 km/h) or more, registration
can be completed by driving for a
long time. However, if registration
does not complete a fter driving for
1 hour or more, park the vehicle in
a safe place and leave it with the
engine switch in ON for approxi-
mately 15 minute s or more, and
then perform the dr iving procedure
again.
■When performing wheel posi-
tion registration
●Normally, wheel position registra-
tion can be completed within
approximately 30 minutes.
●Wheel position registration is per-
formed while driving at a vehicle
speed of approximately 25 mph
(40 km/h) or more.
■Wheel position registration pro-
cedure
●If the engine switch is turned off
while registering the wheel posi-
tion, the next time the engine
switch is turned to ON, the wheel
position registr ation will resume
and it will not be necessary to
restart the procedure.
●While the position of each wheel is
being determined and the inflation
pressures are not being dis-
played, if the infl ation pressure of
a tire drops, the tire pressure
warning light will come on.
■If the wheel position cannot be
registered easily
●In the following situations, wheel
position registration may take lon-
ger than usual to be completed or
may not be possible.
• Vehicle is not dr iven at approxi-
mately 25 mph (40 km/h) or more
• Vehicle is driven on unpaved roads
• If wheel position registration does
not complete after driving for 1
hour or more, park the vehicle in a
safe place for a pproximately 15
minutes and then drive the vehicle
again.
●If the vehicle is reversed during
wheel position registration, all
data collected unt il then will be
cleared. Perform driving again.
In the following situations, it will
be necessary to perform the tire
inflation pressure setting proce-
dure of the tire pressure warning
system.
When the specified tire infla-
tion pressure has changed,
such as due to carried load,
etc.
When the tire inflation pres-
sure is changed such as
when the tire size is changed.
If the tire inflation pressure has
been adjusted to the specified
level, perform the tire inflation set-
ting procedure by selecting speci-
fied inflation pressure on the
multi-information display.
When the tire inflation pressure is
Setting the tire pressure
(vehicles with a tire pres-
sure warning system)