light TOYOTA COROLLA 2023 Service Manual
[x] Cancel search | Manufacturer: TOYOTA, Model Year: 2023, Model line: COROLLA, Model: TOYOTA COROLLA 2023Pages: 468, PDF Size: 14.4 MB
Page 100 of 468
1002-1. Instrument cluster
mation:
Route guidance to destination
Compass display (head-
ing-up display)
Select to enable selection of an
audio source or track on the
meter using the meter control
switches.
This menu icon can be set to be
displayed/not displayed in .
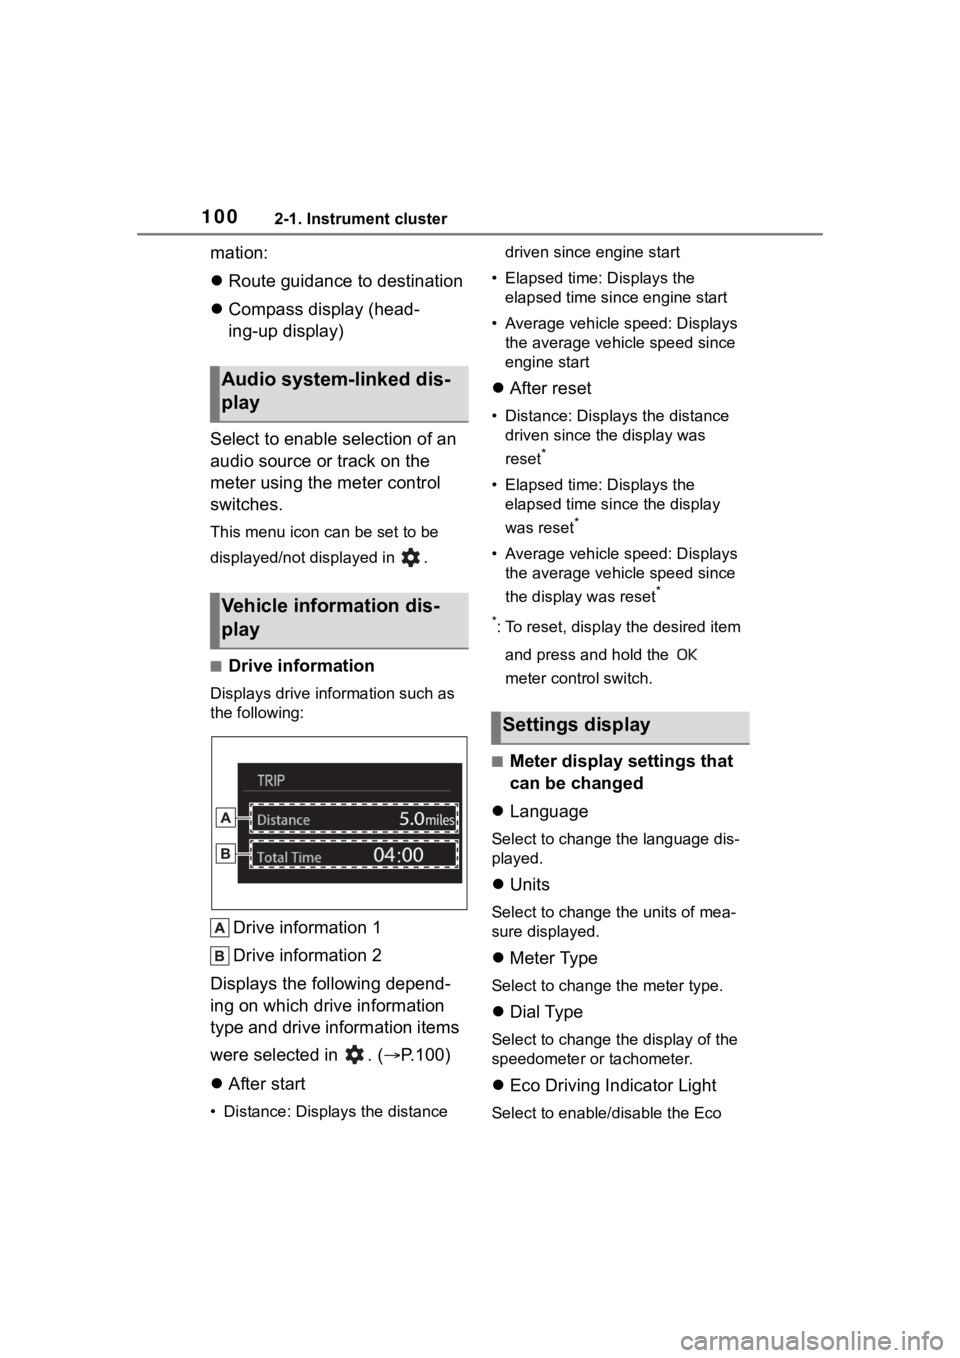
■Drive information
Displays drive information such as
the following:
Drive information 1
Drive information 2
Displays the following depend-
ing on which drive information
type and drive information items
were selected in . ( P.100)
After start
• Distance: Displays the distance driven since engine start
• Elapsed time: Displays the elapsed time since engine start
• Average vehicle speed: Displays the average vehicle speed since
engine start
After reset
• Distance: Displays the distance
driven since the display was
reset
*
• Elapsed time: Displays the elapsed time since the display
was reset
*
• Average vehicle speed: Displays the average vehicle speed since
the display was reset
*
*
: To reset, display the desired item and press and hold the
meter control switch.
■Meter display settings that
can be changed
Language
Select to change the language dis-
played.
Units
Select to change the units of mea-
sure displayed.
Meter Type
Select to change the meter type.
Dial Type
Select to change the display of the
speedometer or tachometer.
Eco Driving Indicator Light
Select to enable/disable the Eco
Audio system-linked dis-
play
Vehicle information dis-
play
Settings display
Page 101 of 468
1012-1. Instrument cluster
2
Vehicle status information and indicators
Driving Indicator Light.
Fuel economy display
Select to change the average fuel
consumption display to any of the
following: trip average/total aver-
age/tank average. ( P. 9 8 )
Select to display/not display the
audio system linked display.
Select to change the displayed con-
tent of the following:
• Drive information type
Select to change the drive informa-
tion type display between trip infor-
mation/total information.
• Drive information items
Select to set the first and second
items of the drive information dis-
play to any of the following: aver-
age vehicle
speed/distance/elapsed time.
Pop-up display
Select to enable/disable pop-up
displays for each relevant system.
Multi-information display off
Select to turn the m ulti-information
display off.
To turn the multi-in formation display
on again, press any of the following
meter control switches
//// /.
Default setting
Select to reset the meter display
settings to the default setting.
■Vehicle functions and set-
tings that can be changed
P.412
■Suspension of the settings dis-
play
●Some settings cannot be changed
while driving. When changing set-
tings, park the vehicle in a safe
place.
●If a warning message is displayed,
operation of the settings display
will be suspended.
WARNING
■Cautions during setting up
the display
If the engine is running when
changing the dis play settings,
ensure that the vehicle is parked
in a place with adequate ventila-
tion. In a closed area such as a
garage, exhaust gases including
harmful carbon monoxide (CO)
may collect and enter the vehicle.
This may lead to death or a seri-
ous health hazard.
NOTICE
■During setting up the display
To prevent batte ry discharge,
ensure that the engine is running
while setting up the display fea-
tures.
Page 102 of 468
1022-1. Instrument cluster
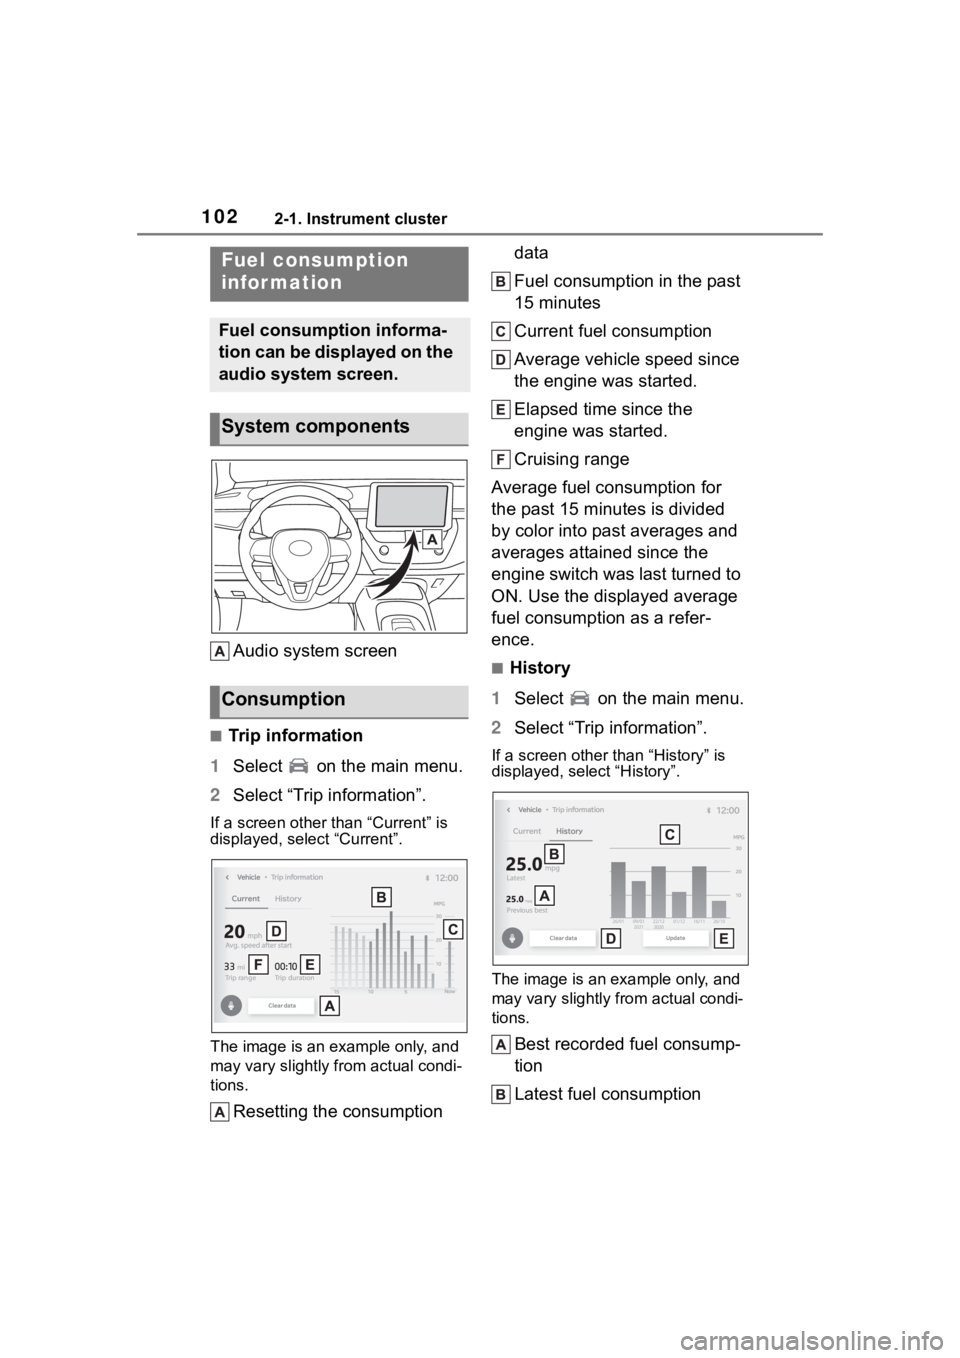
Audio system screen
■Trip information
1 Select on the main menu.
2 Select “Trip information”.
If a screen other than “Current” is
displayed, select “Current”.
The image is an example only, and
may vary slightly f rom actual condi-
tions.
Resetting the consumption data
Fuel consumption in the past
15 minutes
Current fuel consumption
Average vehicle speed since
the engine was started.
Elapsed time since the
engine was started.
Cruising range
Average fuel consumption for
the past 15 minutes is divided
by color into past averages and
averages attained since the
engine switch was last turned to
ON. Use the displayed average
fuel consumption as a refer-
ence.
■History
1 Select on the main menu.
2 Select “Trip information”.
If a screen other than “History” is
displayed, select “History”.
The image is an example only, and
may vary slightly from actual condi-
tions.
Best recorded fuel consump-
tion
Latest fuel consumption
Fuel consumption
infor mation
Fuel consumption informa-
tion can be displayed on the
audio system screen.
System components
Consumption
Page 109 of 468
1093-1. Key information
3
Before driving
Locks the doors (P. 1 1 1 )
Unlocks the doors ( P. 1 1 1 )
Opens the windows
*1 and
moon roof
*1, 2 ( P. 1 1 1 )
Opens the trunk ( P. 1 1 8 )
Sounds the alarm ( P.109)
*1:This setting must be customized
at your Toyota dealer.
*2: If equipped
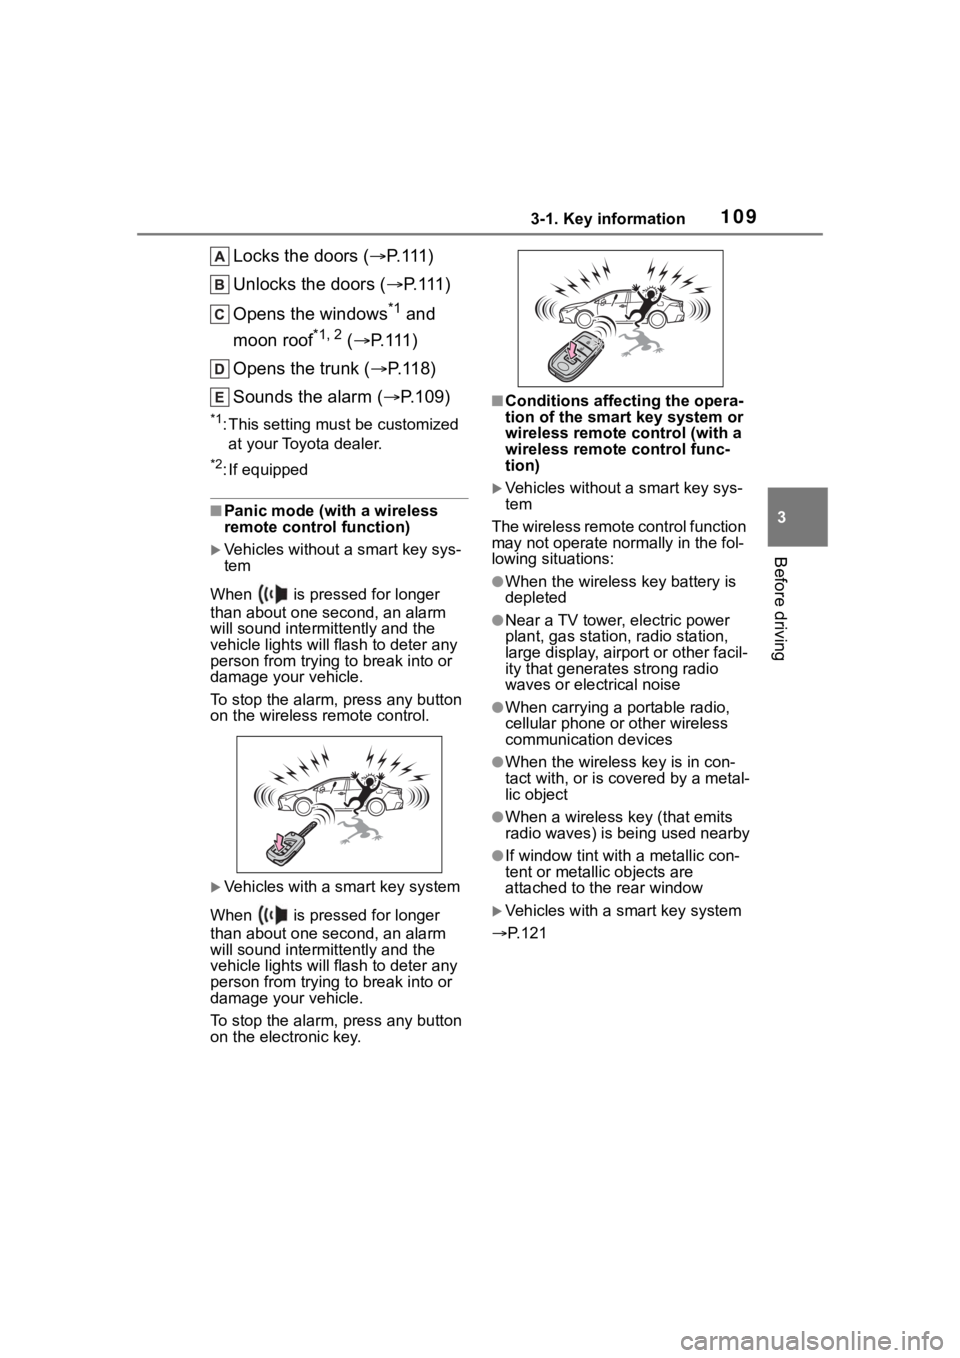
■Panic mode (with a wireless
remote control function)
Vehicles without a smart key sys-
tem
When is pressed for longer
than about one second, an alarm
will sound intermittently and the
vehicle lights will f lash to deter any
person from trying to break into or
damage your vehicle.
To stop the alarm, press any button
on the wireless re mote control.
Vehicles with a smart key system
When is pressed for longer
than about one second, an alarm
will sound intermittently and the
vehicle lights will f lash to deter any
person from trying to break into or
damage your vehicle.
To stop the alarm, press any button
on the electronic key.
■Conditions affecting the opera-
tion of the smart key system or
wireless remote control (with a
wireless remote control func-
tion)
Vehicles without a smart key sys-
tem
The wireless remote control function
may not operate normally in the fol-
lowing situations:
●When the wireles s key battery is
depleted
●Near a TV tower, electric power
plant, gas station, radio station,
large display, airpo rt or other facil-
ity that generates strong radio
waves or electrical noise
●When carrying a portable radio,
cellular phone or other wireless
communication devices
●When the wireless key is in con-
tact with, or is c overed by a metal-
lic object
●When a wireless key (that emits
radio waves) is being used nearby
●If window tint wit h a metallic con-
tent or metallic objects are
attached to the rear window
Vehicles with a smart key system
P.121
Page 112 of 468
1123-2. Opening, closing and locking the doors
again within 3 seconds unlocks the
other doors.
Press and hold to open the win-
dows
*1and moon roof.*1, 2
*1
:This setting mu st be customized
at your Toyota dealer.
*2: If equipped
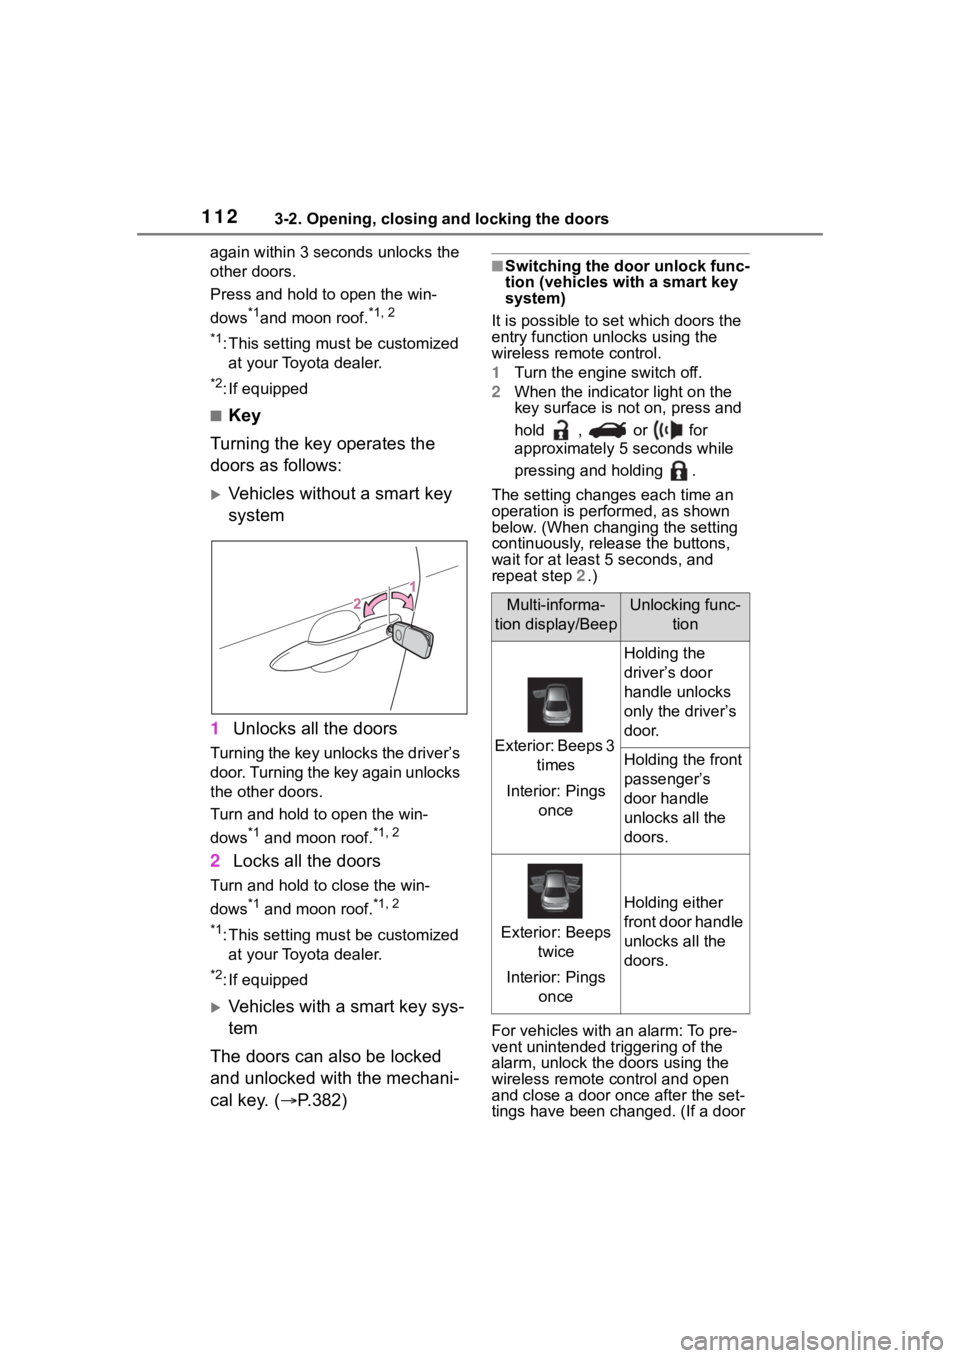
■Key
Turning the key operates the
doors as follows:
Vehicles without a smart key
system
1 Unlocks all the doors
Turning the key unlocks the driver’s
door. Turning the key again unlocks
the other doors.
Turn and hold to open the win-
dows
*1 and moon roof.*1, 2
2Locks all the doors
Turn and hold to close the win-
dows
*1 and moon roof.*1, 2
*1
:This setting mu st be customized
at your Toyota dealer.
*2: If equipped
Vehicles with a smart key sys-
tem
The doors can also be locked
and unlocked with the mechani-
cal key. ( P.382)
■Switching the door unlock func-
tion (vehicles with a smart key
system)
It is possible to set which doors the
entry function unlocks using the
wireless remote control.
1 Turn the engine switch off.
2 When the indicator light on the
key surface is not on, press and
hold , or for
approximately 5 seconds while
pressing and holding .
The setting changes each time an
operation is per formed, as shown
below. (When changing the setting
continuously, release the buttons,
wait for at least 5 seconds, and
repeat step 2 .)
For vehicles with an alarm: To pre-
vent unintended triggering of the
alarm, unlock the doors using the
wireless remote control and open
and close a door once after the set-
tings have been ch anged. (If a door
Multi-informa-
tion display/BeepUnlocking func- tion
Exterior: Beeps 3 times
Interior: Pings once
Holding the
driver’s door
handle unlocks
only the driver’s
door.
Holding the front
passenger’s
door handle
unlocks all the
doors.
Exterior: Beeps twice
Interior: Pings once
Holding either
front door handle
unlocks all the
doors.
Page 118 of 468
1183-2. Opening, closing and locking the doors
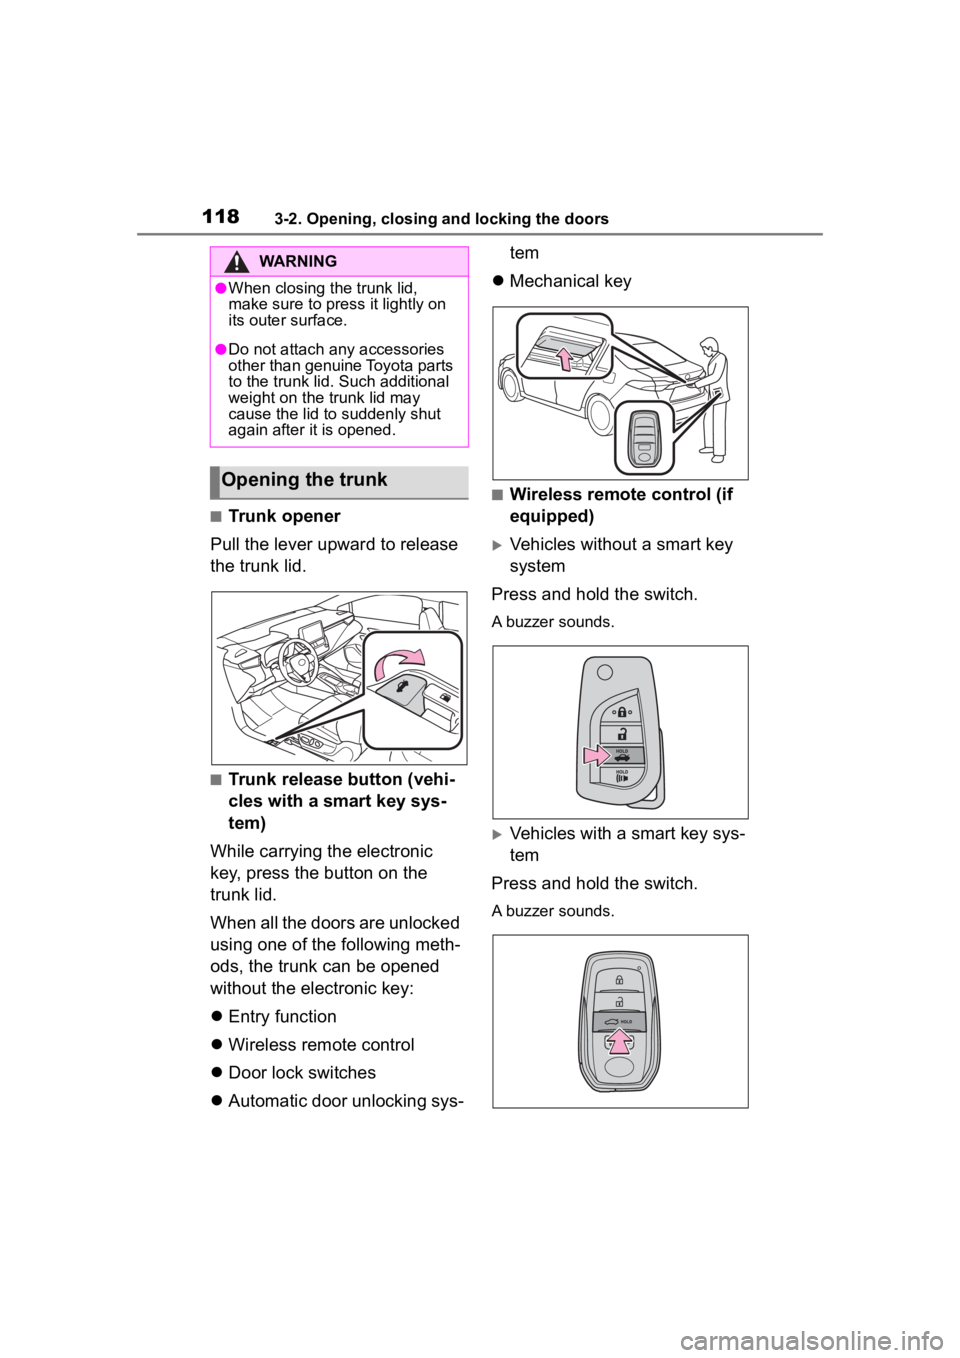
■Trunk opener
Pull the lever upward to release
the trunk lid.
■Trunk release button (vehi-
cles with a smart key sys-
tem)
While carrying the electronic
key, press the button on the
trunk lid.
When all the doors are unlocked
using one of the following meth-
ods, the trunk can be opened
without the electronic key:
Entry function
Wireless remote control
Door lock switches
Automatic door unlocking sys- tem
Mechanical key
■Wireless remote control (if
equipped)
Vehicles without a smart key
system
Press and hold the switch.
A buzzer sounds.
Vehicles with a smart key sys-
tem
Press and hold the switch.
A buzzer sounds.
WARNING
●When closing the trunk lid,
make sure to press it lightly on
its outer surface.
●Do not attach any accessories
other than genuine Toyota parts
to the trunk lid . Such additional
weight on the trunk lid may
cause the lid to suddenly shut
again after it is opened.
Opening the trunk
Page 119 of 468
1193-2. Opening, closing and locking the doors
3
Before driving
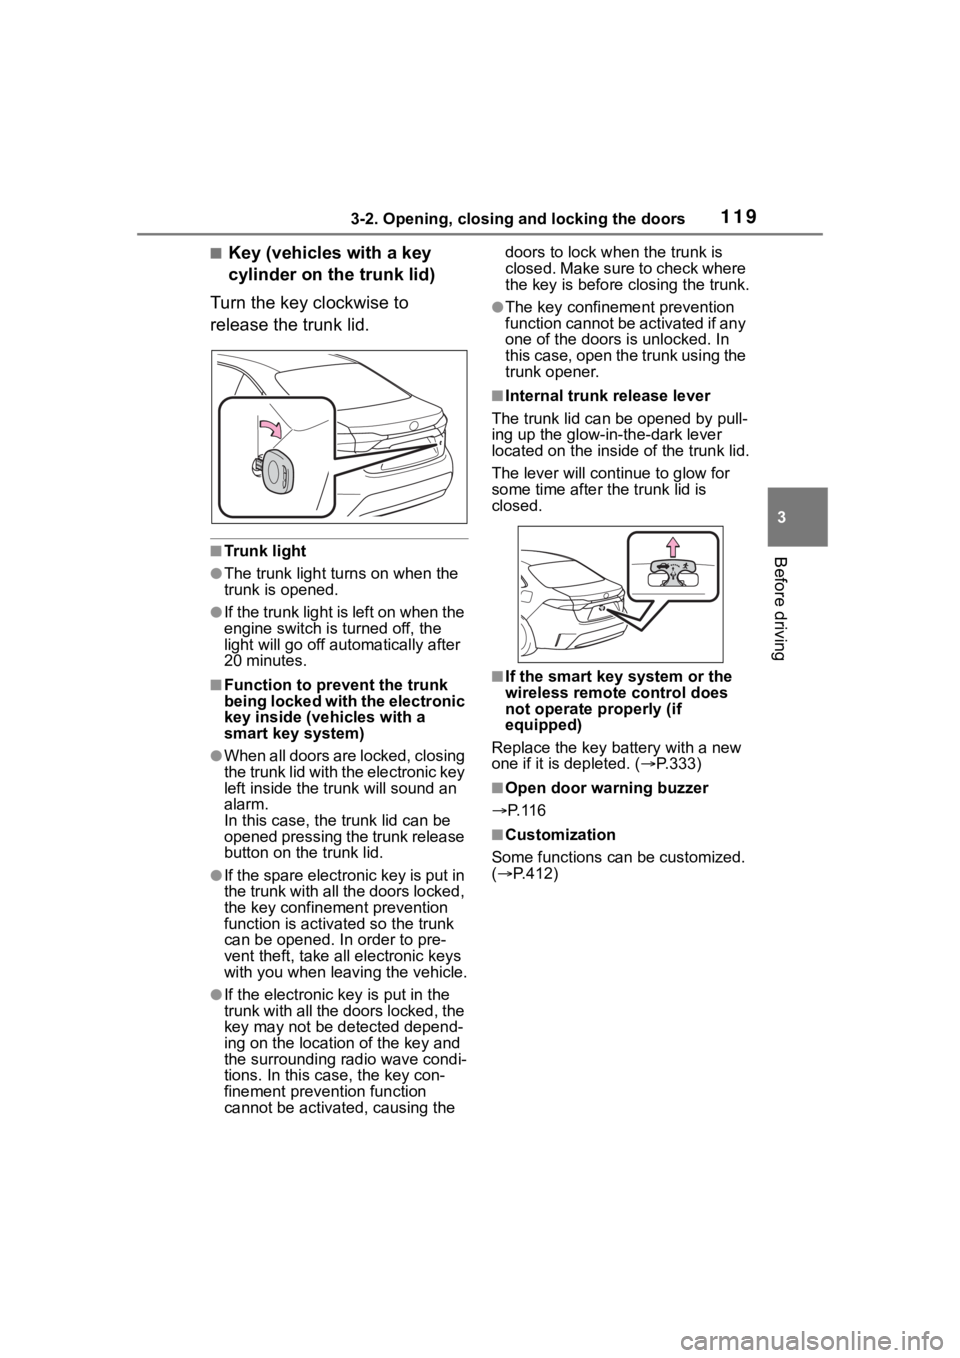
■Key (vehicles with a key
cylinder on the trunk lid)
Turn the key clockwise to
release the trunk lid.
■Trunk light
●The trunk light turns on when the
trunk is opened.
●If the trunk light is left on when the
engine switch is turned off, the
light will go off aut omatically after
20 minutes.
■Function to prevent the trunk
being locked with the electronic
key inside (vehicles with a
smart key system)
●When all doors are locked, closing
the trunk lid with the electronic key
left inside the tr unk will sound an
alarm.
In this case, the trunk lid can be
opened pressing the trunk release
button on the trunk lid.
●If the spare electronic key is put in
the trunk with all the doors locked,
the key confinement prevention
function is activated so the trunk
can be opened. In order to pre-
vent theft, take all electronic keys
with you when leaving the vehicle.
●If the electronic key is put in the
trunk with all the doors locked, the
key may not be detected depend-
ing on the location of the key and
the surrounding radio wave condi-
tions. In this case, the key con-
finement prevention function
cannot be activate d, causing the doors to lock when the trunk is
closed. Make sure to check where
the key is before closing the trunk.
●The key confinement prevention
function cannot be activated if any
one of the doors i
s unlocked. In
this case, open the trunk using the
trunk opener.
■Internal trunk release lever
The trunk lid can b e opened by pull-
ing up the glow-in-the-dark lever
located on the inside of the trunk lid.
The lever will contin ue to glow for
some time after the trunk lid is
closed.
■If the smart key system or the
wireless remote control does
not operate properly (if
equipped)
Replace the key battery with a new
one if it is depleted. ( P.333)
■Open door warning buzzer
P. 1 1 6
■Customization
Some functions can be customized.
( P.412)
Page 123 of 468
1233-2. Opening, closing and locking the doors
3
Before driving
the door handle, such as in the
rain or in a car wash when the
electronic key is within the effec-
tive range. (The doors will auto-
matically be locked after
approximately 60 seconds if the
doors are not opened and closed.)
●If the wireless remote control is
used to lock the doors when the
electronic key is near the vehicle,
there is a possib ility that the door
may not be unlocke d by the entry
function. (Use the wireless remote
control to unloc k the doors.)
●If the doors have been locked
from outside of the vehicle and are
then not unlocked using the wire-
less remote contr ol or smart key
system, the engine cannot be
started using the smart key sys-
tem. (However, if the doors have
been locked from inside the vehi-
cle, the engine can be started
using the smart key system.)
If it is necessary to start the
engine, it can be started using the
procedure in “If the electronic key
dose not operate properly”
( P.382).
●Touching the door lock or unlock
sensor while wearing gloves may
prevent lock or unlock operation.
●When the lock op eration is per-
formed using the lock sensor, rec-
ognition signals will be shown up
to two consecutive times. After
this, no recogniti on signals will be
given.
●If the door handle becomes wet
while the electronic key is within
the effective ran ge, the door may
lock and unlock repeatedly. In that
case, follow the fo llowing correc-
tion procedures to wash the vehi-
cle:
• Place the electronic key in a loca- tion 6 ft. (2 m) or more away from
the vehicle. (Take care to ensure
that the key is not stolen.)
• Set the electronic key to bat-
tery-saving mode to disable the
smart key system. ( P.121)
●If the electronic key is inside the
vehicle and a door handle
becomes wet during a car wash, a
message may be shown on the
multi-information display and a
buzzer will sound outside the vehi-
cle. To turn off the alarm, lock all
the doors.
●The lock sensor may not work
properly if it comes into contact
with ice, snow, mud, etc. Clean
the lock sensor and attempt to
operate it again.
●A sudden handle operation or a
handle operation immediately
after entering the effective range
may prevent the doors from being
unlocked. Touch the door unlock
sensor and check that the doors
are unlocked befo re pulling the
door handle again.
●If there is another electronic key in
the detection area, it may take
slightly longer to unlock the doors
after the door handle is gripped.
■When the vehicle is not driven
for extended periods
●To prevent theft of the vehicle, do
not leave the electronic key within
6 ft. (2 m) of the vehicle.
●The smart key system can be
deactivated in advance. ( P.412)
●Setting the electronic key to bat-
tery-saving mode helps to reduce
key battery depletion. ( P.121)
■To operate the system properly
●Make sure to carry the electronic
key when operating the system.
Do not get the electronic key too
close to the vehicle when operat-
ing the system from the outside of
the vehicle.
Depending on the position and hold-
ing condition of the electronic key,
the key may not be detected cor-
rectly and the system may not oper-
ate properly. (The alarm may go off
accidentally, or the door lock pre-
vention function m ay not operate.)
Page 127 of 468
1273-3. Adjusting the seats
3
Before driving
WARNING
●Do not allow anyone to sit on a
folded seatback or in the trunk
while driving.
●Do not allow child ren to enter
the trunk.
●Be careful not to get your hand
caught when folding the rear
seatbacks.
●Adjust the position of the front
seats before folding down the
rear seatbacks so that the front
seats do not interfere with the
rear seatbacks when folding
down the rear seatbacks.
■After returning the rear seat-
back to the upright position
●Make sure that the seatback is
securely locked in position by
lightly pushing it back and forth.
If the seatback is not securely
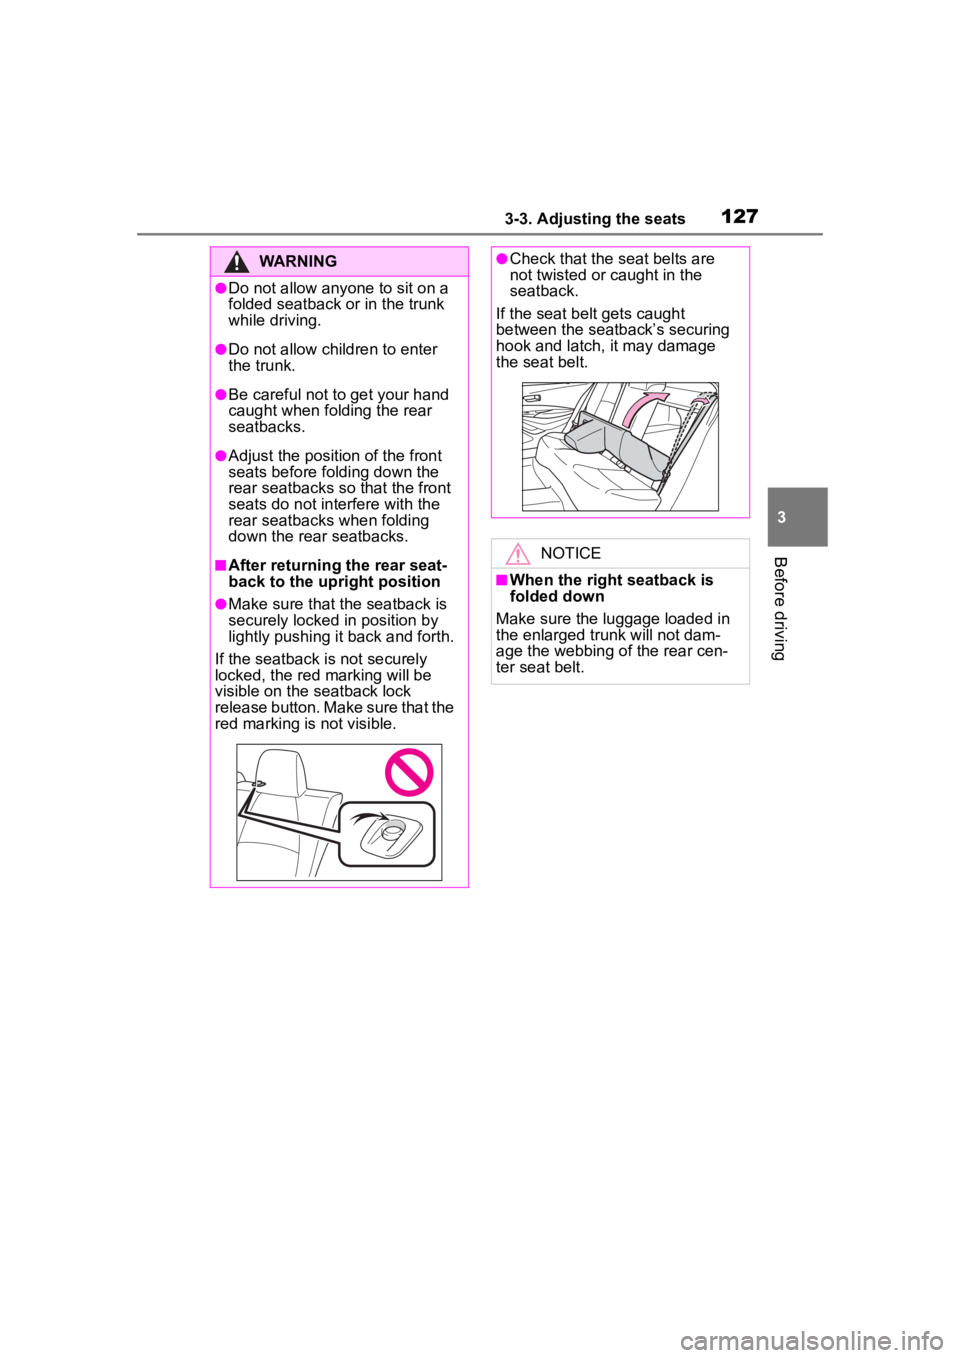
locked, the red marking will be
visible on the seatback lock
release button. Make sure that the
red marking is not visible.
●Check that the seat belts are
not twisted or caught in the
seatback.
If the seat belt gets caught
between the seatback’s securing
hook and latch, it may damage
the seat belt.
NOTICE
■When the right seatback is
folded down
Make sure the luggage loaded in
the enlarged trunk will not dam-
age the webbing of the rear cen-
ter seat belt.
Page 131 of 468
1313-4. Adjusting the steering wheel and mirrors
3
Before driving
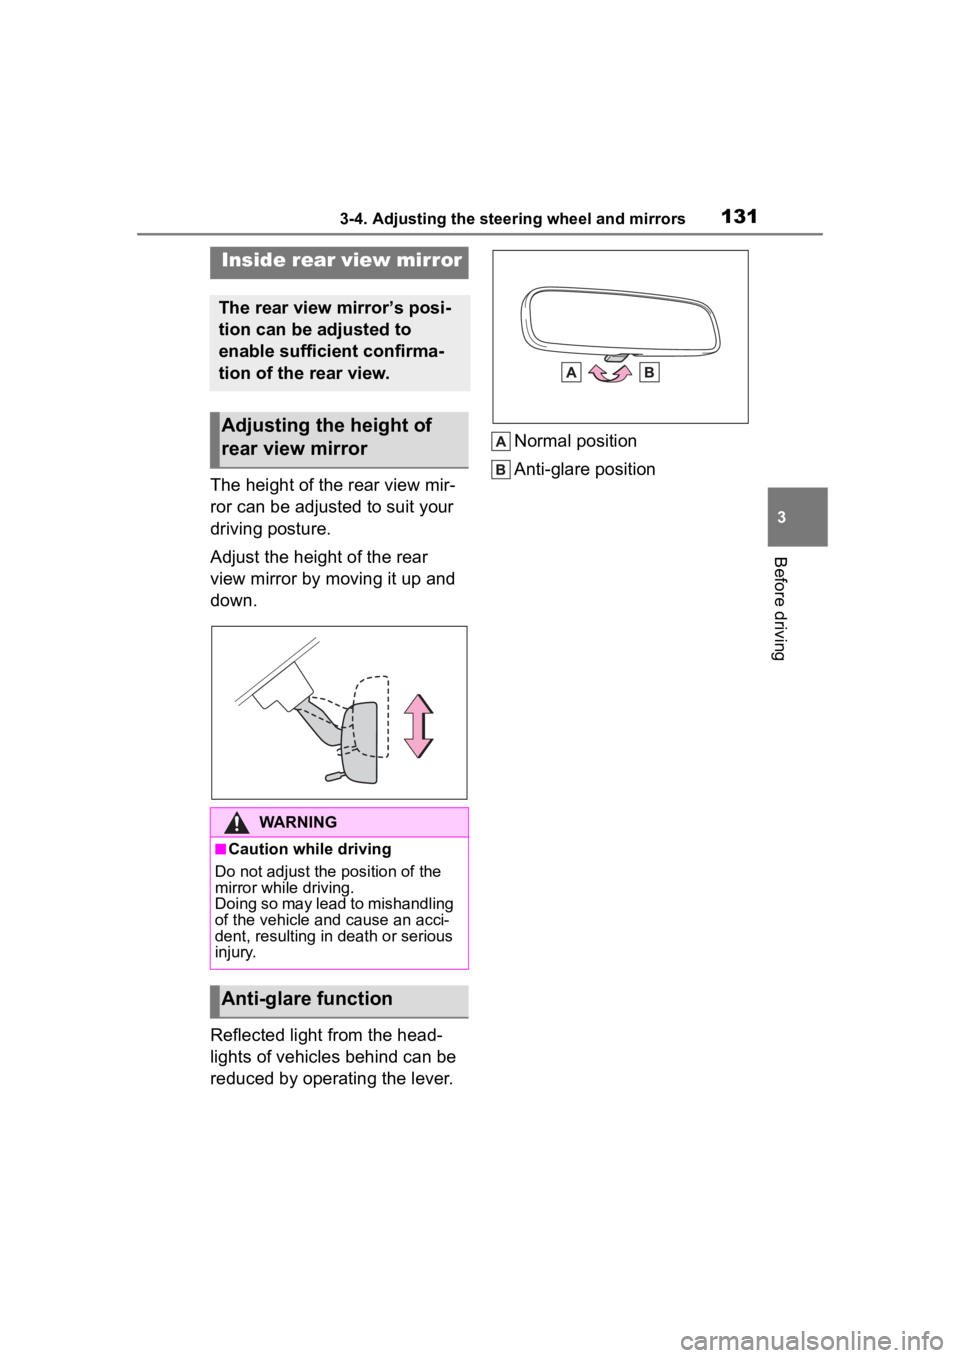
The height of the rear view mir-
ror can be adjusted to suit your
driving posture.
Adjust the height of the rear
view mirror by moving it up and
down.
Reflected light from the head-
lights of vehicles behind can be
reduced by operating the lever.Normal position
Anti-glare position
Inside rear view mirror
The rear view mirror’s posi-
tion can be adjusted to
enable sufficient confirma-
tion of the rear view.
Adjusting the height of
rear view mirror
WARNING
■Caution while driving
Do not adjust the position of the
mirror while driving.
Doing so may lead to mishandling
of the vehicle and cause an acci-
dent, resulting in death or serious
injury.
Anti-glare function