fog light TOYOTA COROLLA 2023 Owners Manual
[x] Cancel search | Manufacturer: TOYOTA, Model Year: 2023, Model line: COROLLA, Model: TOYOTA COROLLA 2023Pages: 468, PDF Size: 14.4 MB
Page 3 of 468
3TABLE OF CONTENTS
1
2
3
4
5
6
7
8
9
10
Continuously variable transmis-sion (vehicles without paddle
shift switches) .................. 160
Continuously variable transmis- sion (vehicles with paddle shift
switches) .......................... 162
Turn signal lever................. 167
Parking brake ..................... 168
Brake Hold ......................... 171
4-3. Operating the lights and wip- ers
Headlight switch ................. 173
AHB (Automatic High Beam) ......................................... 175
Windshield wipers and washer ......................................... 178
4-4. Refueling Opening the fuel tank cap .. 180
4-5. Using the driving support sys- tems
Toyota Safety Sense 3.0 soft-ware update ..................... 182
Toyota Safety Sense 3.0 .... 184
PCS (Pre-Collision System) ......................................... 190
LTA (Lane Tracing Assist)... 201
LDA (Lane Departure Alert) ......................................... 206
PDA (Proactive driving assist) ......................................... 211
RSA (Road Sign Assist) ..... 217
Dynamic radar cruise control ......................................... 219
Cruise control ..................... 227
Emergency Driving Stop System ......................................... 230
BSM (Blind Spot Monitor)... 232
RCTA (Rear Cross Traffic Alert) function ............................ 237
Safe Exit Assist .................. 243
Driving mode select switch ......................................... 247Driving assist systems .......
248
4-6. Driving tips Winter driving tips .............. 253
5-1. Using the air conditioning system and defogger
Manual air conditioning system......................................... 258
Automatic air conditioning sys- tem ................................... 263
Heated steering wheel/seat heaters ............................. 269
5-2. Using the interior lights Interior lights list ................. 271
5-3. Using the storage features List of storage features ...... 273
5-4. Other interior features Other interior features ........ 277
6-1. Maintenance and care Cleaning and protecting the vehicle exterior................. 288
Cleaning and protecting the vehicle interior.................. 291
6-2. Maintenance Maintenance requirements......................................... 294
General maintenance......... 296
Emis sion inspection and mainte-
n ance (I/M)
programs ...... 298
6-3. Do-it-yourself maintenance Do-it-yourself service precau-tions ................................. 300
Hood .................................. 302
Positioning a floor jack ....... 303
Engine compartment .......... 304
Tires ................................... 311
5Interior features
6Maintenance and care
Page 16 of 468

16Pictorial index
When a warning message is displayed ................................ P.366
Turn signal lever.............................................. ................... P.167
Headlight switch ............................................... ................. P.173
Headlights/parking lights/tail lig hts/side marker lights/daytime run-
ning lights/LED accent lights
*3............................................. P.173
Windshield wiper and washer switch............................... P.178
Usage................................................................................... P.178
Adding washer fluid .............................................................. P.310
Emergency flasher switch ....................................... .......... P.348
Hood lock release lever ........................................ ............. P.302
Tilt and telescopic steering lock release lever ................P. 1 3 0
Air conditioning system ............................. ............... P.258, 263
Usage.......................................................... ................. P.258, 263
Rear window defogger ........................................... ...... P.260, 265
Audio system
*4
*1
: Vehicles without a smart key system
*2: Vehicles with a smart key system
*3: If equipped
*4: Refer to “MULTIMEDIA OWNER’S MANUAL”.
Page 143 of 468
1434-1. Before driving
4
Driving
4-1.Before driving
■Starting the engine
P.154, 155
■Driving
1 With the brake pedal
depressed, shift the shift
lever to D. ( P.160)
2 Release the parking brake.
( P.168)
If the parking brake is in automatic
mode, the parkin g brake will be
released automatically. ( P.169)
3 Gradually release the brake
pedal and gently depress the
accelerator pedal to acceler-
ate the vehicle.
■Stopping
1 With the shift lever in D,
depress the brake pedal.
2 If necessary, set the parking
brake. ( P.168)
If the vehicle is to be stopped for an
extended period of time, shift the
shift lever to P. ( P.160)
■Parking the vehicle
1 With the shift lever in D,
depress the brake pedal to
stop the vehicle completely.
2 Set the parking brake
( 168), and shift the shift
lever to P. ( P.160)
Make sure the park ing brake indi-
cator light is on.
3 Vehicles without a smart key
system: Turn the engine
switch to OFF to stop the
engine.
Vehicles with a smart key
system: Press the engine
switch to stop the engine.
4 Slowly release the brake
pedal.
5 Lock the door, making sure
that you have the key on your
person.
If parking on a hill, block the wheels
as needed.
■Starting off on a steep
uphill
1 Make sure that the parking
brake is set and shift the shift
lever to D.
2 Gently depress the accelera-
tor pedal.
3 Release the parking brake.
■Driving in the rain
●Drive carefully whe n it is raining,
because visibility will be reduced,
the windows may become
fogged-up, and the road will be
slippery.
●Drive carefully whe n it starts to
rain, because the road surface will
be especially slippery.
●Refrain from hig h speeds when
driving on an expressway in the
rain, because there may be a
layer of water between the tires
and the road surface, preventing
the steering and brakes from
operating properly.
Driving the vehicle
The following procedures
should be observed to
ensure safe driving:
Driving procedure
Page 176 of 468
1764-3. Operating the lights and wipers
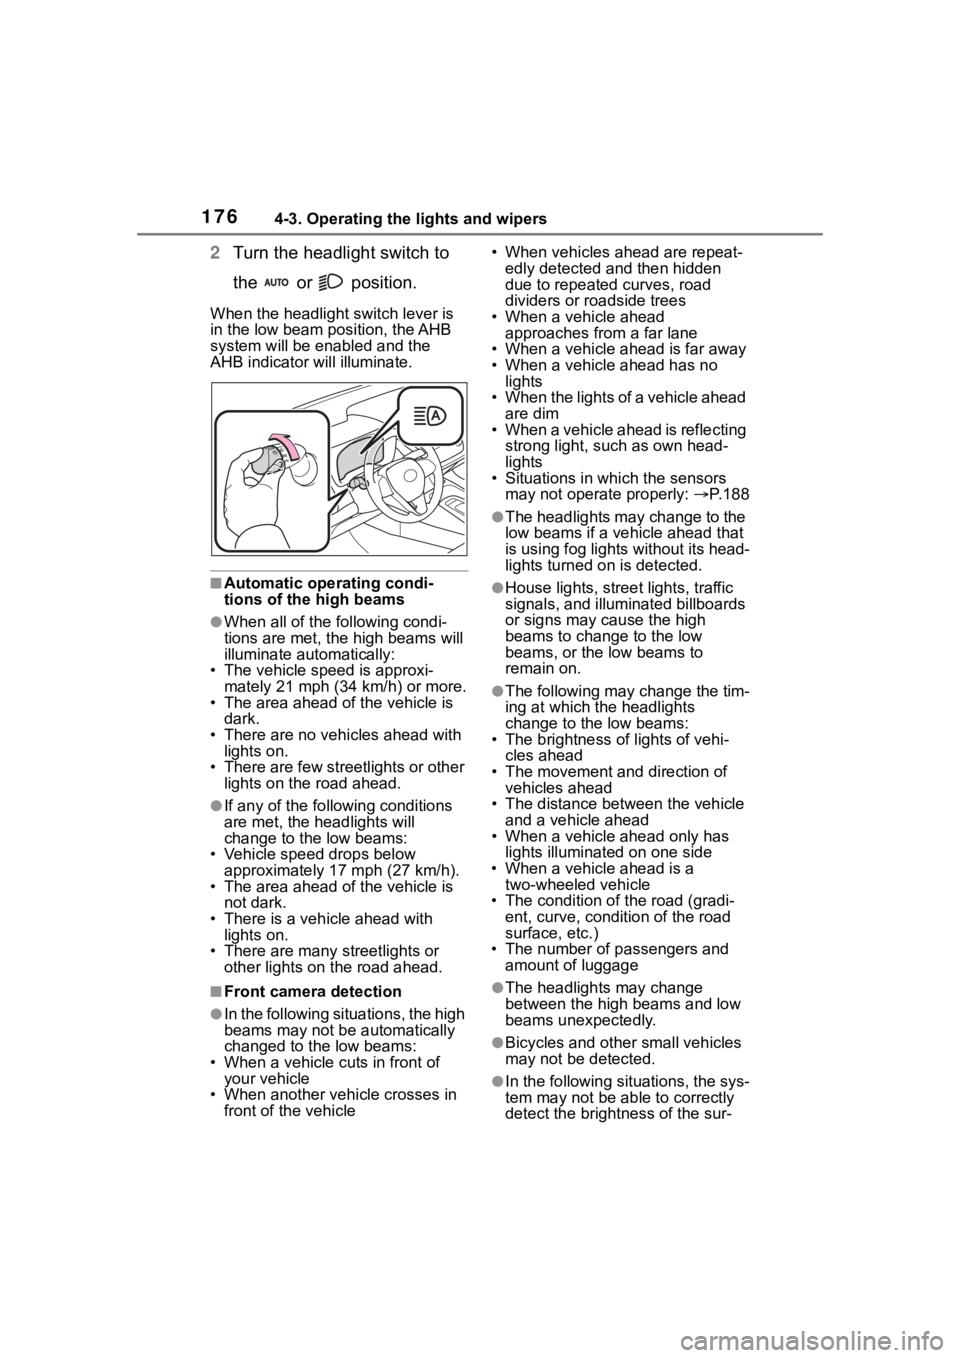
2Turn the headlight switch to
the or position.
When the headlight switch lever is
in the low beam position, the AHB
system will be enabled and the
AHB indicator will illuminate.
■Automatic operating condi-
tions of the high beams
●When all of the following condi-
tions are met, the high beams will
illuminate automatically:
• The vehicle speed is approxi-
mately 21 mph (34 km/h) or more.
• The area ahead of the vehicle is dark.
• There are no vehicles ahead with lights on.
• There are few streetlights or other
lights on the road ahead.
●If any of the following conditions
are met, the headlights will
change to the low beams:
• Vehicle speed drops below
approximately 17 mph (27 km/h).
• The area ahead of the vehicle is not dark.
• There is a vehi cle ahead with
lights on.
• There are many streetlights or
other lights on the road ahead.
■Front camera detection
●In the following situations, the high
beams may not be automatically
changed to the low beams:
• When a vehicle cuts in front of your vehicle
• When another vehicle crosses in front of the vehicle • When vehicles ahead are repeat-
edly detected and then hidden
due to repeated curves, road
dividers or roadside trees
• When a vehicle ahead approaches from a far lane
• When a vehicle ahead is far away
• When a vehicle ahead has no lights
• When the lights of a vehicle ahead are dim
• When a vehicle ahead is reflecting
strong light, such as own head-
lights
• Situations in which the sensors
may not operate properly: P. 1 8 8
●The headlights may change to the
low beams if a vehicle ahead that
is using fog lights without its head-
lights turned on is detected.
●House lights, street lights, traffic
signals, and illuminated billboards
or signs may cause the high
beams to change to the low
beams, or the low beams to
remain on.
●The following may change the tim-
ing at which the headlights
change to the low beams:
• The brightness o f lights of vehi-
cles ahead
• The movement and direction of vehicles ahead
• The distance between the vehicle and a vehicle ahead
• When a vehicle ahead only has
lights illuminate d on one side
• When a vehicle ahead is a two-wheeled vehicle
• The condition of the road (gradi- ent, curve, condition of the road
surface, etc.)
• The number of passengers and amount of luggage
●The headlights may change
between the high beams and low
beams unexpectedly.
●Bicycles and other small vehicles
may not be detected.
●In the following situations, the sys-
tem may not be able to correctly
detect the brightness of the sur-
Page 188 of 468
1884-5. Using the driving support systems
■Situations in which the sensors
may not operate properly
●When the height or inclination of
the vehicle has been changed due
to modifications
●When the windshield is dirty,
fogged up, cracked or damaged
●When the ambient temperature is
high or low
●When mud, water, snow, dead
insects, foreign matter, etc., is
attached to the front of the sensor
●When in inclement weather such
as heavy rain, fog, snow, or a
sandstorm
●When water, snow, dust, etc. is
thrown up in front of the vehicle, or
when driving through mist or
smoke
●When the headlig hts are not illu-
minated while driving in the dark,
such as at night o r when in a tun-
nel
●When the lens of a headlight is
dirty and illumination is weak
●When the headlights are mis-
aligned
●When a headlight is malfunction-
ing
●When the headlights of another
vehicle, sunlight, or reflected light
shines directly into the front cam-
era
●When the brightness of the sur-
rounding area changes suddenly
●When driving near a TV tower,
broadcasting station, electric
power plant, radar equipped vehi-
cles, etc., or other location where
strong radio waves or electrical
noise may be present
●When a wiper blade is blocking
the front camera
●When in a location or near objects
which strongly reflect radio waves,
such as the following:
• Tunnels
• Truss bridges
• Gravel roads
• Rutted, snow-covered roads
• Walls
• Large trucks
• Manhole covers
• Guardrail
• Metal plates
●When near a step or protrusion
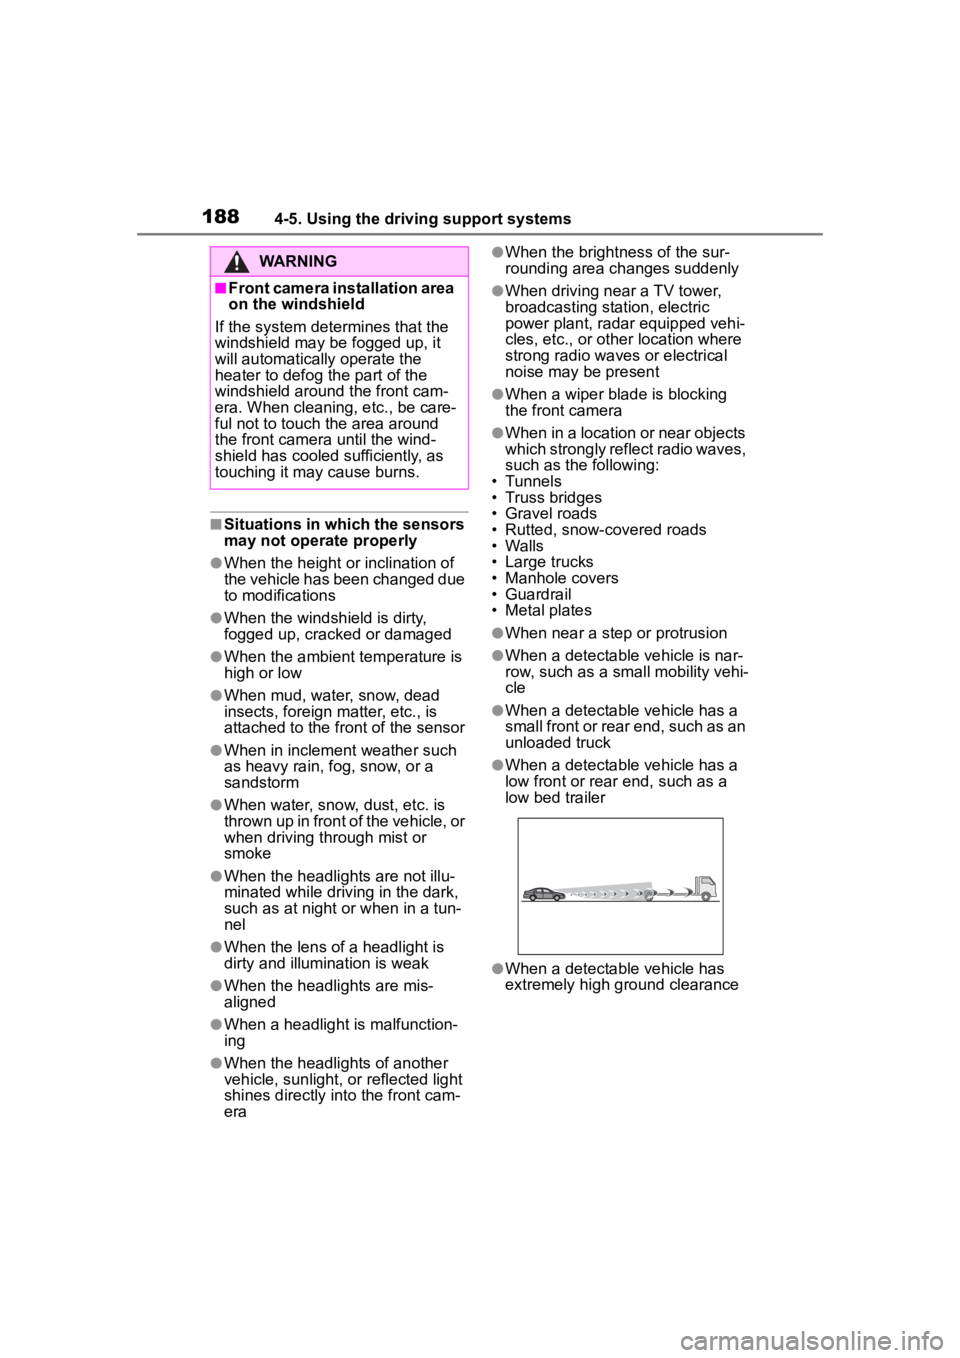
●When a detectable vehicle is nar-
row, such as a small mobility vehi-
cle
●When a detectable vehicle has a
small front or rear end, such as an
unloaded truck
●When a detectable vehicle has a
low front or rear end, such as a
low bed trailer
●When a detectable vehicle has
extremely high ground clearance
WARNING
■Front camera installation area
on the windshield
If the system determines that the
windshield may be fogged up, it
will automatically operate the
heater to defog the part of the
windshield around the front cam-
era. When cleaning, etc., be care-
ful not to touch the area around
the front camera until the wind-
shield has cooled sufficiently, as
touching it may cause burns.
Page 257 of 468
257
5
5
Interior features
Interior features
.5-1. Using the air conditioning system and defogger
Manual air conditioning sys- tem ............................ 258
Automatic air conditioning system ....................... 263
Heated steering wheel/seat heaters ...................... 269
5-2. Using the interior lights Interior lights list .......... 271
5-3. Using the storage features List of storage features.................................. 273
5-4. Other interior features Other interior features . 277
Page 292 of 468
2926-1. Maintenance and care
Remove dirt using a
water-dampened soft cloth or
synthetic chamois.
Wipe the surface with a dry,
soft cloth to remove any
remaining moisture.
■Cleaning the areas with
satin-finish metal accents
The metal areas use a layer of real
metal for the surface. It is necessary
to clean them regularly. If dirty areas
are left uncleaned for long periods
of time, they may be difficult to
clean.
Remove dirt and dust using a
vacuum cleaner.
Wipe off any excess dirt and
dust with a soft cloth damp-
ened with diluted detergent.
Use a diluted water solution of
approximately 5% neutral wool
NOTICE
• Seats: Alkaline or acidic solu-
tions, such as thinner, benzene,
and alcohol
• Steering wheel: Organic sub- stances, such as thinner, and
cleaner that contains alcohol
●Do not use polish wax or polish
cleaner. The instrument panel’s
or other interior part’s painted
surface may be damaged.
■Preventing damage to leather
surfaces
Observe the following precautions
to avoid damage to and deteriora-
tion of leather surfaces:
●Remove any dust or dirt from
leather surfaces immediately.
●Do not expose the vehicle to
direct sunlight for extended peri-
ods of time. Park the vehicle in
the shade, especially during
summer.
●Do not place items made of
vinyl, plastic, or containing wax
on the upholstery, as they may
stick to the leather surface if the
vehicle interior heats up signifi-
cantly.
■Water on the floor
Do not wash the vehicle floor with
water.
Vehicle systems such as the
audio system may be damaged if
water comes into contact with
electrical components such as the
audio system above or under the
floor of the vehicle. Water may
also cause the body to rust.
■When cleaning the inside of
the windshield
Do not allow glass cleaner to con-
tact the lens. Also, do not touch
the lens. (
P.185)
■Cleaning the inside of the rear
window
●Do not use glass cleaner to
clean the rear window, as this
may cause damage to the rear
window defogger heater wires
or antenna. Use a cloth damp-
ened with lukewarm water to
gently wipe the window clean.
Wipe the window in strokes run-
ning parallel to the heater wires
or antenna.
●Be careful not to scratch or
damage the heater wires or
antenna.
Cleaning the areas with
satin-finish metal accents
Cleaning the leather areas
Page 341 of 468
3416-3. Do-it-yourself maintenance
6
Maintenance and care
■LED light bulbs
The lights other th an the front turn
signal lights/parking lights (vehicles
without side turn sig nal lights), front
side marker lights (bulb type), rear
turn signal lights, rear side marker
lights (bulb type) and back-up lights
consist of a number of LEDs. If any
of the LEDs burn out, take your
vehicle to your Toyota dealer to
have the light replaced.
■Condensation build-up on the
inside of the lens
In certain situatio ns, such as when
driving in the rain or when washing
the vehicle, condensation may form
on the inner side of the headlight
lens and other li ghts. As each light
has a ventilation hole, moist air may
enter. If the ambient temperature is
low, condensation may form tempo-
rarily, but it will di ssipate as the
inside of the light i s warmed up. As
the condensation is due to a phe-
nomenon similar to windows fogging
in the rain, it doe s not indicate a
malfunction.
Contact your Toyota dealer for more
information in the following situa-
tions:
●Large drops of water have built up
on the inside of the lens.
●Water has built up inside the
headlight.
■When replacing light bulbs
P. 3 3 8
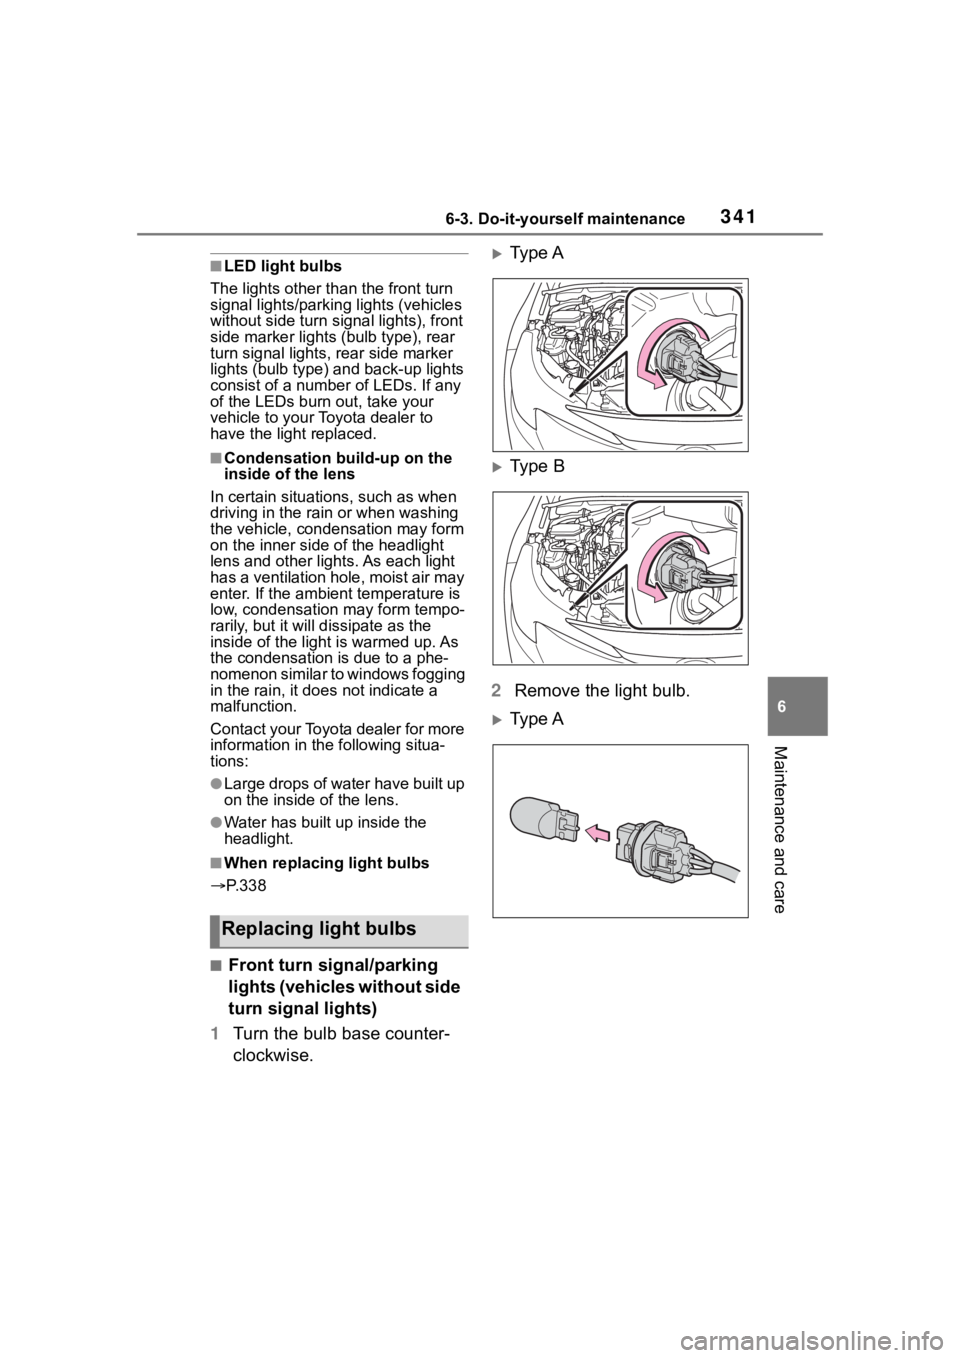
■Front turn signal/parking
lights (vehicles without side
turn signal lights)
1 Turn the bulb base counter-
clockwise.
Type A
Type B
2 Remove the light bulb.
Type A
Replacing light bulbs
Page 368 of 468

3687-2. Steps to take in an emergency
●LTA (Lane Tracing Assist)
●AHB (Automatic High Beam)
●Dynamic radar cruise control
●RSA (Road Sign Assist) (if
equipped)
Follow the followi ng correction
methods.
• Using the windshield wipers, remove the dirt o r foreign matter
from the windshield.
• Using the air conditioning system, defog the windshield.
• Close the hood, r emove any stick-
ers, etc. to clear the obstruction in
front of the front camera.
■If “System Stopped Front Cam-
era Out of Temperature Range
Wait until Normal Temperature”
is displayed
Indicates one of the following sys-
tems is disabled.
●PCS (Pre-Collision system)
●LDA (Lane Departure Alert)
●LTA (Lane Tracing Assist)
●AHB (Automatic High Beam)
●Dynamic radar cruise control
●RSA (Road Sign Assist) (if
equipped)
Follow the followi ng correction
methods.
• If the front camera is hot, such as after the vehicle is parked in the
sun, use the air conditioning sys-
tem to decrease the temperature
around the front camera
• If a sunshade was used when the vehicle was parked, depending on
its type, the sunlight reflected from
the surface of the sunshade may
cause the temperature of the front
camera to become excessively
high
• If the front camera is cold, such
after the vehicle is parked in an
extremely cold environment, use the air conditioning system to
increase the temperature around
the front camera
■If “System Stopped Front Radar
Sensor Blocked Clean Radar
Sensor” is displayed
Indicates one of the following sys-
tems is disabled.
●PCS (Pre-Collision system)
●LDA (Lane Departure Alert)
●LTA (Lane Tracing Assist)
●AHB (Automatic High Beam)
●Dynamic radar cruise control
Follow the following correction
methods.
• Check if there is any foreign mat- ter attached to the radar sensor or
radar sensor cover and clean
them if necessary ( P.186)
• This message may be displayed when driving in an open area with
few nearby vehicles or structures,
such as a desert, grasslands, sub-
urbs, etc.
The message may be cleared by
driving the vehicle in an area with
structures, vehicles, etc., nearby.
■If “System Stopped Front Radar
Sensor Out of Temperature
Range Wait until Normal Tem-
perature” is displayed
Indicates one of the following sys-
tems is disabled.
●PCS (Pre-Collision system)
●LDA (Lane Departure Alert)
●LTA (Lane Tracing Assist)
●AHB (Automatic High Beam)
●Dynamic radar cruise control
Follow the following correction
methods.
The temperature of the radar sensor
is outside of the operating range.
Wait for the temperature to become
appropriate.
Page 440 of 468

440Alphabetical Index
Parking brake ....................... 168
Warning light ........................ 356
Brake assist ............................ 248
Break-in tips ........ ................... 144
Brightness control Instrument panel light control88, 91
Meter light control ................... 90
BSM (Blind Spot Monitor) ...... 232
C
Care Exterior ................................. 288
Interior .................................. 291
Seat belts ............................. 291
Wheels and wheel ornaments........................................... 288
Cargo capacity ....................... 152
Chains ..................................... 254
Child restraint system Fixed with a LATCH system ... 64
Fixed with a seat belt ............. 60
Front passenger occupant clas-sification system ................... 41
Points to remember ................ 48
Riding with children ................ 47
Types of child restraint system installation met hod ............... 50
Using an anchor bracket ........ 68
Child safety Airbag precautions ................. 36
Battery precautions ...... 309, 386
Child restraint system............. 50
Heated steering wheel and seat
heater precautions ............. 269
How your child should wear the seat belt................................ 28
Moon roof precau tions ......... 138
Power window lock switch.... 136
Power window precautions .. 135
Rear door child-protectors.... 116 Seat belt extender precautions
.............................................28
Seat belt precautions..............47
Trunk precautions ................. 117
Child-protectors...................... 116
Cleaning Exterior .................................288
Interior ..................................291
Seat belts .............................291
Wheels and wheel ornaments...........................................288
Clock ................... .....86, 88, 89, 91
Coat hooks ..............................285
Condenser ............. ..................307
Console box ............................275
Consumption screen ..............102
Continuously variable transmis- sion ................................160, 162If th e s hif t le ver ca n no t b e s hif te d from P .........................161, 164
M mode ................................165
Paddle shift switches ....164, 165
Cooling system .......................306 Engine overheating ..............387
Cruise control .........................227
Cup holders.............................274
Current fuel consumption..93, 98
Curtain shield airbags ..............31
Customizable featu res ...........412
D
Daytime running light system173
Defogger
Outside rear view mirrors ...260, 265
Rear window.................260, 265
Windshield ....................259, 264
Dimensions .............................392
Dinghy towing .........................153
Display Cruise control .......................228
Dynamic radar cruise control 222