display TOYOTA COROLLA CROSS 2022 Owners Manual
[x] Cancel search | Manufacturer: TOYOTA, Model Year: 2022, Model line: COROLLA CROSS, Model: TOYOTA COROLLA CROSS 2022Pages: 612, PDF Size: 17.18 MB
Page 1 of 612
1
2
3
4
5
6
COROLLA CROSS_MTMUS_U
7
8
9
10
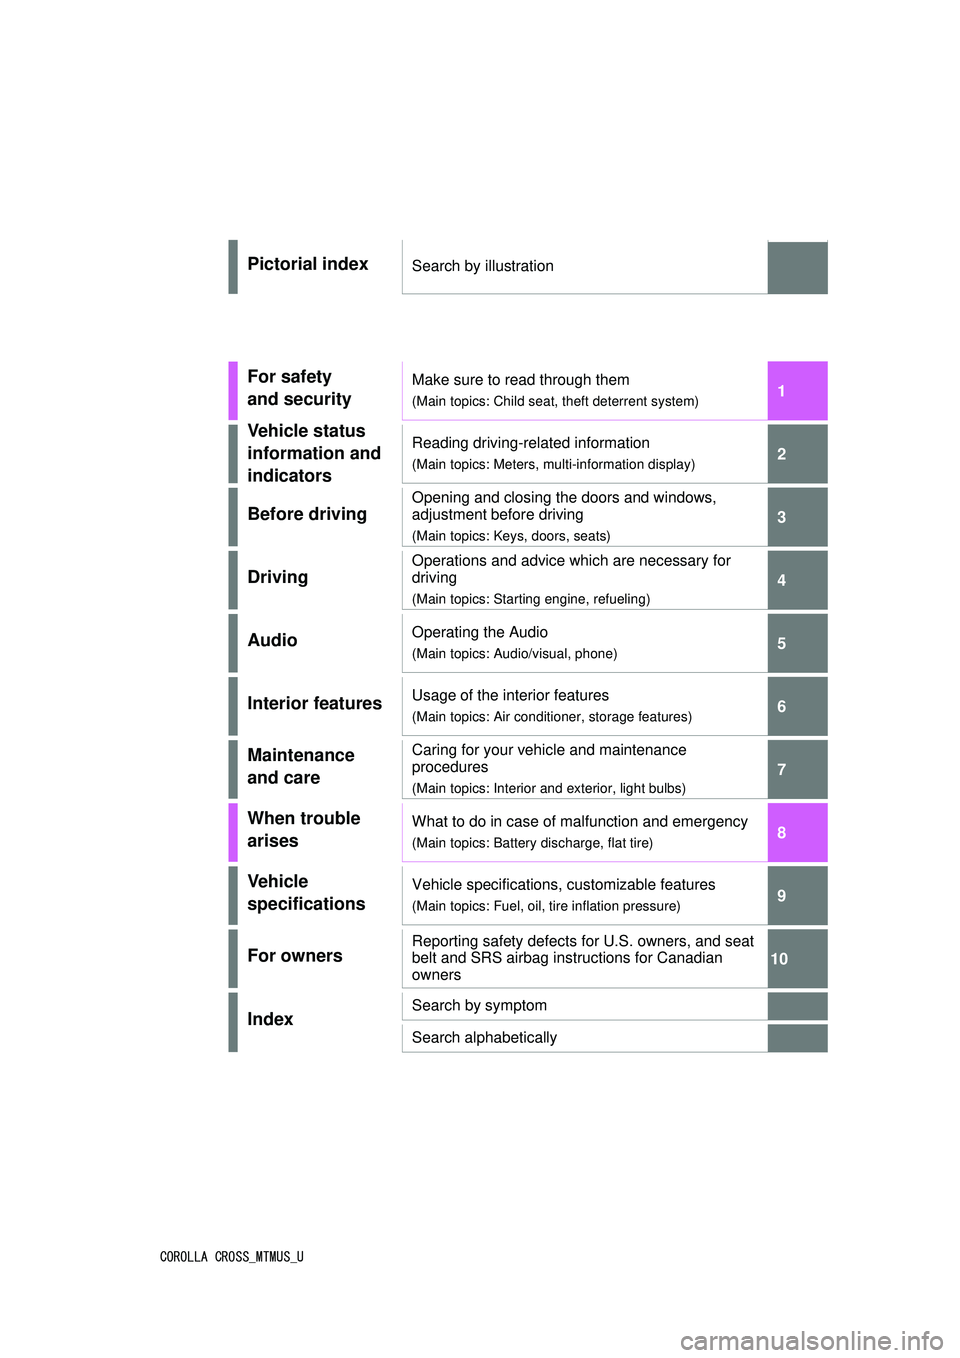
Pictorial indexSearch by illustration
For safety
and securityMake sure to read through them
(Main topics: Child seat, theft deterrent system)
Vehicle status
information and
indicatorsReading driving-related information
(Main topics: Meters, multi-information display)
Before driving
Opening and closing the doors and windows,
adjustment before driving
(Main topics: Keys, doors, seats)
Driving
Operations and advice which are necessary for
driving
(Main topics: Starting engine, refueling)
AudioOperating the Audio
(Main topics: Audio/visual, phone)
Interior featuresUsage of the interior features
(Main topics: Air conditioner, storage features)
Maintenance
and careCaring for your vehicle and maintenance
procedures
(Main topics: Interior and exterior, light bulbs)
When trouble
arisesWhat to do in case of malfunction and emergency
(Main topics: Battery discharge, flat tire)
Vehicle
specificationsVehicle specifications, customizable features
(Main topics: Fuel, oil, tire inflation pressure)
For ownersReporting safety defects for U.S. owners, and seat
belt and SRS airbag instructions for Canadian
owners
IndexSearch by symptom
Search alphabetically
Page 2 of 612
2TABLE OF CONTENTS
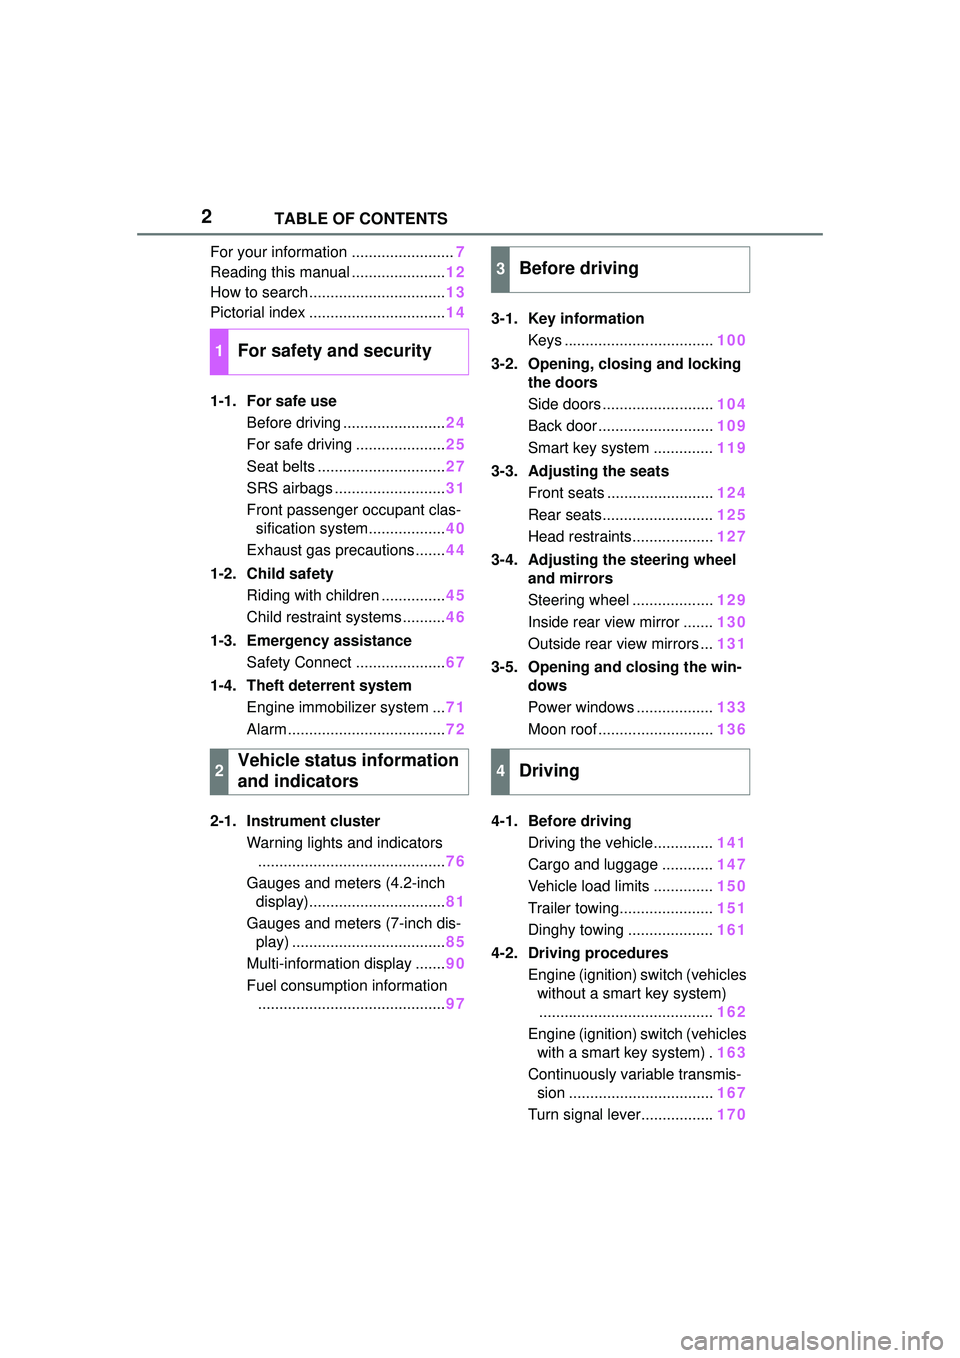
For your information ........................7
Reading this manual ...................... 12
How to search ................................ 13
Pictorial index ................................ 14
1-1. For safe use Before driving ........................ 24
For safe driving ..................... 25
Seat belts .............................. 27
SRS airbags .......................... 31
Front passenger occupant clas- sification system.................. 40
Exhaust gas precautions....... 44
1-2. Child safety Riding with children ............... 45
Child restraint systems .......... 46
1-3. Emergency assistance Safety Connect ..................... 67
1-4. Theft deterrent system Engine immobilizer system ... 71
Alarm ..................................... 72
2-1. Instrument cluster Warning lights and indicators............................................ 76
Gauges and meters (4.2-inch display)................................ 81
Gauges and meters (7-inch dis- play) .................................... 85
Multi-information display ....... 90
Fuel consumption information ............................................ 973-1. Key information
Keys ................................... 100
3-2. Opening, closing and locking
th e doors
Side doors .......................... 104
Back door ........................... 109
Smart key system .............. 119
3-3. Adjusting the seats Front seats ......................... 124
Rear seats.......................... 125
Head restraints................... 127
3-4. Adjust ing the steering wheel
and mirrors
Ste ering wheel ................... 129
Inside rear view mirror ....... 130
Outside rear view mirrors ... 131
3-5. Opening and closing the win- dows
Power windows .................. 133
Moon roof ........................... 136
4-1. Before driving Driving the vehicle.............. 141
Cargo and luggage ............ 147
Vehicle load limits .............. 150
Trailer towing...................... 151
Dinghy towing .................... 161
4-2. Driving procedures Engine (ignition) switch (vehicles without a smart key system)......................................... 162
Engine (ignition) switch (vehicles with a smart key system) . 163
Continuously variable transmis- sion .
................................. 167
Turn signal lever................. 170
1For safety and security
2Vehicle status information
and indicators
3Before driving
4Driving
Page 3 of 612
3TABLE OF CONTENTS
1
2
3
4
5
6
7
8
9
10
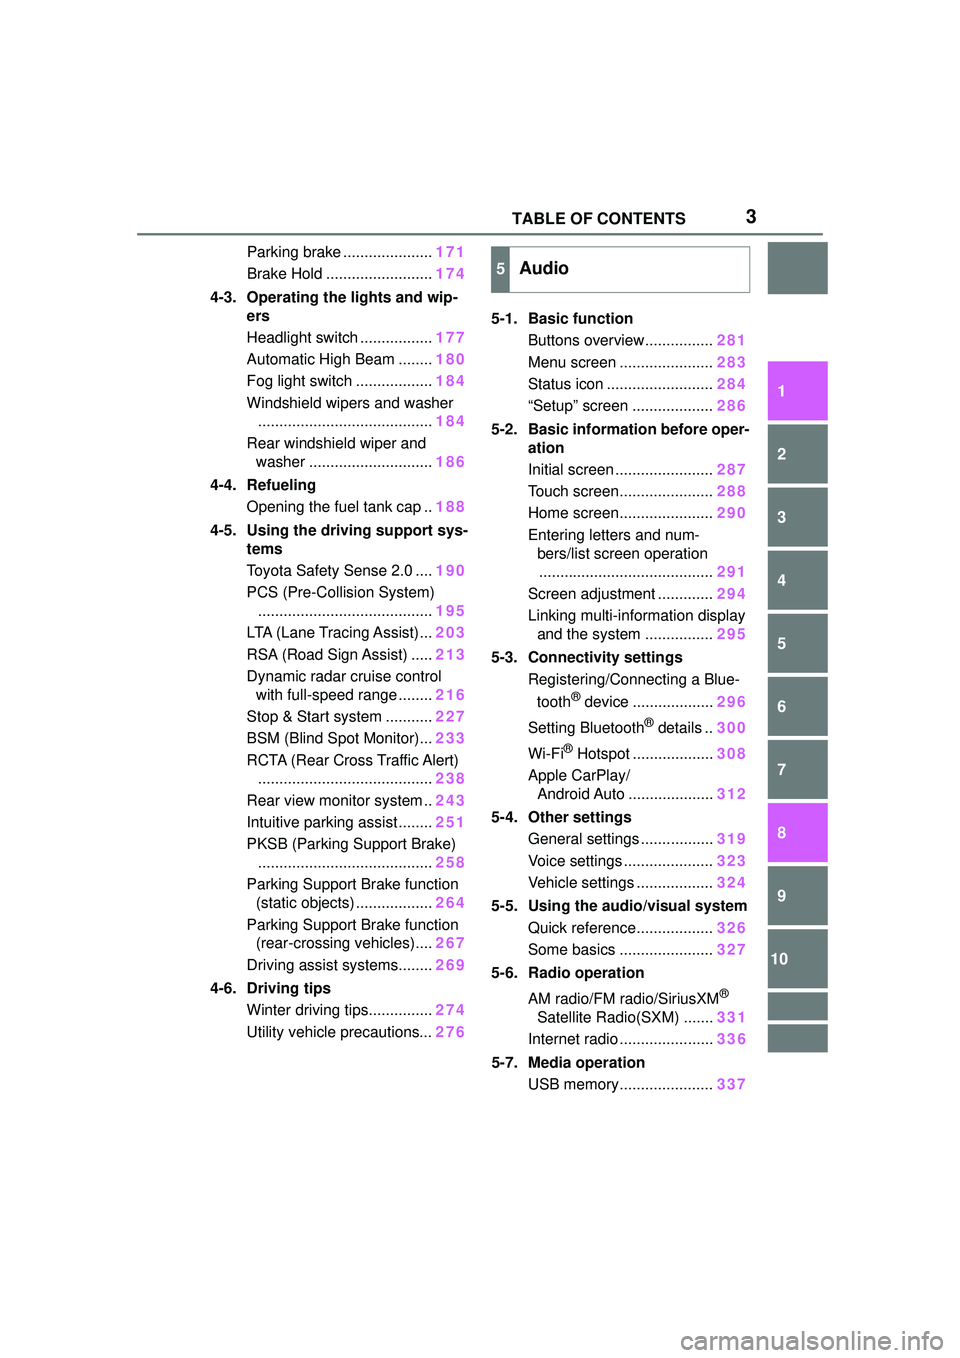
Parking brake .....................171
Brake Hold ......................... 174
4-3. Operating the lights and wip- ers
Headlight switch ................. 177
Automatic High Beam ........ 180
Fog light switch .................. 184
Windshield wipers and washer ......................................... 184
Rear windshield wiper and washer ............................. 186
4-4. Refueling Opening the fuel tank cap .. 188
4-5. Using the driving support sys- tems
Toyota Safety Sense 2.0 .... 190
PCS (Pre-Collision System) ......................................... 195
LTA (Lane Tracing Assist)... 203
RSA (Road Sign Assist) ..... 213
Dynamic radar cruise control with full-speed range ........ 216
Stop & Start system ........... 227
BSM (Blind Spot Monitor)... 233
RCTA (Rear Cross Traffic Alert) ......................................... 238
Rear view monitor system .. 243
Intuitive parking assist ........ 251
PKSB (Parking Support Brake) ......................................... 258
Parking Support Brake function (static objects) .................. 264
Parking Support Brake function (rear-crossing vehicles).... 267
Driving assist systems........ 269
4-6. Driving tips Winter driving tips............... 274
Utility vehicle precautions... 2765-1. Basic function
Buttons overview................ 281
Menu screen ...................... 283
Status icon ......................... 284
“Setup” screen ................... 286
5-2. Basic information before oper- ation
Initial screen ....................... 287
Touch screen...................... 288
Home screen...................... 290
Entering letters and num- bers/list screen operation......................................... 291
Screen adjustment ............. 294
Linking multi-information display and the system ................ 295
5-3. Connectivity settings Registering/Connecting a Blue-
tooth
® device ................... 296
Setting Bluetooth
® details .. 300
Wi-Fi
® Hotspot ................... 308
Apple CarPlay/ Android Auto .................... 312
5-4. Other settings General settings ................. 319
Voice settings ..................... 323
Vehicle settings .................. 324
5-5. Using the audio/visual system Quick reference.................. 326
Some basics ...................... 327
5-6. Radio operation
AM radio/FM radio/SiriusXM
®
Satellite Radio(SXM) ....... 331
Internet radio ...................... 336
5-7. Media operation USB memory...................... 337
5Audio
Page 16 of 612
16Pictorial index
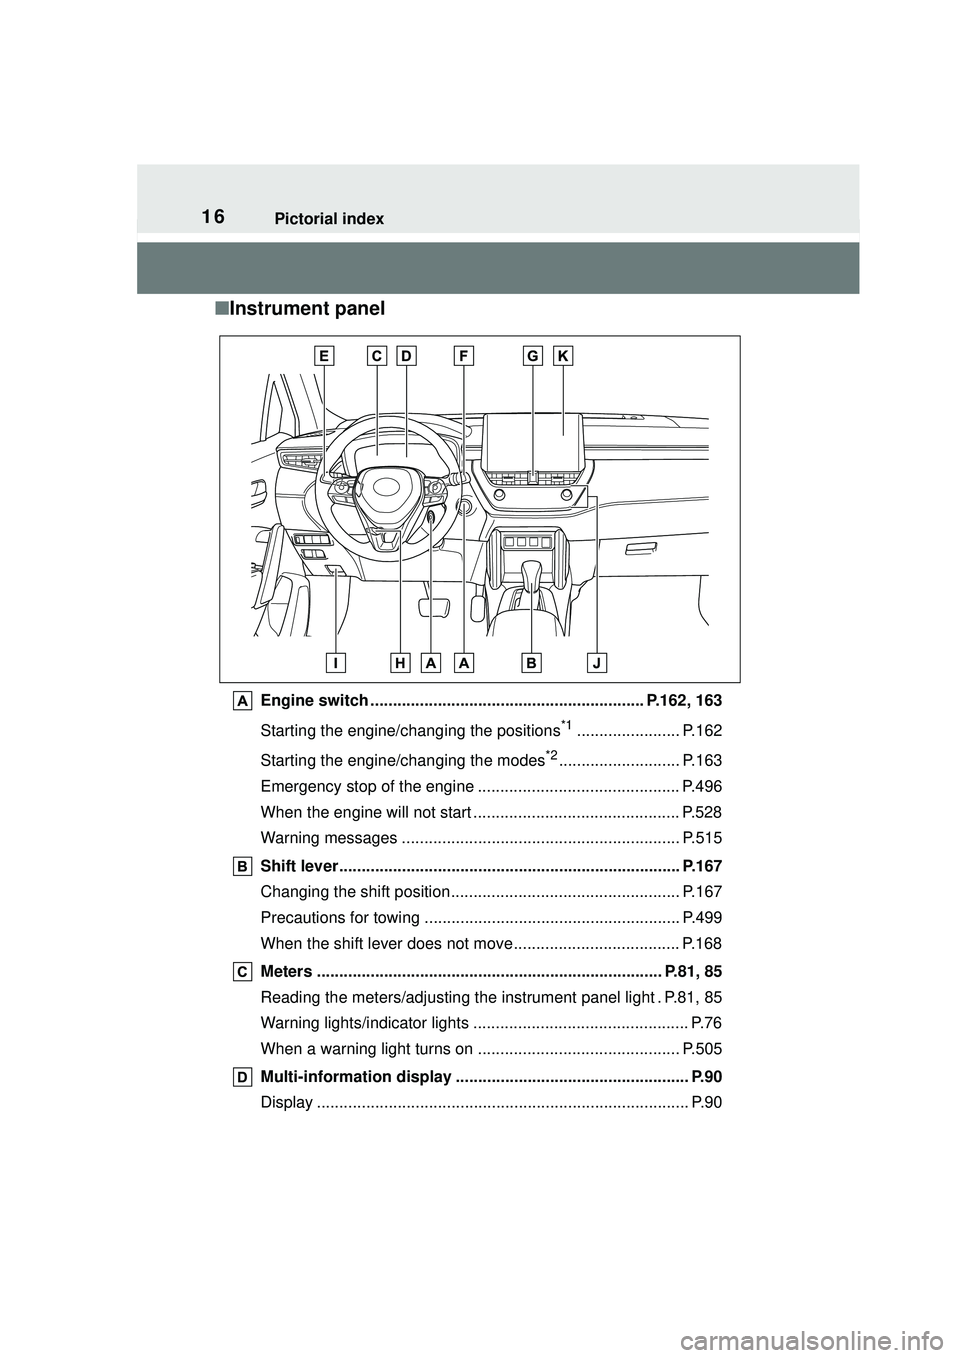
■Instrument panel
Engine switch ............................................................. P.162, 163
Starting the engine/changing the positions
*1....................... P.162
Starting the engine/changing the modes
*2........................... P.163
Emergency stop of the engine ............................................. P.496
When the engine will not start .............................................. P.528
Warning messages .............................................................. P.515
Shift lever............................................................................ P.167
Changing the shift position................................................... P.167
Precautions for towing . ........................................................ P.499
When the shift lever does not move..................................... P.168
Meters ............................................................................. P.81, 85
Reading the meters/adjusting the instrument panel light . P.81, 85
Warning lights/indicator lights ................................................ P.76
When a warning light turns on ............................................. P.505
Multi-information display ........... ......................................... P.90
Display ................................................................................... P.90
Page 17 of 612
17Pictorial index
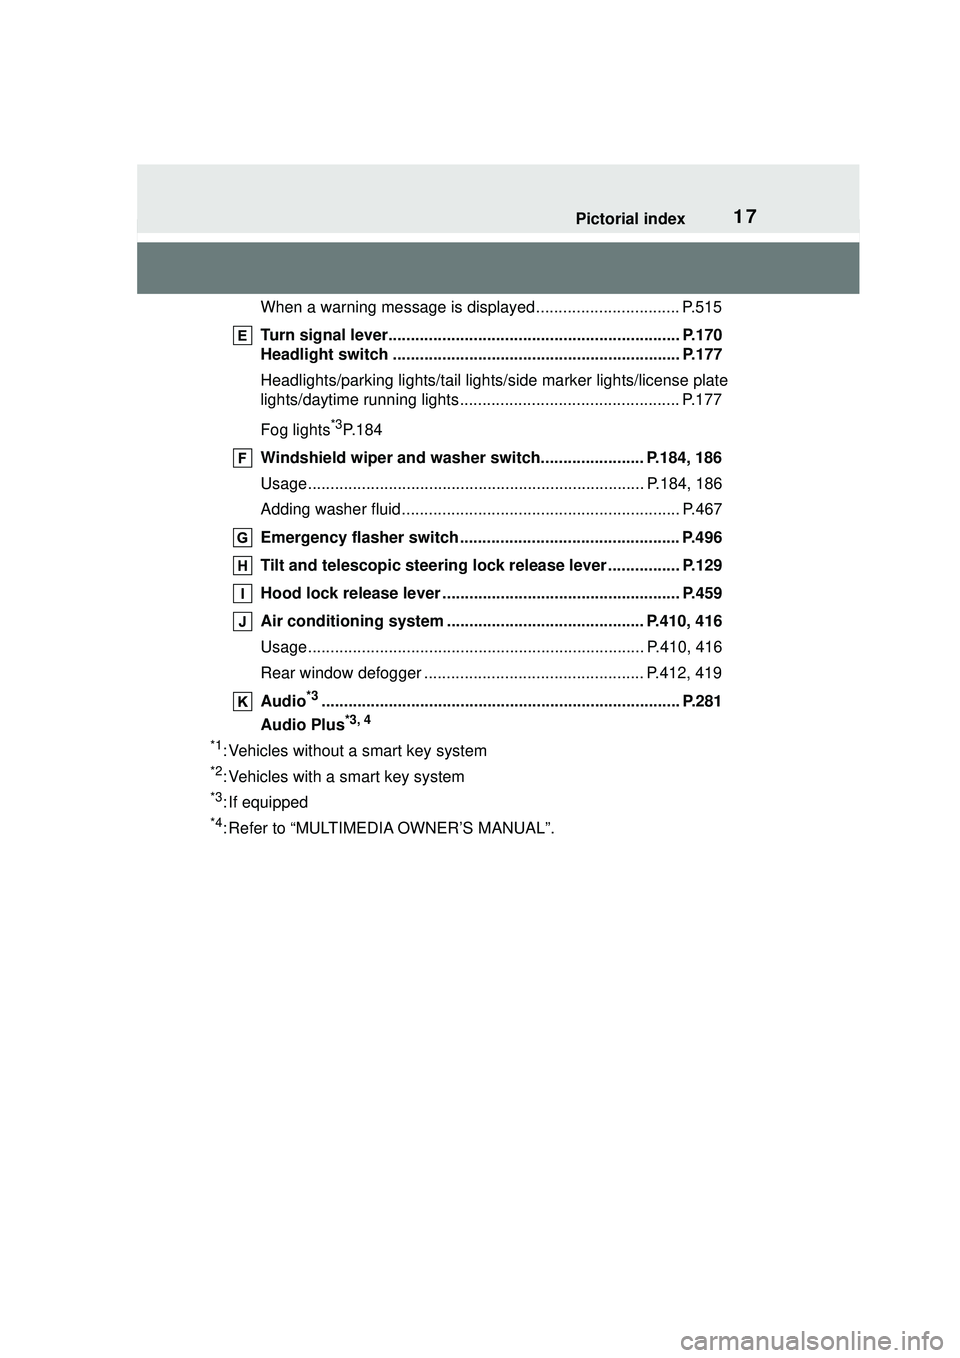
When a warning message is displayed ................................ P.515
Turn signal lever................................................................. P.170
Headlight switch ................................................................ P.177
Headlights/parking lights/tail lights/side marker lights/license plate
lights/daytime running lights ................................................. P.177
Fog lights
*3P. 1 8 4
Windshield wiper and washer switch....................... P.184, 186
Usage........................................................................... P.184, 186
Adding washer fluid .............................................................. P.467
Emergency flasher switch ................................................. P.496
Tilt and telescopic steering lo ck release lever ................ P.129
Hood lock releas e lever .............................................. ....... P.459
Air conditioning system ................................. ........... P.410, 416
Usage........................................................................... P.410, 416
Rear window defogger ................................................. P.412, 419
Audio
*3................................................................................ P.281
Audio Plus
*3, 4
*1
: Vehicles without a smart key system
*2: Vehicles with a smart key system
*3: If equipped
*4: Refer to “MULTIMEDIA OWNER’S MANUAL”.
Page 50 of 612
501-2. Child safety
■Child restraint system com-
patibility for each seating
position
Compatibility of each seating
position with child restraint sys-
tems ( P.52) displays the type
of child restraint systems that
can be used and possible seat-
ing positions for installation
using symbols.
Also, the recommended child
restraint system that is suitable
for your child can be selected.
Otherwise, check [Recom-
mended child restraint systems
and Compatibility table] for rec-
ommended child restraint sys-
tems. ( P.54)
WARNING
●Do not allow the child to lean
his/her head or any part of
his/her body against the door or
the area of the seat, front or rear
pillars, or roof side rails from
which the SRS side airbags or
SRS curtain shield airbags
deploy even if the child is
seated in the child restraint sys-
tem. It is dangerous if the SRS
side and curtain shield airbags
inflate, and the impact could
cause death or serious injury to
the child.
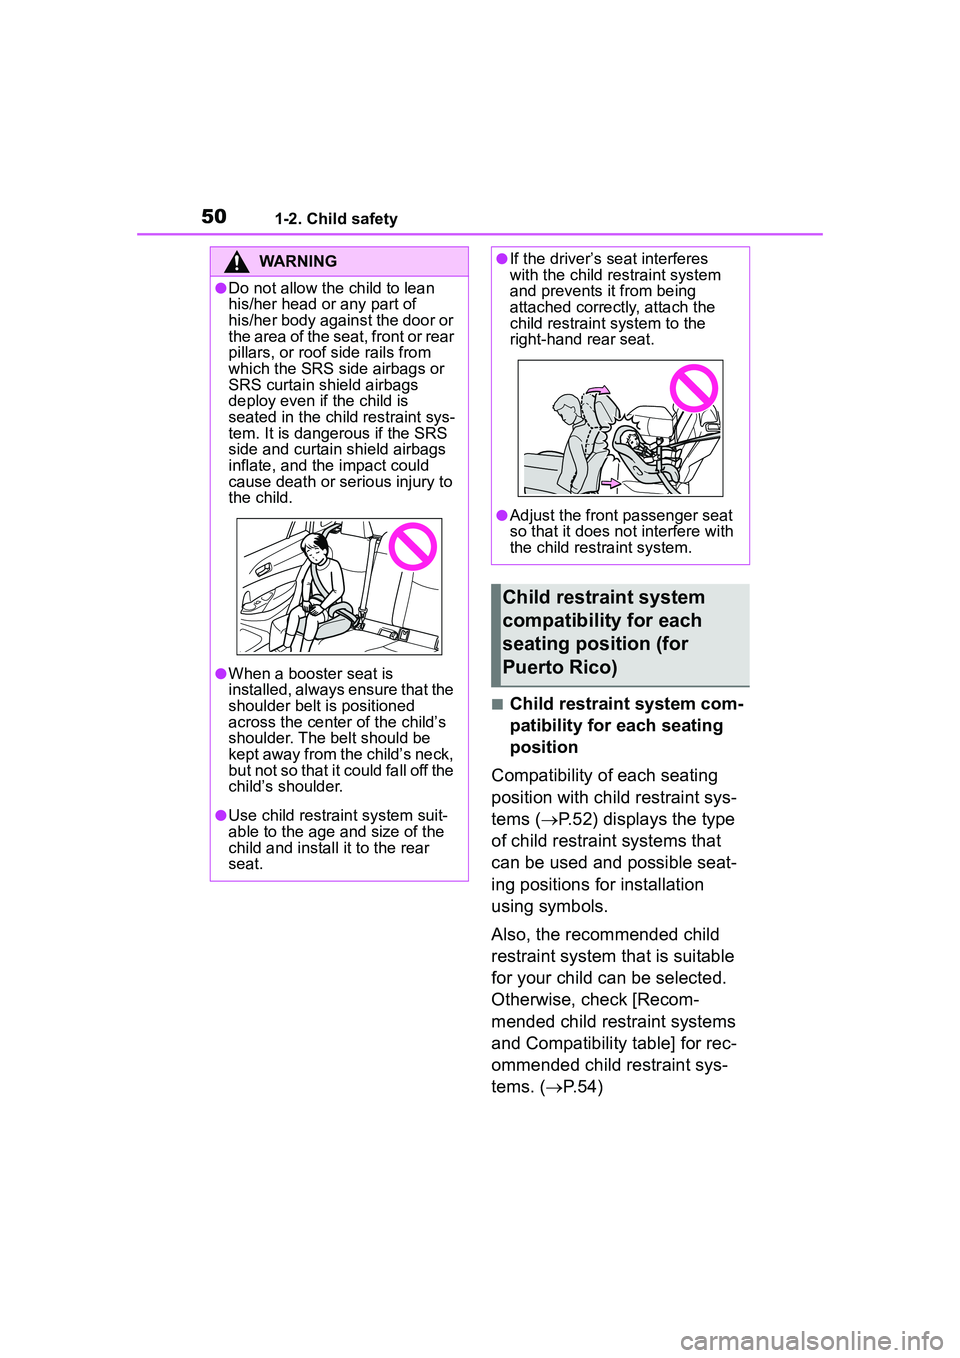
●When a booster seat is
installed, always ensure that the
shoulder belt is positioned
across the center of the child’s
shoulder. The belt should be
kept away from the child’s neck,
but not so that it could fall off the
child’s shoulder.
●Use child restraint system suit-
able to the age and size of the
child and install it to the rear
seat.
●If the driver’s seat interferes
with the child restraint system
and prevents it from being
attached correctly, attach the
child restraint system to the
right-hand rear seat.
●Adjust the front passenger seat
so that it does not interfere with
the child restraint system.
Child restraint system
compatibility for each
seating position (for
Puerto Rico)
Page 51 of 612
511-2. Child safety
1
For safety and security
Check the selected child
restraint system together with
the following [Before confirming
the compatibility of each seating
position with child restraint sys-
tems].
■Before confirming the com-
patibility of each seating
position with child restraint
systems
1 Checking the child restraint
system standards.
Use a child restraint system
that conforms to UN(ECE)
R44
*1 or UN(ECE) R129*1, 2.
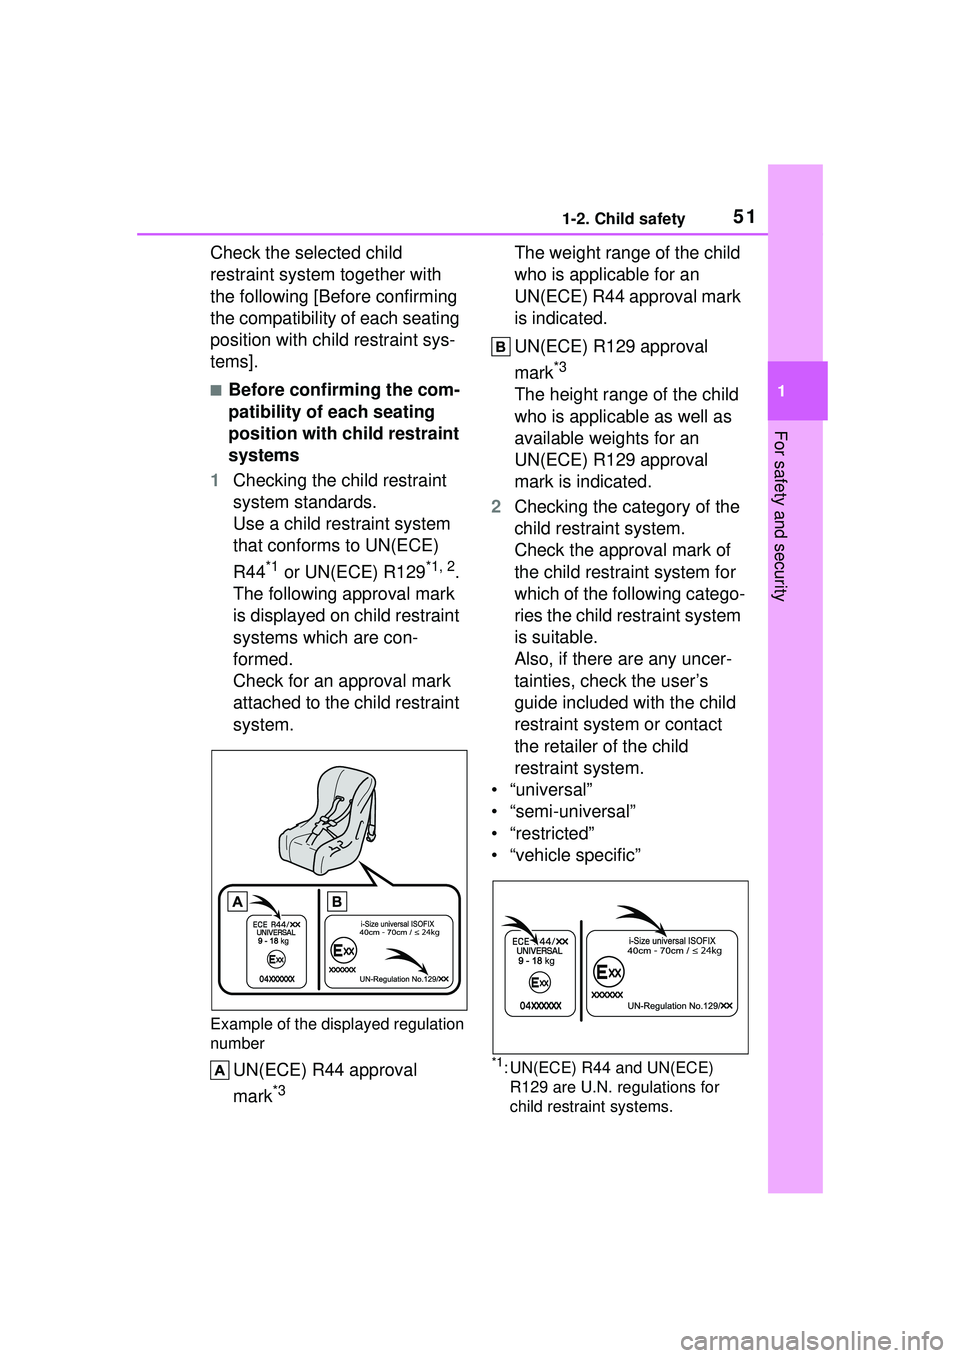
The following approval mark
is displayed on child restraint
systems which are con-
formed.
Check for an approval mark
attached to the child restraint
system.
Example of the displayed regulation
number
UN(ECE) R44 approval
mark
*3
The weight range of the child
who is applicable for an
UN(ECE) R44 approval mark
is indicated.
UN(ECE) R129 approval
mark
*3
The height range of the child
who is applicable as well as
available weights for an
UN(ECE) R129 approval
mark is indicated.
2 Checking the category of the
child restraint system.
Check the approval mark of
the child restraint system for
which of the following catego-
ries the child restraint system
is suitable.
Also, if there are any uncer-
tainties, check the user’s
guide included with the child
restraint system or contact
the retailer of the child
restraint system.
• “universal”
• “semi-universal”
• “restricted”
• “vehicle specific”
*1: UN(ECE) R44 and UN(ECE) R129 are U.N. regulations for
child restraint systems.
Page 52 of 612
521-2. Child safety
*2: The child restraint systems men-tioned in the table may not be
available outside of the EU area.
*3: The displayed mark may differ depending on the product.
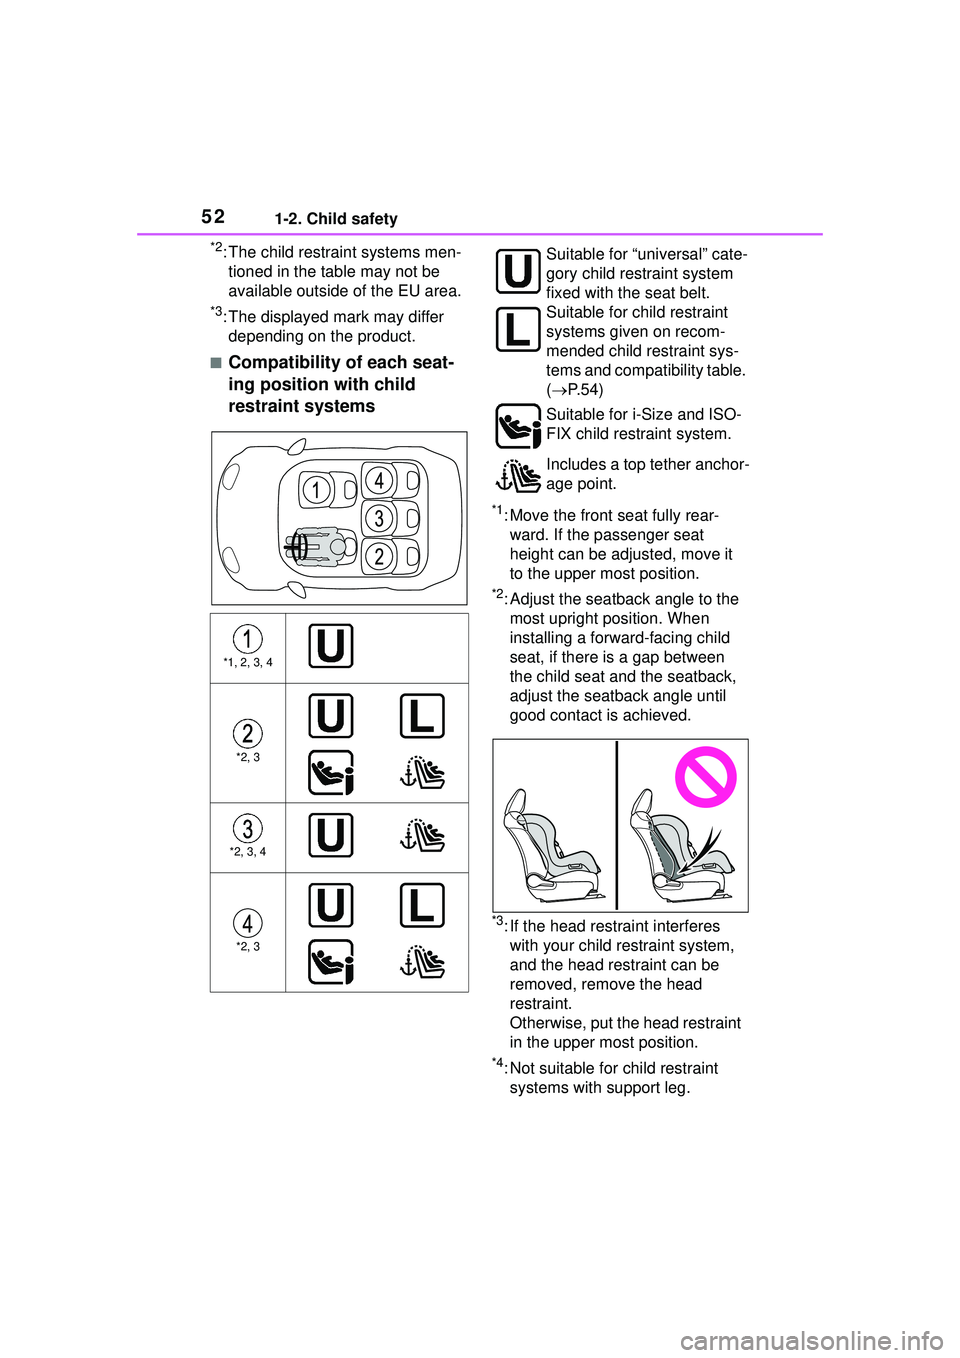
■Compatibility of each seat-
ing position with child
restraint systems
*1: Move the front seat fully rear-ward. If the passenger seat
height can be adjusted, move it
to the upper most position.
*2: Adjust the seatback angle to the most upright position. When
installing a forw ard-facing child
seat, if there is a gap between
the child seat and the seatback,
adjust the seatback angle until
good contact is achieved.
*3: If the head restraint interferes with your child restraint system,
and the head restraint can be
removed, remove the head
restraint.
Otherwise, put the head restraint
in the upper most position.
*4: Not suitable fo r child restraint
systems with support leg.
*1, 2, 3, 4
*2, 3
*2, 3, 4
*2, 3
Suitable for “universal” cate-
gory child restraint system
fixed with the seat belt.
Suitable for child restraint
systems given on recom-
mended child restraint sys-
tems and compatibility table.
( P. 5 4 )
Suitable for i-Size and ISO-
FIX child restraint system.
Includes a top tether anchor-
age point.
Page 59 of 612
591-2. Child safety
1
For safety and security
■Child restraint LATCH
anchors
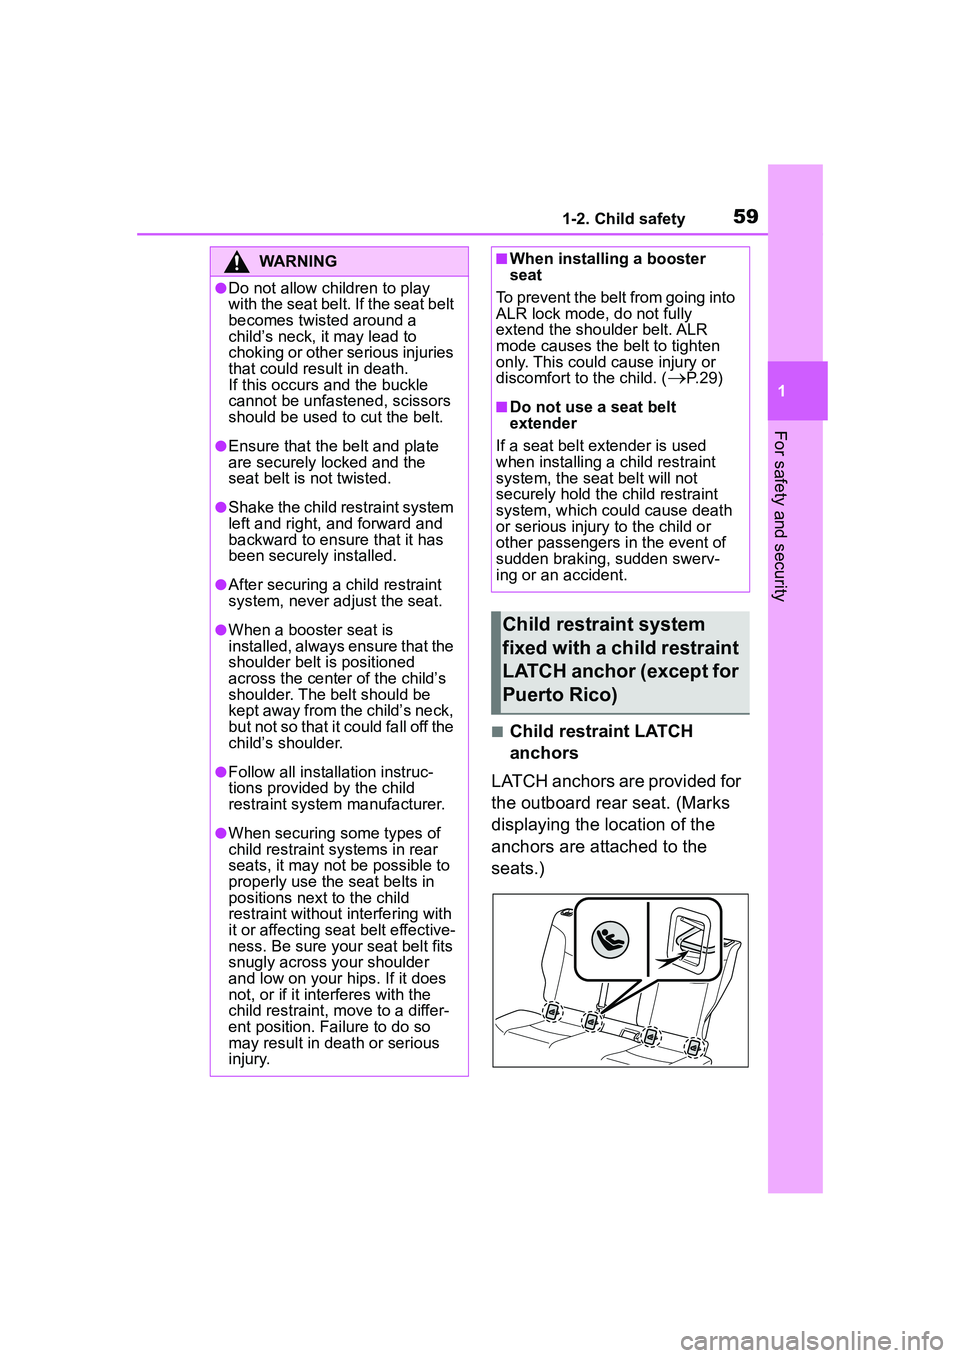
LATCH anchors are provided for
the outboard rear seat. (Marks
displaying the location of the
anchors are attached to the
seats.)
WARNING
●Do not allow children to play
with the seat belt. If the seat belt
becomes twisted around a
child’s neck, it may lead to
choking or other serious injuries
that could result in death.
If this occurs and the buckle
cannot be unfastened, scissors
should be used to cut the belt.
●Ensure that the belt and plate
are securely locked and the
seat belt is not twisted.
●Shake the child restraint system
left and right, and forward and
backward to ensure that it has
been securely installed.
●After securing a child restraint
system, never adjust the seat.
●When a booster seat is
installed, always ensure that the
shoulder belt is positioned
across the center of the child’s
shoulder. The belt should be
kept away from the child’s neck,
but not so that it could fall off the
child’s shoulder.
●Follow all installation instruc-
tions provided by the child
restraint system manufacturer.
●When securing some types of
child restraint systems in rear
seats, it may not be possible to
properly use the seat belts in
positions next to the child
restraint without interfering with
it or affecting seat belt effective-
ness. Be sure your seat belt fits
snugly across your shoulder
and low on your hips. If it does
not, or if it interferes with the
child restraint, move to a differ-
ent position. Failure to do so
may result in death or serious
injury.
■When installing a booster
seat
To prevent the belt from going into
ALR lock mode, do not fully
extend the shoulder belt. ALR
mode causes the belt to tighten
only. This could cause injury or
discomfort to the child. (
P. 2 9 )
■Do not use a seat belt
extender
If a seat belt extender is used
when installing a child restraint
system, the seat belt will not
securely hold the child restraint
system, which could cause death
or serious injury to the child or
other passengers in the event of
sudden braking, sudden swerv-
ing or an accident.
Child restraint system
fixed with a child restraint
LATCH anchor (except for
Puerto Rico)
Page 61 of 612
611-2. Child safety
1
For safety and security
However, the inboard LATCH
anchors of the outboard seats,
which are 16.1 in. (410 mm)
apart, can be used if the child
restraint system manufacturer’s
instructions permit use of those
anchors with the anchor spacing
stated.
Child restraint systems with rigid
lower attachments cannot be
installed in the center seat. This
type of child restraint system
can only be installed in the out-
board seat.
■Laws and regulations pertain-
ing to anchors
The LATCH system conforms to
FMVSS225 or CMVSS210.2.
Child restraint systems conforming
to FMVSS213 or CMVSS213 speci-
fications can be used.
This vehicle is designed to conform
to SAE J1819.
■ISOFIX lower anchorages
(ISOFIX child restraint sys-
tem)
Lower anchorages are provided
for the outboard rear seats.
(Marks displaying the location of
the anchorages are attached to
the seats.)
WARNING
■When installing a child
restraint system
Observe the following precau-
tions.
Failure to do so may result in
death or serious injury.
●When using the LATCH
anchors, be sure that there are
no foreign objects around the
anchors and that the seat belt is
not caught behind the child
restraint system.
●Follow all installation instruc-
tions provided by the child
restraint system manufacturer.
●Never attach two child restraint
system attachments to the
same anchor. In a collision, one
anchor may not be strong
enough to hold two child
restraint system attachments
and may break. If the LATCH
anchors are already in use, use
the seat belt to install a child
restraint system in the center
seat.
●When securing some types of
child restraint systems in rear
seats, it may not be possible to
properly use the seat belts in
positions next to the child
restraint without interfering with
it or affecting seat belt effective-
ness. Be sure your seat belt fits
snugly across your shoulder
and low on your hips. If it does
not, or if it interferes with the
child restraint, move to a differ-
ent position. Failure to do so
may result in death or serious
injury.
●If the seat is adjusted, reconfirm
the security of the child restraint
system.
Child restraint system
fixed with an ISOFIX lower
anchorage (for Puerto
Rico)