brakes TOYOTA COROLLA HATCHBACK 2021 (in English) User Guide
[x] Cancel search | Manufacturer: TOYOTA, Model Year: 2021, Model line: COROLLA HATCHBACK, Model: TOYOTA COROLLA HATCHBACK 2021Pages: 576, PDF Size: 12.73 MB
Page 247 of 576
2474-5. Using the driving support systems
COROLLA H/B_U
4
Driving
■Enhanced VSC (Enhanced
Vehicle Stability Control)
Provides cooperative control of
the ABS, TRAC, VSC and EPS.
Helps to maintain directional
stability when sw erving on slip-
pery road surfaces by con-
trolling steering performance.
■Secondary Collision Brake
When the airbag sensor detects
a collision, the brakes and stop
lights are automatically con-
trolled to reduce the vehicle
speed and that helps reduce the
possibility of further damage
due to a secondary collision.
■TRAC (Traction Control)
Helps to maintain drive power
and prevent the drive wheels
from spinning when starting the
vehicle or accelerating on slip-
pery roads
■Active Cornering Assist
(ACA)
Helps to prevent the vehicle
from drifting to the outer side by
performing inner wheel brake
control when attempting to
accelerate while turning
■Hill-start assist control
Helps to reduce the backward
movement of the vehicle when
starting on an uphill
■EPS (Electric Power Steer-
ing)
Employs an electric motor to
reduce the amount of effort needed to turn the steering
wheel.
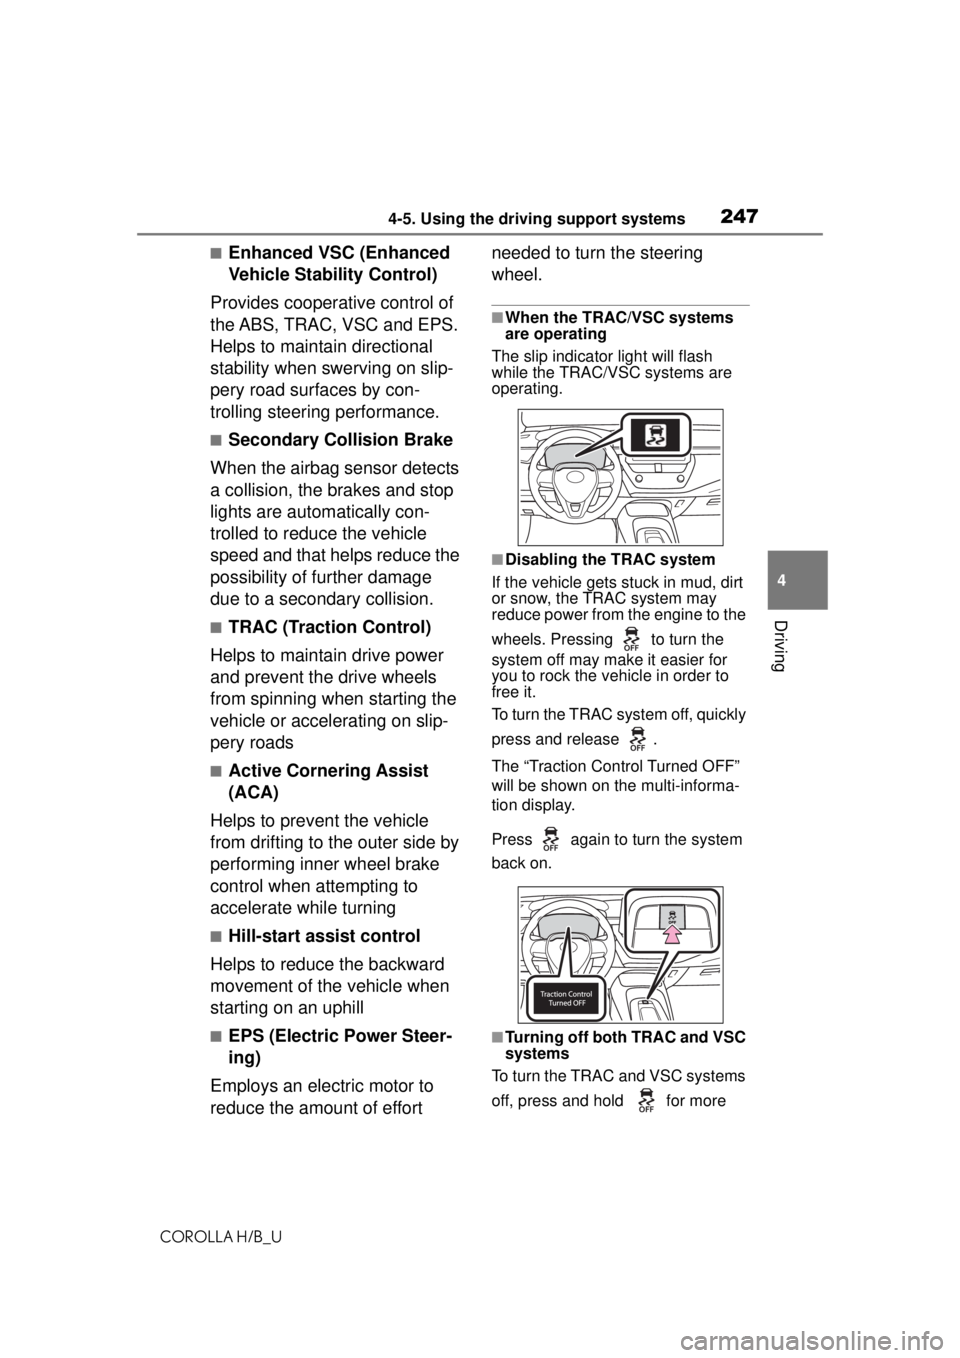
■When the TRAC/VSC systems
are operating
The slip indicator light will flash
while the TRAC/VSC systems are
operating.
■Disabling the TRAC system
If the vehicle gets stuck in mud, dirt
or snow, the TRAC system may
reduce power from the engine to the
wheels. Pressing to turn the
system off may make it easier for
you to rock the vehicle in order to
free it.
To turn the TRAC system off, quickly
press and release .
The “Traction Control Turned OFF”
will be shown on the multi-informa-
tion display.
Press again to turn the system
back on.
■Turning off both TRAC and VSC
systems
To turn the TRAC and VSC systems
off, press and hold for more
Page 250 of 576
2504-5. Using the driving support systems
COROLLA H/B_U
WARNING
●When driving over roads with
potho
les or uneven surfaces
■TRAC/VSC may not operate
effectively when
Directional control and power may
not be achievable while driving on
slippery road surfaces, even if the
TRAC/VSC system is operating.
Drive the vehicle carefully in con-
ditions where stability and power
may be lost.
■Active Cornering Assist does
not
operate effectively when
●Do not overly rely on Active
Cornering Assist. Active Corner-
ing Assist may not operat
eef
fectively when accelerating
down slopes or driving on slip-
pery road surfaces.
●When Active Cornering Assistfr equently operates, Active Cor-
nering Assist may tempor
arily
stop
operating to ensure proper
operation of the brakes,
TRAC
and
VSC.
■Hill-start assist control does
not
operate effectively when
●Do not overly rely on hill-start
a
ssist control. Hill-start assist
control may not operate effec-
tively on steep inclines an
d
roads
covered with ice.
●Unlike the parking brake,hill-start assist control is not
intend
ed to hold the vehicle sta-
tionary for an extended period
of time. Do not attempt to
use
hill-s
tart assist control to
hold
th
e vehicle on an incline, as
doing so may lead to an acci-
dent.
■When the TRAC/VSC is acti-
vated
The slip indicato r light flashes.
Always drive carefully. Reckless
driving may cause an accident.
Exercise particular care when the
indicator light flashes.
■When the TRAC/VSC systems
a
re turned off
Be especially careful and drive at
a speed appropriate to the road
conditions. As these are the sys-
tems to help ensure vehicle stabil-
ity and driving force, do not turn
the TRAC/VSC systems off
unless necessary.
■Secondary Collision Brake
Do not overly rely on the Second-
ary Collision Brake. This system
is designed to help reduce the
possibility of furt her damage due
to a secondary collision, however,
that effect changes according to
various conditions. Overly relying
on the system may result in death
or serious injury.
■Replacing tires
Make sure that all tires are of the
specified size, brand, tread pat-
tern and total load capacity. In
addition, make sure that the tires
are inflated to the recommended
tire inflation pressure level.
The ABS, TRAC and VSC sys-
tems will not function correctly if
different tires are installed on the
vehicle.
Contact your Toyota dealer for fur-
ther information when replacing
tires or wheels.
■Handling of tires and the sus-
pension
Using tires with any kind of prob-
lem or modifying the suspension
will affect the driving assist sys-
tems, and may cause a system to
malfunction.
Page 252 of 576
2524-6. Driving tips
COROLLA H/B_U
Perform the following according
to the driving conditions:
Do not try to forcibly open a
window or move a wiper that
is frozen. Pour warm water
over the frozen area to melt
the ice. Wipe away the water
immediately to prevent it from
freezing.
To ensure proper operation of
the climate control system
fan, remove any snow that
has accumulated on the air
inlet vents in front of the wind-
shield.
Check for and remove any
excess ice or snow that may
have accumulated on the
exterior lights, vehicle’s roof,
chassis, around the tires or on
the brakes.
Remove any snow or mud
from the bottom of your shoes
before getting in the vehicle.
Accelerate the vehicle slowly,
keep a safe distance between
you and the vehicle ahead, and
drive at a reduced speed suit-
able to road conditions.
Park the vehicle and shift the
shift lever to P (continuously variable transmission), or 1 or
R (manual transmission)
without setting the parking
brake. The parking brake may
freeze up, preventing it from
being released. If the vehicle
is parked without setting the
parking brake, make sure to
block the wheels.
Failure to do so may be dan-
gerous because it may cause
the vehicle to move unexpect-
edly, possibly leading to an
accident.
Vehicles with a continuously
variable transmission: If the
vehicle is parked without set-
ting the parking brake, con-
firm that the shift lever cannot
be moved out of P
*.
*: The shift lever will be locked if it is
attempted to be sh ifted from P to
any other position without
depressing the brake pedal. If the
shift lever can be shifted from P,
there may be a problem with the
shift lock system. Have the vehi-
cle inspected by your Toyota
dealer immediately.
Use the correct tire chain size
when mounting the tire chains.
Chain size is regulated for each
tire size.
Before driving the vehicle
When driving the vehicle
When parking the vehicle
Selecting tire chains
Page 428 of 576
4287-2. Maintenance
COROLLA H/B_U
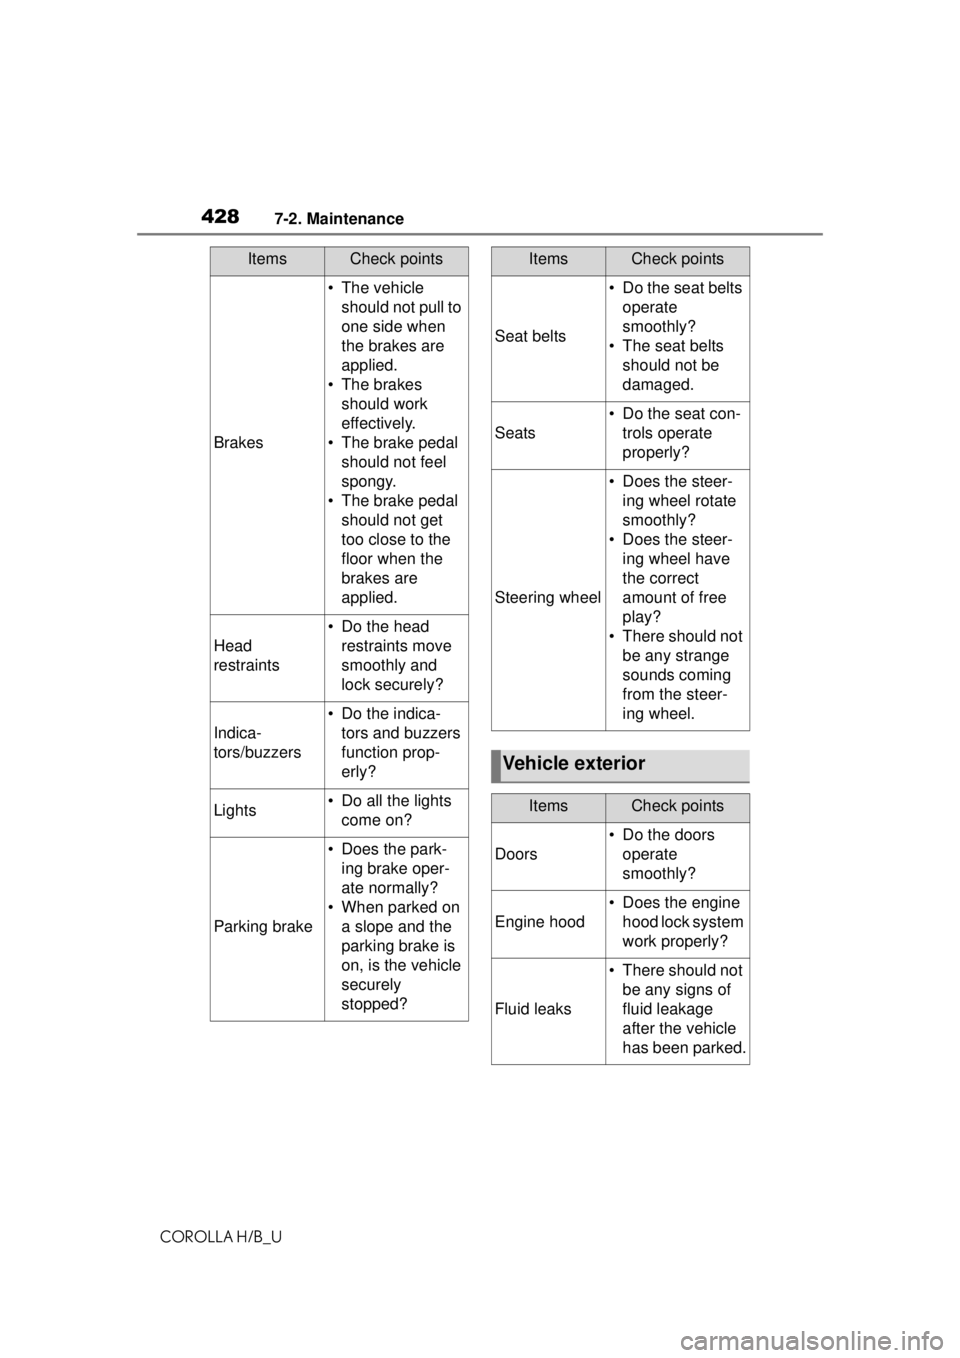
Brakes
• The vehicle should not pull to
one side when
the brakes are
applied.
• The brakes should work
effectively.
• The brake pedal should not feel
spongy.
• The brake pedal should not get
too close to the
floor when the
brakes are
applied.
Head
restraints
• Do the head restraints move
smoothly and
lock securely?
Indica-
tors/buzzers
• Do the indica-tors and buzzers
function prop-
erly?
Lights• Do all the lights come on?
Parking brake
• Does the park-ing brake oper-
ate normally?
• When parked on a slope and the
parking brake is
on, is the vehicle
securely
stopped?
ItemsCheck points
Seat belts
• Do the seat belts operate
smoothly?
• The seat belts should not be
damaged.
Seats
• Do the seat con-trols operate
properly?
Steering wheel
• Does the steer-ing wheel rotate
smoothly?
• Does the steer- ing wheel have
the correct
amount of free
play?
• There should not be any strange
sounds coming
from the steer-
ing wheel.
Vehicle exterior
ItemsCheck points
Doors
• Do the doors operate
smoothly?
Engine hood
• Does the engine hood lock system
work properly?
Fluid leaks
• There should not be any signs of
fluid leakage
after the vehicle
has been parked.
ItemsCheck points
Page 465 of 576
4658-1. Essential information
COROLLA H/B_U
8
When trouble arises
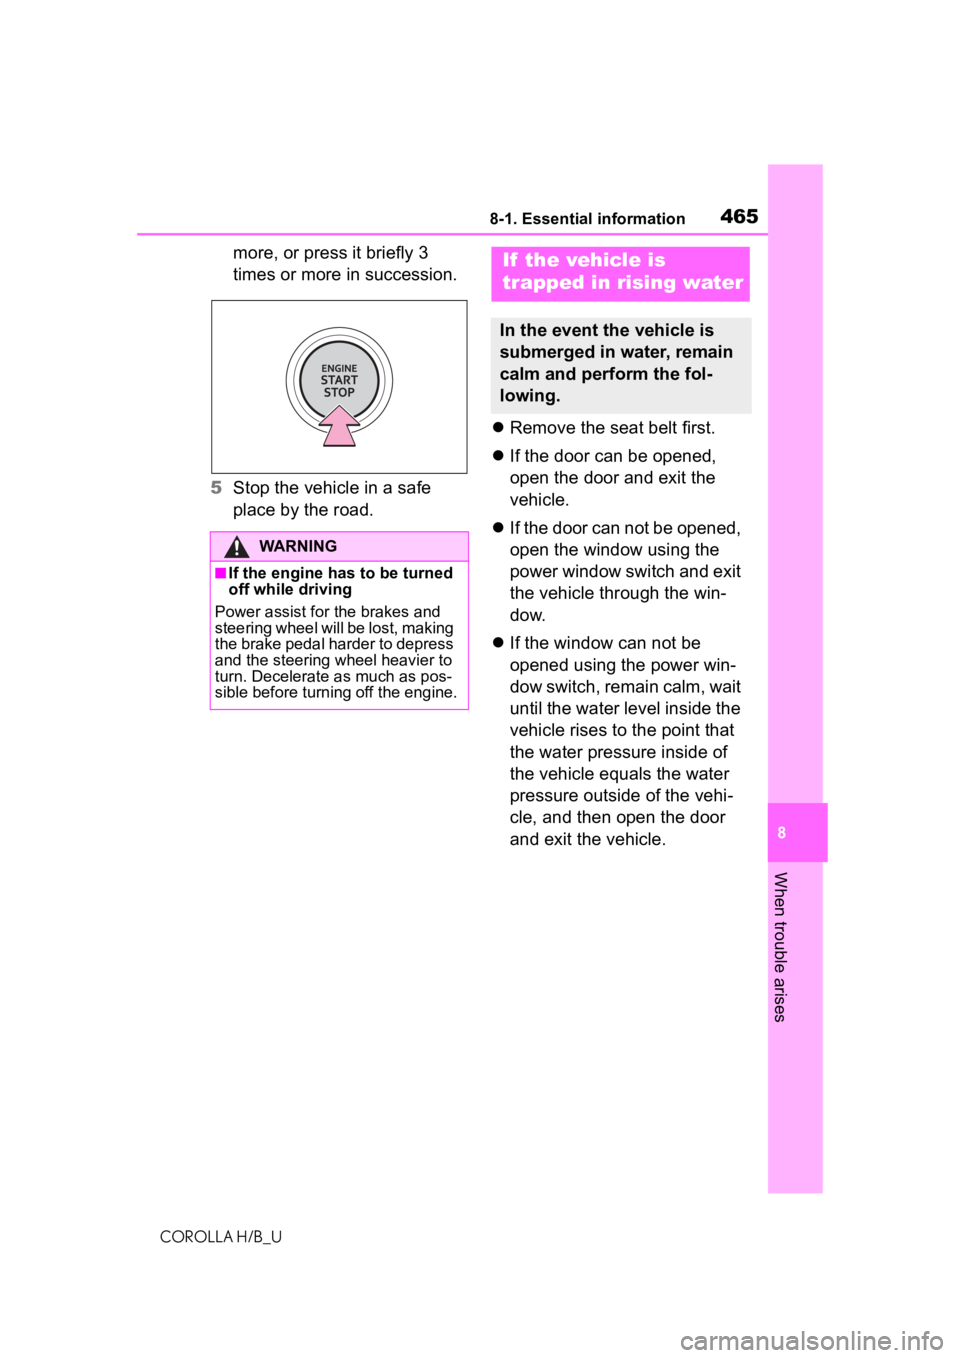
more, or press it briefly 3
times or more in succession.
5 Stop the vehicle in a safe
place by the road.
Remove the seat belt first.
If the door can be opened,
open the door and exit the
vehicle.
If the door can not be opened,
open the window using the
power window switch and exit
the vehicle through the win-
dow.
If the window can not be
opened using the power win-
dow switch, remain calm, wait
until the water level inside the
vehicle rises to the point that
the water pressure inside of
the vehicle equals the water
pressure outside of the vehi-
cle, and then open the door
and exit the vehicle.
WARNING
■If the engine has to be turned
off while driving
Power assist for the brakes and
steering wheel will be lost, making
the brake pedal harder to depress
and the steering wheel heavier to
turn. Decelerate as much as pos-
sible before turning off the engine.
If the vehicle is
trapped in rising water
In the event the vehicle is
submerged in water, remain
calm and perform the fol-
lowing.
Page 469 of 576
4698-2. Steps to take in an emergency
COROLLA H/B_U
8
When trouble arises
an emergency, your vehicle may
be temporarily towed using
cables or chains secured to the
emergency towing eyelets. This
should only be attempted on
hard surfaced roads for at most
50 miles (80 km) at under 18
mph (30 km/h).
A driver must be in the vehicle to
steer and operate the brakes.
The vehicle’s wheels, drive train,
axles, steering and brakes must
be in good condition.
For vehicles with a continuously
variable transmission, only the
front towing eyelets may be
used.
To have your vehicle towed by
another vehicle, the towing eye-
let must be installed to your
vehicle. Install the towing eyelet
using the following procedure.
1 Take out the wheel nut
wrench, flathead screwdriver
and towing eyelet. ( P.485,
495)
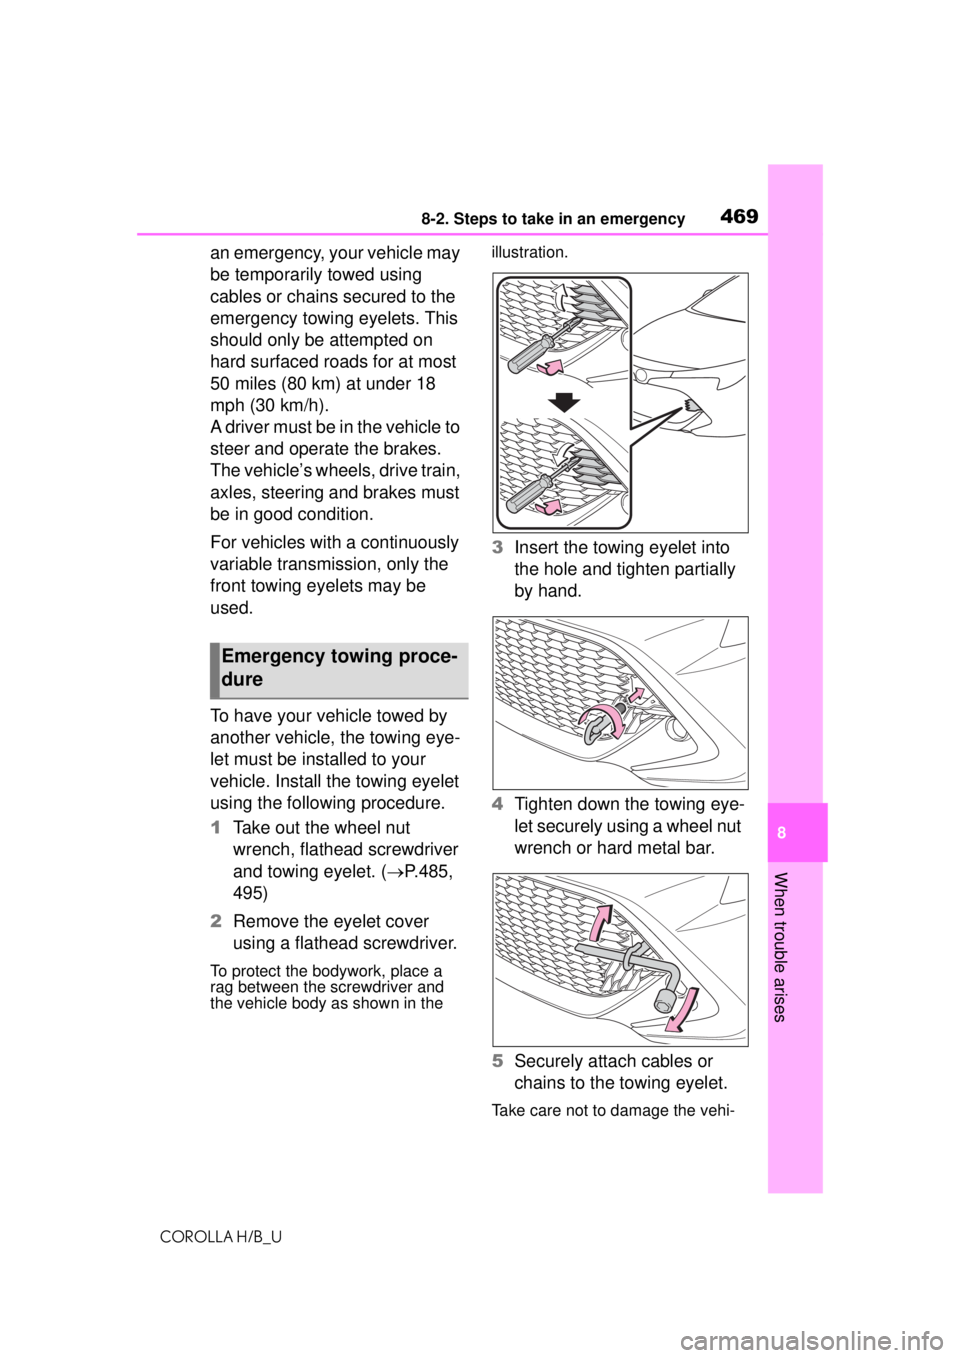
2 Remove the eyelet cover
using a flathead screwdriver.
To protect the bodywork, place a
rag between the screwdriver and
the vehicle body as shown in the illustration.
3
Insert the towing eyelet into
the hole and tighten partially
by hand.
4 Tighten down the towing eye-
let securely using a wheel nut
wrench or hard metal bar.
5 Securely attach cables or
chains to the towing eyelet.
Take care not to damage the vehi-
Emergency towing proce-
dure
Page 470 of 576
4708-2. Steps to take in an emergency
COROLLA H/B_Ucle body.
6
Enter the vehicle being towed
and start the engine.
If the engine does not start, turn the
engine switch to ON.
7Shift the shift lever to N and
release the parking brake.
Turn automatic mode off.
( P.155)
Vehicles with a continuously
variable transmission: When
the shift lever cannot be
shifted: P.148
■While towing
If the engine is not running, the
power assist for the brakes and
steering will not function, making
steering and braking more difficult.
■Wheel nut wrench
Wheel nut wrench is installed in lug-
gage compartment. ( P.485, 495)
Fluid leaks under the vehicle.
(Water dripping from the air
conditioning after use is nor-
mal.)
Flat-looking tires or uneven
tire wear
Engine coolant temperature
gauge needle continually
points higher than normal.
Changes in exhaust sound
Excessive tire squeal when
cornering
Strange noises related to the
suspension system
Pinging or other noises
related to the engine
Engine missing, stumbling or
running roughly
Appreciable loss of power
Vehicle pulls heavily to one
If you think something
is wrong
If you notice any of the fol-
lowing symptoms, your
vehicle probably needs
adjustment or repair. Con-
tact your Toyota dealer as
soon as possible.
Visible symptoms
Audible symptoms
Operational symptoms
Page 480 of 576
4808-2. Steps to take in an emergency
COROLLA H/B_U
WARNING
■When the electric power
steering system warning light
comes on
When the light comes on yellow,
the assist to the power steering is
restricted. When the light comes
on red, the assist to the power
steering is lost and handling oper-
ations of the steering wheel
become extremely heavy.
When steering wheel operations
are heavier than usual, grip the
steering wheel firmly and operate
it using more force than usual.
■If the tire pressure warning
light comes on
Be sure to observe the following
precautions.
Failure to do so could cause a
loss of vehicle control and result
in death or serious injury.
●Stop your vehicle in a safe place
as soon as possible. Adjust the
tire inflation pressure immedi-
ately.
●Vehicles with a compact spare
tire: If the tire pressure warning
light comes on even after tire
inflation pressure adjustment, it
is probable that you have a flat
tire. Check the tires. If a tire is
flat, change it with the spare tire
and have the flat tire repaired by
the nearest Toyota dealer.
●Vehicles with emergency tire
puncture repair kit: If the tire
pressure warning light comes
on even after tire inflation pres-
sure adjustment, it is probable
that you have a flat tire. Check
the tires. If a tire is flat, repair
the flat tire by using emergency
tire puncture repair kit.
●Avoid abrupt maneuvering and
braking.
If the vehicle tires deteriorate,
you could lose control of the
steering wheel or the brakes.
■If a blowout or sudden air
leakage should occur
The tire pressure warning system
may not activate immediately.
■Maintenance of the tires
Each tire, includ ing the spare (if
provided), should be checked
monthly when cold and inflated to
the inflation pressure recom-
mended by the vehicle manufac-
turer on the vehicle placard or tire
inflation pressure label (tire and
load information label). (If your
vehicle has tires of a different size
than the size indicated on the
vehicle placard or tire inflation
pressure label [tire and load infor-
mation label], you should deter-
mine the proper tire inflation
pressure for those tires.)
As an added safety feature, your
vehicle has been equipped with a
tire pressure monitoring system
(TPMS-tire pres sure warning sys-
tem) that illuminates a low tire
pressure telltale (tire pressure
warning light) when one or more
of your tires is significantly
under-inflated. Accordingly, when
the low tire pressure telltale (tire
pressure warning light) illumi-
nates, you should stop and check
your tires as soon as possible,
and inflate them to the proper
pressure. Driving on a signifi-
cantly under-inflated tire causes
the tire to overheat and can lead
to tire failure. Under-inflation also
reduces fuel efficiency and tire
tread life, and may affect the vehi-
cle’s handling and stopping ability.
Page 492 of 576
4928-2. Steps to take in an emergency
COROLLA H/B_U
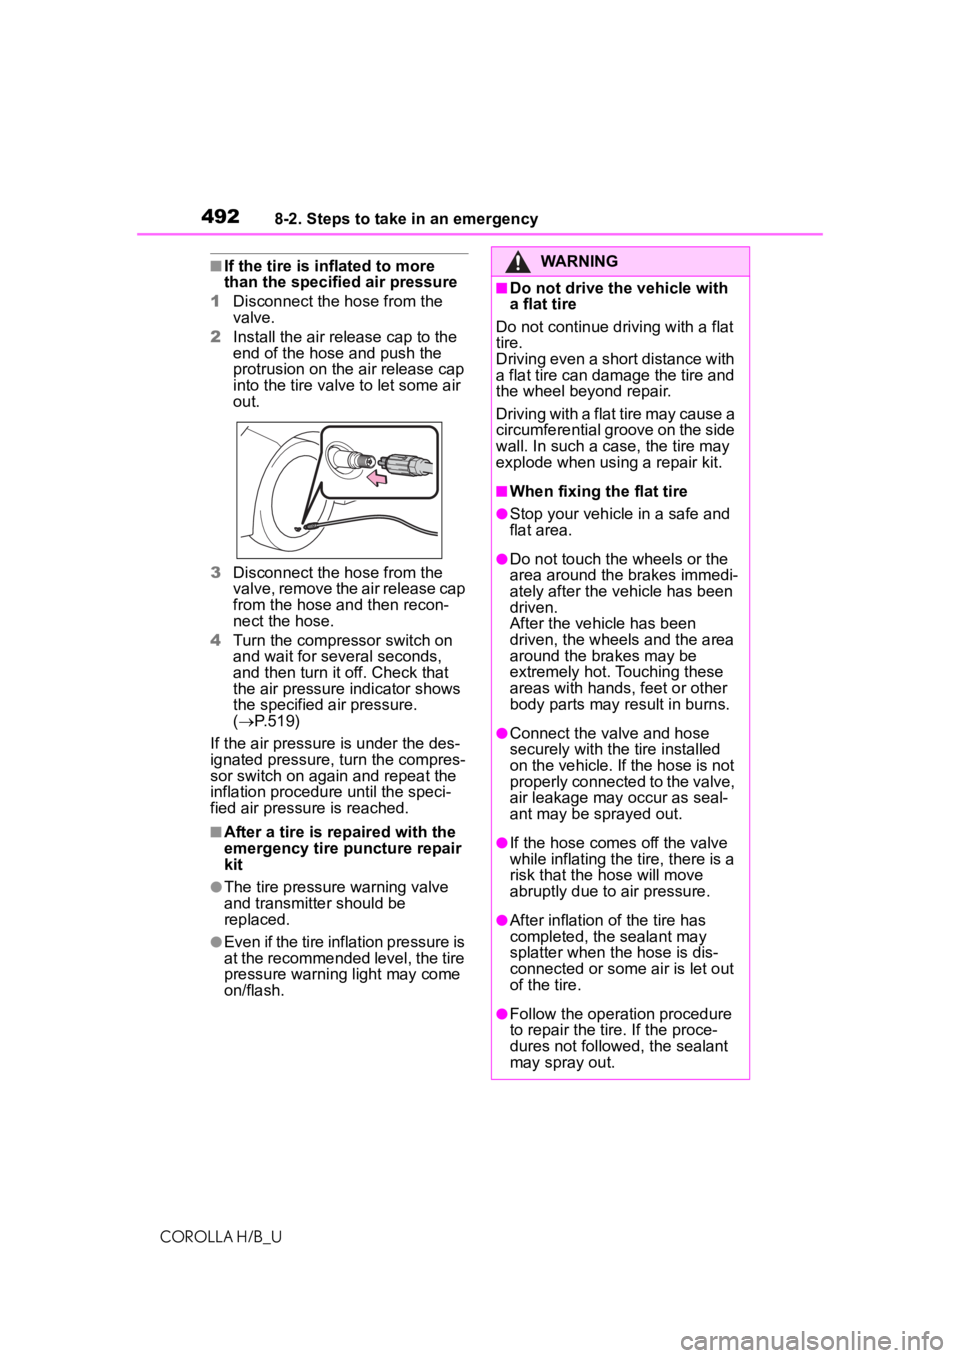
■If the tire is inflated to more
than the specified air pressure
1 Disconnect the hose from the
valve.
2 Install the air release cap to the
end of the hose and push the
protrusion on the air release cap
into the tire valve to let some air
out.
3 Disconnect the hose from the
valve, remove the air release cap
from the hose and then recon-
nect the hose.
4 Turn the compressor switch on
and wait for several seconds,
and then turn it off. Check that
the air pressure indicator shows
the specified air pressure.
( P.519)
If the air pressure is under the des-
ignated pressure, turn the compres-
sor switch on again and repeat the
inflation procedure until the speci-
fied air pressure is reached.
■After a tire is repaired with the
emergency tire puncture repair
kit
●The tire pressure warning valve
and transmitter should be
replaced.
●Even if the tire inflation pressure is
at the recommended level, the tire
pressure warning light may come
on/flash.
WARNING
■Do not drive the vehicle with
a flat tire
Do not continue driving with a flat
tire.
Driving even a short distance with
a flat tire can damage the tire and
the wheel beyond repair.
Driving with a flat tire may cause a
circumferential groove on the side
wall. In such a case, the tire may
explode when using a repair kit.
■When fixing the flat tire
●Stop your vehicle in a safe and
flat area.
●Do not touch the wheels or the
area around the brakes immedi-
ately after the vehicle has been
driven.
After the vehicle has been
driven, the wheels and the area
around the brakes may be
extremely hot. Touching these
areas with hands, feet or other
body parts may result in burns.
●Connect the valve and hose
securely with the tire installed
on the vehicle. If the hose is not
properly connected to the valve,
air leakage may occur as seal-
ant may be sprayed out.
●If the hose comes off the valve
while inflating the tire, there is a
risk that the hose will move
abruptly due to air pressure.
●After inflation of the tire has
completed, the sealant may
splatter when the hose is dis-
connected or some air is let out
of the tire.
●Follow the operation procedure
to repair the tire. If the proce-
dures not followed, the sealant
may spray out.
Page 499 of 576
4998-2. Steps to take in an emergency
COROLLA H/B_U
8
When trouble arises
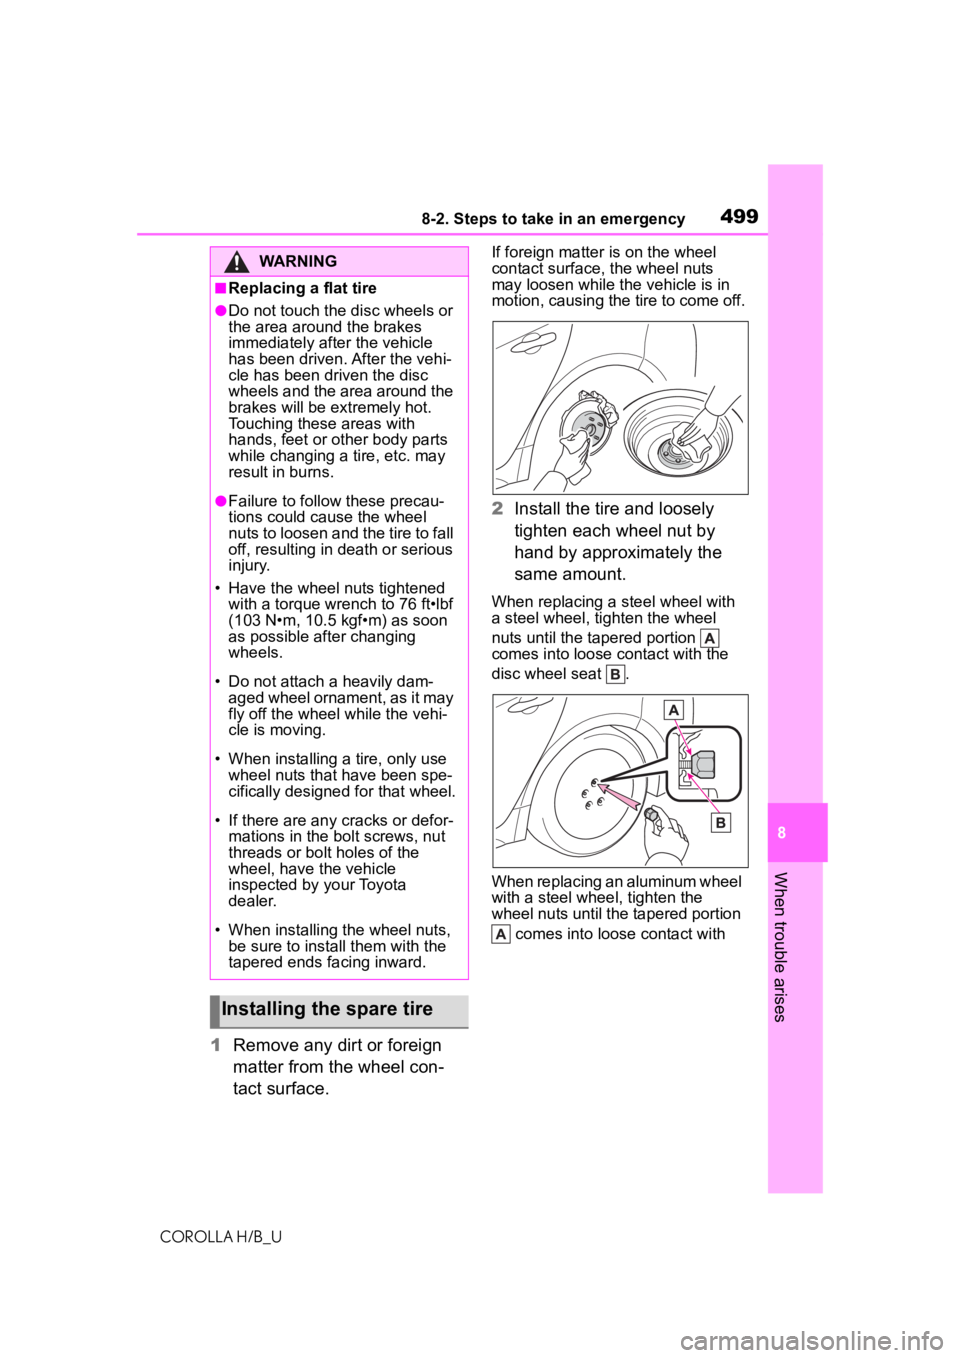
1 Remove any dirt or foreign
matter from the wheel con-
tact surface.
If foreign matter is on the wheel
contact surface, the wheel nuts
may loosen while th e vehicle is in
motion, causing the tire to come off.
2 Install the tire and loosely
tighten each wheel nut by
hand by approximately the
same amount.
When replacing a steel wheel with
a steel wheel, tighten the wheel
nuts until the tapered portion
comes into loose contact with the
disc wheel seat .
When replacing an aluminum wheel
with a steel wheel, tighten the
wheel nuts until the tapered portion
comes into loose contact with
WARNING
■Replacing a flat tire
●Do not touch the disc wheels or
the area around the brakes
immediately after the vehicle
has been driven. After the vehi-
cle has been driven the disc
wheels and the area around the
brakes will be extremely hot.
Touching these areas with
hands, feet or other body parts
while changing a tire, etc. may
result in burns.
●Failure to follow these precau-
tions could cause the wheel
nuts to loosen and the tire to fall
off, resulting in death or serious
injury.
• Have the wheel nuts tightened with a torque wrench to 76 ft•lbf
(103 N•m, 10.5 kgf•m) as soon
as possible after changing
wheels.
• Do not attach a heavily dam- aged wheel ornament, as it may
fly off the wheel while the vehi-
cle is moving.
• When installing a tire, only use wheel nuts that have been spe-
cifically designed for that wheel.
• If there are any cracks or defor- mations in the bolt screws, nut
threads or bolt holes of the
wheel, have the vehicle
inspected by your Toyota
dealer.
• When installing the wheel nuts, be sure to install them with the
tapered ends facing inward.
Installing the spare tire