door lock TOYOTA COROLLA HATCHBACK 2023 Owners Manual
[x] Cancel search | Manufacturer: TOYOTA, Model Year: 2023, Model line: COROLLA HATCHBACK, Model: TOYOTA COROLLA HATCHBACK 2023Pages: 436, PDF Size: 8.72 MB
Page 2 of 436
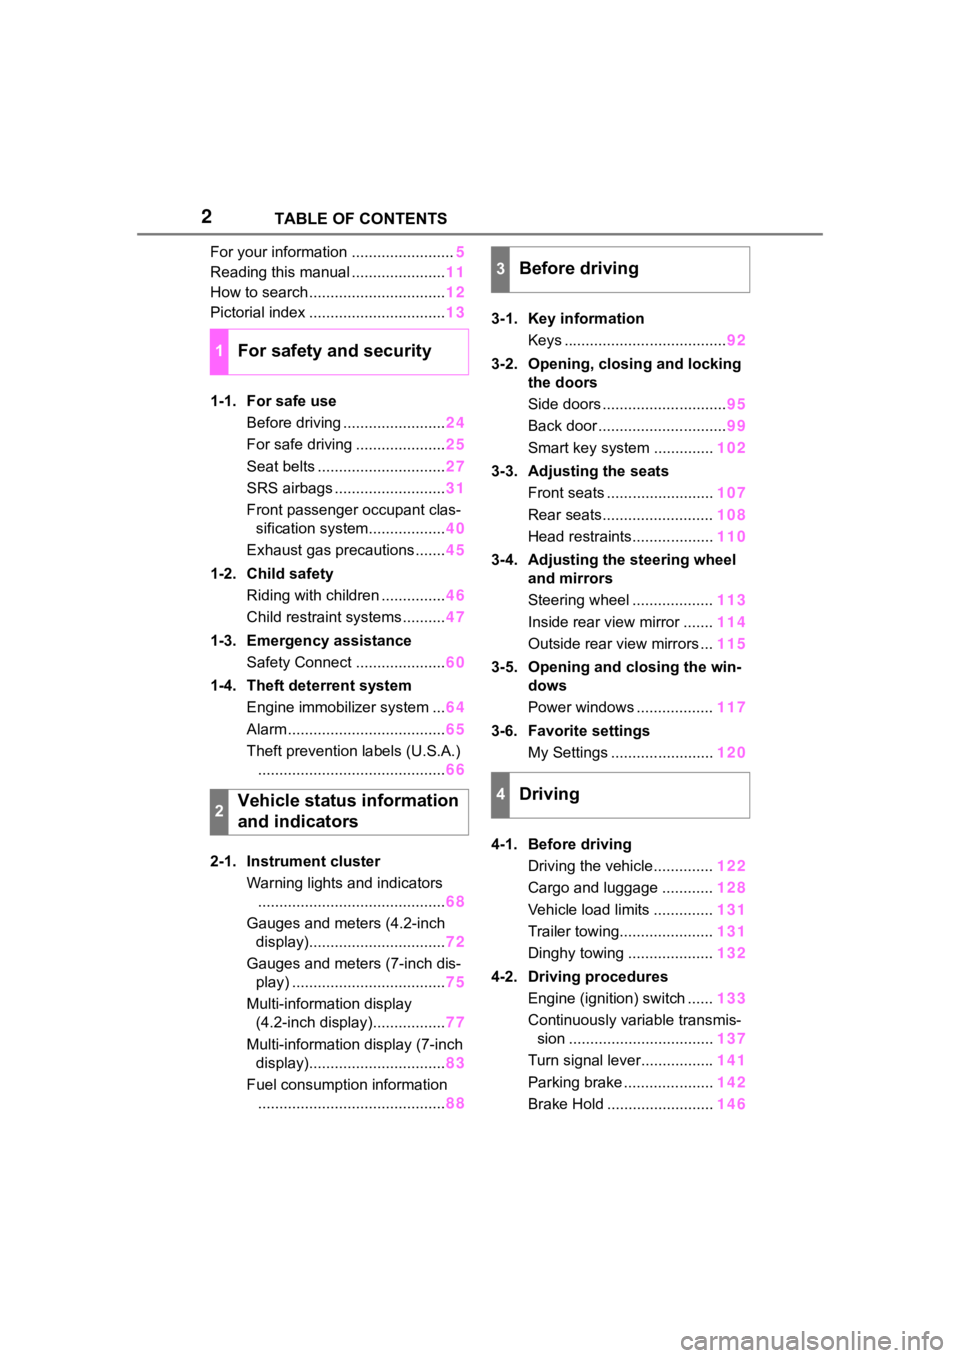
2TABLE OF CONTENTS
For your information ........................5
Reading this manual ...................... 11
How to search ................................ 12
Pictorial index ................................ 13
1-1. For safe use Before driving ........................ 24
For safe driving ..................... 25
Seat belts .............................. 27
SRS airbags .......................... 31
Front passenger occupant clas- sification system.................. 40
Exhaust gas precautions....... 45
1-2. Child safety Riding with children ............... 46
Child restraint systems .......... 47
1-3. Emergency assistance Safety Connect ..................... 60
1-4. Theft deterrent system Engine immobilizer system ... 64
Alarm ..................................... 65
Theft prevention labels (U.S.A.) ............................................ 66
2-1. Instrument cluster Warning lights and indicators............................................ 68
Gauges and meters (4.2-inch display)................................ 72
Gauges and meters (7-inch dis- play) .................................... 75
Multi-information display (4.2-inch display)................. 77
Multi-information display (7-inch display)................................ 83
Fuel consumption information ............................................ 883-1. Key information
Keys ...................................... 92
3-2. Opening, closing and locking the doors
Side doors ............................. 95
Back door .............................. 99
Smart key system .............. 102
3-3. Adjusting the seats Front seats ......................... 107
Rear seats.......................... 108
Head restraints................... 110
3-4. Adjusting the steering wheel and mirrors
Steering wheel ................... 113
Inside rear view mirror ....... 114
Outside rear view mirrors ... 115
3-5. Opening and closing the win- dows
Power windows .................. 117
3-6. Favorite settings My Settings ........................ 120
4-1. Before driving Driving the vehicle.............. 122
Cargo and luggage ............ 128
Vehicle load limits .............. 131
Trailer towing...................... 131
Dinghy towing .................... 132
4-2. Driving procedures Engine
(ignition) switch ...... 133
Continuously variable transmis- sion .................................. 137
Turn signal lever................. 141
Parking brake ..................... 142
Brake Hold ......................... 146
1For safety and security
2Vehicle status information
and indicators
3Before driving
4Driving
Page 13 of 436
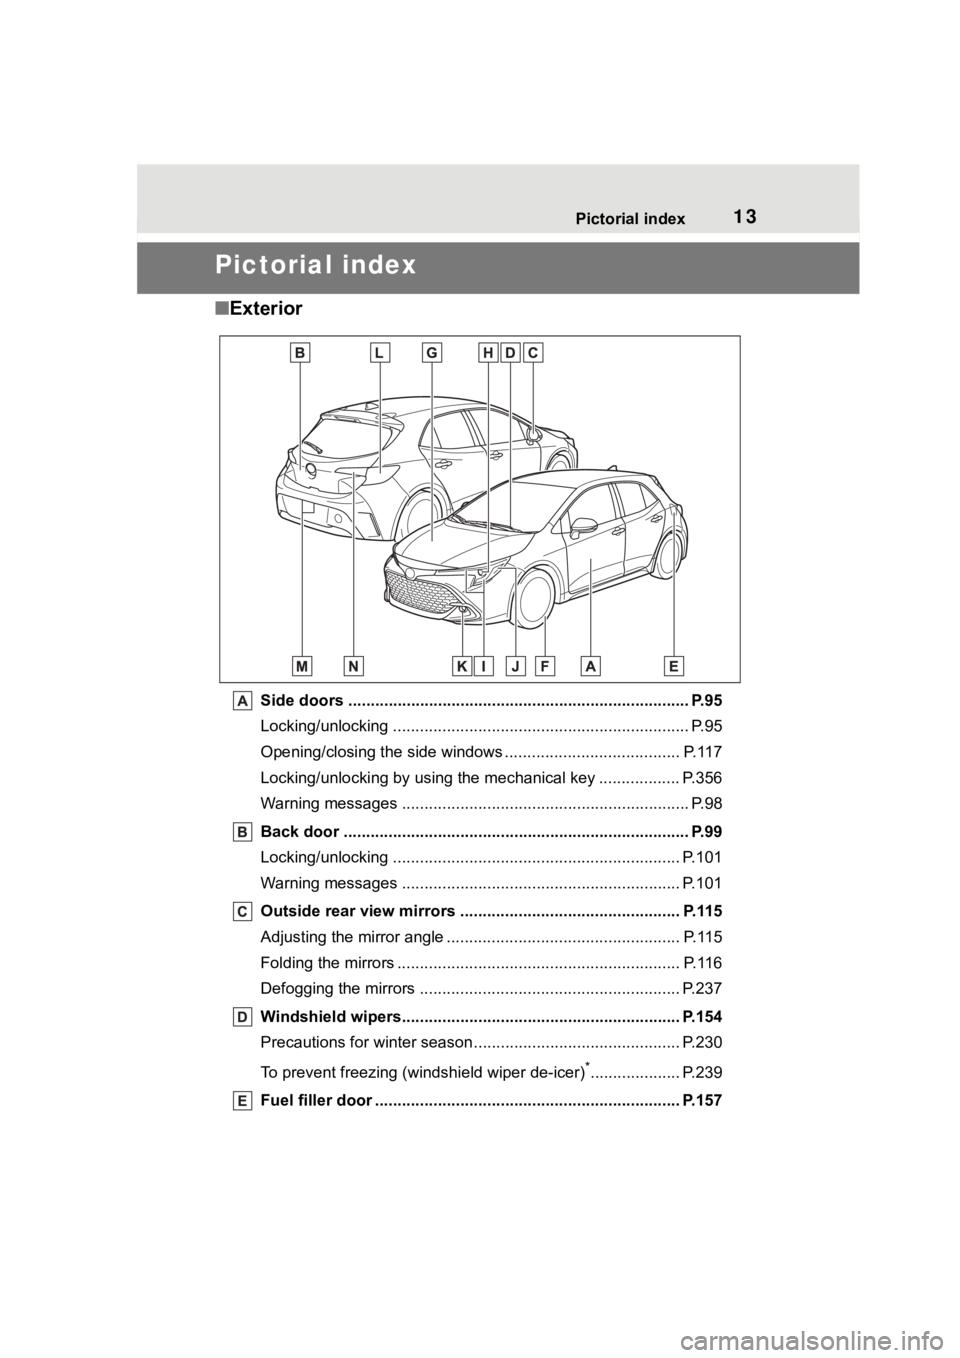
13Pictorial index
Pictorial index
■Exterior
Side doors ......... ................................. .................................. P.95
Locking/unlocking .............................................. .................... P.95
Opening/closing the side windows ............................... ........ P.117
Locking/unlocking by using the mechanical key .................. P. 3 5 6
Warning messages ............................................... ................. P.98
Back door ...................................................... ....................... P.99
Locking/unlocking .............................................. .................. P.101
Warning messages ............................................... ............... P.101
Outside rear view mirrors ...................................... ........... P.115
Adjusting the mirror angle ..................................... ............... P.115
Folding the mirrors ............................................ ................... P.116
Defogging the mirrors .......................................... ................ P.237
Windshield wipers.............................................. ................ P.154
Precautions for winter seas on.............................................. P.230
To prevent freezing (windshield wiper de-icer)
*.................... P.239
Fuel filler door ............................................... ..................... P.157
Page 17 of 436
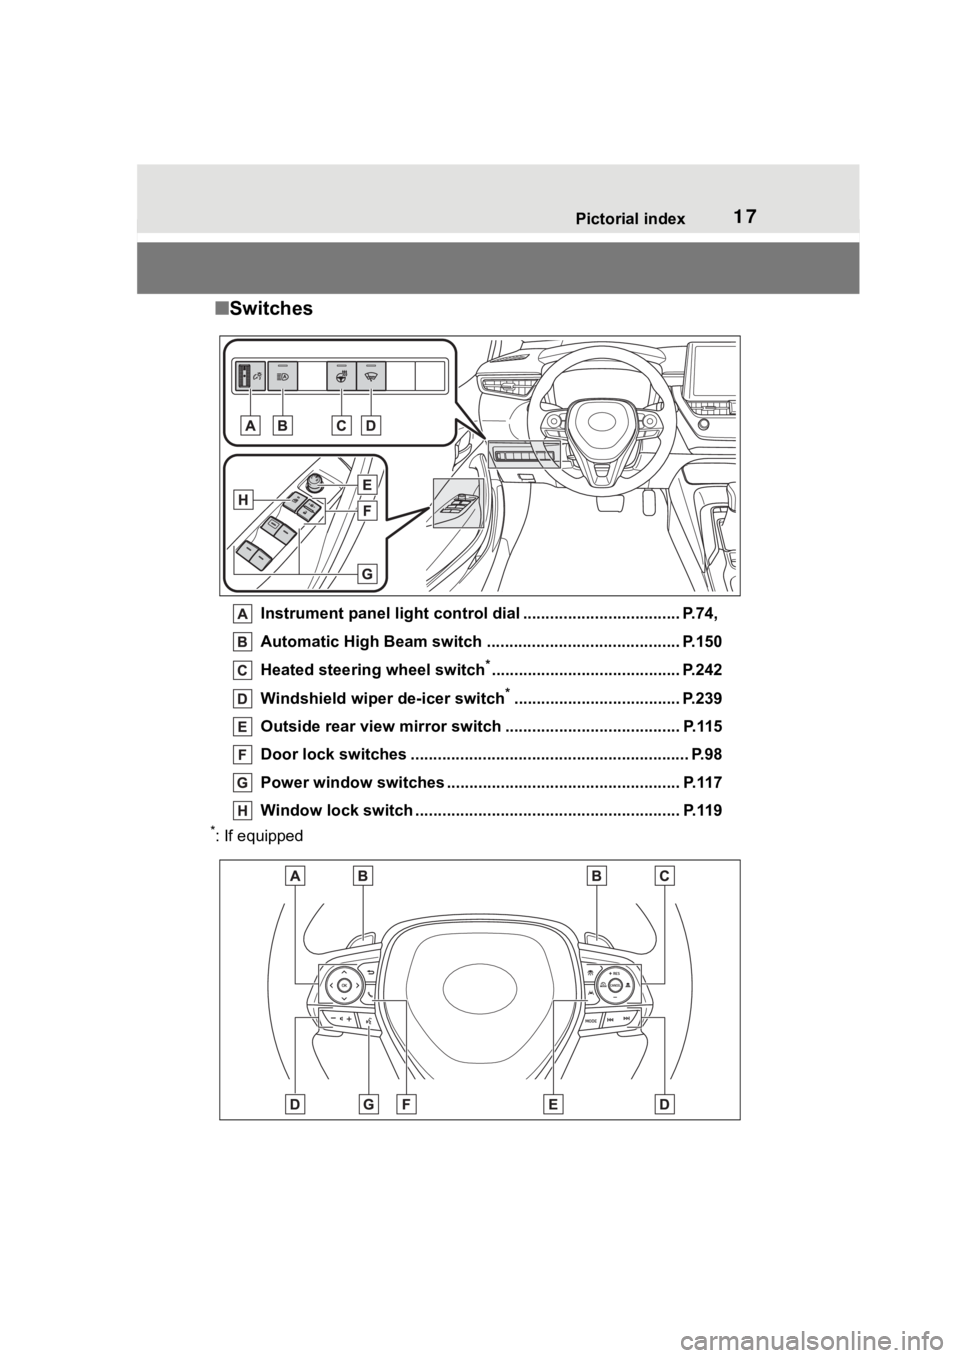
17Pictorial index
■Switches
Instrument panel light cont rol dial ................................... P.74,
Automatic High Beam switch ..................................... ...... P.150
Heated steering wheel switch
*.......................................... P.242
Windshield wiper de-icer switch
*..................................... P.239
Outside rear view mirror s witch ....................................... P.115
Door lock switches .............................................................. P.98
Power window switches ....... ............................................. P.117
Window lock switch ............................................. .............. P.119
*: If equipped
Page 46 of 436
461-2. Child safety
1-2.Child safety
Riding with children
Observe the following pre-
cautions when children are
in the vehicle.
Use a child restraint system
appropriate for the child,
until the child becomes
large enough to properly
wear the vehicle’s seat belt.
It is recommended that chil-
dren sit in the rear seats to
avoid accidental contact
with the shift lever, wiper
switch, etc.
Use the rear door child-pro-
tector lock or the window
lock switch to avoid children
opening the door while driv-
ing or operating the power
window accidentally.
( P.98, 119)
Do not let small children
operate equipment which
may catch or pinch body
parts, such as the power
window, hood, back door,
seats, etc.
WARNING
■When children are in the vehi-
cle
Never leave children unattended
in the vehicle, and never allow
children to have or use the key.
Children may be able to start the
vehicle or shift the vehicle into
neutral. There is also a danger
that children ma y injure them-
selves by playing with the win-
dows or other features of the
vehicle. In addition, heat build-up
or extremely cold temperatures
inside the vehicle can be fatal to
children.
Page 51 of 436
511-2. Child safety
1
For safety and security
A child restraint system for a
small child or baby must itself be
properly restrained on the seat
with the lap portion of the
lap/shoulder belt.
■Installing child restraint
system using a seat belt
(child restraint lock func-
tion belt)
Install the child restraint system
in accordance to the operation
manual enclosed with the child
restraint system.
WARNING
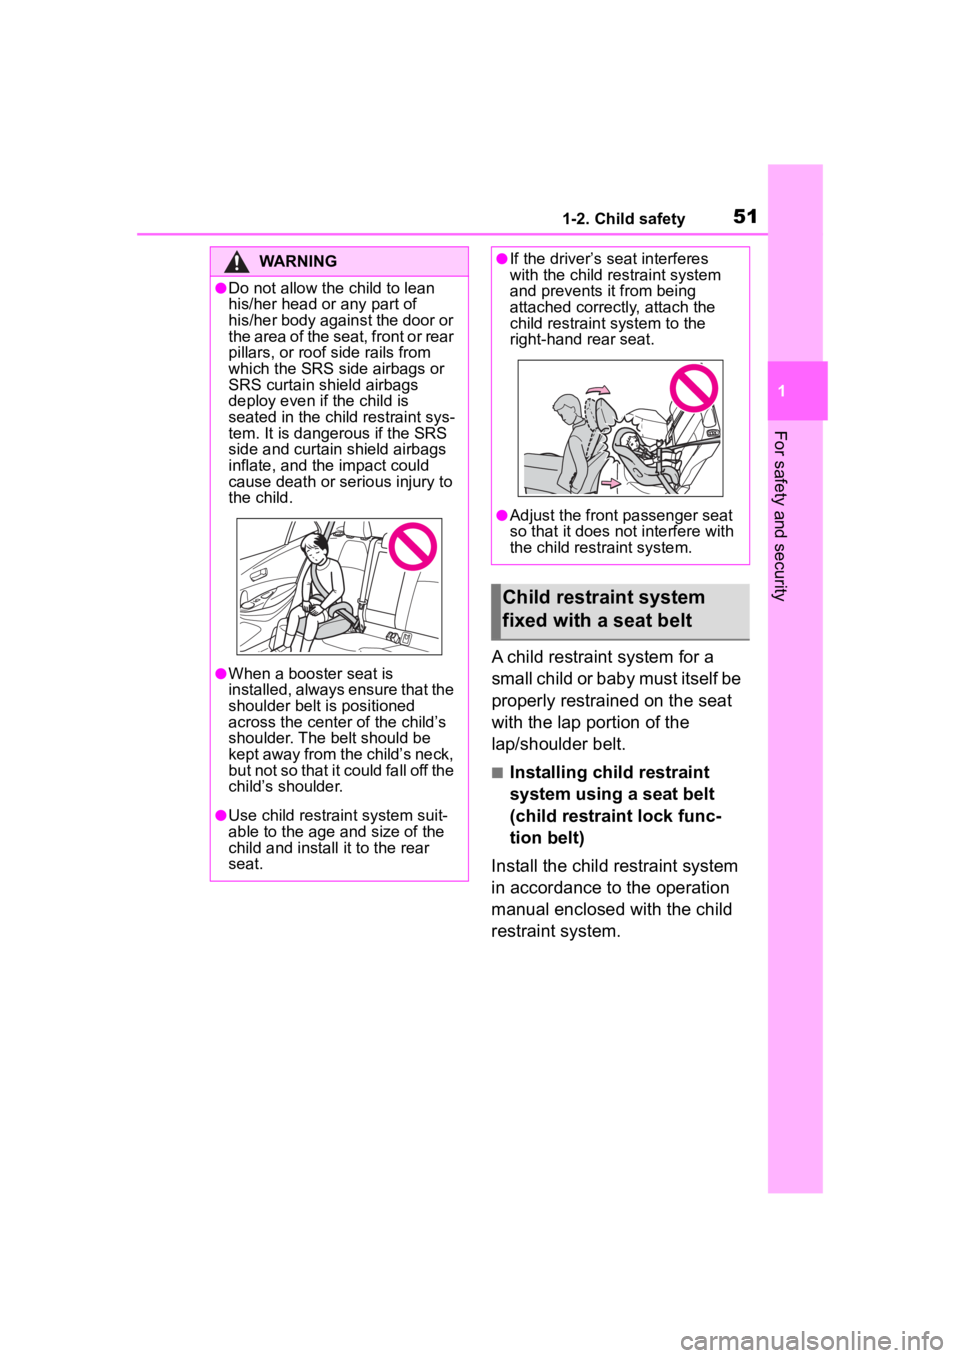
●Do not allow the child to lean
his/her head or any part of
his/her body against the door or
the area of the seat, front or rear
pillars, or roof side rails from
which the SRS side airbags or
SRS curtain shield airbags
deploy even if the child is
seated in the child restraint sys-
tem. It is dangerous if the SRS
side and curtain shield airbags
inflate, and the impact could
cause death or serious injury to
the child.
●When a booster seat is
installed, always ensure that the
shoulder belt is positioned
across the center of the child’s
shoulder. The belt should be
kept away from the child’s neck,
but not so that it could fall off the
child’s shoulder.
●Use child restraint system suit-
able to the age and size of the
child and install it to the rear
seat.
●If the driver’s seat interferes
with the child restraint system
and prevents it from being
attached correct ly, attach the
child restraint system to the
right-hand rear seat.
●Adjust the front passenger seat
so that it does not interfere with
the child restraint system.
Child restraint system
fixed with a seat belt
Page 65 of 436
651-4. Theft deterrent system
1
For safety and security
*: If equipped
■Items to check before lock-
ing the vehicle
To prevent unexpected trigger-
ing of the alarm and vehicle
theft, make sure of the following:
Nobody is in the vehicle.
The windows are closed
before the alarm is set.
No valuables or other per-
sonal items are left in the
vehicle.
■Setting
Close the doors, back door and
hood, and lock all the doors.
The system will set automati-
cally after 30 seconds.
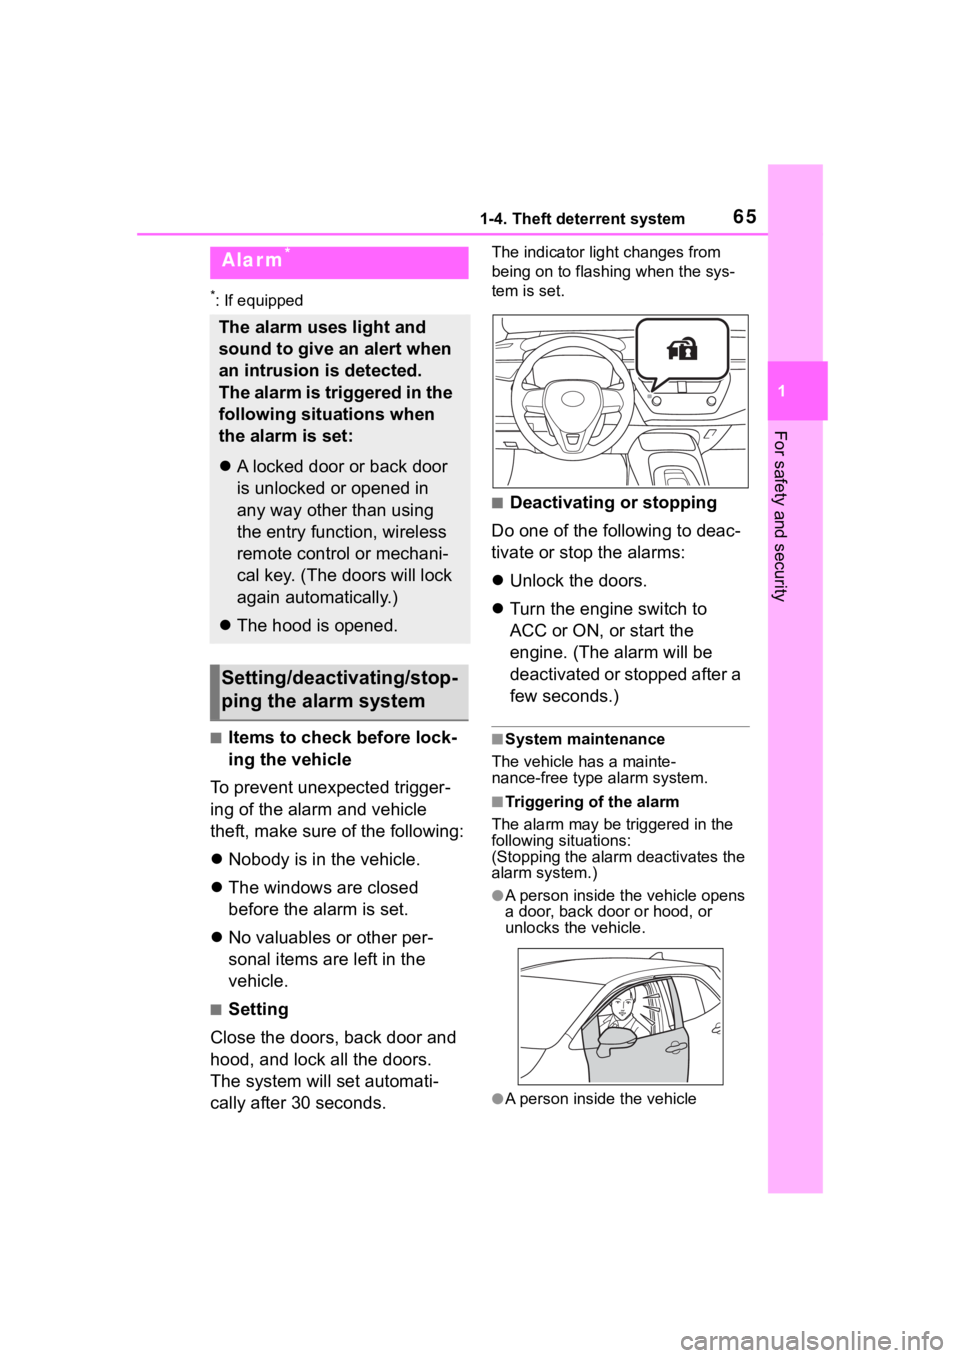
The indicator light changes from
being on to flashing when the sys-
tem is set.
■Deactivating or stopping
Do one of the following to deac-
tivate or stop the alarms:
Unlock the doors.
Turn the engine switch to
ACC or ON, or start the
engine. (The alarm will be
deactivated or stopped after a
few seconds.)
■System maintenance
The vehicle has a mainte-
nance-free type alarm system.
■Triggering of the alarm
The alarm may be triggered in the
following situations:
(Stopping the alarm deactivates the
alarm system.)
●A person inside the vehicle opens
a door, back door or hood, or
unlocks the vehicle.
●A person inside the vehicle
Alarm*
The alarm uses light and
sound to give an alert when
an intrusion is detected.
The alarm is triggered in the
following situations when
the alarm is set:
A locked door or back door
is unlocked or opened in
any way other than using
the entry function, wireless
remote control or mechani-
cal key. (The doors will lock
again automatically.)
The hood is opened.
Setting/deactivating/stop-
ping the alarm system
Page 66 of 436
661-4. Theft deterrent system
unlocks the door using the inside
lock buttons.
●The battery is recharged or
replaced when the vehicle is
locked. (P.360)
■Alarm-operated door lock
In the following cases, depending
on the situation, th e door may auto-
matically lock to p revent improper
entry into the vehicle:
●When a person remaining in the
vehicle unlocks the door and the
alarm is activated.
●While the alarm is activated, a
person remaining in the vehicle
unlocks the door.
●When recharging or replacing the
battery
NOTICE
■To ensure the system oper-
ates correctly
Do not modify or remove the sys-
tem. If modified or removed, the
proper operation of the system
cannot be guaranteed.
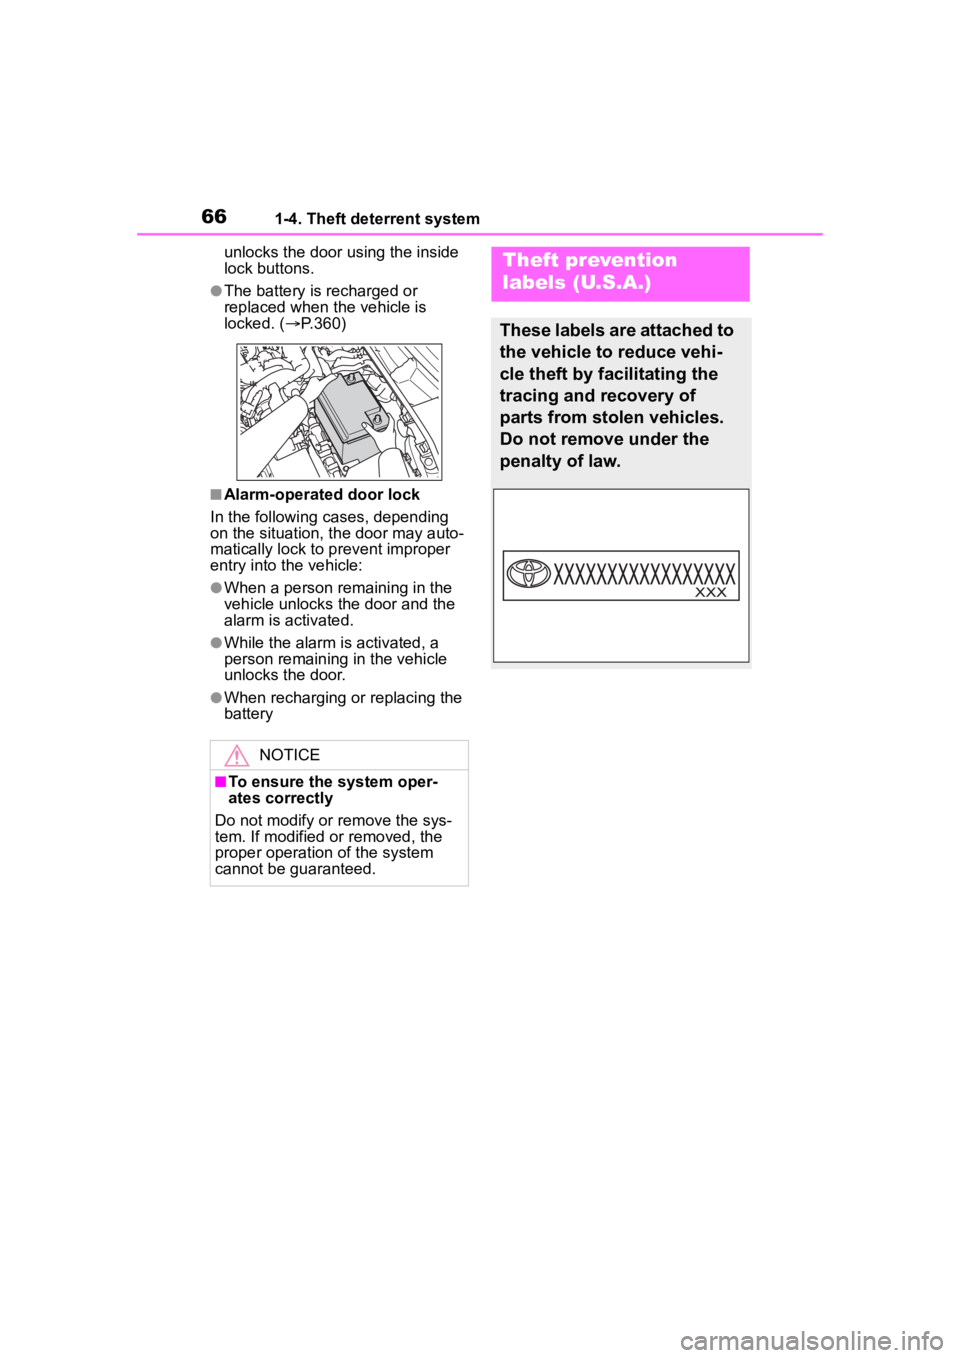
Theft prevention
labels (U.S.A.)
These labels are attached to
the vehicle to reduce vehi-
cle theft by facilitating the
tracing and recovery of
parts from stolen vehicles.
Do not remove under the
penalty of law.
Page 91 of 436
91
3
3
Before driving
Before driving
.3-1. Key informationKeys ............................... 92
3-2. Opening, closing and locking the doors
Side doors ...................... 95
Back door ....................... 99
Smart key system ....... 102
3-3. Adjusting the seats Front seats .................. 107
Rear seats................... 108
Head restraints............ 110
3-4. Adjusting the steering wheel and mirrors
Steering wheel ............ 113
Inside rear view mirror .................................. 114
Outside rear view mirrors .................................. 115
3-5. Opening and closing the windows
Power windows ........... 117
3-6. Favorite settings My Settings ................. 120
Page 93 of 436
933-1. Key information
3
Before driving
it is picked up.
■If “A New Key has been Regis-
tered Contact Your Dealer for
Details” is shown on the
multi-information display
This message will be displayed
each time the driver’s door is
opened when the doors are
unlocked from the outside for
approximately 10 days after a new
electronic key has been registered.
If this message is displayed but you
have not had a new electronic key
registered, ask your Toyota dealer to
check if an unknow n electronic key
(other than those in your posses-
sion) has been registered.
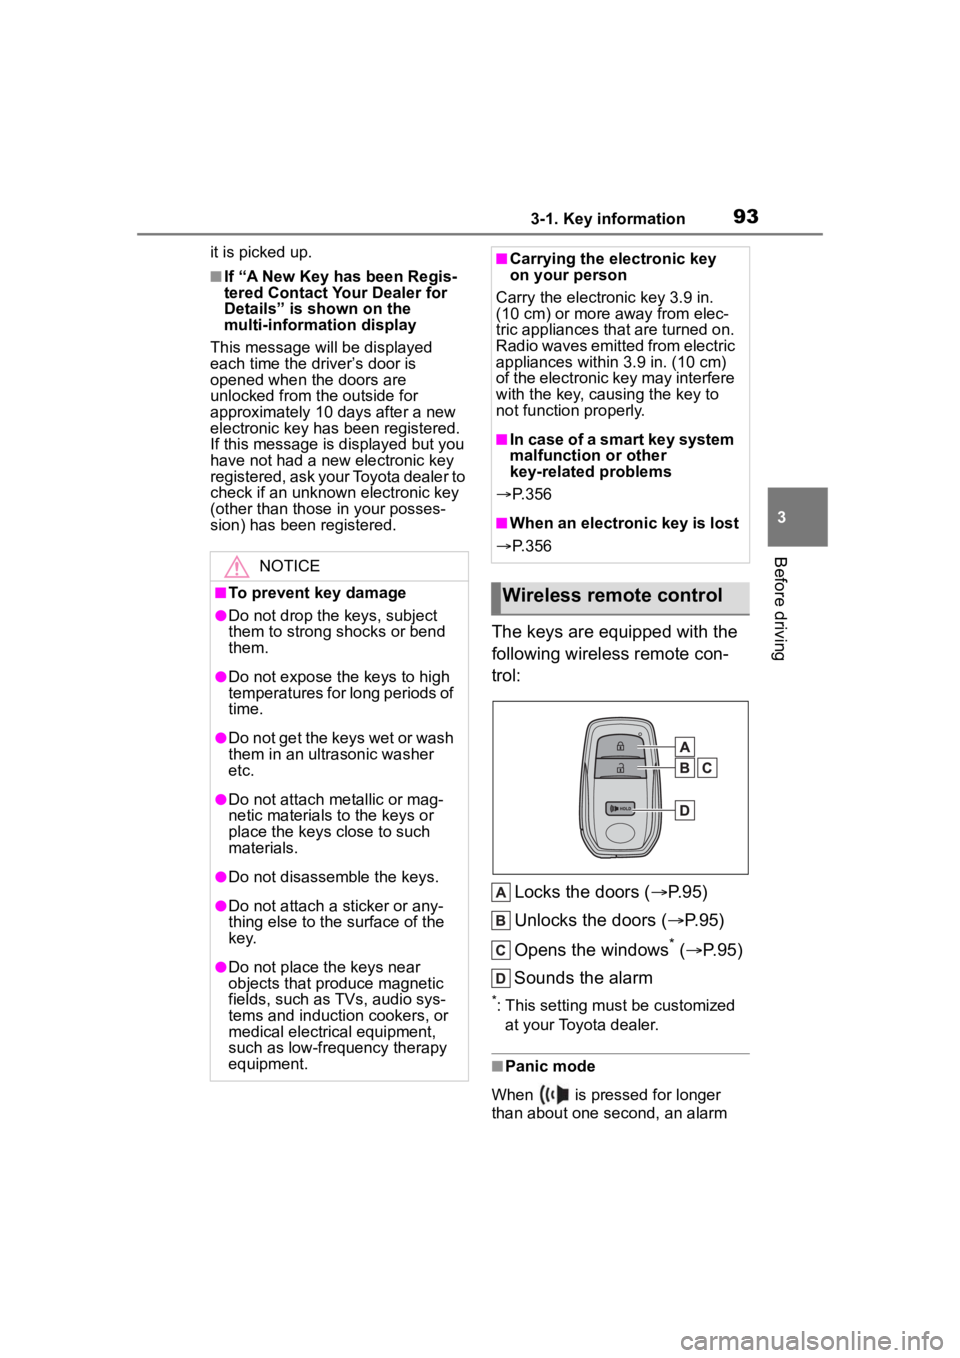
The keys are equipped with the
following wireless remote con-
trol:
Locks the doors ( P.95)
Unlocks the doors ( P.95)
Opens the windows
* ( P.95)
Sounds the alarm
*: This setting must be customized at your Toyota dealer.
■Panic mode
When is pressed for longer
than about one second, an alarm
NOTICE
■To prevent key damage
●Do not drop the keys, subject
them to strong shocks or bend
them.
●Do not expose the keys to high
temperatures for long periods of
time.
●Do not get the keys wet or wash
them in an ultrasonic washer
etc.
●Do not attach metallic or mag-
netic materials to the keys or
place the keys close to such
materials.
●Do not disassemble the keys.
●Do not attach a sticker or any-
thing else to the surface of the
k e y.
●Do not place th e keys near
objects that produce magnetic
fields, such as TVs, audio sys-
tems and induction cookers, or
medical electrical equipment,
such as low-frequency therapy
equipment.
■Carrying the electronic key
on your person
Carry the electronic key 3.9 in.
(10 cm) or more away from elec-
tric appliances that are turned on.
Radio waves emitte d from electric
appliances within 3.9 in. (10 cm)
of the electronic key may interfere
with the key, causing the key to
not function properly.
■In case of a smart key system
malfunction or other
key-related problems
P. 3 5 6
■When an electronic key is lost
P. 3 5 6
Wireless remote control
Page 95 of 436
953-2. Opening, closing and locking the doors
3
Before driving
3-2.Opening, closing and locking the doors
■Smart key system
Carry the electronic key to
enable this function.
1 Grip the driver’s door handle
to unlock the door. Holding
the driver’s door handle for
approximately 2 seconds
unlocks all the doors. Grip
the front passenger’s door
handle to unlock all the
doors.
*
Make sure to touch the sensor on
the back of the handle.
The doors cannot be unlocked for 3
seconds after the doors are locked.
*: The door unlock settings can be
changed. ( P.95, 386)
2 Touch the lock sensor (the
indentation on the side of the
front door handle) to lock all
the doors.
Check that the door is securely
locked.
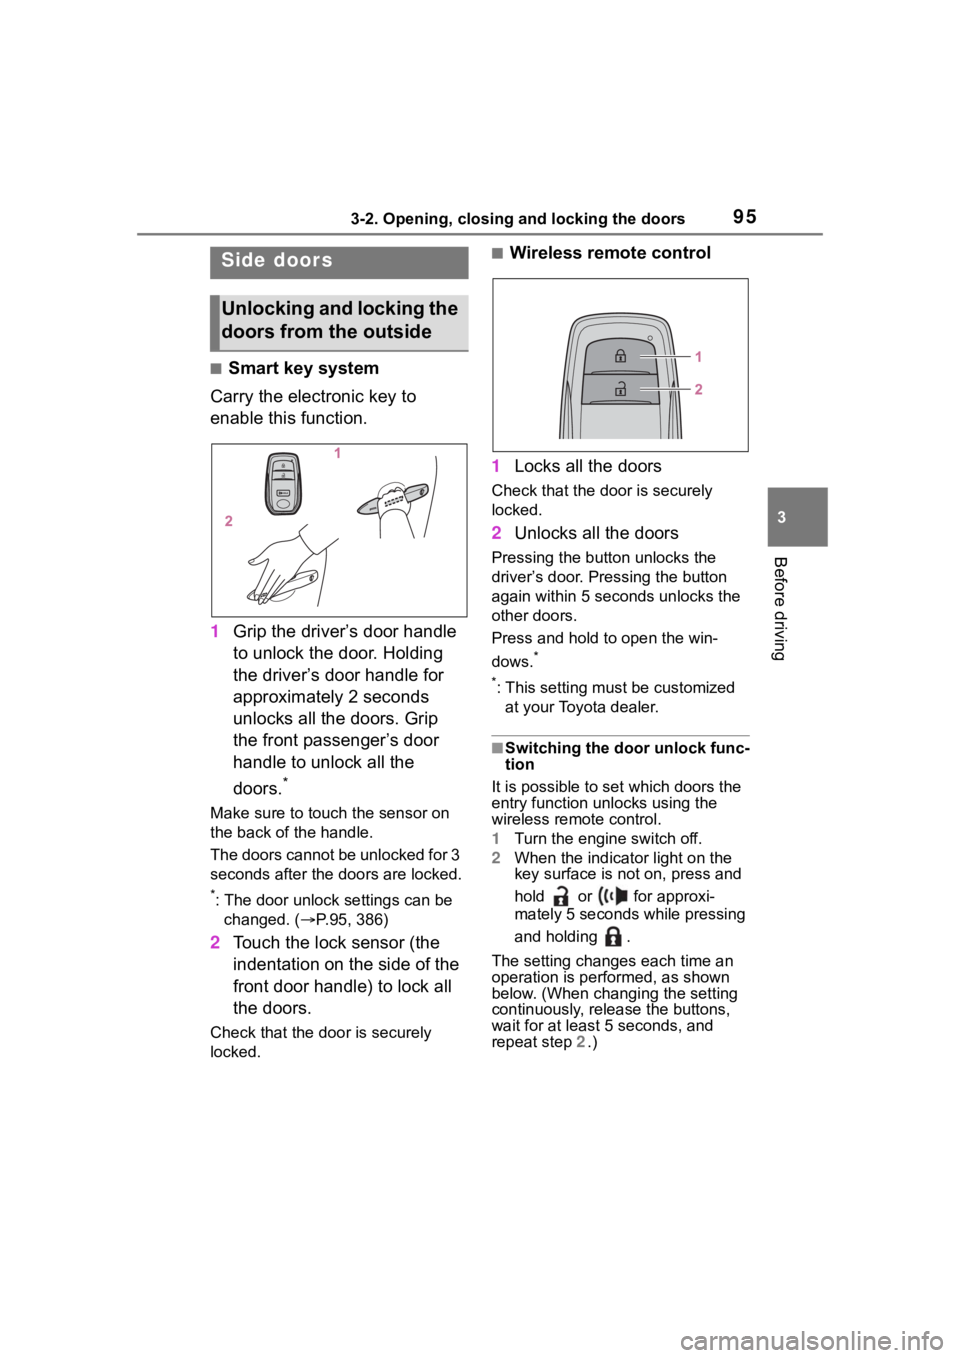
■Wireless remote control
1 Locks all the doors
Check that the d oor is securely
locked.
2 Unlocks all the doors
Pressing the button unlocks the
driver’s door. Pressing the button
again within 5 seconds unlocks the
other doors.
Press and hold to open the win-
dows.
*
*
: This setting must be customized at your Toyota dealer.
■Switching the door unlock func-
tion
It is possible to set which doors the
entry function unlocks using the
wireless remote control.
1 Turn the engine switch off.
2 When the indicator light on the
key surface is not on, press and
hold or for approxi-
mately 5 seconds while pressing
and holding .
The setting changes each time an
operation is per formed, as shown
below. (When changing the setting
continuously, release the buttons,
wait for at least 5 seconds, and
repeat step 2 .)
Side doors
Unlocking and locking the
doors from the outside