TOYOTA GR SUPRA 2022 Owners Manual
Manufacturer: TOYOTA, Model Year: 2022, Model line: GR SUPRA, Model: TOYOTA GR SUPRA 2022Pages: 356, PDF Size: 39.14 MB
Page 301 of 356
3015-1. MOBILITY
5
MOBILITY
This chapter describes all stan-
dard, country-specific and
optional features offered with
the series. It also describes fea-
tures and functions that are not
necessarily available in your
vehicle, e.g., due to the selected
options or country versions. This
also applies to safety-related
functions and systems. When
using these functions and sys-
tems, the applicable laws and
regulations must be observed.
The maintenance system pro-
vides service notifications and
thereby provides support in
maintaining road safety and the
operational reliability of the vehi-
cle.
In some cases, scopes and
intervals of the maintenance
system may vary according to
the country version. Replace-
ment work, spare parts, fuels
and lubricants, and wear materi-
als are calculated separately.
Further information is available
from a Toyota dealer.Sensors and special algorithms
take into account the driving
conditions of the vehicle. CBS
uses these to calculate the need
for maintenance.
The system makes it possible to
adapt the amount of mainte-
nance corresponding to your
user profile.
Information on service notifica-
tions, refer to page 141, can be
displayed on the Control Dis-
play.
Storage periods during which
the vehicle battery was discon-
nected are not taken into
account.
If this occurs, have a Toyota
dealer update the time-depen-
dent maintenance procedures,
such as checking brake fluid
and, if necessary, changing the
engine oil and the microfil-
ter/activated-charcoal filter.
Maintenance
Vehicle features and
options
Maintenance system
Condition Based Service
CBS
Concept
General information
Storage periods
Page 302 of 356
3025-1. MOBILITY
Please consult “Owner's War-
ranty Information Booklet” or
“Owner's Manual Supplement”
for additional information on ser-
vice and maintenance work.
The manufacturer of your vehi-
cle recommends that mainte-
nance and repair be performed
by a Toyota dealer. Records of
regular maintenance and repair
work should be retained.
Scheduled maintenance should
be performed at specified inter-
vals according to the mainte-
nance schedule.
For details about maintenance
items and schedules, refer to
the "Scheduled Maintenance
Guide" or "Owner's Manual Sup-
plement".
Devices connected to the OBD
socket trigger the alarm system
when the vehicle is locked.
Remove any devices con-
nected at the OBD socket before locking the vehicle.
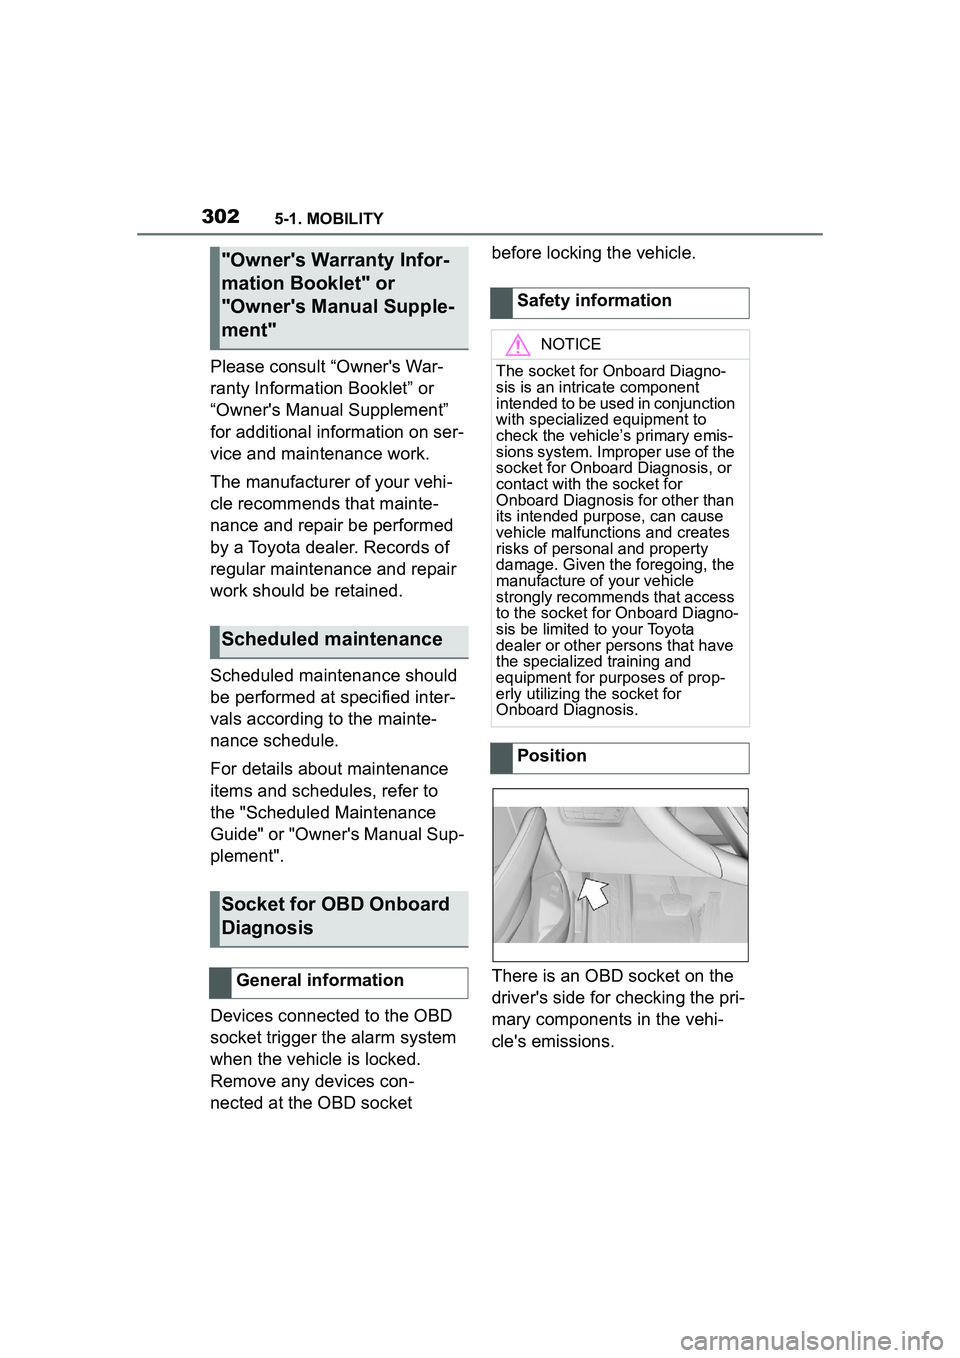
There is an OBD socket on the
driver's side for checking the pri-
mary components in the vehi-
cle's emissions.
"Owner's Warranty Infor-
mation Booklet" or
"Owner's Manual Supple-
ment"
Scheduled maintenance
Socket for OBD Onboard
Diagnosis
General information
Safety information
NOTICE
The socket for Onboard Diagno-
sis is an intricate component
intended to be used in conjunction
with specialized equipment to
check the vehicle’s primary emis-
sions system. Improper use of the
socket for Onboard Diagnosis, or
contact with the socket for
Onboard Diagnosis for other than
its intended purpose, can cause
vehicle malfunctions and creates
risks of personal and property
damage. Given the foregoing, the
manufacture of your vehicle
strongly recommends that access
to the socket for Onboard Diagno-
sis be limited to your Toyota
dealer or other persons that have
the specialized training and
equipment for purposes of prop-
erly utilizing the socket for
Onboard Diagnosis.
Position
Page 303 of 356
3035-1. MOBILITY
5
MOBILITY
This chapter describes all stan-
dard, country-specific and
optional features offered with
the series. It also describes fea-
tures and functions that are not
necessarily available in your
vehicle, e.g., due to the selected
options or country versions. This
also applies to safety-related
functions and systems. When
using these functions and sys-
tems, the applicable laws and
regulations must be observed.
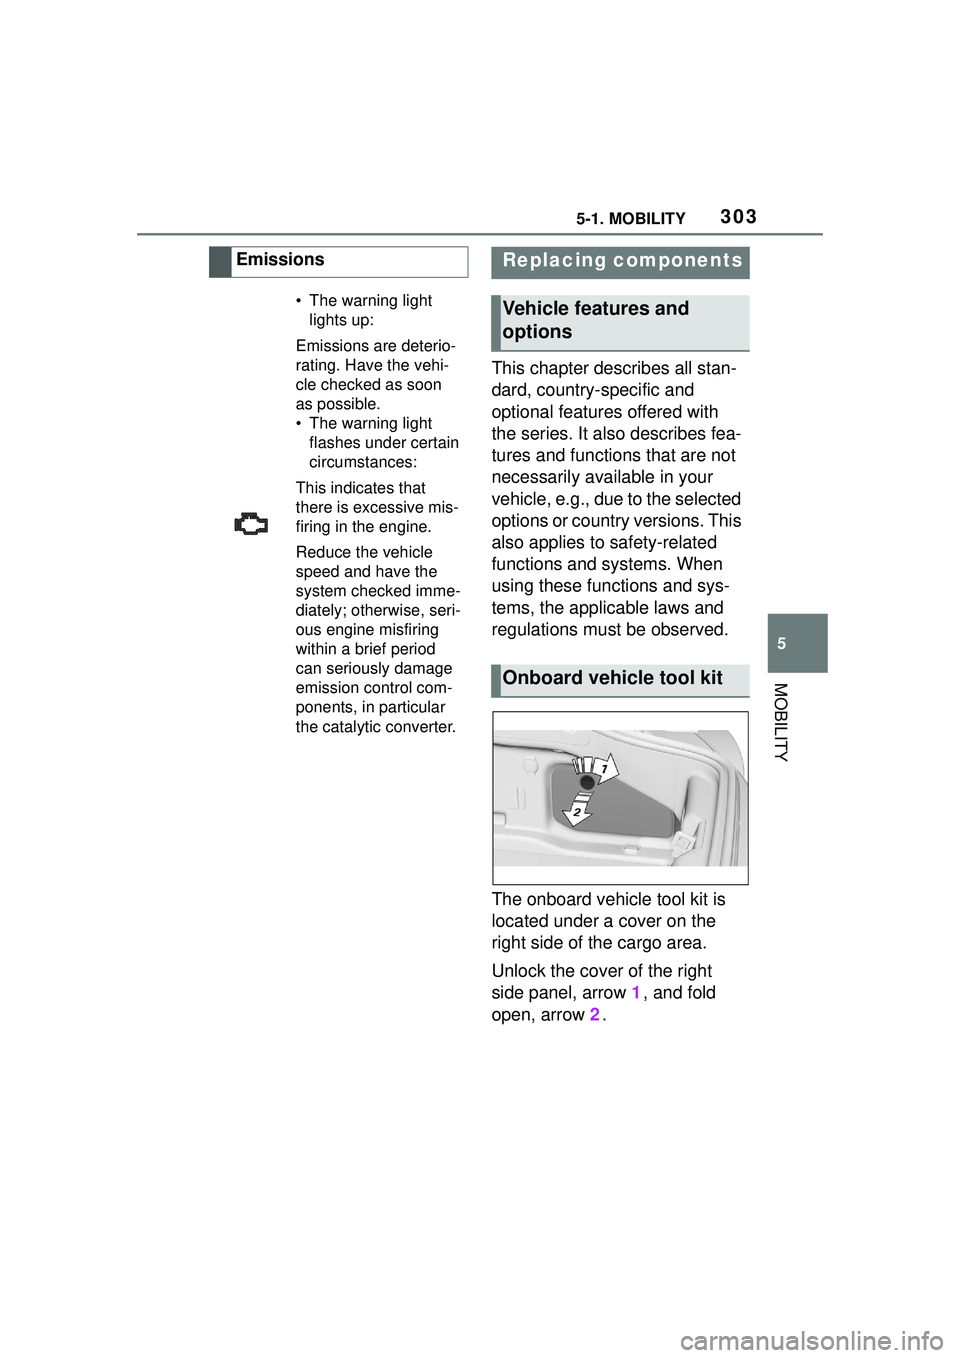
The onboard vehicle tool kit is
located under a cover on the
right side of the cargo area.
Unlock the cover of the right
side panel, arrow 1, and fold
open, arrow 2.
Emissions
• The warning light
lights up:
Emissions are deterio-
rating. Have the vehi-
cle checked as soon
as possible.
• The warning light flashes under certain
circumstances:
This indicates that
there is excessive mis-
firing in the engine.
Reduce the vehicle
speed and have the
system checked imme-
diately; otherwise, seri-
ous engine misfiring
within a brief period
can seriously damage
emission control com-
ponents, in particular
the catalytic converter.
Replacing components
Vehicle features and
options
Onboard vehicle tool kit
Page 304 of 356
3045-1. MOBILITY
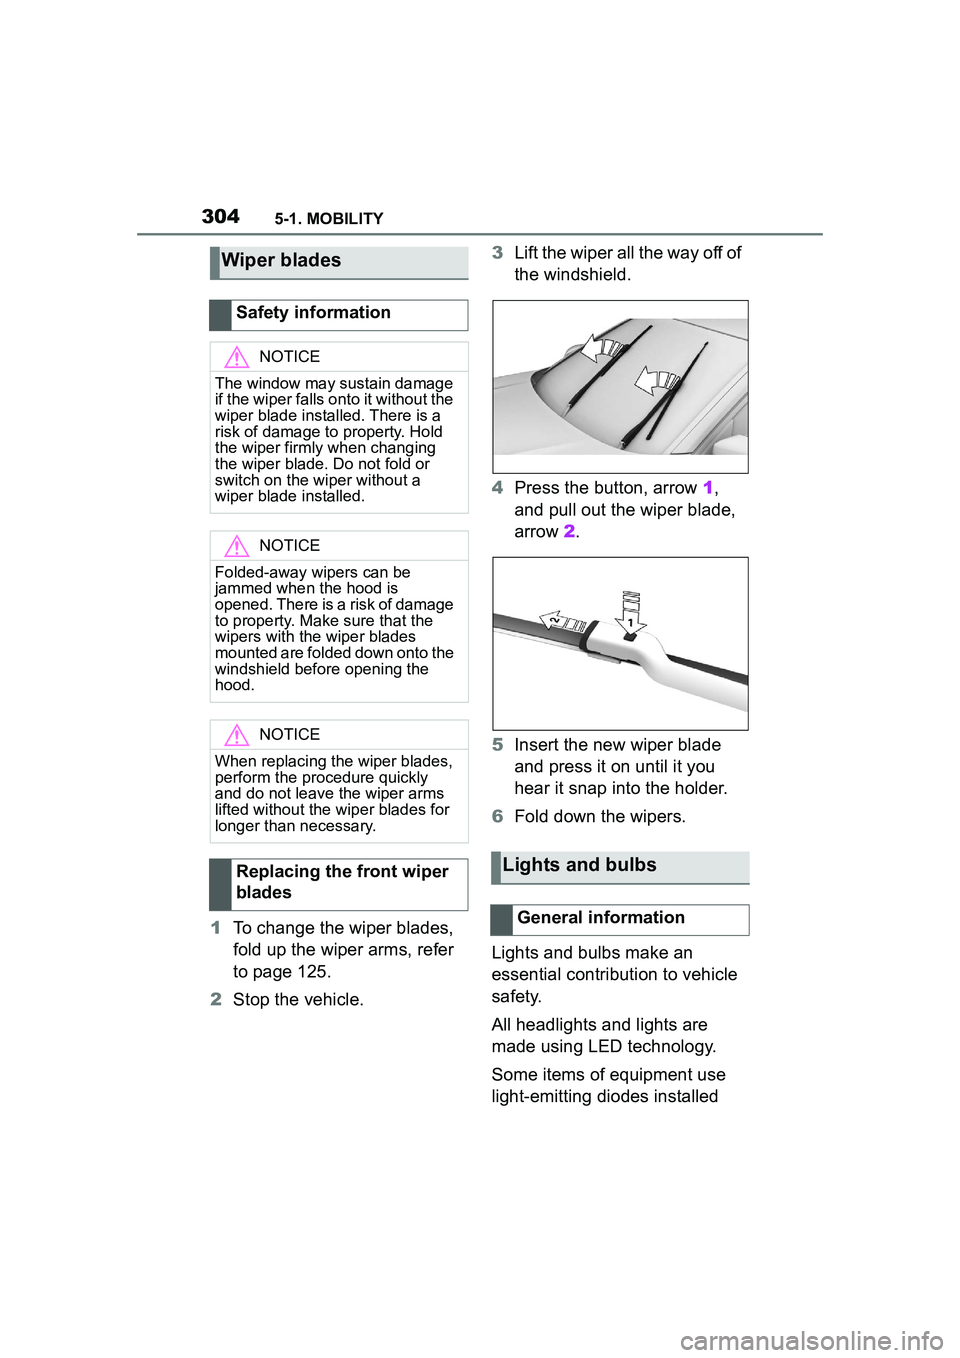
1To change the wiper blades,
fold up the wiper arms, refer
to page 125.
2 Stop the vehicle. 3
Lift the wiper all the way off of
the windshield.
4 Press the button, arrow 1,
and pull out the wiper blade,
arrow 2.
5 Insert the new wiper blade
and press it on until it you
hear it snap into the holder.
6 Fold down the wipers.
Lights and bulbs make an
essential contribution to vehicle
safety.
All headlights and lights are
made using LED technology.
Some items of equipment use
light-emitting diodes installed
Wiper blades
Safety information
NOTICE
The window may sustain damage
if the wiper falls on to it without the
wiper blade installed. There is a
risk of damage to property. Hold
the wiper firmly when changing
the wiper blade. Do not fold or
switch on the wiper without a
wiper blade installed.
NOTICE
Folded-away wipers can be
jammed when the hood is
opened. There is a risk of damage
to property. Make sure that the
wipers with the wiper blades
mounted are folded down onto the
windshield before opening the
hood.
NOTICE
When replacing the wiper blades,
perform the procedure quickly
and do not leave the wiper arms
lifted without the wiper blades for
longer than necessary.
Replacing the front wiper
bladesLights and bulbs
General information
Page 305 of 356
3055-1. MOBILITY
5
MOBILITY
behind a cover as a light source.
These light-emitting diodes are
related to conventional lasers
and are officially designated as
Class 1 light-emitting diodes.
The manufacturer of the vehicle
recommends that you let your
Toyota dealer perform the work
in case of a malfunction.
Follow the safety information,
refer to page 305.
Condensation can form on the
inside of the headlight glass in
cool or humid weather. When
driving with the lights switched
on, the condensation evapo-
rates after a short time. The
headlight glass does not need to
be changed.
If despite driving with the head-
lights switched on, increasing
humidity forms, for instance
water droplets in the light, have
the headlights checked.The battery is maintenance-free.
More information regarding the
battery can be requested from
your Toyota dealer.
The manufacturer of your vehi-
cle recommends that you have
your Toyota dealer register the
vehicle battery to the vehicle
after the battery has been
replaced. Once the battery has
been registered again, all com-
fort features will be available
without restriction and any vehi-
cle messages displayed which
relate to comfort features will
disappear.
The installed battery is designed
specifically for this vehicle. If an
inappropriate battery is used,
operation of the Auto Start Stop
function may be restricted in
order to protect the battery.
Also, the battery may deterio-
rate faster than normal and the
Headlight glass
Safety information
WARNING
Focused laser light
can irritate or
permanently damage the retina of
the eye. There is a risk of injury.
The manufacturer of your vehicle
recommends that the work on the
lighting system including bulb
replacement be performed by
your Toyota dealer.
WARNING
Intensive brightness can irritate or
damage the retina of the eye.
There is a risk of injury. Do not
look directly into the headlights or
other light sources. Do not
remove the LED covers.
Vehicle battery
General information
When replacing the bat-
tery
Page 306 of 356
3065-1. MOBILITY
engine may not be able to be
restarted. Contact your Toyota
dealer for details.
Make sure that the battery is
always sufficiently charged to
guarantee that the battery
remains usable for its full ser-
vice life.
Charge the battery when accel-
eration is insufficient.
The following circumstances
can have a negative effect on
the performance of the battery:
Frequent short-distance
drives.
The vehicle is not used for
more than a month. Charge the battery only when
the engine is off and via the
starting aid terminals, refer to
page 317, in the engine com-
partment.
After a power loss, some equip-
ment needs to be newly initial-
ized or individual settings
updated, for example:
Memory function: store the
positions again.
Time: update.
Date: update.
Maintain the battery in an
upright position for transport and
Safety information
WARNING
Vehicle batteries that are not com-
patible can damage vehicle sys-
tems and impair vehicle functions.
There is a risk of personal and
property damage. Only vehicle
batteries that ar
e compatible with
your vehicle type should be
installed in your vehicle. Informa-
tion on compatible vehicle batter-
ies is available at your Toyota
dealer.
Charging the battery
General information
A discharged battery is
indicated by a red indi-
cator light.
Safety information
NOTICE
Battery chargers for the vehicle
battery can work with high volt-
ages and currents, which means
that the 12 volt on-board network
can be overloaded or damaged.
There is a risk of damage to prop-
erty. Only connect battery char-
gers for the vehicle battery to the
starting aid terminals in the
engine compartment.
Charging the battery
Power failure
Disposing of old batteries
Have old batteries dis-
posed of by your Toyota
dealer or take them to a
collection point.
Page 307 of 356
3075-1. MOBILITY
5
MOBILITY
storage. Secure the battery so
that it does not tip over during
transport.
The fuses are located at differ-
ent places in the vehicle.
The fuses are located in the
car's interior in the front passen-
ger floor area behind a cover.Loosen fasteners, arrows, and
open cover.
The fuse box is located on the
front right.
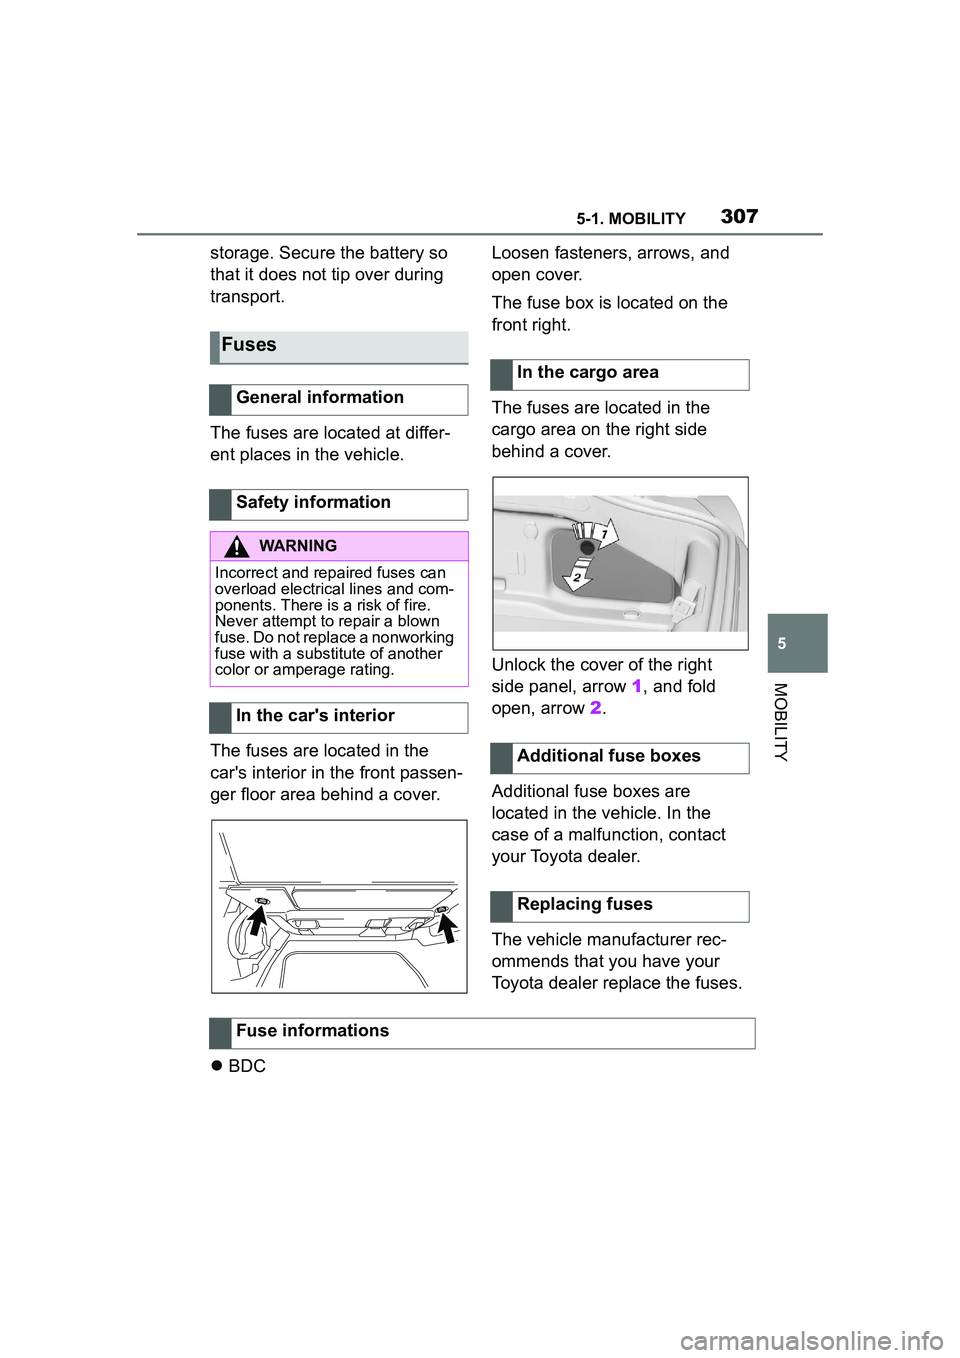
The fuses are located in the
cargo area on the right side
behind a cover.
Unlock the cover of the right
side panel, arrow
1, and fold
open, arrow 2.
Additional fuse boxes are
located in the vehicle. In the
case of a malfunction, contact
your Toyota dealer.
The vehicle manufacturer rec-
ommends that you have your
Toyota dealer replace the fuses.
BDC
Fuses
General information
Safety information
WARNING
Incorrect and repaired fuses can
overload electrical lines and com-
ponents. There is a risk of fire.
Never attempt to repair a blown
fuse. Do not replace a nonworking
fuse with a substitute of another
color or amperage rating.
In the car's interior
In the cargo area
Additional fuse boxes
Replacing fuses
Fuse informations
Page 308 of 356
3085-1. MOBILITY
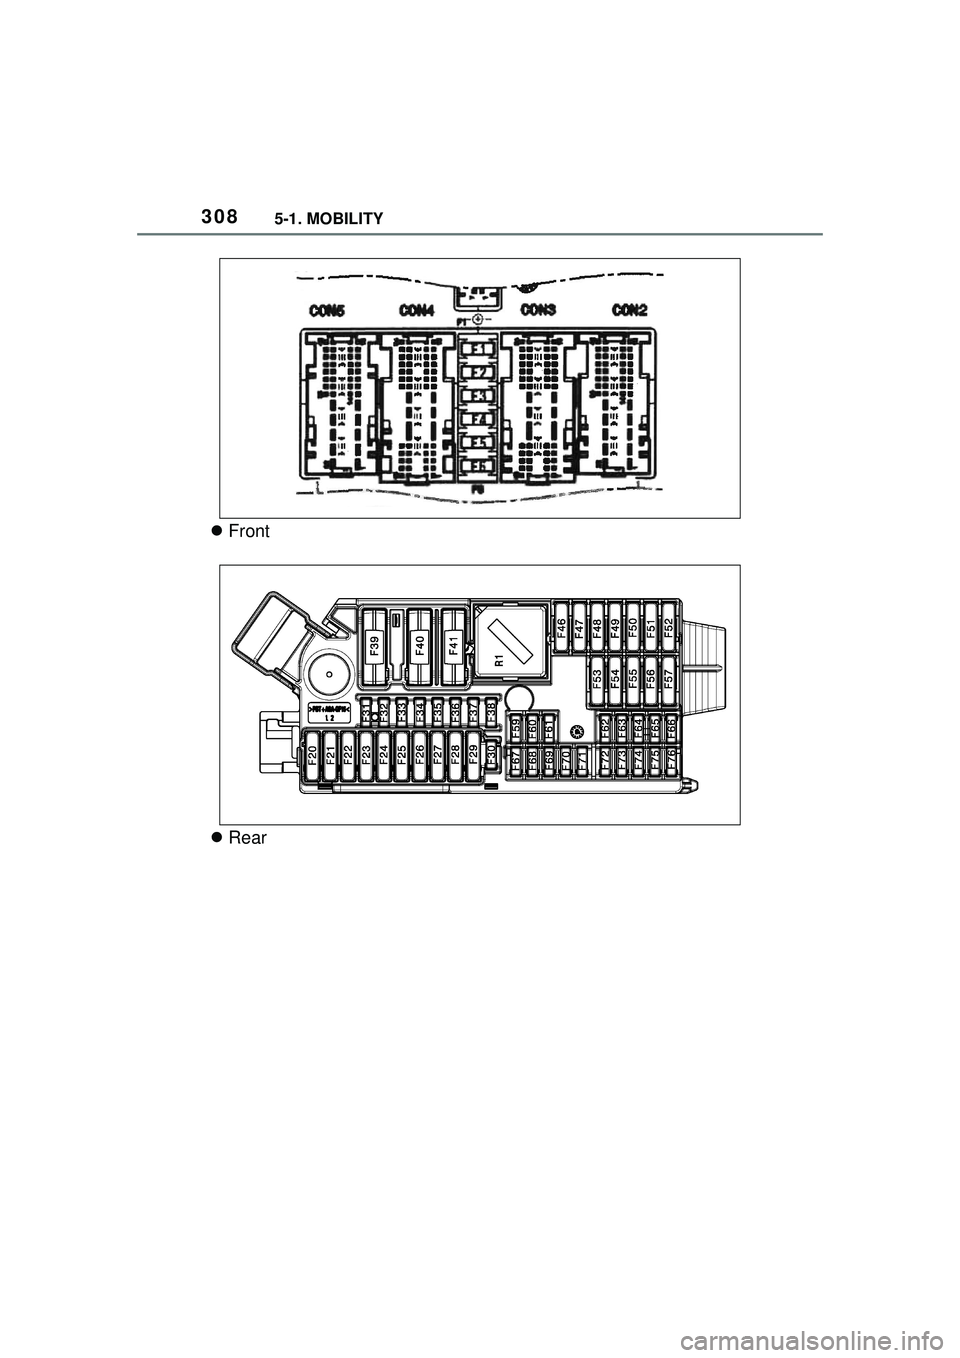
Front
Rear
Page 309 of 356
![TOYOTA GR SUPRA 2022 Owners Manual 3095-1. MOBILITY
5
MOBILITY
Fuse values
F: Fuse
[A]: Ampere (Fuse - Value)
*: Spare Slot
F28
F28, F32
F3, F40, F204
F40 TOYOTA GR SUPRA 2022 Owners Manual 3095-1. MOBILITY
5
MOBILITY
Fuse values
F: Fuse
[A]: Ampere (Fuse - Value)
*: Spare Slot
F28
F28, F32
F3, F40, F204
F40](/img/14/67014/w960_67014-308.png)
3095-1. MOBILITY
5
MOBILITY
Fuse values
F: Fuse
[A]: Ampere (Fuse - Value)
*: Spare Slot
F28
F28, F32
F3, F40, F204
F40
Page 310 of 356
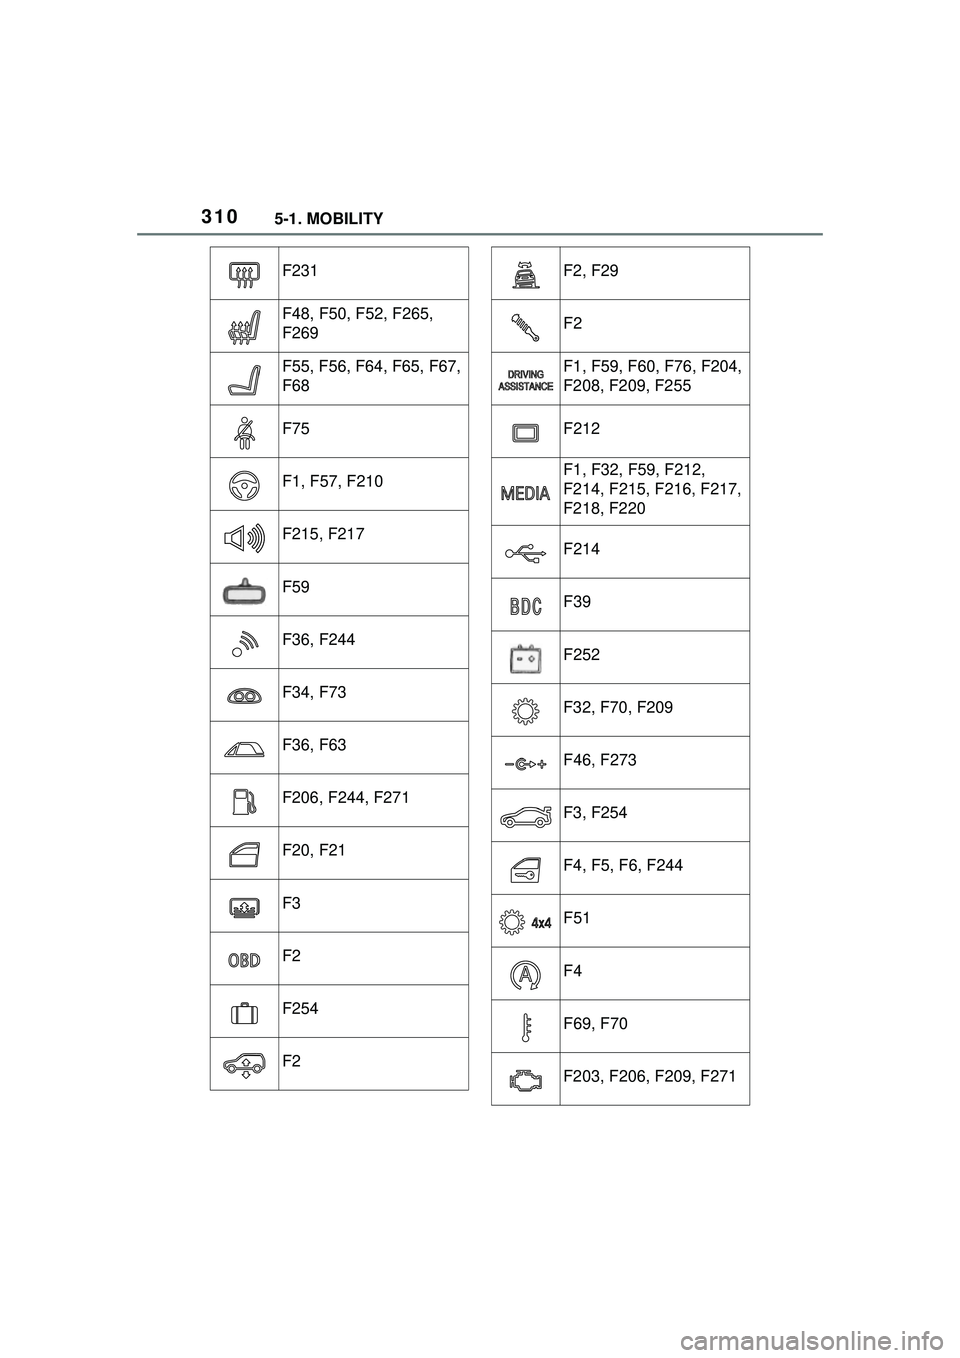
3105-1. MOBILITY
F231
F48, F50, F52, F265,
F269
F55, F56, F64, F65, F67,
F68
F75
F1, F57, F210
F215, F217
F59
F36, F244
F34, F73
F36, F63
F206, F244, F271
F20, F21
F3
F2
F254
F2
F2, F29
F2
F1, F59, F60, F76, F204,
F208, F209, F255
F212
F1, F32, F59, F212,
F214, F215, F216, F217,
F218, F220
F214
F39
F252
F32, F70, F209
F46, F273
F3, F254
F4, F5, F6, F244
F51
F4
F69, F70
F203, F206, F209, F271