TOYOTA HIGHLANDER 2012 XU40 / 2.G Owners Manual
HIGHLANDER 2012 XU40 / 2.G
TOYOTA
TOYOTA
https://www.carmanualsonline.info/img/14/6410/w960_6410-0.png
TOYOTA HIGHLANDER 2012 XU40 / 2.G Owners Manual
Trending: low beam, oil type, headlights, coolant temperature, wheel torque, open hood, brake light
Page 541 of 636
5
When trouble arises
541
5-2. Steps to take in an emergency
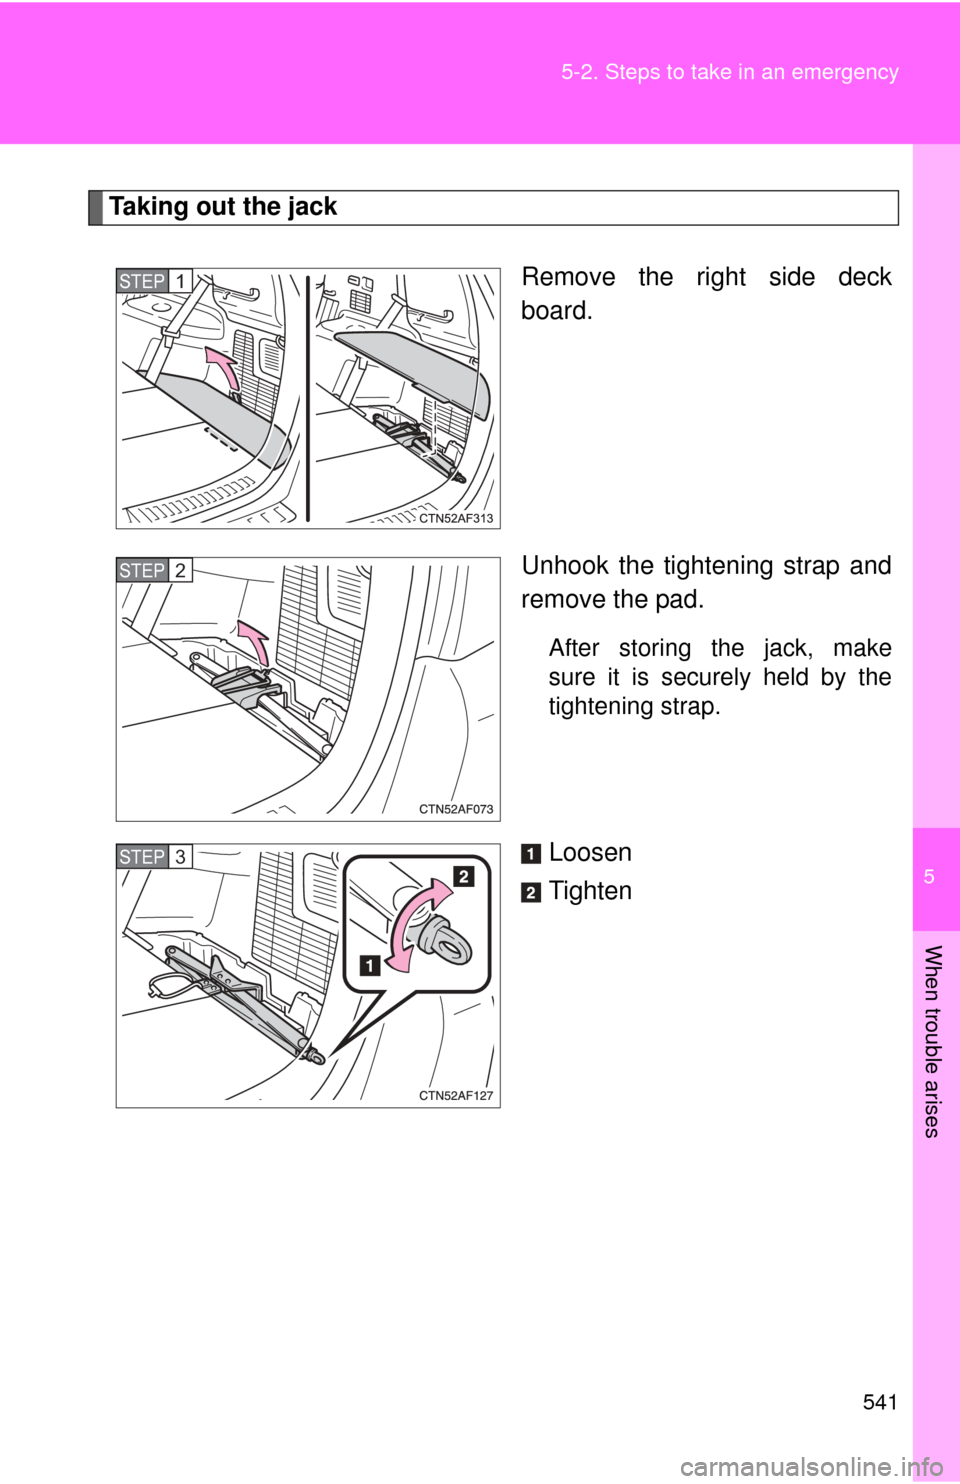
Taking out the jack
Remove the right side deck
board.
Unhook the tightening strap and
remove the pad.
After storing the jack, make
sure it is securely held by the
tightening strap.
Loosen
Tighten
STEP1
STEP2
STEP3
Page 542 of 636
542 5-2. Steps to take in an emergency
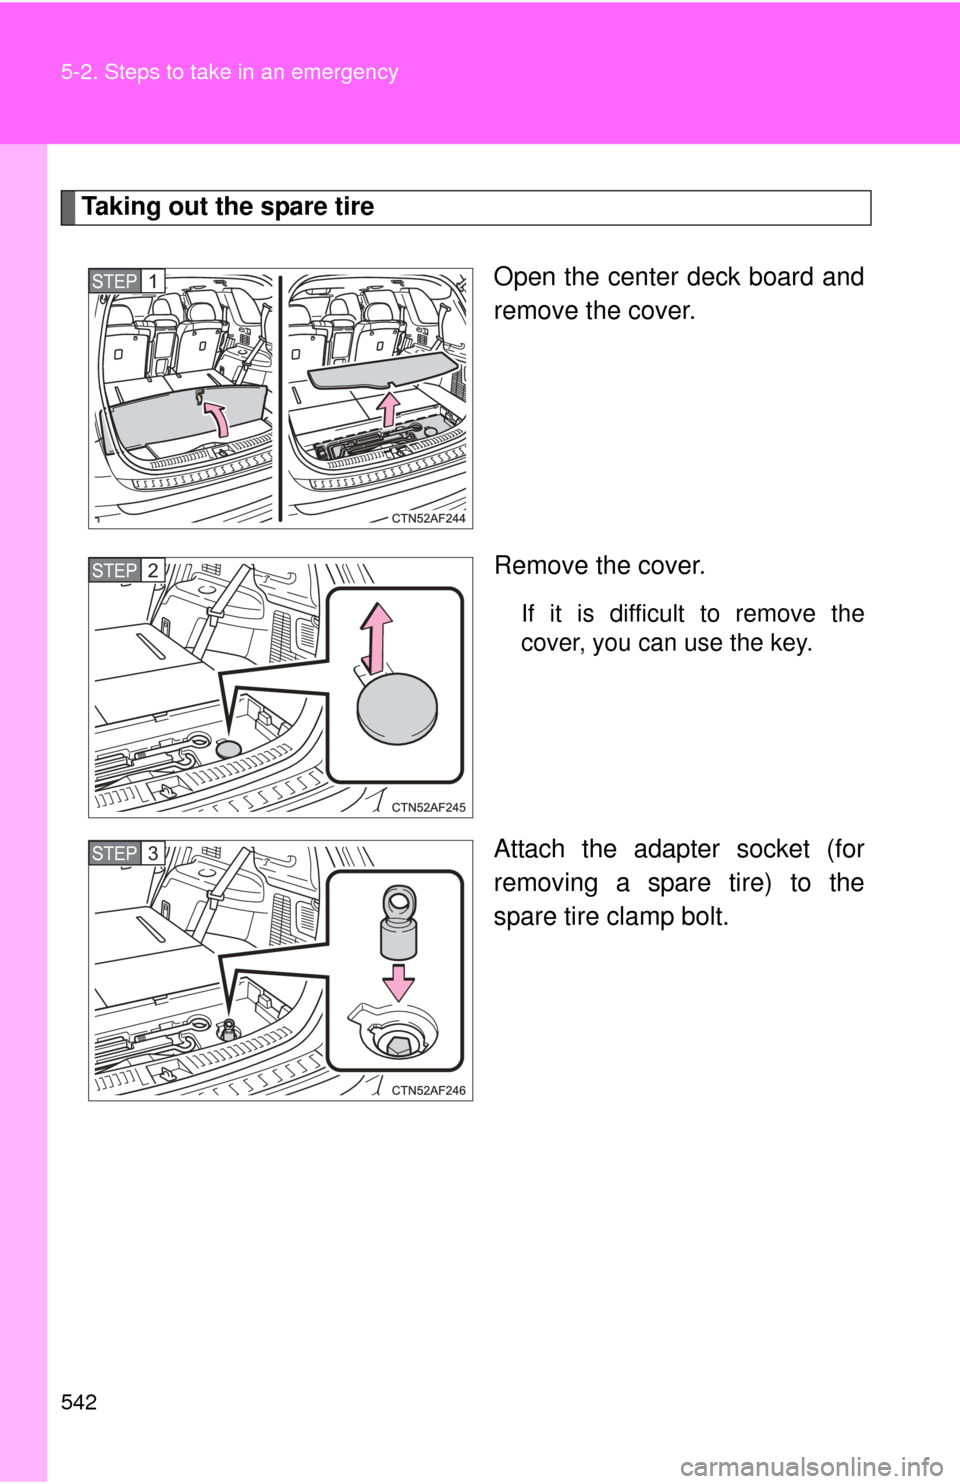
Taking out the spare tireOpen the center deck board and
remove the cover.
Remove the cover.
If it is difficult to remove the
cover, you can use the key.
Attach the adapter socket (for
removing a spare tire) to the
spare tire clamp bolt.
STEP1
STEP2
STEP3
Page 543 of 636
5
When trouble arises
543
5-2. Steps to take in an emergency
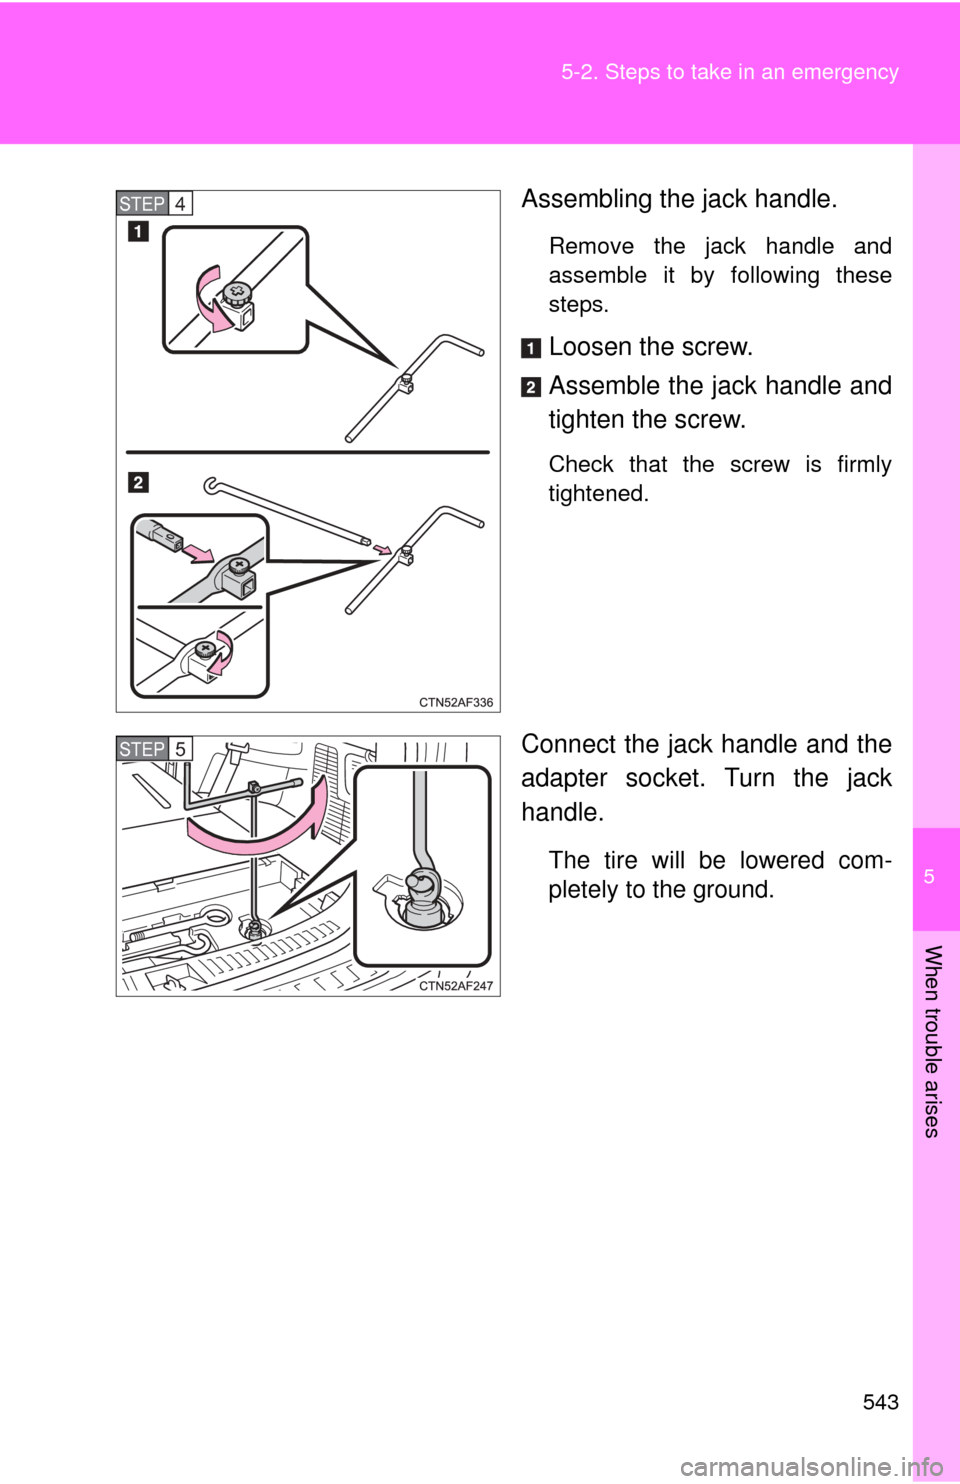
Assembling the jack handle.
Remove the jack handle and
assemble it by following these
steps.
Loosen the screw.
Assemble the jack handle and
tighten the screw.
Check that the screw is firmly
tightened.
Connect the jack handle and the
adapter socket. Turn the jack
handle.
The tire will be lowered com-
pletely to the ground.
STEP4
STEP5
Page 544 of 636
544 5-2. Steps to take in an emergency
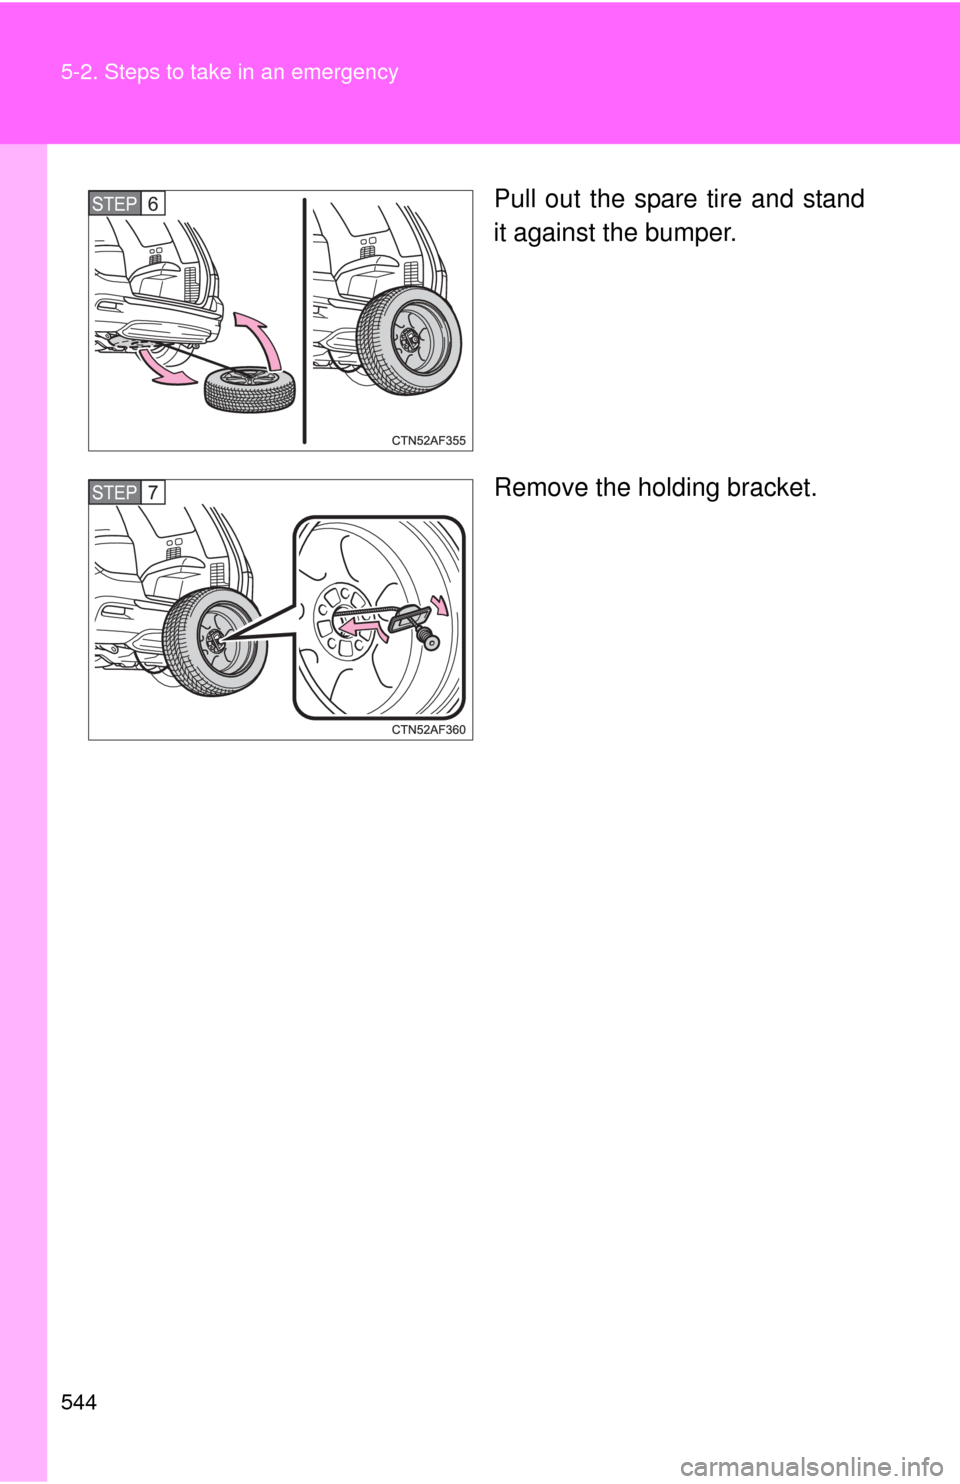
Pull out the spare tire and stand
it against the bumper.
Remove the holding bracket.STEP6
STEP7
Page 545 of 636
5
When trouble arises
545
5-2. Steps to take in an emergency
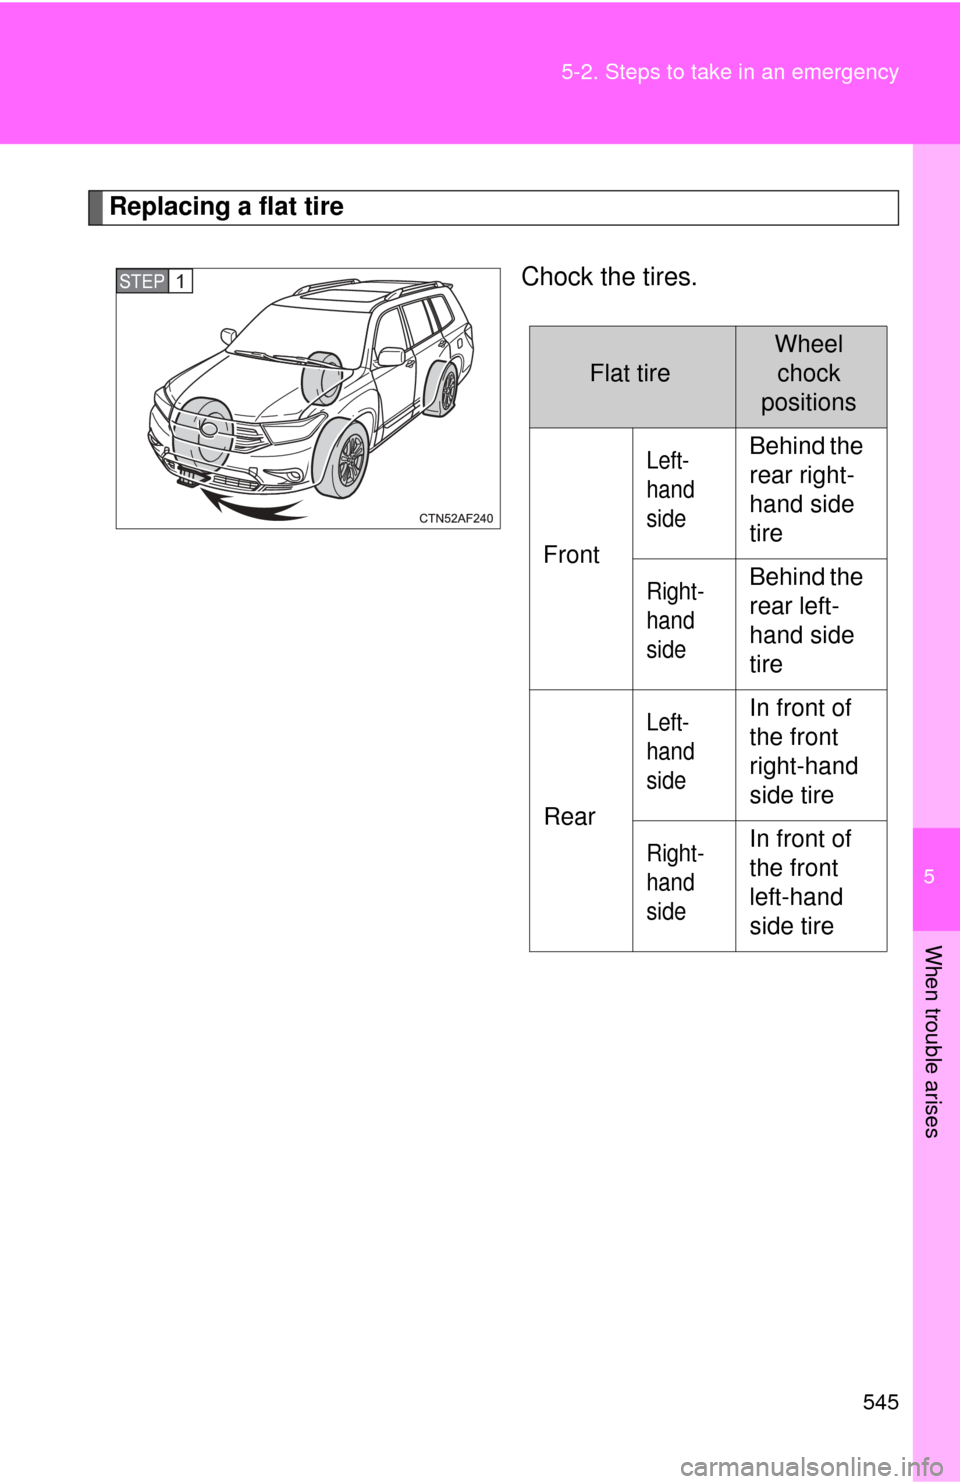
Replacing a flat tire
Chock the tires.
STEP1STEP1
Flat tire
Wheel chock
positions
Front
Left-
hand
sideBehind the
rear right-
hand side
tire
Right-
hand
sideBehind the
rear left-
hand side
tire
Rear
Left-
hand
sideIn front of
the front
right-hand
side tire
Right-
hand
sideIn front of
the front
left-hand
side tire
Page 546 of 636
546 5-2. Steps to take in an emergency
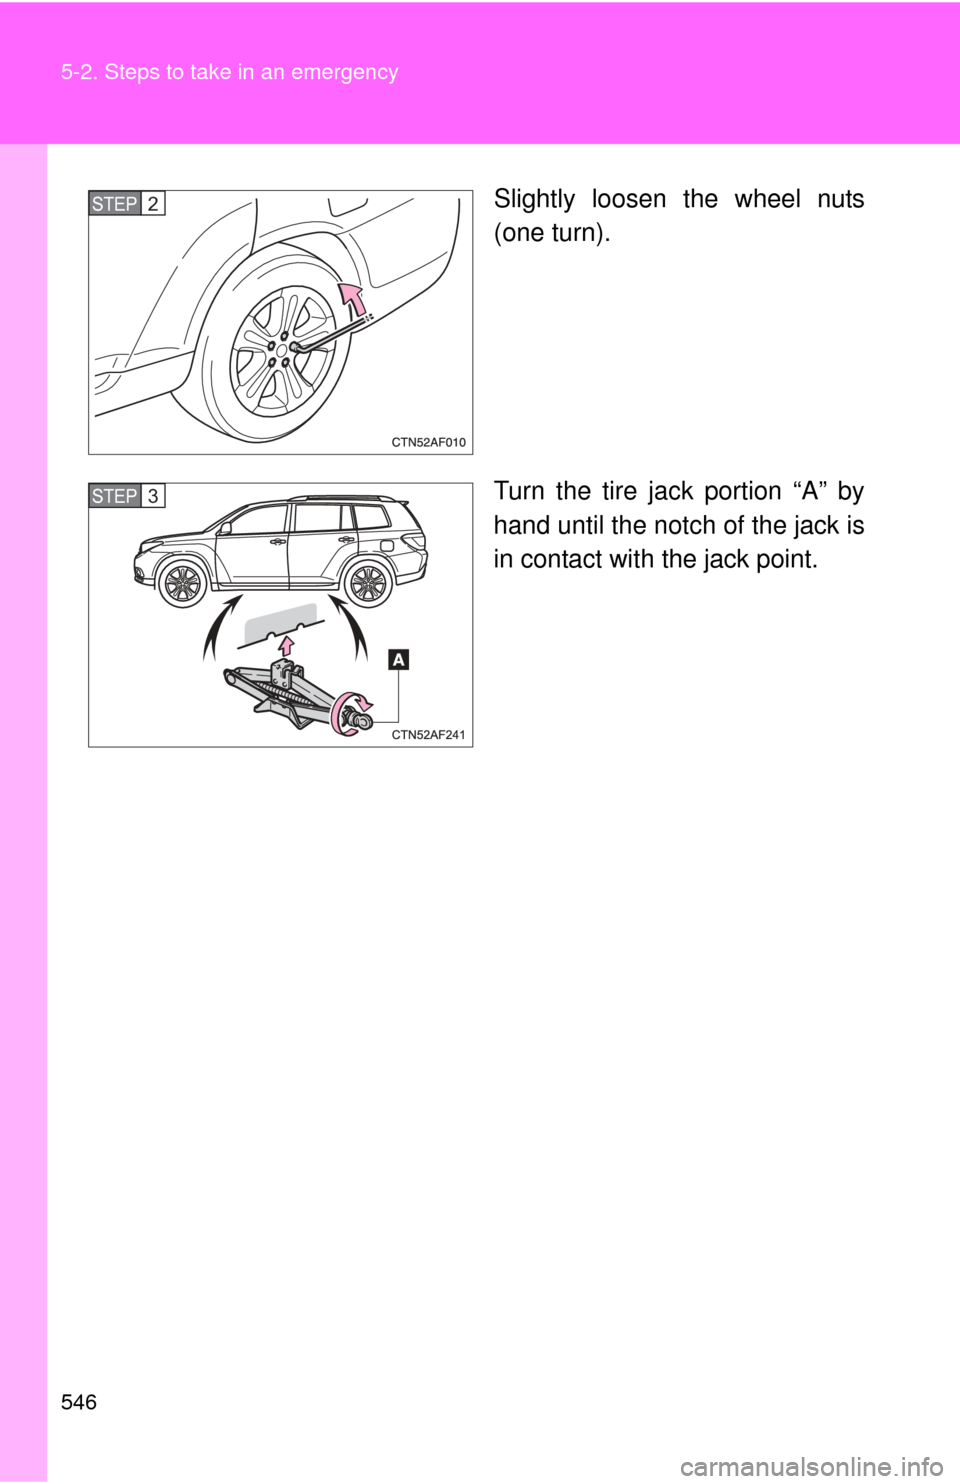
Slightly loosen the wheel nuts
(one turn).
Turn the tire jack portion “A” by
hand until the notch of the jack is
in contact with the jack point.STEP2
STEP3
Page 547 of 636
5
When trouble arises
547
5-2. Steps to take in an emergency
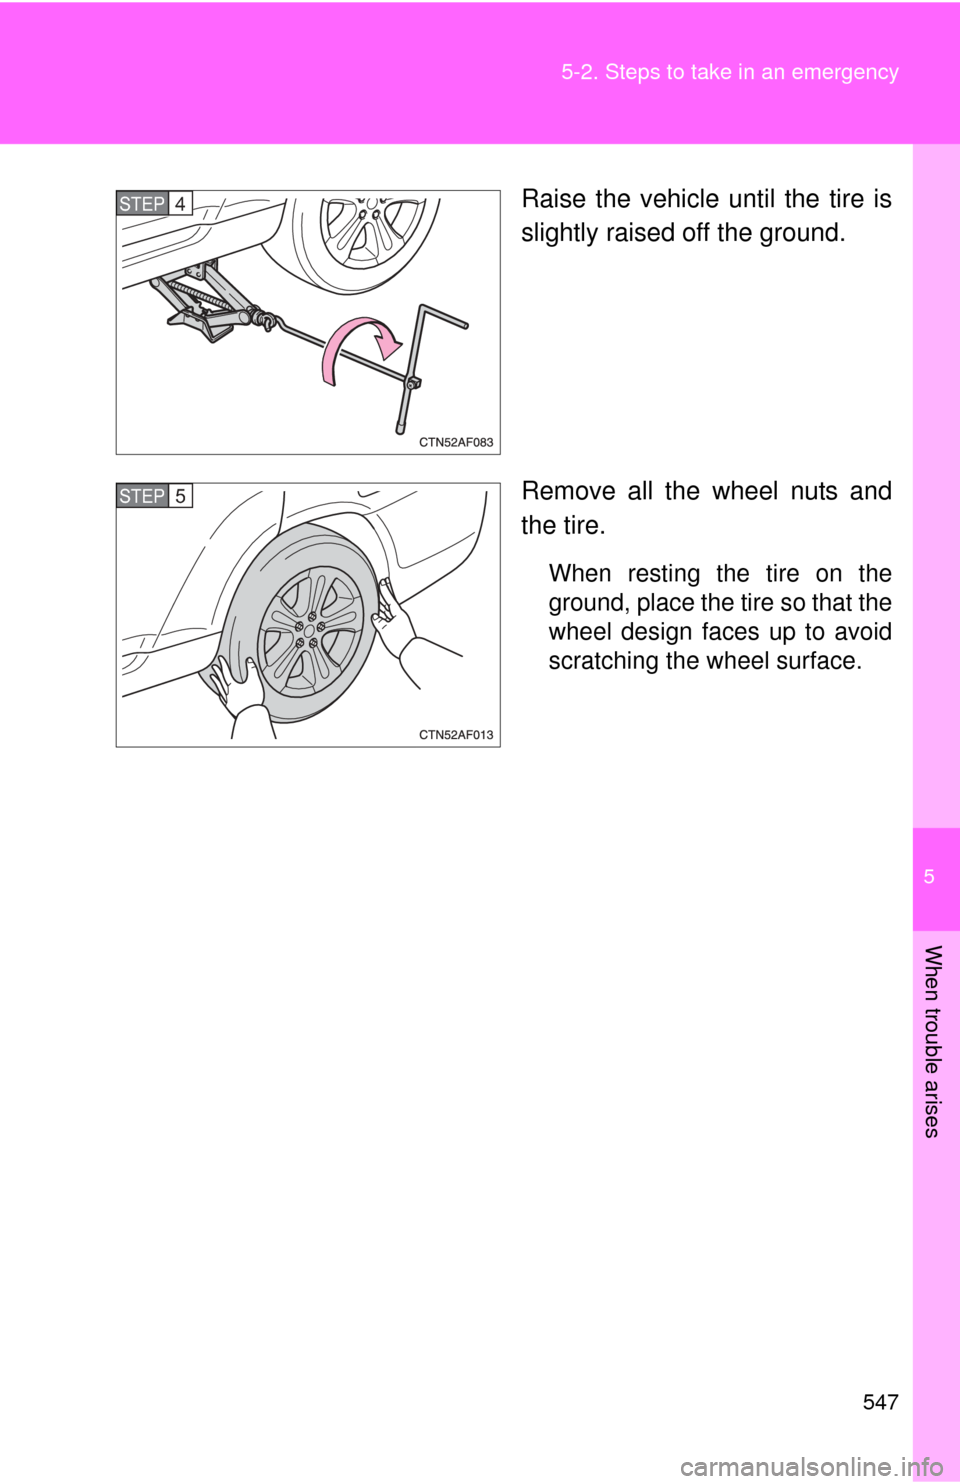
Raise the vehicle until the tire is
slightly raised off the ground.
Remove all the wheel nuts and
the tire.
When resting the tire on the
ground, place the tire so that the
wheel design faces up to avoid
scratching the wheel surface.
STEP4
STEP5
Page 548 of 636
548 5-2. Steps to take in an emergency
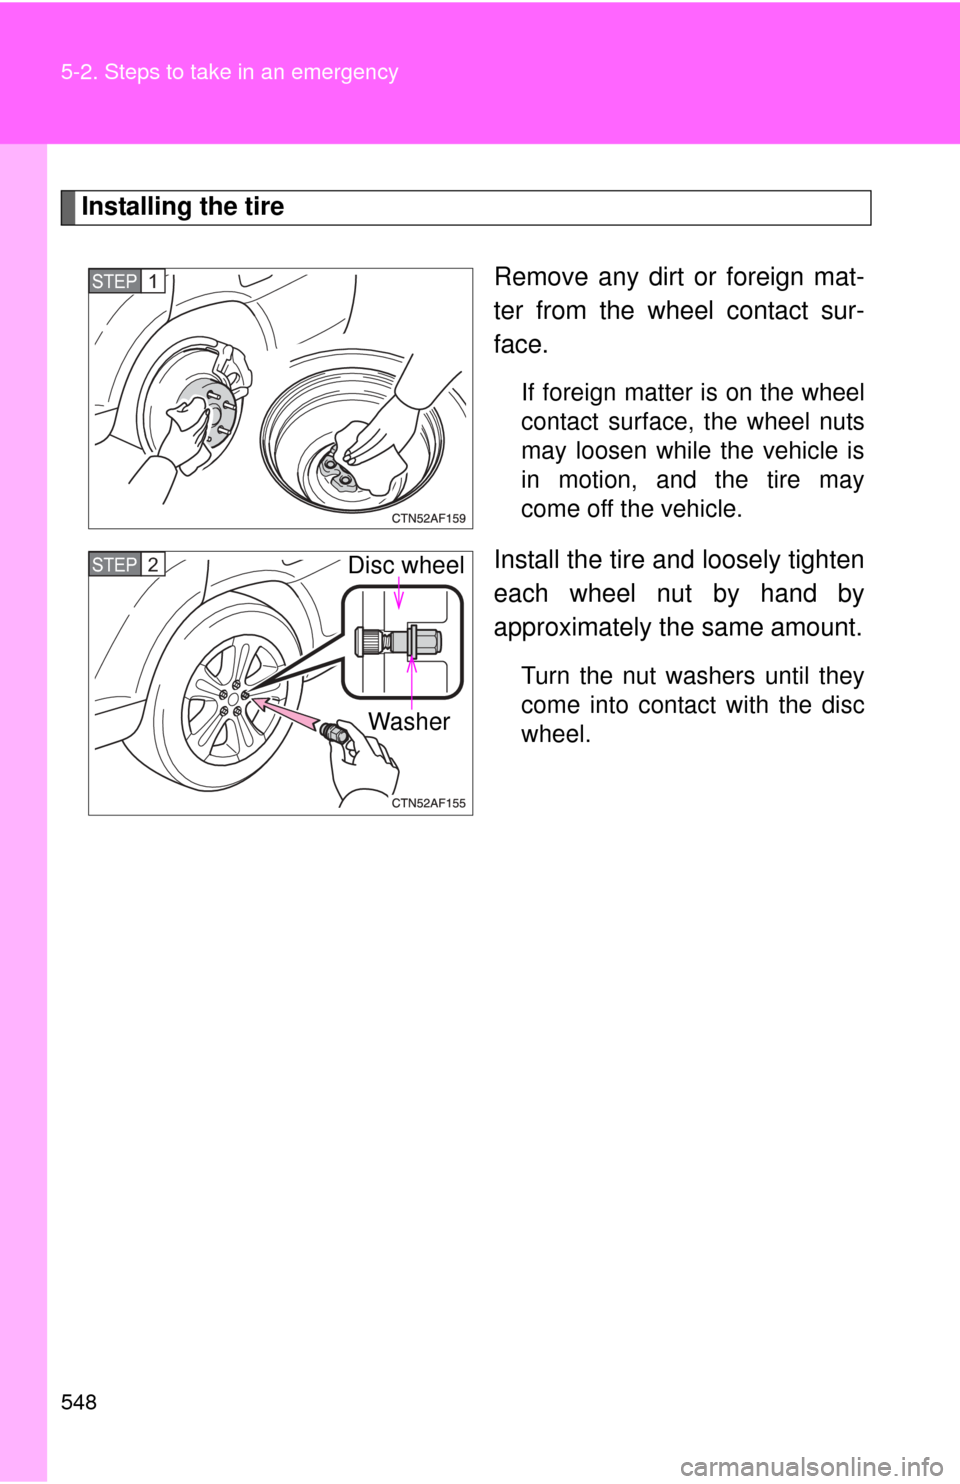
Installing the tireRemove any dirt or foreign mat-
ter from the wheel contact sur-
face.
If foreign matter is on the wheel
contact surface, the wheel nuts
may loosen while the vehicle is
in motion, and the tire may
come off the vehicle.
Install the tire and loosely tighten
each wheel nut by hand by
approximately the same amount.
Turn the nut washers until they
come into contact with the disc
wheel.
STEP1
Disc wheel
WasherSTEP2
Page 549 of 636
5
When trouble arises
549
5-2. Steps to take in an emergency
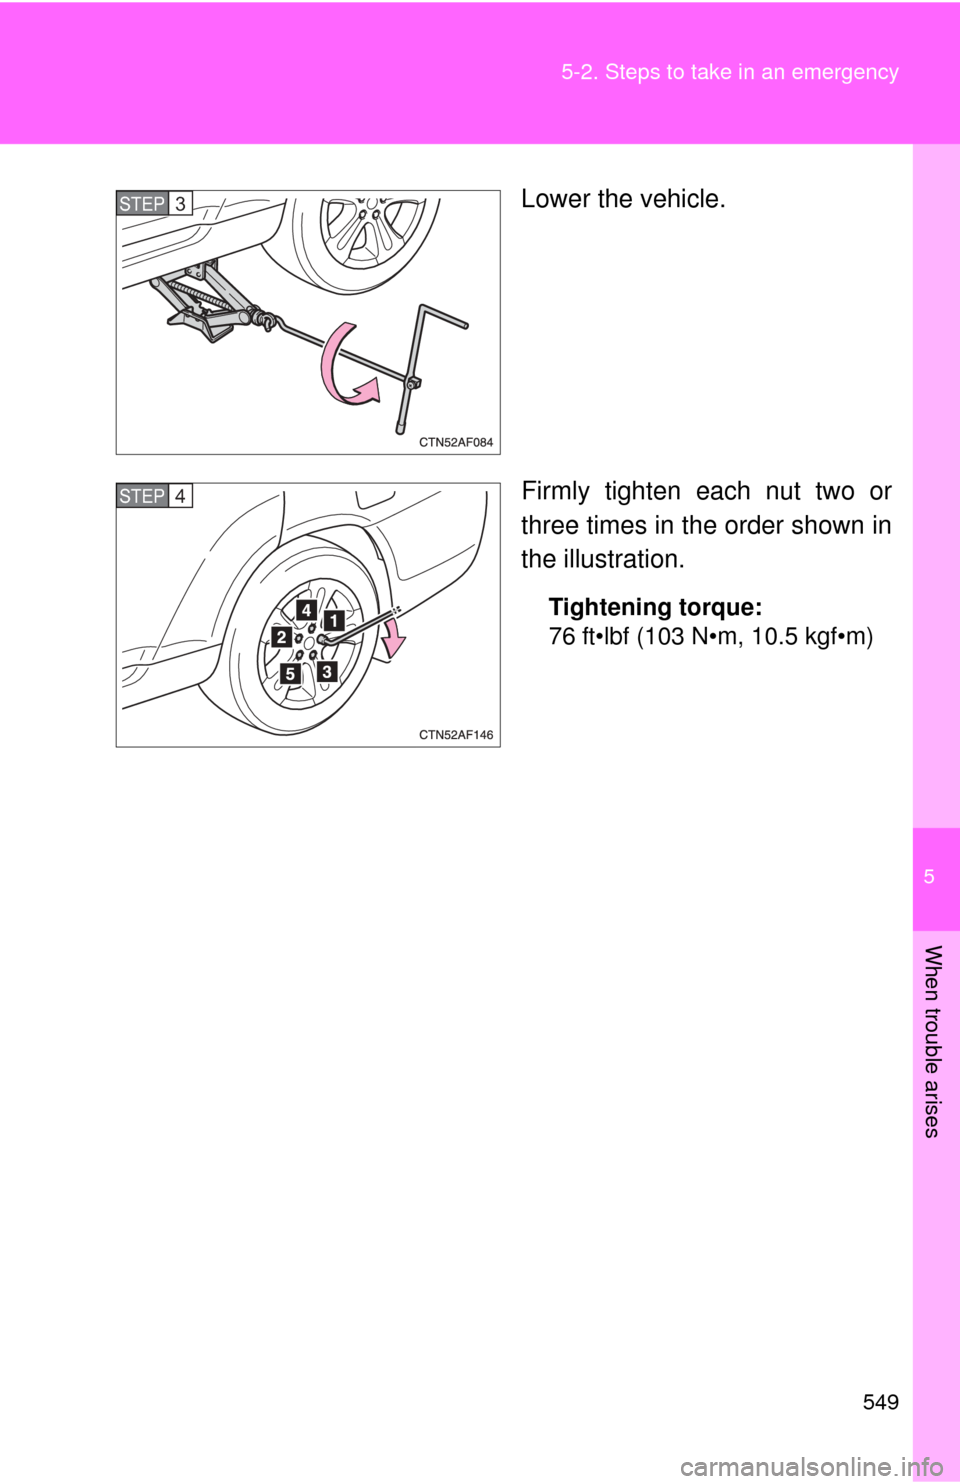
Lower the vehicle.
Firmly tighten each nut two or
three times in the order shown in
the illustration.
Tightening torque:
76 ft•lbf (103 N•m, 10.5 kgf•m)
STEP3
STEP4
Page 550 of 636
550 5-2. Steps to take in an emergency
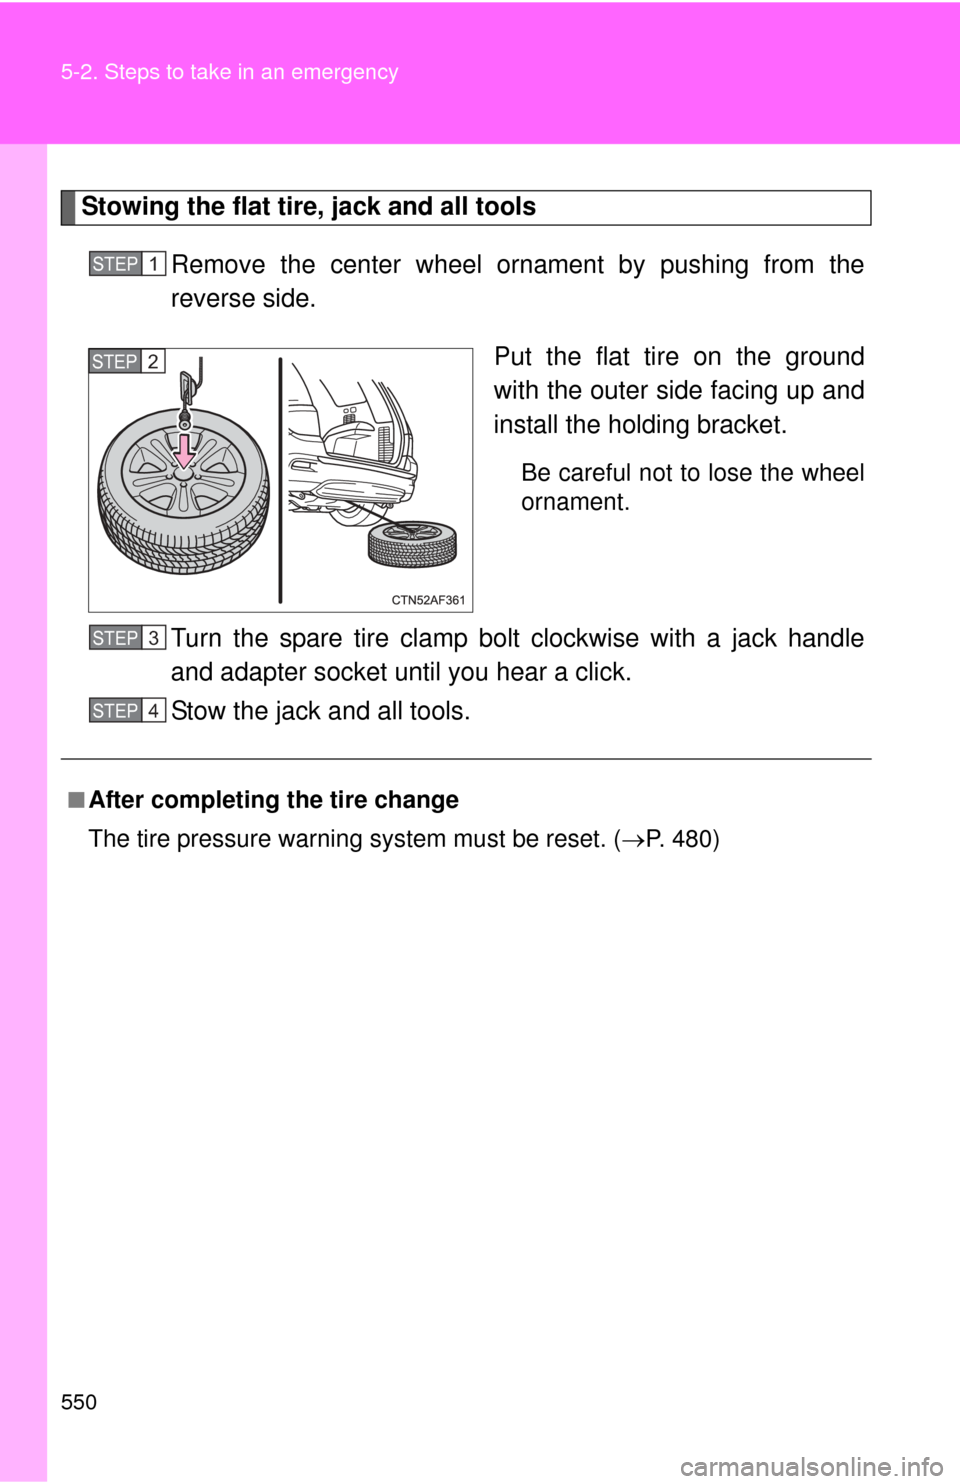
Stowing the flat tire, jack and all toolsRemove the center wheel ornament by pushing from the
reverse side. Put the flat tire on the ground
with the outer side facing up and
install the holding bracket.
Be careful not to lose the wheel
ornament.
Turn the spare tire clamp bolt clockwise with a jack handle
and adapter socket until you hear a click.
Stow the jack and all tools.
STEP1
STEP2
■After completing the tire change
The tire pressure warning system must be reset. ( P. 480)
STEP3
STEP4
Trending: manual radio set, immobilizer, remote control, garage door opener, wiring, fuel filter, parking brake
