change wheel TOYOTA HIGHLANDER 2023 User Guide
[x] Cancel search | Manufacturer: TOYOTA, Model Year: 2023, Model line: HIGHLANDER, Model: TOYOTA HIGHLANDER 2023Pages: 552, PDF Size: 13.36 MB
Page 156 of 552

1563-4. Adjusting the steering wheel and mirrors
If you notice any of the following symptoms, refer to the following
table for the likely cause and the solution.
If the symptom is not resolved by the solution, have the vehicle
inspected by your Toyota dealer.
NOTICE
• Do not apply hot water to the camera in cold weather, as the
sudden change of temperature
may cause the camera to not
operate properly.
• When using a high pressure washer to wash the vehicle, do
not directly spra y the camera
and its surrounding area, as
doing so may cause the camera
to not operate properly.
●Do not subject t he camera to a
strong impact as this could
cause a malfunction.
If this happens, have the vehicle
inspected by your Toyota dealer
as soon as possible.
If you notice any symptoms
Page 157 of 552
1573-4. Adjusting the steering wheel and mirrors
3
Before driving
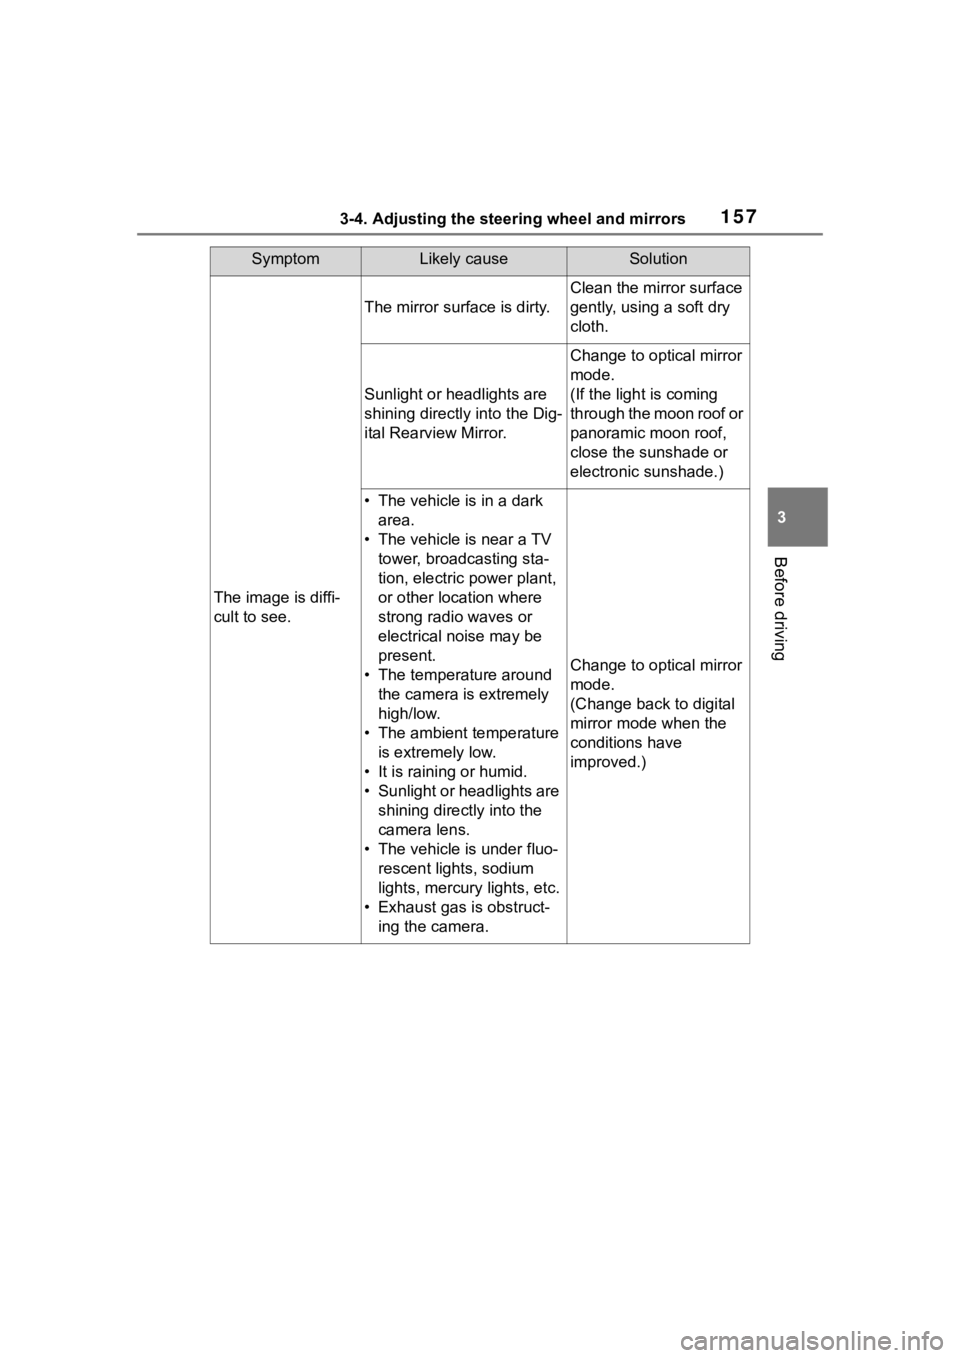
SymptomLikely causeSolution
The image is diffi-
cult to see.
The mirror surface is dirty.
Clean the mirror surface
gently, using a soft dry
cloth.
Sunlight or headlights are
shining directly into the Dig-
ital Rearview Mirror.
Change to optical mirror
mode.
(If the light is coming
through the moon roof or
panoramic moon roof,
close the sunshade or
electronic sunshade.)
• The vehicle is in a dark area.
• The vehicle is near a TV tower, broadcasting sta-
tion, electric power plant,
or other location where
strong radio waves or
electrical noise may be
present.
• The temperature around the camera is extremely
high/low.
• The ambient temperature is extremely low.
• It is raining or humid.
• Sunlight or headlights are shining directly into the
camera lens.
• The vehicle is under fluo- rescent lights, sodium
lights, mercury lights, etc.
• Exhaust gas is obstruct- ing the camera.
Change to optical mirror
mode.
(Change back to digital
mirror mode when the
conditions have
improved.)
Page 158 of 552
1583-4. Adjusting the steering wheel and mirrors
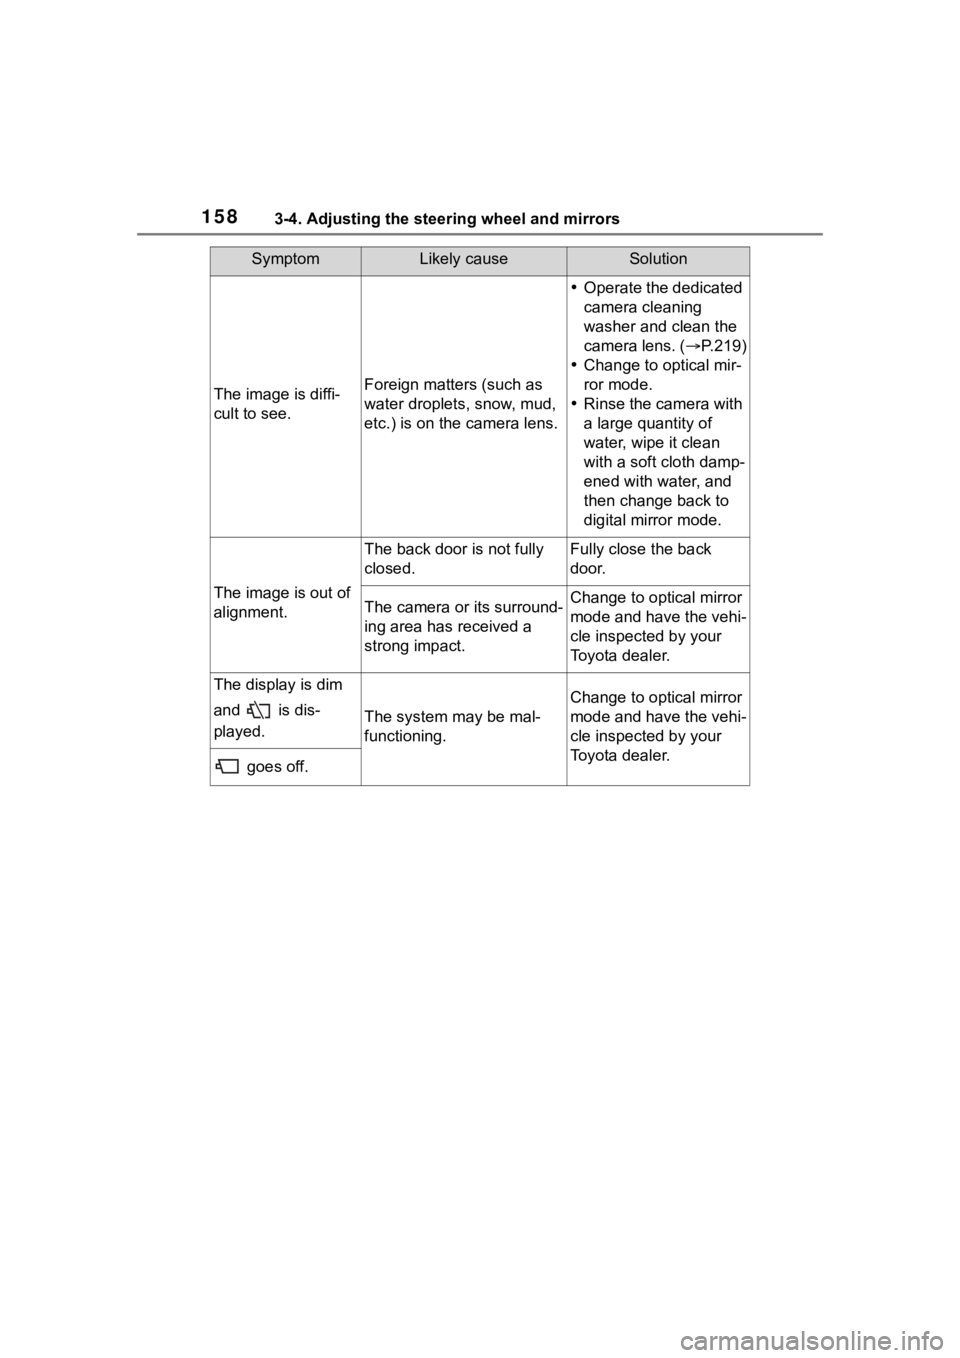
The image is diffi-
cult to see.Foreign matters (such as
water droplets, snow, mud,
etc.) is on the camera lens.
Operate the dedicated
camera cleaning
washer and clean the
camera lens. ( P.219)
Change to optical mir-
ror mode.
Rinse the camera with
a large quantity of
water, wipe it clean
with a soft cloth damp-
ened with water, and
then change back to
digital mirror mode.
The image is out of
alignment.
The back door is not fully
closed.Fully close the back
door.
The camera or its surround-
ing area has received a
strong impact.Change to optical mirror
mode and have the vehi-
cle inspected by your
Toyota dealer.
The display is dim
and is dis-
played.
The system may be mal-
functioning.
Change to optical mirror
mode and have the vehi-
cle inspected by your
Toyota dealer.
goes off.
SymptomLikely causeSolution
Page 159 of 552
1593-4. Adjusting the steering wheel and mirrors
3
Before driving
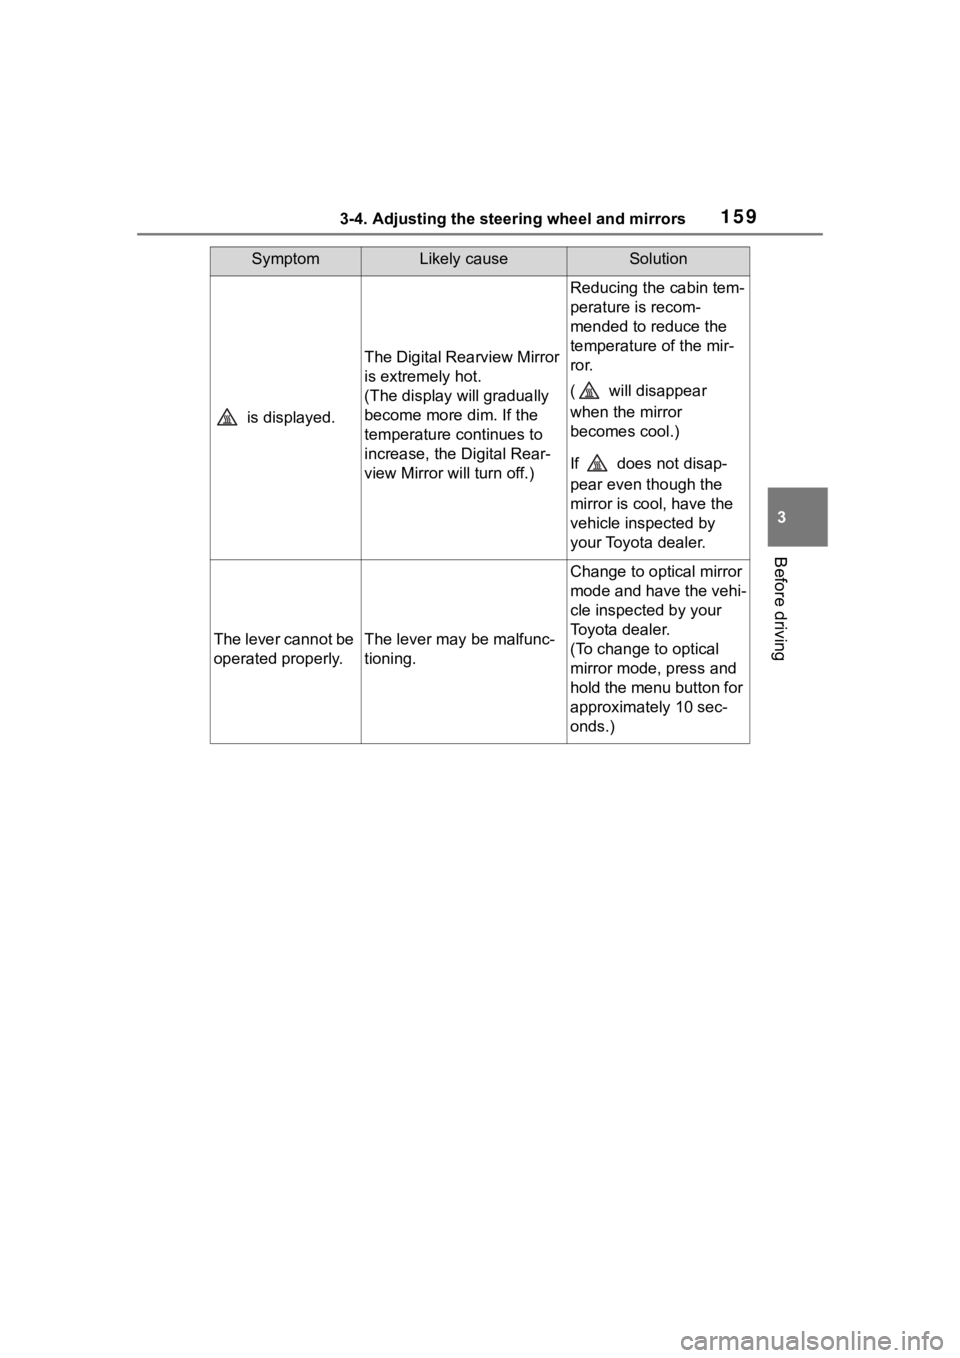
is displayed.
The Digital Rearview Mirror
is extremely hot.
(The display will gradually
become more dim. If the
temperature continues to
increase, the Digital Rear-
view Mirror will turn off.)
Reducing the cabin tem-
perature is recom-
mended to reduce the
temperature of the mir-
ror.
( will disappear
when the mirror
becomes cool.)
If does not disap-
pear even though the
mirror is cool, have the
vehicle inspected by
your Toyota dealer.
The lever cannot be
operated properly.The lever may be malfunc-
tioning.
Change to optical mirror
mode and have the vehi-
cle inspected by your
Toyota dealer.
(To change to optical
mirror mode, press and
hold the menu button for
approximately 10 sec-
onds.)
SymptomLikely causeSolution
Page 161 of 552
1613-4. Adjusting the steering wheel and mirrors
3
Before driving
mirror angle at a desired position
with the shift lever in R.
The adjusted angle will be memo-
rized and the mirror will automati-
cally tilt to the memorized angle
whenever the shift lever is shifted to
R from next time.
The memorized downward tilt posi-
tion of the mirror is linked to the nor-
mal position (angle adjusted with
the shift lever in other than R).
Therefore, if the normal position is
changed after adjustment, the tilt
position will also change.
When the normal position is
changed, readjust the angle in
reversing.
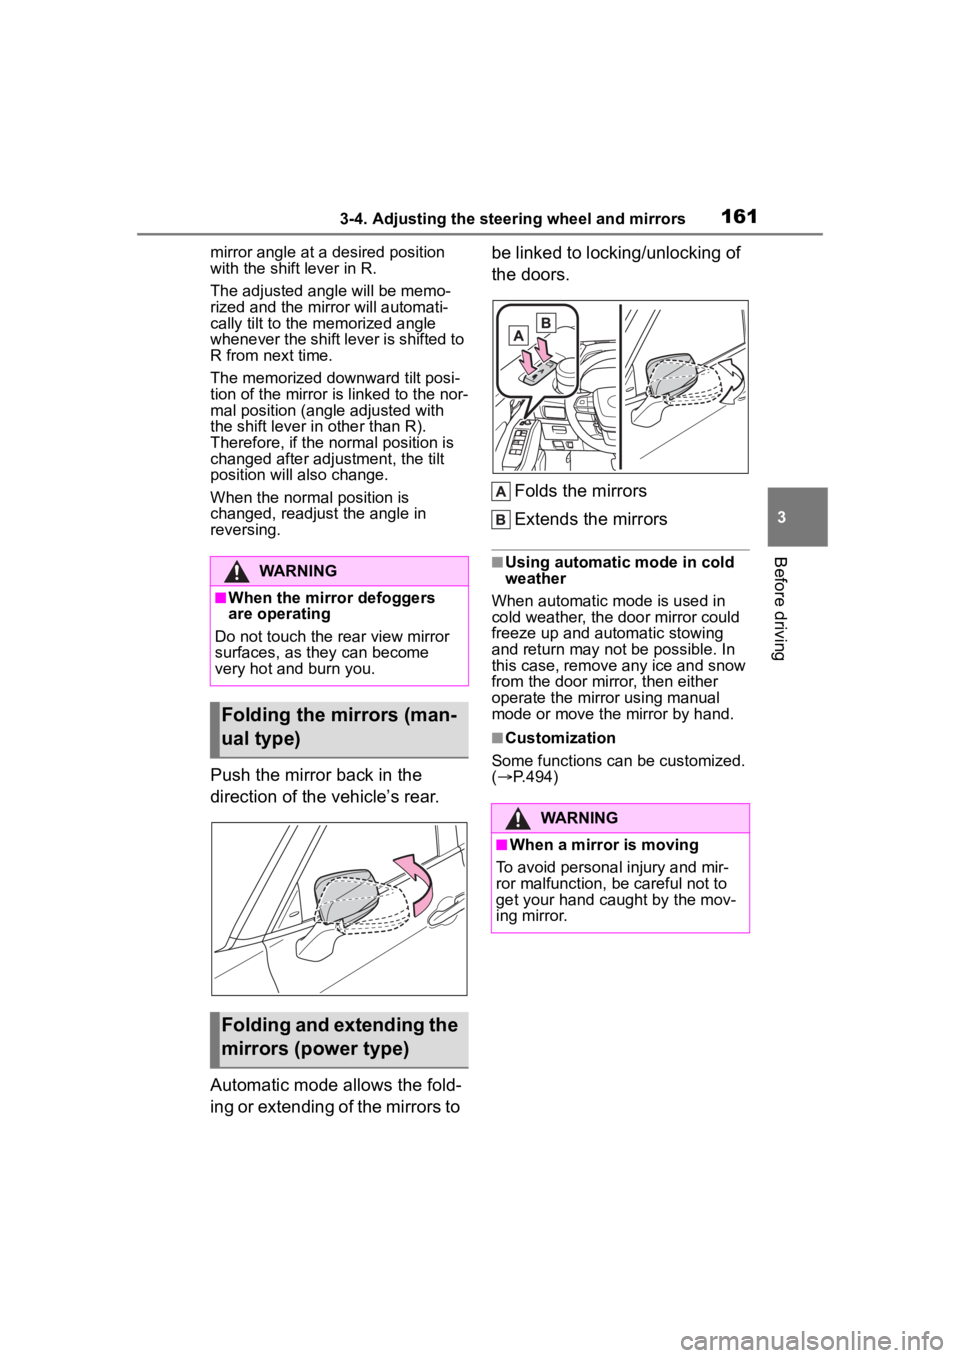
Push the mirror back in the
direction of the vehicle’s rear.
Automatic mode allows the fold-
ing or extending of the mirrors to be linked to locking/unlocking of
the doors.
Folds the mirrors
Extends the mirrors
■Using automatic mode in cold
weather
When automatic mode is used in
cold weather, the door mirror could
freeze up and automatic stowing
and return may not be possible. In
this case, remove any ice and snow
from the door mirror, then either
operate the mirror using manual
mode or move the mirror by hand.
■Customization
Some functions can be customized.
( P.494)
WARNING
■When the mirror defoggers
are operating
Do not touch the rear view mirror
surfaces, as they can become
very hot and burn you.
Folding the mirrors (man-
ual type)
Folding and extending the
mirrors (power type)
WARNING
■When a mirror is moving
To avoid personal injury and mir-
ror malfunction, be careful not to
get your hand caught by the mov-
ing mirror.
Page 180 of 552
1804-1. Before driving
NOTICE
■When parking the vehicle
Always set the parking brake and
shift the shift lever to P. Failure to
do so may cause the vehicle to
move or the vehi cle may acceler-
ate suddenly if the accelerator
pedal is accidentally depressed.
■Avoiding damage to vehicle
parts
●Do not turn the steering wheel
fully in either direction and hold
it there for an extended period
of time.Doing so may damage
the power steering.
●When driving over bumps on
the road, drive as slowly as pos-
sible to avoid damaging the
wheels, underside of the vehi-
cle, etc.
■If you get a flat tire while driv-
ing
A flat or damaged tire may cause
the following situations. Hold the
steering wheel firmly and gradu-
ally depress the brake pedal to
slow down the vehicle.
●It may be difficult to control your
vehicle.
●The vehicle will make abnormal
sounds or vibrations.
●The vehicle will lean abnor-
mally.
Information on what to do in case
of a flat tire (
P.446)
■When encountering flooded
roads
Do not drive on a road that has
flooded after heavy rain etc.
Doing so may cause the following
serious damage to the vehicle:
●Engine stalling
●Short in electrical components
●Engine damage caused by
water immersion
In the event that you drive on a
flooded road and the vehicle is
flooded, be sure to have your Toy-
ota dealer check the following:
●Brake function
●Changes in quantity and quality
of oil and fluid used for the
engine, transaxle, transfer
(AWD models), rear differential
(AWD models), etc.
●Lubricant condition for the pro-
peller shaft (AWD models),
bearings and suspension joints
(where possible), and the func-
tion of all joints, bearings, etc.
Page 214 of 552

2144-3. Operating the lights and wipers
from around a curve
• When the vehicle is cut in front of by another vehicle
• When vehicles ahead cannot be detected due to repeated curves,
road dividers or roadside trees
• When vehicles ahead appear in a faraway lane on a wide road
• When the lights of vehicles ahead
are not on
●The high beams may be turned off
if a vehicle ahead that is using fog
lights without its headlights turned
on is detected.
●House lights, street lights, traffic
signals, and illumi nated billboards
or signs and other reflective
objects may cause the high
beams to change to the low
beams, or the low beams to
remain on.
●The following factors may affect
the amount of time taken for the
high beams to turn on or off:
• The brightness of the headlights, fog lights, and ta il lights of vehi-
cles ahead
• The movement and direction of vehicles ahead
• When a vehicle ahead only has
operational lights on one side
• When a vehicle ahead is a two-wheeled vehicle
• The condition of the road (gradi-
ent, curve, condi tion of the road
surface, etc.)
• The number of passengers and amount of luggage in the vehicle
●The high beams may turn on or off
unexpectedly.
●Bicycles or similar vehicles may
not be detected.
●In the following situations the sys-
tem may not be abl e to correctly
detect the surrounding brightness
level. This may cause the low
beams to remain on or the high
beams to flash or dazzle pedestri-
ans or vehicles ahead. In such a
case, it is necess ary to manually
switch between the high and low
beams. • When driving in inclement weather
(heavy rain, snow, fog, sand-
storms, etc.)
• When the windshi eld is obscured
by fog, mist, ice, dirt, etc.
• When the windshield is cracked or
damaged
• When the camera sensor is deformed or dirty
• When the temperature of the cam- era sensor is extremely high
• When the surrounding brightness
level is equal to that of headlights,
tail lights or fog lights
• When headlights or tail lights of
vehicles ahead are turned off,
dirty, changing color, or not aimed
properly
• When the vehicle is hit by water,
snow, dust, etc. from a preceding
vehicle
• When driving through an area of intermittently changing brightness
and darkness
• When frequently and repeatedly driving ascending/descending
roads, or roads with rough, bumpy
or uneven surfaces (such as
stone-paved roads, gravel roads,
etc.)
• When frequently and repeatedly taking curves or driving on a wind-
ing road
• When there is a h ighly reflective
object ahead of the vehicle, such
as a sign or mirror
• When the back of a preceding vehicle is highly reflective, such as
a container on a truck
• When the vehicle’s headlights are damaged or dirty, or are not aimed
properly
• When the vehicle is listing or titling due to a flat tire, a trailer being
towed, etc.
• When the headlights are changed between the high beams and low
beams repeatedly in an abnormal
manner
• When the driver believes that the high beams may be flashing or
dazzling pedestrians or other driv-
ers
Page 230 of 552
2304-5. Using the driving support systems
WARNING
●Although this system is
designed to help avoid a colli-
sion or help reduce the impact
of the collision, its effectiveness
may change according to vari-
ous conditions, therefore the
system may not always be able
to achieve the same level of
performance.
Read the following conditions
carefully. Do not overly rely on
this system and always drive
carefully.
• Conditions under which the sys- tem may operate even if there is
no possibility of a collision:
P. 2 3 5
• Conditions under which the sys- tem may not operate properly:
P. 2 3 6
●Do not attempt to test the oper-
ation of the pre-collision system
yourself.
Depending on the objects used
for testing (dummies, card-
board objects imitating detect-
able objects, etc.), the system
may not operate properly, possi-
bly leading to an accident.
■Pre-collision braking
●When the pre-collision braking
function is operating, a large
amount of braking force will be
applied.
●If the vehicle is stopped by the
operation of the pre-collision
braking function, the pre-colli-
sion braking function operation
will be canceled after approxi-
mately 2 second s. Depress the
brake pedal as necessary.
●The pre-collision braking func-
tion may not operate if certain
operations are performed by the
driver. If the accelerator pedal is
being depressed strongly or the
steering wheel is being turned,
the system may determine that
the driver is taking evasive
action and possibly prevent the
pre-collision braking function
from operating.
●In some situations, while the
pre-collision brak ing function is
operating, operation of the func-
tion may be canceled if the
accelerator pedal is depressed
strongly or the steering wheel is
turned and the system deter-
mines that the driver is taking
evasive action.
●If the brake pedal is being
depressed, the system may
determine that t he driver is tak-
ing evasive action and possibly
delay the operation timing of the
pre-collision braking function.
■Emergency steering assist
●As emergency steering assist
operation will be canceled when
the system determines that lane
departure prevention function
has been completed.
●Emergency steering assist may
not operate or may be cancel in
the following cases as the sys-
tem may determine the driver is
taking actions.
• If the accelerator pedal is being depressed strongly, the steering
wheel is being operated sharply,
the brake pedal is being
depressed or the turn signal
lever is being operated. In this
case, the syst em may deter-
mine that the driver is taking
evasive action and the emer-
gency steering assist may not
operate.
Page 237 of 552
2374-5. Using the driving support systems
4
Driving
• When part of a detectable object is hidden by an object, such as
large baggage, an umbrella, or
guardrail
• When there are many things which can reflect the radio waves
of the radar in the vicinity (tunnels,
truss bridges, gravel roads, snow
covered road that have tracks,
etc.)
• When there is an effect on the radio waves to the radar that is
installed on another vehicle
• When multiple detectable objects are close together
• If the sun or other light is shining directly on a detectable object
• When a detectable object is a
shade of white and looks
extremely bright
• When a detectable object appears
to be nearly the same color or
brightness as its surroundings
• If a detectable object cuts or sud-
denly emerges in front of your
vehicle
• When the front of your vehicle is
hit by water, snow, dust, etc.
• When a very bright light ahead, such as the sun or the headlights
of oncoming traffic, shines directly
into the front camera
• When approaching the side or
front of a vehicle ahead
• If a vehicle ahead is a motorcycle
• If a vehicle ahead is narrow, such as a personal mobility vehicle
• If a preceding vehicle has a small rear end, such as an unloaded
truck
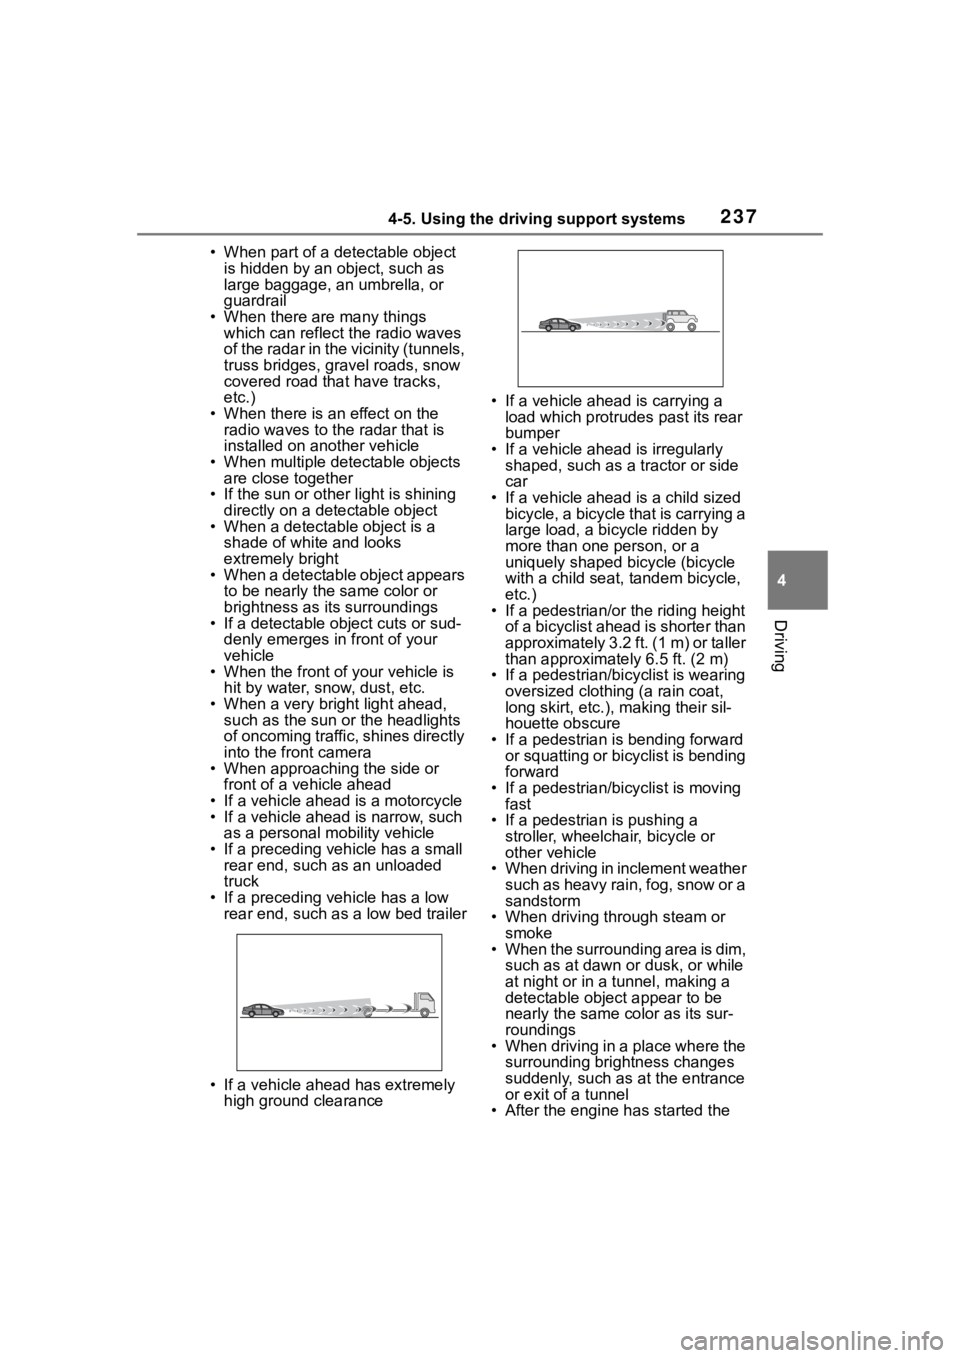
• If a preceding vehicle has a low rear end, such as a low bed trailer
• If a vehicle ahead has extremely high ground clearance • If a vehicle ahead is carrying a
load which protrudes past its rear
bumper
• If a vehicle ahead is irregularly shaped, such as a tractor or side
car
• If a vehicle ahead is a child sized bicycle, a bicycle that is carrying a
large load, a bicycle ridden by
more than one person, or a
uniquely shaped bicycle (bicycle
with a child seat, tandem bicycle,
etc.)
• If a pedestrian/or the riding height of a bicyclist ahead is shorter than
approximately 3.2 ft. (1 m) or taller
than approximate ly 6.5 ft. (2 m)
• If a pedestrian/bic yclist is wearing
oversized clothing (a rain coat,
long skirt, etc.), making their sil-
houette obscure
• If a pedestrian is bending forward or squatting or bicyclist is bending
forward
• If a pedestrian/bicyclist is moving fast
• If a pedestrian is pushing a
stroller, wheelchair, bicycle or
other vehicle
• When driving in inclement weather
such as heavy rain, fog, snow or a
sandstorm
• When driving through steam or
smoke
• When the surrounding area is dim, such as at dawn or dusk, or while
at night or in a tunnel, making a
detectable object appear to be
nearly the same co lor as its sur-
roundings
• When driving in a place where the surrounding brightness changes
suddenly, such as at the entrance
or exit of a tunnel
• After the engine has started the
Page 257 of 552
2574-5. Using the driving support systems
4
Driving
the steering wheel is returned to
the center position, the vehicle
speed reduction will end.
Depending on the situation, the
vehicle speed will then return to
the vehicle-to-vehicle distance
control mode set speed.
In situations where vehi-
cle-to-vehicle distance control
needs to operate, such as when
a preceding vehicle cuts in front
of your vehicle, the curve speed
reduction function will be can-
celed.
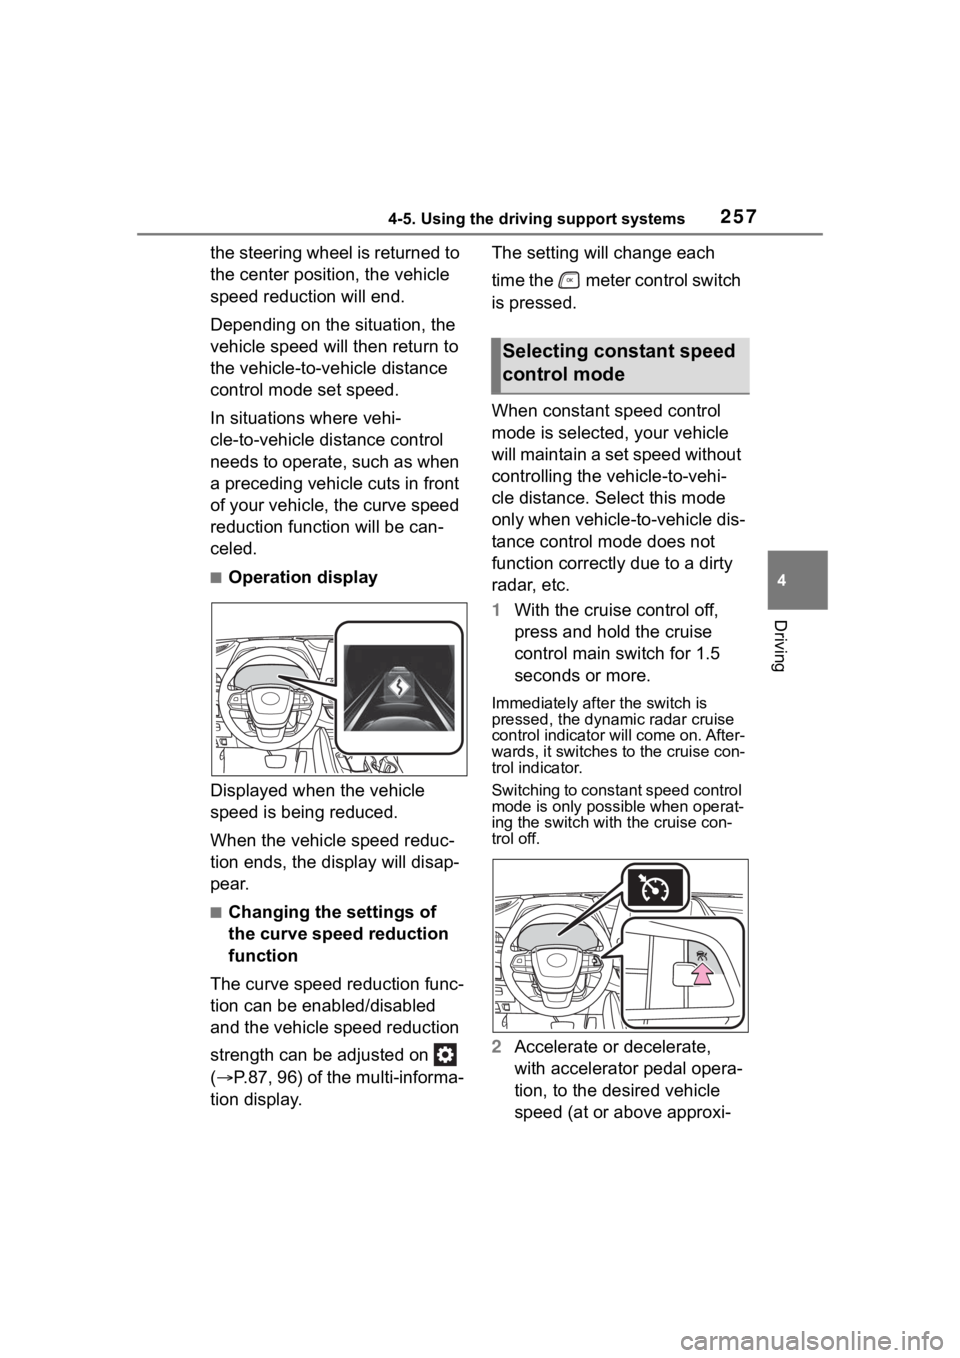
■Operation display
Displayed when the vehicle
speed is being reduced.
When the vehicle speed reduc-
tion ends, the display will disap-
pear.
■Changing the settings of
the curve speed reduction
function
The curve speed reduction func-
tion can be enabled/disabled
and the vehicle speed reduction
strength can be adjusted on
( P.87, 96) of the multi-informa-
tion display. The setting will change each
time the meter control switch
is pressed.
When constant speed control
mode is selected, your vehicle
will maintain a set speed without
controlling the vehicle-to-vehi-
cle distance. Select this mode
only when vehicle-
to-vehicle dis-
tance control mode does not
function correctly due to a dirty
radar, etc.
1 With the cruise control off,
press and hold the cruise
control main switch for 1.5
seconds or more.
Immediately after the switch is
pressed, the dynamic radar cruise
control indicator will come on. After-
wards, it switches to the cruise con-
trol indicator.
Switching to const ant speed control
mode is only possible when operat-
ing the switch with the cruise con-
trol off.
2 Accelerate or decelerate,
with accelerator pedal opera-
tion, to the desired vehicle
speed (at or above approxi-
Selecting constant speed
control mode