roof TOYOTA HIGHLANDER 2023 User Guide
[x] Cancel search | Manufacturer: TOYOTA, Model Year: 2023, Model line: HIGHLANDER, Model: TOYOTA HIGHLANDER 2023Pages: 552, PDF Size: 13.36 MB
Page 55 of 552
551-2. Child safety
1
For safety and security
A child restraint system for a
small child or baby must itself be
properly restrained on the seat
with the lap portion of the
lap/shoulder belt.
■Installing child restraint
system using a seat belt
(child restraint lock func-
tion belt)
Install the child restraint system
in accordance to the operation
manual enclosed with the child
restraint system.
■Rear-facing Infant
seat/convertible seat
1 Adjust the rear seat
If there is a gap between the child
seat and the seatb ack, adjust the
seatback angle until good contact is
achieved.
WARNING
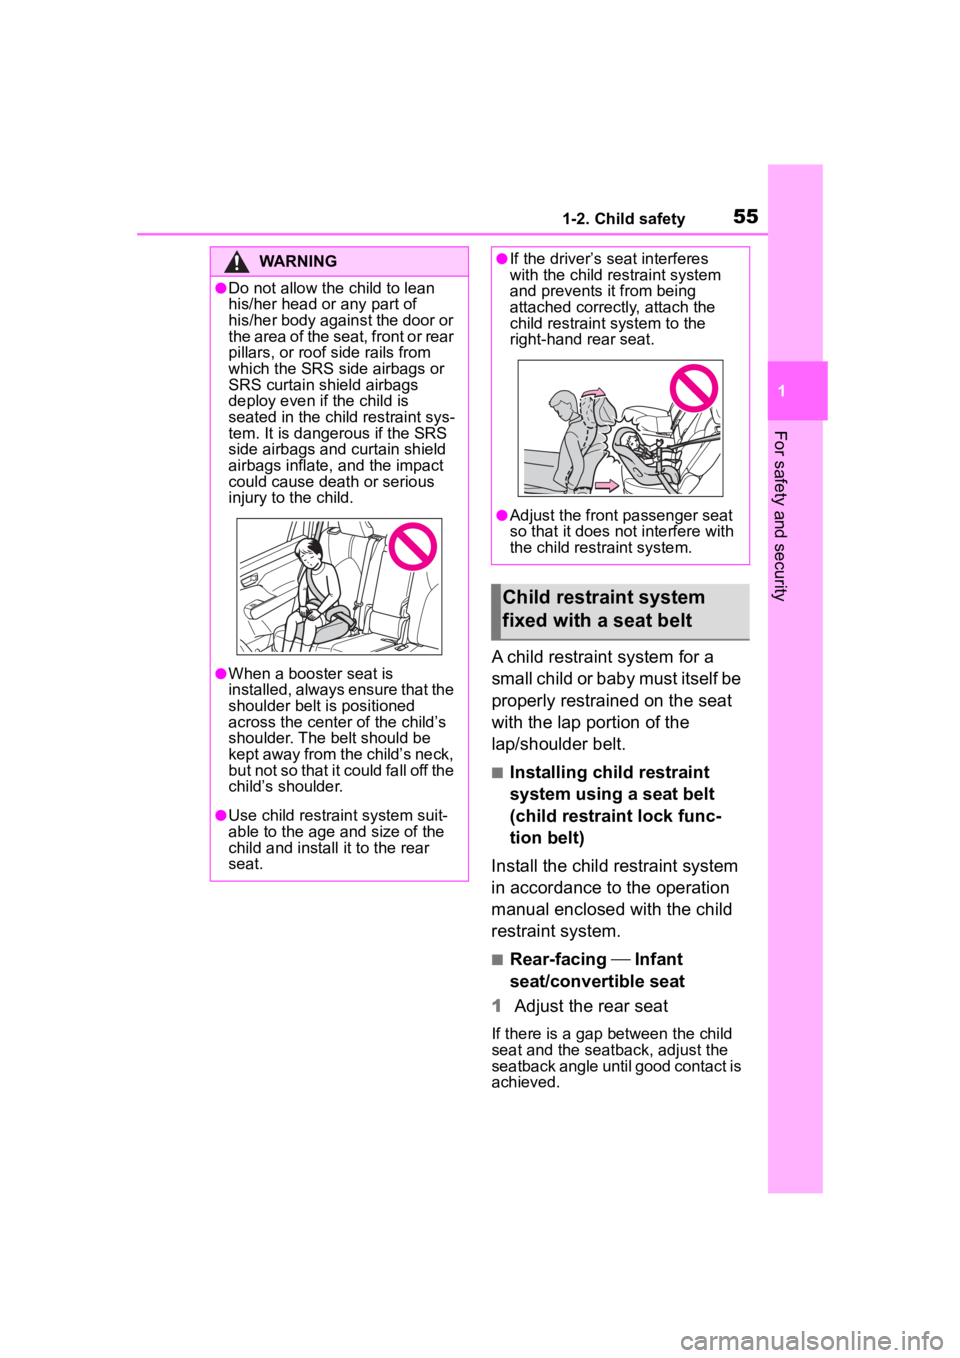
●Do not allow the child to lean
his/her head or any part of
his/her body against the door or
the area of the seat, front or rear
pillars, or roof side rails from
which the SRS side airbags or
SRS curtain shield airbags
deploy even if the child is
seated in the child restraint sys-
tem. It is dangerous if the SRS
side airbags and curtain shield
airbags inflate, and the impact
could cause death or serious
injury to the child.
●When a booster seat is
installed, always ensure that the
shoulder belt is positioned
across the center of the child’s
shoulder. The belt should be
kept away from the child’s neck,
but not so that it could fall off the
child’s shoulder.
●Use child restraint system suit-
able to the age and size of the
child and install it to the rear
seat.
●If the driver’s seat interferes
with the child restraint system
and prevents it from being
attached correct ly, attach the
child restraint system to the
right-hand rear seat.
●Adjust the front passenger seat
so that it does not interfere with
the child restraint system.
Child restraint system
fixed with a seat belt
Page 70 of 552
701-4. Theft deterrent system
*: If equipped
■Items to check before lock-
ing the vehicle
To prevent unexpected trigger-
ing of the alarm and vehicle
theft, make sure of the following:
Nobody is in the vehicle.
The windows, moon roof (if
equipped) and panoramic
moon roof (if equipped) are
closed before the alarm is set.
No valuables or other per-
sonal items are left in the
vehicle.
■Setting
Close the doors and hood, and
lock all the doors. The system will be set automatically after 30
seconds.
The security indicator changes from
being on to flashing when the sys-
tem is set.
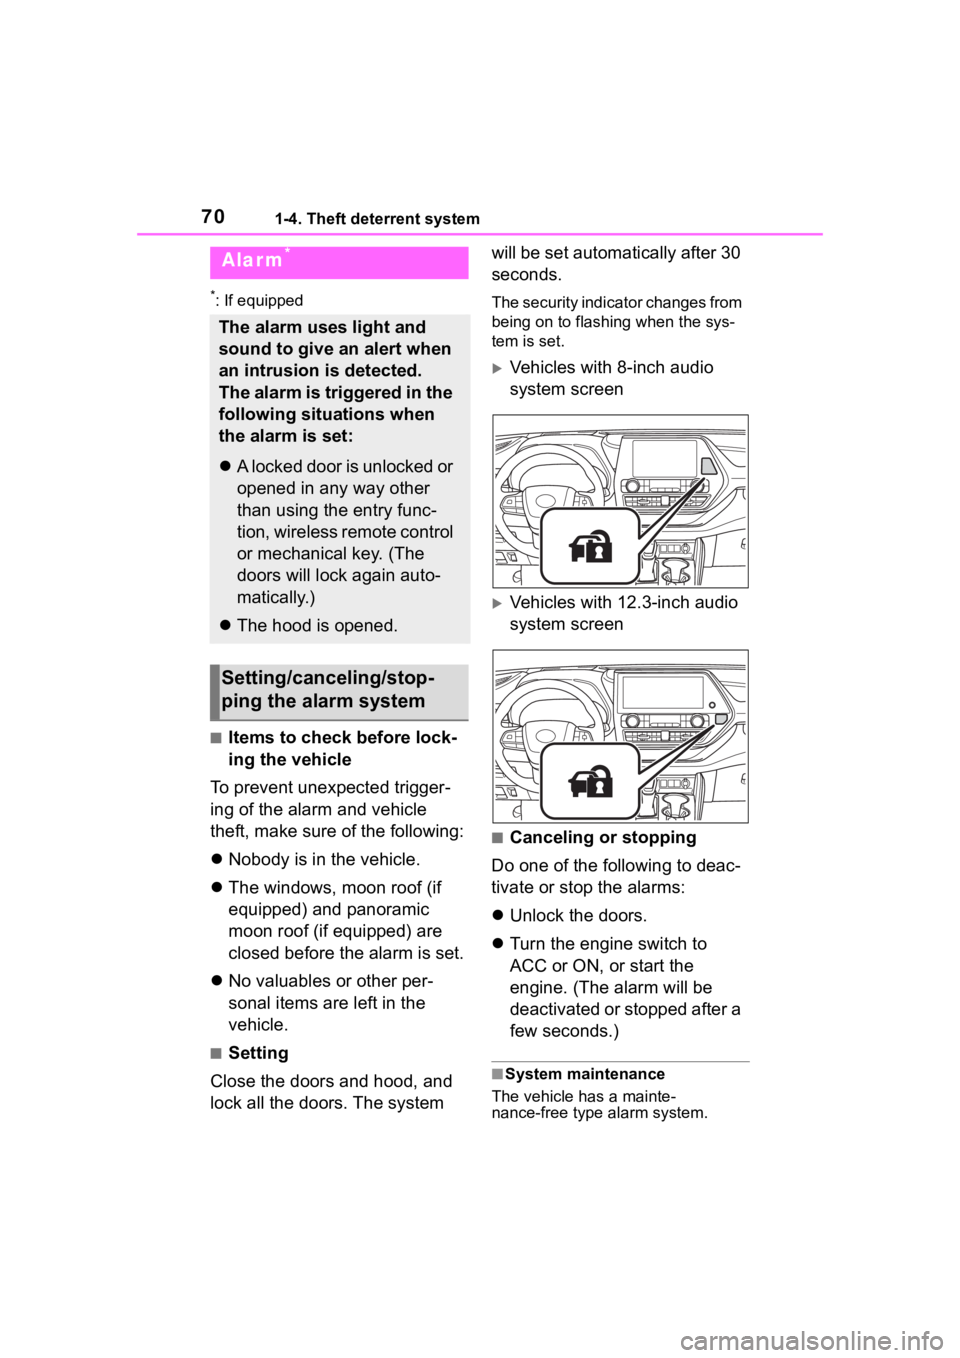
Vehicles with 8-inch audio
system screen
Vehicles with 12.3-inch audio
system screen
■Canceling or stopping
Do one of the following to deac-
tivate or stop the alarms:
Unlock the doors.
Turn the engine switch to
ACC or ON, or start the
engine. (The alarm will be
deactivated or stopped after a
few seconds.)
■System maintenance
The vehicle has a mainte-
nance-free type alarm system.
Alarm*
The alarm uses light and
sound to give an alert when
an intrusion is detected.
The alarm is triggered in the
following situations when
the alarm is set:
A locked door is unlocked or
opened in any way other
than using the entry func-
tion, wireless remote control
or mechanical key. (The
doors will lock again auto-
matically.)
The hood is opened.
Setting/canceling/stop-
ping the alarm system
Page 111 of 552
111
3
3
Before driving
Before driving
.3-1. Key informationKeys ............................ 112
3-2. Opening, closing and locking the doors
Side doors ................... 115
Back door .................... 119
Smart key system ....... 131
3-3. Adjusting the seats Front seats .................. 136
Rear seats................... 137
Driving position memory .................................. 142
Head restraints............ 145
3-4. Adjusting the steering wheel and mirrors
Steering wheel ............ 148
Inside rear view mirror .................................. 149
Digital Rearview Mirror .................................. 150
Outside rear view mirrors .................................. 160
3-5. Opening, closing the win- dows and moon roof
Power windows ........... 162
Moon roof .................... 165
Panoramic moon roof.. 168
Page 113 of 552
1133-1. Key information
3
Before driving
If this message is displayed but you
have not had a new electronic key
registered, ask your Toyota dealer to
check if an unknow n electronic key
(other than those in your posses-
sion) has been registered.
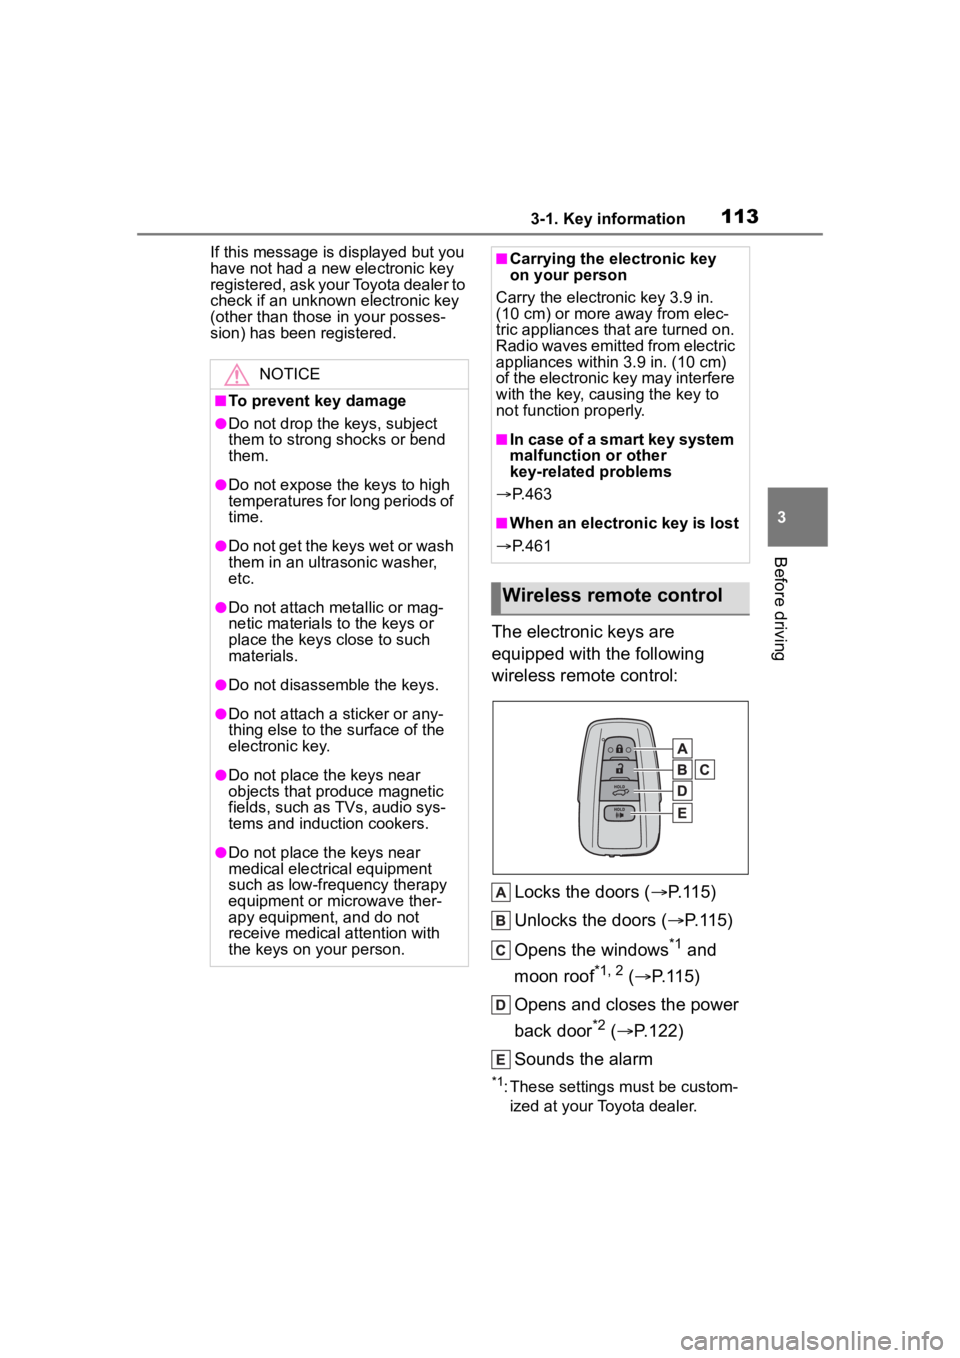
The electronic keys are
equipped with the following
wireless remote control:
Locks the doors ( P.115)
Unlocks the doors ( P.115)
Opens the windows
*1 and
moon roof
*1, 2 ( P.115)
Opens and closes the power
back door
*2 ( P.122)
Sounds the alarm
*1: These settings must be custom- ized at your Toyota dealer.
NOTICE
■To prevent key damage
●Do not drop the keys, subject
them to strong shocks or bend
them.
●Do not expose the keys to high
temperatures for long periods of
time.
●Do not get the keys wet or wash
them in an ultrasonic washer,
etc.
●Do not attach metallic or mag-
netic materials to the keys or
place the keys close to such
materials.
●Do not disassemble the keys.
●Do not attach a sticker or any-
thing else to the surface of the
electronic key.
●Do not place th e keys near
objects that produce magnetic
fields, such as TVs, audio sys-
tems and induction cookers.
●Do not place th e keys near
medical electrical equipment
such as low-frequency therapy
equipment or microwave ther-
apy equipment, and do not
receive medical attention with
the keys on your person.
■Carrying the electronic key
on your person
Carry the electronic key 3.9 in.
(10 cm) or more away from elec-
tric appliances that are turned on.
Radio waves emitte d from electric
appliances within 3.9 in. (10 cm)
of the electronic key may interfere
with the key, causing the key to
not function properly.
■In case of a smart key system
malfunction or other
key-related problems
P. 4 6 3
■When an electronic key is lost
P. 4 6 1
Wireless remote control
Page 115 of 552
1153-2. Opening, closing and locking the doors
3
Before driving
3-2.Opening, closing and locking the doors
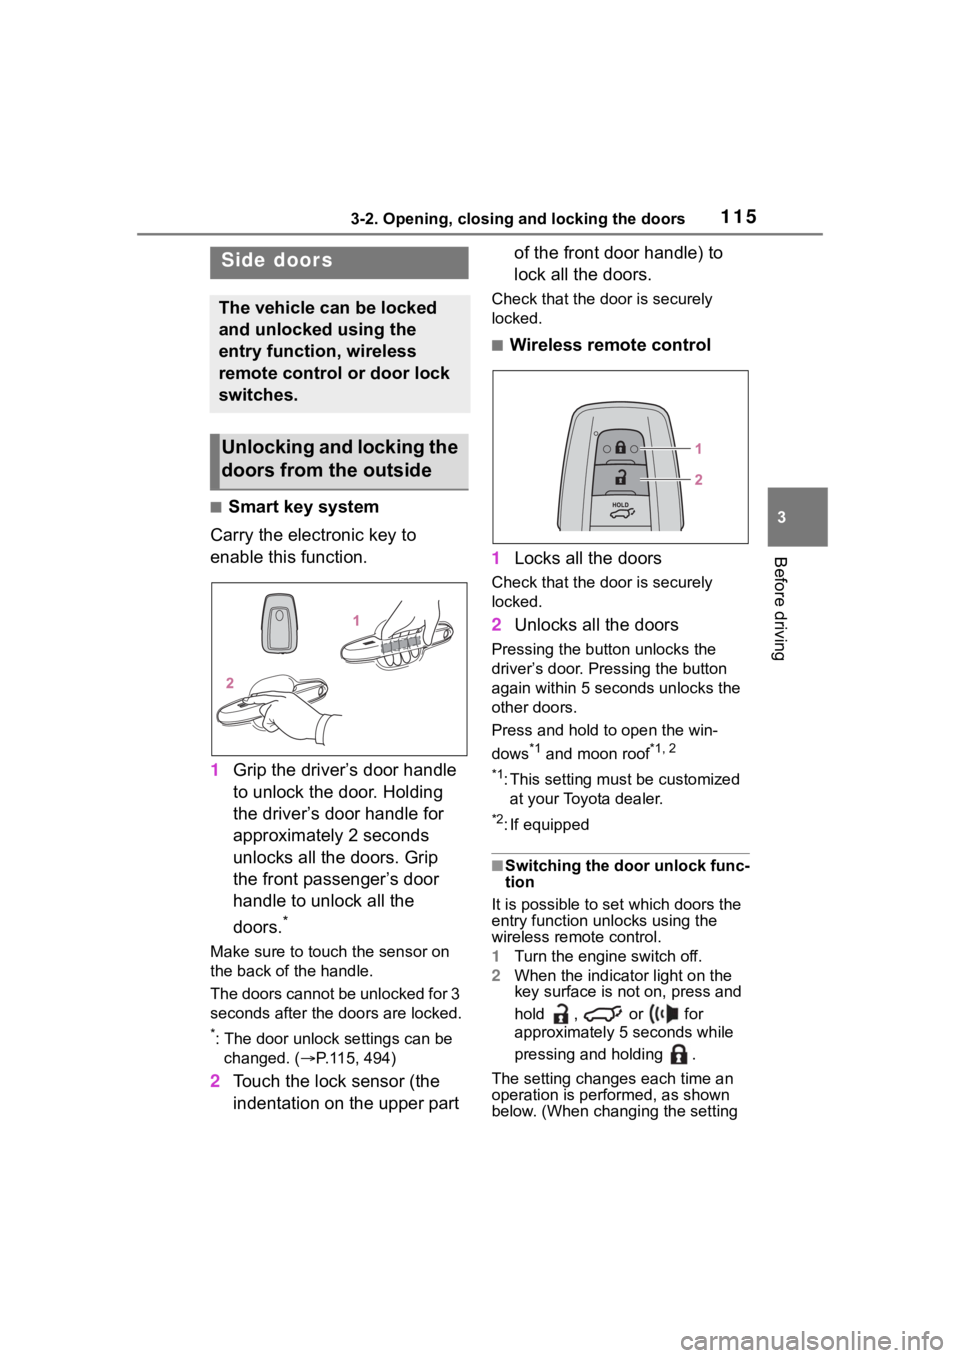
■Smart key system
Carry the electronic key to
enable this function.
1 Grip the driver’s door handle
to unlock the door. Holding
the driver’s door handle for
approximately 2 seconds
unlocks all the doors. Grip
the front passenger’s door
handle to unlock all the
doors.
*
Make sure to touch the sensor on
the back of the handle.
The doors cannot be unlocked for 3
seconds after the doors are locked.
*: The door unlock settings can be
changed. ( P.115, 494)
2 Touch the lock sensor (the
indentation on the upper part of the front door handle) to
lock all the doors.
Check that the d
oor is securely
locked.
■Wireless remote control
1 Locks all the doors
Check that the d oor is securely
locked.
2 Unlocks all the doors
Pressing the button unlocks the
driver’s door. Pressing the button
again within 5 seconds unlocks the
other doors.
Press and hold to open the win-
dows
*1 and moon roof*1, 2
*1
: This setting must be customized at your Toyota dealer.
*2: If equipped
■Switching the door unlock func-
tion
It is possible to set which doors the
entry function unlocks using the
wireless remote control.
1 Turn the engine switch off.
2 When the indicator light on the
key surface is not on, press and
hold , or for
approximately 5 seconds while
pressing and holding .
The setting changes each time an
operation is per formed, as shown
below. (When changing the setting
Side doors
The vehicle can be locked
and unlocked using the
entry function, wireless
remote control or door lock
switches.
Unlocking and locking the
doors from the outside
Page 116 of 552
1163-2. Opening, closing and locking the doors
continuously, release the buttons,
wait for at least 5 seconds, and
repeat step 2.)
For vehicles with an alarm: To pre-
vent unintended triggering of the
alarm, unlock the doors using the
wireless remote control and open
and close a door once after the set-
tings have been changed. (If a door
is not opened within 60 seconds
after is press ed, the doors will
be locked again an d the alarm will
automatically be set.)
In case that the alarm is triggered,
immediately stop the alarm. ( P. 7 0 )
■Impact detection door lock
release system
In the event that t he vehicle is sub-
ject to a strong impact, all the doors
are unlocked. Depending on the
force of the impact or the type of
accident, however, the system may
not operate.
■Operation signals
A buzzer sounds and the emer-
gency flashers flash to indicate that
the doors have been
locked/unlocked. (Locked: Once;
Unlocked: Twice)
A buzzer sounds to indicate that the
windows and the moon roof
* or pan-
oramic moon roof* are operating.
*: If equipped
■Security feature
If a door is not opened within
approximately 60 s econds after the
vehicle is unlocked, the security fea-
ture automatically locks the vehicle
again.
■When the door cannot be
locked by the lock sensor on
the surface of the front door
handle
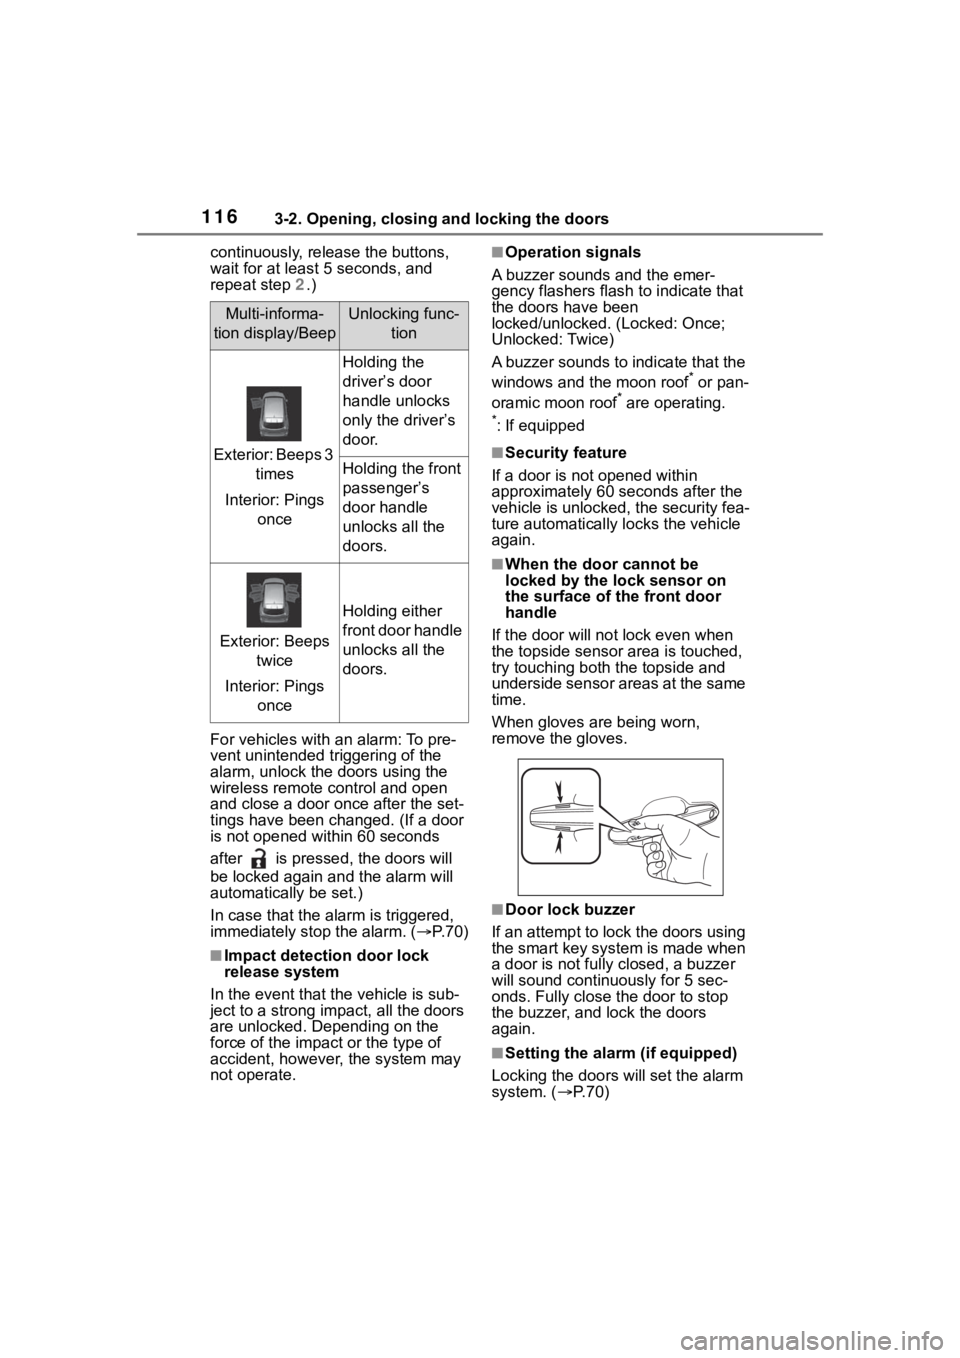
If the door will not lock even when
the topside sensor area is touched,
try touching both the topside and
underside sensor areas at the same
time.
When gloves are being worn,
remove the gloves.
■Door lock buzzer
If an attempt to lock the doors using
the smart key system is made when
a door is not fully closed, a buzzer
will sound continuo usly for 5 sec-
onds. Fully close the door to stop
the buzzer, and lock the doors
again.
■Setting the alarm (if equipped)
Locking the doors will set the alarm
system. ( P. 7 0 )
Multi-informa-
tion display/BeepUnlocking func- tion
Exterior: Beeps 3 times
Interior: Pings once
Holding the
driver’s door
handle unlocks
only the driver’s
door.
Holding the front
passenger’s
door handle
unlocks all the
doors.
Exterior: Beeps twice
Interior: Pings once
Holding either
front door handle
unlocks all the
doors.
Page 152 of 552
1523-4. Adjusting the steering wheel and mirrors
closed.
●If the display is difficult to see due
to reflected light, close the sun-
shade for the moon roof or the
electronic sunshade for the pan-
oramic moon roof.
●Any of the following conditions
may occur when d riving in the
dark, such as at night. None of
them indicates that a malfunction
has occurred.
• Colors of objects in the displayed image may differ f rom their actual
color.
• Depending on the height of the lights of the vehicle behind, the
area around the vehicle may
appear white and blurry.
• Automatic image adjustment for
brighter surrounding image may
cause flickering.
If it is difficult to see the displayed
image or flickering bothers you,
change to optical mirror mode.
●The Digital Rearview Mirror may
become hot while it is in digital
mirror mode.
This is not a malfunction.
●Depending on your physical con-
dition or age, it may take longer
than usual to focus on the dis-
played image. In this case,
change to optical mirror mode.
●Do not let passengers stare at the
displayed image when the vehicle
is being driven, as doing so may
cause motion sickness.
■When the system malfunctions
If the symbol show n in the illustra-
tion is displayed when using the
Digital Rearview Mirror in digital mir-
ror mode, the system may be mal-
functioning. The symbol will
disappear in a few seconds. Oper-
ate the lever, chang e to optical mir-
ror mode and have the vehicle
inspected by your Toyota dealer.
■Adjusting the mirror height
The height of the rear view mir-
ror can be adjusted to suit your
driving posture.
Change to optical mirror mode,
adjusting the height of the rear
view mirror by moving it up and
down.
■Display settings (digital mir-
ror mode)
Settings of the display in the dig-
ital mirror mode, on/off operation
of the automatic anti-glare func-
tion, etc. can be changed.
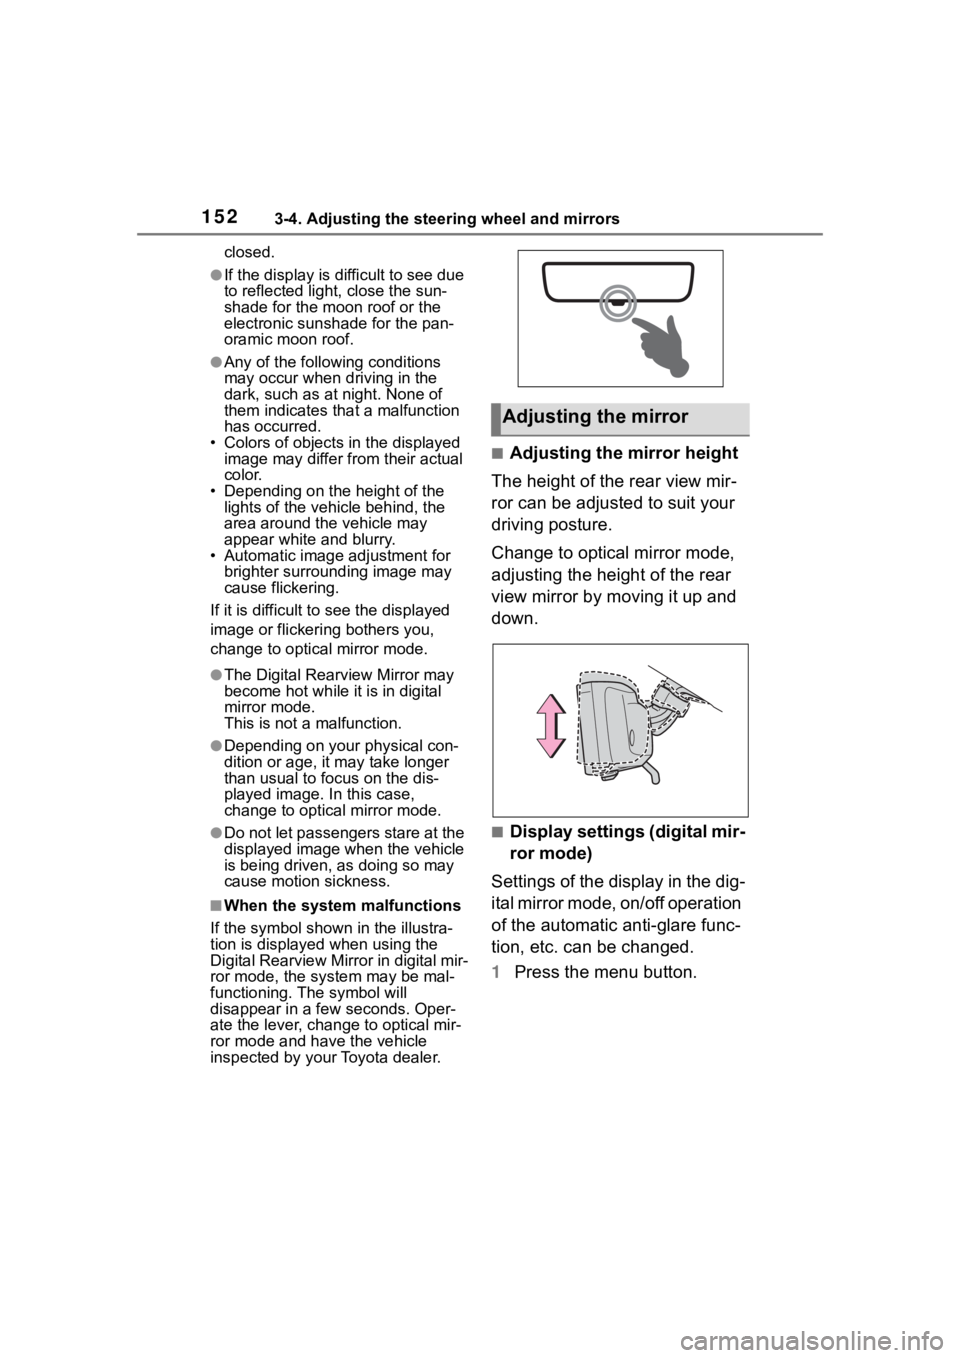
1 Press the menu button.
Adjusting the mirror
Page 157 of 552
1573-4. Adjusting the steering wheel and mirrors
3
Before driving
SymptomLikely causeSolution
The image is diffi-
cult to see.
The mirror surface is dirty.
Clean the mirror surface
gently, using a soft dry
cloth.
Sunlight or headlights are
shining directly into the Dig-
ital Rearview Mirror.
Change to optical mirror
mode.
(If the light is coming
through the moon roof or
panoramic moon roof,
close the sunshade or
electronic sunshade.)
• The vehicle is in a dark area.
• The vehicle is near a TV tower, broadcasting sta-
tion, electric power plant,
or other location where
strong radio waves or
electrical noise may be
present.
• The temperature around the camera is extremely
high/low.
• The ambient temperature is extremely low.
• It is raining or humid.
• Sunlight or headlights are shining directly into the
camera lens.
• The vehicle is under fluo- rescent lights, sodium
lights, mercury lights, etc.
• Exhaust gas is obstruct- ing the camera.
Change to optical mirror
mode.
(Change back to digital
mirror mode when the
conditions have
improved.)
Page 162 of 552
1623-5. Opening, closing the windows and moon roof
3-5.Opening, closing the windows and moon roof
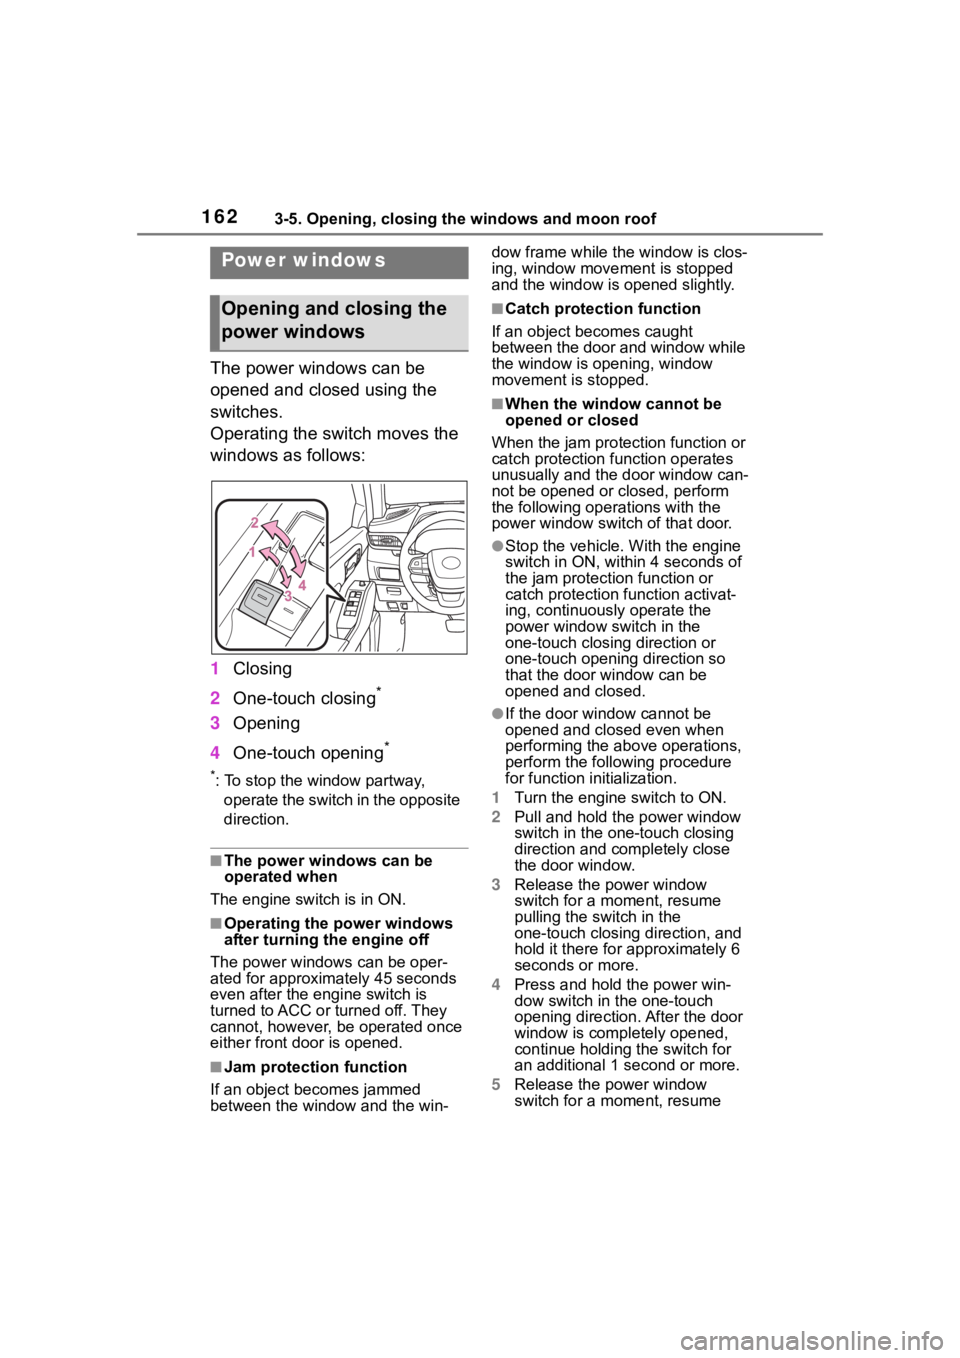
The power windows can be
opened and closed using the
switches.
Operating the switch moves the
windows as follows:
1Closing
2 One-touch closing
*
3Opening
4 One-touch opening
*
*: To stop the window partway,
operate the switch in the opposite
direction.
■The power windows can be
operated when
The engine switch is in ON.
■Operating the power windows
after turning the engine off
The power windows can be oper-
ated for approximately 45 seconds
even after the engine switch is
turned to ACC or turned off. They
cannot, however, be operated once
either front door is opened.
■Jam protection function
If an object becomes jammed
between the window and the win- dow frame while the
window is clos-
ing, window move ment is stopped
and the window is opened slightly.
■Catch protection function
If an object becomes caught
between the door and window while
the window is opening, window
movement is stopped.
■When the window cannot be
opened or closed
When the jam protection function or
catch protection function operates
unusually and the door window can-
not be opened or closed, perform
the following operations with the
power window swit ch of that door.
●Stop the vehicle. With the engine
switch in ON, within 4 seconds of
the jam protection function or
catch protection function activat-
ing, continuously operate the
power window switch in the
one-touch closing direction or
one-touch opening direction so
that the door window can be
opened and closed.
●If the door window cannot be
opened and closed even when
performing the above operations,
perform the follo wing procedure
for function initialization.
1 Turn the engine switch to ON.
2 Pull and hold the power window
switch in the on e-touch closing
direction and completely close
the door window.
3 Release the power window
switch for a m oment, resume
pulling the switch in the
one-touch closing direction, and
hold it there for approximately 6
seconds or more.
4 Press and hold the power win-
dow switch in the one-touch
opening direction. After the door
window is completely opened,
continue holding the switch for
an additional 1 second or more.
5 Release the power window
switch for a m oment, resume
Power windows
Opening and closing the
power windows
Page 163 of 552
1633-5. Opening, closing the windows and moon roof
3
Before driving
pushing the switch in the
one-touch opening direction, and
hold it there for approximately 4
seconds or more.
6 Pull and hold the power window
switch in the one-touch closing
direction again. After the door
window is completely closed,
continue holding the switch for a
further 1 second or more.
If you release the switch while the
window is moving, start again from
the beginning.
If the window reverses and cannot
be fully closed or opened, have the
vehicle inspected by your Toyota
dealer.
■Door lock linked window opera-
tion
●The power windows can be
opened and closed using the
mechanical key.
* ( P.463)
●The power windows can be
opened using the wireless remote
control.
* ( P. 1 1 5 )*: These settings must be custom-
ized at your Toyota dealer.
■Power windows open warning
buzzer
A buzzer sounds and a message is
shown on the multi -information dis-
play when the engine switch is
turned off and the driver’s door is
opened with the power windows
open.
■Customization
Some functions can be customized.
( P.494)
WARNING
Observe the following precau-
tions.
Failing to do so may result in
death or serious injury.
■Closing the windows
●The driver is responsible for all
the power window operations,
including the operation for the
passengers. In order to prevent
accidental operation, especially
by a child, do not let a child
operate the power windows. It is
possible for children and other
passengers to have body parts
caught in the power window.
Also, when ridin g with a child, it
is recommended to use the win-
dow lock switch. (
P.164)
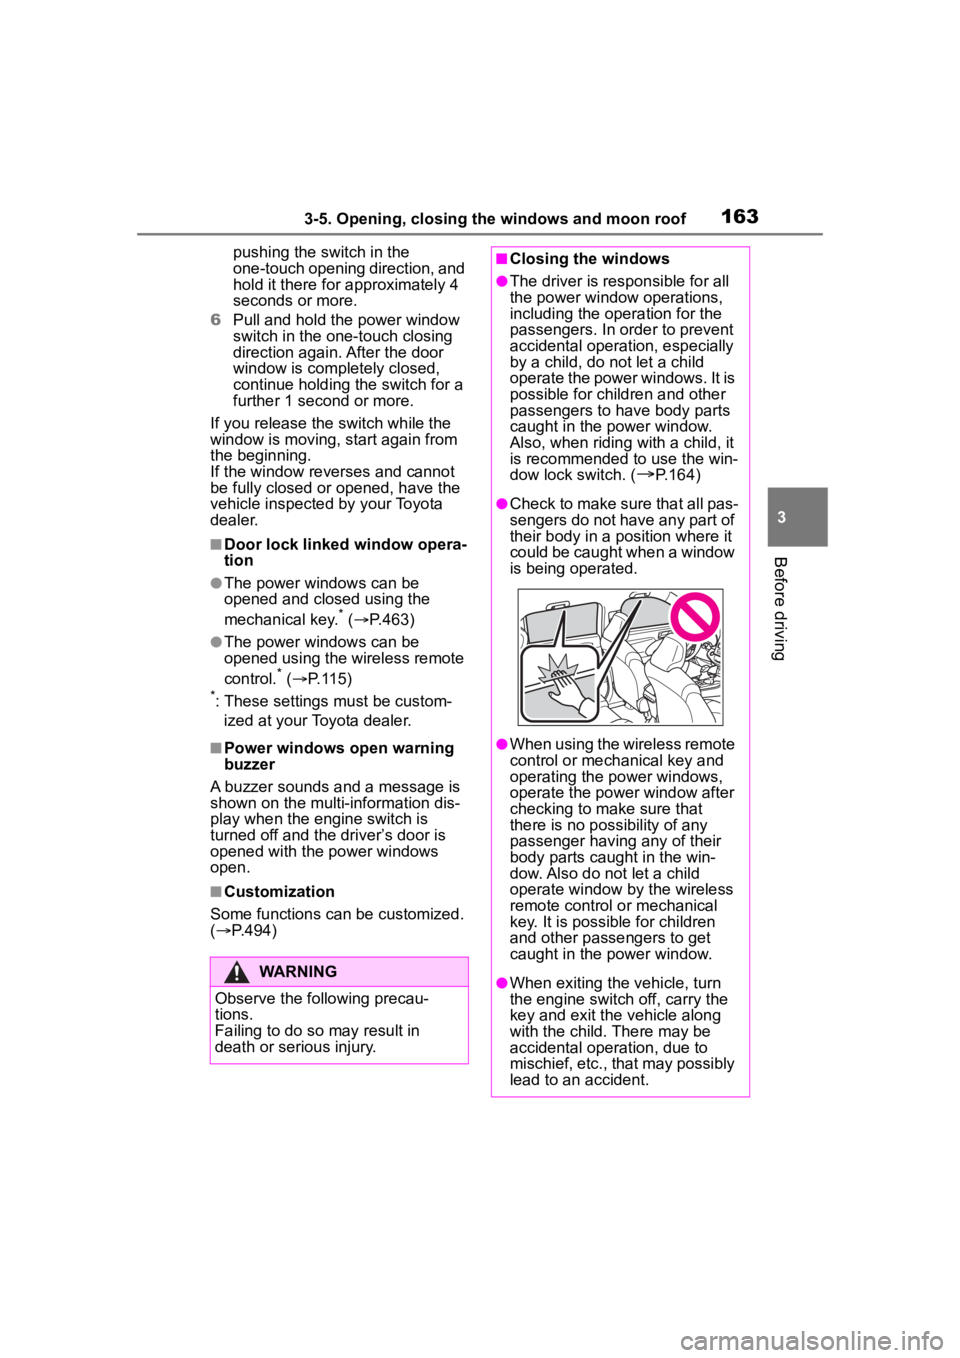
●Check to make sure that all pas-
sengers do not have any part of
their body in a pos ition where it
could be caught when a window
is being operated.
●When using the wireless remote
control or mechanical key and
operating the power windows,
operate the power window after
checking to make sure that
there is no possibility of any
passenger having any of their
body parts caug ht in the win-
dow. Also do not let a child
operate window by the wireless
remote control or mechanical
key. It is possib le for children
and other passengers to get
caught in the power window.
●When exiting the vehicle, turn
the engine switch off, carry the
key and exit the vehicle along
with the child. There may be
accidental operation, due to
mischief, etc., that may possibly
lead to an accident.