display TOYOTA HIGHLANDER HYBRID 2008 XU40 / 2.G Owner's Guide
[x] Cancel search | Manufacturer: TOYOTA, Model Year: 2008, Model line: HIGHLANDER HYBRID, Model: TOYOTA HIGHLANDER HYBRID 2008 XU40 / 2.GPages: 580, PDF Size: 13.29 MB
Page 211 of 580
211
2-4. Using other driving systems
2
When driving
Rear view monitor system
Vehicles with navigation system
Refer to the “Navigation System Owner's Manual”.
Vehicles without navigation system
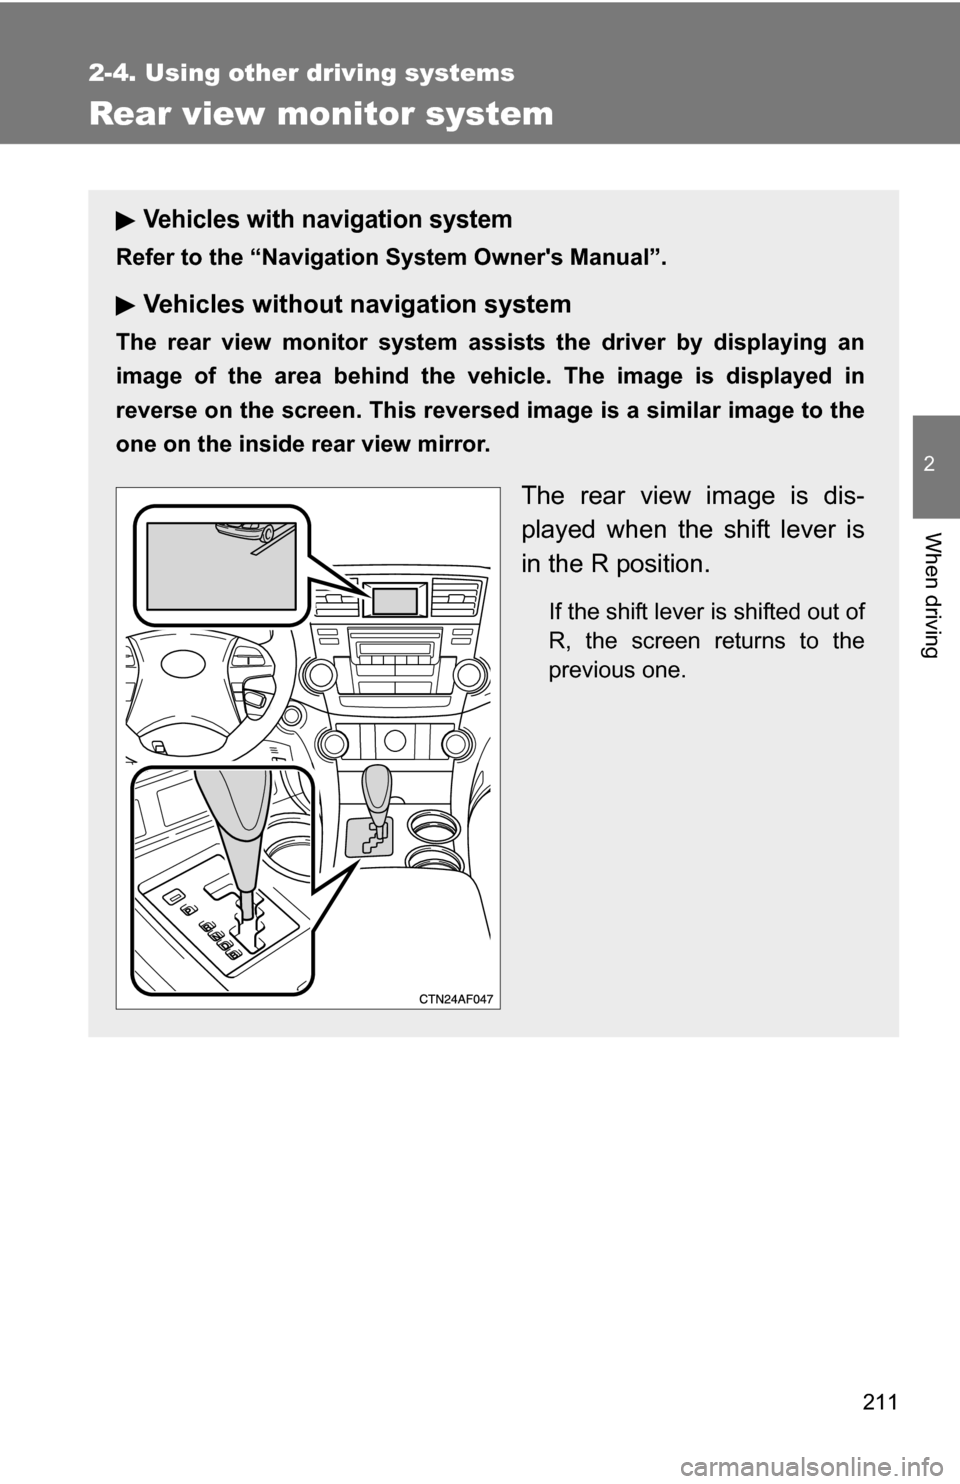
The rear view monitor system assists the driver by displaying an
image of the area behind the vehicle. The image is displayed in
reverse on the screen. This reversed im age is a similar image to the
one on the inside rear view mirror.
The rear view image is dis-
played when the shift lever is
in the R position.
If the shift lever is shifted out of
R, the screen returns to the
previous one.
Page 212 of 580
212 2-4. Using other driving systems
■Displayed area
■ Rear view monitor system camera
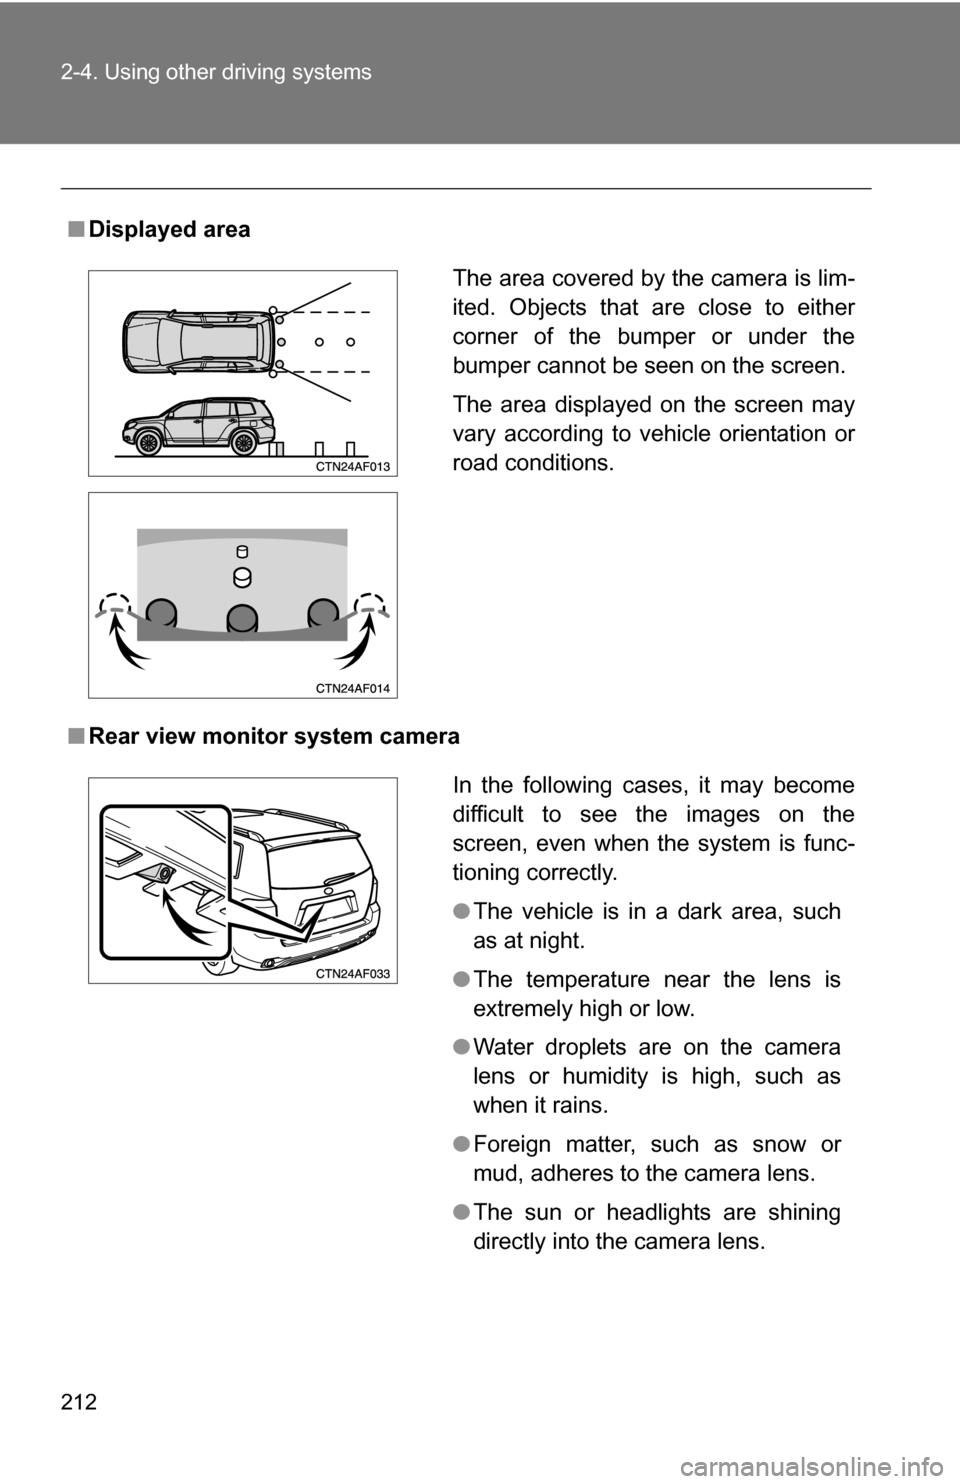
The area covered by the camera is lim-
ited. Objects that are close to either
corner of the bumper or under the
bumper cannot be seen on the screen.
The area displayed on the screen may
vary according to vehicle orientation or
road conditions.
In the following cases, it may become
difficult to see the images on the
screen, even when the system is func-
tioning correctly.
●The vehicle is in a dark area, such
as at night.
● The temperature near the lens is
extremely high or low.
● Water droplets are on the camera
lens or humidity is high, such as
when it rains.
● Foreign matter, such as snow or
mud, adheres to the camera lens.
● The sun or headlights are shining
directly into the camera lens.
Page 213 of 580
213
2-4. Using other
driving systems
2
When driving
■Smear effect
■ Setting the rear view monitor system displays
P. 197
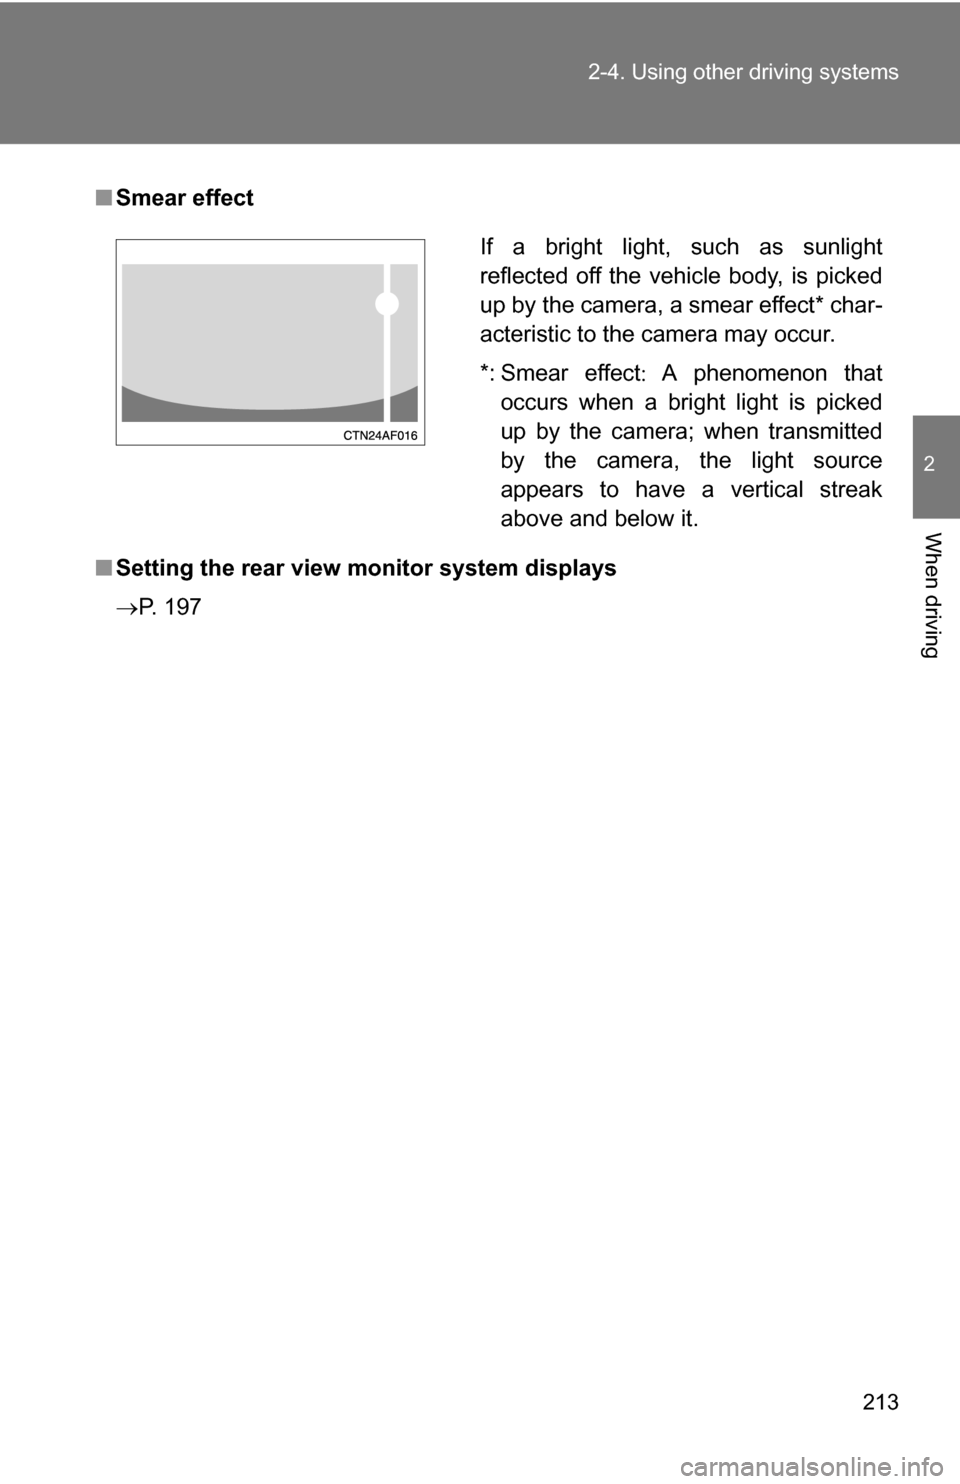
If a bright light, such as sunlight
reflected off the vehicle body, is picked
up by the camera, a smear effect* char-
acteristic to the camera may occur.
*: Smear effect A phenomenon that
occurs when a bright light is picked
up by the camera; when transmitted
by the camera, the light source
appears to have a vertical streak
above and below it.
Page 214 of 580
214 2-4. Using other driving systems
CAUTION
■When using the rear view monito r system, observe the following pre-
cautions to avoid an accident that coul d result in death or serious inju-
ries.
● Never depend solely on the monitor system when reversing.
● Always check visually and with the mirrors to confirm your intended path is
clear.
● Depicted distances between objects and flat surfaces differ from actual
distances.
● Do not use the system if the back door is open.
■ Conditions which may affect the rear view monitor system
● If the back of the vehicle has been hit, the camera’s position and mounting
angle may have changed. Have the vehicle inspected by your Toyota
dealer.
● Rapid temperature changes, such as when hot water is poured on the
vehicle in cold weather, may cause the system to function abnormally.
● If the camera lens is dirty, it cannot transmit a clear image. Rinse with
water and wipe with a soft cloth. If extremely dirty, wash with a mild
cleanser and rinse.
● The displayed image may be darker and moving images may be slightly
distorted when the system is cold.
Page 217 of 580
217
2-4. Using other
driving systems
2
When driving
■Hill-start assist control operating conditions
●The system will operate in the following situations:
• The shift lever is in a position other than P
• The parking brake is not applied
• The accelerator pedal is not depressed
To engage the system, bring the vehicle to a complete stop and then further
depress the brake pedal. A buzzer beeps once to indicate that hill-start
assist control is ready.
The system operates for a period of approximately 2 seconds after the brake
pedal is released.
● Hill-start assist control will not operate when “Check VSC system” is dis-
played on the multi-information display.
■ If the buzzer does not sound or the indicator does not flash
Slightly reduce the pressure on the brake pedal and then fully depress it
again.
■ Automatic cancellation of hill-start assist control
In the following situations, the buzzer will beep twice and hill-start assist con-
trol will be canceled.
●No attempt is made to drive the vehicle within approximately 2 seconds
of releasing the brake pedal
● The shift lever is moved to P
● The parking brake is applied
● The brake pedal is re-applied.
■ EPS operation sound
When the steering wheel operates, a motor sound (whirring sound) may be
heard.
This does not indicate a malfunction.
■ Reduced effectiveness of EPS
The effectiveness of EPS is reduced to prevent the system from overheating
when there is frequent steering input over an extended period of time. The
steering wheel may feel heavy as a result. Should this occur, refrain from
excessive steering input or stop the vehicle and turn the hybrid system off.
The system should return to normal within 10 minutes.
Page 254 of 580
254 3-1. Using the air conditioning system and defogger
Using the automatic mode
Press .The air conditioning system will begin to operate. Air out-
lets and fan speed are automatically adjusted according to
the temperature setting.
“AUTO” will be displayed on the multi-information display.
Turn the temperature control dial clockwise (warm) or coun-
terclockwise (cool).
Air outlets and fan speed for the right-hand and left-hand seats may
be set separately depending on the temperature setting.
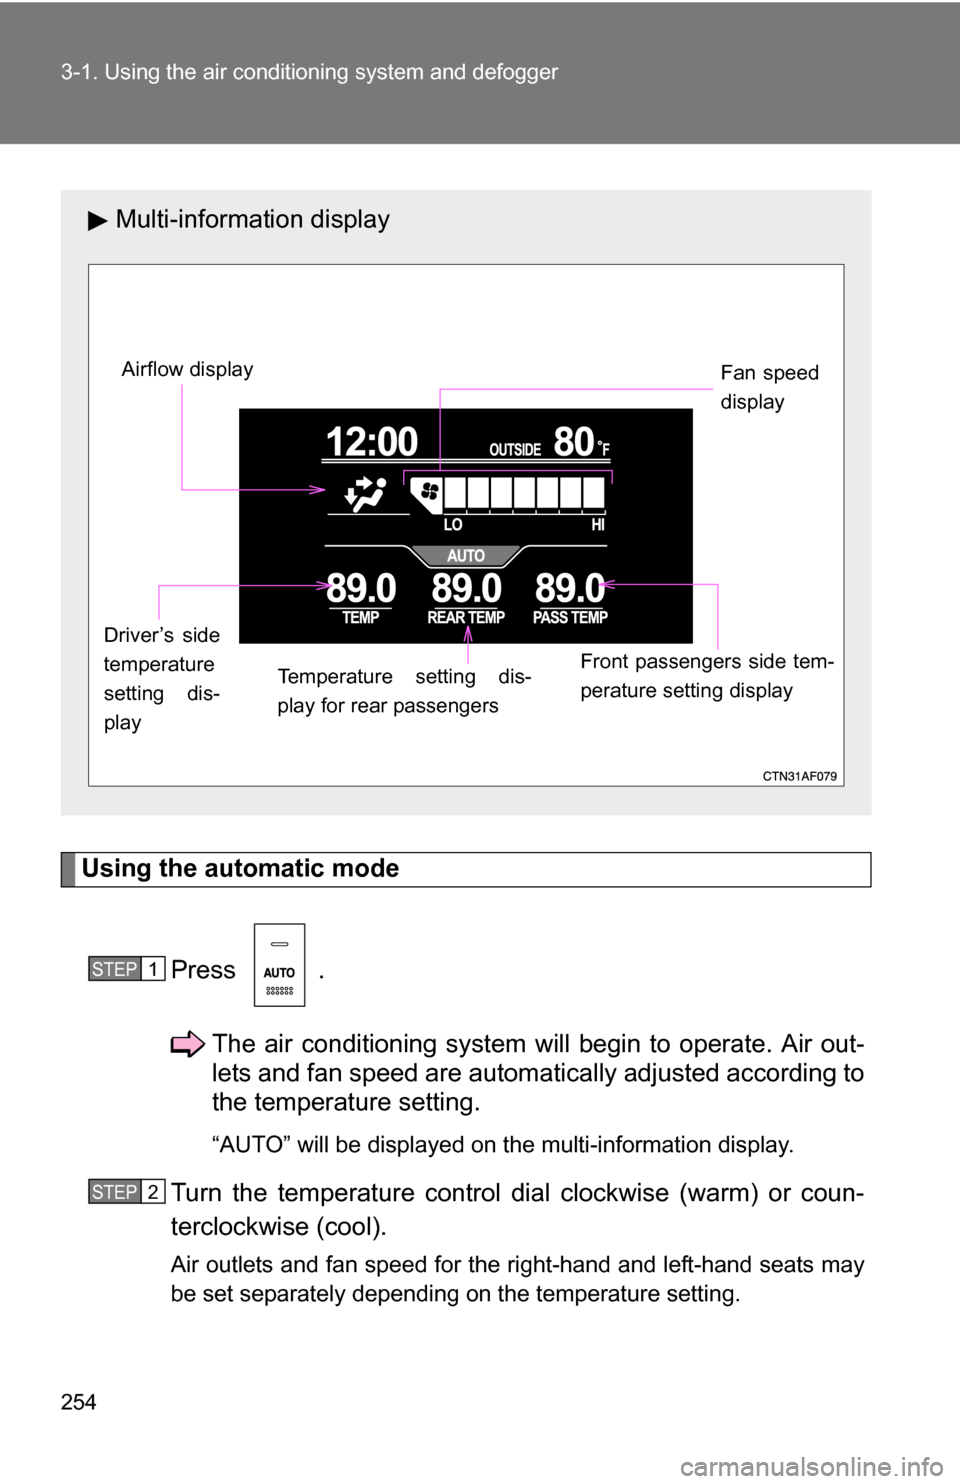
Multi-informat ion display
Front passengers side tem-
perature setting display Fan speed
display
Airflow display
Driver’s side
temperature
setting dis-
play Temperature setting dis-
play for rear passengers
STEP1
STEP2
Page 255 of 580
255
3-1. Using the air conditioning system
and defogger
3
Interior features
Adjusting the settings
■ Adjusting the temperature setting
Turn the temperature control dial clockwise (warm) or counter-
clockwise (cool).
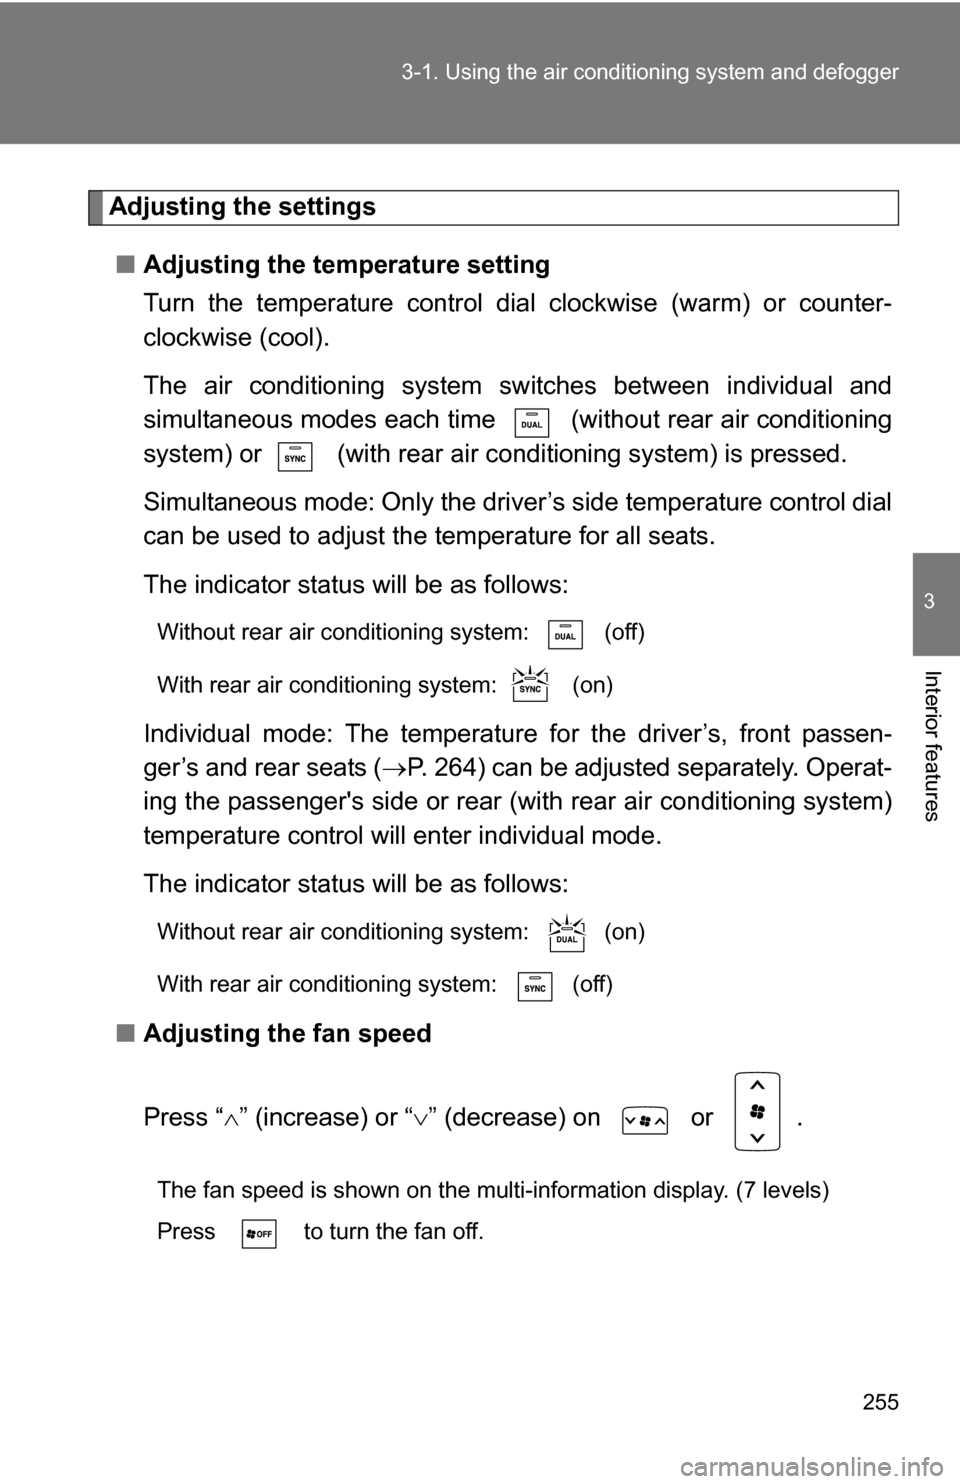
The air conditioning system sw itches between individual and
simultaneous modes each time (w ithout rear air conditioning
system) or (with rear air condi tioning system) is pressed.
Simultaneous mode: Only the driver’s side temperature control dial
can be used to adjust the temperature for all seats.
The indicator status will be as follows:
Without rear air conditioning system: (off)
With rear air conditioning system: (on)
Individual mode: The temperatur e for the driver’s, front passen-
ger’s and rear seats ( P. 264) can be adjusted separately. Operat-
ing the passenger's side or rear (with rear air conditioning system)
temperature control will enter individual mode.
The indicator status will be as follows:
Without rear air conditioning system: (on)
With rear air conditioning system: (off)
■ Adjusting the fan speed
Press “ ” (increase) or “ ” (decrease) on or .
The fan speed is shown on the multi-information display. (7 levels)
Press to turn the fan off.
Page 256 of 580
256 3-1. Using the air conditioning system and defogger
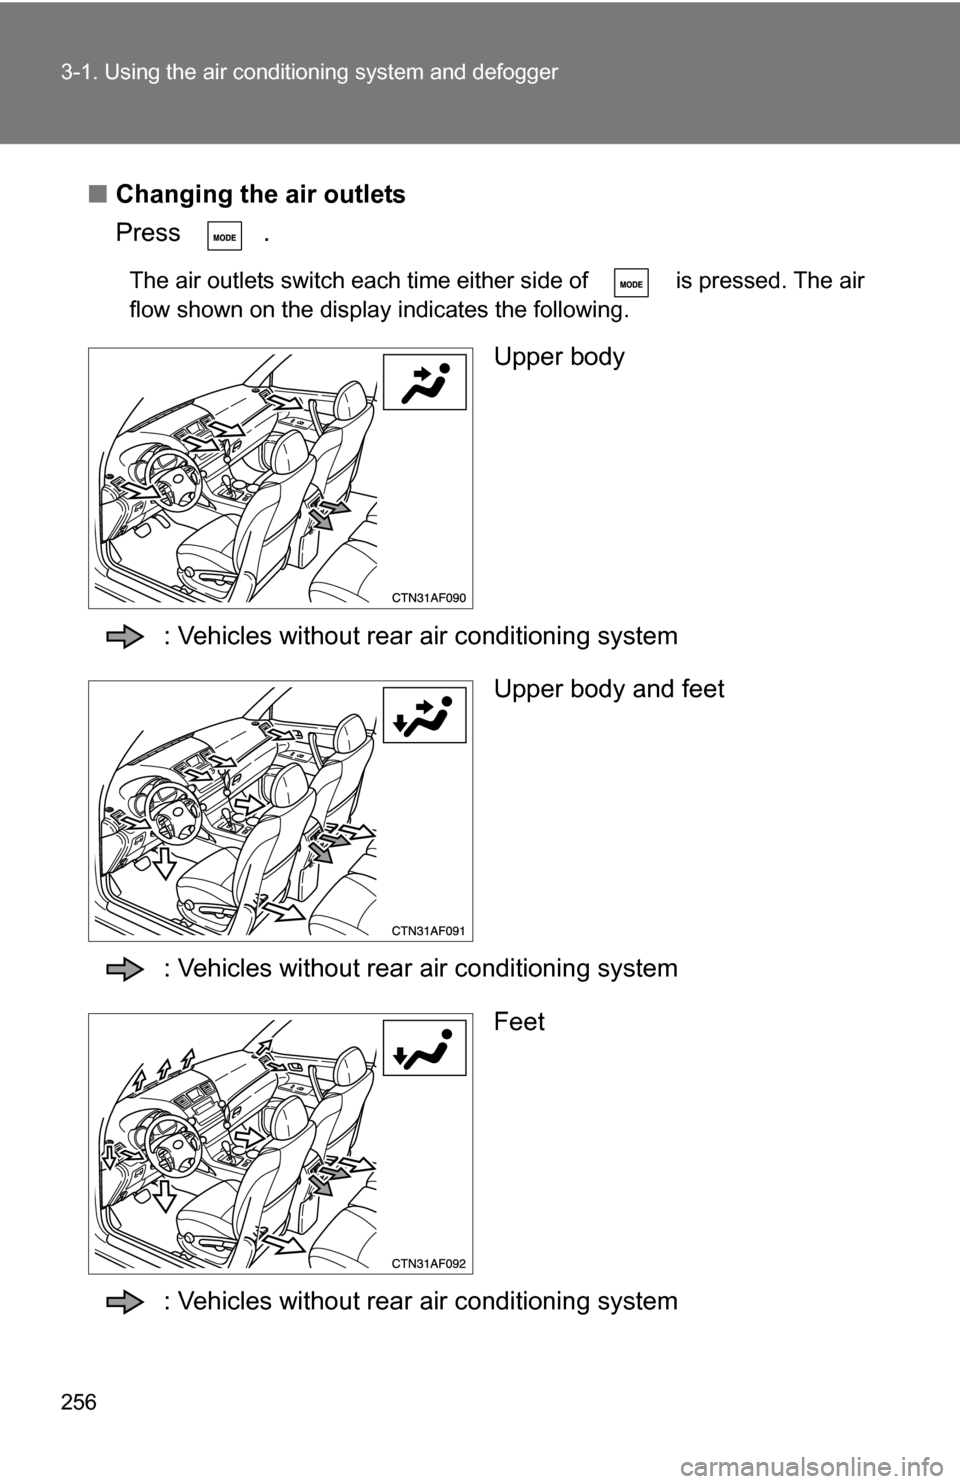
■Changing the air outlets
Press .
The air outlets switch each time either side of is pressed. The air
flow shown on the display indicates the following.
Upper body
: Vehicles without rear air conditioning system Upper body and feet
: Vehicles without rear air conditioning system Feet
: Vehicles without rear air conditioning system
Page 264 of 580
264
3-1. Using the air conditioning system and defogger
Rear automatic air conditioning system (if equipped)
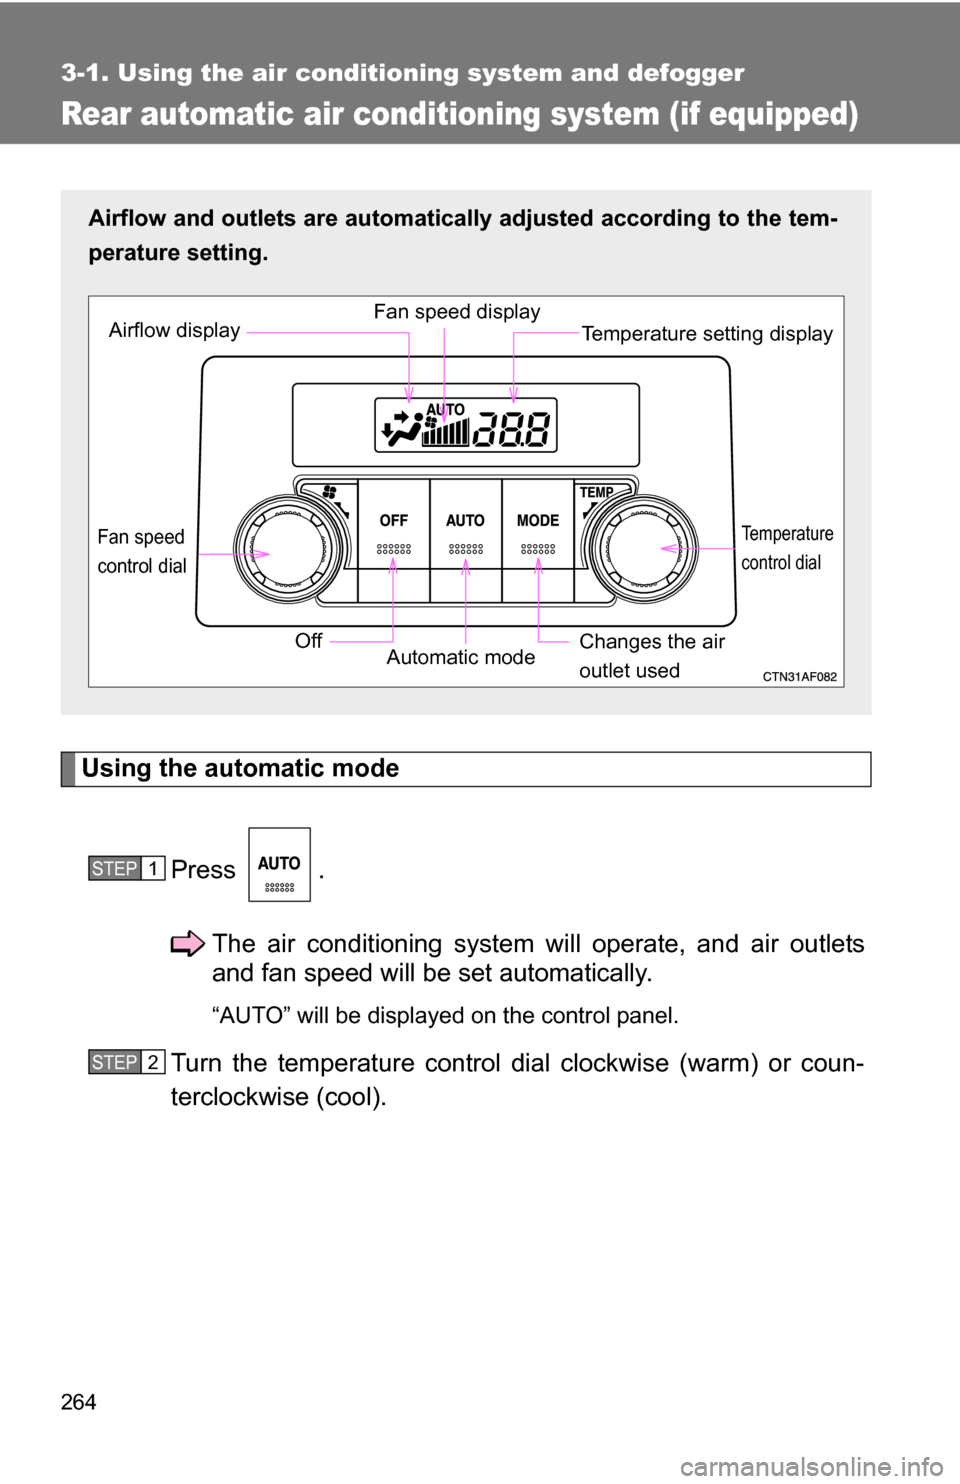
Using the automatic modePress .The air conditioning system will operate, and air outlets
and fan speed will be set automatically.
“AUTO” will be displayed on the control panel.
Turn the temperature control dial clockwise (warm) or coun-
terclockwise (cool).
Airflow and outlets are automatica lly adjusted according to the tem-
perature setting.
Airflow display Fan speed display
Temperature setting display
Fan speed
control dial
OffAutomatic mode Changes the air
outlet used
Temperature
control dial
STEP1
STEP2
Page 270 of 580
270
3-1. Using the air conditioning system and defogger
Using the steering wheel climate remote control switches (if equipped)
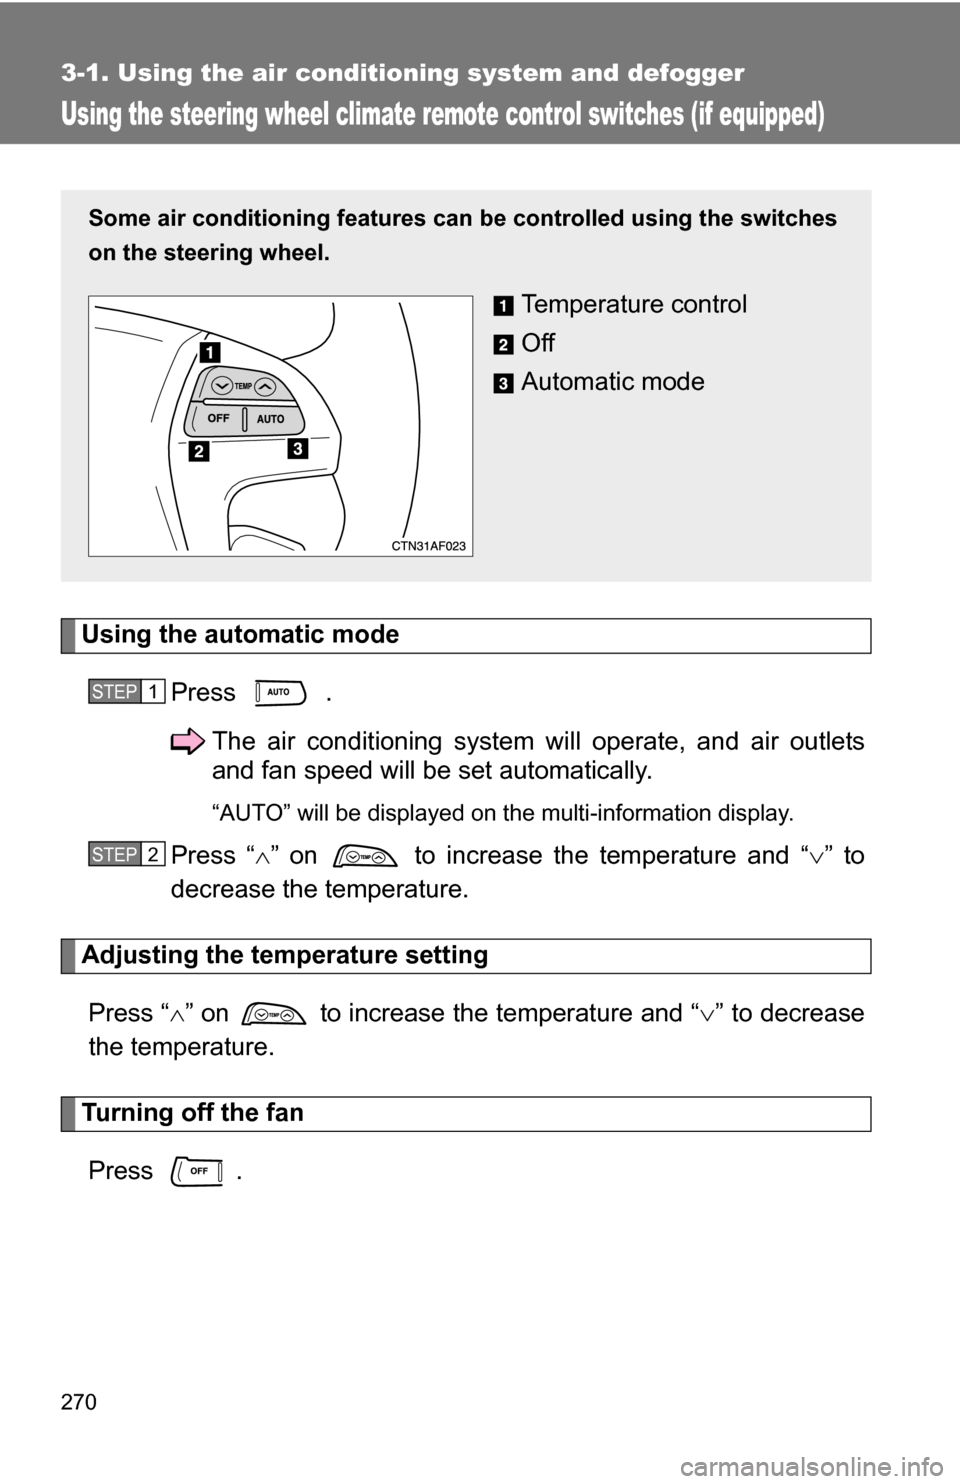
Using the automatic modePress .The air conditioning system will operate, and air outlets
and fan speed will be set automatically.
“AUTO” will be displayed on the multi-information display.
Press “” on to increase the temperature and “ ” to
decrease the temperature.
Adjusting the temperature setting
Press “ ” on to increase the temperature and “ ” to decrease
the temperature.
Turning off the fan
Press .
Some air conditioning features can be controlled using the switches
on the steering wheel.
Temperature control
Off
Automatic mode
STEP1
STEP2