turn signal TOYOTA HILUX 2023 Owner's Manual
[x] Cancel search | Manufacturer: TOYOTA, Model Year: 2023, Model line: HILUX, Model: TOYOTA HILUX 2023Pages: 810, PDF Size: 131.54 MB
Page 539 of 810

5377-3. Do-it-yourself maintenance
HILUX_OM_OM0K789E_(EE)
7
Maintenance and care
■Front turn signal lights (halogen headlights type B)
To allow enough working
space, turn the steering
wheel to the opposite side
where the bulb to be
replaced is located.
Remove the screws and
clips.
Removing the clip
Installing the clip
1
1
2
Ty pe AType B
Page 544 of 810
5427-3. Do-it-yourself maintenance
HILUX_OM_OM0K789E_(EE)
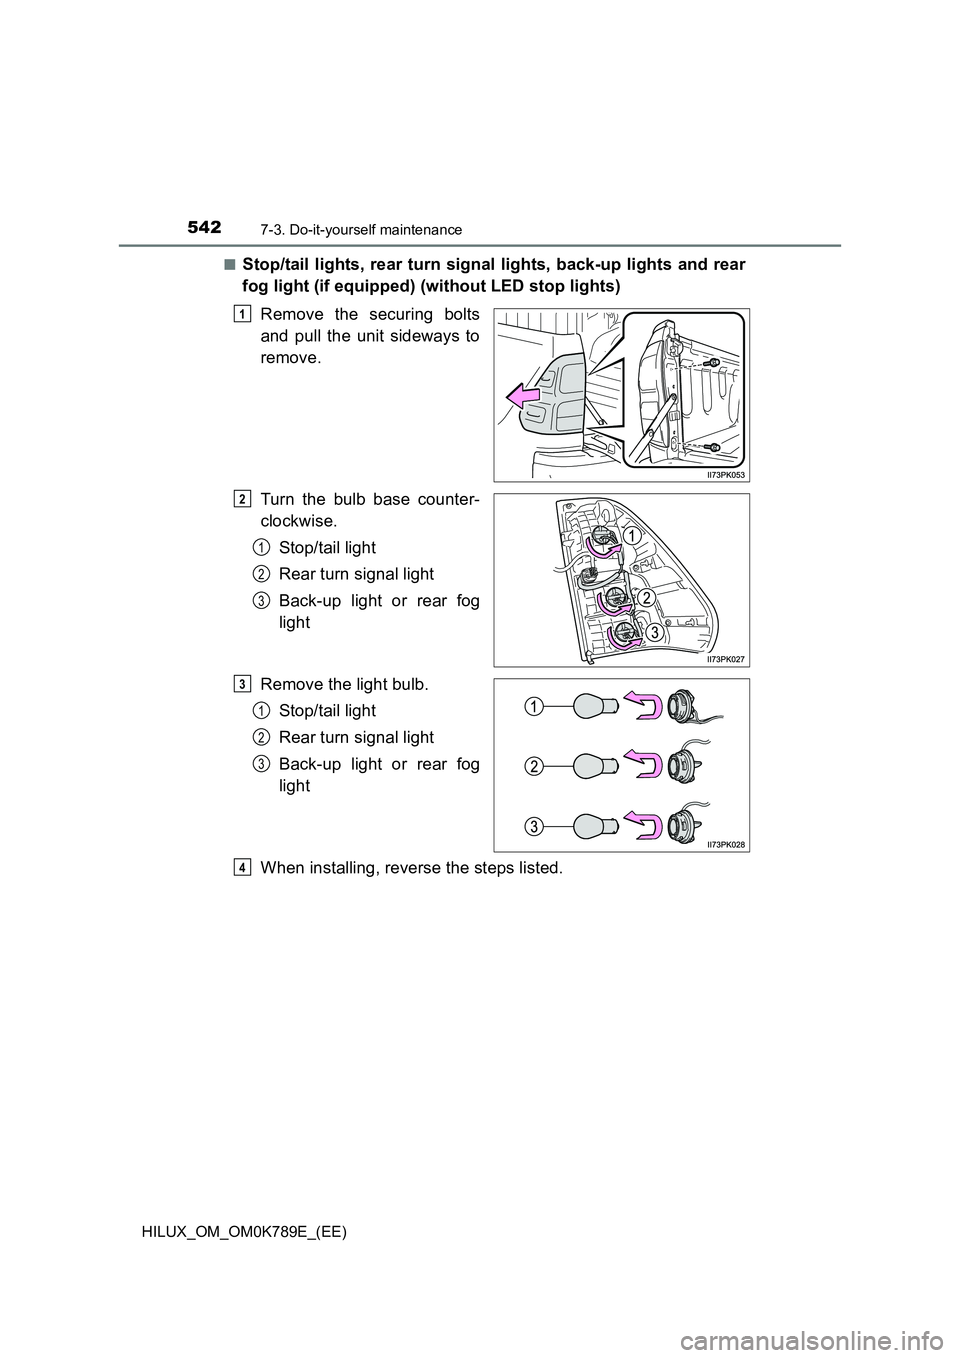
■Stop/tail lights, rear turn signal lights, back-up lights and rear
fog light (if equipped) (without LED stop lights)
Remove the securing bolts
and pull the unit sideways to
remove.
Turn the bulb base counter-
clockwise.
Stop/tail light
Rear turn signal light
Back-up light or rear fog
light
Remove the light bulb.
Stop/tail light
Rear turn signal light
Back-up light or rear fog
light
When installing, reverse the steps listed.
1
2
1
2
3
3
1
2
3
4
Page 545 of 810
5437-3. Do-it-yourself maintenance
HILUX_OM_OM0K789E_(EE)
7
Maintenance and care
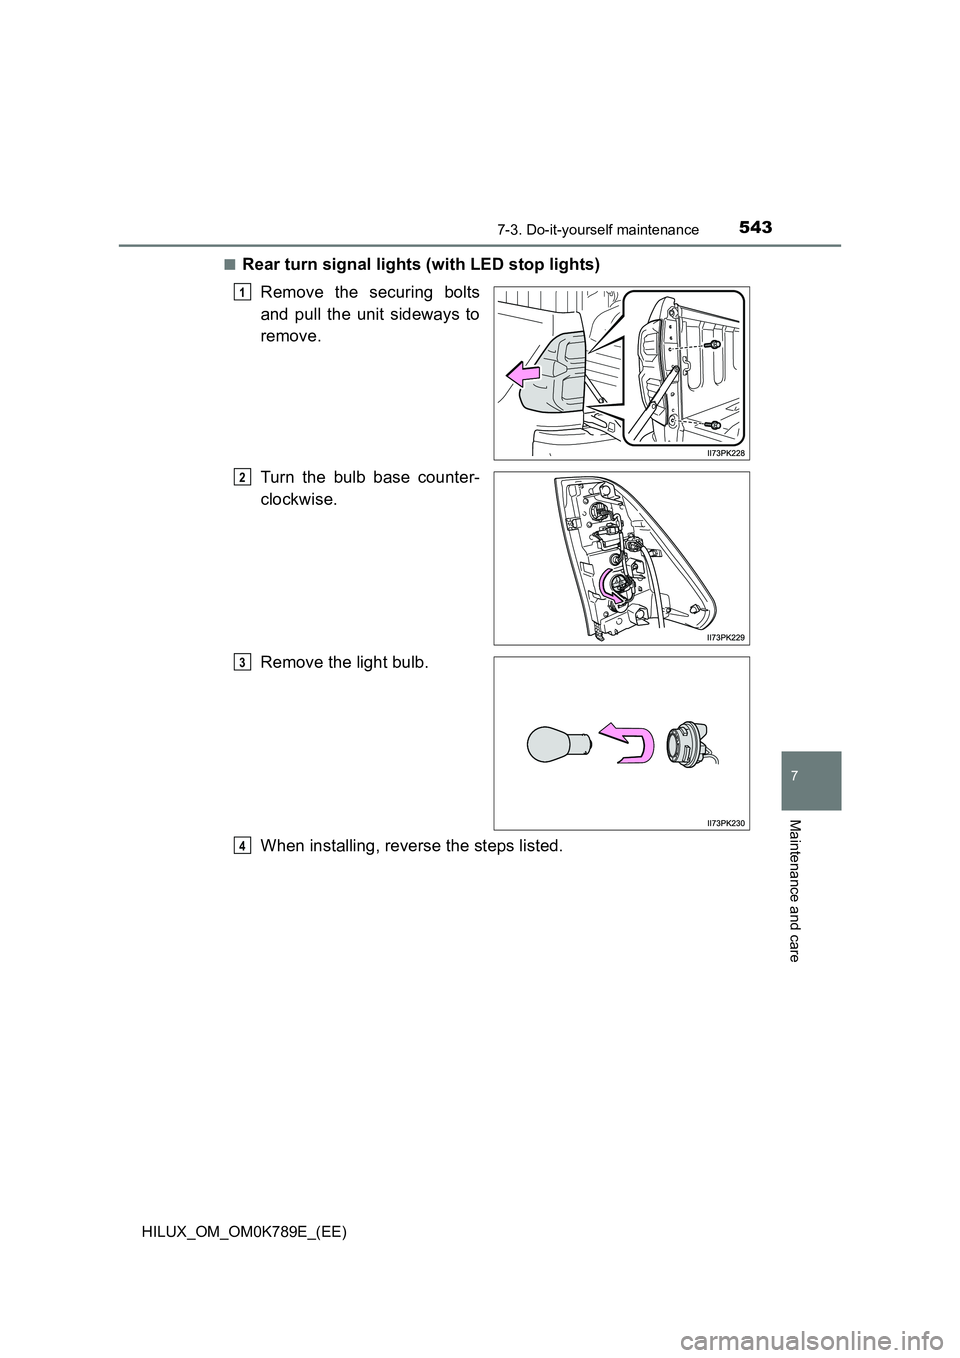
■Rear turn signal lights (with LED stop lights)
Remove the securing bolts
and pull the unit sideways to
remove.
Turn the bulb base counter-
clockwise.
Remove the light bulb.
When installing, reverse the steps listed.
1
2
3
4
Page 548 of 810

5467-3. Do-it-yourself maintenance
HILUX_OM_OM0K789E_(EE)
Fold the mirror forward.
Remove the lower cover.
Remove the side turn signal
light lens.
Remove the bulb base.
5
6
7
8
Page 550 of 810

5487-3. Do-it-yourself maintenance
HILUX_OM_OM0K789E_(EE)
Install the side turn signal
light lens.
Insert the projection into the
hole of the lens, and align the
lens corner with the plate, as
shown in the illustration.
Install the lower cover.
Return the mirror to its origi-
nal position.
Install the screws and upper
cover.
13
14
15
16
Page 551 of 810

5497-3. Do-it-yourself maintenance
HILUX_OM_OM0K789E_(EE)
7
Maintenance and care
Align the tabs, and secure
the mirror by pushing in each
diagonally-opposite pair of
tabs in order.
Make sure to insert the tabs in
order as shown in the illustra-
tion, and push them in until a
click is heard.
If you do not hear the click, do
not force the tabs in. Instead,
remove the mirror and check
that the tabs are aligned.
■Replacing the following bulbs
If any of the lights listed below has burnt out, have it replaced by
any authorized Toyota retailer or Toyota authorized repairer, or any
reliable repairer.
● Headlights (high/low beams) (LED headlights)
● Front position lights/daytime running lights (if equipped) (LED
headlights)
● Front turn signal lights (LED headlights)
● Side turn signal lights
● LED front fog lights (if equipped)
● LED stop lights
● Tail lights (LED stop lights)
● Rear fog lights (if equipped) or back-up lights (LED stop lights)
● High mounted stoplight (if equipped)
17
Page 552 of 810

5507-3. Do-it-yourself maintenance
HILUX_OM_OM0K789E_(EE)
■When installing the rubber cover of the headlight (halogen headlights
type A)
Ensure the rubber cover is securely attached.
■ LED lights
The following lights consist of a number of LEDs. If any of the LEDs burn out,
take your vehicle to any authorized Toyota retailer or Toyota authorized
repairer, or any reliable repairer to have the light replaced.
● Headlights (high/low beams) (LED headlights)
● Front position lights/daytime running lights (if equipped) (LED headlights)
● Front turn signal lights (LED headlights)
● Side turn signal lights (mirror-mounted type)
● LED front fog lights (if equipped)
● LED stop lights
● Tail lights (LED stop lights)
● Rear fog lights (if equipped) or back-up lights (LED stop lights)
● High mounted stoplight (if equipped)
■ Condensation build-up on the inside of the lens
Temporary condensation build-up on the inside of the headlight lens does not
indicate a malfunction. Contact any authorized Toyota retailer or Toyota
authorized repairer, or any reliable repairer for more information in the follow-
ing situations:
● Large drops of water have built up on the inside of the lens.
● Water has built up inside the headlight.
Fit the rubber cover outer circumfer-
ence in firmly.
Fit the rubber cover around the light
bulb in until the light bulb plug can be
seen.
1
2
Page 556 of 810

5548-1. Essential information
HILUX_OM_OM0K789E_(EE)
Emergency flashers
Press the switch.
All the turn signal lights will flash.
To turn them off, press the switch
once again.
■ Emergency flashers
If the emergency flashers are used for a long time while the engine is not
operating, the battery may discharge.
The emergency flashers are used to warn other drivers when the
vehicle has to be stopped in the road due to a breakdown, etc.
Page 645 of 810

643
9
9-1. Specifications
Vehicle specifications
HILUX_OM_OM0K789E_(EE)
*: If equipped
Light bulbs
Light bulbsWTyp e
Exterior
Headlights
High/low beams (halogen headlights
type A)
Low beams (halogen headlights type B)
High beams (halogen headlights type B)
60/55
55
60
A
B
C
Halogen front fog lights*19 D
Front position lights (halogen headlights)
Without daytime running lights
With daytime running lights
5
21/5
E
E
Front turn signal lights (halogen headlights
type A) 21 F
Front turn signal lights (halogen headlights
type B) 21 G
Rear turn signal lights 21 F
Back-up lights (without LED stop lights) 21 H
Rear fog light (without LED stop lights)*21 H
Stop/tail lights (without LED stop lights) 21/5 H
License plate light 5 E
Outer foot lights*5E
Interior Interior light*8I
Personal/interior lights 5 E
A: H4 halogen bulbs
B: H11 halogen bulbs
C: HB3 halogen bulbs
D: H16 halogen bulbs
E: Wedge base bulbs (clear)
F: Single end bulbs (amber)
G: Wedge base bulbs (amber)
H: Single end bulbs (clear)
I: Double end bulbs
Page 655 of 810
6539-2. Customization
HILUX_OM_OM0K789E_(EE)
9
Vehicle specifications
■Automatic light control system* (P. 247)
*: If equipped
■Turn signal lever ( P. 245)
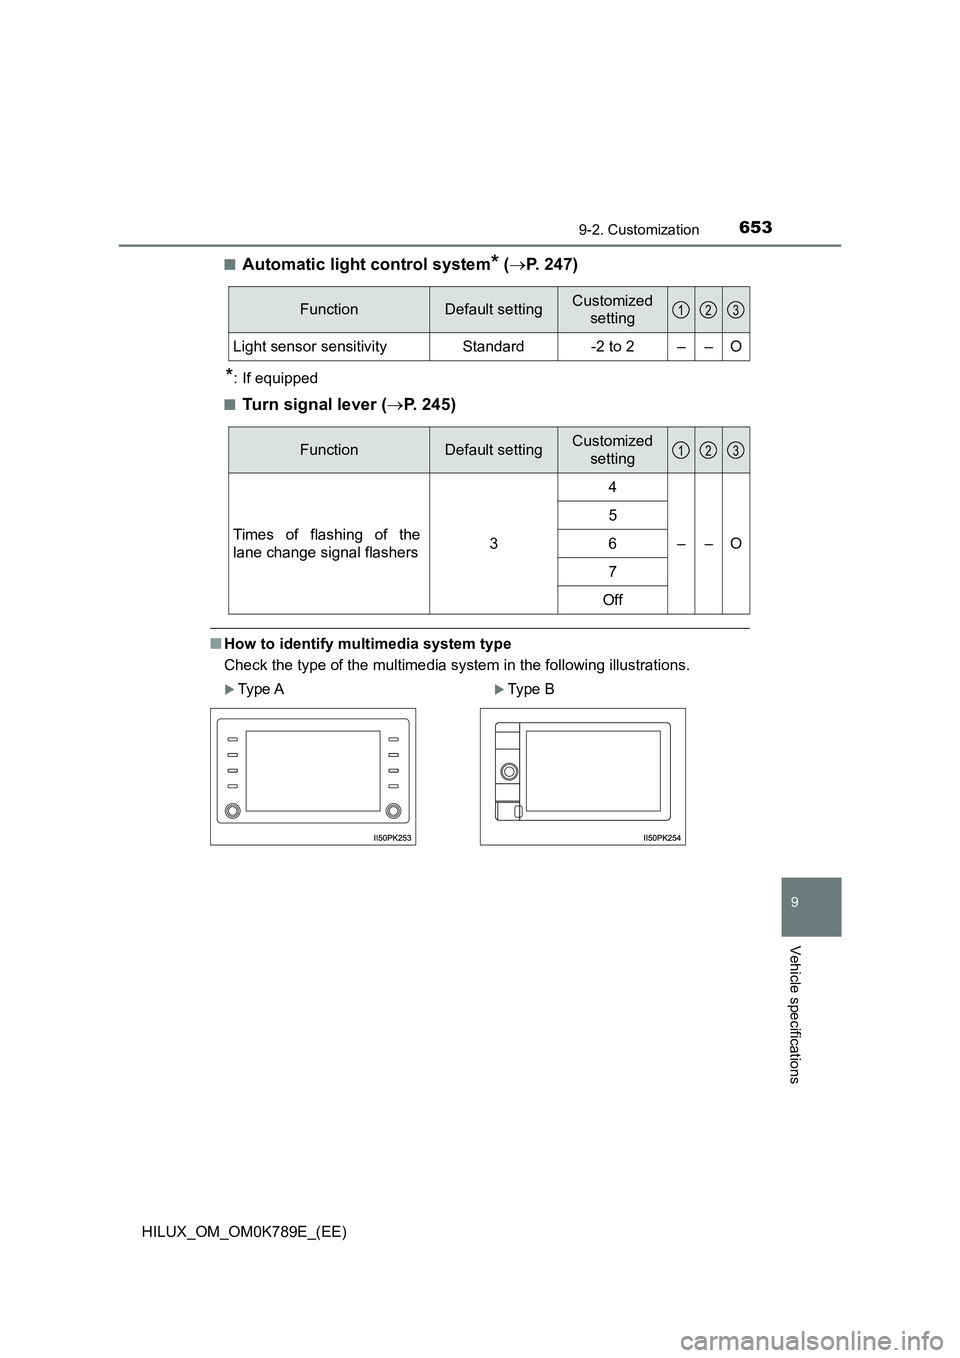
■How to identify multimedia system type
Check the type of the multimedia system in the following illustrations.
FunctionDefault settingCustomized
setting
Light sensor sensitivityStandard-2 to 2––O
123
FunctionDefault settingCustomized
setting
Times of flashing of the
lane change signal flashers3
4
––O
5
6
7
Off
Type AType B
123